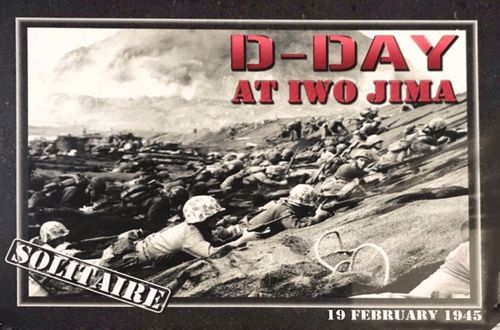
D-Day at Iwo Jima
D-Day at Iwo Jima Rulebook
Table of Contents
Table of Contents
- 1.0 Introduction
- 2.0 Game Components
- 2.1 The Map
- 2.1.1 Japanese Positions
- 2.1.2 Japanese Position Groups (PG)
- 2.1.3 Japanese Fire Dots & Fields of Fire
- 2.1.4 US Beach Landing Boxes & Hexes
- 2.1.5 Other Tracks & Displays
- 2.2 The Playing Pieces
- 2.2.1 US Units
- 2.2.2 Japanese Units
- 2.2.3 Other Markers
- 2.3 The Cards
- 2.3.1 Card Draw
- 2.4 Displays, Charts & Tables
- 2.4.1 Turn Sequence Track (PAC #1)
- 2.4.2 US Step Loss & Unit Holding Display (PAC #2)
- 2.4.3 Game Tracks (PAC #3)
- 2.4.4 Combat Tables & Charts (PAC # 4)
- 2.4.5 Iwo Jima Scenario Setup Display (PAC # 5)
- 2.4.6 Terrain Effects Chart & Sequence of Play (PAC #6)
- 3.0 Setting Up for Play
- 4.0 Sequence of Play
- 5.0 US Amphibious Operations
- 6.0 Japanese Fire
- 6.1 Reading the Fire Cards
- 6.2 Fields of Fire (FoF)
- 6.2.1 Position Groups (PG)
- 6.2.2 Range
- 6.2.3 Line of Sight (LOS) Determination
- 6.3 Resolving Japanese Fire
- 6.3.1 Hit Limits of Japanese Positions
- 6.3.2 Step Loss Because of Japanese Fire
- 6.3.3 Disruption Because of Japanese Fire
- 6.3.4 Step Loss Limitation
- 6.3.5 Concentrated Targets
- 7.0 US Actions
- 7.1 Independent Actions
- 7.2 Conducting Actions
- 7.3 Movement Action
- 7.3.1 Movement Limitations
- Example of Play: Movement and Movement Under Fire Resolution
- 7.3.2 One-Hex Movement
- 7.3.3 Movement Under Fire (MUF)
- 7.3.4 Moved HQ
- 7.3.5 Preservation Move
- 7.3.6 Terrace Hexes
- 7.3.7 Cliff Hexsides
- 7.4 Enter Hex Occupied by Revealed Enemy Unit
- 8.0 US Combat Actions
- 9.0 Japanese Units, Depth & Reserves
- 9.1 Revealing Japanese Units & Depth Markers
- 9.2 Adding Depth to Japanese Units
- Example of Close Combat
- 9.2.1 Re-placing Depth Markers
- 9.2.2 Depth Marker Depletion
- 9.3 Reserve Unit Placement
- 9.3.1 Positions Eligible for Reinforcements
- 9.3.2 Reserve Pool Adjustment
- 9.4 Japanese Tactical Reinforcements
- 9.5 Reserve & Depth Marker Culling
- 9.6 Reserve Rejuvenation
- 10.0 Japanese Raids
- 11.0 US Heroes, Headquarters & Command
- 12.0 Control & Communication
- 13.0 Japanese Lettered Actions
- 13.1 Action Procedure
- 13.2 Machine Gun Action [M] (Starts GT 2)
- 13.3 Mortar Action [M] (Starts GT 2)
- 13.4 Muster Action [M] (Starts GT 2)
- 13.5 Re-Supply Action [R] (Starts GT 6)
- 13.6 Redeploy Action [R] (Starts GT 6)
- 13.7 Reinforce Action [R] (Starts GT 6)
- 13.8 Assault Action [A] (Starts GT 7)
- 13.9 Ambush Action [A] (Starts GT 7)
- 13.10 Artillery Action [A]
- 13.11 Infiltrate Action [I] (Starts GT 22)
- 14.0 Japanese Tank Units
- 14.1 Japanese Tank Extended FoF
- 14.2 Japanese Tank Actions
- 14.3 US Actions Against Japanese Tanks
- 14.4 Japanese Counterattack Stance
- 14.4.1 Setting up Counterattack Stance
- 14.4.2 Counterattack Action
- 14.4.3 Modifications to Close Combat
- 14.4.4 Modifications to US Attacks
- 14.4.5 Eliminating Counterattack Depth
- 14.4.6 Leaving Counterattack Stance
- 14.4.7 Subsequent Draw
- 15.0 Command Posts (CPs) & Garrisons
- 15.1 Establishing a Command Post
- 15.1.1 Abandoning a Command Post
- 15.2 Command Range
- 15.2.1 One Range per Regiment
- 15.2.2 Duplicate Ranges on Track
- 15.3 Capabilities of Command Posts
- 15.3.1 Japanese Effects on Command Range
- 15.3.2 Command Posts are Leaders
- 15.4 Placing Garrison Markers
- 15.4.1 Properties of Garrisons
- 16.0 Replacements, Reserves & Rest
- 17.0 Fortification Markers
- 17.1 When to Place Forts
- 17.2 How to Place Forts
- 17.2.1 Hilltop Positions & Fortifications
- 17.3 Properties of Fortification Markers
- 17.4 Terrain Effects of Fortification Markers
- 17.5 Reduction of Fortifications
- 17.5.1 Reducing a Fort by Barrage
- 17.5.2 Eliminating a Fort by CC
- 17.6 Hit Limits of Fortified Positions
- 17.7 Two Forts in a Single Position Hex
- 18.0 Scenarios
- 19.0 US Master Reinforcement List
- 20.0 Event Descriptions
- 21.0 Close Combat Events
- Japanese Fire/Action Summary
1.0 Introduction
D-Day at Iwo Jima (DD IJ) is a solitaire game simulating the 1945 US invasion and conquest of Iwo Jima Island. In this game, the player controls the US forces assaulting the Japanese garrison. The game system controls the opposing Japanese forces.
Important: Rules cases may be subdivided into sentences or paragraphs listed using small case letters, bullet points (•), or numbers. When listed with numbers the procedure must be conducted in the order given. Letters are used to identify major topics within the case, and bullet points are used to identify separate information with the case.
The game includes six scenarios. The first scenario covers the first day of the landings up until nightfall, with each game turn (GT) representing two hours of actual time. GTs in all other scenarios represent about a third of a day's daylight time (with three GTs equal to one day). Nighttime activity has been abstracted into the PM GT.
1.1 Abbreviations
The following abbreviations are used throughout the rules.
- Battalion: Bn. or Bn.'s
- Command Post: CP
- Company: Co. or Co.'s
- Division: Div
- Field of Fire: FoF
- Game Turn: GT
- Headquarters: HQ
- Heavy Weapons: HW
- Infantry: Inf
- Japanese: Jpn
- Player Aid Card: PAC
- Position Group: PG
- Regiment: Rgt
- United States: US
- The Player: You
2.0 Game Components
D-Day at Iwo Jima includes the following components:
- 22×34-inch hard mounted game map
- 528 playing pieces
- One deck of 55 cards
- Five Player-Aid Cards
- Rules booklet
- Campaign analysis
- Storage bags
Important: Dice are not required to play D-Day at Iwo Jima.
2.1 The Map
Map Errata:
- Suribachi is incorrectly shown as Surabachi on both the map and Setup Display.
- Hex 0518: Delete Steady FoF symbol.
- Hex 0521: Add black position Steady FoF symbol.
- Beach Yellow 2: Replace red hit square with brown hit square. Add purple hit square.
- Beach Red 1: Delete brown hit square.
- Hex 1326 (map and setup display): Should be labeled as I11 not I6.
- Hex 2335 (map only): Should be labeled M9, not M5. Add steady FoF symbols in each hex surrounding the black M9 position in hex 2335.
The game map portrays Iwo Jima Island with only the northernmost coastal bluffs and beaches being omitted. A hexagonal grid is superimposed over the map's terrain features to regulate the placement and movement of units. Each hex is approximately 250 meters across. The map is divided into four sectors. Sectors are used when setting up Japanese units and to regulate Japanese artillery fire (6.5). Each type of terrain and its effect on game play is identified on the Terrain Effects Chart. The thin brown lines are contour lines (they are for cosmetic purposes only and have no effect on play) and should not be confused with the thick brown lines that indicate terrace lines.
Example: Hexes 0409 and 0410 contain Terraces.
Example: Hex 0707 is a Level 1 hex. Hex 0708 is a Level 2 hex. The underlying contour lines have no effect on the hex's terrain level.
2.1.1 Japanese Positions
Hexes displaying a colored dashed border are Japanese positions representing clusters of defensive works and fortified complexes.
a) Each position is color-coded and assigned a unique identity code consisting of a letter (A to M) and a priority number (from 1 to 9). The letter code and number are also used to prioritize game actions involving Japanese positions. Position colors are used with Japanese fire cards to determine which Japanese positions conduct actions.
b) Positions marked with an or symbol indicate that Japanese units are initially setup for a scenario.
c) Positions with the artillery symbol ( ) possess fixed artillery that contributes to an artillery sector's (6.5.4) artillery fire if the artillery has not been destroyed (6.7).
d) The hilltop triangle ( ) signifies a terrain feature and is not associated with the target triangle symbol that appears on the fire card sections.
e) Positions may be solid black. Black positions or position groups (PG) normally conduct actions on any Japanese action card draw.
2.1.2 Japanese Position Groups (PG)
Japanese positions may consist of more than one hex, and each such grouping is called a PG.
a) All the hexes of a PG have the same position border color and are marked with dashed lines of the same color linking the hexes together.
b) Each PG conducts actions as one force, with its strength determined by the number of units and depth markers occupying any of that PG's hexes.
Important: You conduct actions against a PG's hexes individually, not against the entire PG.
2.1.3 Japanese Fire Dots & Fields of Fire
Unlike previous games in this series, not all Japanese fields of fire (FoF) are marked on the game map (6.2). Only the black position/PG fields of fire are printed on the game map. All other FoF are indicated on the Setup Display for reference during play.
a) Non-hilltop Japanese positions have a two-hex FoF.
b) Hilltop positions have a three-hex FoF. The third hex of a black position/PG FoF may be marked by either an intensive FoF symbol or a fire dot (steady FoF).
Setup Display legend (printed on the Elements of Japanese Positions player aid):
- Black fire dots have special fire rules (6.0).
- Solid dots are Intense Field of Fire (FoF) hexes. In this case, the gold dot is an intense fire dot for positions G8 or G9.
- Checkered dots are Steady fire hexes. In this case a Steady fire dot for position G9.
- A Connector Link indicates Positions G7, G8 & G9 form a Position Group.
- A Japanese initial setup hex. The black and white boxes with an X denote scenario setup positions for Japanese units.
- A Japanese artillery position.
- Artillery Sectors are divided by grey long-dashed lines.
- Scenario Startlines are noted using black short-dashed lines.
2.1.4 US Beach Landing Boxes & Hexes
The boxes along the eastern and western beaches hold US units approaching each of those beaches for a landing.
a) Each Beach Landing Box (beach box) is identified by a unique code name and number.
b) Each beach box is associated with two or three adjoining beach hexes.
c) The black boundaries around each box line up to its landing beach hexes. Each beach hex is marked with a landing arrow pointing inland from the coastline of the beach.
Beach hexes are also proper map hexes for all other game functions, in addition to landing units from beach boxes.
2.1.5 Other Tracks & Displays
The below tracks and displays are printed on the map:
- Japanese Reserve Displays: Holds Japanese units that are in reserve. Each Japanese sector (1 through 4) has a separate display.
- Japanese Eliminated Elite Units Display: Eliminated Japanese elite units are placed in this display.
- US Infantry Loss Display: Eliminated US infantry units are placed in this display. There are three Infantry Loss Displays (one for each US Div).
- USMC Division (Div) Reserve Displays: Holds US units currently in reserve. Each US Div has a separate display.
- US Command Post Range Track: You use US command range markers to note the current command range of each regimental command post (15.2). Command post ranges are not used until GT 7.
2.2 The Playing Pieces
The playing pieces consist of units and markers. Units represent specific US and Japanese military forces. The features of US and Japanese units differ.
a) Only US units have steps and only Japanese units have an unrevealed side.
b) Markers are used to record a unit's status, and are placed either on top of, or below a unit. The use of each marker is explained in the rules. Markers are also used to record information on the game map or on the various tracks associated with game play.
2.2.1 US Units
Weapons and Equipment: The US Weapons Chart lists the weapons and equipment possessed by:
a) Full-strength infantry (four steps remaining) companies (Co.'s) attacking from adjacent hexes.
b) Heavy weapons (HW) Co.'s with two, three, or four steps remaining (i.e., any HW Co. with more than one step) that are attacking from an adjacent hex.
c) Full-strength Infantry Co.'s and HW Co.'s with more than one step attacking from a non-adjacent hex.
d) All other US units regardless of the number of steps remaining.
Example: At full-strength, the A/1/3 Infantry Co. possesses all the weapons/equipment as listed on the US Weapons Chart when attacking an adjacent hex or a non-adjacent hex.
a) If the unit takes one step loss, you randomly draw a step loss marker placing the marker under the unit with the Step Loss 1 side of the marker up. The Co. now has a Browning Automatic Rifle (BR), Demolitions (DE), and Radio (RD) available (i.e., those shown on the Step Loss 1 marker).
b) If the unit suffers a second step loss, remove the Step Loss 1 marker. The unit now possesses a Machine Gun (MG) and a BR (the weapons on the unit's two-step side).
c) If the unit suffers a third step loss, randomly draw a step loss marker and place it with the Step Loss 3 side face up. Now the unit only possesses the BR weapon.
Steps: Each US unit possesses from one to four steps, indicating a unit's overall manpower and cohesiveness. Steps are lost due to combat and/or events. US infantry Co.'s and HW Co.'s with four steps are marked with a step loss marker when they suffer their first and third step loss.
a) If there is a step loss marker underneath the unit, subtract two attack points from the attack strength that is showing on the side of the unit counter that is face-up.
b) When a four-step unit suffers its first step loss, randomly pick a step loss marker, and place it with the Step Loss 1 side face up under the unit counter (do not flip the unit counter). If a two-step unit suffers one step loss, flip the counter over to show its one-step side.
c) When a four-step unit suffers its second loss, flip it over to its reverse side and remove the step loss marker.
d) US infantry Co.'s with a step loss marker possess only the weapons listed on the step loss marker. Heavy weapon infantry units possess all the weapons listed on the US Weapons Chart until reduced to one step at which time, the HW Co. only possesses the weapons listed on the step loss marker.
Important: Weapons listed on a loss marker change from counter to counter, so that a unit's weapons compliment may fluctuate throughout the game. Available weapons may not always match those possessed when the unit had more steps remaining.
Important: When a HW Co. takes step losses, step loss markers are placed normally; however, you ignore the weapons listed on the step loss marker until the unit is reduced to one step at which time the HW Co. possesses the weapon(s) listed on the Step Loss 3 marker.
Range: US units may have a numerical range printed on the counter that allows them to attack or barrage Japanese units or positions from non-adjacent hexes. Naval gunfire, airstrikes and artillery have an unlimited range (printed with a "U"). They may fire at any hex on the map when allowed by the rules.
Division: There are three USMC Divs available for action on Iwo Jima. They are the 3rd, 4th, and 5th Marine Divs. Each unit belonging to a division displays that division's emblem in the upper right corner of the unit counter.
Designation: In addition to belonging to a Div, all units are further identified by their sub-organization within their Divs. Units may belong to Co.'s, Bn.'s, and/or Rgts within a Div, listed in that order.
Example: The unit shown has a designation of A/1/23. It is A Co., First Bn., 23rd Marine Rgt of the 4th Marine Div.
Target Symbol: A selector used to randomly determine which US units are affected by a Japanese action or event during play. Target symbols are color coded by battalion. The first battalion in each regiment is red, second battalion white, and the third battalion is blue. HW, tank, engineer, and regimental HQ target symbols are black.
2.2.2 Japanese Units
Strength: A quantification of the unit's ability when involved in close combat and when defending against US attacks.
US Weapon Requirements: Weapons that attacking US units must possess to defeat Japanese units.
Formations: Japanese units belong to one of five formations:
- SAG: Southern Air Group (approximately 2400 men assigned to general naval duties on the island)
- TAP: Technical Air Personnel (mixture of machinists and mechanics from the Naval Air Group)
- MC: Machine Cannon (20mm to 40mm)
- E: Engineers
- MG: Machine Gun
Japanese units are also marked as Elite or Regular. Elite Japanese units have a filled-in unit type box (the entire unit box is red).
Important: A unit with a 'CC' requirement has an advantage in close combat.
Japanese Unit Depth Markers: Are placed underneath Japanese units according to the setup rules, events, and/or Japanese actions. A depth marker represents a unit that is fully deployed and positioned to maximize its combat effectiveness.
a) Depth markers are usually deployed with their unrevealed side (the flag image) face up (representing an unknown quantity to you).
b) Depth markers are only flipped to their revealed side by a US action against the hex they occupy, or as called for by events on the playing cards.
c) The exact properties and functions of depth markers are described in 9.0.
Japanese Fortification Markers: These markers are placed in position hexes to strengthen Japanese defenses. They are placed according to an event or setup instructions.
Important: The three Japanese tank units each have a different position color printed on their counter. A Japanese tank unit uses the position color on its counter when in a non-position hex. The color is disregarded when the tank unit is in a position hex.
Important: The back of all Japanese units represent their unrevealed side. The Japanese Action markers are not used in D-Day at Iwo Jima.
2.2.3 Other Markers
Markers used in play include: Turn Marker, Phase Marker, US Hero / US Inspired, Japanese Hero / Japanese Inspired, US Garrison / US Disrupted 2 (D2), US Disrupted 1 (D1) / US Disrupted 2 (D2), Japanese Disrupted 1 (D1) / Disrupted 2 (D2), Japanese Artillery Destroyed, Smoke, US Command Range, Caves, Japanese Artillery Sector Value Markers, USMC Infantry Replacements, US Engineer Replacements, US Tank Replacements, US Artillery Missions, and US Artillery Missions (Used).
2.3 The Cards
Cards are used to determine any landing effects on US units, to generate events and Japanese actions, and other game functions.
a) During play, cards are drawn from the deck and then you consult the relevant section on the card to determine its effects.
b) Each card is divided into three sections, with each section relating to a different element of game play and activity resolution.
- Landing Section: Results displayed in this section affect US units in the beach landing box. The landing section target symbol color is used to determine a black position's color when resolving barrage and close combat.
- Event Section: Used when a card is drawn during an Event Phase. This section may be further divided into sub-sections that only apply to scenarios occurring during the dates given on the card. A close combat event may also appear at the bottom of this section.
Important: The numbers are dates, not game turn (GT) ranges. Each event is valid on its listed event date and all subsequent dates until the next listed date on the card.
Example: Card 09 shows the Minefield event with a date of 2-20 and then Japanese Fortification with a date of 2-25. This means that on all GTs for February 20th through all GTs on February 24th the Minefield event would be conducted.
- Fire/Action Section: Applies primarily during the Japanese Fire Phase and is used to determine the Japanese positions that fire at US units and/or perform other actions.
-
a) This section is also sometimes used to resolve US actions (like Movement under fire and barrages).
-
b) Japanese artillery fire is resolved by referencing the artillery value appearing beneath the fire color symbols on the card.
-
2.3.1 Card Draw
A single card draw is used for a single purpose. Ignore the other sections of the card unless otherwise directed.
a) Cards drawn for landing checks, events, and Japanese fire/actions are placed in the appropriate card displays on the Turn Sequence Track.
b) Cards drawn for any other purpose are immediately placed in the discard pile. At the end of a GT, all cards on the turn track are placed in the discard pile.
2.4 Displays, Charts & Tables
Displays, charts and tables are depicted on the player aid cards (PACs). Each PAC is identified by a number (see bottom of PACs).
2.4.1 Turn Sequence Track (PAC #1)
a) The track is composed of displays that list (in order) the phases of a GT and are large enough to hold the card that is currently in play during that phase.
b) As a player draws cards during each phase, place the drawn card in the display containing the listed action for that card. At the end of the GT, remove all cards from the track and place them in a discard pile, off-map. The phase marker may be moved along the track to record the current phase of a GT.
2.4.2 US Step Loss & Unit Holding Display (PAC #2)
There are three separate displays showing all the infantry and HW Co.'s assigned to each US Div. You may use this display to sort the US Inf and HW Co.'s and track which units have been eliminated.
2.4.3 Game Tracks (PAC #3)
The Game Tracks PAC provides three separate tracks.
a) Game Turn Track provides an easy reference to note the current GT and notes the GT that each scenario begins and ends. Additionally, the GTs that US reinforcements arrive are also shown on this track.
b) Japanese and US Record Tracks are used by you as a mnemonic to note different game functions. Individual rules will provide detailed instructions for these tracks.
2.4.4 Combat Tables & Charts (PAC # 4)
This PAC contains the charts and tables required to resolve the different types of combat and provide a reference for US weapons.
a) US Barrage Result Chart: used to resolve US artillery, naval gunfire, and air attacks (8.4, 8.5 & 17.5.1).
Errata: Under Possible Fortification Hit should read: Draw one card, if the color of the landing symbol matches one of that card's fire colors, the fort is reduced by one level.
b) Japanese Fire Chart: used to determine the result of Japanese fire (6.3 & 6.3.2).
c) US Attack Results Chart: used to determine the result of US attacks (8.3 & 9.2).
d) US Weapons Chart: used to determine the weapon's capabilities of each US unit when at full-strength or reduced-strength and its range to the target hex (2.2.1, 8.2, & 8.2.7).
2.4.5 Iwo Jima Scenario Setup Display (PAC # 5)
The Scenario Setup Display is used by you to setup Japanese units, US units, and depth markers for each scenario (18.0).
2.4.6 Terrain Effects Chart & Sequence of Play (PAC #6)
The Terrain Effects Chart lists the effects on movement and combat for each type of terrain. The different types of terrain are also depicted to allow you to easily identify the pertinent terrain. The back of PAC #6 provides a listing of the Sequence of Play (4.0).
Important: The only cliff hexsides on the map are the dark brown hexsides that run along the following hexes: 0534 to 0835; 1736 to 2136.
3.0 Setting Up for Play
Lay out the map with the edge with the green, red, yellow, and blue landing beaches closest to you. Then choose one of the following six scenarios for play. Scenario instructions are listed in 18.0:
-
D-Day, 19 February 1945 (18.4): Covers the entire first day (GTs 1–6) and takes two to three hours to play. This is the recommended scenario for players new to the game system.
-
Suribachi (18.5): Depicts the 28th Marine Regiment's capture of this dominant height on the south end of the island. It starts on the AM GT of 20 Feb and concludes at the end of the PM GT of 24 Feb (GT 7–21) and takes about 2 hours to play.
-
Drive to the North (18.6): Involves the complete capture of Airfield One and the advance to the Motoyama Plateau by the 4th and 5th Marine Divs. It starts on the AM GT of 20 Feb and concludes at the end of the PM GT of 24 Feb (GT 7–21). This scenario takes four to five hours to play. Suribachi and Drive to the North occur in the same period and may be combined into one scenario.
-
Hot Rocks (18.7): Clearing the Motoyama Plateau. This scenario begins on the AM GT of 25 Feb and concludes at the end of the PM GT of 4 March (GT 22–45). This is an ideal scenario for two players cooperating against the solo system with each player commanding one of the two US divisions and randomly determining which player commands the 9th Marine Regiment of the 3rd Marine Division. This scenario takes about 12 hours to play.
-
Drive to the Sea (18.8): Involves the final clearing of the plateau and the practical end of organized Japanese resistance. This scenario begins on the AM GT of 6 Mar and concludes at the end of the PM GT of 10 Mar (GT 49–63). It requires three to four hours to play.
-
Sands of Iwo Jima Campaign Game (18.9): Begins with the 0900 GT (GT 1) of 19 Feb and concludes at the end of the PM GT of 11 Mar (GT 1–66). This scenario combines all aspects of the previous scenarios into a comprehensive look at the entire campaign until organized resistance came to an end. Special rules are added to represent strategic decisions that are not present in the smaller scenarios.
Errata: Inf/Bn. HQ line should read: FT (if adjacent), RD.
4.0 Sequence of Play
DD-IJ is played in GTs. Each GT consists of specific phases, conducted in the below sequence. Move the phase marker along the Turn Sequence Track to note the current phase. During the GT, you will draw cards for various functions. As each is drawn, place it in the appropriate box of the Turn Sequence Track for reference.
I. US Amphibious Operations Phase (AOP)
- Conduct a landing check for each beach box containing US units (5.1).
- Move each unit in a beach box to any beach hex attached to that box (5.2).
- Place units scheduled to arrive during the next GT in beach boxes (5.3).
II. HQ Phase: AM & PM GTs Only (Start GT 7)
- Place garrison markers in eligible position hexes within command range of a US command post (15.4).
- Convert regimental HQ units to command posts (CP) and increase the command range of previously established CPs (15.1 & 15.2).
- Expend replacement points to rebuild eliminated units and replace step losses for reduced units (16.1).
- Assign tank and engineer units to US Rgts.
- Transfer units to and from the USMC Reserve Pool (16.2). Units transferred from the pool are placed in hexes on the game map.
- (PM GT only) Return eligible eliminated regimental HQ to the game map (15.3.2).
III. First Event Phase (Start GT 2)
Draw an event card and implement the event listed for the current date. If there is no event listed for the current day, no event takes place.
Example: 2-19 refers to all turns on February 19th.
IV. Japanese Fire Phase
Draw a fire card and conduct Japanese fire against US units. Japanese positions that match the colors shown on the fire card, and that contain a non-disrupted Japanese unit or fort, fire at US units in the position's FoF.
Important: Complete each action by a Japanese position before checking the next position.
- If any Japanese units are in counterattack stance, (14.4) conduct actions with those units first.
- Check to see which US units are hit by fire (if any) and apply disruption or step losses as called for.
- Beginning on GT 7, Japanese positions may perform actions in addition to firing (13.0).
- Remove disruption markers from eligible Japanese positions (6.4.2).
V. Second Event Phase (Start GT 7)
Draw an event card and implement the event listed for the current day. If there is no event listed for the current day, no event takes place.
Important: Airfield objective events are persistent events.
VI. US Action Phase
All units within the command range of their HQ may perform actions each turn.
- Conduct naval gunfire and airstrike barrages.
- Conduct movement (including preservation movement) and combat actions (including CC) in any order you choose. Artillery and tank barrages can be conducted at any point in this step.
- Resolve deliberate CC.
- Remove disruption from US units that are eligible and did not conduct preservation movement. a) US units disrupted on even-numbered GTs use the lighter shade (D1) markers. b) Those disrupted on odd-numbered GTs use the darker shade (D2) markers. c) D1 markers may only be removed on odd-numbered GTs and D2 markers can only be removed on even-numbered GTs.
VII. Japanese Artillery Fire Phase (GTs 3 & 6 and then every GT starting on GT 7)
Check each Japanese artillery sector, applying losses or disruptions to US units.
VIII. Japanese Raid Phase (Start GT 7)
- Check US occupied hexes for open flank (10.0).
- Draw one fire card for each US hex with an open flank.
- Inflict disruptions or hits due to the Japanese Raid.
Important: US units disrupted this phase cannot recover until Phase VI Step 4 of the next game turn.
IX. End of Turn
Move all cards from the Turn Sequence Track to a discard pile and move the phase marker back to the beginning of the track. Move the turn marker one turn ahead on the Record Track.
a) If the discard pile clearly has more cards than the draw deck, shuffle all discards back into the deck.
b) Keep playing GTs until the US forces suffer catastrophic loss (18.1) or until you complete the last GT of the scenario. If you have completed the last GT, determine if you have won or lost.
c) If the current GT is a PM GT, remove all disruption markers from Japanese units.
5.0 US Amphibious Operations
US units enter play during the US Amphibious Operations Phase.
Sequence of the Amphibious Operations Phase
- Landing Checks: Starting from the south (your left) conduct a landing check (5.1) for each beach box containing one or more US units. Apply step losses and drift results as called for.
- Landing Units: You may place each unit still in a beach box in a beach hex of your choice adjoining that landing box (5.2).
- Arriving Units: Place units scheduled to arrive the next GT in the beach landing box indicated for that unit on the US Master Reinforcement List (19.0). Use the procedures as per (5.3).
5.1 Landing Checks
The landing section of the card shows a target symbol (circle, diamond, or triangle) in one of the six Japanese position colors. Landing cards may also show a drift result.
a) Draw one landing card for each Bn. (4 units) in each Beach Landing Box.
b) Draw one card for every four (or fraction of four) other unit types (engineers and tanks) in each Beach Landing Box.
Important: The card drawn applies only to the subject US Bn. or group of engineers/tanks and no others, even if they are in the same Beach Landing Box.
Example: If two Bn.'s and one tank unit are in a Beach Landing Box, you would draw three cards. The first card drawn applies to the Bn. with the lower Bn. identification, the second card would apply to the next higher Bn. and the last card would apply to the tank unit.
c) If the color of the card's landing target symbol matches a fire square in the Beach Landing Box, remove the required number of steps from each US unit whose target symbol matches the card's landing target symbol.
d) Japanese positions must be within three hexes of at least one of the beach hexes associated with that Beach Landing Box.
e) Remove one step from the above unit(s) for each of the below in the colored position matching the card's landing target symbol color:
- Non-disrupted Japanese Unit
- Depth Marker
- Fortification
f) If a black fire square is shown in the Beach Landing Box and a Japanese black position (occupied by at least one of the above) is within three hexes of any beach hex associated with the Beach Landing Box, add one step loss to the number of step losses determined in e) above.
GT 1–6 only: If the card has a drift result, one US unit with the landing card's target symbol drifts. Move the unit from its beach box to the adjacent beach box in the indicated direction. If more than one unit has the indicated target symbol, you choose only one unit to drift. If there is no beach box in the indicated direction, the unit drifts in the opposite direction.
5.2 Landing Units
Move units in a beach box into a beach hex adjoining that box.
a) Units may exceed the normal stacking limits at your option, but then the number of units (your choice) that exceed the stacking limit are disrupted.
b) You may choose to keep units in the beach box for landing the next GT, but if you do, those units will again undergo landing checks in that next GT.
5.3 Arriving Units
Take all units scheduled to land the next GT (19.0) and place each in the beach box listed for the unit.
a) If a unit's listing contains a beach color code name without a number (such as Or for Orange) that unit may be placed in any beach box of that color code.
b) A unit without a beach listing may be placed in any beach box.
c) Any number of units may be placed in a beach box.
d) All Inf Co./Bn. HQ units are treated exactly like any other US infantry unit when being landed. They are considered to have the star target symbol.
e) See scenario instructions for the arrival and/or placement of regimental HQs (18.0).
Important: HQ and HW units have a star target symbol but are not subject to drift or step loss during landing checks.
Example of Landing Check (GT 1 Amphibious Operations Phase, Beach Landing Box Blue 1 only):
Landing Check: You draw two cards for the Blue 1 Landing Box (one for the 1/25 Bn. and one for the 3/25 Bn.). You draw card 30 and card 01. The landing section of card 30 shows a blue diamond, and card 01 shows a red triangle. Since there is a blue fire box in Blue 1 and there is an undisrupted Japanese unit occupying the blue position, the US unit with a diamond symbol, A/1/25, must take one step loss. There is no red fire box in Blue 1, so card 01 is ignored (including drift, if any). In this case, the A/1/25 takes one step loss. Place a Step Loss 1 marker under the unit. The landing box also indicates a Drift Right for a US unit with a diamond symbol; thus, the A/1/25 executes the drift (5.1.c). Move the unit and hit marker into the Blue 2 Landing Box.
Landing Units: After completing all landing checks, you move units in landing boxes to landing beach hexes adjoining each box. Within each box, the choice of the landing beach hex in which to place each unit is up to you.
6.0 Japanese Fire
During the Japanese Fire Phase draw one fire card to determine which Japanese positions fire at US units.
a) US units in the FoF of a Japanese unit may be hit by fire and suffer disruption or step loss.
b) Japanese black positions always fire.
- A black bar appearing above a fire color signifies that the lettered action now occurs in any black position within two hexes of a US unit, in lieu of that colored position.
- If no such black position exists within three hexes, that original position conducts the lettered action.
Example: In the diagram below, the gold fire color box has a black bar over it. Any black position within three hexes of a US unit would conduct the "M" action (see Japanese Fire/Action Summary Chart). In this case the black positions would take this action, not the gold positions.
c) All undisrupted occupied Japanese positions may potentially fire (whether the units there are revealed or unrevealed).
- Firing does not cause a Japanese unit to become revealed.
- The hex that potential fire is being directed at is called the target hex.
- The hex that the FoF originates from is termed the firing hex.
6.1 Reading the Fire Cards
Each fire card identifies Japanese positions eligible to fire and US units likely to be hit. Each fire card includes:
- Japanese Position Colors: Every non-disrupted Japanese-occupied position matching a color symbol on the card may be eligible to fire at US units in the position's FoF. Position colors are brown, green, red, gold, blue, and purple.
- US Target Symbol: US units with the target symbol indicated on the fire card are more likely to be hit by Japanese fire.
- Action letters and Hero/HQ stars as described below.
a) Position colors on the fire card may have a star, indicating that a US Hero or HQ may be hit by fire from a position of that color (11.4).
b) Position colors on the fire card may include an Armor Hit Bonus, indicating that fire from positions of that color also hit US armored units (6.3.6).
c) Position colors on the fire card may have action letters (A, I, M and R).
- See the Japanese Fire/Action Summary at the end of this rule booklet and section 13.0. Lettered actions go into effect on different GTs.
- Until lettered actions become available, treat the position color as a fire action and ignore the letter codes.
Important: To assist in distinguishing between the colors brown, green, and red; all brown indicators have a white square and/or white letters/symbology. Green indicators have a black square in the center, or upper right corner.
Important: To help in identifying FoF and fire color, the Setup Map shows colored dots for all positions as used in the other games in the series. Refer to it if FoF questions arise.
Important: A black bar appearing above a fire color signifies that the lettered action now occurs in any black position within two hexes of a US unit, in lieu of the originally colored position.
6.2 Fields of Fire (FoF)
A position's field of fire represents the hexes that can be hit by fire from that position. Other games in the D-Day series rely on colored dots on the map to represent such hexes. In DD-IJ, line of sight (LOS) and range determine fields of fire.
a) LOS rules establish whether a clear FoF can be traced to a hex without being blocked by terrain. LOS is traced from the center of the firing hex to the center of the target hex.
b) Range measures how far a FoF (in hexes) can be traced from a position. Basically, can the enemy see you (LOS), and are you close enough for him to hit you (range).
Important: If US units are in a Japanese FoF, the Japanese position or unit creating that FoF is also in the FoF of those US units (i.e., FoF are reciprocal).
6.2.1 Position Groups (PG)
Positions with two or more position hexes are considered one position and have one FoF.
a) There is no requirement for all position hexes of a PG to be Japanese occupied nor are all position hexes of a PG required to trace an LOS to the target hex.
b) Additionally, in some cases one of the position hexes of a PG may be able to project a FoF out to three hexes due to this rule.
Exception: A Japanese unit or fort in a PG projects its fire into any of that PG's FoF hexes, even from hexes in that PG that they do not occupy. If one or more position hexes within the PG are occupied by a US unit (including a garrison unit), the remaining position hex(es) of the PG must have an LOS to the target hex to be able to project a FoF into that hex and is limited to the two-hex range (unless on a hilltop). In this case, those Japanese units/forts would then only project fire from those other Japanese PG hexes that are still under Japanese control. Thus, some printed Japanese FoF will no longer be effective after the US player has occupied a hex of a Japanese PG.
6.2.2 Range
A hex is normally in range of a Japanese position if it is within two hexes of that position.
- Do not count the hex that the position is in.
- This range is increased to three hexes if the position is a triangular hilltop position (TEC).
Overlapping Fire: The proximity of Japanese positions may cause FoF from positions of different colors to overlap. There is no location on the map where Japanese positions of the same color project a FoF into the same hex.
Japanese Artillery Range: The Japanese artillery range is managed differently than other types of fire.
- All the Japanese artillery points in a Japanese artillery sector are within range of every hex in that sector. Additionally, artillery points are in range of every hex in an adjacent artillery sector.
Important: Artillery points on Suribachi are a special case: they are in range of Artillery Sectors 2 and 3, in addition to their own.
6.2.3 Line of Sight (LOS) Determination
A valid LOS is the second component necessary to create a FoF.
a) Terrain can block LOS through a hex or across a hexside. Terrain that does so is called blocking terrain.
b) Blocking terrain never affects a FoF that originates from an adjacent hex (i.e., the range of the FoF is only one hex); all hexes adjacent to an enemy position or unit are in that enemy's FoF (and vice versa).
Blocking Terrain: The following terrain blocks LOS:
a) Rocky Hexes.
b) Wooded Hexes.
c) Bluff Hexsides.
d) Terrain that is at a higher elevation than both the firing hex and the target hex.
- Units never block a LOS.
- If a LOS crosses through any part of a hex (except for the target hex) containing a blocking feature, that LOS is blocked.
- A LOS may be traced along the hexside of a hex containing blocking terrain but may not do so if both hexes adjacent to that hexside contain blocking terrain.
Elevations and Blocking Terrain:
a) If a firing hex is at the same elevation as the target hex, all blocking terrain prohibits the establishment of a valid FoF.
b) If a firing hex is at a higher elevation than the target hex, the LOS is blocked by any intervening hex that is entirely at the firing hex's elevation.
c) A hex with both equal and lower terrain does not block the LOS from the higher elevation firing hex.
d) A FoF that originates from a hilltop hex is blocked only by a hex entirely at the same elevation.
e) LOS reciprocity also extends to elevations and blocking terrain. If a unit at a higher elevation can see a unit at a lower elevation, the reverse LOS is also valid.
Bluff Hexsides: Bluff hexsides are a special case: LOS into a target hex adjacent to a bluff hexside is blocked by that bluff hexside regardless of elevation unless the firing hex is adjacent to the target hex. LOS reciprocity is in effect here, as well. A hilltop LOS is never blocked by a bluff.
Beach Landing Boxes (beach boxes): US units in beach boxes are not considered to be in Japanese LOS during the Japanese Fire Phase. The fire squares in beach boxes are used only when making landing checks in the Amphibious Operations Phase (5.1).
Smoke: Smoke reduces the intensity of any FoF being projected from the hex containing the smoke marker.
a) Smoke reduces an intense FoF to a steady FoF.
b) Steady FoF hexes are not affected.
c) The maximum range that a position with a smoke marker can fire is reduced by one hex.
d) Smoke markers on the map are removed during the End of Turn Phase.
Example: The hilltop position in hex 1026 would normally be able to fire out to a three-hex range. If a smoke marker is placed on the position, all intense FoF hexes surrounding the position would become steady FoF hexes, and the position would only be able to conduct fire attacks out to a two-hex range.
Examples of Overlapping Fields of Fire: The setup display is used to illustrate overlapping fields of fire. Normally it should be clear as to the fields of fire for each position. Refer to the Setup map when in doubt as to the correct fields of fire. In this illustration the overlapping FoF of three Japanese positions are outlined: Position I8 (red), Position Group G7, G8, & G9 (gold) and Position Group G5 & G6 (blue). Other fields of fire also exist on this map section. For the clarity of this example, they are not included.
Abutting FoF: The proximity of positions may cause FoF from positions of the same color to abut, but FoF of a single color never overlap. If there is a question as to which position projects a given fire dot, note that dots are printed on the side of the hex nearest to the projecting position. In this illustration the fields of fire of I8 and G10 (just off south boundary of map) abut along two hex sides.
6.3 Resolving Japanese Fire
Upon drawing a fire card, resolve Japanese fire for all positions matching any of the three colors appearing on the card.
a) For each Japanese position hex firing, check each hex in its FoF (and LOS) occupied by US units and refer to the Japanese Fire Chart.
b) Use the row of the chart for the type of fire projected into the hex by the Japanese position. Read across that row to the column listing the status of the Japanese position firing: either a position with all units revealed (not depth markers), or a position with any unrevealed units.
c) Read the result in the box to determine if any US units in the hex are hit by fire. Factors determining if a US unit is hit include:
- The type of fire in the hex (intense or steady).
- The US unit's target symbol.
- The US unit's type (armored or non-armored).
Units hit by fire lose steps and/or become disrupted, as noted on the chart.
Intense Fire: The following target hexes in a Japanese position's FoF constitute intense fire (see 11.4 for effect on leaders and Inf/Bn. HQ):
- Beach Hexes (only hexes with beach arrows).
- Airfield Hexes.
- Hexes that are adjacent to the firing Japanese position unless they contain woods or rocky terrain.
- Hilltop positions firing into non-adjacent hexes at a lower elevation without rocky or wooded terrain.
- A hex linked to a connecting position that is generating the FoF.
Steady Fire: All hexes that are in a Japanese position's FoF that are not listed as intense fire hexes, plus any hex that contains rocky or wooded terrain, regardless of the range, are steady fire hexes.
6.3.1 Hit Limits of Japanese Positions
In a single fire, a Japanese position or PG may hit the number of US units equal to the number of undisrupted Japanese units, depth markers and fortification markers in the position and/or PG.
Example: A lone unit in a position may hit just one US unit in a single turn, while a PG with two-unit markers and one depth marker may hit up to three US units.
Important: The hit limit of each hex in a Japanese PG can never exceed three. If a black hilltop Japanese position contains two fortification markers, the second fortification marker still contributes to the hex's hit limit (up to the max of three). Except for special letter actions (armor hit or leader/hero hits are additional), a position hit limit is three.
a) If the number of US units eligible to be hit exceeds this limit, select the units to take hits using the following priority order:
- Priority 1: Units in intense FoF hexes. If after checking all intense FoF hexes, the Japanese position has not reached its hit limit, proceed to priority 2.
- Important: A US tank unit in an intense FoF may be chosen to absorb two hits as Priority 1.
- Priority 2: Units in steady FoF hexes. If after checking all steady FoF hexes, the Japanese position has not reached its hit limit, proceed to priority 3.
- Priority 3: If the position is firing with machine guns (lettered M action), all steady FoF hexes become intense FoF hexes and hexes that are not in the position's FoF but that are adjacent to any steady FoF hexes for that position also are considered in the position's steady FoF.
b) If you need to select from among units within one of the above priorities:
- Important: When selecting units within a priority, always choose units that possess the same target symbol as the fire card or marker first.
-
- Select the unit closest to the firing position.
-
- Then select the US unit with the most steps.
-
- If a choice remains, you choose which units receive the hits.
6.3.2 Step Loss Because of Japanese Fire
A US unit hit by fire may suffer a one-step loss, as noted on the Japanese Fire Chart. You may be able to convert an infantry step loss into a disruption of two infantry units or into a tank unit step loss.
Important: A reduced unit has a range of the side of the counter that is up. Step losses only affect the range of a unit when the reduced side of the counter is up.
Example: A four-step unit takes one step loss. A step loss marker is placed under the unit counter; however, the unit still has a range of two, until the unit suffers a second step loss, and the unit counter is turned over to reveal the reduced side that now has a range of one.
a) If the unit is a Bn./HQ, engineer, or tank unit, flip it over to its reduced-strength side. The next time the unit is hit, eliminate it.
b) If the unit is an infantry or heavy weapons company, it possesses four steps when at full-strength.
- The first time such a unit takes a loss: randomly draw, and place a one-step loss marker under the unit. Its attack strength is reduced by two, as shown by the marker.
- If it takes a second loss: remove the marker, and flip the unit to its reverse side (with a dark color band).
- To show a third loss: draw and flip a Step Loss 1 marker to its reverse side (with the dark color band) and place it underneath the flipped company (subtract two from the attack strength shown on reverse side of the unit).
- When a unit suffers a fourth loss: it is removed from the map and is placed in the appropriate Loss Box.
Important:
- Steady FoF Hex: You may disrupt two US units instead of taking one step loss, even if the fire card target symbol matched one of the two units being disrupted.
- Intense FoF Hex: You may choose to disrupt two units instead of taking a step loss as long as no unit in that hex has the same fire symbol as the drawn fire card.
- Steady or Intense FoF Hex: You may choose to inflict one tank step loss on a tank unit if it is present with a unit that would normally be forced to take a step loss. Additionally, each step loss from a tank unit absorbs up to two non-tank step loss requirements. The fire card must not contain an armor hit symbol for the fire color of the position inflicting those hits.
6.3.3 Disruption Because of Japanese Fire
Fire results may cause a US unit to become disrupted instead of or in addition to losing a step; place a disrupted marker on the unit.
Important: Tank units are not disrupted by step losses. A tank unit is only disrupted by a step loss if it is not stacked with any other type of unit, or if all other units in the hex are disrupted in the same Action Phase (exception 6.3.6).
a) An already disrupted unit that incurs another disruption result is not further affected.
b) A unit may be disrupted by fire from one position and lose a step because of fire from another position in the same Fire Phase.
Exception: A regimental HQ unit is not disrupted by Japanese fire.
c) A US unit may take a hit (in addition to any already inflicted) to avoid disruption as long as it does not have the target symbol shown on the fire card drawn for that fire combat.
6.3.4 Step Loss Limitation
A given US unit may not lose more than one step in a single Japanese Fire Phase, even if hit by fire from multiple Japanese positions. Apply the excess hits to other US units in the same hex, if available; if not, ignore the excess hits. However, you must attempt to hit the most US units possible when assigning hits from multiple positions.
Exception: A US unit may (voluntarily) be given more than one hit to avoid being disrupted (6.3.3c).
Example: If Japanese Position A is limited to hitting two units and three units are eligible to be hit, one of which is also hit by Position B, assume that Position B hits that unit, and Position A hits the other two.
6.3.5 Concentrated Targets
Any US occupied hex in a steady FoF that contains more than ten non-tank steps is a concentrated target. Concentrated targets are considered to have the target symbol shown on the Japanese fire card, regardless of the symbols printed on the units' counters.
Important: A stack of US units may be considered a concentrated target even if the stack is not in an over-stack situation (7.5).
6.3.6 Armor Hit Bonus
A position color with the armor symbol receives an armor hit bonus when firing. An armor hit bonus causes one US armor unit:
a) To suffer an automatic step loss and be disrupted if the armor unit is in an intense FoF.
b) To automatically be disrupted if in a steady FoF.
This result is in addition to any already suffered using the normal fire procedure.
Important: Step losses must take priority over disruption.
6.3.7 Firing on Stacks
Hits are against units, not stacks, although it may be a stack of units being fired on.
a) One unit in a stack may be hit while the other is not.
b) If both units in a stack are hit, both may lose a step.
6.4 Disrupted Japanese Units
A Japanese unit with a disrupted marker does not fire and does not project a FoF.
Exception: Disrupted units do project a steady FoF into their own PG hexes.
6.4.1 Disruption in Position Groups
If a PG has units in more than one hex and any of those units are disrupted, the non-disrupted units in the position still fire. The disrupted unit and its depth marker do not contribute to determining if the position is eligible to fire and the number of units it can hit.
Important: Disrupted Japanese units in black positions do contribute fire, however their FoF is downgraded one level if disrupted.
Example: A steady FoF disappears, while an intense FoF becomes steady.
6.4.2 Removing Disruption from Japanese Units
A Japanese unit remains disrupted until its position color appears on a fire card. After resolving all fire in the Japanese Fire Phase, remove disruption markers from every disrupted Japanese unit in a position matching a color appearing on the fire card. Black positions recover if they are within three hexes of a position whose color is indicated on the fire card and the black position(s) have a Japanese line of communication. Japanese units may also recover under the following circumstances:
a) All Japanese disruptions are removed at the end of the PM GT of each day.
b) Certain events call for removal of disruption from Japanese units.
6.4.3 Japanese Stacking Limits
Only one Japanese non-tank unit and one depth marker may be stacked in a hex.
a) If a tank unit is present in a position, it can stack with one other Japanese unit, and each can be stacked with a depth marker.
b) If a unit with a revealed depth marker is eliminated and the position is in communication, put the marker back in the Japanese Depth Marker Pool. If it is not revealed, stack it underneath any remaining Japanese unit in the position. If no other unit is present place the marker back in the Depth Marker Pool.
6.5 Japanese Artillery Fire
In addition to fire from Japanese positions, Japanese artillery fire may also be conducted. Artillery fire may result in more step losses and disruptions against US units.
Japanese Artillery Value: Fire cards may also have a Japanese artillery value that is used to determine the effect of Japanese artillery.
6.5.1 When to Conduct Japanese Artillery Fire
Japanese artillery fire occurs during the Japanese Artillery Fire Phase in GT 3 and 6. Beginning GT 7 Japanese artillery fire is conducted every game turn.
6.5.2 Japanese Artillery Sectors
The game map is divided into four artillery sectors (1–4). Artillery fire is resolved separately for each sector.
a) You draw one fire card for each sector.
b) The current artillery fire strength in each sector is divided by the artillery value on the fire card drawn for that sector.
c) The resulting value is the number of hits inflicted on the US units in that sector.
6.5.3 Artillery Fire Strength & Range
The artillery fire strength of a sector depends on the number of Japanese occupied artillery positions that exist in that sector or are within range of it. Destroyed artillery positions and artillery positions that are not occupied by a Japanese unit are not counted.
Important: There are no artillery positions in sector two.
a) Artillery positions in sector 1 each equal three artillery points.
b) Each non-hilltop artillery position (not in sector 1) equals one artillery point.
c) Each position on a hilltop artillery position (not in sector 1) equals two artillery points.
d) Use the artillery sector markers to record the Japanese artillery strength in a sector based on these values. As artillery in the positions is eliminated or occupied, adjust the markers on the Japanese Record Track to reflect the current value of each sector. The starting full-strength artillery value for sectors 1, 3, and 4 are printed on the Japanese track.
Errata: Sector 3 has 29 artillery points, not 28 as printed on the Japanese track.
6.5.4 Artillery Sectors & Allocation of Fire
A sector's artillery points can be fired on US units in its own sector or adjacent sectors.
a) An artillery point can never be allocated to more than one sector during the Japanese Artillery Fire Phase.
b) If there are no US units in a Japanese artillery sector all that sector's artillery points must be allocated to an adjacent sector if, that adjacent sector contains US units.
c) If US units are present in a sector and there are US units present in an adjacent sector you must allocate one-third of that sector's artillery points to the adjacent sector.
d) If US units are present in sectors 2, 3, and 4, Japanese artillery in sector 3 can only be allocated against its own sector and sector 4.
e) After determining how many artillery points must fire into an adjacent sector, you must halve that number (round down) to determine the actual artillery point strength. Points dropped due to this reduction cannot be used elsewhere.
Exception: Do not halve sector 1 (Suribachi) artillery points when firing into sector 2, even if there are US units present in sector 1.
6.6 Artillery Fire Procedure
Japanese artillery attacks are conducted in each artillery sector containing US units.
a) Draw one fire card for each sector (starting with the lowest numbered eligible sector).
b) If the card for a sector displays the artillery symbol at the bottom of the card, artillery fire must be resolved for that sector. The procedure used is the same for each sector.
c) Conduct Japanese artillery fire for the sector the card was drawn for using the following procedures:
-
Total the artillery fire strength firing into the sector. Include artillery points firing from within the current sector and from adjacent sectors.
-
Divide the total strength by the divisor shown next to the artillery symbol on the current fire card. The result is rounded to the nearest whole number (i.e., if fractional result less than one-half, round down, if equal to or greater than one-half round up).
-
The resulting value is the total number of step losses due to artillery fire that must be satisfied by US units in that sector.
Important: Each artillery sector uses the card drawn for that sector when determining the effects of artillery fire.
Example: If there are nine Japanese-occupied artillery positions in artillery sector 3 (and four of them are on hilltops) the artillery value existing within that sector is 5 + 8 = 13. Sector 4 has 12 artillery points and no US units within it, so all 12 are allocated to sector 3. Their value is halved because they are firing into an adjacent sector, which leaves six points to be added to the original 13. For a total of 19 artillery points. The value on the fire card next to the artillery symbol is "6". 19 divided by six results in a value of 3.16 (rounded down) resulting in three step losses that must be inflicted on the US units in sector 3.
6.6.1 Hit Priority for Japanese Artillery Fire
Units must be in the current sector (6.6). Within a sector, artillery hits must be spread evenly as possible between all the active US Rgts in that sector. Units are hit according to the following priority:
- In a beach landing box. Skip this priority if not being conducted against sector 2 and it is after GT 6.
- In a landing beach hex. Skip this priority if not being conducted against sector 2 and it is after GT 6.
- A unit closest to an airfield hex. If more than one, choose a hex that is closest to the leftmost intact black Japanese position.
- Always select a unit with the most steps in a hex. If a choice remains, you choose which unit to hit.
- A unit in an intense FoF (other than black).
- Use the fire colors that appear on the fire card for priority.
Important: HQ units are immune to artillery fire.
6.6.2 Inflicting Artillery Step Losses & Disruptions
When a step loss must be inflicted, use the same procedure used for Japanese fire listed in 6.3.2 and 6.3.3.
Exception: A unit that takes a step loss in this phase is not disrupted. If there is more than one undisrupted US unit in the hex, you may disrupt all US units in the hex in lieu of taking a step loss.
6.7 Knocking Out Japanese Artillery
The artillery in an artillery position is permanently destroyed if occupied solely by a US unit or if a barrage against the position achieves an artillery destroyed result.
a) Place an artillery destroyed marker in the position, as a reminder.
b) If the Japanese reoccupy a position with undestroyed artillery, that artillery again contributes to any Japanese artillery fire from that sector.
6.8 Black Position Groups
Because they are uniquely different and more lethal, black PGs have special rules that govern their activities. Black PGs have their FoF printed on the main map due to their importance and frequency of fire.
6.8.1 Disruption
Black PGs always fire, even those PGs containing only disrupted units.
a) There is not a necessary fire color needed to indicate that they fire.
b) If only disrupted units occupy such a position, the fire level is downgraded; intense FoF hexes are reduced to steady FoF hexes, and steady FoF hexes temporarily cease to exist.
c) Black PGs recover from disruption if they are within three hexes of a PG whose color is indicated on the fire card. It does not matter that the colored position is not Japanese controlled or occupied-just its presence on the map is needed.
6.8.2 Letter Actions
Black PGs execute any Japanese letter actions indicated on the fire card color boxes if a black line appears above a PG color and a PG of that color is Japanese occupied and within two hexes. If this happens, the colored position does not undertake the lettered activity.
Exception: Ignore the assault letter action and the redeploy action if the position affected is a black PG and there are US units in its FoF.
6.8.3 Command
A black PG that can trace a line of communication (LoC) (of any length) to another black PG that is not controlled by the US side is in command. Any other PG that can trace an LoC of any length to a black PG that is in command, is itself in command.
6.8.4 Suribachi
The Suribachi black PG provides command for all sector 1 positions, until US occupied by a US unit/garrison.
6.8.5 CC & Barrage
When a black PG is involved in a CC or barrage, draw a separate card to temporarily determine the fire color for that PG. Use the color indicated in the Landing Section of the card.
7.0 US Actions
During the US Action Phase, you may conduct actions with any US units or stacks that are undisrupted and in command.
a) US units may conduct one of the following actions in any order if eligible:
- Barrage: (tank, artillery points, naval gunfire, and airstrike markers only) Naval gunfire and airstrikes must occur before conducting any other barrage actions.
- Move: During GT 1 through 6, you may move all units up to two hexes. Beginning GT 7 all units may move up to three hexes.
- Important: The first time a US unit enters an intense FoF of an unoccupied Japanese position, you must follow the procedures in 9.3 b).
- Important: If you attempt to enter an unoccupied Japanese position with a US unit and that position is in communication with a black position, you must follow the procedures detailed in 9.6.
- Move Into: An adjacent revealed enemy occupied hex for close combat (tanks, infantry, engineers, and Inf/Bn. HQs). Upon doing so you may immediately resolve close combat in the hex or wait until all actions are completed in the phase and then resolve a deliberate close combat in the hex.
- Attack: (all), but not a hex that has or will be barraged in this Action Phase.
- Remove Disruption: You may remove disruption markers.
b) The process of conducting these actions is described in the rules in this section and section 8.0. Actions may be separately categorized as Combat Actions, which can inflict losses, disruptions and defeat on Japanese units and positions.
c) Movement can trigger Japanese movement under fire (MUF) that must be immediately resolved.
d) No unit may perform more than one of these actions in an Action Phase.
Important: Resolving a close combat is part of the action of entering a Japanese occupied hex.
7.1 Independent Actions
Independent actions may be conducted by units that are either out of command, disrupted, or are in command by commanding themselves. Units in the following situations may conduct independent actions:
a) A disrupted unit may make a one hex preservation move; however, it cannot recover in the same Action Phase (7.3.5).
b) A unit with a hero or inspired marker is always in command and may perform all actions normally.
c) An infantry, Inf/Bn. HQ, and HW unit in a landing beach hex may conduct a one-hex preservation move (7.3.5).
d) A hero may be flipped (if inspired it would be removed) to un-disrupt a US unit, regardless of the disruption marker color or enemy FoF.
7.2 Conducting Actions
Actions are performed by single units or by a stack of units.
a) A unit may perform an action individually.
b) Units that began the phase stacked together may perform a single action as a stack. All units in the stack must perform the same action.
c) Players should rotate (or mark them in some way) units to signify that they have performed an action.
Example: They move into the same hex, or attack the same Japanese position, or barrage the same hex.
7.3 Movement Action
A unit may move one, two or three hexes in any direction. The TEC lists terrain that limits or prohibits movement for certain unit types.
Exception: On GTs 1–6, units may move a maximum of two hexes.
7.3.1 Movement Limitations
A unit must end its move if it meets any of the criteria below:
a) It is a non-tank unit, and it has moved three hexes (two hexes on GT 1 through 6).
b) It is a non-tank unit, and it has entered a second FoF hex.
Important: Japanese disruption does not negate the above restriction.
c) The unit moved adjacent to a Japanese unit (disrupted or not) or intact fortification (Japanese occupied or not).
d) The unit has triggered movement under fire (7.3.3) attempting to leave a hex and has been disrupted by that fire. The unit's movement ends in the hex it was attempting to leave.
e) The unit has entered a Japanese occupied position to conduct close combat (CC).
f) The unit entered a hilltop, rocky or wooded hex.
g) Tank units may not cross bluff or cliffside hexsides unless a road runs through those hexsides.
h) A newly unoccupied hex in Japanese communication must be checked for reserve rejuvenation (9.6) and then MUF if the reserve rejuvenation succeeded or if another position within a PG is Japanese occupied before you move the US unit(s) into the hex. The US units must not have conducted any other action in the current phase to be eligible to move into the hex.
Example of Play: Movement and Movement Under Fire Resolution
This example illustrates a complex maneuver to engagement by three US battalions and supporting units. Detailed close combat descriptions have been left out. The blue boxes with white letters (A – H) denote starting US units/stacks and their final locations after movement. Solid blue arrows depict the movement routes of each of these lettered stacks. Dashed blue arrows represent failed moves. The red boxes with white numbering (PG 1 – PG 4) identify the Japanese occupied hexes for this example. Fields of Fire are not depicted in this example, but players can consult the setup diagram to see how they correspond to this example. The order of movement is conducted alphabetically.
- A: The first move is a one-hex move by G/2/27. The unit is leaving a steady FoF, but since it is conducting a one hex move, it does not undergo MUF. This move places a US unit next to Japanese PG 3 (hex 1222), thereby reducing that position's range by one hex for firing against moving US units. In this case, that range was reduced from two hexes to one. This means that US units in B, G, and H will not be vulnerable to MUF from position 3.
- B: The US B stack enters the revealed Japanese PG 4 (it can do this because the Japanese unit is revealed). Because it is attempting to enter the PG the Japanese PG conducts MUF against the stack. Had the units entered one at a time, they might each be vulnerable to MUF separately. It is better in this case to try to enter as a stack. The fire is intense (because the Japanese unit is not disrupted, and the US units are attempting to enter the PG), but the US player draws card 46 which does not have the fire color of this Japanese position. Therefore, the MUF is ineffective. Now the reasoning for this move was so the US player could conduct an immediate CC against this position. If the CC succeeds in clearing the Japanese from this hex, subsequent US movement in this same action will now be unaffected by the Japanese unit that was originally in this PG. For the purposes of this example, without getting into CC details, let's assume the US player conducted the CC at the end of this stack's movement and the Japanese unit was defeated (and removed).
- C: B/1/27 now moves (using three hex movement) unhindered to hex 1125. Note that clearing hex 1024 facilitated this.
- D: In the same way that G/2/27 reduced PG 3's FoF in A above, C/1/28 attempts to move adjacent to PG 1 in hex 1721. Because it is not using one hex movement and is leaving a steady FoF in hex 1719, it must first undergo MUF from PG 1. The US player draws card 31 for PG 1's fire. The PG's color (green) and the target symbol indicator indicate that fire has occurred, and that C/1/28 must be hit. Even though PG 1 can inflict up to two hits (a unit and a depth marker) a US unit can only be forced to take one hit per phase. Because the Japanese unit was unrevealed (consult the Japanese Fire Chart) the unit takes a step loss and is disrupted. The disruption halts C/1/28's movement in the hex the fire occurred in; it cannot complete the move. Had the target symbol not been a circle, the US player could have chosen to take an extra hit on C/1/28 and not disrupt the unit, which would have allowed it to finish its movement.
Important: Additional movement limitations apply to certain unit types. See the Terrain Effects Chart and US Action Summary.
7.3.2 One-Hex Movement
Certain other conditions may also limit a unit to only one hex of movement per Action Phase.
a) Any kind of unit that begins its movement in a terrace hex that has not been bulldozed.
b) A non-tank unit crosses a bluff hexside (up or down) that does not contain a road.
c) A non-tank unit avoiding MUF that is not moving with a tank unit.
d) Any US units conducting MUF (7.3.3).
7.3.3 Movement Under Fire (MUF)
In previous games in the D-Day series only infiltration fire affected US units attempting to maneuver next to a position. Iwo is different in that US units will take fire while maneuvering within FoF.
a) Whenever a US unit moves out of a hex that is in a position's FoF, it may trigger MUF. A one hex move does not avoid MUF fire (see below).
Important: Black positions that are disrupted still project a FoF (although their fire is downgraded one level).
For the purposes of MUF, as soon as a US (disrupted or not) unit is adjacent to a Japanese occupied position hex (or in that hex), that position is no longer eligible to conduct MUF beyond a one-hex range (two-hex range if a hilltop position).
Important: The FoF still exists for determining the two-hex FoF movement limit for US non-tank units.
Example: A US non-tank unit moves adjacent to a Japanese occupied hilltop position hex. That position does not contribute any MUF out to its usual three-hex range. A second US unit may now leave a hex that would ordinarily be in that position's third hex of FoF without triggering any kind of MUF. The second unit could still only enter one more hex that would normally be considered an FoF.
Important: Smoke markers in a position conducting MUF reduce the fire from intense to steady.
b) If a US non-tank unit leaves a FoF and does not utilize one hex movement (7.3.2) it always triggers MUF.
Exception: The unit is leaving a steady FoF and is moving with a US tank unit.
c) A US tank unit alone, or moving with non-tank units, triggers MUF if it leaves an intense FoF to enter any other kind of active FoF, and it does not use one-hex movement.
d) A US unit that moves directly from an intense FoF adjacent to an occupied undisrupted Japanese position into another intense FoF projected from the same position is subject to MUF.
e) US units that are entering an unoccupied position of a PG and the other hex is occupied by an undisrupted Japanese unit must also undergo MUF. The unoccupied position is considered to contain an intense FoF. If the hex contains woods or rocks, the FoF is steady. If the US units attempting the move are disrupted due to this fire, they may not enter the position.
Important: If neither position of a PG is Japanese occupied, you must conduct reserve rejuvenation (9.6) for the PG. If a Japanese unit appears due to reserve rejuvenation, the US unit undergoes MUF.
f) When MUF is triggered, it is resolved in the same manner as all other Japanese fire, and hit limits still apply. One fire card is drawn for each hex of movement that triggered MUF (resolve fire before continuing any movement) and any active Japanese PGs with the indicated fire colors contribute in the normal fire fashion to that of MUF fire.
Important: MUF fire is different in that only Japanese positions that are adjacent to the moving US units participate in MUF. Black PGs participate if any color within three hexes of that black PG appear on the drawn fire card.
7.3.4 Moved HQ
Once you move an HQ unit, it no longer provides command for the rest of the Action Phase, except to any units it is stacked with (11.3). Plan the sequencing of your units' actions accordingly.
7.3.5 Preservation Move
A disrupted and/or out of command US unit that begins its action in a US landing beach hex or in any hex in an intense FoF may conduct an independent action (preservation move) to move one hex into a hex not in an intense FoF.
a) A preservation move may be into a hex in a steady FoF, but only if a hex not in a FoF is not available. A preservation move may not be made into a hex in an intense FoF or into an enemy-occupied hex.
b) A disrupted unit may not recover from disruption in the same Action Phase that it conducted a preservation move.
c) A disrupted unit may not move to a hex adjacent to any Japanese units or fortifications even if the hex does not contain an intense FoF.
7.3.6 Terrace Hexes
Units that start their move in an un-bulldozed terrace hex may only move one hex that phase.
a) Starting with GT 7, all beach hexes associated with Green, Red, Yellow, and Blue beaches containing terraces have been bulldozed.
b) On GT 10, all terrace hexes adjacent to the above beach hexes have been bulldozed (ramps have been constructed to get units off the beach quicker).
c) On GT 12 all terraces have no further effect on game play.
Clarification: Terrace hexes are depicted with thick brown lines. The thin brown lines on the map are elevation lines and have no effect on game play.
7.3.7 Cliff Hexsides
No unit may move or attack across a cliff hexside.
7.4 Enter Hex Occupied by Revealed Enemy Unit
A US unit that begins the Action Phase adjacent to a hex occupied by a revealed enemy unit may conduct an action to enter the hex. Doing so constitutes the unit's entire action and triggers close combat (8.6).
a) The terrain being crossed or entered must not prohibit movement by that unit's type.
Important: If the unit was attempting to enter an un-occupied PG hex and a Japanese unit appears due to 9.6, after the Japanese unit conduct the MUF, the Japanese unit is revealed, and the US unit(s) may enter the hex if not disrupted.
b) US units may not enter a hex occupied by an unrevealed enemy unit (depth markers have no effect on this).
c) A unit may not enter an enemy-occupied hex that was attacked in the same Action Phase but may enter a hex that was barraged.
Important: If US units are already in that PG hex, no MUF fire occurs.
7.5 Stacking Units
More than one US unit may end an Action Phase in a hex, the units in such a hex are considered stacked. Stacking limits always apply. If US units exceed stacking limits at any time during the GT, you must immediately disrupt (your choice) the number of units that exceed the stacking limit (7.5.2).
7.5.1 HQ, Heroes & Marker Stacking
Regimental HQ units, heroes and garrisons do not count toward stacking limits. Neither does any informational marker (such as disruption or step loss). Inf/Bn. HQ units do count as a unit for stacking purposes.
7.5.2 Stacking Penalties
There is no limit to the number of steps or units that may occupy a hex. However, the number of units that can operate effectively in a hex is limited.
a) If a US stack is in a steady FoF and that stack contains more than ten steps it is considered a concentrated target during Japanese fire (6.3.5).
b) Up to four units (two of which can be Inf Co.'s) can occupy a hex or conduct activity as a stack without being disrupted. The instant this limit is exceeded, all units beyond this limit are disrupted.
Important: Only disruptions that occurred in the previous GT may be removed at the end of this Action Phase, so violating stacking limits because of movement will mean that the disruptions will remain until the next GT.
7.6 Disrupted US Units
A US unit with a disrupted marker may not perform any action, except removal of their disruption marker or a preservation move.
Note: Wait until all other units have performed their actions before removing disruption markers from US units, so that you do not inadvertently perform other actions with those units.
a) US units disrupted on odd-numbered GTs are marked with the lighter shaded US D markers.
b) US units disrupted on even numbered GTs are marked with the darker shaded D markers.
c) Lighter shaded disrupted units can only recover on even numbered GTs, while the darker shaded disrupted units can only recover on odd-numbered GTs.
d) If a unit does not recover, switch its D marker shade with the appropriate side so that you know it is eligible to recover in the next GT.
Important: US units cannot recover from disruption in an intense FoF or if adjacent to Japanese fortifications unless stacked with an NCO or officer hero.
8.0 US Combat Actions
During the US Action Phase, your units may attempt to disrupt and destroy Japanese units via an attack action, a barrage action, or a close combat.
Important: A Japanese position cannot be the subject of an attack action and a barrage during the same US Action Phase.
Attack a Japanese-occupied hex: An attack must include at least one infantry or engineer unit adjacent to the Japanese-occupied hex. Other units may participate from adjacent hexes and, if capable of ranged fire, from non-adjacent hexes. A hex occupied by both US and Japanese units may not be attacked.
Barrage a revealed Japanese-occupied hex exclusively from non-adjacent hexes: Naval fire and airstrikes (no range limitations), tank units and artillery points (within range) may barrage a Japanese-occupied hex. A hex occupied by both US and Japanese units may not be barraged.
Conduct Close Combat (CC): After you conduct an action to move a unit or stack of units into an enemy-occupied hex you must resolve close combat, either immediately or at the end of the US Action Phase (8.6). A hex may not be CC'd more than once per Action Phase. If you have CC'd a hex and the Japanese force is still intact, rotate them to show that they cannot be CC'd again in this phase.
8.1 Units Eligible to Attack
An attack must include at least one rifle Inf, Inf/Bn. HQ or engineer unit attacking a Japanese-occupied hex from an adjacent hex. If this requirement is met, other units may join in the attack against the same Japanese-occupied hex within the following conditions:
a) All participating units with a range of 1 must be in a hex adjacent to the Japanese-occupied hex and must not be attacking through a fortification's blocked side.
b) Inf units with a printed range of 2 must be adjacent to or within range of the Japanese-occupied hex. Inf units may not conduct ranged fire if there is no LOS to the hex being attacked.
c) All Inf units must belong to the same Bn., with the exception that one Inf Co. from another Bn. may participate if:
- Both Bn.'s are from the same regiment; and,
- The additional Bn is stacked with a Hero; and,
- All units are in command.
d) One HW unit may participate if an attacking unit is of the same Rgt.
e) Up to two tank units may participate if within range and LOS, and at least one of the following is true:
- The tank unit is adjacent to the target hex; or,
- The tank unit is adjacent to or stacked with an attacking Inf or Inf/Bn. HQ unit; or,
- The tank units are in command by the same Rgt as the Inf.
f) Up to three divisional and four corps artillery points may participate in the same attack. You may add artillery points to the attack under the following conditions:
- The sector the target hex is in must contain a US unit.
- A US unit that is in command and within the command range of a US Rgt HQ has a LOS to the target hex and has radios.
g) Up to one naval gunfire and one airstrike may be included in the attack if you have naval gunfire or airstrike points to expend, and at least one attacking infantry unit has a radio or is in command of a Rgt HQ.
8.1.1 Determining Range
A hex is in range of a US unit if the distance in hexes between them (counting the target hex but not the firing unit's hex) is equal to or less than the unit's range.
Unlimited Range: US artillery fire, airstrikes, and naval gunfire have unlimited range. You do not need to calculate range when conducting these types of attacks.
US Unit Ranges: The range of US units is printed on their counters.
- If no range appears, then that unit's range is automatically one hex.
- US tank units have a range of two hexes for attack and three hexes when barraging.
8.1.2 Attack is an Action
Each unit participating in an attack against a single Japanese-occupied hex must conduct an action to participate in the attack (7.2). A unit unable to conduct an action may not attack.
8.1.3 HQ Attacks
Regimental HQ units do not directly participate in an attack and are not affected by the results of an attack. Inf/Bn. HQ units participate in attacks as infantry units.
8.2 Attack Weapons
Every US unit possesses one or more weapons, as shown on:
- The US Weapons Chart; or,
- The unit itself; or,
- The loss marker currently under the unit.
a) Every Japanese unit and depth marker lists weapon requirements.
b) If US units do not possess all weapon requirements you must adjust the row and/or column when determining the results of an attack on the US Attack Results Chart (8.3).
8.2.1 Reduced-Strength US Weapons
US units with a step loss marker possess only the weapons listed on that marker. Heavy weapon infantry units possess all their weapons until reduced to one step.
Important: Weapons listed on a loss marker change from counter to counter, so that a unit's weapons compliment may fluctuate throughout the game. That is why you randomly pick loss markers.
8.2.2 Flanking
Some Japanese units and depth markers list flanking (FL) as a weapon requirement. This weapon (a tactic) requirement is not possessed by any US unit. Attacks against Japanese units and/or depth markers with an FL weapons requirement must be conducted as listed below.
Exception: An officer or NCO hero may stand in for a FL weapon requirement. An officer or NCO hero does not negate the below requirements. They only reduce the possibility of the attacking US not possessing all weapon requirements (8.2.b)).
a) If the Japanese unit or its depth marker (only one of the two) lists the flanking requirement, the US units must be attacking the Japanese-occupied hex from at least two hexes that are adjacent to the target but not to each other.
b) If both the Japanese unit and its depth marker list the flanking requirement, the US units must be attacking from at least three hexes adjacent to the Japanese hex to satisfy the requirement. The three hexes may be adjacent to each other.
8.2.3 Japanese Close Combat Requirement
Japanese units and depth markers may list close combat (CC) as a weapon requirement. This weapon (a tactic) is not possessed by any US unit.
Exception: An officer or NCO hero may stand in for the CC weapons requirement.
If the CC weapon requirement is not met a US attack result of:
- JE has no effect.
- JEX only affects a Japanese depth marker.
- JDX result is not changed.
8.2.4 Heroes & Weapons
If a hero is stacked with a unit attacking from an adjacent hex, the hero may provide one of the below benefits:
a) Provide a weapon "wild card".
- The hero wild card may stand in for any one weapon requirement of your choice.
- You make this decision after all Japanese weapon requirements are revealed.
b) Add one point to the total US strength when calculating/comparing the US strength to the Japanese defense strength.
Exception: Only an officer or NCO hero may stand in for the CC or FL weapon requirements.
Important: If more than one qualifying hero participates in an attack, you may only name one wild card weapon or one strength increase. Multiple heroes cannot provide these benefits to the same attack.
8.2.5 HQ Radios
US regimental HQ units possess radios. A US unit attacking a Japanese position from an adjacent hex when in command of a regimental HQ may include the HQ's radio among its weapon capabilities.
8.2.6 Naval Artillery
The naval artillery weapon requirement can be met by:
a) Expending a naval gunfire point (8.5); or,
b) A hero's wild card.
8.2.7 Infantry Range & Weapons
Infantry units with four steps and HW units with two, three or four steps have a range of two.
a) When such a unit is attacking from an adjacent hex, it has all weapon capabilities listed for its type on the US Weapons Chart. Use the lines that state "Attacking from an adjacent hex".
b) When participating in an attack from a non-adjacent hex, an infantry unit with a two-hex range can bring fewer of its weapons to bear. Use the line "Attacking from a non-adjacent hex".
Important: An infantry unit's attack strength is halved when attacking at a 2-hex range.
8.2.8 Tank Weapons
As noted on the US Weapons Chart, the weapon capabilities of a US tank unit depend on the unit's range from the target hex. See 8.1.1 for tank attack and barrage range.
a) Tank attack strength is halved at two-hex range.
b) Tank attack is halved (this is cumulative with a)) when firing across or into any terrain that ordinarily halves US attack strength.
c) When attacking at a range of one or two hexes, the tank fulfills the requirement for artillery (AR), bazooka (BZ), browning automatic rifle (BR) and a machine gun (MG).
d) At a range of one hex, tanks fulfill the requirement for all the above and a flamethrower (FT).
8.3 Resolving an Attack
Resolve an attack by comparing the strength and weapons of the attacking US units to the strength and weapon requirements of the units and markers in the Japanese-occupied hex under attack.
a) The Japanese defenders may become disrupted, lose their depth marker, gain a depth marker, or be defeated because of the attack. A defeated Japanese unit is removed from play, temporarily or permanently.
Exception: A defeated elite Japanese unit retreats to an adjacent PG hex if it does not create an overstack situation when doing so. The presence of US units adjacent to that hex do not prevent this retreat (8.3.3).
b) Attacking US units may become disrupted and/or may lose a step.
c) Once you have declared an attack action against a Japanese-occupied hex and selected all the US units performing actions to participate in the attack (including expenditure of a naval gunfire or airstrike marker), resolve the attack as follows:
- Unrevealed Japanese units are revealed.
Important: Unrevealed depth markers are not revealed at this time.
- Add up the total strength of your attacking units and compare it to the strength total of:
- Revealed Japanese unit(s); and,
- Revealed depth marker; and,
- The top Japanese fort (the second Japanese fort is ignored until the top fort is eliminated).
- The Japanese strength may be increased by the terrain in the Japanese position's hex or a Japanese hero, as noted on the TEC.
- Check to see if your attacking units possess all the weapons required to defeat the revealed Japanese unit and depth marker (if present and revealed). If a US hero is participating, that hero may stand in for one required weapon.
Exception: Only NCO or officer heroes may stand in for FL or CC requirements (8.2.2 & 8.2.3).
- Refer to the US Attack Results Chart. The table has three columns that each relate to the defense posture of Japanese units and depth markers in the position. Use the column that corresponds with this posture (revealed, unrevealed, presence of a depth marker).
Important: Attack results are explained on the US Attack Results Chart.
- Locate the line corresponding to the numerical comparison of your attack strength to the Japanese defense strength. Cross-index that line with the column to find the attack result.
- For each weapon requirement not met by the US attacker, decrease the odds of the attack by one row (i.e., move the horizontal row being used up one line).
- If this adjustment results in being at the 1:3 row and there are still unfulfilled weapons requirements, shift the column being used one to the left. After this column shift, any more unmet weapon requirements are ignored.
- If the target hex includes an unrevealed depth marker, the attack result may direct you to immediately reveal the depth marker and perform the following:
- Recalculate the weapon and strength comparison using the now revealed depth marker.
- Consult the US Attack Results Chart, applying row and column shifts as required.
-
Apply the attack result to the Japanese units and depth marker in the target hex.
-
If called for, apply results to the US units.
8.3.1 Multi-Unit Attacks
An attack by more than one unit against a Japanese-occupied hex is resolved as a single attack.
a) Add the strengths of all your participating units together to acquire a single strength total and utilize all the weapons of your participating units.
b) A given Japanese occupied hex may be attacked only once in each US Action Phase.
8.3.2 Attacking Position Groups
Hexes in a PG are attacked individually. Japanese units in the other hexes of the PG do not aid the defense of the attacked hex and are not affected by the outcome of the attack.
8.3.3 Japanese Elite Withdrawal
When a US attack defeats an elite in-communication Japanese unit, the unit withdraws instead of being eliminated.
Important: Non-elite units and elite units that are not in Japanese communication cannot withdraw (12.2).
a) If there is an adjacent unoccupied Japanese position hex move the withdrawing unit there.
b) If there is an adjacent occupied Japanese position hex and the withdrawing unit would not create an overstack, move the unit into the position as follows:
- If the position is not occupied by a Japanese unit or if the Japanese unit in the position is not already revealed, the withdrawing unit is flipped to show its unrevealed side and is placed in the hex.
- If the position contains a revealed unit or revealed depth marker, the withdrawing unit remains revealed after being placed in the hex.
c) If an elite unit could not withdraw due to stacking, then return that withdrawing unit to the Reserve Pool for that sector.
d) During GTs 1 through 6, place defeated units not eligible to withdraw in the Japanese Eliminated Units Box.
e) Beginning GT 7, defeated units not eligible to withdraw are removed from play.
8.3.4 No Advance After Combat
There is no advance after combat when a Japanese unit is defeated by an attack. A separate action is required to move a US unit into the hex (7.3.1 h).
8.4 Conducting a Barrage Action
US tank units, artillery points, naval gunfire points, and airstrike points can barrage revealed Japanese units. A hex occupied by both US and Japanese units cannot be barraged.
Important: Any Japanese unit not in a position is always revealed.
a) A Japanese-occupied hex may be barraged only once per Action Phase.
b) Naval and airstrike barrages must be conducted before any other actions in the Action Phase.
c) Tanks and artillery barrages can occur during any point in the Action Phase.
d) Tanks are the only units that can combine to conduct a barrage, no other units can combine their strength into one barrage.
- A maximum of two tank units may combine their strengths into a single barrage (that is why the 6+ column exists). The tank units must either be stacked together, or in hexes adjacent to each other.
- When more than one tank unit participates in a barrage, use the fire symbol on the tank unit with the greatest number of remaining steps.
- If the tank units have the same number of steps, select the tank unit with the following target symbol priority: 1) Diamond; 2) Triangle; 3) Circle.
Attack Examples
Example 1: Two US stacks (A & B) are attacking Japanese PG 1 in 1721 occupied by an elite Japanese unit and its depth marker. US stack A is attacking across a bluff hexside. Consider all US units in command and within range of the 28th Marine Rgt HQ. G/2/28 can attack because up to one other Inf Co. can participate with a Bn. as long as that Co. is assigned to the same regiment. No air, naval or artillery support is being called in for this attack. Assume that all Japanese fire has already occurred.
Example 2: The US player is attacking unrevealed hilltop fortification (class 2) PG 2. Because it has not been revealed (only an attack will reveal a fortification) the US player can only take a chance that the orientation of the blocked hexsides (the dark thick borders indicated on the fort's hexagon pattern) are such that the two US forces (or even just one) A & B will be able to complete their assault. In addition to the forces in A & B, the US player also commits 3 divisional and 4 Corps artillery points to the attack. The attack will only be allowed if at least one adjacent stack is able to attack.
The raw odds for this attack are A = 3+6 (the company has suffered a step loss) +4 = 13 divided by two (halved because these units are attacking across a bluff hexside) equals 7 (round fractions up) added to B = 6 (-2 for the step loss) gives a total of 13, which is divided by the total strength of the Japanese force (3+3) = 6, resulting in a 13/6 ratio = 2:1.
After deciding to attack and committing his units and artillery, the US player flips over the hidden Japanese fortification marker. Luckily for the US player, the two hexsides he is attacking from are not impeded from doing so by blocked hexsides. Had both hexsides from 1423 and 1424 been blocked, the combat would have ended immediately (and the artillery points expended) with no effect (although the fortification would still be revealed).
The US player meets all the weapon requirements listed on the Japanese unit and depth marker except for CC (that cannot be satisfied during an attack unless an Officer or NCO is present) and FL (flanking) that would require two US attacking stacks not adjacent to one another. For each requirement that cannot be met, the final odds are shifted one row up (worse for the attacking US player). In this case, the result goes from 2:1 up to 1:1 (for FL and CC) and under the Japanese Unit and Revealed Depth Marker column the result is JD, which disrupts all Japanese units in the position hex.
The next step would be to determine the initial Japanese defending strength against the US attack. The Japanese unit is flipped to its revealed side (A company of the 309th Btn) and has a printed strength of 4. It is also an elite unit. The depth marker is not yet flipped over. The defense strength of the unit is tripled (the fortification doubles it, and being on a hilltop is another multiplier, for an overall tripling of the unit's strength) to 12. The US attack strength is 3+6= 9 from A, and 8+4= 12 from B and then 7 points of artillery are added to give a combined US total attack strength of 28 points. The US units meet the weapon requirements listed on the Japanese unit (DE and MO) and the artillery points meet the AR requirement found on the fortification marker. Therefore, the combat odds do not shift up on the attack table. The attack remains at 2:1. The result is JX, which eliminates the depth marker (if the position is in communication, it can be culled). This ends the attack. Had the odds been 3:2 or less, the Japanese depth marker would have been flipped over and the attack would have to be recalculated, with the NG requirement not being met, resulting in a 1:2 overall attack and No Effect.
Important: A tank unit barraging from a range of three, has its barrage strength halved.
8.4.1 Resolving a Barrage
Resolve barrages using the below steps in the order given:
- Calculate the strength of the barrage and find the column on the US Barrage Results Chart that the strength equals or exceeds.
- If the target unit is in a hilltop hex and contains a fortification, shift the determined column on the chart one to the left, unless the strength of the barrage is equal to or greater than six.
Important: Hexsides have no effect on the barrage strength of artillery, naval gunfire, or airstrikes. Hexsides do affect tank barrages.
Example 3: This example involves barraging Japanese fortification PG 3. The fortification has been revealed, and therefore it may be barraged. The US player can only barrage a fortification if he has an undisrupted US unit adjacent to that fortification that is in command. Assume this is so. B is adjacent to the fortification which allows the US player to barrage the fortification. A's 2A and 2C tank companies are two hexes away (they are within the command range of the 27th Marine Rgt HQ). Their attack strengths are normal at two-hex range, and they are stacked together or adjacent to each other, allowing them to combine for a barrage. The barrage strength of A is therefore 4+4 = 8. The barrage strength remains on the 6+ column as the strength was greater than 6 against a hilltop fort.
Before drawing the fire card, the US player must designate which of the tank symbols he is going to use as the firing unit. Only one symbol may ever be used for each barrage. In this case, the US player must choose the diamond symbol on 2A/5T (as per 8.4). The US player draws a card from the deck (#40). The card has both the diamond symbol and a brown fire color. He compares the fire colors on that card to the position's color. In this case, PG 3 (H-9) is brown. The US player therefore uses the bottom row on the barrage chart since he matched both the color and the symbol on the draw card. The result is that all Japanese units in the hex are disrupted, any Japanese artillery in PG 3 is destroyed (place a destroyed artillery marker in the hex and reduce the Japanese artillery strength for that sector), one depth marker is eliminated, and there is a possible reduction of the fortification (fortification hit). Another card is drawn to determine if the fortification is reduced. Card 39 is drawn. The color of the landing symbol matches one of that card's fire colors, so the fortification is reduced by one level (17.5.1). That ends the barrage.
- Draw a fire card. Consult the three fire colors on the card and the fire symbol.
- If any of the fire colors match the position's color, you have a color match.
- If the fire symbol matches the barraging unit's target symbol:
- a) For airstrikes, naval gunfire, or artillery use the fire target symbol listed that matches the symbol displayed in the results section of the US Barrage Results Chart (Example: An artillery barrage would use the diamond symbol).
- b) If using tanks, use target symbol listed in 8.4.1.
- Find the result row that corresponds to the type of matches you have (if any) and cross-index that line with the column found in step one. Apply the listed result.
Important: Results against a fortification hex require an extra procedure to determine if the fortifications suffer reduction itself (17.0).
8.5 Naval Gunfire, Airstrikes & Artillery Points
Naval gunfire (NG), airstrikes (AS), and US artillery are all represented by points of each type that are used to either support attack actions or conduct separate barrage actions by themselves.
a) You receive one NG point and one AS point at the start of each game day.
b) Each NG point has a combat strength of six.
c) Each AS point has a combat strength of five.
d) Artillery points are received according to the Reinforcement Schedule.
e) You may also receive NG and AS points from an event card.
f) Record the number of all such points available according to events, daily allotments, and usage on the US Record Track.
g) You may never save more than two NG and two AS points that were unused from the previous day into the next.
h) Artillery points become available starting GT 5.
Important: Some scenarios may restrict the use of artillery points.
i) Artillery points can be used once per game day (once per turn box on the track) and are kept track of on the US Record Track. They may be lost or gained due to game events.
j) All such points may be eligible to either conduct separate barrage actions, or support attack actions by other US units (8.1 & 8.4).
8.5.1 Supporting an Attack
You may expend points to support a US attack if the eligibility requirements are met (8.1). The attack is supported as follows:
a) The strength of the NG or AS point is added to your attack strength (six or five respectively).
b) If expending a NG point (only), the weapon requirement for naval artillery (NA) is met.
c) The number of artillery points expended is added to the attack strength and satisfies all AR and DE requirements.
8.5.2 Barrage & Attack Prohibition
A hex that was barraged in an Action Phase cannot be attacked in that same Action Phase, either before or after the barrage. A close combat can be conducted in a hex that was barraged; however, you may not attack and CC the same in hex in the same Action Phase.
8.5.3 US Artillery
As explained above, all US artillery is represented using artillery points. The rules will state the number of artillery points available at the start of each scenario. Additional artillery points may arrive via the Reinforcement Schedule.
a) Each Marine Div will have an allotment of artillery points assigned to it. Those points can only be used if a unit from the assigned Div has a LOS to the target hex.
b) There are also eight extra artillery points that represent corps assets (155Hs). These points are kept track of in the same manner as divisional points. They may be used with any of the three Marine divisions.
8.5.4 Artillery Fire Restrictions
You may never assign more than three divisional and four corps artillery points to the same attack or barrage. Any increment less than these restrictions is always allowed.
8.6 Close Combat
Close combat can occur at two points in the sequence of play, and is resolved separately in each hex containing opposing units:
- Japanese Action Phase: If a Japanese unit moves into a US-occupied hex, the Japanese unit must immediately conduct close combat against US units in the hex.
- US Action Phase: During the US Action Phase you may:
- a) Conduct a regular CC using a single stack of US units immediately after they have entered a Japanese occupied hex; or,
- b) Conduct a deliberate CC at the end of the Action Phase after all other actions are complete.
- c) Deliberate CCs:
- Allow other units that were not part of the original US stack to enter the hex and to participate in the same CC.
- Allow US units entering the CC hex after the original stack entered the hex to not undergo MUF.
- Do not allow other US units to (other than to enter the CC hex) ignore the Japanese units that were originally in that CC hex (i.e., they would be subject to possible MUF from the Japanese units in the CC hex). The Japanese FoF of the position is reduced to one hex with a steady FoF.
- c) Units conducting either type of CC, that were disrupted by that CC cannot recover in the same phase.
8.6.1 Close Combat Procedure
Resolve each close combat by first revealing all unrevealed Japanese units and depth markers in the hex. Then draw cards blindly for each side and place them face down in a Japanese pile and a US pile using the below procedures:
- US Card Draw:
a) Draw one card for every three undisrupted steps of US units (round down) in the hex. Steps are counted as follows:
- Each Inf and engineer Co. step counts as one step.
- HW Co. units count as one step (no matter the number of steps in the Co.).
- Each tank step counts as two steps.
Important: No matter the above result, a maximum of four cards are drawn.
b) Then draw one additional card for each of the following that apply:
- If one or more participating US units have a flamethrower (FT).
- If there is one or more US heroes participating.
- If the Japanese unit is in counterattack stance (14.4).
Important: The maximum number of US cards that can be drawn is five.
- Japanese Card Draw: Draw one card for each (disrupted and/or un-disrupted) unit and depth marker present. Draw additional cards for the Japanese side for each of the below:
- One card if the Japanese unit occupies a fortification, hilltop, rocky or wooded terrain; or if the Japanese unit is a tank.
- One card if a Japanese unit is attacking and not in counterattack stance.
- One card if the Japanese force has a total strength of 4 or more, not modified by terrain.
- One card for each close combat (CC) requirement listed on the Japanese unit and depth marker in the combat.
Important: If a card is drawn for the first condition above and at least one of the other conditions are met, only draw one additional card no matter the number that are met.
Important: The maximum number of Japanese cards that can be drawn is five.
Important: If the Japanese unit in a CC is in counterattack stance (14.4) and any US units are adjacent to the CC hex, reverse the order of steps 3 and 4. That is, the US side reveals the first card.
- Reveal Japanese Card: Reveal the top card from the Japanese pile (unless counterattacking) and then conduct the below procedures in the order given:
a) If the CC is occurring in a black Japanese position, draw an additional card from the deck to temporarily assign a color to that position to resolve the CC. Use the color shown on that card's landing section symbol.
b) If the card shows a close combat event (CC), implement the event (21.0).
c) Then, if the card shows the color of the position in the firing section of the card where the CC is occurring:
- Discard the top card from the US pile and remove a step from a participating US unit of your choice.
- You may eliminate a US hero in CC instead of eliminating the last step of the unit to which the hero is assigned.
- You may also choose to discard two cards instead of taking the step loss.
d) If the card shows neither an event nor the position color, the revealed card has no effect. In any case, discard the revealed card.
e) At your option, you may conduct a US withdrawal under fire (8.6.4).
- Reveal US Card: Reveal the top card from the US pile and then conduct the below procedures in order.
a) If the card shows a close combat event, implement the event (21.0).
b) Then, if the card shows the color of the position in which the CC is occurring, discard the top card from the Japanese pile (if any). Then do the first of the following that applies:
- If the Japanese participants are not disrupted, place a disruption marker on the Japanese unit(s) and depth marker(s).
- If unit(s) and depth marker(s) are already disrupted, remove a depth marker.
- If already disrupted and no depth marker is present, eliminate a Japanese unit.
c) If the card shows neither an event nor the position color, the revealed card has no effect. In any case, discard the revealed card.
- Repeat steps 3 and 4: Continue until all participating units on one side are eliminated, or until all cards on both sides have been revealed.
- If one side runs out of cards before the other, continue revealing cards for the side with the remaining cards one after the other.
- If cards remain undrawn (due to 8.6.2, 8.6.3, or 8.6.4) after a CC, return the undrawn cards from either or both sides to the top of their respective card deck.
8.6.2 Ending CC by Elimination
A CC ends immediately if all units of one side are eliminated, or if the Japanese are eliminated by the Conscripts Surrender CC Event.
a) Place elite Japanese units eliminated during CC in the Japanese Eliminated Elite Units Box. Remove all non-elite Japanese units eliminated in close combat from play.
Important: Japanese units in the Eliminated Elite Units Box may come back into play later (9.5).
b) Units not eliminated (US or Japanese) remain in the hex and are disrupted.
Exception: A Japanese unit conducting CC in a non-position hex as part of the assault action becomes disrupted and is moved to a nearby position hex, per the action description (13.8).
8.6.3 Ending CC by Exhaustion
A CC ends if both sides' card piles are exhausted.
a) Surviving defending units remain in the hex and are disrupted.
b) Return surviving US attacking units to the hex or hexes from which they entered the CC hex, if they were disrupted due to the CC, they remain disrupted.
c) Disrupt surviving attacking Japanese units and move them to the position from which they entered the CC.
8.6.4 Ending CC by US Withdrawal
You may choose to withdraw all participating US units during a CC following the reveal and implementation of a Japanese card, even if your units are disrupted.
a) To withdraw, draw one more Japanese card and implement its results (and event if any). Then place the surviving US units in a hex adjacent to the CC hex.
b) If more than one hex is available, in a hex from which US communication can be traced, then you choose.
8.6.5 Japanese Tanks in CC
Japanese tank units sometimes conduct CC against US units in non-position hexes (14.2 & 14.4.2).
a) In this case, use the color on the tank unit's counter as the position color when checking for CC hits by both sides.
b) If the Japanese tank unit survives the CC in a non-position hex, disrupt the unit and place it in the nearest unoccupied position.
8.6.6 Disruption in CC
Japanese units can begin a CC disrupted and may become disrupted during the CC.
a) Disrupted US units do not count when determining the number of US cards drawn.
b) Being disrupted does not affect a Japanese unit's conduct of CC.
c) US units conducting a CC are only disrupted by that CC if the unit received at least one step loss during the CC. The disruption takes place after completion of the CC.
8.6.7 Japanese Survivors
Japanese units and depth markers that survive a CC remain revealed.
8.7 Close Combat Events
CC events are listed at the end of this rule booklet (21.0).
9.0 Japanese Units, Depth & Reserves
Japanese units on the map occupy Japanese position hexes. A unit may occupy a Japanese position hex alone, or with one depth marker stacked beneath it (6.4.3). At the start of play few Japanese units on the map have depth markers beneath them. During play depth markers and Japanese reserve units enter play in several ways as detailed below.
9.1 Revealing Japanese Units & Depth Markers
Japanese units and depth markers are initially placed on the map face down (unrevealed), unless otherwise specified. The general type of unit or marker is identified on the back of the counter. An unrevealed unit exerts a field of fire and may conduct actions.
a) A Japanese unit is revealed as the result of US actions (usually an attack) (8.0).
b) When a Japanese unit is revealed in a US attack, its depth marker remains unrevealed until the unit is subject to a sufficiently strong attack. At that time, the unit's depth marker is revealed to add to the unit's defense.
c) A revealed Japanese unit or depth marker remains revealed until removed from the map. A revealed Japanese unit may also become unrevealed by certain US attack results.
9.2 Adding Depth to Japanese Units
Depth markers are added to Japanese units during play due to:
- Event card draws; or,
- Japanese actions; or,
- An unsuccessful US attack (see US Attack Results Chart).
a) An event may require you to add a depth marker to one unit, or to add depth markers to two units.
b) A Japanese unit must be in communication to receive a depth marker (12.2). Disrupted units may receive a depth marker. If no unit is eligible to receive a depth marker, no depth marker is placed.
c) A depth marker may only be placed in a Japanese position occupied by a Japanese unit or fortification. Depth markers never occupy a hex on their own, unless placed under a Cave marker (20.0).
d) To resolve a depth marker event, choose one Japanese unit without a depth marker, other than a tank unit or unit in counterattack mode, and place a depth marker beneath it. If there is more than one eligible Japanese position without a depth marker, use the below procedure.
e) Choose the Japanese unit closest in hexes to a US unit. If more than one choice exists, use the letter and number codes for the positions to determine the position that receives the marker. Priority goes alphabetically, and then from lowest to highest position number.
Example: Both "F9" and "F8" are equidistant, place the depth marker in "F8".
f) Upon selecting a Japanese unit to receive a depth marker, randomly draw a depth marker from the Depth Marker Pool and place it beneath the unit, unrevealed.
g) If the event calls for the placement of two depth markers, repeat this procedure.
Example of Close Combat
This CC example illustrates an extremely complicated situation, mostly since the Japanese PG 1 is a black hilltop position with two intact fortification markers. This is a deliberate CC as the US player moved units from more than one stack into the PG hex and the CC must be resolved at the end of the US Action Phase. Assume that movement, barrage and attacking have occurred in this and the previous Action Phases. Supporting units involved in this, while they would be present, have been omitted to avoid cluttering this example of play. The US units of A are all in command by being within command radius of B, the 27th Marine Rgt HQ (let us say its current command radius is 4 for this example). This also provides the radio component to all US units in range.
Through earlier attacks, the top fortification marker was revealed and found to be a Class 1 fort (the strongest kind). The A units entered PG 1's hex along the dark blue arrows (they could only have done so through those hexsides as the others were blocked). The units had to undergo MUF to enter the hex, and F/2/27 suffered a step loss, and then the US player inflicted another step loss to avoid disrupting the unit (which would have prevented it from entering the PG hex). This was allowed because the MUF fire card did not have the triangle target symbol that is on F/2/27. The other reduced units had taken a hit during the preceding Japanese Fire Phase. So, the units listed for A are now in the PG 1 hex.
Since PG 1 still has two intact forts and is a black PG, stacking rules allow for two Japanese units and their associated depth markers. Either because of setup or card actions, two Japanese units and depth markers for each ended up in this PG hex. All are flipped to their revealed sides as soon as the US player initiates the CC.
Card Draw: The US side gets one card for every three steps (round down), up to a maximum of four if he has twelve steps. If there had been a Heavy Weapons company in the stack, it would always count as only one step, regardless of its actual strength. US tank units if present count double the number of steps currently with the unit. In this example, there are 8 total steps, so the US side receives two cards for strength. Also, if any FT weapons are present (tanks also qualify as FT capable) one more additional card is drawn for the US side. A hero (not inspired) also grants one extra card to the US side. In this example, the US player then draws a total of four cards.
The Japanese are given one card for each unit and one card for each depth marker, plus one card if CC appears on any unit and/or depth marker. Additionally, one extra card is drawn if there are any intact fortifications in the PG hex. No more than five cards are ever drawn for the Japanese side in a CC-excepting extra cards that may be drawn due to a CC event on one of the originally drawn Japanese CC cards. In this example, the Japanese draw the maximum number of possible CC cards (5).
Because this is a black PG hex, the US player must also draw one fire card to determine the temporary "color" of the black PG hex to resolve this CC. Draw one card from the draw deck and use the color shown on the landing symbol. In this case card #8 is drawn and the landing symbol is a red circle, so red will be the stand-in color for this black PG hex.
Close Combat Resolution: Now resolve the CC by starting with PG 1 and flip the first card (#49) which has a red fire color. Therefore, PG 1 has started with a hit against A. The top US card is discarded (without being revealed) and the US player must inflict one step loss on a unit in the US force. He chooses to take a hit on E/2/27, reducing it to its two-step loss side and removing the Step Loss 1 marker.
Next, you reveal the top US card (#30) with a red fire color, so the US player has hit PG 1. There was no CC event. The top unrevealed Japanese card is discarded, and the entire Japanese stack is disrupted.
Another Japanese card is revealed (#51) again a red fire color. The top US unrevealed card is discarded and one more hit is inflicted on the US force. The US player chooses to take a hit against the B/5E unit.
The US player now reveals his last remaining card (#20) red, with no CC event. Since the Japanese force is now disrupted, one depth marker is removed from the Japanese force and one of the two remaining Japanese cards is discarded.
The Japanese force has one remaining card, and the US force has none. The Japanese card is revealed (#09) yellow with a Heroism CC event. The Japanese force has missed. However, since the card has CC Heroism Event, add one card to the Japanese pile. Since the Japanese units still have a depth marker and the US has no cards remaining no further action is taken.
The last Japanese card is then revealed (#4). The card has a red fire color. The US player must inflict one step loss on a unit in the US force. He chooses to take a hit on E/2/27, placing Step Loss 3 marker under the unit. The Conscripts Surrender CC event only applies if the card was revealed from the US pile.
Result: Since all Japanese cards and US cards for this CC have been played, the CC ends due to exhaustion. The surviving US forces are withdrawn to either of the two hexes they came from. US units that suffered hits during this CC are disrupted. The Japanese disruption remains also. You can see that this will be a tough position to reduce—it will require multiple CCs. If both Japanese units and depth markers had been eliminated, the US player would still have to eliminate the fort steps, as each fort step is then considered a unit. Although, the Japanese player would only get one card during each CC for any fort presence in the PG hex.
9.2.1 Re-placing Depth Markers
A depth marker may be placed with a Japanese unit that previously lost its depth marker due to US attack or barrage.
a) There is no limit to the number of times a Japanese unit may lose a depth marker and receive another, if it is in Japanese communication.
b) If a unit with a revealed depth marker is eliminated and the position is in communication, put the marker back in the Japanese Depth Marker Pool.
c) If a Japanese depth marker is eliminated while out of communication, it is permanently eliminated.
Tank exception: Each Japanese tank unit begins the game with a depth marker, and may not receive another, even if the original depth marker is lost.
9.2.2 Depth Marker Depletion
If the Depth Marker Pool is empty when a depth marker is called for, you cannot add another depth marker (the Japanese have run out of depth).
9.3 Reserve Unit Placement
Important: Due to the placement procedures in 9.3, 9.4, & 9.6 Japanese reserve units drawn from one sector's Reserve Pool, may be placed in another sector.
Japanese reserves are divided into four sectors. These sectors align with the Japanese artillery sectors. When picking a unit for placement, the unit must come from the Japanese Reserve Display (Reserve Pool) sector that the hex of placement is located. If the Reserve Pool is empty when a reinforcement unit is called for, the reinforcement does not enter play. Japanese reserve units enter play when:
- A lettered Japanese action calls for Japanese reinforcements; or,
- An event card draw directs you to place a Japanese reinforcement unit; or,
- Japanese Rejuvenation (9.6); or,
- When a depth marker is revealed to be a tactical reinforcement (9.4).
a) If any of the four above situations take place, follow the below procedure:
- For each reinforcement called for, draw a Japanese reserve unit at random from the Reserve Pool for the sector in which the placement hex is located.
- Select the specific position in or nearest to a black position hex that is in Japanese communication using the following priorities:
-
- A position hex adjacent to a US unit. If two or more positions are adjacent to a US unit, place it in the hex with the lowest position number.
-
- A position hex within two hexes of a US unit. If two or more positions within two hexes of a US unit, place in the hex with the lowest position number.
-
- The hex with the lowest position number.
-
- The hex with the lowest position letter.
-
- Place the unit face down (unrevealed) in the position.
- Draw a depth marker from the Depth Marker Pool and place it beneath the reinforcement unit, unrevealed.
b) The first time a US unit enters an intense FoF of a Japanese in communication position that is unoccupied. In this case:
-
You draw a card.
-
If that position's color is shown as one of the fire colors, a Japanese unit from the Reserve Pool is immediately placed (unrevealed) in that position hex. All FoF effects are immediately in play.
Important: If the position is black, Japanese occupation is triggered if any Japanese position's color within two hexes of the black position being entered appears on the drawn card.
- If the position's color is not shown as one of the fire colors, no unit is placed.
9.3.1 Positions Eligible for Reinforcements
A Japanese position must be in communication to receive a reinforcement unit (12.2). If no positions can trace communication, the reinforcement unit does not appear.
Important: Reserve rejuvenation may occur if a Japanese unit in a position was eliminated by a previous US action and then other US units attempt to the enter the position.
- Draw one card. If the position color appears on the fire card, draw one unit from the Reserve Pool for the appropriate sector.
- Place the Japanese unit (unrevealed) in the position.
- Immediately use the drawn unit to conduct MUF against the US unit(s) attempting to enter the hex. Any unit that is hit is disrupted and cannot enter the hex.
- After resolving MUF, undisrupted US unit(s) must enter the hex and conduct CC normally (either immediately or as a deliberate CC).
Important: An unoccupied position may be adjacent to US units and still be in communication, and thus eligible to receive a reinforcement.
a) A reinforcement unit may not be placed in a position occupied by a US unit or garrisoned.
b) A reinforcement unit may not be placed in a position already occupied by a Japanese unit.
c) A reinforcement unit may be placed in a position hex that is part of a PG, even if the other hex in the group is occupied by a US or Japanese unit.
9.3.2 Reserve Pool Adjustment
If at any time all Japanese positions within a sector are US occupied/controlled all remaining units in that sector's Reserve Pool are moved to the next higher Sector Reserve Pool that contains at least one position that is not US occupied/controlled.
9.4 Japanese Tactical Reinforcements
A Japanese reinforcement unit enters play when you reveal a depth marker reading Tactical Reinforcement. When this happens, immediately conduct the following:
a) Permanently remove the depth marker from play.
b) Draw a unit from the Reserve Pool for the sector the position is located in.
c) Place the unit (unrevealed) in an unoccupied position hex nearest to the position from which you removed the depth marker.
d) If two or more positions are equidistant, place the reserve unit in the position closest to a US unit. If still equidistant, place the reinforcement unit in the lower numbered position, then lowest lettered position.
e) If the Reserve Pool for the sector is empty, the tactical reinforcement does not enter play.
9.5 Reserve & Depth Marker Culling
When Japanese elite units and depth markers are eliminated while in communication, you place them in the Japanese Eliminated Units Box. During the first Event Phase of each AM GT, conduct the following:
a) Randomly select two elite units in the Japanese Eliminated Elite Units Box.
b) Then randomly place one unit aside, it is permanently removed from play. Do not reveal the unit.
c) If there are any positions still Japanese occupied in Sector 3, place the other unit face down (do not reveal it) in the Japanese Sector 3 Reserve Display.
d) If there are no Japanese occupied positions in Sector 3, place the unit in the Japanese Sector 4 Reserve Display.
e) Repeat this process until the Eliminated Units Box only has one unit or is empty.
f) Once all eligible reserve units are placed, repeat the process with all depth markers in the Eliminated Units Box.
9.6 Reserve Rejuvenation
Important: If there are no Japanese units in that sector's Reserve Display, ignore this procedure.
If you attempt to enter an unoccupied Japanese position or a PG where neither position is occupied by a US unit and that position is in communication with a black PG, you must conduct the below (if no Japanese units are left in the sector's Reserve Pool, ignore this requirement) procedure:
Example (Raid Check): In this example, US units on the frontline must be checked for the possibility of Japanese raid attacks being conducted against them. Raid hexes are possible only adjacent to US units and only if those hexes are in Japanese communication. The hexes to the right of the red dashed line are still in Japanese communication and must be checked. Note that if a Japanese PG that was not occupied and still in communication existed within two hexes of PG E7, E7 would also still be in communication since it has not been garrisoned or is not currently US occupied. But since no other such position is within two hexes, it does not qualify as in communication.
A US occupied hex is susceptible to a Japanese raid if there is more than one non-US occupied hex adjacent to that US occupied hex that is also not adjacent to another un-disrupted US occupied hex. In this case, the following hexes must undergo a raid check: A (1920), B (1421), and C (1122). A is vulnerable because the US unit in 1819 is disrupted and therefore cannot "cover" hex 1820. B and C are vulnerable because they each have two such hexes (marked with the yellow explosions). All other US hexes either have covering units, or the hexes adjacent to them are not in Japanese communication.
Next, one card is drawn for the raid check. The card (#31) which signifies that red, brown, and green positions conduct raids (marked on the above map by the R's). Count the number of raiding PGs within three hexes of the US occupied hexes that are subject to a raid. If PG H5 had been within three hexes of A, it would also be added to the green raiding PG since H5 is a black PG.
Also, if it is a PM GT, one is added to the value of all raids.
A: The raid value is one (from R1). Since the number of US units in the hex exceeds this value, the raid has no effect.
B: The raid value is two, therefore one of the US units in this hex must be disrupted. Use the correct shade of disruption marker for this GT.
C: The raid value here is also equal to the number of US units in the hex, therefore one US unit is disrupted. In this case, that means the only unit there is disrupted. Note that in all these cases, if the raid value had exceeded the number of units in the affected hex, one unit would have had to take a step loss and be disrupted.
Note on the printed text: Section 9.6 ends with "the below procedure" but no numbered steps are printed under it; the next printed section is 10.0 Japanese Raids, transcribed below.
10.0 Japanese Raids
Note: Many hexes behind the US front line will not have to be checked as no Japanese LoC can usually be traced to them.
Raids are a special operation that Japanese forces initiate whenever US units on the frontline have insufficient protection on their flanks.
10.1 Raid Check
During the Japanese Raid Check Phase, you must check to determine if any US units undergo a Japanese raid. Raids occur against US occupied hexes that are not supported on their flanks by friendly units.
a) You must first determine which US occupied hexes are susceptible to enemy raids.
b) A US occupied hex may be subject to a Japanese raid if:
- There is more than one hex (either not occupied or occupied by US units that are all disrupted) adjacent to the hex being checked; and,
- At least one of the two hexes is in Japanese communication.
10.2 Raid Resolution
After determining that a US occupied hex is eligible for a Japanese raid, draw one card from the deck.
a) If the card's position fire colors match:
- The position color of an occupied Japanese position within three hexes of the raid target hex; and,
- That position is occupied by a Japanese unit and/or depth marker (disruption does not matter) conduct the raid.
Important: If the card includes a fire color with a black line over it, ignore the color and count the black positions of a black PG within three hexes of the US position.
b) The raid is conducted using the above color match. Count the number of occupied Japanese positions, adding the following to the total:
- If the Night Assault event is in effect and the raid occurs during the PM GT, add one to the number of raiding positions.
- If any Japanese position within three hexes of a black PG conducts a raid, add one to the number of raiding positions.
c) If the number of raiding Japanese positions is equal to the number of US units in the hex, one US unit is disrupted. You must select the US unit with the most steps, if two or more units are equal, you may select the unit from those units.
d) If the number of positions is greater than the number of US units, one US unit suffers a step loss and is disrupted. You must select the US unit with the most steps, if two or more units are equal, you may select the unit from those units.
11.0 US Heroes, Headquarters & Command
Key US individuals and command formations are represented by hero markers, Inf/Bn. HQ units and regimental HQ units.
11.1 Heroes
Heroes are individual soldiers, NCOs, and low-level officers who performed above and beyond the call of duty, inspiring their fellow soldiers with initiative and courage in the face of overwhelming danger. DDIJ includes counters to represent these men. Each of these three types of heroes may have capabilities that will aid you in conquering Iwo Jima. Not all capabilities will be the same.
11.1.1 Hero Entry
Heroes are randomly drawn from a cup and only enter play due to events.
Note: Heroism pertains to CC and not the same as Hero.
a) If a rifleman or NCO hero is picked, he is placed with one infantry Co. of your choice and stays with that unit until removed from play.
b) An officer is placed with one Inf/Bn. HQ of your choice. He may be moved to and from any unit within the battalion using normal unit movement until he is removed from play.
11.1.2 Hero Command
Each type of hero can place units in command.
Rifleman Hero: The Co. that the rifleman hero is attached to is always in command.
NCO Hero: All units stacked with an NCO hero are always in command. An NCO hero allows any units stacked with the hero to un-disrupt at the end of any phase and in any kind of FoF (even if adjacent to Japanese occupied positions). The color of the disruption marker has no effect on this ability.
Officer Hero: If an officer hero is stacked with a Inf/Bn. HQ:
a) All units assigned to that Inf/Bn. HQ are in command, regardless of the Inf/Bn. HQ's command status; and,
b) All engineer and tank units stacked with any unit of the Bn. are also in command.
c) The officer hero can un-disrupt two of the battalion's Co.'s at the end of any Action Phase regardless of the color of the disruption marker.
d) Allows any units stacked with the hero to un-disrupt at the end of any phase and in any kind of FoF (even if adjacent to a Japanese occupied position). The color of the disruption marker has no effect on this ability.
e) Allows a moving stack to pick up units as though they began movement action together.
Example: Two Co.'s of the Bn. are disrupted, one of the Co.'s has a D-2 and one has a D-1. An officer hero stacked with the Bn. HQ, allows you to remove both disruption markers.
11.1.3 Hero Attack Wild Card
See 8.2.4.
11.1.4 Hero in Close Combat
See 8.6.1.
11.1.5 Hero Sacrifice
Japanese fire (11.4) may kill a hero. You may also voluntarily sacrifice a hero to save a unit. If a hero is with a one-step unit that must take a step loss because of CC or Japanese fire, you may choose to sacrifice the hero instead of eliminating the unit.
11.1.6 Inspired Units
When a hero is killed by Japanese fire or voluntary sacrifice, his marker is flipped over to the inspired side and remains with his unit until he is killed again.
a) A unit with an inspired marker may convert one step loss into a disruption by eliminating the inspired marker.
b) An inspired marker does not provide a hero's attack wild card bonus (8.2.4) or CC card draw (8.6.1).
11.1.7 Counter Mix Limit
The counter mix includes eight hero markers.
a) Once all eight hero markers have been placed, no more heroes can enter the game until more are made available by the elimination of inspired markers.
b) If an event calls for a hero and none are available, treat it as a no event.
c) There is no limit to the number of times a hero marker may be recycled.
11.2 Regimental Headquarters & Command
The nine-regimental headquarters of the three committed Marine Divs are represented by HQ units, each comprising the regiment's commander, his staff and equipment. See 5.3,e for regimental HQ arrival.
11.2.1 Regimental HQ Capabilities
Regimental HQs have a command range of two hexes. Inf/Bn. HQs and/or units must be within the command range of a regimental HQ to receive any of the below benefits.
a) Regimental HQ units:
- Provide command to all three Inf/Bn. HQs assigned to the regimental HQ. The regimental HQ may also provide command to one Inf/Bn. HQ from a different Rgt of the same Div.
- Provide command to all US tank and engineer units assigned to the same regiment.
- Allows units to utilize divisional and corps artillery points and call in NG and AS points.
- Provide radio capability to units that attack a Japanese position from an adjacent hex.
- Enables tank and artillery units to conduct ranged fire (8.1).
b) Starting with GT 7, you may use a regimental HQ to establish a command post (CP) (15.0).
c) A regimental HQ unit does not count as a unit for purposes of stacking.
d) A regimental HQ acts like a garrison for the hex it is currently occupying.
11.2.2 Regimental HQs & Close Combat
You cannot move a regimental HQ unit into an enemy occupied hex. If a Japanese unit enters a hex occupied by a regimental HQ unit, the HQ is considered a one-step unit for purposes of drawing cards and elimination in the ensuing CC.
11.3 Infantry/Bn. HQ Units & Command
US Inf/Bn. HQ units have the properties of infantry units and have limited HQ capabilities. These units can be recognized by their star symbol (in place of a normal target symbol).
a) An Inf/Bn. HQ not in the command range of its regimental HQ is out of command unless an officer hero or event has provided command for that Inf/Bn. HQ.
b) An undisrupted Inf/Bn. HQ has a command range of two hexes.
c) A disrupted Inf/Bn. HQ has a command range of one hex.
d) Inf/Bn. HQ units:
- Provide command to infantry units assigned to that Inf/Bn. HQ.
- Provide command to any one additional Inf Co. assigned to the same regiment as the Inf/Bn. HQ, but only if the additional Inf Co. is stacked with a Hero.
- Provide command to all tank and engineer units from the Inf/Bn. HQ's assigned regiment that are stacked with infantry Co.'s assigned to that Inf/Bn. HQ.
e) Inf/Bn. HQ units conduct actions like other infantry units and count toward stacking limits.
Design Note: Reorganization of US Marine Divs in 1944 increased the manpower and support weapons in each Inf battalion's HQ Co.
11.4 Japanese Fire Against Leaders
A leader (a hero, regimental HQ, or Inf/HQ unit) may be hit by Japanese fire during the Japanese Fire Phase. If a fire card includes a Japanese position color with a star symbol, eligible Japanese positions may hit a leader that is in its FoF.
a) Since all units in a Japanese intense FoF are affected, an HQ may be required to take a hit.
Important: A Inf/Bn. HQ fired upon by revealed or unrevealed Japanese positions in an intense FoF suffers a step loss/disruption normally (Japanese Fire Chart).
b) If more than one hit must be taken in any single Japanese fire and a leader is present, the leader must absorb one hit.
Exception: If a tank unit is present, 6.3.2 applies and you may absorb two hits by taking one hit on the tank unit.
c) If a hero is hit, he is killed; flip his marker to the inspired side or if the inspired side is showing the marker is eliminated. The hero marker is returned to the pool.
d) If a regimental HQ is hit, remove it from the map and place it one turn ahead on the Turn Track. The HQ will re-enter play via amphibious operations.
Example: If hit on GT 7, place it on Turn Track space 8.
e) If a two-step Inf/Bn. HQ unit is hit, it loses a step. A reduced one-step Inf/Bn. HQ unit is eliminated when hit.
11.4.1 Leader Disruption
Heroes and regimental HQs do not become disrupted by Japanese fire or actions, although the units they are stacked with may become disrupted. Inf/Bn. HQ units may become disrupted due to CC and enemy fire and actions.
12.0 Control & Communication
Each US unit controls the hex it occupies, and most US units control adjacent hexes.
a) Japanese units do not control hexes per se; they affect nearby hexes through their FoF.
b) US control affects whether Japanese communication can be traced to a Japanese position or hex. Japanese FoF affect whether US communication can be traced to a US unit or hex.
12.1 US Control
US units of the following types control the hex they occupy: CPs; Infantry; Garrisons; Inf/Bn. HQs; Tanks on an airfield hex; Regimental HQs; Engineers.
a) The below US units control all adjacent hexes, even if disrupted:
- Infantry units with three or four steps.
- Two US infantry, Inf/Bn. HQ or engineer units stacked together that possess three or more total steps control the hex they occupy and all six adjacent hexes, even if disrupted.
Important: A US unit in a hex with a Japanese unit does not exert control over any hex.
12.2 Japanese Communication
A Japanese position must be in communication to:
- Receive a reserve unit (9.3, 9.4 & 9.6).
- Exception: A Japanese infiltration or tunnels event does not require the position to be in communication (20.0).
- Receive a depth marker (9.2).
- Conduct a Japanese elite withdrawal (8.3.3).
- Perform a lettered action (13.0).
- Conduct a Japanese raid (10.0).
a) A PG is considered a single position when tracing Japanese communication.
b) The communication path may not pass through any hexes occupied or controlled by US units (12.1).
c) A Japanese communication path may not pass through a US landing beach where US units are or have landed.
d) A Japanese position is in communication if it can trace a path of hexes from its hex to an intact black Japanese hilltop position that is itself in communication. A black position must trace to another black position (of any type) to be in communication itself.
e) Suribachi is a special case: Positions A4 and A6, and A8 all provide communication for any other position in Sector 1.
12.2.1 Negating US Control for Communication
A Japanese unit in a hex adjacent to a US unit negates US control of that hex for purposes of tracing Japanese communication through the hex, including tracing communication for the Japanese unit itself. When tracing communication for an unoccupied Japanese position or for a position occupied by both Japanese and US units, the position's hex itself can be in US control and still be in Japanese communication.
12.2.2 Timing of Communication Determination
Communication status of Japanese positions is determined as it is required.
12.3 US Communication
US units must be able to trace communication to secure Japanese position hexes for victory purposes.
a) A hex is in US communication if you can trace a path of hexes of any length from the hex to any US landing beach hex.
b) A US communication path may not be traced into or through:
- A Japanese occupied hex; or,
- A hex containing a Japanese FoF, even if the Japanese unit is disrupted.
c) An unoccupied Japanese position has no FoF for purposes of tracing US communication.
13.0 Japanese Lettered Actions
Japanese positions can conduct actions other than firing, as called for by action letters (M, R, A & I) appearing with the position colors on the fire cards. Lettered actions go into effect during varying GTs. Actions may change during later GTs. They are summarized on the Japanese Action Summary at the back of this booklet.
Example: At the start of GT 6 actions on the Japanese Action Summary identified with the letter R become available. From this point forward, when a position color on a fire card includes the letter R, positions of that color may conduct resupply, redeploy, reinforcement and overruns in certain situations, instead of regular fire.
13.1 Action Procedure
When you draw a fire card, check all the following types of Japanese positions matching the colors on the fire card to determine if each fire and/or conduct some other action:
- Every Japanese occupied position.
- Every unoccupied position within three hexes of a US unit and in Japanese communication.
- If a position color on the card shows the I action, also check unoccupied positions not in Japanese communication.
Exception: If no US units are in Sector 3 or 4, do not check positions in Sector 4.
a) Refer to the Japanese Action Fire/Action Summary. The summary is divided into five GT sections:
- Game Turns 1–6: Note that lettered action M starts on GT 2 and the R action starts on GT 6. No other lettered actions are active.
- Game Turns 7–48: Note that lettered action I goes into effect on GT 22.
- Tanks Start Turn 7: Note that all tank actions start on GT 7 and continue until the end of the game.
- Start Turn 7: All actions listed in this section start on GT 7 and continue until the end of the game.
- Start Turn 49: Actions listed in this section start on GT 49 and continue until the end of the game.
b) Locate the fire card action on the left of the summary that is on the position color (from the firing card) that is firing and then determine the section of the summary that applies (the GT).
c) Cross-reference the correct section with the symbol or letter and then the position's situation:
- Occupied with US units in FoF; or,
- Occupied with US units not in FoF; or,
- Unoccupied, the position is in Japanese communication and US units are within three hexes.
d) The position then will then conduct the action(s) listed (if any). Complete all actions for each color position before checking the next position color.
e) Check all positions matching the first (leftmost) position color on the card first, then all positions matching the second color, then the third. Within a position color, check all positions hexes in order from west (closest to you) to east.
f) Black positions are a special case; there are no specific black fire colors to associate a lettered action with. Instead, one of the three fire colors on the card may have a black line above it. In this case, should a black position be within two hexes of a position of that color, it conducts the lettered action indicated by that other position's color, and the original position does nothing. Always conduct black position lettered actions first.
13.2 Machine Gun Action [M] (Starts GT 2)
Eligible position: Japanese occupied position that has US units in its FoF.
a) All steady FoF hexes become intensive FoF hexes.
b) Hexes that are not in the position's FoF but are adjacent to any steady FoF hexes for that position are considered in the position's steady FoF (6.3.1).
c) With the above exceptions, fire is conducted normally.
13.3 Mortar Action [M] (Starts GT 2)
Eligible position:
- The position must contain an intact artillery position; and,
- No US units can be within the position's normal FoF.
Procedure: The Japanese unit fires mortars at US units within the position's mortar range.
- Mortar range for units in positions other than hilltop positions is three hexes.
- Mortar range for hilltop positions is four hexes. Increase the position's hit limit by one unit.
a) All hexes within a position's mortar range may be hit by mortar fire.
- All hexes within the position's mortar range are considered in the position's steady field of fire.
- US units (including armor) with the target symbol indicated on the fire card are eligible to be hit.
- A unit hit by mortar fire loses a step but is not disrupted. A player may disrupt two units instead of taking a step loss.
b) Beginning on GT 7, if there are Japanese tank units in the position conduct Tank Action: Multiple Fire (14.2).
c) If US units with the target symbol shown on the Japanese fire card are not within mortar range of the position, the position conducts no action.
13.4 Muster Action [M] (Starts GT 2)
Eligible positions: The position:
- Cannot be occupied by Japanese units; and,
- Must be in Japanese communication; and,
- Must be within three hexes of a US unit.
Procedure:
a) Place a reserve unit from the Reserve Pool for the corresponding sectors (if available) and then place a depth marker (if available) in the position.
b) If no reserve units are available, take no further actions.
c) If a PG has multiple hexes that are eligible for the muster action, place a reserve unit and depth marker in the lowest numbered position only.
d) If there are more positions eligible for muster than available units, place the units in the position that is closest to US units. If two or more are equidistant randomly pick the position.
e) If US units are in the position's FoF conduct fire.
13.5 Re-Supply Action [R] (Starts GT 6)
Eligible position: The position must:
- Be in Japanese communication; and,
- Be Japanese occupied; and,
- Have US units in its FoF.
Procedure:
-
If the Japanese unit does not have a depth marker, draw and place an unrevealed depth marker.
-
After checking for depth marker placement, conduct fire, even if no depth markers were placed.
13.6 Redeploy Action [R] (Starts GT 6)
Eligible position: Japanese occupied position with no US units in its FoF:
- That is within three hexes of an unoccupied position hex; and,
- The unoccupied position is closer to a US unit.
If neither of the above conditions are met, the position conducts no action.
Important: Units in a black position/PG never redeploy.
Procedure:
a) Move the Japanese unit and depth marker (if any) to the unoccupied position hex.
b) If more than one unoccupied position qualifies:
- Place the unit in a qualifying position hex, place the unit/depth marker in the position closest to the unit's original position.
- If two unoccupied positions are equidistant place the unit/depth marker in the positions that is a different color than the unit's original position.
- If more than one is the same color place the unit/depth marker in the lower numbered position.
c) Conduct fire for the newly occupied position, regardless of the color of the new position.
d) A Japanese unit may redeploy to a position hex in the same or different PG.
13.7 Reinforce Action [R] (Starts GT 6)
Eligible positions: Unoccupied Japanese position that is:
- In Japanese communication; and,
- Within three hexes of a US unit.
Procedure:
a) Place a reserve unit from the Reserve Pool for the corresponding sector (if available) and then place a depth marker (if available) in the position.
b) If no Japanese units are in the appropriate Reserve Pool, take no further action.
c) If two or more hexes in a PG are eligible for the reinforce action, place a reserve unit and depth marker in the lowest numbered eligible hex only.
d) If there are any US units in the newly occupied position's FoF, conduct fire.
Important: When conducting all reinforcement, redeploy and resupply actions; a PG may not receive a second unit from the Reserve Pool (and consequently a second depth marker) until all PGs not in US control in that sector have at least one unit. Priority for placing a second unit is as follows:
- Black PGs with a hilltop must all receive a second unit/depth marker; then,
- Other hilltop PG hexes must all receive a second unit/depth marker; then,
- All other PG hexes.
13.8 Assault Action [A] (Starts GT 7)
Eligible Position:
- Japanese occupied position that does not have intact artillery; and,
- Has US units in its intense FoF. The US units may or may not be in a Japanese position hex.
Procedure:
a) Conduct the fire action normally and if after resolving the fire, if any US units remain in the position's intense FoF:
- Move the Japanese unit and its depth marker (if any) from the position into any hex within the position's intense FoF that is occupied by one or more US units, then conduct CC.
- Black PG ignore assault actions.
- If more than one US occupied hex is in the position's intense FoF:
-
- Choose the US occupied hex closest to the Japanese position.
-
- If more than one hex is equidistant, choose the hex with the fewest US steps.
-
- If more than one hex meets both the above criteria, you may choose the hex.
-
b) If after conducting the fire, no US units remain in the position's intense FoF:
- Move the Japanese unit and depth marker (if any) to a position hex no more than three hexes away from its current position and closer to the nearest US unit.
- The unit may move into an unoccupied or US-occupied position hex. It may not move into a Japanese occupied position hex.
- If entering a position hex with US units, conduct CC. If entering a position hex with a garrison marker, remove it.
- If two or more eligible positions are equidistant from the nearest US unit, move the Japanese unit and depth marker (if any) to the position closest to the Japanese unit's original position, then you choose.
c) If both hexes of a PG are Japanese-occupied positions, check each position hex for assault separately.
d) Units conducting the assault action gain the benefit of any disruption or step loss inflicted prior to the CC.
e) If the assault action results in a CC in a non-position hex, use the color of the position hex from which the Japanese unit began its assault to resolve the CC. If the assaulting unit survives the CC in a non-position hex, return it and any surviving depth marker to the position hex from which it came. The unit is then disrupted.
13.9 Ambush Action [A] (Starts GT 7)
Eligible Position: An unoccupied position that is in Japanese communication and is within three hexes of a US unit.
Procedure:
a) Disrupt one US unit with a matching target symbol that is in the hex closest to the position.
b) If more than one US occupied hex is equidistant, choose the hex with the greatest number of steps.
c) If a choice remains randomly pick the US occupied hex affected.
d) If there is more than one US unit that matches the target symbol, disrupt the unit with the most remaining steps.
e) If no US unit matches the target symbol, there is no effect.
13.10 Artillery Action [A]
Important: This is an exception to the requirement on Japanese Fire/Action Summary Chart that there are no US units in FoF.
Eligible Position: Japanese occupied position with artillery symbol that has a US unit in the position's intense FoF.
Procedure:
a) Conduct fire normally, then draw one additional fire card.
b) If the artillery fire symbol is present on the card, inflict one step loss on one US unit in the position's intense FoF.
c) If there is more than one US occupied hex in the position's intense FoF, conduct the attack against the hex with the greatest number of steps.
13.11 Infiltrate Action [I] (Starts GT 22)
Eligible positions: Unoccupied (non-garrisoned) Japanese position not in Japanese communication and within three hexes of a US unit.
Procedure:
a) Draw a reserve unit from the sector's Reserve Pool and place the unit (but not a depth marker) in the position.
b) The unit does not fire in the Japanese Fire Phase in which it is placed.
c) If multiple position hexes in a PG are eligible for the infiltrate action, place the unit in the lowest numbered position hex.
d) If there are more positions eligible for infiltration than available units, place the units using the below priority:
- In the hexes that are closest to US units.
- Then in the lowest lettered position.
- Then the lowest number position hex.
14.0 Japanese Tank Units
The Japanese forces include three tank units. During play, when a tank's position is selected to perform an action, the tank performs actions specific to tanks.
14.1 Japanese Tank Extended FoF
A position occupied by a Japanese tank unit projects a steady field of fire into all hexes one hex beyond the position's printed FoF (that is, all hexes outside of but adjacent to a hex in the position's printed FoF).
a) This extended FoF cannot extend beyond three hexes.
b) Use the same LOS rules as used by hilltop positions but use the actual elevation in the hex the tank unit occupies.
14.2 Japanese Tank Actions
A Japanese tank unit performs an action when its position color appears on the Japanese fire card.
a) Tank units may also perform an action as the result of an event.
b) It is possible for a Japanese tank unit to be in a non-position hex. In this situation, use the color on the tank unit as its position color.
c) When in a position hex, use the position's color.
Default Tank Action: Fire or Advance:
- Fire: If any US units are in the tank unit's FoF conduct fire normally. The tanks do not advance.
- Advance: If no US units are in the tank's FoF.
a) Move the tank unit and depth marker (if any) to a position hex that is unoccupied or occupied by a non-tank Japanese unit (the unit may have a depth marker).
b) The position hex can be no more than three hexes from the tank's original position hex and must be closer to a US unit than the original position hex.
c) If two or more eligible position hexes are equidistant from the nearest US unit, use the below priorities:
- An unoccupied position hex.
- The position closest to the tank unit's current position.
- The highest numbered position.
d) A tank unit will only move to a position occupied by a Japanese non-tank unit if the unit in that position can trace Japanese communication.
e) If there are no eligible positions within three hexes of the tank's starting hex, take no action.
[M] Tank Action: Multiple Fire.
Eligible Position:
- Japanese tank unit(s) occupy the position; and,
- After conducting fire, US units remain in the tank's FoF (14.1).
Procedure: Draw another fire card and conduct a second fire action using the tank units only. Ignore any lettered action on the second card.
[R] Tank Action: Overrun.
Eligible Position: A position occupied by a Japanese tank unit that has one or more US units in its tank FoF (14.1). If US units are not in the tank's FoF, this action is not taken.
Procedure:
a) The tank unit conducts a fire action.
b) If no US units are hit, take no further action.
c) If one or more US units are hit, then move the tank unit into the hex occupied by the nearest hit US unit and conduct CC. If hit US units are equidistant, move to the hex occupied by the fewest US steps, then you choose.
d) The tank unit may move into a non-position hex when performing this action. If it does so, use the position color printed on the tank's counter to resolve the CC.
e) If the tank unit survives the CC in a non-position hex, move the unit to the nearest unoccupied position (this could be the position from which the tank unit came). If unoccupied positions are equidistant, move to the position closest to a US unit, then the lowest numbered position.
[A] Tank Action: Double Advance or Fire.
Eligible Position: A position occupied by a Japanese tank unit with no US units in its tank FoF (14.1).
a) Conduct an advance as described in the default Fire or Advance action.
b) If the tanks advance and there are US unit(s) in the tank unit's new FoF, the tank unit conducts fire normally. There is no further advance.
c) If there are no US units in the tank unit's new FoF, conduct another advance (as above). No fire takes place.
14.3 US Actions Against Japanese Tanks
Japanese tank units not in a position hex may be attacked in the same manner as a Japanese position. The hex may be subject to CC and may suffer disruption and defeat. A defeated Japanese tank unit does not withdraw and is not placed in the Eliminated Units Box, it is removed from play.
Important: Japanese tank units and depth markers do not receive benefit from terrain when not in a position (do not double a tank unit's strength when attacked) regardless of the terrain. When US tanks fire on a hex containing Japanese tanks not in a position hex, the US tank's attack strengths are doubled.
14.4 Japanese Counterattack Stance
Japanese tank units and certain other Japanese units enter counterattack stance (CA) when the Japanese Tank Attack event is drawn. All units in CA stance conduct the CA action in the Japanese Fire Phase, regardless of the position colors and actions showing on the fire card.
14.4.1 Setting up Counterattack Stance
When the Japanese Tank Attack event occurs, set up counterattack stance as follows:
a) Reveal all Japanese tanks on the map (unrevealed units stacked with armor depth markers).
b) Remove all armor depth markers from the game and place a Japanese depth marker (revealed) on each of the tank units. If any of the tank units are disrupted, remove the disruption marker.
c) Select one unrevealed Japanese unit and depth marker (if any) that is within three hexes of each Japanese tank unit. The non-tank unit cannot be in an intact artillery position.
d) If the only Japanese units within three hexes of a Japanese tank unit are already revealed, select the strongest unit and its accompanying depth marker (if any). If two units are of equal strength and distance from the tank unit, pick the unit that is further away from a US unit.
e) Reveal the non-tank units. Return their accompanying depth markers to the Depth Marker Pool and if the unit is disrupted remove the marker.
f) Place the non-tank units with the closest tank units (one non-tank unit for every tank unit) and place a revealed depth marker on top of the unit to signify they are in counterattack stance.
14.4.2 Counterattack Action
During the Japanese Fire Phase, all CA units conduct the counterattack action regardless of the colors on the fire card.
a) Conduct all counterattack actions before conducting actions with other units in the Japanese Fire Phase.
b) Conduct the counterattack action one stack at a time, beginning with the CA unit closest to a US landing beach. If equally close, then the westernmost unit(s) goes first.
c) Actions for Japanese units in CA stance are limited to movement and CC. To conduct a CA action, move the CA unit to a hex within three hexes of the unit's current hex. The unit does not fire. Among hexes within three hexes, choose the hex listed first in the following priorities:
- Unoccupied position hex with a FoF into a US landing beach hex.
Important: Beginning GT 13, ignore the above priority.
- A hex occupied by a US unit, even if not a position hex. If more than one, the hex closest to a US landing beach hex, then the southernmost hex. Immediately conduct CC prior to moving another CA stack.
- Unoccupied position hex closer to a black position hex than the CA unit's current hex.
- If multiple choices exist within any of these priorities, move to the hex closest to the moving unit. If still more than one choice, move to the westernmost hex, then southern-most.
- If no hex meets any of these priorities for a CA unit, that unit conducts no action during this Japanese Fire Phase.
14.4.3 Modifications to Close Combat
These modifications apply to a CC involving a Japanese unit in CA stance, during the Japanese Fire Phase or the US Action Phase.
a) Do not draw an additional Japanese card for the Japanese attacking.
b) Japanese depth markers used to note the units being in CA stance count as a depth marker until revealed.
c) Draw an additional US card.
d) Remove disruption markers from all participating US units (if any) before revealing cards.
e) If any US units are in hexes adjacent to the CC hex, the US side reveals the first card each round of CC.
f) If in a non-position hex, use the position color on the CA tank unit's counter when checking for hits. If in a position hex, use the position's color.
14.4.4 Modifications to US Attacks
A Japanese unit in counterattack stance receives no terrain benefits when attacked by US units.
14.4.5 Eliminating Counterattack Depth
If a CA unit loses its depth marker, flip the marker to its unrevealed side. The unit no longer has depth, but the marker remains to indicate that the unit is still in counterattack stance.
14.4.6 Leaving Counterattack Stance
A CA unit remains in CA stance until it is eliminated or ends its action in a Japanese position projecting a FoF into a US beach landing hex.
a) When a non-tank unit with counterattack depth marker leaves CA stance, replace the counterattack depth marker with a unrevealed depth marker (under the unit), drawn from the Depth Marker Pool. The counterattack depth marker is returned to the Depth Marker Pool. The unit remains revealed.
b) When a tank unit with counterattack depth marker leaves CA stance, remove the counterattack depth marker but do not replace it.
14.4.7 Subsequent Draw
If the Japanese Tank Attack event is drawn again after it has already occurred, treat the event as a Reinforce event.
15.0 Command Posts (CPs) & Garrisons
Starting on GT 7, you may convert your regimental HQ units into command posts during the US HQ Phase.
a) A CP may not move but gains a command range that increases over time, enabling it to command US units up to five hexes away.
Example: A CP with a range of three, commands all US units within three hexes of its hex.
b) A CP also enables the placement of US garrison markers in certain position hexes.
15.1 Establishing a Command Post
A regimental HQ unit may convert to a CP in any hex that is not in the FoF of any Japanese position.
a) If a Japanese-occupied position or an unoccupied position in Japanese communication projects any fire dots into the HQ's hex, the HQ may not convert into a CP.
b) To establish a CP, flip the HQ unit to its command post side during the HQ Phase and place the matching command range marker in the first space of the Command Range Track. This is not counted as an action.
15.1.1 Abandoning a Command Post
You may revert a CP to a regimental HQ unit during the HQ Phase by flipping the unit to its HQ side. If you do so, remove the corresponding command range marker from the Command Range Track.
15.2 Command Range
When you first establish a CP, it commands US units in its hex and any hexes within two hexes.
a) The initial placement of the CP's command marker on the Command Range Track shows this capability (command range of two hexes).
b) In subsequent GTs, you may increase the CP's command range during the HQ Phase.
c) If the CP is not in the FoF of any Japanese occupied position (there must be an undisrupted Japanese unit in the position hex), you may advance the marker for an already established CP one space along the command range track.
15.2.1 One Range per Regiment
As many as nine command range markers may occupy the Command Range Track (one for each regimental HQ in the game), and, if eligible, every marker may be advanced along the track during the US HQ Phase.
15.2.2 Duplicate Ranges on Track
Command range values may appear on the Command Range Track more than once.
Example: A command range of 2 appears in two boxes in a row, meaning that it takes at least two GTs to increase a CP's range from two to three.
15.3 Capabilities of Command Posts
A CP commands all the US units belonging to the CP's Rgt that are within its current command range.
Example: A CP with a range of three commands all US units of its Rgt within three hexes of its hex.
a) When counting range include the hex occupied by the unit, but not the hex occupied by the CP.
b) Bn. HQs no longer provide command when the Bn. HQ and units are within the command range of their CP.
c) Units within a CP's command range receive all the benefits of being in command of an HQ including:
- Radios.
- Coordination of tank and artillery ranged fire for US attacks.
- Tank and artillery barrage.
15.3.1 Japanese Effects on Command Range
You may count command range through hexes in Japanese FoF but not through Japanese occupied hexes.
15.3.2 Command Posts are Leaders
A CP acts as a leader. Japanese fire may hit a CP.
a) If hit, the CP immediately reverts to an HQ unit; flip it over and remove its command range marker from the Command Range Track. Japanese fire cannot eliminate a CP.
b) If eliminated, place the regimental HQ on the Record Track in the box for the next game day. It returns to the map during HQ Phase of that PM GT. You may place the HQ in any hex not in a Japanese FoF.
c) While the regimental HQ is on the track, all Bn. HQs of that regiment have a one hex command range.
15.4 Placing Garrison Markers
During the US HQ Phase, you may place garrison markers in unoccupied Japanese position hexes.
a) You may place any number of garrison markers in a single HQ Phase, but no more than one garrison marker per hex.
b) If a Japanese position hex meets the following requirements, place a garrison marker in the position hex.
- In the command range of a CP.
- Occupied by or adjacent to a US unit.
- In US communication.
- Not in the FoF of a Japanese unit, even if disrupted.
15.4.1 Properties of Garrisons
When checking for Japanese actions, treat a position hex with a garrison marker as US-occupied.
a) Garrison markers do not count as a unit for stacking.
b) A garrison marker may not perform actions and may not participate in a CC or US attack.
c) Remove the garrison marker if:
- It is alone in a position hex when that position is in the FoF of a Japanese unit performing a fire action; or,
- If a Japanese unit enters its hex.
d) Do not count the garrison's removal toward the Japanese unit's hit limit.
16.0 Replacements, Reserves & Rest
Units that have suffered step losses may use replacement points to recover lost steps. Units may recover a limited number of steps while still near the enemy, but if a player wishes to have units recover more quickly and at less cost, it is better to put them into reserve.
16.1 Replacement Steps
You start each scenario, or campaign game with a set number of replacements. There are three types of replacements: tank, engineer, and Inf steps.
a) One replacement step replaces one step loss in a: Rifle Infantry Co.; Inf/Bn. HQ Unit; Tank Unit; Engineer Unit.
b) Two replacement steps replace one step loss in a HW Co.
c) A unit not in reserve can only receive one replacement step during the US HQ Phase of the AM GT of each day.
d) A tank unit not in reserve may not recover steps in a Japanese intense FoF.
e) When taking replacement steps, adjust the Inf replacement markers for each Div and the markers for tanks and engineers to reflect the number of each type of points left.
f) You may only use divisional Inf replacement points to rebuild or replace units from the unit's Div.
g) During the AM GT, you receive one tank replacement step for every two tank steps in the Reserve Pool.
h) During the AM GT, you receive one engineer replacement step for every three engineer steps in the Reserve Pool.
16.2 Reserve
Units in reserve have special capabilities for recovery and replacement.
Important: You only receive replacements for any of the below conditions during the HQ Phase of the AM GT.
a) A unit may enter reserve during the HQ Phase if, the unit is not in a FoF of a Japanese occupied position. Simply pick up the unit and place it in the appropriate Division Reserve Display on the map.
b) A unit must remain in reserve for at least one full day (three GTs) after entering such status.
Important: A unit in reserve may replace more than one step in one day.
c) If all units of a Bn. are in the Division Reserve Display, you receive one additional Inf replacement point for each Bn. Add the point to the Bn.'s divisional total.
d) If all three Bn.'s of a Rgt are in reserve, you also receive one additional Inf replacement. This point is in addition to those points gained for the Bn.'s.
e) To come out of reserve, you take the units out of the Reserve Display during any HQ Phase and place them in hexes that are:
- In communication; and,
- Not in a Japanese FoF of any kind; and,
- Are within six hexes of the unit's regimental HQ/CP; or,
- If the unit's HQ/CP are not on the map, the unit(s) may be placed within six hexes of another regimental HQ subordinate to the same Div.
16.3 Rest Day
On any AM GT on 27 February or later, you may take a day of rest.
a) No actions of any kind occur (Japanese or US) during all GTs of that day.
b) All US units not in a Japanese intense FOF are in reserve and garner/receive replacements as per 16.2.
c) If there are no Japanese controlled positions in Sector 1 and/or Sector 2, all units, in all sectors (Japanese and US), automatically recover from disruption.
d) On the next AM GT, play resumes as normal.
16.4 Divisional Combat Efficiency Loss
Once a player has expended more than 46-points of a division's Inf replacement pool, you may not rebuild non-HQ Inf Co. units of that Div to their full-strength (i.e., they can at most have three steps).
17.0 Fortification Markers
Fortification markers represent heavily fortified tunnel, bunker and pillbox complexes constructed by the Japanese to resist the US advance. The use of the term fort(s) will be synonymous with fortification.
17.1 When to Place Forts
Forts are set up according to scenario instructions and/or due to the presence of nearby US units.
a) Only place forts in position hexes that contain a fort location symbol (F or FF).
b) Follow any scenario instructions (if any) that direct you to place a fort.
c) A fort location that does not contain a fort and that is not controlled by US units, has a fort immediately placed in that hex if a US unit enters a hex within three hexes of that fort location.
d) The type and number of fort markers will depend upon the type of Japanese position in that hex.
17.2 How to Place Forts
A fort's unrevealed side is the side with the word "Fortification" printed on it. All fortifications are initially placed with this side up. The reverse side is its revealed side, which displays the fort's classification and the hexsides that will be obstructed (impassable) by that intact fort.
a) A fort's classification is a measure of how strong or weak it is. Class 1 forts are the strongest, and class 3 forts are the weakest.
b) Forts should be divided into three groups by class, with each class placed in a cup or face down in three separate groups near the map.
c) When required to pick a fort for a fort location, the forts are chosen randomly. Pick the appropriate number of forts as required.
d) If two forts of different classifications are required, pick one from each random class pool.
17.2.1 Hilltop Positions & Fortifications
All black Japanese hilltop positions and the Quarry position (0723) require two forts when placement occurs. One fort is a class 1 fort, and the other is a class 2 fort.
a) After both have been picked, randomly pick from the two forts, and place them as chosen in the fort location (first pick on the bottom and the second above it).
b) Each such location has a unit from the Sector Reserve Pool and a depth marker from the Depth Marker Pool placed with the forts. If there are no units or markers in the pools, then no unit or depth marker is placed.
c) Non-black Japanese hilltop positions require one class 1 fort, one unit from the Sector Reserve Pool, and one depth marker.
d) Black non-hilltop Japanese fort locations require the placement of a class 2 fort, one unit from the Sector Reserve Pool and one depth marker.
17.3 Properties of Fortification Markers
A position with a fortification marker is considered Japanese occupied for purposes of Japanese actions, CC, US attacks, and movement. That is, a position occupied solely by a fortification marker may be attacked, and only normal terrain restrictions and stacking rules prohibit how many US units may enter a fort hex to conduct CC.
a) A fortification is always treated as a Japanese unit until destroyed (even if unoccupied). It fires, and halts movement and projects a FoF like a normal occupied Japanese position.
b) The combat strength of each class of fort is:
- Class 1 fort: 3
- Class 2 fort: 2
- Class 3 fort: 1
c) A revealed fortification marker indicates which hexsides bordering a fortified position are impassable and may add weapon requirements to the position.
d) A fortification marker is revealed when a US unit attempts to attack the fortification. When this occurs, flip the fortification marker to its revealed side, then orient the fort marker with the arrowhead on the marker pointing toward you (the south map edge), so that the hex depicted on the marker aligns with the hex.
e) When a fort is revealed, the impassable hexsides may be such that a US unit is attempting to attack across an impassable hexside. US units that are found to be attacking across such a hexside:
- Are automatically disrupted; and,
- Are not allowed to participate in the attack; and,
- Have used their action for the current phase.
f) If the fort marker is alone in the hex, randomly pick one unit from the Sector Reserve Pool and one depth marker from the Depth Marker Pool.
g) If the Sector Reserve Pool does not contain any units you conduct the following:
- If there is a Japanese unit adjacent to the fort hex that is not adjacent to any US units, move the unit and its depth marker to the fort's hex. If there is more than one eligible unit you must:
-
- Select an unrevealed unit, if two more are unrevealed, you choose the unit.
-
- If all eligible units are revealed, you must select the weakest unit. If all revealed units are equal, you choose the unit.
-
- If the moved unit did not have an associated depth marker, pick one depth marker from the Depth Marker Pool.
- If there are no eligible adjacent Japanese units, then no units are moved, and the fort defends by itself.
h) A black position hilltop fort triples the defense strength of any Japanese units occupying it.
i) All other fort locations double the defense strength of occupying Japanese units.
j) During a CC, if all units and depth markers have been eliminated, but a fort(s) still exist, the fortification is treated like a unit and must be eliminated in that CC using the normal procedures for eliminating a unit for each classification step it still possesses.
17.4 Terrain Effects of Fortification Markers
A fortification marker creates one or more impassable hexsides around the hex, as depicted on the marker. US units may not move or attack across an impassable hexside.
a) When determining if a fortified position is flanked, consider only those US units attacking the position through non-blocked hexsides.
b) Japanese units that have their defense strengths tripled by a fort do not have their defense strengths further increased by terrain.
c) Japanese units that have their defense strengths doubled by a fort, will have those strengths tripled if the terrain in their hex would also ordinarily double their strength.
17.5 Reduction of Fortifications
Once a fortification marker is placed it remains until the fortification may only be reduced by a barrage (17.5.1), or CC (17.5.2).
a) Once a fortification is revealed, it stays revealed even if it is reduced. When replacing the fortification marker randomly draw and then place the marker face up (it does not need to be attacked again to be revealed).
b) If another fortification marker is in the same position hex, it must be attacked to be revealed once the top fortification is eliminated.
c) When a fort is successfully reduced, it is replaced by the next weaker fort class marker. (i.e., class 1 is replaced by a class 2). When replacing a reduced fort marker, use the same procedure for initial placement of a fort.
d) A class 3 fort that suffers reduction is eliminated and the marker is removed from the map.
17.5.1 Reducing a Fort by Barrage
You may barrage a fort. Consult the US Barrage Results Chart. If the result displays an asterisk, there is a chance that the fort is reduced. Pick one card from deck; if the color of the landing symbol matches one of that card's fire colors, the fort is reduced by one level.
17.5.2 Eliminating a Fort by CC
Fort steps are always eliminated before Japanese units and depth marker, except for the last step of that fort-any Japanese unit/depth marker must be eliminated before eliminating that fort's last step.
Important: Impassable hexsides do not affect Japanese FoF. US units moving from a hex adjacent to a fort to a hex adjacent to the same or any other fort always undergo MUF.
17.6 Hit Limits of Fortified Positions
When firing, a fortified position may inflict hits on the number of units, equal to the number of counters in the position.
- Fortification Marker Only: 1 hit
- Fortified Marker & Depth Marker: 2 hits
- Fortified Marker & Unit: 2 hits
- Fortified Marker, Unit & Depth Marker: 3 hits
Important: If more units than those listed above are present in a fortification, do not count their presence for hit limits purposes.
Important: Mortar fire from a fortified position occupied by just a fortification marker hits one unit.
17.7 Two Forts in a Single Position Hex
If a hex contains two forts, the top fort must be eliminated before the hex can be subjected to a US CC.
Important: If you run out of fortification markers in the pool, two markers of the next lowest classification can be used in place of one correct marker.
a) The bottom fort cannot be barraged until the top fort counter has been eliminated.
b) A position with a fortification marker may be disrupted, even if unoccupied. If a Japanese unit is placed when the position is still disrupted, the unit is disrupted.
c) When conducting a CC on the top fort of two in a hex, all Japanese units/depth markers plus the top fort must be eliminated before the bottom fort can be affected by combat in any way. After you have cleared the top fort, all US units must be retreated out of that fort's hex and the combat process starts all over again using the normal rules to eliminate that second fort.
18.0 Scenarios
There are five separate scenarios that break up most of the battle into smaller more manageable chunks of time, thus allowing players to explore various aspects of the battle in a shorter time than if the entire battle was played from start to finish. There is also one campaign scenario that lets a player start right with the landings on D-Day and play through till the end of most organized resistance on the island. The campaign scenario combines all the smaller scenarios into one game, but it is much longer to play, while offering some interesting strategic choices. Scenarios Three and Four can also be started and played through to the end of what would be the campaign game.
Each of the scenarios lists the starting setup for the units that begin on the map, special rules for that scenario, victory conditions and reinforcements and the turns they land for the US side. The starting frontlines (where units start) for each scenario are printed on the Setup Display. The US units that start on the map have their regimental and battalion IDs for where they start printed on the game map in blue type. Units may set up in or adjacent to hexes with their battalion and regimental IDs. If a battalion is noted on the map (i.e., 1/25) then all units of that battalion must set up in or adjacent to that hex. If a battalion does not have a specific set up hex, it sets up in or adjacent to the regimental HQ placement hex.
Important: When setting up each scenario, ensure that units are place in the correct area for that scenario. In all the below scenarios, if the starting position for a battalion is not adjacent to the scenario start line (frontline), no units from that battalion may be setup adjacent to the start line.
Example: 1/27 is shown in a hex that is two hexes away from a scenario start line, therefore A/1/27 could not begin the scenario adjacent to that start line.
Scenario Setup Display Errata:
- The display calls for 14 Japanese units in Sector 3. Change to 15 Japanese units.
- Players should randomly pick one Japanese unit from the In Reserve Pool.
- Scenario 1, Scenario 2, and the campaign game Add: Place a class 2 fort and one Japanese unit in hex 2125 (sector 3, Nishi-L3 position). Randomly pick the Japanese unit from the In Reserve Pool for Sector 3.
Clarification: If using this setup for the Campaign game, use the setup card and place all the indicated Depth markers in all sectors.
18.1 US Catastrophic Loss
Catastrophic loss represents a level of casualties so great that the invader's fighting capability has been effectively destroyed.
a) Play continues until the US forces suffer catastrophic loss (ending the game immediately) or until completing the last turn of the scenario, at which point you consult the victory conditions for the scenario to determine if you win or lose.
b) Catastrophic loss occurs the moment the number of infantry counters in the Catastrophic Loss Box equals or exceeds the Catastrophic Loss Level listed in these rules. Include only the fully eliminated units and whenever a rifle Co. loses a second step (this is signified by placing a step loss marker in the loss box). Thus, an eliminated infantry unit adds two counters to the Catastrophic Loss Level Box.
c) Eliminated infantry/HQ units and non-infantry units are not placed in the loss box and do not count toward catastrophic loss.
d) Catastrophic loss cannot occur before GT 7.
e) Units that are rebuilt and removed from the loss box no longer count toward any loss limit unless they are again destroyed.
f) Keep track of the unit losses by Div.
18.1.1 Catastrophic Loss Limit
The catastrophic loss limit at any time after GT 7 is initially five rifle companies for any one Div (it only takes one of the three Divs to reach the limit) before 1 March (GT 34), and then that limit drops to four.
Note: Scenarios may list separate catastrophic loss limits. Scenario instructions take precedence over the above limits.
18.1.2 Reduction of Loss Limit
If the number of replacement steps for any one US Div drops to less than 12, then that division's limit is reduced by one Inf Co.
18.2 Third Marine Division Full Commitment
Historically, General Schmidt refused to commit the 3rd Marine Rgt of the Third USMC Div, creating a major controversy among the divisional and regimental commanders who fought at Iwo Jima. Those commanders felt that the extra Rgt would have accelerated capture of the island and lessened the lengthy casualty list. Among the nine Rgts at Iwo Jima, it alone was the last fresh force that could be committed to end the battle, but it never was.
a) Any time after you control Airfield #1 and no Japanese occupied position projects a FoF onto the airfield, you may commit the 3rd Marine Rgt in its entirety.
b) If you do, immediately place all units of the 3rd Rgt in the beach landing boxes of any one colored beach (this includes beach purple, brown, white, orange). The units will land during the AOP of the next GT.
Example: The Rgt could be placed in beach boxes Blue 1 and/or 2 but could not be placed in Yellow 2 and Blue 1.
c) No restrictions are placed on the formation; it now functions like any other Marine Rgt and is under control of the 3rd Marine Div.
d) Should this Rgt be deployed, you must now reduce your Catastrophic Loss Limit by one for each Div.
e) Additionally, count the number of GTs before the end of the scenario being played. Divide this number by 8. The result is the number of turns that the scenario is shortened by.
18.3 Units
18.3.1 Japanese Units
Consult the instructions for each scenario (18.0) and then follow the instructions for each sector as detailed on the Scenario Setup Display. Scenarios Three, Four, and Five have additional instructions listed on the Scenario Setup Display.
Important: Units may already be eliminated and out of play, while others start in reserve unit pools belonging to certain sectors on the game map.
-
Mix together all depth markers and then place the number of depth markers listed for each sector in the appropriate Reserve Displays located on the main map. Depth markers may not be available for play per scenario instructions; set them aside as they are not used.
-
Using the sector setup instructions sort all Japanese units by sector. Carefully read the Scenario Setup instructions on the Iwo Jima Scenario Setup Display to ensure the correct number and type of units are placed in each scenario.
-
When setting up, the units and markers belonging to each sector should be mixed in such a way that you do not know the identity of the unit or strength of the depth marker. These units are then placed with their unrevealed side face up to start play.
Note: There are up to three Marine Divs in play eventually.
18.3.2 US Units
US units are set up according to scenario rules.
a) Units may already have suffered step losses at the start of play. A step loss marker should be placed under the unit if necessary, to show this.
b) Units may be scheduled to enter play in a later game turn of a scenario. The Reinforcement Schedule at the end of these rules will list units scheduled to arrive and where they appear.
c) Other units that are immediately available for play may start in a holding display where they remain until a player selects them for use on the game map.
18.3.3 Markers
Disruption markers and garrison markers should be collected and kept near the game map for use as needed. US step loss markers are placed in cup to allow for random selection. Other markers will have to be placed on game tracks in spaces that correspond to values given for each scenario.
a) Place the turn marker in the space of the GTRT that the scenario begins with.
b) Place the phase marker on the Turn Sequence and Card Track.
18.4 Scenario One: D-Day, 19 February
This scenario depicts the first day only. It covers the initial landings, the effort to isolate Suribachi (Sector 1) and capture all of Airfield #1. GT 1 is the first turn of the scenario and GT 6 is the last.
18.4.1 US Setup
Set up all units landing on GT 1 in the beach boxes. All US units landing on GT 2–6 should be made ready as they will be used also. Ignore arriving artillery points, you cannot use them.
Landing Beach Codes: G = Green, R = Red, Y = Yellow, B = Blue. The number after each letter code is that beach box's number. The ID numbers represent all four units of a USMC Rifle Btn.
Example: When the set-up states to place 1/28, you would place HQ/1/28, A/1/28, B/1/28, and the C/1/28 infantry companies.
The other IDs are for divisional engineers and tank units. This setup is also printed on the Iwo Jima Scenario Setup Display.
- G: 1/28 & 2/28
- R1: 2/27
- R2: 1/27
- G or R1: 1A/5Tk & B/5E (2nd Wave)
- R2: 1C/5Tk & A/5E (2nd Wave)
- Y1: 1/23
- Y2: 2/23
- Y1-Y2: 1C/4Tk & A/4E (2nd Wave)
- B1: 1/25, 3/25
- B1: 1A/4Tk & B/4E (2nd Wave)
18.4.2 US Reinforcements
- GT2: 3/27 [R1–R2]
- GT3: 3/28 & 1B/5Tk [G–R1]; 3/23 [Y1]; 2/25 [B1]; 23HW Co & 25HW Co [Y or B]
- GT4: 1/26 & 2B/5Tk [R1]; 1/24 [B1]; 27HW Co & 28HW Co [G or R]
- GT5: 2/26 & 3/26 [R1]; 2/24 [Y1]; 1B/4Tk [Y2]; rest of 4th and 5th Div Eng [any]; 2 points of 4th Div artillery.
- GT6: HW/26 [R1]; 3/24 [B2]; 3 points 4th Div artillery; 7 points of 5th USMC divisional artillery; 2B/4Tk [Y2].
18.4.3 Japanese Setup
Consult the Iwo Jima Scenario Setup Display and follow the instructions for each Japanese sector (1–4) on the map.
Important: In each sector, units may begin near the beaches (within three hexes of a beach hex) while others must be setup farther away. Mix up each group separately so that they can be picked randomly. Do not look at the front sides while deploying them on the map.
-
Place one Japanese unit in every position bearing the setup symbol (the symbol is an image in the printed booklet and does not survive text extraction; see the Setup Display). All Japanese units begin with their unrevealed side face up.
-
The depth markers should be divided up as indicated on each of the sector setups. When they are needed, you should place them in a cup by sector so that they can be randomly picked. Sectors 1 and 4 are not used in this scenario, you do not need to place the depth markers for those sectors in a cup.
-
Other units in a sector may belong to that sector's reserve. Place them in the appropriate Reserve Pool and draw them randomly when required by events, game rules or scenario instructions.
-
Forts are setup according to the fort setup rules (17.0) in Sector 1 only, and in hexes 0720 and 0820.
18.4.4 Special Rules
Before the Landing Phase on GT 1, shuffle the card deck and place it face down near the map. Then draw the top card. The three fire colors on that card indicate the Japanese positions that start this game turn in a disrupted state. Only positions within three hexes of a beach hex are affected.
a) Tank and engineer units that land on GT 1 (2nd Wave) do so at the end of the US Action Phase, after all other actions are complete. The units listed as 2nd Wave then go through the same landing procedure that normally is conducted, with the exception that after landing these units may not move from a beach hex on this GT.
b) All US units are always in command. You do not assign tank and engineer units to battalions.
Important: When playing scenario one, there is no need to place regimental HQs.
c) You may take no more than eight replacement steps during the scenario.
d) You may only expend replacement points on GTs 2 and 5.
e) You receive one naval gunfire point and one airstrike point for use on GTs 2, 4, and 6. Points must be used on the game turn received and may not be held over until the next game turn.
f) US units may not enter Sector 1.
18.4.5 Victory Conditions
To win, you must meet all the following criteria. Not winning is losing.
a) The US side cannot suffer more than fifty step losses total (you can record losses by using an unused counter on the US Record Track).
b) Additionally, at the end of the scenario, the Japanese must not be able to trace communication from any position on Suribachi to another position in any other sector.
c) At least one position on Airfield #1 and one position in Sector 3, must also be US controlled by the end of the scenario.
18.5 Scenario Two: Suribachi (20–24 February)
This scenario covers the capture of Mt. Suribachi and the securing of all of Sector 1. GT 7 is the first turn of the scenario and GT 21 is the last. US units may not enter Sector 3 and all hexes north of the 28th Regiment set-up hexes are out of play.
Note: This scenario may be combined with Scenario 3 for a full 20–24 February scenario.
18.5.1 US Setup
All units of the 28th Marine Regiment, plus any two 5th Div tank units and two 5th Div engineer units are available. Six artillery points are available to the US side. There are no reinforcements in this scenario.
18.5.2 Japanese Setup
The Japanese setup for Scenario 1 (18.3.1) is used for Sector 1. No other Japanese units are in play.
18.5.3 Special Rules
a) US units are always in command.
Important: When playing scenario two, there is no need to place regimental HQs.
b) You may randomly pick one hero during the Action Phase of GT 7 and place him with any unit starting the scenario on the map.
c) You may take a total of ten replacements points and four tank and four engineer points for the scenario.
d) The scenario catastrophic loss limit is three infantry companies.
18.5.4 Victory Conditions
To win, you must meet all the following criteria. Not winning is losing.
a) You cannot exceed the catastrophic loss limit, nor can you suffer more than twenty infantry step losses total.
b) Additionally, at the end of the scenario, Sector 1 must be completely cleared of Japanese units and positions.
c) At any time, if the Japanese have re-established communication from Suribachi to Sector 2, the US side loses.
Note: Scenario Two may be combined with this scenario. If this is done, the restrictions on artillery point allocations and NG and Air are lifted.
18.6 Scenario Three: Drive to the North (20–24 February)
This scenario covers the effort to capture all of Airfield #1 and gain a foothold on the Motoyama Plateau. GT 7 is the first turn of the scenario and GT 21 is the last. US units may not enter Sector 1 or Sector 4.
18.6.1 US Setup
All units, except the 28th Marine Rgt (along with any two 5th Div tank units and two 5th Div engineer units) that were landed up to GT 6, are available, this includes artillery points for the 4th and 5th Divs. All reinforcements are received normally.
Exception: Six points of the 5th Marine Div are not available for use.
Note: Starting units have setup IDs printed in blue in the setup area.
a) US units may be in or adjacent to these setup designations (the Rgt or Bn. ID is used). Place regimental HQs within two hexes of that regiment's HW Co. If the regimental HW Co. is not on the map, the regimental HQ arrives with that HW Co.
b) You must start 4th USMC Div with 14 Inf step losses and the 5th Div with 12. No unit may have more than one step loss. Step losses may be taken from those units in reserve.
c) Each Div has 18 Inf replacement steps available and a total of nine tank steps and six engineer replacement steps.
d) The following Bn.'s are in reserve.
- 4th Div: 2/24, 3/24, 2/25.
- 5th Div: 2/26, 3/26, 1/27.
e) You may pick one hero for each US division and start them with any appropriate unit.
18.6.2 Japanese Setup
Use the setup for Scenario 3 that is shown on the Setup Display. In addition, fort locations at 0820 and 0723 are setup with fort markers (0723 receives two fort markers, one in C1 and one in C2). Randomly select six units from the Sector 3 Reserve Pool and place them with their un-revealed sides up on hilltop positions in Sector 3.
18.6.3 Special Rules
a) The US units are no longer automatically in command.
b) At the start of play, pick a fire card. All the positions adjacent to US units with those fire colors are revealed. This does not include their depth markers.
c) The scenario catastrophic loss limit is five Co.'s per US Div.
18.6.4 Victory Conditions
To win, you must meet all the following criteria. Not winning is losing.
a) You cannot exceed the catastrophic loss limit, nor can you suffer more than thirty infantry step losses in any one day.
b) Additionally, at the end of the scenario, Sector 2 must be completely cleared of Japanese units and positions and at least one position on Airfield #2 must be under US control.
c) Also, ten Japanese positions in Sector 3 must be under US control.
18.7 Scenario Four: Hot Rocks (25 February–4 March)
This scenario covers the effort to capture all of Airfield #2, and part of Airfield #3. GT 22 is the first turn of the scenario and GT 45 is the last. US units may not enter Sector 1.
18.7.1 US Setup
All units are available that were landed through GT 17, this includes artillery points for the 4th and 5th Div. All reinforcements are received normally.
a) Starting units have setup IDs printed in blue in the setup area. US units may be in or adjacent to these setup designations (the Rgt or Bn. ID is used). Place regimental HQs within two hexes of that regiment's HW Co.
b) You must start 4th USMC Div with 12 infantry step losses and the 5th Div with 12. No unit may have more than one step loss.
c) Each Div has 24 Inf replacement steps available and a total of 8 each of engineer and tank steps.
d) The 3rd Marine Div becomes available on GT 22. The 21st Marine Rgt has no losses.
e) The following Bn.'s/Rgts are in reserve.
- 3rd Div: 1/21
- 4th Div: 2/23, 3/25, 25th Regimental HQ, 25HW Co.
- 5th Div: 28 Rgt, 1/26, 3/26, 3/27.
f) You may pick one hero for each US division and start them with any appropriate unit.
Map Errata:
a) The 1/26 is shown as being set up on the map. Ignore the map placement, the battalion is in reserve, as shown above.
b) All US engineer and tank assets start unassigned and off-map. You need to assign them to reserve, or assign them to regiments, placing them on the map in or adjacent to the regimental HQ/CP.
18.7.2 Japanese Setup
Use the setup for Scenario 4 shown on the Setup Display. All Japanese fort locations in Sector 3 are set up according to the fort set up rules in 17.0. This means that Japanese black hilltop positions each receive two fort markers, a unit, and a depth marker; however, do not place a unit from the Reserve Pool if a unit is already starting there due to initial setup instructions.
Errata: The following set up corrections are not shown correctly on the Set-up Diagram.
a) The Japanese set up requires that six units are taken from the at start Reserve Pool. Mix these units in with the units shown on the Setup Diagram.
b) Add one unit, one depth marker and one class 2 fortification to position group F2 (Nishi Village) at start units.
c) Add one unit to PG L2.
18.7.3 Special Rules
a) The US units are no longer automatically in command.
b) The 3rd Marine Regiment may be committed at any time.
c) Japanese units are checked to see if they are revealed in the same manner as rule 18.6.3.
d) The US catastrophic loss limit is five Co.'s per Div.
18.7.4 Victory Conditions
To win, you must meet all the following criteria. Not winning is losing.
a) You cannot exceed your catastrophic loss limit, nor can you suffer more than thirty infantry step losses in any one day.
b) Additionally, at the end of the scenario, Airfield #2 must be under US control and at least one hex of AF #3.
c) Also, six Japanese positions in Sector 4 must be under US control.
18.8 Scenario Five: Drive to the Sea (6–10 March)
This scenario covers the effort to capture all of Airfield #3, and the clearing of the Motoyama Plateau. GT 49 is the first turn of the scenario and GT 63 is the last. Sector 1 and Sector 2 are under total US control.
18.8.1 US Setup
All units are available except for the 3rd Marine Regiment.
a) Starting units do have setup IDs printed in blue in the setup area.
b) US units may be in or adjacent to these setup designations (the regiment or battalion ID is used). Place regimental HQs within two hexes of that regiment's HW Co.
c) You must start 4th USMC Div with 16 Inf step losses and the 5th Div with 18. The 3rd Div begins with 12. No unit may have more than two step losses.
d) The 4th and 5th Divs each have 16 Inf replacement steps available and a total of five each of engineer and tank steps. The 3rd Marine Div has 30 replacement steps left and all its tanks and engineers in reserve.
e) You may pick two heroes for each US division and start them with any appropriate unit.
18.8.2 Japanese Setup
Use the setup for Scenario Five that is shown on the Setup Display.
a) Turkey Knob is setup with one class 2 fort. All other fort locations still in Japanese controlled territory are set up with their forts according to rule 17.0., although note that there will not be enough units in reserve to accompany these forts.
b) Place the 109th Div HQ in hex 2335.
18.8.3 Special Rules
a) The US units are no longer automatically in command.
b) The 3rd Marine Regiment may be committed at any time, but the scenario is shortened by six game turns.
c) The US catastrophic loss limit is four Co.'s per Div.
18.8.4 Victory Conditions
To win, you must meet all the following criteria. Not winning is losing.
a) You cannot exceed your catastrophic loss limit, nor can you suffer more than 24 infantry step losses in any one day.
b) Additionally, at the end of the scenario, all Japanese positions (every colored position on the map) must be under US control.
18.9 Sands of Iwo Jima Campaign Game (19 February–11 March)
A campaign game of D-Day Iwo Jima may be played by starting with Scenario One and playing through to the end of Scenario Five. GT 1 is the first turn of the scenario and GT 66 is the last. There are no hexes under US control.
18.9.1 US Setup
Start with the setup for Scenario One. There are no restrictions other than the reinforcement schedule as to when US units arrive.
18.9.2 Japanese Setup
Start with the Scenario 1 setup.
18.9.3 Special Rules
a) The US units are automatically in command until GT 7, at which time normal command rules apply. At the beginning of GT 7 if a regiment's HW Co. is on the map, place the regimental HQ within two hexes of that HW Co. If the regimental HW Co. is not on the map by the beginning of GT 7, the regimental HQ arrives at the same time as the regimental HW Co.
b) The 3rd Marine Regiment may be committed at any time after GT 7, but the scenario is shortened by one GT for each day before GT 64 that the regiment is taken.
19.0 US Master Reinforcement List
- GT2: 3/27 [R1–R2].
- GT3: 3/28 & 1B/5Tk [G–R1]; 3/23 [Y1]; 2/25 [B1]; 23HW Co & 25HW Co [Y or B].
- GT4: 1/26 & 2B/5Tk [R1]; 1/24 [B1]; 27HW Co & 28HW Co [G or R].
- GT5: 2/26 & 3/26 [R1]; 2/24 [Y1]; 1B/4Tk [Y2]; rest of 4th and 5th Div Eng [any]; 2 points 4th Div artillery.
- GT6: HW/26 [R1]; 3/24 [B2]; 3 points 4th Div artillery; 7 points 5th Div artillery; 2B/4Tk [Y2].
- GT7: HW/24 [Y or B].
- GT9: 3 pts 5th Div artillery; 2A/5Tk & 2C/5Tk [R2]; 5 pts 4th Div artillery; 2A/4Tk & 2C/4Tk [Y2].
- GT12: 21st Rgt; 2 engineer units 3rd Div [Y or B].
- GT15: 4 artillery points/VAC.
- GT18: 4 artillery points/VAC.
- GT19: All 3Tk [Any].
- GT21: 5 points 3rd Div artillery.
- GT22: 9th Rgt; 2 engineer units 3rd Div [any beach].
- GT30: 5 points 3rd Div artillery.
Note: The shortening of the scenario listed here overrides the rule in 18.2 which describes the procedure for all other scenarios.
c) Each US Div has 60 replacement Inf steps available to it. A total of 24 tank and 24 engineer steps are available for the entire game.
d) Anytime a Japanese sector is cleared, all units and depth markers in that sector's Reserve Pool are moved into the northern adjacent sector's Reserve Pool.
e) The US catastrophic loss limit is five Co.'s per Div until March 6 at which time it is reduced to four Co.'s per Div.
18.9.4 Victory Conditions
To win, you must meet all the following criteria. Not winning is losing.
a) You cannot exceed your catastrophic loss limit, nor can you suffer more than thirty infantry step losses in any one day.
b) Additionally, at the end of the scenario, all Japanese positions (every colored position on the map) on the map must be under US control.
20.0 Event Descriptions
Important: Airfield Objective and Heavy Mortar Fire events are listed as "Persistent". The event description will state the period that the event remains active.
Airfield Objective (Persistent): At least one attack against a Japanese position on or adjacent to Airfield #1, #2 or #3 must be made each turn (only one airfield position on one airfield need be attacked).
a) If you fail to do so, then all unoccupied Japanese positions located on or adjacent to one airfield gain one unit. If a unit already occupies a position, then the position gains one depth marker. Priority is Airfield #1, then AF #2, and finally, AF #3.
Important: Only the lowest numbered AF that is still able to receive Japanese units gets them.
b) Ignore this event, if all airfields are US controlled (no Japanese position can project a FoF into a hex containing an airfield).
c) This event remains in play until all airfields are US controlled. At the end of each GT, determine the status of all airfields and if all airfields are not US controlled leave the card in the event space, it will carry over into the next GT.
Airstrike: You gain one airstrike marker.
Ammo Dump Explosion: All US HW units and tank units are halved on attack and barrage for the remainder of the GT. Additionally the number of available US artillery points are halved for the rest of the GT (round up).
AT Ditch: Tanks may not enter Japanese positions that match fire colors on the card listing the event this GT unless accompanied by engineer units.
Caves: Place one cave marker. If all cave markers are in play, or the placement condition cannot be met, ignore this event.
a) The cave marker is placed in:
- A non-position hex adjacent to a Japanese occupied hilltop position.
- The hilltop position must be adjacent to a US unit; and,
- The hex of placement must be adjacent to at least one US occupied hex.
b) Place one unrevealed depth marker (a Japanese unit is never placed in a cave hex) from the Depth Marker Pool with the cave marker. The depth marker is only revealed if attacked by a US unit.
c) The cave projects an intense FoF into all adjacent hexes and no FOF into any other hexes.
d) The cave fires only when US units attempt to enter the cave hex to conduct CC. (conduct as MUF).
e) When conducing a CC, treat the depth marker as though it was an elite unit with the strength printed on the depth marker. Resolve CC normally.
f) When barraging a cave, draw two cards. The first card is used to determine the cave's position color (use the landing symbol's color).
g) A cave is not a fortification and confers no special benefits. Remove the cave if the depth marker is eliminated.
Command Post Hit: Disrupt one US Inf/Bn. HQ unit that is nearest to a Japanese position. If two or more are equal distance from a Japanese position, choose the one closest to a black position.
Fatigue US Bn.: Disrupt all the units of any one US Bn. not in reserve. Player's choice.
Hero: Add a hero marker to one US stack in an intensive FoF. Priority according to fire color (left to right). Japanese gain one depth marker in the position closest to the hero's placement hex that does not already contain a depth marker. If two or more positions are equidistant, you choose (11.1.1).
Heavy Mortar Fire (Persistent): All Japanese mortar attacks in the next Japanese Fire Phase inflict one extra hit on US units. No more than one hit can be added. If this event occurs during the First Event Phase it is complete at the end of the Japanese Fire Phase. If the card is drawn in the Second Event Phase the event remains active until the end of the Japanese Fire Phase of the next GT.
Intense Fire: All US non-tank movement is reduced to two hexes if units start or move into any Japanese FoF.
Japanese Counterbattery: US loses one divisional artillery point for each of the following (including the current GT) four GTs. If Suribachi has not fallen, lose two points. Record this loss on paper and move the artillery marker to reflect the loss.
Japanese Depth: Add one Japanese depth marker to one Japanese occupied position that is adjacent to a US unit in each sector. Only add a depth marker to a position if the position does not already contain a depth marker. Select the position hex that has the greatest number of adjacent US units.
Japanese Flee: In each sector, if a position hex is occupied by an in communication Japanese non-elite revealed unit and that position hex is adjacent to US units, the unit moves to the nearest unoccupied Japanese position within the same sector that is not adjacent to US units.
a) Select the position that is adjacent to the greatest number of US units. If more than one position has an equal number of adjacent US units, you choose.
b) If no eligible Japanese positions are available to move to, eliminate the unit.
Japanese Fortification: Place a randomly picked class 1 fortification in any one position hex in rocky or mountain terrain. Priority is accorded to the fire colors on the event card, with first color first, etc. Choose a position that is closest to the most US occupied hexes. Player's choice.
Japanese Hero: Place a Japanese hero in nearest position (use color priority, then use strongest adjacent US stack).
a) A Japanese hero doubles the strength (before other terrain considerations) of the strongest unit in the position and creates a CC requirement that cannot be negated.
b) The hero is removed from the map (it may be placed again) after being subjected to one attack or CC.
Japanese Infiltration: Place one unrevealed Japanese unit in an unoccupied position that is out of communication and within six hexes of an occupied Japanese position that is in communication. Choose the position closest to a beach hex. If no such position exists, then no event.
Japanese Reinforcement: Follow the procedures in 9.3a and 9.3.1.
Japanese Tank Attack: Follow the procedures in 14.4. If a Japanese Tank Attack has already occurred ignore this event.
Landing: Beach Congestion: All units in a beach landing hex of the player's choice are disrupted. Lose one step from any one unit.
Landing: DUKW Swamped: Lose one artillery point scheduled to land during the next GT (if any). If no artillery points are scheduled to land the next GT, ignore this event.
Landing: LVT Fire: Draw one fire card, if any occupied Japanese positions within three hexes of a beach landing hex match the first (leftmost) fire color on the card, disrupt the occupying unit. If more than one such position exists, choose the position closest to a beach landing hex. If two or more are equidistant, you choose the position.
Landing: Tanks Stuck on Terrace: Disrupt one tank unit in a terrace hex (your choice). Ignore this event if there are no undisrupted tank units in a terrace hex.
Landing: US Infiltration: Choose one rifle infantry Co. from each regiment on the map that is in or adjacent to a beach landing hex. Move the unit one hex in any direction without triggering Japanese MUF. The unit may be in a terrace hex.
Local Japanese Counterattack: Select one unrevealed Japanese unit that is in a position that matches the leftmost fire color on the card and that is adjacent to a US unit. If two or more Japanese units meet the above requirement, select the unit that is adjacent to the least number of US units. If two or more positions still qualify, choose the position closest to any beach landing hex.
a) The Japanese unit is revealed and then enters CA stance and conducts a CC into the adjacent US occupied hex that contains the least number of steps. See 8.6 for CC procedures.
b) If the Japanese unit survives the CC and it is an elite unit, return it to the position from which it moved. The unit is disrupted.
c) If the Japanese unit is a non-elite unit, it is eliminated.
LVT(A) Support: You may conduct one three-point US barrage against any Japanese position within three hexes of any coastline hex that is adjacent to a US unit (your choice). Discard the event card after conducting the event or if the barrage is not conducted.
Minefields: During the US Action Phase, US units not moving with at least one engineer unit may only move one hex. This only applies to units that start their movement within two hexes of an occupied Japanese position matching the leftmost fire color on the card.
Napalm Works: You immediately make one airstrike anywhere on the map. The strike is not shifted against fortifications.
Naval Gunfire (NG): You gain one NG marker.
NG Error: Lose one step from any type of US unit that is within two hexes of and in the FoF of an occupied Japanese position (player's choice).
Night Assault: All raid attacks conducted during the PM GT only (ignore if not a PM GT), add one to the number of raiding positions (10.2).
Rain: All US fire ranges and Japanese FoF reduced to one hex. Artillery and NG not affected. No airstrikes allowed. US units may move a maximum of two hexes. Tanks may not use roads.
Remove Japanese Disruption: Remove disruption markers from two Japanese positions of your choice that have a color match with the left most fire color on the card.
Sketch of Enemy Positions: One Japanese fortification of your choice within two hexes of a US unit is flipped over to reveal its layout. Add one Japanese unit and one depth marker to that position.
Smoke: Place smoke markers (only in sectors with US units present) on the three Japanese occupied positions closest to US units that match the three fire colors on the card. If a black position bar appears on the card and a black position is within two hexes of a US unit, place one marker there instead of on the color below the black position bar (if any) on the card. Smoke markers are removed during the End of Turn Phase (6.2.3).
Tunnels: One Japanese unit that is out of communication is considered back in communication if it is within six hexes of a Japanese position that is in communication. Place a blank counter on top of the position to signify this.
US Artillery Replacement: Gain back one lost artillery point.
War Dogs: Reveal a unit and depth marker of your choice in any one position adjacent to US units.
60/81mm Support: Disrupt any one Japanese position (not a hilltop or black position). Add a Japanese depth marker to that position.
21.0 Close Combat Events
Conscripts Surrender: Applies only if drawn from the US pile. If the Japanese unit is not elite, is not a tank unit and has no depth marker, the unit is eliminated. The combat is over. Remove the unit from play. This event is disregarded if drawn from the Japanese pile or the unit is an elite unit, a tank unit, or has a depth marker.
Heroism: Add a card to the card pile of the side revealing this card and remove a card (if any) from the card pile of the other side. If drawn from the Japanese pile, and the Japanese unit has no depth marker, add a revealed depth marker.
Naval Artillery Blast: Draw a card from the draw deck (not the close combat draw piles).
a) If none of the fire colors match the color of the position where the CC occurs, there is no event. This is a non-event if the CC is occurring in a non-position hex.
b) If the card shows both the color of the CC hex and the target symbol for any US unit in the CC, remove one step from that US unit.
c) If more than one unit in the CC has the same target symbol, remove just one step from the unit with the most steps, then your choice.
d) If no US units in the CC have the target symbol shown on the card, eliminate the depth marker from the Japanese force in the CC, if no depth marker, eliminate the Japanese unit.
Reinforce: Add a card to the Japanese card pile, and if the participating Japanese unit has no depth marker, draw and place a depth marker, revealed. Do not place a depth marker if the only counter in the hex is a fortification marker. If drawn during a counterattack, add depth by adding a depth marker from the Reinforcement Pool. If this event occurs during a US card play and the card has a hit, the hit and the reinforce event off set each other, treat the card as no event and no hit.
US Fire on Counterattack: If this event is drawn from the Japanese pile during a Japanese counterattack (14.4), treat this card as no hit, regardless of the target symbol on the card. If drawn from the US pile during a Japanese counterattack, treat this card as a hit, regardless of the target symbol on the card. If a Japanese counterattack is not underway, treat as no event.
US Withdrawal Hit: If US units are conducting withdrawal under fire, remove one step from a participating US unit of your choice.
Japanese Fire/Action Summary
Icons in the first column are the fire card action symbols; rows are the card icon, columns are the position situation. Lettered actions are described in 13.0.
Game Turns 1–6
| Fire card action | Occupied, US units in FoF | Occupied, no US units in FoF | Unoccupied, in communication, US units within 3 hexes | Tank actions (start Turn 7) |
|---|---|---|---|---|
| Red square | Fire | No Action | No Action | — |
| Olive oval | Fire; Extra Armor Hit | No Action | No Action | — |
| M (starting GT 2) | MG Fire: Steady Fire FoF becomes Intense Fire | Mortar Fire: Hit US units with target symbol within 3 hexes | Muster: Place reserve unit & 1 depth marker in position; if US in FoF, conduct fire | — |
| Star (starting GT 3) | Fire: Leader/HQ Hit | No Action | No Action | — |
| R (starting Turn 6) |
Starting Game Turn 7
| Fire card action | Occupied, US units in FoF | Occupied, no US units in FoF | Unoccupied, in communication, US units within 3 hexes | Tank actions (start Turn 7) |
|---|---|---|---|---|
| Red square | Fire | No Action | No Action | — |
| Olive oval | Fire; Extra Armor Hit | No Action | No Action | Fire or Advance |
| M | MG Fire: Steady Fire FoF becomes Intense Fire FoF | Mortar Fire: Hit US units with target symbol within 3 hexes | Muster: Place reserve unit & 1 depth marker in position; if US in FoF, conduct fire | Multiple Fire: If US units still in FoF, fire again as separate action |
| Star | Fire: Hit Hero/HW/HQ in that order first | No Action | No Action | Fire or Advance: Hit Hero/HW/HQ in that order |
Game Turns 7–48
| Fire card action | Occupied, US units in FoF | Occupied, no US units in FoF | Unoccupied, in communication, US units within 3 hexes | Tank actions (start Turn 7) |
|---|---|---|---|---|
| A (start GT 7) | Assault: Conduct Fire, then move to conduct CC | Artillery: See 13.10 | Ambush: Disrupt 1 US unit within 3 hexes; use target symbol | Double Advance or Fire |
| I (start GT 22) | Fire | No Action | Infiltrate: Place 1 unit from reserve into any unoccupied hex within 3 hexes not in communication | Fire or Advance |
Starting Game Turn 49
| Fire card action | Occupied, US units in FoF | Occupied, no US units in FoF | Unoccupied, in communication, US units within 3 hexes | Tank actions (start Turn 7) |
|---|---|---|---|---|
| A | Assault: Conduct Fire, then move to conduct CC | Artillery | No Action | Double Advance or Fire |
| I | Fire | Redeploy: Move 1 unit closer to empty position & Fire if US in FoF | Reinforce: Place Reserve unit with depth marker, No Fire | Fire or Advance |
End of rulebook text as printed (page 48).