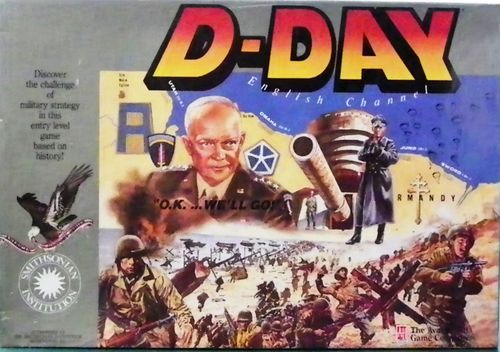
D-Day (1991)
D-Day (1991) Rulebook
Table of Contents
Table of Contents
- §1 Components
- §2 Optional rules
- §3 Setting up
- §4 Turn sequence
- §5 Zone of Control
- §6 Stacking and headquarter holding boxes
- §7 Control
- §8 Weather
- §9 Move points
- §10 Reinforcement phase
- §11 Replacement phase
- §12 Port transfer phase
- §13 Invasion phase
- §14 Movement phase
- §15 Air unit reaction
- §16 Strategic air missions
- §17 Combat phase
- §18 Supply phase
- §19 Scenarios
§1 Components
The game consists of
- A board with a map of western Europe.
- 62 and 68 counters representing the Allied and German units, respectively, involved in the conflict.
- A marker for each faction to keep track of available resources.
- Three common markers for game dynamics.
- Two sets of each two Orders of Battle (OOB) for each scenario. These show which units are available to each faction at what point in time, during the game.
- These rules.
In addition, each player should have a 10-sided dice to resolve combats.
§1.1 The board
The map on the board shows the southern part of the British isles, mid-western Europe, and a small bit of North Africa. Superimposed on the map are hexagon fields (hexes) meant to capture movement of troops. Each hex is labelled with grid coordinates.
Each hex has an associated terrain, as summarised in Table 1. Natural terrain are
Table 1: Terrain Effects Chart (TEC). Defence (DF) and Attack (AF) combat factor modifiers depend on hex occupied by defender. Modifiers are per unit and are cumulative. In the printed chart the DF and AF cells are split into unit-type icon columns; the values are reproduced here in printed left-to-right order, separated by "/". A dash "–" is a printed entry meaning no modifier.
| Terrain | MF | DF | AF |
|---|---|---|---|
| Clear | 1 (2§) | – | – |
| Swamp | 2 | – | – / −1 |
| Woods | 2 | +1 / – | – / −1 |
| Mountains | 2 | +2 / – | −1 |
| City | 1 | +1 / – | −1 |
| Fortified city‡ | 1 | +4 / – | −1 |
| Fortified‡ | – |
† MF cost for ground units. River crossing +1 MF in addition to other terrain cost. Air units: 1 MF for all terrain, including sea hexes. ‡ DF modifier for German defenders only, treat fortified city as city for Allied defenders. § On bad weather turns if the optional rule Weather is in use. ¶ Allied invasions only. Air units may use sea hexes for transit. * 1944 scenario. ** 1943 scenario, and only if all attackers are invading.
- Clear: Mostly open terrain (fields, roads, small forests).
- Woods: Dense vegetation, such as forests. Manoeuvring in these areas is limited, and therefore provides some cover for defending troops.
- Mountains: Regions of higher elevation and limited manoeuvrability. These provide defensive advantages.
- Marsh: Swamps or river deltas. Manoeuvring through these areas is difficult for ground units.
- Coastal: Hexes that are partial land, partial sea, are coastal hexes. Some of these are possible invasion points for the Allied faction.
- Sea: These hexes can only be navigated by ships or planes. In this conflict, the Allied forces had naval supremacy and only the Allied faction may navigate the waters by ships, and only as means of transporting troops to and fro the European continent.
Some sea hexes has a white number and white arrows in them. These are possible starting points for Allied invasions. Allied units that start an invasion can land on the coastal hexes pointed to by the arrows.
- Rivers: Another natural feature of the map are the river hex-sides. These represent major in-land waterways which limits manoeuvrability. Establishing a bridge-head by an attacking force is a major undertaking, and rivers therefore provide additional defensive advantages.
Non-natural features of the map are
- Cities: These are marked with a circle and the name of the city printed next to it. Attacking a city is a complicated manoeuvre and cities therefore provide a defensive advantage.
Some coastal cities has a port installation attached to it. Port cities controlled by the Allied faction play an important role for bringing Allied troops on to the continent.
Some cities have a different colour and a number printed in them. These cities are supply points (§18) for their respective factions. Note that Paris (G13) is a possible supply point for both factions.
- Fortified cities: Just like regular cities, these are marked with a filled circle, and an additional fortification ring. The fortifications are only usable by the German faction and provides an enhanced defensive advantage to defending German units.
- Fortifications: These hexes represent the "west wall" built by the Germans. These fortified positions provide the German (and only the German) units with a strong defensive stance.
Also on the board is the turn track. This, together with the game turn counter keeps track of time throughout the game.
At the top and bottom of the board are nine holding boxes, one for each army HQs (arhqs) of the German and Allied factions, respectively. These are used to hold ground and air units which are currently attached to an arhq. While a unit is attach to an arhq it moves together with the HQ, and defends against attacks against that HQ.
Players may decide to stack units with their arhqs rather than keeping them in the corresponding holding boxes. Note, however, that this can result in stacking quite a lot of chits in the same hex, which may be a little cumbersome.
If the optional rule on national integrity is in use, there are some restrictions on which units can be placed in an armies holding box.
§1.2 The units
The vast majority of counters in the game represent various units, and most of these are ground units, identified by a rectangular frame on the counters. Other counters represent aerial units, with a curved frame, and equipment which has a circular frame.
The counters are colour coded according to the nationality or command structure to which they belong. The Allied colours are
- Combined Allied: These units are combinations of various Allied units into higher echelon units, for example the 1st Allied airborne army.
- British: Units from Great Britain and the Commonwealth.
- Canadian: For some optional rules these are considered part of the British Commonwealth structure.
- Free French units.
- Units from the United States of America.
The German unit colours are
- German Heer (army) and attached Luftwaffe (air force) units.
- German Waffen Schutzstaffel (armed protective corps).
§1.2.1 Ground units
Figure 1 shows the elements of ground units. These are
-
Turn: The turn from which the unit is available. If no turn is printed on the counter, it means that the unit is part of the initial set-up.
-
Set up: This field specifies where on the map the unit appears. This can be a specific hex coordinate (like 'A14' as shown to the top right), or a letter representing possible locations. For the Allied faction, these are
- F: Any controlled (§7) city in France.
- P: Any controlled (§7) coastal port city on the continent.
- G (optional): If the Garrisons optional rule is used, then these units may be used to garrison a hex (§14.9).
For the German faction, these letters are
- M: Any controlled (§7) city in the Axis main-land (Germany, Austria, and Czechoslovakia).
- O: Any controlled (§7) hex in the German occupied territories (France, Belgium, and Netherlands).
- C: Any controlled (§7) coastal hex in the German occupied territories (France, Belgium, and Netherlands).
-
CF: Combat factor. This represents the units fighting ability, both offensive and defensive. The higher the number the stronger the unit.
The face-up side of a unit shows its full-strength status, while the face-down side shows its reduced-strength status. The reduced-strength side is identified by a lighter background. A unit is flipped to its reduced-strength side as a consequence of a step loss (§17.4). A reduced-strength unit operates as normal, but possibly with a reduced CF.
§1.2.2 Air units
Figure 2 shows the elements of air units. These are the same as those of ground units explained above and shown in Figure 1. There are two types of air units
- Tactical wings: These represent units typically attached to some command structure such as army HQ, and consist of fighter and tactical air crafts. These units provide Close Air Support (CAS) to ground units, and are identified by an 'F' above the fixed wing symbol.
- Strategic wings (optional): Bomber units are strategic units that the Allied faction can use to weaken German ground units. They consist mainly of heavy bomber planes, and are identified by a 'B' above the fixed wing symbol, as well as '*' for the Combat Factor (CF). Bomber units are based in London and will always return there after flying a mission.
§1.2.3 Other units
In Figure 3 is shown a 'Mulberry' unit. These represent the floating docks that the Allied powers built, based on a design by Winston Churchill, for the landing in Normandy. These units form naval supply points (§18) for the Allied faction if the optional rule is used.
§1.3 Markers
There are five markers in the game, as shown in Figure 4. These are
- Game turn: Use this marker on the turn track on the board to keep track of the time in the game. Flip the counter to the faction which is in turn at any given point (§4).
- Moves: This marker, one for each faction, is used on the moves track on the OOBs of each faction, to keep track of the number of moves available to the factions.
- Out-of-supply (OOS): This is used to mark units as out-of-supply (§18). Place the marker on top of units that are OOS.
- Weather (optional): A marker to indicate the current weather conditions. The white side indicates clear weather, while the brown side indicate worse conditions. Place this marker somewhere on the board, if the optional weather rule is used, for example next to the turn track.
- Initiative (optional): Use this marker to keep track of who has the initiative, by flipping it to the appropriate side. Place the marker, if the optional rule is used, on the OOB of the faction that currently holds the initiative.
§1.4 Orders of Battle
There are two sets of Order of Battle (OOB), one for each of the two scenarios. Each set consist of an OOB for the Allied and German faction.
On the OOBs are printed the all the units used in a scenario ordered by turn and location of appearance of each unit. The 'At Start' units start the game on the board, while other units become available at later stages.
Furthermore, there is a track to keep of each factions move points. These points reflect the resources that each faction has to perform manoeuvres, such as moving units or invasions.
§1.5 Dice
In addition to the materials provided, at least one, preferably two, 10-sided dice are needed. These are used to resolve various situations in the game, such as battles and if the optional weather rule is used, to determine the weather in a given turn.
Many available 10-sided dice are numbered from 0 to 9. In that case, a roll of '0' must be read as a '10'. That is, random rolls of a dice takes values from 1 to 10.
§2 Optional rules
There are 16 optional rules that the factions may agree to use. The optional rules are, sorted according to main effect,
- Desperate measures: These optional rules adds a bit more randomness to the rules, and provide a possible way out of a predicament.
- Initiative: Allows the faction that holds the initiative to re-roll one combat, after which the initiative passes on to the other faction.
- Fight on: The loosing side in a combat may decide to fight on.
- Moves: These optional rules changes how moves are acquired and spent.
- Alternative move points: The number of move points acquired depend on controlled hexes and units on the continent.
- Replacements: Move points can used to replace step losses or eliminated units.
- Weather: This optional rule introduces the element of weather into the game.
- Air units: These optional rules modifies the use of air units, including expanding with strategic bombing.
- Air unit reaction: A faction may try to assists its defending ground units with available tactical air units.
- Allied strategic bombing: The two Allied strategic air units may be used to weaken German ground units via carpet bombing missions.
- Close air support: Tactical air units can only assist ground combat, or perform air-to-air combat.
This optional rules will be described in more details together with the basic rules. The optional rules are be clearly marked in the following text.
§3 Setting up
The two factions should decide the scenario (§19), and on the optional rules (§2) to be used, if any. This may effect how the set-up is done.
Both factions then place all units on their respective OOB, and place the move point marker at the starting value according to the chosen scenario (§19). Note that some units have duplicate counters, differing in the setup and turn information (§1.2.1). This is because these units have different order and place of appearance in the different scenarios. The factions should therefore follow the OOB, and place the counters accordingly.
The German faction then places the 'At-start' units according to the OOB, and respecting the stacking limitations (§6).
- Ground units with a specific hex coordinate specified must be placed at that hex.
- Units with the M start location must be placed in any city in the Axis main-land (Germany, Austria, Czechoslovakia).
- Units with the O start location must be placed in any hex in the German occupied territories (France, Belgium, Netherlands).
- Units with the C start location must be placed in a coastal hex in the occupied territories (France, Belgium, Netherlands, not Germany). At most one unit may be placed in any given coastal hex in the occupied territories.
Simultaneously, the Allied faction places the 'At-start' units in their specified set-up hexes (either Southampton (A14), Dover (C12), or London (B12)).
- Allied strategic bombing: The Allied strategic units need only be placed if the strategic bombing optional rule is in force.
- Mulberry harbours: The Allied Mulberry units need only be placed if the Mulberry optional rule is in force.
- Initiative: If the Initiative optional rule is in force, place the initiative marker OOB that has a slot for it, depending on the selected scenario (§19).
- Weather: If the weather optional rule is used, place the weather marker on the board with the clear weather side up.
Finally, place the 'game turn' marker on the first slot in the turn track on the board. Once this is done, the game starts in earnest.
§4 Turn sequence
The game runs over 12 turns, irrespective of the scenario chosen. Each turn corresponds to a month, and is sub-divided into an Allied and German turn. Since the Allied faction is the aggressor in this conflict, the Allied faction goes first.
Each faction's turn is further sub-divided into phases, as shown in Table 2. Some of the phases depends on the optional rules used.
Table 2: Turn sequence. The Allied faction goes first and goes through each of the Allied phases in the given order. Then the German faction goes through the German phases. Once both faction has completed their turn, the turn is over and the game progress to the next turn. Phases marked * are optional rules.
Allied turn
-
- Roll for weather
- Acquire move points
- Reinforcements
-
- Replacements
-
- Port transfers
- Invasions
- Movement
-
- German air reactions
-
- Strategic air missions
- Combat
- Supply
German turn
- Acquire move points
- Reinforcements
-
- Replacements
- Movement
-
- Allied air reactions
- Combat
- Supply
The following section, after a few definitions, expands upon these phases in detail.
§5 Zone of Control
An important concept is Zone of Control (ZOC). All supplied (§18) ground units, except HQs, excerpt a zone of control in the six land hexes surrounding the unit. ZOC does not extend over coasts into other land hexes. This is illustrated in Figure 5.
Figure 5: Zone of Control. A unit occupying E9 excerpts ZOC into E8, F8, F9, and E10, but not D8 nor D9, since ZOC does not extend into sea hexes or over coast lines. (The unit symbol in the printed caption is not legible in the source file.)
This zone reflects a units ability to scout and fire into its surroundings. ZOC effects how units may manoeuvre in the board (§14.5) and which enemy units may be attacked (§17). Enemy ZOC is sometimes abbreviated EZOC.
- HQ units do not excerpt ZOC into neighbouring hexes, but only in the hex it occupies. Regular ground units (corps or divisions) in a HQ's box (§6) do, however, excerpt normal ZOC.
- Air units do not excerpt ZOC into neighbouring hexes, except into an attacked hex during a combat phase.
A unit in an enemy units ZOC is said to be engaged with the enemy. To disengage the enemy a unit must be moved completely out of enemy ZOC. A unit cannot reengage the enemy in the same movement phase (see also §14).
§6 Stacking and headquarter holding boxes
No more than two friendly units, i.e., units of the same faction, may occupy a hex at the end of the movement (§14) and combat (§17) phases, and only if at least one of the units is an army headquarter unit (arhq).
Friendly units may temporarily violate stacking limitations during the movement and combat phases when moving through a friendly stack of units.
Units of opposing sides may never occupy the same hex, even temporarily.
If, at the end of any movement or combat phases, including opponents movement or combat phases, the stacking limitations are not observed, the controlling faction must eliminate (§17.5) units until the requirements are met. The controlling faction may freely choose which units to eliminate.
- Allied strategic bombing: Allied strategic air units do not count toward the stacking limitations. Also, since carpet bombing (§16) is resolved in a German occupied hex, it is permissible to place an Allied strategic air unit on top of a stack of German units.
- Mulberry harbours: Allied Mulberry harbour installation units do not count toward stacking limitations. A German unit may enter a hex occupied by a Mulberry unit, unless otherwise occupied by other Allied units, in which case the Mulberry unit is immediately eliminated (§17.5).
- Anti aircraft fire: If this optional rule is in effect, then an air unit may move through a hex occupied by enemy ground units only.
A friendly ground or air unit that occupies a hex together with an army headquarter unit (arhq) is immediately placed in that arhq holding box on the board. Ground units are corps, division, army group, or theatre size units (§1.2.1), and regular air units are tactical air units (§1.2.2).
There is no limit on how many units may be held in an arhq's holding box. Other army HQ units can not be placed in a holding box, but larger, army group and theatre, units may.
The factions may agree to keep regular ground and air units on the board, stacked in the hex occupied arhq. Note, though, that this can result in a bit more bookkeeping and rather high stacks of units. Stacking limitations must of course be observed nonetheless.
- Allied strategic bombing: Allied strategic air units cannot be placed in an arhq holding box. Once an Allied strategic air unit has performed its mission, it returns to London (B12).
- National integrity: With this optional rule, the Allied faction must pay attention to the nationality of units placed in arhq holding boxes. The limitations are
- For this rule, British and Canadian units are considered part of the Commonwealth, and of the same nation.
- The Allied 1st airborne arhq holding box is considered a US holding box.
- Tactical air units may only be placed in holding boxes of the same nationality as the air unit. Thus, British air units may only be placed in British or Canadian holding boxes, the French air unit in the French holding box, and US air units in the US holding boxes.
- An arhq holding box cannot hold more foreign regular ground units than it hold regular ground units of its own nationality. Thus, a Commonwealth holding box that holds 3 British or Canadian ground units can at most hold a total of 3 US or French regular ground units.
If, by the end of the movement or combat phases, the regular stacking limitations and nationality requirements cannot be met, then the Allied faction is forced to eliminate units (§17.5) until both of these rules are observed.
§7 Control
A hex, of any terrain, is controlled by the faction that last had a unit in or passing through it. Control of hexes, in particular coastal ports and supply points matters for supply (§18) and, if the optional Alternative move points rule is in force, acquired move points (§9).
§8 Weather
This section only applies if the Weather optional rule is in effect.
The Allied faction rolls a dice at the start of the turn and cross indexes the die roll result with the turn number in the weather chart (Table 3). A result of a good-weather icon means good weather and conditions are normal. A result of a bad-weather icon means bad weather and several aspects are affected.
Table 3: Weather chart. G = good weather, meaning normal conditions. B = bad weather, affects movement, airborne drops, strategic bombing, supply from Mulberry harbours, and limited close air support.
| Turn / Month | Die roll 1 | 2-3 | 4-7 | 8 | 9 | 10 |
|---|---|---|---|---|---|---|
| 1-4 Jun-Sep | G | G | G | G | G | B |
| 5 Oct | G | G | B | B | B | B |
| 6 Nov | G | G | B | B | B | B |
| 7-9 Dec-Feb | G | B | B |
- It costs 2 MF for a ground unit to enter a clear hex.
- Airborne drops (optional): Allied Airborne drops are not possible (§14.8).
- Allied strategic bombing (optional): Allied Strategic air missions are not possible (§16).
- Tactical CAS missions are limited. A faction must roll a die for each air unit participating in an attack. On a roll of 1 through 6 the CAS mission is accomplished and the air support gained. On a roll 7 to 10, no air support is available for that combat (§17).
- Mulberry harbours (optional): Mulberry harbours does not provide move points (§9) for the Allied faction.
§9 Move points
Move points (MP) reflect the resources, e.g., fuel, available to a faction for manoeuvring its troops. MPs are expended during the cause of game for various purposes as summarised in the move point chart (Table 4).
A faction must have enough MPs to perform a manoeuvre. MPs are accumulated over turns, up to a maximum of 27 MP. MPs cannot be transferred between faction, nor borrowed from the future. A factions MP cannot fall below 0.
When one or more MPs are used the number of available MPs must be adjusted on the OOB of the faction immediately. Once expended, MPs cannot be recovered by 'un-doing' the manoeuvre.
At the start of each factions turn, that faction receives a number of move points as specified in the chosen scenario (§19) and summarised in the top of Table 5.
Alternative move points (optional): This optional rule replaces the fixed MPs received by a faction by a number of MPs depending on the factions current standing in the game, as summarised in the bottom of Table 5. These are
- 1 MP for each army group (XXXX) or theatre (XXXXX) headquarter unit the faction has on the continent. That is, such units in Britain or at the Mediterranean base does not yield an MP.
- For each controlled supply point belonging to the faction (marked with the Allied and German "controlled" icons respectively, see Table 5), the number of MPs printed in the supply point. For example, if the Allied faction controls Amsterdam (E9), then that faction will receive 4 MP. The German faction receives no MPs for controlling Amsterdam. Conversely, the Allied faction receives no MPs for controlling Essen (G7), but the German faction receives 2 MP for it.
- Note that Paris (G13) is a supply point for whichever faction controls it.
- If the Mulberry harbours optional rule is used, then the Allied faction receives 1 MP per Mulberry harbour unit on the continent. That is, the Mulberry unit must have successfully invaded on the continent. If the Weather optional rule is also in force, then on turns the Allied faction receives no MPs from Mulberry units on the continent.
- The German faction receives 1 MP per Allied strategic air mission (§16) flown during the Allied faction turn. Thus, if the Allied faction utilised both strategic bomber units in a turn, then the German player will receive 2 MP that turn, irrespective of the outcome of the strategic air missions. These German MPs can be recorded when the strategic bombing missions are resolved.
When the Allied faction decides to allocate strategic bombers to provide ground attack support, it takes away bombers from destroying German infrastructure, which in turns allows the German faction to produce more resources to be spent on the battle field.
The maximum MPs the Allied faction may receive in a single turn according to this optional rule is 20 MP. For the German faction, the maximum MPs in a turn is 11 MP.
Table 4: MP costs. Y = all units expend MPs individually. N = units in arhq holding boxes do not expend MPs; the arhq (HQ) unit does. The invasion MP cost ("×2") is multiplied on the invasion hex cost. Rows marked * are optional rules.
| Manoeuvre | MP | Individual |
|---|---|---|
| Move a unit | 1 | N |
| Port transfer | 1 | Y |
| Invasion | ×2 (see note) | Y |
| Replace step loss* | 1 | Y |
| Replace a headquarter unit* | 2 | Y |
| Replace a corps ground unit* | 3 | Y |
| Replace an air unit* | 4 | Y |
| Air unit reaction* | 1 | Y |
| Pursuit* |
Table 5: MPs each faction receives per turn. The top half shows the scenario specified MP/turn. The bottom half is used if the Alternative move points optional rule is in force. Columns: Allied (shield icon) and German (cross icon). Rows marked * depend on other optional rules being used. † If the Mulberry harbours and Weather optional rules are in force, then no MPs are received from Mulberry harbours during bad-weather turns.
| Fixed | Allied | German |
|---|---|---|
| 1943 scenario | 11 | 8 |
| 1944 scenario | 13 | 7 |
| Per turn (Alternative move points) | Allied | German |
|---|---|---|
| Army group (XXXX) on continent | 1 | 1 |
| Theatre (XXXXX) on continent | 1 | 1 |
| Controlled supply points (Allied) | x | – |
| Controlled supply points (German) | – | x |
| Mulberry harbour on continent *† | 1 | – |
| Allied strategic air mission * | – | 1 |
§10 Reinforcement phase
In the reinforcement phase, the faction consults its OOB for the scenario played if any reinforcements arrive that turn. The faction may then place the reinforcement units at their designated locations (see §3 for explanations).
Reinforcements must be placed according to the set-up requirements given in the OOB. If the valid reinforcement places are not controlled by the faction, then that reinforcement unit may not arrive at that turn.
Reinforcements can be brought in from the turn of availability or any later turn. Reinforcements cannot be brought in earlier than on their turn of appearance.
Once placed, reinforcement units can move, do invasions or port transfers (Allied faction only) as any other unit.
§11 Replacement phase
This section describes the optional Replacements rule. A faction may choose to use MPs to restore units to full strength or replace previously eliminated units.
-
By expending 1 MP, one reduced strength, in-supply (§18) unit may be restored to full strength. That is, the unit is flipped from its face-down side to its face-up side.
-
Previously eliminated units, which should be placed face-down in its slot on the OOB, can be restored by spending MPs.
- 2 MP to replace a headquarter unit
- 3 MP to replace a corps ground unit
- 4 MP to replace an air unit
The unit is flipped to its face-up side on the OOB, and is available as a regular reinforcement unit (§10) on the following turn. Division units cannot be taken as replacements.
German replacements always follow the M placement, while Allied replacements follow the printed placement.
§12 Port transfer phase
Port transfers are only available to the Allied faction. A ground unit in an Allied controlled port city, whether on the continent, Britain, or the Mediterranean base, may transfer to another Allied controlled port city in the port transfer phase. Units can be transported any distance by port transfer.
Each unit using port transfer costs 1 MP. That is, an arhq unit with regular ground or air units in its holding box costs 1 MP for the headquarter unit and 1 MP per unit in its holding box.
The Allied faction may of course decide to only transfer the headquarter unit, leaving the regular ground or air units behind.
Stacking limitations (§6) need not be observed. That is, more than two regular ground or air units may be in the same hex as a consequence of a port transfer, for example if a headquarter unit was transferred without the units in its holding box. An example is shown in Figure 6.
Units that used port transfer may move normally in the following movement phase (§14) expending MPs as required.
-
Allied strategic bombing and Mulberry harbours (optional): Allied strategic air units and Mulberry harbour equipment cannot be transferred using port transfer.
-
Mulberry harbours (optional): A Mulberry unit on a continental coastal hex functions as a port city for port transfers. That is, the floating docks can be a destination or source of a port transfer of units.
Figure 6: Port transfer. The Allied faction transfers units from Southampton (A14) to Dieppe (E14), leaving the 3rd arhq behind. This costs 1 MP per unit, so the Allied faction expends a total of 2 MP on this port transfer. Note that the two ground units technically violate stacking limitations, which, however, are not in force at this point. The Allied faction should take care to observe the stacking limitations (§6) before the end of the following movement phase (§14), or will have to eliminate (§17.5) one of the ground units.
§13 Invasion phase
Invasions are only available to the Allied faction. Any unit in a port city in either Britain or at the Mediterranean base, may invade on the continent. However, units in Britain (A14, B12, or C12) may only invade in the North Sea, English Channel, or Bay of Biscay, and units at the Mediterranean base (T19) may only invade in the Mediterranean Sea.
Invading ground units may travel any distance, within the above limitations, from its starting port to an invasion hex. These hexes are sea hexes with a white number and arrow(s) in it. Invading air units may only travel their regular allowed movement (5 hexes) from their starting port city to the invasion hex.
To perform this manoeuvre the number printed in the invasion hex times 2 MP must be expended per invading unit. That is, just as for port transfers (§12) a headquarter unit that invades with units in its holding box must spend the appropriate amount of MPs for it self and for any units in its holding box.
Just like for port transfers, the Allied faction may decide to leave some units behind.
The invading units are placed in the invasion hex without any stacking limitations (§6). If the coastal hex is occupied by German units, then the invading Allied units must conduct combat against these in the following combat phase (§17). If there are no defending German units in the coastal hex, then the invading Allied units may freely move into the coastal hex in the following combat phase (§17).
Any invading unit that cannot be moved into a coastal hex at the end of the combat phase are automatically eliminated (§17.5).
Figure 7 shows an example of an invasion in June 1944 (the printed example's combat-by-combat factor arithmetic is set in the map image and is not reproduced here; see the figure in the source PDF).
- Allied strategic bombing (optional): Allied strategic air units cannot perform an invasion, but may support it through regular strategic air missions (§16).
- Mulberry harbours (optional): Mulberry harbour equipment units may invade on the continent as any other unit by expending 2 MP times the invasion hex cost. Mulberry units cannot invade into a port city hex. If the Allied invasion into a non-port city coastal hex was successful, then the Mulberry unit must be placed in that coastal hex. No more than one Mulberry unit may be placed in given coastal hex. If the invasion was a failure, then the Mulberry unit is eliminated (§17.5) like any other invading unit.
The Mulberry unit cannot move once placed in a coastal hex, nor do the Mulberry unit have any offensive or defensive capabilities. Should a German unit move into or through the coastal hex occupied by the Mulberry unit, then the Mulberry unit is immediately eliminated (§17.5).
Once placed, the Mulberry unit works as a port city for port transfers (§12) but does not provide CF modifiers to Allied or German units.
If the Alternative move points optional rule is in effect, then a successfully placed Mulberry unit functions as a supply point for the Allied faction (§9).
§14 Movement phase
In a faction's movement phase, the faction may move as many or as few units, in any order, as it pleases. A unit is moved from hex to adjacent hex, in any direction, within the limitations described below.
Units of opposing sides may never occupy the same hex, however temporarily.
- Anti aircraft fire: If this optional rule is in effect, there are some exceptions to this rule. See §14.5.
Stacking limitations (§6) must be observed by the end of the movement phase. During the movement phase, however, they may be violated. If the stacking limitations are violated at the end of the movement phase, then the controlling faction must eliminate units (§17.5) until the limitations are observed.
- National integrity: With the Allied National integrity optional rule in effect, there are limitations on which units can be placed in arhqs holding boxes (§6). These limitations work as additional stacking limitations for the Allied faction. Thus, if these limitations cannot be met at the end of the movement phase, then the Allied faction must eliminate units (§17.5) until those limitations are met.
Out-of-supply (OOS) units (§18) cannot expend MPs and can therefore not move. The following therefore only applies to units that are in-supply.
§14.1 Movement allowance
Each unit has a movement factor (MF, §1.2.1). A unit may spend up to and including this number of movement factors during a single turn. Movement factors cannot be transferred between units nor can they be saved for later turns. If a unit does not have enough MF to enter a hex, it cannot enter that hex.
A unit can never be moved more than its MF factor allows, even if in an arhq's holding box. Units with 0 MF cannot move on its own volition (even if in an arhq's holding box), or advance after combat (§17.6), but can attack adjacent enemy units and can be forced to retreat (§17.3).
The cost of moving an air unit into a hex is always 1 MF. An air unit may move through sea hexes but may not end its movement phase in such hex.
The cost of moving a ground unit from one hex to another depends on the terrain of the entered hexes, and is summarised in Table 1.
- Clear: It costs 1 MF for a ground unit to enter a clear hex.
- Weather: If the optional rule on weather is in effect, and the weather is bad, then it costs 2 MF to enter a clear hex.
- Marsh, woods, & mountains: It costs 2 MF to enter a marsh, woods, or mountains hex.
- City, & fortified city: It cost 1 MF to enter a city or fortified city hex.
- River crossing: To cross a river hex-side costs an additional 1 MF to the regular cost of the entered hex.
- Supply, coastal, & port city: No additional MF cost other than the terrain of the hex in which the supply point, coast, or port city is in.
- Sea: A ground unit may not enter a sea hex during its movement phase. Sea hexes are off-limits to ground units during the movement phase, and air units cannot end their movement phase in them. However, for the Allied faction, during an invasion, Allied ground and air units can occupy a sea invasion hex at the end of the invasion phase (§13) and thus also at the end of the following movement phase.
Figure 8 shows an example of terrain cost during movement.
§14.2 Strategic movement
A unit that starts its turn not in enemy ZOC (§5) and does not enter enemy ZOC during its movement may move twice its normal movement allowance. That is, its MF is doubled. Figure 8 shows an example strategic movement.
A unit that does not perform strategic movement, i.e., ends its movement phase in enemy ZOC, is said to perform combat movement.
§14.3 Cost of movement
To move a unit costs 1 MP. This cost must be recorded on the factions OOB immediately.
This cost covers all units that move together with an arhq unit at any point of the movement phase. Thus, if a unit is picked up by an arhq unit (§14.4), moved with that HQ unit, and then continues movement on its own, only one MP is spent in total.
§14.4 Army headquarter movement
As described in §6 any friendly regular (non-HQ) unit that moves into a hex occupied by an arhq is immediately transferred to that arhq's holding box. If two arhq units are present in the hex, then the controlling faction may choose which of the two corresponding holding boxes the unit is placed in.
An arhq unit that moves through a hex occupied by a friendly regular unit may pick up that unit and place it in its holding box. If an arhq unit ends its movement phase in a hex with a friendly regular unit, it automatically picks up that unit and it is placed in the arhq holding box immediately.
Units attached to an arhq (in its holding box) move together with the arhq and only one MP is spent for all units. A regular unit may be moved out of an arhq (detach) if it has enough MF to do so. If the arhq previously moved, and the faction has thus spent 1 MP on that movement, then no MPs are spent on the detached units movement.
An arhq that moves may detach units as it moves, and then move on. Figure 9 shows an example of HQ movement.
Unit can never move more than their MF allows, even if attached to an arhq. Thus, if an arhq holds a regular infantry unit (2 MF) but wish to move further with other units, it can be forced to detach such a unit first.
Since a unit may never expend more MFs than it has, and divisional units has 0 MF, it means that divisional units cannot move even if with an arhq. An arhq with a division in its holding box must detach that unit before it can move on.
The 1 MP cost for all attached units only applies to regular movement on the continent. MP cost during port transfers (§12) and invasions (§13) are always per individual unit. If the Extra effort optional rule is in effect (§14.6), then MP cost for the extra effort movement is also individual.
Figure 8: Example of movement. The DE/39 A unit is moved in two ways. Both tracks utilise strategic movement which doubles the units MF to 6 MF. The left path moves first to I7 and then H7 (both clear, 1 MF each). Then the unit crosses over a river (+1 MF) and into a woods hex (2 MF), for a total cost of 5 MF. The right path first crosses a river (+1 MF) into a clear hex (1 MF). The unit then moves via the clear hex K8 (1 MF) and then into a woods hex (2 MF), and then another clear hex (1 MF). The total cost is 6 MF.
Figure 9: Example of HQ movement. Shaded units show intermittent placements. The US/7 arhq with US/6 MI, US/15 MI, and US/12 FW in its holding box expends 1 MP to move. It first moves to K11 (1 MF) and US/15 MI detach here. The arhq then moves to K10 (1 MF) and picks up US/19 MI located there. The arhq moves to L9 (1 MF) where it stops movement. However, the US/19 MI picked up in K10 moves on to L8 across a river (+1 MF) and into mountains (2 MF). Since the US/19 MI has expended 1 MF while moving with the arhq, it has spent a total of 4 MF. However, since US/19 MI moved with the arhq, for which 1 MP was already spent, no MPs need to be spent for the individual movement of US/19 MI.
§14.5 Enemy zone of control
A unit must end its movement when it enters an enemy units' ZOC (§5). This applies to both ground and air units.
- Anti aircraft fire: If this optional rule applies, then air unit movement is restricted differently.
- An air unit (tactical or strategic) cannot enter a hex occupied by an enemy air unit. Allied strategic bombing: This also applies when moving strategic air units.
- An air unit may pass through a hex occupied by enemy ground units (and only ground units), but cannot end its movement in such a hex. Allied strategic bombing: A strategic air unit must end its movement phase in a hex occupied by German ground units (and only ground units) to perform its strategic bombing mission (§16).
- A ground unit may move into or through a hex occupied only by enemy air units. In that case, all enemy air units in the hex are eliminated immediately (§17.5). This applies only to tactical air units, as the Allied strategic air units are returned to London after its bombing mission (§16).
- If there are any enemy ground units in a hex, then it is not possible for a ground unit to move into that hex.
A unit that starts its movement phase in enemy ZOC may leave the enemy ZOC only if it does not enter enemy ZOC again during its movement phase. That is, a unit engaged with the enemy may disengage if it does not reengage the enemy in the same movement phase. This also means that a unit cannot move from one hex in enemy ZOC to another hex also in enemy ZOC, irrespective of which enemy units excerpt the ZOC or whether the hex contains friendly units. Figure 10 shows an example of the effect of enemy ZOC on movement.
Figure 10: Movement and enemy ZOC. BR/30 MI, in the ZOC of DE/67 I, can only move to F10 or G11, since all other hexes are in enemy ZOC. From those two hexes it may move on, but not enter enemy ZOC. Note that the presence of BR/12 MI in H10 does not invalidate the ZOC of DE/66 I.
§14.6 Extra effort
This describes an optional rule.
Mobile ground units, that is HQ, armoured, and motorised infantry units, may, at the cost of 1 MP gain an additional 3 MF after performing normal movement (strategic or combat, §14.2), with the following limitations.
- The additional 3 MF must be used immediately.
- The extra 3 MF cannot be used for strategic movement (§14.2), even if the unit does not enter enemy ZOC. That is, the additional 3 MF are never doubled.
- This can only be done during the units normal movement phase. If the Pursuit optional rule (§17.6.1) is used, then one 1 MP may be used to gain an additional 3 MP during pursuit movement.
- The 1 MP cost is per individual unit. That is, a regular unit in an arhq holding box must also spend 1 MP to use this extra effort.
§14.7 Movement of Allied strategic air units
This describes the optional Allied strategic bombing rule.
During the Allied movement phase, the Allied faction may move one or more of its strategic air units from London (B12) up to 15 hexes (14 intervening hexes) onto a German unit (or stack of units) to allocate it for combat support, with the following stipulations:
- Each hex traversed costs 1 MF, as with regular air unit movement.
- The strategic units cannot pass through nor end its movement in a hex occupied by the German LUFT air unit.
- The strategic units may pass through hexes occupied by German ground units.
- Regular ground units must be allocated to attack the target hex of the strategic bombing.
- No MPs are expend on this movement or attack.
- Weather. If the Weather rule is in effect, and the weather is bad, then no strategic bombing missions are possible.
The Allied faction must then point out which German corps unit in the target hex is being attacked. The Allied faction may choose to attack a single or two units with both strategic air units if so desired. The Allied faction should place the strategic air units on top of the attacked German unit (possibly in an arhq holding box).
§14.8 Allied airborne drops
This describes the optional Allied airborne drops rule.
Airborne drops are only available to the Allied faction, and only for US/18 ABI, BR/1 ABI, and AL 1AB arhq units (Figure 11).
- An in-supply (§18) Allied airborne unit (shown in Figure 11) that starts its movement phase in a city can be used for an airborne drop.
- 1 MP must be expended as per normal movement. If one or two of the airborne corps are in the AL/1AB arhq holding box, only 1 MP need to be spent for the airdrop of both the arhq and its contained units.
- Non-airborne units cannot be dropped with the AL/1AB arhq.
- The unit may be moved 5 hexes (4 intervening hexes) from its starting city, and may move through hexes occupied by German ground units only. The unit cannot be moved through a hex containing the German LUFT air unit.
- An airborne unit can be dropped multiple times during the game, but only once per turn.
- The unit cannot end its movement in a hex occupied by German units, but can end its movement in German ZOC (§5).
- The unit cannot end its movement in a mountain hex.
- The unit cannot move any further that turn (including Extra effort movement or further airborne drops).
- Weather. If the optional rule is in force, and the weather is bad then no airborne drops are possible.
Figure 7 shows an example of Allied airborne drops. US/18 ABI is at first in Southampton (A14) and dropped in D16, while BR/1 ABI started in Dover (C12) and is dropped in E16, five hexes away. (The source PDF uses the label "Figure 7" for both this airborne example and the invasion example in §13.)
§14.9 Garrisons
This describes the optional rule of Garrisons.
A full strength (§1.2.1) corps (icon) may detach a division (icon) as part of its movement.
- The corps unit must be full strength, i.e., face-up.
- A division unit must be available on the OOB. That is, the division unit has not previously been deployed (all Allied divisions start not deployed), eliminated, or because it was absorbed by corps (see below).
- Replacements. Note that the division unit are placed face-up on the OOB at start or when eliminated. The faction therefore does not need to spend MPs to rebuild the division unit for reinforcement as detailed in (§11).
- The corps unit expends 1 MF on the manoeuvre (but no MP).
- The division is placed in the hex where the corps performed the manoeuvre.
- The corps unit takes one step loss (§17.4) and is flipped to its face-down side.
- If the corps unit has more MF to spend it may do so.
Figure 12 shows an example of a corps detaching a division.
A reduced-strength corps may likewise absorb a division as part of its movement.
- The corps unit must be in the same hex as the division.
- The corps unit must be at reduced-strength, i.e., face-down.
- The division is removed from the map, and placed face-down (as if eliminated, §17.5) in its slot on the OOB.
- The corps unit is flipped to its full-strength (face-up) side (§1.2.1).
- If the corps unit has more MF to spend it may do so.
A corps unit can perform these manoeuvres during its movement phase, or, if the Pursuit optional rule is in use, during pursuit movement.
These manoeuvre represents a corps ability to detach a division to guard, or garrison, a particular important area. A garrison can then at some later stage be recombined into the corps.
Figure 12: Garrison. The corps unit (as shown) moves from H14 to Paris (G13), where it detaches a division DE/II ST, which had previously been eliminated, to garrison the city against conquest by FR/1 MI. This costs 1 MF. The unit takes a step loss (§17.4), and continues movement to G12 in its reduced state.
§14.10 Declaring attacks
Once a faction has moved all desired units, and has check for stacking limitations (§6 including possibly National integrity limitations), then the active faction must declare all attacks that the faction intends to perform in the following combat phase (§17).
§15 Air unit reaction
This section describes the optional Air unit reaction optional rule.
After the faction currently in turn has moved all units desired and has declared all attacks, then the opposing faction may declare Air unit reaction moves with the following considerations.
- A tactical air unit may move up to 5 hexes (4 intervening hexes) into a hex that is being attacked by the active faction.
- The tactical air unit must be in-supply (§18).
- The hex in which the tactical air unit starts must not be attacked itself.
- As many tactical air units as available may be used, given the above restrictions, and 1 MP must be spent immediately per reacting air unit.
- If the Allied strategic bombing optional rule is in effect, the German LUFT unit cannot react in a hex containing an Allied strategic air unit.
- If the Anti aircraft fire optional rule is used, then the tactical air unit cannot pass through hexes occupied by enemy air units (of any kind).
- One or more tactical air units reacting to a declared attack adds its CF to the total defensive CF when resolving the battle (§17.1).
§16 Strategic air missions
This describes the optional rule of Allied strategic air missions.
Any strategic bombing mission declared during the Allied movement phase must be resolved before the Allied combat phase.
The Allied faction has placed one or more strategic air units in a hex occupied by German ground units, and declared which specific German corps unit is the target of each strategic air attack.
As stipulated above (§14.7), the hex in which the strategic air attack is performed must be attacked by Allied ground forces in the following combat phase.
For each attack, the Allied faction rolls a 10-sided dice and consults the Strategic air mission chart (Table 6). Note that the result differs by the scenario chosen. The meaning of the results are as follows:
- NT: In the following combat phase, when resolving the attack against the hex, no terrain modifiers can be applied. Thus, if the strategic air unit attacks a German corps unit in a fortified city, and the result contains 'NT', then that one unit does not receive the +4 modifier. The attacking Allied ground units does suffer the -1 modifier for attacking into a city.
- D1: The attacked German corps unit take one step loss (§17.4). If this eliminates the unit, because it has no more steps to lose, then the German unit is eliminated immediately.
- NT+D1: Both of the above effects.
If both Allied strategic units attack the same German unit and the first attack eliminated that unit, then the second Allied strategic attack is wasted.
The Allied strategic air units are returned to London (B12) after resolving all strategic air missions.
- Alternative move points: If the Alternative move points optional rule is used, then the German faction receives one MP per strategic air mission flown by the Allied player in the German subsequent moves phase (§9). It may be beneficial to record this MP gain immediately after resolving a strategic air attack.
Table 6: Strategic air mission chart.
| Die roll | 1943 | 1944 |
|---|---|---|
| 1-4 | – | – |
| 5-6 | – | NT |
| 7-8 | NT | D1 |
| 9 | D1 | D1+NT |
| 10 | D1+NT | D1+NT |
NT: No terrain modifiers. D1: German step loss.
§17 Combat phase
Combat between units of opposing sides can take place between units that are in adjacent hexes. Another way to say that is that combat can happen when defending units, i.e., units belonging to the faction not in turn, are in the ZOC of attacking units.
Units of the faction in turn are never forced to conduct combat, except in the case of Allied invasions (§13). That is, a unit which is adjacent to one or more enemy units (or engaged) need not attack the enemy.
However, if the faction in turn does decide to attack into a hex containing enemy units, then all enemy units must be attacked.
The faction in turn is free to allocate units to attacks as long as
- Each unit may only attack once per turn.
- Pursuit: If this optional rule is used, then a attacking unit may attack more than once per turn.
- Fight on: Likewise, if this optional rule is in force, then the same combat may be fought several times during a turn, but is considered one attack.
- Multiple units from multiple adjacent hexes may attack the same hex, but all units must be adjacent to the attacked hex.
- Each attack is into one and only one hex, and all defending units must be attacked.
- Defending units may only be attacked once per turn.
- Pursuit: If this optional rule is used, then a re-treated defending unit may be attacked twice in a single turn.
The faction in turn then resolves all combats in any desired order.
In some cases the outcome of one battle may affect how another battle is resolved. For example if a defending unit is forced to retreat, but cannot because the attacker has occupied all possible retreat routes as a result of previous battles. It is therefore a good idea to access the situation and come up with a strategic plan for resolving combat.
Each combat is resolved based on the combat factors (CF, see §1) of the units involved in the combat and the terrain occupied by the defending units.
HQ units have 0 CF and can therefore never attack. Units in an arhq's holding box can attack units adjacent to the arhq unit.
§17.1 Combat factors and modifiers
When resolving a combat, the current face-up unit's CF (§1.2) values are used. The attacking faction adds up all attacking units CF and the defending faction adds up the CF of all the defending units CF. These are the base offensive (AF) and defensive (DF) CFs.
Then, the terrain of the defending units is inspected and relevant modifiers, as given in the Terrain Effect Chart (Table 1), are applied.
- Clear: No modifiers.
- Marsh: Attacking motorised infantry, armoured, tactical air units have a -1 AF modifier.
- Woods: Defending ground units receive a +1 DF modifier, and attacking motorised infantry, armoured, tactical air units have a -1 AF modifier.
- Mountains: Defending regular, mountaineer, and airborne infantry units receive a +2 DF modifier, and all attacking units get -1 AF.
- City: Defending ground units receive a +1 DF modifiers, while any attacking unit get -1 AF.
- Fortified city: Defending German ground units are modified by +4 DF. Otherwise a fortified city is treated as a city.
- Fortification: Defending German ground units receive +2 DF. Allied defending units receive no modifier.
- River: Any attacking ground unit that attacks across a river hex side are modified by -1 AF.
- Coastal: German defending units receive a bonus, if and only if all attackers are attacking from an invasion hex. If any attacker is attacking over land, e.g., an airborne unit dropped behind enemy lines, then the German defending units do not get this modification to their CF. The modifier is +2 DF in the 1944 scenario but +1 DF in the 1943 scenario to reflect the state of the Atlantic defences.
Note that these modifiers are per either defending or attacking units. Thus, if 2 motorised infantry or armoured units attack into a woods hex, then both units are modified by -1 AF for a total of -2 AF. Conversely, if 3 ground units are defending a woods hex, then all three are modified by +1 DF for a total of +3 DF.
The terrain modifiers are added to the respective base AF and DF to obtain the total AF and DF. Any AF or DF larger then 10 is then capped to 10, and any AF or DF smaller than 0 is treated as 0.
Mathematically, this can be written
AF′ = Σ_units ( CF + m_AF ), where m_AF = −1 for (Marsh or Woods) and (motorised infantry, armoured, or tactical air), −1 for (Mountains, City, or Fortified city), and −1 for an attacking ground unit across a river.
AF = min(max(AF′, 0), 10)
DF′ = Σ_units ( CF + m_DF ), where m_DF = +1 for (Woods or City) and ground unit; +2 for Mountains and (regular, mountaineer, or airborne infantry); +4 for Fortified city and German ground unit; +2 for Fortification and German ground unit; +2 for Coastal and German unit in the 1944 scenario with all attackers invading; +1 for Coastal and German unit in the 1943 scenario with all attackers invading.
DF = min(max(DF′, 0), 10)
Each side then rolls a 10-sided dice (d10) and adds the die roll to their respective total AF and DF. This is then the final die roll modified AF and DF which ranges between 1 and 20.
-
Close air support: The use of tactical air units for Close Attack Support (CAS) is limited if this optional rule is in effect.
An attacking tactical air unit's CF only applies if the attacked hex contains either
- enemy ground units (and possibly enemy tactical air units), or
- only enemy air units.
That is, one or more tactical air units cannot attack enemy ground units on their own — they must support a ground attack, but can attack enemy air units independently (air-to-air combat).
-
Weather: If the optional rule is in use, and the weather is bad, then tactical air units are limited in both offensive and defensive capabilities.
Any faction that has tactical air units involved in a battle during bad weather must roll a 10-sided dice for each tactical air unit.
- If the die roll result is 1 to 6 (d10 ≤ 6) means that the air unit can be used normally and its CF is added to the factions total CF.
- On a die-roll result of 7 to 10 (d10 ≥ 7), then the weather is so bad that the air unit cannot fly its mission and its CF is not added to the factions total CF.
An example of calculating modified CFs is shown in Figure 13.
Figure 13: Example of combat. BR/30 MI has moved into G10, which is in the ZOC of both DE/66 I and DE/67 I. The Allied faction now has two possible attacks: either into G9 (red) or F10 (magenta). For the first attack, the British unit has 5 − 1 (river) = 4 AF, and the German unit 1 DF. In the second attack against H10, the British unit attacks at 5 − 1 (⊠ into hex) = 4 AF, while the DE/66 I has 1 + 1 (⊠ in hex) = 2 DF.
Table 7: Combat resolution table (CRT). CF difference of 0 or less is a defender win, while CF difference larger than 0 is an attacker win.
| CF difference (ΔCF) | ≤ −7 | −6, −5, −4 | −3, −2, −1, 0 | +1, +2, +3 | +4, +5, +6 | ≥ +7 |
|---|---|---|---|---|---|---|
| Result | A2 | A1 | — | DR | D1 | D2 |
- A2: Attacker two step loss
- A1: Attacker one step loss
- —: Defender wins
- DR: Defender retreat
- D1: Defender one step loss and DR
- D2: Defender two step loss and DR
§17.2 Combat resolution
To resolve the combat, the attacking faction subtracts the final die-roll modified DF from the final die-roll modified AF to get the combat factor difference ΔCF. Mathematically this can be written
ΔCF = AF + d10 − DF − d10
The combat difference takes values between −19 and +19². The result is then looked up in the Combat Resolution Table (CRT, Table 7) to get the result of the combat.
If the CF difference is
- zero or less (ΔCF ≤ 0), then the defending units wins the combat.
- smaller or equal to -4 (ΔCF ≤ −4), then the attacking units take one step loss (A1, §17.4).
- smaller or equal to -7 (ΔCF ≤ −7), then the attacking units take an additional step loss (A2, §17.4).
- 1 or greater (ΔCF ≥ 1), then the attacking units wins the battle, and defending units must retreat (DR, §17.3).
- 4 or greater (ΔCF ≥ 4) then the defender takes one step loss (D1, §17.4), and must retreat (DR, §17.3).
- 7 or greater (ΔCF ≥ 7) then the defender takes an additional step loss (§17.4) for a total of two step losses (D2), and must retreat remaining units (DR, §17.3).
The combat result must be applied immediately before moving on to the next battle or the supply phase.
-
Fight on: With this optional rule, the losing faction has the opportunity fight on. The attacking faction is the losing side if the CF difference is zero or less (ΔCF ≤ 0). The defending faction is the losing side if the CF difference is larger than 0 (ΔCF > 0).
Any retreat result (DR) is ignored, but step losses are applied. The losing units take one step loss (§17.4), and the combat is then performed again, meaning both factions
- recalculate their respective AF and DF as outlined above
- re-roll a 10-sided dice and adds result to their respective AF and DF
The CF difference (ΔCF) is then recalculated and look up the result in the CRT (Table 7). The result of this second combat is then applied immediately.
The losing side of this combat may then again decide to fight on, and the process is repeated. The process can be repeated as long as the losing side has units available to fight and opts to continue.
Units with no attack value (HQ units) cannot attack, but can defend, so if the attacker only has HQ units and loses a battle, that faction cannot chose to fight on.
-
Initiative: The faction that currently holds the initiative marker may decide to execute that option. The die rolls of the combat is discarded. Both factions re-roll a 10-sided dice, add the die roll result to their respective AF and DF, calculate the CF difference (ΔCF) and look up the result in the CRT (Table 7). The result of this second roll is then applied immediately.
The faction holding the initiative marker cannot choose between the two die-rolls. The initiative marker is then passed on to the opposing faction immediately.
This option can be used at any time including in a sequence of Fight on combats.
² For the statistically inclined, the difference between two d10 rolls is triangular distributed with a mean of 0 and standard deviation of 4. This means that more then two thirds of combat rolls fall between −4 and +4. See also Table 9.
§17.3 Retreat
If the defender suffered a DR, D1, or D2 result, then all defending units must be retreated by the defending faction, following the procedure below.
- Retreating units must retreat to a land hex not in enemy ZOC (§5). Only if this is not possible may the retreating units retreat into an hex in enemy ZOC.
- Units cannot retreat into a hex occupied by enemy units.
- Units can retreat through enemy ZOC, but only if there are no other viable retreat routes.
- All retreating unit must retreat to the same hex.
- If retreating units cannot retreat to hex because it would violate stacking limitations (§6 including possibly National integrity limitations) then the retreating units must be retreated further until stacking limitations are observed.
- If there is no viable retreat route, for example because the defending units are surrounded by enemy units, sea hexes, or edge of the board, then the retreating units stay in their original hex but takes an additional step loss (§17.4) to any other step loss incurred in the battle.
- If the only retreat route available will take the retreating units off the map, then the defending faction has the option to eliminate the units rather than taking another step loss (§17.4).
Figure 14 shows an example of a retreat.
Although division units has no manoeuvrability, they must retreat as any other units if the combat result calls for it (DR, D1, or D2).
§17.4 Losses
When a combat result (or some other rule) calls for a step loss, the controlling faction must decide which unit will absorb that reduction (casualties in case of combat).
In D1 and D2 combat results, the defending faction chooses how to distribute the casualties, while the attacking faction chooses in case of A1 and A2 combat results.
The controlling faction is free to choose among the affected units as long as the choice does not cause stacking limitations (§6) to be violated. The controlling faction may chose to let one or more units absorb multiple step losses, e.g., A2 or D2 combat results.
For the defending faction all defending units in hex are affected by the combat. But for the attacking faction only units that actually partook in the combat are affected. This means that a HQ unit, which cannot attack, cannot absorb A1 or A2 losses.
A defending faction has an arhq unit with two corps units in its holding box, and must take a step loss. Since HQ units only has one step (its face-down side is blank) it means that if that HQ unit was to absorb the casualties it would be eliminated. That would place the two corps units in the hex previously occupied by the HQ unit, and thus violate the stacking limitations. The step loss must therefore be absorbed by one of the corps units.
A full-strength unit (§1.2.1) absorbs a step loss by flipping the unit to its reduced-strength side. If the reduced strength side is blank, then the unit is eliminated (§17.5) immediately. A reduced-strength unit (face-down) absorbs a step loss by being eliminated (§17.5) immediately.
Figure 14 shows an example of applying step losses.
Corps units and tactical air units typically have two steps (i.e., a non-blank reduced-strength side), while divisions and HQs only has one step (i.e., a blank back-side).
- Allied strategic bombing: Strategic air units are never the subject of step losses, as they are never directly involved in a combat.
- Mulberry harbours: The amphibious ports are not units, but rather equipment, and as such has no steps. A Mulberry unit is "eliminated" if a German unit pass through or occupy the coastal hex that the Mulberry unit is in.
§17.5 Elimination
When a unit has no more steps to lose, it is automatically eliminated when absorbing another step loss. A unit with a blank back-side only has one step, and is therefore eliminated on a single step loss. Units with a non-blank back-side (reduced-strength) has two steps, and is therefore eliminated when it absorbs a second step loss.
Step losses accumulate over turns. That is, to eliminate a two-step unit, both step losses does not need to occur in the same turn. Such a unit could have suffered a step loss in a previous turn, and then be eliminated by a second step loss in a subsequent turn.
When a unit is eliminated, through step losses or other means, it is
- immediately removed from the map, and
- placed face-down in its slot on the controlling factions OOB.
By placing an eliminated unit face-down on the OOB, it is marked as eliminated, but not to be used as a reinforcement unit.
If the Replacements optional rule is used, then an eliminated unit may be restored by spending move points (§11).
§17.6 Advance after combat
If the defending units are retreated (§17.3), then
- attacking units that partook in the combat, or
- units in the same hexes (including in arhq holding boxes) from which attack took place, that did not nor will not partake in other combats
may immediately advance into the hex attacked and left vacant by the retreated defending units.
Division units has no manoeuvrability and cannot advance after combat.
If the attacking units are invading (§13) then the attacking units must advance into the vacated hex, or be eliminated (§17.5) in the following supply phase (§18).
It is up to the attacking faction which and how many of the eligible units that are moved into the vacant hex, as long as the stacking limitations (§6, including possibly National integrity limitations) are not violated. Note, however, that the stacking limitations can be temporarily broken in an advance, as long as they are observed at the end of the combat phase.
Attacking units can advance after combat even if that would mean passing through enemy ZOC (§5) as an exception to §14.5. It costs no MPs to advance after combat, nor does the advancing units need to have available MFs. Defending units may not advance after combat, even if an A1 or A2 result would vacate a hex from whence the attack came.
Figure 14 shows an example of advance after combat, while Figure 15 shows a possible outcome of an invasion, including advances.
- Pursuit: This optional rule modifies the ability to advance after combat and is detailed in §17.6.1.
Figure 14: Example of combat. US/20 MI in the US/1 arhq holding box, at J10, attacks the reduced DE/39 A in K10 (red arrow), while US/19 MI and US/9 FW, in the same arhq holding box, attack DE/81 I in J9 (magenta arrow). US/3 MI does not partake in any combat, but can influence the outcomes of the battles. The Allied faction decides to resolve the attack on K10 first. The attack is 5 AF versus 2 DF, or ΔCF = 3 before any die-rolls. If the Allied and German factions rolled 7 and 3, respectively, then the final CF difference would be ΔCF = 7 for a D2 result. A single step loss eliminates the reduced DE/39 A unit as shown in the top-right. The US/20 MI and US/1 arhq, which did not nor will take part in the attack, can now advance into K10. For this example, only US/20 MI will advance (green arrow). The situation is now as in bottom-left. In the second attack on J9 we have 4 + 4 − 1 (river) − 1 (⊠ and hex) = 6 AF versus 2 + 1 (hex) = 3 DF. If the Allied and German factions rolled 7 and 6, respectively, the final CF difference will be ΔCF = 4 for a result of D1. The German unit must retreat. Since I9 and K9 are both in Allied ZOC, the retreat must be to J8 (white arrow). Also, the German unit takes one step loss as shown on the bottom-right. US/19 MI advances into J9 (green arrow). US/3 MI may not advance after combat in either case, as no attack was performed from its occupied hex. Had the Allied faction resolved combats in different order, then DE/81 I may have had other retreat routes open to it.
§17.6.1 Pursuit
This optional rule modifies the rule on advance after combat (§17.6) substantially.
- Regular, mountaineer, and airborne infantry units can only perform a normal advance after combat, at no additional MP cost, as described in §17.6.
- Motorised infantry, armoured, HQs, and tactical air units may advance after combat, at no additional MP cost, as described in §17.6.
Alternatively, these units may be used for pursuit by expending MPs. By expending regular movement MPs (§14.3), i.e., 1 MP per arhq or individual units moved, the motorised infantry, armoured, HQ, and tactical air units that could otherwise advance after combat, can move up to their normal MF.
The movement follows the normal movement rules (§14), including paying MFs to enter the vacated hex, enemy ZOC, Extra effort, and Garrisons if those optional rules are used.
Note that normal enemy ZOC restrictions on move- ment applies (§14.5). That is, pursuing units must stop upon entering enemy ZOC, and cannot move from one hex in enemy ZOC to another hex in enemy ZOC.
Pursuing units may engage enemy units (i.e., enter their ZOC, §5). The pursuing units may also attack these engaged enemy units if and only if the attacked hex contains some of the retreated units that enabled the pursuit.
Pursuing unit can be moved adjacent to enemy units that where not previously attack. However, these 'fresh' unit may not be attacked as part of the pursuit.
If the retreated defending units were retreated into a hex containing other units of the defending faction, then all units in that hex must be attacked as per normal combat rules.
If the pursuing units engages in another combat against the retreated units (and possibly other enemy units in the same hex), and the result vacates the attacked hex (DR, D1, or D2), then the pursuing units may advance after combat normally as described in §17.6, but may not perform another pursuit manoeuvre.
Figure 15: A (best) possible outcome of the example invasion in Figure 7. The base AF and DF are given in that example. The Allied faction has successfully landed its troops on the continent, including the two Mulberry amphibious ports, and two upper echelon headquarters (important if Alternative move points is used), via advances. Note that US/18 ABI and BR/1 ABI could have advanced into D15 and E15, respectively, since they partook in combat that vacated these hexes. The DE/II ST garrison in Cherbourg (C16) is cut off from supplies (§18) and is most likely overrun in the following Allied turn.
Figure 16: Example of pursuit. Starting with the situation in the bottom right of Figure 14, but before the US/19 MI advances. The Allied expends 1 MP and let the US/1 arhq and all its unit pursue DE/81 I by moving into J9, as shown to the right. The units US/19 MI and US/9 FW may now attack DE/81 I again. The total base AF is still 6, but 1 + 1 (hex) + 2 (hex) = 4 DF. If the attack succeeds, then the victorious units may advance into J8, but cannot do further pursuits, and the Allied faction will have made a breakthrough the German defences.
§18 Supply phase
Any unit that failed to invade (§13) and are therefore left in a sea hex, are automatically eliminated (§17.5).
A supply line is an unbroken line of hexes, of any length and in any direction, that
- starts at the hex occupied by the unit in question,
- does not pass through enemy occupied hexes,
- does not pass through enemy ZOC, unless the hex is occupied by a friendly unit,
- does not exit the map,
- for the German faction, does not pass through sea hexes, and
- terminates in a controlled hex (§7) with a supply point for the faction in question.
The Allied faction may trace a supply route through sea hexes.
Supply points are cities coloured in the factions colour. The possible supply points are
- Allied: A14, B14, C12, C16, D7, D11, D19, G13, J19, and R16, as well as the two Mulberry harbours, if Mulberry harbours is used, when successfully landed on the continent.
- German: E3, G7, G13, and I1.
Note that Paris (G13) is a possible supply point for both factions.
A unit in a hex containing a valid supply point for the units faction is always in-supply.
A unit that can trace a supply route is said to be in-supply. A unit that cannot trace a valid supply route is out-of-supply (OOS).
In both the Allied and German faction supply phases, both faction checks all of its units on the continent for supply. An out-of-supply marker (§1.3) should be placed on any unit that is deemed OOS.
Note that both factions must check its units for supply, not just the active faction. E.g., in the Allied supply phase, both the Allied and the German faction must check all of their units for supply.
Any unit that is OOS may not expend move points (MPs), nor otherwise perform manoeuvres. OOS units may not attack, move, nor move with arhq units.
An OOS unit must retreat if combat results (§17) calls for it. An OOS unit does not excerpt a ZOC (§5). This means that enemy units may move past, but not through, OOS units.
The supply status of units is only determined during the supply phases, and persists until the opposing factions supply phase.
A unit with an OOS marker will be have this marker until the next supply turn. As long as the unit has this marker it is OOS.
Thus, a unit may be OOS at the start of a factions turn, but during that turn come back into supply. However, since the supply status persists until the next supply turn, it cannot attack, move, or move with arhq units until the next turn. This also means that an arhq cannot pick up a unit that was OOS at the start of the factions turn, and then move on with that unit.
In Figure 15 the DE/II ST unit is OOS.
-
Step loss if out of supply: If this optional rule is used, then units that are OOS for a prolonged period are reduced. A unit that was determined to be OOS in the opposing factions last supply phase, still OOS in its own factions supply phase, and, for German units, not in a fortified city hex takes one step loss (§17.4). This may eliminate the unit.
Note that the exception for units in fortified cities only applies to German units.
§19 Scenarios
The factions must agree on the scenario to play, 1943 or 1944, and then select the OOBs relevant to the faction and scenario. The OOB gives the specifies the starting MPs (circled number), the number of MPs per turn (unless the Alternative move points optional rule is used), as well as which faction holds the initiative (Initiative optional rule, see §17.2).
For both scenarios, the German faction controls all of continental Europe, while the Allied faction controls Britain and the Mediterranean base (T19).
Table 8: Victory conditions. The Allied faction wins if all conditions are met. The German faction wins if the Allied faction has not met the conditions, and the German faction has eliminated enough Allied corps units. Otherwise, the game is a tie.
| Victory Condition | 1943 | 1944 |
|---|---|---|
| Allied | ||
| Number of units (army group icon) east of the Rhine | 10 | 20 |
| Controlled cities | Berlin (I1) | Essen (G7), Hamburg (E3), Munich (O6) |
| German | ||
| Number of eliminated Allied corps units | 10 | 5 |
The particular victory conditions are given in Table 8. The Allied faction must meet all conditions to win. The German faction wins if some of the Allied conditions have not been met, and that enough Allied corps units have been eliminated. If neither faction has met the conditions at the end of turn 12, then the game is a tie.
- Replacements: Above, in the number of eliminated Allied corps units is given, possibly replaced units does not count. That is, if an Allied corps has been eliminated at any point in time, it counts toward the German victory conditions, even if the corps was later replaced.
Table 9: Probabilities of combat outcomes given the combat differential (ΔCF). Columns A2, A1, –, DR, D1, D2 give the probability of each combat result (see Table 7). A- = attacker at least 1 step loss; D- = defender at least 1 step loss; Dr = defender retreats.
| ΔCF | A2 | A1 | – | DR | D1 | D2 | A- | D- | Dr |
|---|---|---|---|---|---|---|---|---|---|
| −10 | 79% | 15% | 6% | 94% | |||||
| −9 | 72% | 18% | 10% | 90% | |||||
| −8 | 64% |