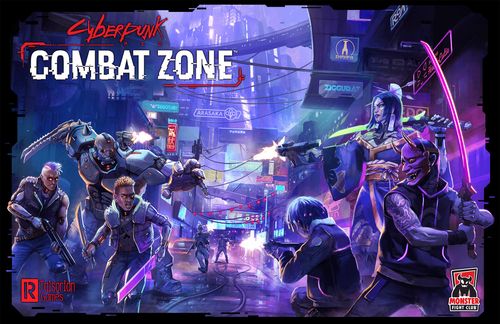
Cyberpunk Red: Combat Zone
Cyberpunk RED: Combat Zone Rulebook
Table of Contents
Table of Contents
- The Combat Zone
- Gangs of Night City
- Introduction
- How to Play
- Character Cards
- Gonk Cards
- Skills
- Gear Cards
- Player Turns
- Getting Lucky
- Taking Actions
- Anatomy of an Action
- 1. Skill Used
- 2. Range
- 3. Result
- Targets of Actions
- Success & Failure
- Resolving an Action
- Available Actions
- Attack Actions
- Looting Bodies
- Basic Reflexes Action
- Basic Ranged Action
- Basic Melee Action
- Basic Medical Action
- Basic Tech Action
- Basic Influence Action
- Crits & Fumbles
- Gameplay Example
- Difficult Actions
- (Un)Skilled Rolls
- Free Actions
- Fully Resolving Actions
- Command Actions
- Movement
- Open Movement
- Obstacles & Barriers
- Moving & Obstacles
- Moving Through Rival Models
- Moving & Barriers
- Openings in Barriers
- Moving & Dragging Objects
- Jumping Gaps
- Falling Damage
- Opposed Rolls That Do No Wounds
- Climbing Up & Down
- Climbing – One Action
- Climbing – Two Actions
- Climbing Down
- Ease of Climbing
- Parkour!
- Free Movement
- Targeting Actions
- Armor
- Brawls
- Wounds & the Wounded
- Looting Bodies
- Healing
- [RE]actions
- Netrunning
- Drones
- Building Your Team
- The Battlespace
- Action Effect Rules
- Rule of X
- Accurate
- Blast
- Successful Blast Hits
- Missing with Blast Attacks
- Fumbling Blast Actions
- Vertical Blasts
- Blasts and Barriers
- Complex
- Crit Effects
- Dangerous
- Deadly
- Defense: [Skill X]
- Discard
- Heal [X]
- Indirect
- Pierce [X]
- Push
- Refresh [X]
- Rapid [X]
- Walking Fire: Switching Targets
- Silent
- Stun [X]
- Suppression
- Torrent
- Unwieldy
- Campaign Games
- Scenarios
- Beginner's Luck
- Gear: The HQ's Armory
- Life & Death in the Combat Zone
- Proving Your Worth
- Optional Campaign Mode: Shared Market
- Multiplayer Games
- Team Games
- In Conclusion
- Glossary
- Game Summary
The Combat Zone
THE YEAR IS 2045. The uncaring sky, dyed blood-red by the fourth corporate war, hangs heavily over humanity as it tries to put the pieces of a once-great society back together. In the Combat Zone of Night City, none of that really matters. In the Zone there is no law. But where there is danger, there is also opportunity.
Night City was the brainchild of Richard Night. He envisioned a self-sufficient city, unaligned with any nation and beholden only to the Megacorporations that ran its economy and selected its city council. It would be a city free from the chains of crime and government regulation, the ultimate expression of free trade and capitalism.
Before the city was even complete, his dream began to fall apart. Construction was controlled by the mob, and that gave crime a foothold in Night City before it was even done being built. Once the heavy lifting was done, the Megacorps cleared out the mob in a brutal street war. Corporate-sponsored mercenaries equipped with the latest cybernetics stormed every district of the city, pushing the mob out street by street.
This was soon followed by the fourth corporate war. International Megacorps are the pinnacle of power in the Cyberpunk age and when war broke out between them, no government could get in their way. Of course, a corporate war was not waged like one between nations. There were no borders. There were only assets and properties, often located within the same city. Lightning raids happened on a global scale, turning every major city into a battlefront.
In 2023, the fourth corporate war reached Night City with a bang when a small suitcase nuke was set off; a quick and brutal solution to Arasaka's stronghold in the financial district of Night City. The nuke was not big enough to truly level Night City, but it decisively ended the era of the Megacorp's total stranglehold. Over a million people were killed and the central city was reduced to rubble.
The nuke was the final straw. The US nationalized Militech and banned Arasaka from its territory. The two Megacorps had expended so many resources, and drawn so much public ire, that they were unable to do anything about it. Other countries followed suit, and soon the war was at an end. But the world would never be the same.
The US was fragmented, with the federal government only holding onto the territory East of the Mississippi. To the West, the Pacifica Federation hold power. Across the Atlantic, a United Europe rose from the ashes, maintaining their economies. Here the Megacorps still hold a great deal of power.
The UK was left in ruin, plagued by faulty infrastructure and an influx of American refugees. In Russia, the Neo-soviets hold power, while the rest of the Asian continent is fractured. The African States, coming together and calling themselves the Highriders, have taken the lead in the world's tech race. The most futuristic cities in the world exist on the African continent, and the African States firmly control the networks of satellites and orbital relays that circle the planet.
Even the NET was ravaged by the fourth corporate war. Cyberspace was just another of the battlefields on which the war was fought and, by the end, it was nothing more than a no-man's land of corrupt data, psychic booby traps, and rogue demon programs. The war had truly changed the shape of humanity, both in cyber and meat space.
The years following the fourth corporate war are known as the time of the Red. Radioactive particles and other munitions have left the sky a permanent blood-red color. Sometimes these particles mix with rainwater, forming "blood rains" as a thick, red liquid falls from the sky. A fitting metaphor to the bleeding world that has been left by the Megacorps.
Night City, like the rest of the world, has been entirely reshaped during the time of the Red. It is still a bustling megacity where fortunes can be made or lost. A place where no government holds dominion and free trade is the ideal.
However, the hold of the Megacorps is broken. While they still hold massive power, there is room for others to build their futures. Criminal organizations have moved in, a lot of regular working folk have moved out, and small sections of the city that were too radioactive have been sunk into the bay.
Largely spared by the nuke, the Combat Zone area of Night City saw some of the toughest street to street fighting during the fourth corporate war. The Combat Zone is heavily occupied, but totally lawless. An area completely free of government or even corporate control has certain advantages when it comes to trade. There is no cybernetic or drug that is off limits in the Zone, creating markets that exist almost exclusively within its borders. Corporate meetings can be held in utter secrecy here, and loyalty can always be bought.
As such, different areas of the Zone are controlled by different gangs. One building might be crawling with Maelstrom while right next door Zoners rule the turf. The areas that each gang controls are ever shifting, depending on how the latest firefight or payoff went. However, lawless does not mean entirely without order. Each gang has its own rules, and some of them are simply people who lived there before the war and have banded together to get by. Life continues in the Zone, goods are traded, and people go on. But gang violence is always one wrong turn or careless insult away. And, if you're handy with a gun, there is always ample work to be found.
Gangs of Night City
Maelstrom
Making a home across the industrial warehouses and earning a living from arms and tech sold on the black market, the Maelstrom are a brutal gang of heavily modified, hulking fighters.
Heavily into body modification—to the point of cyberpsychosis—Maelstrom gangers leverage the latest cyberwear and focus on gear that makes them more physically intimidating and brutal melee fighters.
Their attention to reworking their bodies has brought them into conflict with more puritanical groups like the Inquisitors; their long-running feud has cut a bloody tear across parts of the Zone. But for the most part, their rivals give them a wide berth, to prevent being chopped into scraps.
Maelstrom chapters tend to make their home near the dockyards and industrial sectors close to and in the Combat Zone. Their expansion into the Zone is primarily to secure networks of transit for elicit goods, cybergear, weapons, and to profit on the misery of the constant violence that plagues the city. The Maelstrom will put their hands on anything that can turn a Eurobuck.
Tyger Claws
After the War, the Tyger Claws started to break away from Arasaka as a corporate sponsor. Their goal: protect the Asian community of Night City in 2045. The gang controlled the district of Old Japantown and were slowly expanding.
Japantown, even with the reconstruction efforts all over the city, was still a lawless sector with many groups vying for control of the streets. Its strategic position, and the more insular interests of its inhabitants, made for an inconvenience to many would-be smugglers and syndicates. But the Tyger Claws would not be daunted. They were the muscle and the blood that kept this area of town together, and were essential in seeing it rebuilt.
Though effectively a Combat Zone in its own right, Japantown inhabitants moved on to Watson, across the bay, where there is new development and a better chance to escape the constant gang violence. This has left Japantown mostly empty, save the gangs that still fight their never-ending war for turf and loot. This is where you can find the majority of Tyger Claws today.
Gang members typically eschew heavy cyber modifications, leaning heavily on speed and guile. Alterations that can improve reflexes and combat abilities are heavily prized and sought after. Tyger Claws are organized similar to late 20th Century Yakuza gangs — they respect their "family" and have a hierarchical structure that respects the business of the gang over their ability to unleash the gang's sheer brutality. But when called to violence, the very air will be full of razor sharp blades, and attackers that can fade from a fight on their fast street bikes as quickly as they appeared.
The Bozos
Of the Combat Zone's many different predators, the Bozos lurk at the edge of every shadow. Biosculpted to look like circus clowns, Bozos call forth childhood fears and apply sadistic violence when their prey is at their most vulnerable. The Bozos aren't clowning around.
Lawmen
For the law, every day in the Combat Zone is a battle to retake the streets and maintain order. The Lawmen are both hammer and anvil. Well trained, well equipped, and well led.
Zoners
Combat Zoners represent the many warlords and their followers scratching out a living in the Combat Zone. Profiting off of illicit trade routes, salvage, or hired-muscle gigs, Zoners make the most of a bad situation with grit, guns, and a strong survival instinct.
Gen Red
Led by a child genius, the kids of Gen Red are a gaggle of streetsmart orphans and runaways: scrappy, stabby, and born into tech. The streets of the Combat Zone aren't kind to the small or weak and quickly weeds out those without the instinct to survive, leaving a highly adaptable (and frequently underestimated) gang of tech-savvy teens.
Arasaka
Corporate interests in the Zone mean that they are willing to lay down blood and treasure to ensure their investments see profit. With some of the best military gear money can buy, Arasaka teams represent the pinnacle of modern military hardware in the confined spaces of the zone.
Edgerunners
For anyone who isn't rocked out of their skull on Black Lace, making a living in the Zone is either a short term occupation, or a death sentence. That said, where there is no law, there can be a lucrative opportunity for anyone plying their skills for fortune.
For any of the gangs vying for control in the Zone, Edgerunners can be a valuable asset, even if you can only afford their help for a little while. Mercenaries of all types work the streets, and for the right price, you can make a lot of headaches go away.
Introduction
Welcome to Combat Zone, the skirmish miniatures game by Monster Fight Club®. Combat Zone lets you play out fast and furious Cyberpunk Red battles using the unique [RE]action System, which combines Character cards with dice and a special LIMITER measuring device.
Combat Zone is scenario-driven, and scenarios can be played as one-off games or linked as a campaign. In each scenario, you'll control a team, represented by miniatures on the table.
The [RE]action System™
At the core of the Cyberpunk Red: Combat Zone game is the [RE]action System. The [RE]action System uses three different colors of dice which link to three colors of actions your models can take.
Actions. When it's your turn to play, you'll be taking actions with your models. Actions include moving, attacking, healing, hacking, and more.
Each model has a number of actions available to them, colored GREEN, YELLOW, or RED. You'll use Action Tokens to track how many actions each character has.
When one of your models takes an action, you'll flip one of their Action Tokens, to show it's been used.
The color of Action Token used determines what color die you'll roll, to see if the action succeeds or fails. Generally, GREEN actions are the best, then YELLOW, with RED actions being the least likely to succeed.
Opposed Dice Rolls. When you attempt an action, your opponent gets to make an Opposed Roll. If your roll is higher than their roll, the action succeeds. Otherwise, the action fails.
[RE]actions. If one of your characters is wounded by a rival's attack, you'll have the opportunity to react to it – instead of just getting pummeled!
Actions and [RE]actions are explained in detail further along in these rules, but it's good to have a handle on the basics before diving in.
The Dice
Combat Zone uses four different colors of dice. Three of them are called Action dice. They are rolled to see if an Action succeeds or not:
| Color | Die |
|---|---|
| GREEN | Twelve-Sided (d12) |
| YELLOW | Eight-Sided (d8) |
| RED | Six-Sided (d6) |
You'll roll these three colored Action dice throughout the game when taking actions with your models.
| Color | Die |
|---|---|
| OBSTACLE | Ten-Sided (d10) |
The black ten-sided dice are called Obstacle dice, used when models attempt something that doesn't target a rival, such as climbing or attempting to hack a terminal.
Models are considered "the attacker" when rolling against the Obstacle die, and fail in the case of a tie.
Crits & Fumbles. Each die also has a CRIT and a FUMBLE face. Crits usually mean success, and can trigger other special rules.
Fumbles can sometimes trigger worse results, and usually mean you have failed whatever you're attempting.
The Limiter
Combat Zone uses "The Limiter" to measure distances during the game. The Limiter is divided into three ranges: GREEN, YELLOW, and RED:
| Color | Length |
|---|---|
| GREEN | 12" long |
| YELLOW | 7" long |
| RED | 3" long |
Reach. The Limiter is 1" wide. Some Actions and rules, such as Brawling, apply to models "within reach" of another model. A model is within reach when it is within the Limiter's 1" width.
The Purple d4. As Cyberpunk Red: Combat Zone embarks on its second printing, we're excited to evolve the [RE]action system. We're introducing the purple d4 die to our mechanics. Keep an eye out for gear cards and future updates that will integrate this dynamic component!
Models
Models are the physical representation of your team members on the board. Your models are called "friendly" models and those belonging to your opponent are referred to as "rival" models.
Models are mechanically defined in two parts; the figure and the base. The figure is the sculpture of a character which determines which card and abilities the model uses in game. The base is a round disk at the bottom, which keeps the model upright and is used for measuring distances and position mechanics. The standard [RE]action base is 27mm in diameter, but some models may be issued with larger bases if the model requires.
How to Play
Combat Zone is scenario-driven. This means that each game uses a scenario that defines your goals, explains how to set up your teams, and gives structure to the game. You can play a single scenario as a "one-off" game, or you can link a series of scenarios together as a campaign and you can watch your team grow and develop through a number of games (see "Campaign Play", below).
There are three things you must do to prepare for a game of Combat Zone: build your team, choose a scenario, and construct a Battlespace.
Building a Team
The world of Cyberpunk Red is rich with gangs, corporate agents, and dramatic personalities vying for wealth, control, information, and tech. You can use the Tyger Claws or Maelstrom included in the core game or you can choose from a number of other factions available separately.
Before the game, you will build your team, consisting of a mixture of powerful characters (including your Leader) and more-expendable Gonks. You can enhance your characters by purchasing additional Gear and Netrunning programs.
Size of Games
Games of Combat Zone can be played with 100, 150, or 200 EB worth of models (Eurobucks, currency of the future). The recommended battlespace area is:
- 100 EB – 22" x 30" (included)
- 150 EB – 22" x 30" (included)
- 200 EB – 44" x 30" (sold separately)
Choosing a Scenario
This core set includes a Scenario booklet. Each Scenario describes a different type of engagement, with its own goals, special rules, and setup instructions. You can pick any of the scenarios to play, except the Prove Your Worth scenarios (they're special). If this is your first game, Turf War is a good place to start!
Each scenario will determine which player Takes Control first.
If you are playing a campaign, winning or losing will have consequences for your gang in future games.
Winning a Scenario
Different scenarios have different goals, which might range from taking out your rivals, stealing tech, capturing territory, and more.
Constructing a Battlespace
The area your models will fight and move through is called the Battlespace. Before play, you will have to create the Battlespace using scenery, guided by the instructions for the scenario you are playing.
After you have constructed the Battlespace, follow any other instructions in the setup for the scenario you are playing. The scenario will tell you which player has Control first. Once you are ready, the fight is on!
Campaign Play
Combat Zone is excellent as a one-off game, but there are campaign rules as well (see Campaign Games, below).
Each time you play a scenario in a campaign, each team will draw three Objective cards, representing the personal goals your team has in addition to the goals of the scenario. If you complete the Objective, your team earns an ongoing advantage they can use in the following games.
You'll also have the opportunity to promote your characters to Veterans, along with a deck of Objectives and Gear cards unique to your team. In addition, each team includes a final "Prove Your Worth" scenario to cap their campaign.
Cards' Supremacy
If a rule on a card ever contradicts the rules in the rulebook, the rule on the card takes precedence.
Special rules on cards may allow you to move different distances, attack targets you wouldn't normally be allowed to, or otherwise "break" the rules.
Character Cards
Models in Combat Zone each have a card detailing their actions, Skills, special rules, and personal Gear.
Name & Keywords. The model's name and any keywords are listed at the top.
Street Cred. Veteran and elite characters may have a number of stars to the right of their name. Models add their street cred to your team, increasing the team's status.
Cost. The EB (Eurobucks) it costs to include this character in your team.
Skills. Most models have three different Skills. When they attempt an action that uses one of those Skills, they add their Skill value to the die roll. Skills include Reflexes, Melee, Ranged, Medical, Tech, and Influence.
Actions. Each card shows how many actions that model begins a game with. Actions can be GREEN, YELLOW, or RED.
Special Rules. Many characters have a special rule or action listed on their card. This rule applies to them, unless stated otherwise. If the special rule is an action, it will show a Skill icon or state that it is an action. Otherwise it is an ability and does not require an Action Token to use.
Gear. Many models have Gear on the bottom of their card which gives them new abilities or actions.
Gonk Cards
Gonks of the same type share a single card with their Skills and special rules. Some teams may have different types of Gonks to choose from. Different teams' Gonks will have different names, but they will all have the Gonk keyword on their card.
Models: Gonks vs. Characters
The rules will sometimes refer to "models," which includes both Gonks and characters. If a rule refers to a "character," then it can't be used by or affect Gonks.
Including Gonks in Your Team
The maximum number of Gonks you can include in your team is the total combined Influence of all your characters.
For example, a Zoner gang with a combined influence of 5 could include up to 5 Gonks.
The EB cost listed on Gonk cards is per Gonk.
Skills
There are six different Skills that models can have. Higher Skills improve the chance that actions using that Skill will succeed.
Reflexes. Used for movement, climbing, jumping, thrown items, and Opposing Ranged and Reflex Actions.
Ranged. Used for ranged attacks.
Melee. Used for brawling, swordplay, close combat, and Opposing Melee Actions.
Medical. Used for healing, drugs, poisons, and Opposing Medical Actions.
Tech. Used for machinery, netrunning, hacking, and Opposing Tech Actions.
Influence. Used to command, intimidate, and for Opposing Influence Actions.
Gear Cards
Gear cards may be equipped to your models to give them additional actions or abilities.
Spice things up with some gear from home! There are so many different pieces of gear your gang can choose from, provided you can pay for it.
Cool goggles up your intimidation factor, while massive grenade launchers welded together with hot, moist gum pack a real punch for the brave.
Name. The name of the Gear card. A model may not equip more than one Gear card of the same name.
Keywords. If the Gear has any keywords (that may be referenced by other rules) they will be listed here.
Cost. The EB (Eurobucks) it costs to equip this card to a model at the start of the game.
Street Cred Requirement. The total amount of Street Cred your team must have (by adding all Street Cred stars on characters and Objectives) in order to add this card to your HQ so it is available to you.
Rarity. The maximum number of copies of this card that your team may include.
Rules. Actions or abilities granted to the model are listed here.
Player Turns
Control of the Battle
At any one time, one player will have Control of the Battlespace. The player in Control takes actions with their models, moving through the Battlespace and interacting with other models. When you take Control, you choose to Activate a Character or Inspire Your Team.
Activate a Character
When you Activate a Character, you choose one of your characters: they are now your Active Model. While you have Control, you may take actions with your Active Model.
Control passes to your rival when you cannot, or do not want to, take any more actions with your Active Model.
Some models have the ability to activate other models on your team, allowing you to use multiple models without letting your rival take Control!
Inspire Your Team
When you choose to Inspire Your Team, you may activate each of your Gonks. When a Gonk activates, it takes a single action. You can activate your Gonks in any order you choose.
While your Gonks are taking actions, all of your characters take a quick breather: after you are done activating your Gonks, refresh all of your characters' used Action Tokens by flipping them to the Ready side (see below).
After you refresh your characters' Action Tokens, your rival takes Control.
If you have no Gonks, you will still choose Inspire Your Team to refresh your characters' actions. If none of your characters have ready actions, you must choose Inspire Your Team. If all your characters' actions are ready, you must choose to Activate a Character.
Gonk Actions
When Control passes to you and you choose to Inspire Your Team, each of your Gonks activates and may take one basic action (usually YELLOW). This is in addition to refreshing your characters' actions.
Gonks may choose from any of the basic actions listed below, except the basic Influence Action. Gonks aren't influential enough to command anyone!
Gonks don't use Action Tokens, since each Gonk model may take one action. If they suffer a wound, they're taken out of action.
How do you know it's time to Inspire Your Team?
Your team needs you. You've been through a lot lately. You're down a man, 'cause he went and got hitched – and their partner doesn't approve of your "lifestyle." Morale is low. You're about to lose your corner, a piece of your territory, and maybe your lives unless you can get these people on your side once more!
So, what do you do? You send in the impressionable underlings to fight a pip squeak and boost their confidence. You shower them with compliments afterward. Bingo: lifetime loyalty, achieved.
Getting Lucky
Each team starts a scenario with three Luck tokens. You can spend your Luck tokens at any time to re-roll a single die roll.
You may never re-roll the same die roll more than once.
Some Gear, characters, and completed Objectives (in campaigns) will increase how many Luck tokens with which you begin the game.
If two players are making an Opposed Roll, the order in which they choose to use their Luck tokens may matter. In this case, the player who has Control must decide if they would like to re-roll first. Then their opponent may choose to re-roll. If the second player chooses to re-roll, the player who has Control may choose to re-roll after seeing the result, so long as they did not already use their re-roll initially.
YOU FEELING LUCKY, KID?
Sometimes you've screwed up so many times, you simply can't recover. Luckily for you – heh – there's an alternative to taking Lady Luck's whims like a champ. Use a Luck Token, and try that last roll again.
Lucky Streak
If you spend a Luck token and the re-roll is a Crit, take the Luck token back.
Underdog's Luck
If your team's Street Cred is lower than your opponent's, you start the game with one additional Luck token for each point lower your Street Cred is. This may happen if you choose less powerful models, or during a campaign.
Exhausting Cards
Sometimes you'll be directed to "exhaust" a card. To exhaust a card, flip the card over so it's back is showing. When you refresh your team, you can also refresh (flip face-up) any exhausted cards (unless the card lists a different way to refresh it).
Taking Actions
Action Tokens are used to keep track of how many actions of each color each character has and whether those actions are Ready or Used.
When a character takes an action, choose one of its Ready Action Tokens and flip it to its Used side. The color of the Action Token determines the color die used to determine success, if a die roll is necessary.
Starting Action Tokens
Each character begins the game with the Action Tokens shown on their card. Actions begin the game Ready. Place them on or near the card, so it's very clear which tokens belong to which character.
Gonks take a single action whenever they're activated and don't use Action Tokens.
Anatomy of an Action
There are three components of every action: the Skill used, the Range, and the Result.
- Skill Used
- Range: Limit the action can target.
- Result: What happens if the action is successful.
1. Skill Used
If an action shows a Skill icon, you'll make a Skill Roll to see if it succeeds. If no Skill icon is shown, it is an Easy Action and it automatically succeeds (but still uses an Action Token).
You'll roll the color die that matches the Action Token used to attempt the action. Taking a GREEN action? Roll a GREEN die.
2. Range
The distance the action can affect, measured by the Limiter. If a range is colored in, the action can affect that area of the Limiter.
Some actions can be used at Long Range and show a black area with a plus sign to the right of the GREEN range. Long Range actions may target models an unlimited distance beyond GREEN. Actions which don't include the long range area may not target models beyond the Limiter.
Actions which don't specify a range will state who they can affect.
Some actions can target models at a longer range but not a closer range. For example, an action with a range of YELLOW and GREEN (but not RED) can target models within YELLOW and GREEN but not RED.
3. Result
What happens if the action is successful.
Targets of Actions
The model being affected by the action is the "target." For details of choosing targets, see the Targeting Actions section below.
Success & Failure
When a model attempts an action that shows a Skill icon, you'll roll a die to resolve whether the action succeeds or fails.
Resolving an Action
After choosing an action and using an Action Token, you'll do the following to resolve it:
- Choose the Action's Target: Make sure it's within the action's range and there is a Path of Attack. For details on Paths of Attack, see the Targeting Actions section below.
- Determine Opposition: If the target is a rival, they choose which color they will use for the Opposed Roll. If the action does not target a Rival, use the black Obstacle die for the Opposed Roll.
- Roll Dice: Both players roll their dice at the same time and add the appropriate Skill value, plus any other modifiers (such as cover).
- Compare Results: If the Active Model's total is higher, the action succeeds; otherwise it fails.
When an action targets a rival model, the target chooses a die for their Opposed Roll that matches any one of their Ready or Used Actions Tokens — but there is a risk! If the target is wounded by the action, that Action Token's color will be reduced. Opposing an action does not use one of the target's actions.
If the action doesn't target a rival model (including actions targeting your models), your rival rolls the black, ten-sided Obstacle die and does not add any Skill to the roll.
You ever really just wanna punch someone? Take action!
If you wanna jump over a barrier so you can punch your neighboring gang's lights out? Reflexes check, friend. You wanna Hack somebody's brain and make them short-circuit because you're tired of their face? Well, first you have to be able to Hack, friend. You gotta know how.
Available Actions
When a model is Active, they can attempt actions on their card. Characters may also choose from actions on their equipped Gear and Loot cards. Models may take the same action multiple times, unless it is Difficult.
In addition, there are six Basic Actions available to Characters. Gonks may attempt most of these (with the exception of the basic Influence action).
Attack Actions
Attack actions may only target rival models and, if they are successful, they deal a wound to the target. Any action with the attack symbol (attack) is an attack action. This may appear in the Attack's text or attached to the Attack's Skill icon.
Looting Bodies
Characters may use an action to loot a body. For details, see the Looting Bodies section below.
Basic Reflexes Action
The Reflexes Skill is used to move, avoid ranged attacks, and use some Gear, such as thrown weapons.
Basic Move Action. Move up to your action color. If the move is unobstructed, it does not require a Skill Roll.
The Basic Move Action allows your model to move up to the portion of the Limiter that matches the color of the Action Token used (RED, YELLOW, or GREEN).
If there is nothing in the way, no Skill Roll is needed. Moving over obstacles or through scenery uses Reflexes, opposed by the Obstacle die. For details on moving through the Battlespace, see the Movement section below.
Basic Ranged Action
In the Combat Zone, everyone's packing a basic sidearm they can use to make short-range attacks.
Basic Ranged Attack. Range: YELLOW and GREEN. Attack.
A Basic Ranged Attack uses your Ranged Skill to attempt to wound a rival within YELLOW or GREEN ranges – but not RED. The attack symbol in the action's effects tells us that this is an attack action, so it may only target rivals and will deal a wound to the target if it is successful.
All ranged attacks are opposed by the target's Reflexes.
Basic Melee Action
Melee Skill is used for close combat attacks, weapons, and Gear.
Basic Melee Attack. Range: RED. Attack.
A Basic Melee Attack action uses your Melee Skill to attempt to wound a rival within RED.
All melee attacks are opposed by the target's Melee Skill.
Basic Medical Action
Aids in healing and cyberware.
Triage. Heal 1 from another Red-lined target within reach.
With the basic MED action, Triage, a model can attempt to heal another badly wounded model within reach (the shortest edge of the Limiter). For details on Healing, see the Wounds & the Wounded section below.
Basic Tech Action
A combo of 'net and meatspace know-how.
Firewall Defender. Remove one Hacked Token from friendly target. Range: RED.
The basic Tech action removes a Hacked token from a character within RED (including the acting character), protecting them from rival Netrunners. Models with one or more Hacked tokens are referred to as "Hacked".
Basic Influence Action
The ability to command, convince, or manipulate other people.
Basic Command. Activate Friendly model [Characters Only]. Range: RED.
Only usable by characters (not Gonks), the Basic Command action activates the target if successful. This may be used as a [RE]action to take Control (but not during an Inspire Your Team), as the target is now the Active Model.
Crits & Fumbles
The dice have two special results: Crit and Fumble.
Crit: A Crit will always succeed, regardless of any modifiers or bonuses, unless your opponent also rolls a Crit. When both players roll a Crit it is considered a tie (regardless of bonuses or the type of die that was rolled), and a tie goes to the defender.
Fumble: When you roll a Fumble, you always fail, regardless of what your opponent rolled or any bonuses or the type of die that was rolled (even if your opponent also rolled a Fumble, the tie goes to the defender).
Gameplay Example
John's Maelstrom are facing off against Lizzie's Tyger Claws. Here's a quick back and forth between their models. John gets the first turn and chooses to activate his Warlord, who has three Action Tokens available.
Maelstrom Action 1: Move
John uses the Warlord's GREEN Action Token to move, so he uses the Limiter to move the Warlord up to the GREEN 12" distance.
Maelstrom Action 2: Attack
Then, John uses one of the Warlord's yellow Action Tokens to attempt a Basic Ranged Attack action targeting Lizzie's Oyabun. The Basic Ranged Attack action can target rivals within the GREEN range (regardless of the fact that a yellow Action Token was used) and the Oyabun is within range. However, because a yellow Action Token was used, John must roll the YELLOW (eight-sided) die and add the Warlord's Ranged Skill of 1 to the roll.
Lizzie's Oyabun has both yellow and green Action Tokens, so she may choose either one to oppose the attack. Lizzie chooses to roll a GREEN (twelve-sided) die and add the Oyabun's Reflexes Skill of 2 to the roll.
John rolls a 7 and Lizzie a 6, for a total of 8 after adding their respective Skills. It is a tie, so the defender wins and the attack fails. John has used two of the Warlord's Action Tokens and has one remaining, but he chooses to end his turn and save the token for later. It is now Lizzie's turn.
Tyger Claws Action 1: Move
Lizzie chooses to activate her Kyodai and uses its yellow Action Token to move, moving the Kyodai up to the YELLOW 7" distance using the Limiter.
Tyger Claws Action 2: Attack
Then Lizzie chooses to use the Kyodai's remaining YELLOW Action Token to take the Basic Melee Attack action, targeting one of John's Pledges who is within RED of her Kyodai after the move. Because Lizzie used the yellow Action Token to make the attack, she rolls a YELLOW die.
The Pledge is a Gonk that shows yellow for its action, so it must roll a YELLOW die to defend. Lizzie rolls a 5 and adds her Kyodai's Melee Skill of 2 for a total of 7, while John simultaneously rolls a 4 and adds his Pledge's Melee Skill of 1 for a total of 5.
Lizzie has Control, so she has the first opportunity to use a Luck token for a re-roll and passes because she is winning. John now has the opportunity to use a Luck token for a re-roll and he uses one, re-rolling the YELLOW die and getting a new roll of 6 for a total of 7 after adding his Melee Skill.
Because John used a Luck token, Lizzie has a second opportunity to spend a Luck token and now chooses to do so (since they both have a 7 and the defender wins ties), re-rolling the YELLOW die: she rolls a 7 for a total of 9, after adding the Melee Skill.
Lizzie (the attacker) has the higher total and has won; the Pledge suffers a wound and is taken out of action (Gonks are always taken out if they are wounded). John falls to his knees and cries in despair; the Pledge's wife is expecting their new baby any day now. The Kyodai has no more Action Tokens, so it is John's turn.
Maelstrom Action 3: Attack
John chooses to activate his Warlord again, who still has one Ready YELLOW Action Token. He uses it to take a shot at the Kyodai in a storm of vengeance for the slain Pledge.
The Kyodai has two YELLOW Action Tokens, and Lizzie must again choose a token to oppose with (because Used Action Tokens may still be used to defend and defending does not exhaust tokens). Sadly for the Pledge's family, John misses. The Warlord's Action Tokens are all used, so John loses Control and play passes to Lizzie.
Tyger Claws: Inspire Your Team
Lizzie chooses to Inspire her Team, letting her take one action with each of her Gonks (Shatei). Next, Lizzie flips all of her characters' Used Action Tokens to Ready (so far just the two on the Kyodai) and play passes to John.
Difficult Actions
Models can normally choose any combination of their available actions when they are activated, including performing the same action multiple times. The exception is Difficult actions.
Any action with the Difficult keyword can be used only once and can only be used again after the next time you Inspire Your Team.
When you use a Difficult action, place a Used Action Token on the Difficult action as a reminder that it cannot be used again. When you Inspire Your Team, remove the Action Token from the Difficult action to show that it is available again.
This Grenade Launcher is "Difficult," so it can only be used once until the model's Team Is Inspired. When they use it, they place the Used Action Token on it to show that it's not available.
(Un)Skilled Rolls
Every model can attempt to use any action available to them, even if the matching Skill does not appear on their card: they simply have "0" for that Skill. When they roll their Skill Roll, they don't add anything to their roll – but they can still try.
Example: A Rookie Lawman moves to a Red-Lined team member and attempts Triage. The cop doesn't have the MED Skill, but he can make an unmodified roll to see if he can help his partner regain a wound.
Free Actions
Sometimes an ability or effect will allow a model to take an action "for free." This means that the model does not need to use an Action Token to take the action. To determine the color of the action, the model may choose any Action Token it has, Ready or Used (Gonks use the color of action available on their card).
Fully Resolving Actions
Each action must be fully resolved before a model may start another action. For example, if a model activates and it has two Action Tokens, it may complete a Move Action and then complete an Attack Action. It may NOT make part of its Move Action, interrupt it to make an Attack Action, and then finish the move.
Command Actions
Comm beads, implanted communications devices, targeted data streams...all lend to more operational awareness and the ability for leaders to coordinate the actions of their teams.
Some actions, like the Basic Influence Action, allow you to activate another model. These are called Command Actions.
Mind Link. Activate friendly model.
If the action is successful, the target model becomes the Active Model and the model who successfully used the Command Action is done with their turn. Control goes to the player who owns the newly activated model (if that is the same player, Control does not change).
You can only ever activate characters who have at least one Ready Action Token, so if all of a characters' actions are used they may not be the target of an action which would activate them (Gonks do not need a Ready Action Token to activate, as they do not have Action Tokens).
Command Actions usually (but not always) use the Influence Skill, and allow you to activate a friendly model. Like other actions that target a friendly model, they are opposed by the Obstacle die.
There are some Command Actions that allow you to activate a rival. In this case, they are opposed by the target's Influence. The newly Active rival is still controlled by your opponent: you're simply dictating who will be Active next.
Only the target of the Command Action may become the Active Model. This means the player who owns the newly activated model may not choose to Inspire Their Team or activate some other character.
Command Actions can be used as [RE]actions, unless otherwise stated.
Lookout. After you finish this model's activation, you may choose a visible friend or rival to activate.
Movement
The distance a model can move is determined by the color of the Action Token used for that move action (or the action shown on their card in the case of Gonks). Place the Limiter next to the model you are moving. You can move anywhere within that color.
GREEN actions allow you to move along the entire length of the Limiter. Use YELLOW or RED Actions to move a reduced distance.
Open Movement
If a moving model's path is clear, without any scenery or other models in it, moving is an Easy Action and does not require a roll.
You may move through friendly models freely, but models cannot end their movement with their base overlapping any other models' bases.
Obstacles & Barriers
There are two basic types of scenery: obstacles and barriers. Obstacles are things that hinder movement but wouldn't stop it, such as fences, cars, barrels, etc. Heavily ruined walls with lots of openings would also count as obstacles.
Barriers are taller, solid objects that can't be moved through, such as intact walls. Solid impassable objects taller than RED should count as barriers.
Before a game begins, discuss with your opponent and decide what scenery falls into which category.
Moving & Obstacles
Sliding over the hoods of cars, leaping fences, and moving through the press of a crowded street can be challenging.
When a model's path crosses an obstacle, the Move Action requires a Reflexes roll (using a die of the same color as the Action Token used for the move) opposed by the Obstacle die.
If the Move Action's roll is successful, the model has cleared the obstacle and can continue moving. If failed, they must stop where they encountered the obstacle.
This model must make a Reflexes roll to move across the obstacle.
Here, the Onee-san bends the Limiter around a container to avoid making a Reflexes roll.
Moving Through Rival Models
When moving through a rival model, your Reflexes roll is opposed by their Reflexes, instead of the black Obstacle die. If successful, the Active Model can keep moving. If it fails, the moving model stops within reach of the rival model! They are now in a Brawl.
This model needs to make an Opposed Reflexes roll to move through the rival model.
Moving & Barriers
Some things are going to stop you in your tracks: solid walls, security doors, concrete bunkers, etc. You cannot move through barriers – you have to either go around or climb over. If a barrier is taller than RED, it must be climbed or avoided.
When faced by tall barriers like solid walls, you must either go around or climb over.
Openings in Barriers
Some scenery elements, especially solid walls, may have holes or windows that a model might use to pass through them. These openings are treated as obstacles. Some especially dilapidated buildings may have so many openings that you'll want to count the entire thing as an obstacle rather than a barrier with separate openings.
Going through a door or similar opening intended to allow the passage of a person does not require a Reflexes roll.
Again, players should confer before playing and agree on what counts as openings and doors.
Openings in barriers are treated as obstacles. A Reflexes roll is needed to move through.
Moving & Dragging Objects
Before the game, discuss with your opponent which objects are light enough to be dragged. A model within reach of an object that may be dragged can attempt to drag the object by making a Reflexes roll. When dragging an object, you may only move within RED, even if using another action color. Make another Reflexes roll if you encounter an obstacle.
Dragging an object is opposed by the Obstacle die. In some instances models may also be dragged; see the Brawls section below.
If successful, move the Active Model and then place the dragged object within reach of it after completing the move. This can include dropping objects off of elevated scenery. Look out below!
Some objects can be dragged: make a Reflexes roll vs. the Obstacle die to move the model within RED, then place the dragged object within reach.
Jumping Gaps
To move across a gap between two elevated surfaces, make a Reflexes roll vs. the Obstacle die. If you succeed, complete your Move Action normally. If you fail, your model has miscalculated its leap and fallen mid-jump: move them downwards to the next horizontal surface below the middle of the gap (see Falling Damage, below). A model may only attempt to jump across a gap that is a distance of RED or less.
Leap across gaps (RED distance or less) with a Reflexes roll vs. the Obstacle die.
Falling Damage
When a model falls, use the Limiter to measure the distance fallen, stopping at the next horizontal surface below the model. If the distance is within the RED range, you suffer no wounds. If you fall within the YELLOW or GREEN range, the model takes 1 wound. If you fall more than the length of the Limiter, the model is taken out. For details on wounds, see the Wounds & the Wounded section below.
If an object (or model) falls onto a model on a lower level, the model on the lower level suffers falling damage as if it had fallen the same distance as the object. The object is then placed into base-to-base contact with the model on the lower level.
If the model falls from this YELLOW height ledge, it will take one wound (replacing one of its Action Tokens with a RED token).
Opposed Rolls That Do No Wounds
There are times that a model is called on to make a roll even when it is not being attacked. One frequent cause for such a roll is when an enemy model attempts to move through one of your models and your model makes a Reflexes roll in an attempt to stop the rival from moving.
In these instances, you may choose any color die to roll that corresponds to an Action Token your model has (Used or Ready) and use that die. If you fail, no wound is dealt and the Action Token remains unchanged. If you suffer a wound, see the Wounds & the Wounded section below.
Here, a Tyger Claw model attempts to move through a rival Maelstrom model.
The Maelstrom model has a Used GREEN Action Token and a Ready YELLOW Action Token. The Maelstrom model chooses to use their GREEN Action Token to stop the Tyger Claw's movement and rolls the GREEN die (even though the token is Used).
The Maelstrom model fails its roll; the Tyger Claw model may continue moving. Nothing happens to the Maelstrom model's Action Token which it used to try to stop the Tyger Claw.
Climbing Up & Down
To climb up or down a vertical barrier taller than RED, a model must start their action at the edge of the barrier. Models can climb up or down the same distance they could move normally.
Climbing – One Action
Make a Reflexes roll opposed by the Obstacle die. If successful, the model has climbed the barrier. On a successful climb, the model may continue moving once reaching the top of the barrier, as long as the total movement is within the limit of the color action being taken.
If the action fails, the model has fallen: they do not move and take falling damage, depending on the height of the barrier (see Falling Damage, above).
A model may climb up and down in the same action, as long as the total movement is within the limit of the color action being taken.
To the left, the model begins its action at the bottom of the building. The building is higher than RED so the model must attempt to climb to move up. It does so, using a YELLOW Action Token. The model succeeds, so it may move 4" up the building and then move another 3" for a total of 7", the length of YELLOW on the Limiter. If the model had failed its climb, it would have taken falling damage as if it fell 4" and the action would have been wasted.
Climbing – Two Actions
You may also combine two actions in a row to climb longer vertical distances, but this requires a second Reflexes roll. If you fail the second roll, the model falls from the point it would have reached at the end of its second action.
A Ronin attempts to climb a tall building using two actions. The model succeeds on its 1st Reflexes roll, but fails the 2nd. The model falls from the height it would have reached on its 2nd action.
Climbing Down
If a model fails while climbing downwards, they have fallen: place them at the bottom of the barrier and they take falling damage.
Ease of Climbing
Some barriers may be easy to climb, for example, the side of a building with a ladder or hand-holds. In these instances, models may move up and down the barrier normally without making a Reflexes roll.
Be sure to discuss all terrain with your opponent before the game so you agree on what may be easy to climb.
Parkour!
A model may need to make multiple rolls during a single move action if they move through multiple obstacles or rival models.
Each obstacle requires a separate roll. With a GREEN action, a model can move a fair distance through the Battlespace and may encounter many obstacles as they traverse the streets of the Combat Zone!
1. This Tyger Claws Ronin uses a GREEN Action Token and attempts to move the full length of the Limiter.
2. An Obstacle is in its path, so the Ronin must make a Reflexes roll opposed by the Obstacle die – and succeeds. If it had failed, it would stop at the obstacle.
3. Finally, this Maelstrom Ripper is also in the path of the Ronin. The Ronin must make a Reflexes roll, opposed by a Reflexes roll from the Ripper. This time the Ronin fails and must stop within reach of the Ripper. It is unable to move the full length of the Limiter.
Free Movement
When an ability causes a model to move, this is shorthand for granting the model a free basic move action. If the action has a color specified with it (such as Moves GREEN or the "the same color") then the move may be up to that range. The moving model must choose one of its action tokens, which determines what die is rolled during parkour, but the distance moved is determined by the effect's text.
Targeting Actions
Many actions target another model: friend or foe. When choosing a target for an action, the Active Model must have a Path of Attack to their target.
Path of Attack
When an action targets another model, imagine a path the width of the Limiter connecting the acting model to the target: this is the Path of Attack.
When making a black-range attack, imagine the edges of the Limiter extending forever. When two models can draw a Path of Attack to each other, they are visible to each other.
The model has a clear Path of Attack to their target.
Obscured Paths of Attack
Scenery can be an obstacle or a barrier. For more details on obstacles and barriers, see the Obstacles & Barriers section above.
Each obstacle that intersects or fully crosses your Path of Attack will add 1 to your target's Opposed Roll. Other models also count as obstacles, adding 1 to the Opposed Roll for each other model in the Path of Attack.
An obstacle crosses the Path of Attack, adding 1 to the target's Opposed Roll.
Barriers that enter your Path of Attack but do not cross it also add 1 to the Opposed Roll.
One barrier enters the Path of Attack and obscures the target, adding 1 to their Opposed Roll.
If a barrier crosses your Path of Attack, the Path of Attack is blocked and you may not attack that target.
A barrier fully crosses the Path of Attack – the Maelstrom Ripper cannot attack their target.
Objects within reach of the attacker do not affect the Opposed Roll.
Elevated Attacks
Any barrier taller than RED that a model can stand on is elevated. When a model is within reach of the edge of an elevated barrier (such as the edge of a rooftop), that barrier counts as an obstacle to being attacked, but not attacking.
Here, the edge of the building counts as an obstacle to the Maelstrom Ripper below, but the Ronin on the roof has a clear Path of Attack to the model below.
Here, because the Ronin is not within reach of the barrier, neither of the models would have a Path of Attack to each other. This is because the building is treated as a normal barrier since the model on top is not within reach of the edge, and it completely crosses the Path of Attack.
Actions with Multiple Targets
When an action targets more than one model, the attacker makes a single die roll, which is opposed by all the targeted models, who each make their own Opposed Roll. This can result in an attack that wounds one model but misses another.
This happens most often with Torrent attacks and when models shoot at Brawling models.
Torrent attacks target all models within the action's Path of Attack.
In the example to the right, since the action has a YELLOW range, the two closer Tyger Claws models would both be targeted by the attack, but the third Tyger Claws in GREEN range would not.
Both targeted models make their own Opposed Roll. Each model whose Opposed Roll is lower than the attacker's roll will be wounded by the attack.
Sample Torrent Attack. Target all models within the action's Path of Attack. Attack.
Armor
Nano-weave body armor, ablative-plated cyberskin, and other high-tech Gear confers Armor, which protects the wearer from ranged and melee attacks.
Armor does not protect against other actions or attacks, such as a Netrunner using a Tech attack.
Gear Cards with Armor
Some Gear cards have Armor. A target with Armor Gear may choose to add the Armor from one piece of Gear to their Opposed Roll, instead of their Skill.
You cannot combine Armor values from multiple pieces of Gear.
If the Attack is successful, the model discards the Armor Gear card used, instead of taking a wound.
If the Attack fails, the Armor Gear and the model are unaffected, as normal.
Character Cards with Armor
Some models have an Armor value on their card. Models with Armor can use their Armor against ranged and melee attacks, just like a character with Armor Gear.
The difference is that the Armor on a model's card is not removed if the model is targeted by a successful attack. Instead, the model suffers a wound as normal. They can still use their built-in Armor value against later attacks.
Armor which is on a model's card may not be combined with Armor from that model's Gear. A model may only ever use one source of Armor against a single attack.
Brawls
When the action really gets up close and personal and two rival models' bases are within reach of each other, they are "Brawling" with each other.
If multiple models from the same team are within reach, they are not Brawling with each other.
When taking actions that have a target, Brawling models may only target rivals that they are Brawling with.
Two rival models are within reach: they are Brawling.
Moving in a Brawl
Movement while in a Brawl is limited. When moving, Brawling models must finish any move within reach of all the rivals they were Brawling with at the start of their movement.
Escaping a Brawl
To move out of a rival's reach while Brawling, attempt a Basic Move Action, opposed by the Reflexes of one rival that is within reach of the model you wish to move (of your opponent's choice, if there's more than one).
If the action succeeds, move normally. If it fails, your action is used and you don't move.
Outnumbering Enemies in Brawls
If the model you wish to move has more friendly models within reach than rival models, you "outnumber" your enemy. Models may freely leave a Brawl when they outnumber their rivals.
Choosing Targets While Brawling
Brawling models may only target rivals they are Brawling with. Once an enemy is grappling with you, it is very hard to pay attention to anything else!
This means many actions are not usable in Brawls, if they can't be used within RED or within reach, or if they have a target that is not a rival.
Shooting into a Brawl
A model that is not Brawling may attempt to target a Brawling rival – but be careful, since you can easily end up wounding your models!
When you target a Brawling rival who the Active Model is not Brawling with themselves, you count as targeting the selected rival and all models that are within reach of that target. The active model's roll is opposed by all the target models (friend and foe).
Only the targeted model with the lowest defense roll (after modifiers) is affected by the action. In the case of a tie, the original target's controller chooses which model is affected.
When firing a blast or torrent weapon into a brawl, resolve the attack against the target(s) as you normally would for those weapon types.
Dragging Models
A model may attempt to drag another model that is within its reach.
Dragging a friendly model that is not Brawling is opposed by the Obstacle die. Dragging a friendly Brawling model is opposed by the Reflexes of the Rival in the Brawl (of your opponent's choice, if there's more than one).
Dragging a rival model within reach is opposed by that rival's Reflexes. If the roll is successful, move your model and the target following the rules for dragging objects (see Moving & Dragging Objects, above).
The active character attempts to drag the rival model within reach. Their roll is opposed by the rival's Reflexes.
These three characters are in a Brawl, since their bases are well within reach of each other (measured by the width of the Limiter).
If the Tyger Claws Leader wants to move away from the Brawl, she'll need to make a Reflexes roll against a rival of her opponent's choice.
If the Tyger Claws' Onee-san shoots into the Brawl, all three characters will be targeted by the attack. The model with the lowest defense roll may be wounded.
Wounds & the Wounded
When a model is the target of a successful attack, they suffer a wound. Other situations, such as falling, can also cause wounds.
Wounding Characters
When characters suffer a wound, one of their Action Tokens will be changed to RED. When a character is wounded during an Opposed Roll (most often an attack), the Action Token they used for their Opposed Roll is changed to a RED token. The new RED token comes into play with the same side up as the one it replaced.
Example 1: One of your characters is targeted by an attack and you choose a YELLOW token for your Opposed Roll.
The attack is successful, so you must replace the chosen YELLOW Action Token with a RED Action Token. The chosen YELLOW token was Ready, so the new RED token is also Ready.
Example 2: One of your characters is targeted by an attack and you choose a GREEN token for your Opposed Roll.
The attack is successful, so you must replace the chosen GREEN Action Token with a RED Action Token. The chosen GREEN token was Used, so the new RED token is also Used.
Example 3: One of your characters attempted to jump a gap (see Jumping Gaps, above). It used a YELLOW Action Token so it rolled a YELLOW die versus the Obstacle die. It failed and fell the GREEN range of the Limiter, so it must suffer a wound. The YELLOW Action Token your character used to jump is replaced with a RED Action Token.
Example 4: One of your characters attempts a Dangerous action using a GREEN Action Token (see Dangerous, below). Your character will roll a GREEN die and, if it Fumbles, the GREEN token used to take the action will be replaced with a RED Action Token.
Red-Lined Models
Models whose actions have all been wounded and are all RED are "Red-lined." Some actions only affect Red-lined models (most notably, the basic MED action, Triage). If a Red-lined model heals any wounds, it will no longer be Red-lined.
Taking Out Your Rivals
If a model opposes an attack with a Red Action Token and is wounded, they are taken out: place a Body token in base to base contact with the taken out model and then remove the model from the table. To remember which body belongs to which model, they are numbered. Find the Body token which matches the number of the token that was placed on the table and place it on the model's card (a Gonk card may end up with multiple Body tokens on it). Taken out models can no longer be healed and are removed from play.
Wounds Outside of Opposed Rolls
On a rare occasion a model may be wounded even when there was no Opposed Roll (for example, an ability that automatically causes a wound). On other occasions, a model may suffer more than one wound during an Opposed Roll, so there are still more wounds to apply after the Action Token that was used to defend is wounded (such as with a Deadly attack).
In these instances, the model's controller chooses which of the model's Action Tokens is replaced with a RED Action Token. If the model was Red-lined (or if it is a Gonk), it is taken out.
Example 5: One of your characters has one GREEN Action Token and two YELLOW Action Tokens. It is targeted with a Deadly attack (Deadly attacks deal an additional wound), defends with a YELLOW token, and fails.
Your model is now suffering two wounds. The first must be applied to the YELLOW token that was used to defend, so it is replaced with a RED token. You may choose which token suffers the second wound, so you choose the remaining YELLOW token to preserve your GREEN token.
Wounding Gonks
Gonks don't use Action Tokens like other models, so don't take wounds in exactly the same way. When a Gonk would be wounded, they are immediately taken out. Place a Body token on the table, as normal.
Looting Bodies
A character within reach of a Body token can attempt to loot the body of its Gear or goods, by taking either of the following actions. Gonks haven't earned the right to loot yet: looting is Characters only.
Note that both looting actions are Complex, so you can't loot bodies when there are rivals within RED.
Loot Gear. Remove a Body token within reach from the table. This character may now use one of the taken out character's Gear or Loot cards. [Complex]
Note: Remember to give the card back after!
The Loot Gear action requires a successful Tech Roll in order to use the card from the body. If successful, remove a Gear or Loot card from the body and equip it to the character taking the action (starting Gear printed on the Character card may also be looted).
Loot Goods. Remove a Body token within reach and draw 1 random Loot card. [Complex, Easy]
If you don't want to risk failing the Loot Gear action or if the body has no Gear you want, you can use Loot Goods instead. No Skill icon is shown and the action is Easy, so no dice roll is required (though it still uses an action).
Most Loot cards can be discarded to gain a one-time benefit, while others provide an ongoing benefit for the rest of the scenario.
Both looting actions remove the Body token from the table, so each body can only be looted once.
Healing
If a model or Gear has the ability to heal wounds, it will say "Heal [X]," where X is the number of wounds healed. Each wound healed restores one RED Action Token to its original color. Characters cannot be healed to give them more actions than they began the game with.
Healing often requires a Med Skill roll. Like any action that targets friendly models, it is opposed by the Obstacle die.
Only models currently on the table can be healed. Once a model is taken out, they can no longer be healed. Since Gonks are immediately taken out when they are wounded, they cannot be healed.
[RE]actions
[RE]actions represent your models adapting quickly as the battle gets more bloody, taking a shot or throwing a punch at the person who just bloodied them – or moving out of the line of fire to avoid being attacked again.
When a character takes a wound from an attack, that character may immediately make a [RE]action. [RE]actions use Action Tokens like normal actions do, so the character must have a Ready Action Token in order to use a [RE]action.
[RE]actions are a single action, taken after your Rival's wounding action is fully resolved. They interrupt the normal sequence of your opponent taking actions.
Each model may only [RE]act once per enemy action, even if that action causes more than one wound (such as a Rapid attack). If that character is wounded again by a different action (and has another Ready Action), then they may [RE]act again.
If a character suffers a wound that was not dealt by an attack, it may not [RE]act. You may not [RE]act to a [RE]action.
If the wound caused the character to be taken out, it may not [RE]act.
Unreactive Gonks
When a Gonk is wounded, they're taken out, so they don't make [RE]actions.
[RE]action Attacks
If you use a [RE]action to attack, the attack must target the model who dealt the wound.
[RE]actions and Control
[RE]actions do not normally change the Active Model and do not change who has Control.
However, if you take out the rival Active Model with a [RE]action, your opponent loses Control. If you take out a Gonk while your opponent is Inspiring their Team, they retain Control and finish Inspiring their Team.
In addition, some Command Actions do change who is the Active Model. If one of these actions is used as a [RE]action, Control may pass to a new player. However, actions which change who has Control may not be used while your opponent is Inspiring their team. (A player may not lose Control while using Inspire Your Team unless a card specifies otherwise).
[RE]acting to an Attack
1. The Maelstrom ganger wounds the Tyger Claws character with a melee attack.
2. Because the Tyger Claws character is wounded, one of her Action tokens is exchanged for a RED token.
3. The Tyger Claws character can now [RE]act, if she has a ready action. She chooses to use that RED action to move away, to stop the Maelstrom ganger from attacking again.
Gameplay Example
John's Maelstrom are still tangling with Lizzie's Tyger Claws. Lizzie gets the first turn and chooses to activate her Veteran Kyodai, who has two actions available (the Veteran version of a character is the one with the Street Cred star in the upper right).
Tyger Claw Action 1: Attack
Below, Lizzie uses the Kyodai's YELLOW Action Token to attempt a Basic Ranged Attack targeting John's Veteran Ripper, who is in range. John chooses to defend with the Ripper's GREEN Action Token and roll the Green die (this does NOT exhaust the token). Because a YELLOW Action Token was used, Lizzie rolls the YELLOW die. The Kyodai has no Ranged Skill, so it adds 0 to the roll. The Ripper has no Reflexes Skill so it also adds 0 to its roll.
Lizzie's result is higher, so the attack was a success and Ripper must suffer a wound!
The Veteran Ripper has two Action Tokens (Green and Yellow) but, because it chose to defend with the GREEN token, the GREEN token is replaced with a RED Action Token. The GREEN Action Token was Ready, so the RED Action Token that replaces it is also Ready.
Maelstrom [RE]action 1: Attack
John chooses to [RE]act with Ripper, which Ripper can do because it has a ready Action Token and it suffered a wound (if the attack had failed, Ripper would not be able to [RE]act).
John chooses to attack with Ripper. Attacks taken during a [RE]action must target the model that dealt the wound, so Ripper must target Kyodai.
Ripper uses its YELLOW Action Token to attempt a Basic Ranged Attack targeting Kyodai. Lizzie chooses to defend with Kyodai's Used YELLOW Action Token.
After both players roll and add their models' relevant Skills, John has the higher result, the attack was a success and Kyodai suffers a wound!
Kyodai has two Action Tokens (GREEN and YELLOW) but, because Lizzie defended with the YELLOW token, the Yellow token is replaced with a RED Action Token. The YELLOW token was Used, so the new RED token is also Used.
Tyger Claw Action 2: Move
Even though John interrupted her turn with a [RE]action, Lizzie still has Control and Kyodai is still the Active Model. Kyodai has one remaining Action Token which Lizzie uses to move. Kyodai then has no more Ready Action Tokens and Control passes to John.
Maelstrom Action 1: Attack
John chooses to activate his Warlord, who has three ready Action Tokens. John uses a GREEN Action Token to attempt a Basic Ranged Attack targeting Kyodai. Lizzie chooses to defend with her remaining GREEN Action Token.
The action is a success, Kyodai suffers a wound, and must replace the Used GREEN token with a Used RED token.
Lizzie wants to [RE]act but, because Kyodai has no Ready Action Tokens, she may not. All of Kyodai's Action Tokens are now RED; Kyodai is Red-lined!
Maelstrom Action 2: Attack
Over-confident and certain Kyodai is done for, John chooses to use the Warlord's first YELLOW Action Token to attempt a Basic Ranged Attack targeting Oyabun. Lizzie chooses to defend with one of the Oyabun's YELLOW Action Tokens.
After both players have rolled and added their relevant Skills, John's result is higher so the Oyabun suffers a wound, replaces its YELLOW Action Token with a RED Action Token, and chooses to [RE]act.
Tyger Claw [RE]action 1: Influence
Lizzie chooses to attempt a Basic Influence Action with her Oyabun. She chooses to use the Oyabun's GREEN Action Token and target the Onee-san (who is within the Basic Influence Action's range of RED). Lizzie rolls the GREEN die (because she used a GREEN Action Token) opposed by the Obstacle die (because she is targeting Onee-san, a friendly model). Lizzie adds the Oyabun's Influence Skill of 2 to the roll.
Lizzie rolls higher than the Obstacle die so the action is a success! Onee-san activates and Control passes to Lizzie, even though John still has one Ready Action Token remaining on his Warlord.
Tyger Claw Action 3: Move
Onee-san has three ready Action Tokens and Lizzie exhausts one of their YELLOW tokens to move them YELLOW towards Kyodai in order to get within reach of Kyodai.
Tyger Claw Action 4: Triage
Lizzie exhausts Onee-san's GREEN Action Token and targets Kyodai (who is now within reach) with the Triage action.
Lizzie rolls the GREEN die opposed by the Obstacle die (she does not add any Skill as Onee-san has no Medical Skill). Lizzie succeeds and restores a Used RED token to a Used GREEN token. Should have taken out Kyodai when you had the chance, John!
Netrunning
When the bombs fell, the global 'net that powered life in the future also fell. In the Time of the Red, bits and pieces remain and talented Netrunners are able to access local nodes and data. Many 'net attacks are made directly against their target, at close ranges.
Netrunners in Your Team
Your team may include one or more Netrunners: talented individuals who are able to surf the digital pathways that so many residents of the Combat Zone have installed in their meat-ware.
Models with the NETRUNNER keyword are able to install and run programs. Programs are a special type of action which don't use "meat-space" Action Tokens the way moving, attacking, or interacting with the Battlespace does.
Installing Programs
Netrunners can install a number of programs equal to their TECH Skill at the beginning of the game.
Before each game begins, choose which of your Netrunners have which programs installed. Programs have a rarity number, just like Gear. You may not include more copies of a program in your team than its rarity. A single Netrunner may not install multiple copies of the same program.
See the Building Your Team section below for details on building your team.
Launching Programs
Like meat-space actions, programs can be GREEN, YELLOW, or RED quality. When you attempt to launch a program using the Tech action on the card, your Netrunner will roll the color die that matches the quality of the program.
Attempting to run a program does not use an Action Token. If the TECH roll is successful, resolve the results and flip the card to its Running side – without flipping an Action Token.
If a Netrunner fails to launch a program, they may not attempt to launch that program again during the same activation.
Programs may not be used as [RE]actions.
Programs User Guide
Program cards are double sided with a GREEN, YELLOW, or RED "Loaded" side, and a blue "Running" side. All programs start Loaded, with their GREEN, YELLOW, or RED side face-up.
Loaded Programs
The Loaded side will have a TECH action the Netrunner can attempt. This may have immediate or ongoing results.
As with other actions, if the program's TECH action targets a rival, it is opposed by that rival's TECH Skill. If it targets a friendly model, the program is opposed by the black Obstacle die.
Running Programs
Programs' Running sides list their ongoing effects. Many programs cause the Netrunner to be Vulnerable while the program is running.
Vulnerable. All of a Vulnerable model's Skills are reduced to zero, except the model's Tech Skill, which remains unchanged.
The Running side will also say when to reload the program, flipping it back to it's Loaded side. Many programs are reloaded when you Inspire Your Team.
Refresh Program. Reload when you Inspire Your Team.
A model may run its programs during its activation, and the program may not interrupt another action, unless the program states it may be used during a different time.
Combat Netrunning
Your Netrunners are your first line of defense against enemy hacking. When one of your models is targeted by a rival's program, you may oppose their TECH roll with a Netrunner instead of the declared target, if that Netrunner has a Path of Attack to the rival attempting to run the program.
If your Netrunner doesn't stop the program, your Netrunner is now the target of the successfully run rival program.
Hacking Your Rivals
Many programs have the effect "Hack target rival" when run. If these programs are run successfully, place a Hacked token on the target's Character card. Characters may have more than one Hacked token at a time.
Many programs only affect "Hacked" Rivals and may have a greater effect on characters with more than one Hacked token.
Note: Because Gonks are low-level scum who don't merit decent cyberware, they can't be Hacked. They can still be affected by programs that do not involve Hacking tokens.
Safeguarding Your Brain. The higher a character's TECH Skill, the less likely they are to be Hacked in the first place.
However, most decent Cyberware has some self-repair functionality built in: when you Inspire Your Team, remove up to one Hacked token from each character.
Memory Leaks
In the time of the Red, Netrunners' programs are often slapdash, untested ideas that don't come with a warranty. Using them can be dodgy or downright hazardous.
When a Netrunner Fumbles an attempt to run a program, they suffer a Stun 1 effect: they must immediately flip one Ready Action Token to Used, if possible. If they have no Ready actions, they take a wound instead. Either way, their activation ends and Control passes to their opponents.
Some programs' abilities have "Dangerous" in their description. Like other Dangerous actions, Fumbling a Dangerous program causes a wound, in addition to the normal program Fumble effects above, potentially causing two wounds if they didn't have an action to use.
Netrunner Activations
When you activate one of your Netrunners, they can use both "meat-space" actions and their installed programs. Netrunners can alternate between launching programs and using their Action Tokens in any order.
Example: A Netrunner could use a YELLOW Action Token to move, then launch two programs, then use a second Action Token to move again.
Sample Netrunner Activation
John activated one of his Netrunners, who has two YELLOW Action Tokens and two installed programs: one RED, one GREEN.
1. First, he uses a YELLOW action to move, to create a Path of Attack.
Then, the Netrunner attempts to use his GREEN Adware program. He rolls the GREEN die, opposed by the target's TECH Skill. Success!
2. The program runs and when the target fails an action roll, John will draw a Loot card.
3. Next, John tries to use his RED Running Rabbit program to provide some bonus movement to his gang.
Drones
Drones are models controlled by a player that do not have their own character or Gonk card. These represent small robots used for gathering scrap, spying, or even self-destructing near the enemy!
Drones are always brought into play with a Program card (either at the start of a game or during it). The program card that brings a drone into play will specify what the drone may do and how. Each unique drone has its own task: once a drone is in play, it continues to act as outlined on the program's Running side, regardless of whether the program is refreshed (unless the program specifies otherwise).
Attacking Drones
Drones are immune to actions other than attacks unless the action specifies that it works on drones. However, drones may be attacked normally. A drone is considered friendly to the team that controls it and a rival to all other teams.
When a drone is targeted by an attack, it defends itself using the Obstacle die. Its roll is unmodified and may not be changed with Luck tokens or other effects (unless they specify they work on drones).
If a drone ever would suffer a wound, it is taken out and does not drop a body token.
Deploying Models During a Scenario
Sometimes a program, Gear, Objective or other effect will direct you to deploy a model during a game. This is most common with programs that deploy drones, but other models are sometimes deployed during a game as well.
When you are directed to deploy a model during a game, take it and place it onto the Battlespace as directed by the effect. You do not need to spend EBs on the model, and it may act normally from that point on.
Building Your Team
In order to compete in the Battlespace, you're going to need a team. These rules assume you are playing a single, one-off game. However, Combat Zone also works great as a campaign. For more on campaigns, see the Campaign Games section below.
Follow these steps to build your team:
Choose a Faction
The first step is to choose your faction. Each faction has its own deck of Character, Objective, and Gear cards to choose from.
All of the models in your team must have that team's keyword or the Merc keyword.
For example, if you have chosen the Tyger Claws Gang as your faction, every model you use has to have Tyger Claws or Merc on their card.
Choose Your Leader
Every team must have one (and only one) character with the Leader keyword. Leaders are typically one of your strongest and most valuable characters, and they can have abilities that affect your entire strategy, so choose carefully.
Your Leader and Specialists are the only unique characters. You may have as many copies of other characters on your team as you wish.
Spending Your Eurobucks
Every Character, Gear, and Program card has a EB cost in the upper right corner (lower right on Programs). The total cost of all the cards you include in your team must be equal to or lower than the amount you and your opponent have agreed upon. Teams worth 100 EB are a good starting point, but you are free to play smaller or larger games.
Remember: The maximum number of Gonks you can include in your team is equal to the total Influence Skill of all your characters, and you must also pay EB for each of them.
During a campaign, you may be able to increase the value of your team beyond the limits of the scenario you are playing.
Rarity
Both Gear and programs have a Rarity value in the lower left corner of the card. Your team may not include more copies of a card with the same name than that card's Rarity value.
For example: The Maelstrom Gear Spikey Leathers has a Rarity of 2, so no more than 2 models in your team may equip Spikey Leathers.
Equipping Gear
When you purchase Gear for your team, equip it to a character. It will stay equipped to that character for the entire scenario. There is no limit to the amount of Gear a character may equip, except that a character may only equip a single Gear card with the Bulky keyword, and a character may not equip two or more Gear cards with the same name.
Some Gear has the "Cybergear" keyword. Any characters with Cybergear equipped are referred to as "Cyber-Characters" (Cyber-Characters are referenced in some abilities and Objectives).
Hiring Veterans
Most characters have two versions of their card. One of the versions shows one or more Street Cred stars in the upper right. The version with Street Cred is the Veteran version of the character.
If you are playing a one-off game, the Veteran version of the character costs an additional 5 EB for each Street Cred star it shows.
Veterans may not be hired in the first game of a campaign, but they may be hired once you have earned them. Also, during a campaign, you do not need to spend the 5 additional EB for a Veteran's Street Cred.
Hiring Mercs
Some models have the Merc keyword, which means they may be hired regardless of faction. In a one-off game, your team may include up to two Mercs. All teams can include Mercs. If you hire Veteran Mercs, you must pay 5 additional EB for each of their Street Cred stars as normal.
In campaign games, you may only hire up to two Mercs in the first game, and they must be the basic version. However, there is no limit to the number of Mercs you may include in your team in a campaign once you have earned more. Like normal Veterans, Veteran Mercs do not cost additional EB in a campaign.
Street Cred Requirements
Many Gear and program cards have a Street Cred requirement. This is shown as a number in the upper right of the card. To determine your team's Street Cred, total the Street Cred stars on all your characters. You may purchase any Gear and programs with a Street Cred requirement equal to or lower than your team's total Street Cred.
In a campaign, completed Objectives can also add to your team's Street Cred.
The Battlespace
The area your models are moving and fighting within is a key part of the game.
Monster Fight Club offers mats in both 22"x30" and 44"x30" sizes. The core box includes a 22"x30" mat. With that size Battlespace, you'd want 10-15 pieces of scenery (3 or 4 per quadrant). With a double-size battlespace, you'd also double the scenery.
You can play on any size space, but something between 20"-48" inches per side works well, with 2-3 pieces of scenery per square foot. You can play in a larger area, but the larger the table, the longer the game (usually).
Anything from buildings to scattered obstacles and cover make for a great Battlespace, and help define the environment. You can play on a wide-open field, but the game will be less varied and ranged attacks will be a lot more powerful.
Combat Zone scenario maps measure distances from the edges and center of the table. For example, a scenario might say that one player can deploy their models within YELLOW (7") of the center.
Cyberpunk Red: Combat Zone includes a folded game board. It may be helpful to mark the center of the map with a token or piece of scenery.
The Scenario
To determine the scenario, you will randomly choose one Scenario (unless you and your opponent agree on one you both want to play). The scenario will determine setup and how to win.
Deploying Your Team
The scenario will tell you how to set up your models in the Battlespace. You may be told to set up in the middle of the zone with your rivals coming from all sides. Or you might set up along one side of the Battlespace and have to fight your way past your rivals and escape!
Reserves
If a model has rules that allow them to be in Reserve, that means that you do not deploy them during setup. Instead, you'll wait and deploy them into the Battlespace later in the game: set them aside for now.
Deploying from Reserves
Some scenarios have special rules about where Reserve models can be deployed. If the scenario doesn't specify Reserve deployment rules, a model in Reserve is deployed the first time they are activated: deploy them within reach of any board edge. When deployed, they must be either more than GREEN away from all rivals OR within RED of a friendly model. The first time you activate a model in Reserve, you must deploy it before taking any actions.
Quarters
Some Objectives or scenarios require you to control "quarters." When asked to do so, divide the Battlespace into four equal quarters. You control a quarter if there are more friendly models completely within that quarter than rival models completely within that quarter.
Action Effect Rules
Each action has an effect in the game if it is successful. These often include one or more keywords that describe common effects. Keywords only take effect if the action is successful unless they state otherwise, such as Dangerous.
Rule of X
Wherever a rule has an [X], the X will be replaced with a number on a Character or Gear card, such as "Pierce 2."
Accurate
You may re-roll Accurate actions, after rolling. You may only ever re-roll each die once.
Blast
Blast actions affect a large area. When attempting a Blast action, place an Impact token in base-to-base contact with the target, then roll to see if the action succeeds and hits or fails and misses, opposed by the target's appropriate Skill (often Ranged vs Reflexes).
Above: The Blast is placed touching target model 1.
Model 2 may also be hit by the Blast.
Model 3 is outside the Blast.
Successful Blast Hits
When a Blast action succeeds, the targeted model (touching the Impact token) is affected by the action.
Next, all models within RED of the Impact token will also be affected (including the target), unless they can move out of the Blast area or evade the Blast. All models with a Ready Action Token may attempt a Basic Move Action.
Models not able to move farther than RED from the impact must attempt a Reflexes roll against the roll that originally placed the Blast. All models that fail this roll suffer the Blast's effect. This could result in the target being affected twice (often resulting in two wounds).
Missing with Blast Attacks
If the action fails, the target is not affected and the targeted player may move the Impact token up to RED away from its original location. The Blast action is then resolved at the new location.
Above: the Blast misses and is moved, within RED, by the targeted player.
The model in the new Blast range must [RE]act to move out of the way, or they will have to make a Reflexes roll to see if they take a wound.
Fumbling Blast Actions
If you Fumble a Blast action, the targeted rival places the Impact token in base contact with the attacker and the Blast is resolved as a "miss" against the Obstacle die (instead of the original result). If the weapon is also DANGEROUS the Blast will cause an automatic wound to the attacker, too.
Vertical Blasts
Blasts have a radius in all directions – including vertically. Models above and below the attack may be caught in the Blast too!
Blasts and Barriers
If there is a barrier between a model and the center of the Blast, that model is not affected.
You can't draw a line from the blast marker to model 4 that doesn't pass through a barrier, so they aren't affected by the blast.
Complex
Complex actions may not be attempted if there are enemy models within RED.
Crit Effects
Some special rules occur when a Crit is rolled and succeeds. On Gear, these appear as (Special Rule) Crits. For example, "Deadly Crits."
Dangerous
If a model rolls a Fumble when attempting a Dangerous action, they take a wound (and the action fails, as normal).
Deadly
Deadly attacks deal an additional wound when they hit. Deadly is often triggered by a Crit, as in "Deadly Crits."
Defense: [Skill X]
When using the listed Skill for an Opposed Roll, add X to your total. Note that unlike most effect keywords, this applies when the model is opposing an action.
Discard
If you use an action on a Gear or Loot card with Discard, you must discard that card after completing the action (success or failure).
Heal [X]
This action can restore [X] wounds (see Healing, above).
Indirect
Obstacles in this action's Path of Attack have no effect: they do not add to the Opposed Roll. Note that barriers still have the normal effect.
Pierce [X]
Pierce attacks reduce the value of the target's Armor by X. If that takes it to zero or below, that Armor may not be used to oppose that attack.
Push
A successful Push action moves the target model RED directly away from the Active Model.
Refresh [X]
Refresh actions flip [X] Action Tokens to Ready.
Rapid [X]
Rapid actions allow you to take the same action X times without using additional actions.
A Rapid action can target the same model more than once or target a number of different models. Resolve each of the Rapid actions separately, then resolve any and all [RE]actions in the order wounds were dealt, if any.
Walking Fire: Switching Targets
Rapid actions may switch targets between the repeated actions. This is called "walking fire." Each new target must be within RED of the previous target. For each target beyond the first, the action suffers a -1 penalty to the Skill Roll.
A shooter with a Rapid 3 weapon opens fire at a group of rivals. They start by attacking the 1st target with no modifier to their Skill Roll.
Then they "walk fire" and switch to a 2nd target, making that attack's Skill Roll at -1.
Finally, they move on to attack the 3rd target, this time with a -2 penalty. Any of the targets who were wounded may then [RE]act.
Silent
Targets of Silent actions may only [RE]act with an attack if the Path of Attack to the attacker is not obscured (meaning no obstacles or barriers cross the Path of Attack). Other [RE]actions, such as movement, may still be taken.
Stun [X]
Successful Stun actions flip [X] of the target's Action Tokens to Used, if possible. Which Action Tokens are flipped are chosen by the target's player.
If a Gonk is stunned, mark the Gonk model with a Used Action Token. Stunned Gonks cannot take any actions until after the next time that player chooses to Inspire Your Team. Then, remove all Used Action Tokens from the stunned Gonks.
Suppression
Models may only [RE]act to Suppression attacks with a move action.
Torrent
Torrent actions target all models in their Path of Attack, both friend & rival. Torrent actions have multiple targets and each target will oppose the action separately.
Unwieldy
Do not add the model's Skill to Unwieldy actions.
Campaign Games
Cyberpunk Red: Combat Zone is designed to be played in single one-off games or as a multi-game campaign.
Campaign Basics
Groups, clubs, or event organizers may wish to run a campaign: a series of games that tell a larger narrative about the denizens of the Combat Zone as you guide your team through its story and track its progress. Winning games and achieving objectives earns your team Street Cred. Once they've earned enough notoriety, your team may attempt its faction's Prove Your Worth mission. It's tough, but if you're victorious, you've won the campaign!
Scenarios, Loot cards, and some general tokens come with the core game and are shared between players. All your Character, Objective, and Gear cards are your own, so the cards you and your team show up with should be the cards you leave with.
When playing a campaign, your team will improve and grow over time.
Generally, things like Loot are discarded after a game. However, if some models happen to keep a shared element between games (such as a model getting to keep Loot from the last game due to a specific scenario effect), then remove the relevant Loot from the shared deck and place it on those models.
Campaign Teams in Single Games
There may be times when you want to use your upgraded campaign team in a one-off game (such as against a brand new opponent or someone who simply does not want to participate in the campaign).
If you're guiding a team through a campaign but want to play a one-off game with them, use the rules for teams in one-off games. This means that you will need to pay the 5 additional EB for each Street Cred star on your Veterans and you can include a maximum of two Mercs.
If your team has completed Objectives, you may include those in the one-off game as well. However, for each completed Objective that you choose to include in the one-off game, your opponent may randomly draw one of their Objective cards until they have an equal number of Objectives to you. Your opponent considers the drawn Objectives as complete for the duration of the one-off game.
Setting Up Your HQ & Supply
Every team has two groups of cards: their Supply and their HQ. The Supply contains the characters, Gear, and other cards you haven't found, bought, or earned yet. The HQ is where you'll keep your team's available characters and Gear.
At the start of the campaign your HQ contains:
- Basic Character cards (without any stars)
- Basic Gear cards (without any stars)
At the start of the campaign your Supply contains:
- Veteran Character cards (with stars)
- Advanced Gear (Gear with stars)
- All Objective cards (not yet completed)
As you play games with your team, complete Objectives, and raise your Street Cred, you'll be able to take better Gear and characters from your Supply and add them to your HQ. Completed Objectives are also moved from your Supply to your HQ. Make sure to keep your Supply and HQ cards separate.
Scenarios
To determine the Scenario, you will randomly choose one Scenario (unless you and your opponent agree on one you both want to play). Each Scenario shows:
- # of Players: How many teams the scenario is intended for.
- Story: A brief background behind the altercation.
- The Setup: Follow these steps before the game begins. This section will also describe any special features of the Battlespace and give a guide to what kind of scenery you should use.
- The Win: This section explains what each player must do to win the scenario.
- The Consequences: The effects of victory and defeat, if any, are explained here. This is critical if you are playing a campaign.
Choosing Your Team
In a campaign, you can promote your characters to improve their actions and Skills. You can acquire new Gear and complete Objectives which unlock new special rules and abilities for your team.
When choosing which cards to bring to a campaign game, you can choose from any of the cards in your HQ, but not your Supply.
Faction Objectives
Objective cards give you personal goals, in addition to the goals of the scenario.
Each faction has a deck of Objectives. Before each game, you will randomly draw four Objective cards and then discard one. The three remaining Objectives are the ones you will try to complete during the game.
You'll keep your Objectives hidden until they're completed. Once completed, you'll gain some sort of ability, bonus, or reward for your team.
Completed Objectives are added to your HQ - many of their rewards persist game after game.
Completed Objectives
When setting up for a game, take your previously completed Objectives from your HQ and set them face-up with their reward showing.
Completed Objectives provide a variety of bonuses: increasing the number of EB you can spend for the game; adding Character or Gear cards to your HQ; starting with more Luck tokens; or other effects.
Many completed Objectives also feature a star icon and increase your team's Street Cred.
There are three kinds of completed Objectives: ongoing, recycles, and Cybergear:
- Completed Objectives that are ongoing stay in play from game to game and continue to give you their benefit.
- Completed Objectives that recycle must be discarded for some effect. When an Objective that recycles is discarded, put it back into your Supply and it may be attempted again in a subsequent game.
- Completed Objectives that are Cybergear may be equipped to any model that is eligible to equip Cybergear during subsequent games. Some Cybergear Objectives may specify the model that is allowed to equip it.
When you complete an Objective, place it in front of you and gain its benefit immediately. Keep in mind some Objectives only help you while choosing your team (such as equipping a character with Cybergear or giving you more EBs), these Objectives will not affect you until the following game.
Street Cred
Your team has a Street Cred rating equal to the total number of stars you've earned. You can earn stars by completing Objectives during the game and promoting characters to Veterans. You can promote one basic character to a Veteran character each time you win a game.
Beginner's Luck
At the start of every campaign game, compare the Street Cred of the two teams. If one team's is lower, they receive a number of Luck tokens equal to the difference.
Gear: The HQ's Armory
During the course of your team's campaign, you'll be able to add Gear cards to your HQ. Each Gear card has a EB cost. When creating a team for a game, you still need to pay for the Gear and follow the EB limit for the game. The more Gear you collect, the more options you'll have.
Many pieces of Gear have a Street Cred requirement – you must be at least that cool to use those cards. At the start of your campaign, your team's HQ only includes Gear with a Street Cred requirement of zero.
Promoting Characters
When you win a scenario, you have the chance to promote a character. To do so, swap the current version in your HQ for the Veteran version of that character from your Supply (the Veteran Version will have an additional Street Cred star).
Most characters have two versions: one with no stars and one with a single star. Some characters may have a two-star version. You can only add one star at a time.
Note that you do not need to pay additional EBs for Veterans (including Veteran Mercs) in campaign games; you already earned them!
When you win a scenario and have the opportunity to promote one of your characters to a Veteran, you can choose to add a model with the Merc keyword to your HQ instead: add their card to your HQ. They're now available in your next game. The Merc you choose in this way may be a Veteran with a single Street Cred star, so you may as well grab a Veteran Merc instead of a basic one! If a Merc has a two-star version, you must hire its single-star version first and then promote it as normal.
Note that in campaign games there is no limit on the number of Mercs you have. If you win five games and add a Merc every time, so be it!
Gearing Up After Games
If your team's Street Cred rises after a game because you promoted a character or completed an Objective, check your Supply and see if there is any Gear you can add to your HQ. When you play your next game, you'll be able to choose from those cards too.
Example: When your Street Cred rises from three to four, you would find the Gear cards with a four-star requirement and add them to your HQ.
You will often have more Gear (and characters) in your HQ than you bring to the table. The extra characters and Gear give you more options, so that you're ready for varied scenarios.
If you acquired Gear or Loot cards during the game by looting an opponent's body, those cards return to the Loot deck or opponent's HQ after the game, unless otherwise specified.
Example: Your Tyger Claw character loots a shotgun from a fallen Maelstrom character. That shotgun returns to the Maelstrom HQ after the game.
Life & Death in the Combat Zone
Which scenario you play will detail the rewards for winning. After resolving those, you'll need to see how your team fared after the skirmish.
Recovering from the Scenario
Novice scrubs are a dime a dozen and no one pays much mind when a newcomer gets taken out, they are easily replaced.
However, you'll need to roll a die for each of your Veteran characters who were wounded or taken out of action during the scenario. Veteran characters will have at least one Street Cred star on their card.
Roll the color die that matches the best Action Token they had remaining at the end of the game. Veteran Characters who are taken out of action roll two RED dice. If you roll a Fumble, the character has suffered a major injury!
For example, a character who was wounded and ended the game with a RED and a YELLOW Action Token would roll a YELLOW die.
Injured Veterans & Mercs
Veteran characters have seen action and their experience in the streets is valuable and hard to replace. If you have someone with a MED Skill higher than zero on your team, have that character make a MED Skill Roll vs. the Obstacle die.
If successful, they pull through the major injury: return them to your HQ. If you fail, they have succumbed to their major injury.
Major Injury
A model that has suffered a major injury might not die, but they're not fighting for a while. Remove their card from your HQ and replace them with the basic version. Mercs are removed from your HQ, you won't be able to use them until you "re-hire" them.
Injured Leaders
The streets wait for no one – except the boss. If your Leader suffers a major injury, that's a major blow to their Street Cred!
If your Veteran Leader "dies" and must be replaced with its basic card, add the "Wounded Leader Objective Card" to your HQ, which temporarily reduces your team's Street Cred by one. The Wounded Leader card is never shuffled into your normal Objective deck.
This may affect what Gear you can bring to future games. You can discard this card after winning a game.
Wounded Leader. Discard this after you win a game. Reward: Ongoing. This gang's current Street Cred is reduced by 1.
Clean Up
Once you have finished promoting characters, determining injuries, and gearing up, it's time to clean up for the next game. All models heal all wounds and remove any game effects (such as Hacked tokens, etc). All Loot cards are discarded. All of your team's Character, Gear, and Objective cards are returned to either your Supply or your HQ, depending on whether they are available to your team.
Proving Your Worth
All good things must come to an end. Not that life in the Combat Zone is "good" exactly, but still...
When your team reaches a Street Cred of 10 stars, you have the opportunity to "Prove Your Worth." That means different things for different gangs: a reassignment for a successful detective, a lucrative corpo contract, or a Merc stint overseas. Either way, this is your chance!
Each gang includes a "Prove Your Worth" Scenario, which can only be played by a team with at least 10 Street Cred.
If your team has at least 10 Street Cred, you must choose to play your Prove Your Worth scenario during your next game. If both players have at least 10 Street Cred, the player with the most Street Cred plays their Prove Your Worth scenario. If the players are still tied, the one with the most completed Objectives plays their scenario. If the players are still tied, each player rolls a RED die and adds their Leader's Influence and the player with the higher result may choose.
Any team who wins their "Prove Your Worth" game has, in fact, proven their worth and escaped the Combat Zone. Congratulations! You have won the campaign!
At this point, the campaign can end, or your group may choose to continue playing to see who makes it out next. You can continue to play games with the winning team if your group agrees, but you might find it's more fun to start from the bottom and try to work your way up again with another team.
Optional Campaign Mode: Shared Market
If all players agree, they may play a Shared Market campaign. This campaign mode is best for players who are sharing a single core box, as they must share a Loot deck and their Gear will end up mixed together.
During the campaign, Loot remains on models from one game to another, until it is discarded.
In addition, you will create a "Shared Market" for Gear. At the start of the Shared Market campaign, each team adds all their Gear with zero Street Cred requirement to their HQ, then the players shuffle together all remaining Gear cards to create their Shared Market deck.
After every game, each player draws three cards from the Market and may add one of them to their HQ: they then pass the remaining two cards to the other player, who may add one of them to their HQ.
After each game, you may also spend Loot cards to draw more Market cards. Draw one Market card for each Loot card spent this way: you may add one of these Market cards to your HQ. Do not pass them to your opponent.
When playing with a shared Market, disregard the Street Cred and faction requirements on Gear. Remember, your team can only choose Gear that's been added to your HQ!
Multiplayer Games
Your group may find it enjoyable to play games with more than two players. In order to do so, you must choose a scenario that shows the number of players you have in the upper right corner. For example, if you want to play with three players, choose a three-player scenario.
Each player draws their own, individual Objectives as normal.
You will consider models from all other players to be rivals.
Control passes from the first player with Control and goes clockwise around the table (and is interrupted by [RE]actions as normal).
If a [RE]action changes who has Control, then Control continues to pass clockwise from the player who now has Control.
Team Games
Your group may find it enjoyable to play team games, with two players on one team facing off against another team of two players.
If you choose to do this, you may play one of the two-player scenarios and simply have one team be the attacker and the other the defender.
Control passes from one team to another, back and forth, just like it was a two-player game. Only one character may be activated at a time, as normal. So teammates will have to discuss whose model to activate when they have Control. If a player chooses to Inspire Your Team, it only applies to their models, not their teammate's. Their teammate will have to Inspire Your Team separately. After the player is done with Inspire Your Team, Control will pass to the opposing team.
You consider your teammate and all of their models to be friendly, and all models on the opposing team to be rivals.
Each player still draws their own individual Objectives, but they may show their Objective cards to their teammate.
Players win and lose as a team, so both players on the winning team will gain the benefits of winning the scenario.
In Conclusion
It's been a rough few decades here in the Zone... It's a tough place to be born in, a tough place to get out of.
Let's say, some of us make it. What next? If the Zone's all you've ever known, good luck trusting anyone on the outside.
Eh, it's not worth getting upset about, the outside world. They've got more EBs, they've got walls you can't hear through – I'm told – and vehicles that don't spew sludge all over the gravel, but anyways. Aside from that, do they know loyalty out there? Do they know Tyger Claws type loyalty, or something even more binding? Or is it every man for himself, just like with the Zoners? Every guy, gal, and pal out there vying for their EBs, vying for a view from their skyscraper windows, whatever.
I reckon the world outside is something to aspire to. But, let's say it's up to us to enjoy what time we have, in the home we found, or the home we were forced to make our own.
This limited time we're given on this forsaken planet, we'll spend it to the best of our abilities. Trying to be somebody. If you make it in the Zone, isn't that kinda, just as impressive as making it at some big fancy company?
Yanno, one day, I did a thing; I joined a gang. I was like, anything's better than rotting alone. I met some of the coolest people there, folks who inspired me to aspire to be the best the Zone has to offer.
Some of the other gangs have morals I'm not cool with. I'd rather we do our own thing.
When it comes to defending our own, we're unrivaled. At least, when it comes to defending ourselves against outsiders.
Anyway, one day I might get to make the choice: To leave, or to stay.
Whether I go or stay depends on what I'm leaving behind:
Did I make it into everything it could be? Did I rise through the ranks and stake out my piece of the Combat Zone?
Glossary
Accurate – You may re-roll Accurate actions, after rolling. You may only ever re-roll each die once.
Action – A single activity performed by a single model. Actions can include movement, attacking, healing, hacking, etc.
Action Dice – The GREEN, YELLOW, and RED dice, used when attempting an action.
Action Token – A marker used to indicate whether a character has an action available as well as the color of die used to resolve that action.
Activate – The act of selecting a model to become the "Active Model."
Active Model – The model that is currently taking an action.
Armor – Protective equipment that the target of an attack may use for an Opposed Roll instead of using a Skill. Armor provided by a Character card can always be used, but Armor from a Gear card can only be used until it fails to protect the wearer.
Attack – An action that will cause a wound to the target if it is successful. May only target rival models.
Barrier – A piece of scenery that a model cannot move through, such as a solid wall.
Basic Actions – 6 standard actions that any model may take (one for each Skill).
Battlespace – The area over which the action of the game takes place, which includes scenery and deployment areas for each team.
Blast – An action that affects models within a radius.
Body Token – A marker used to indicate where a model was taken out. Characters can Loot the Body for equipment.
Brawl – A situation where rival models are within reach of each other. Brawling models have limited action and targeting options.
Bulky – A model may have a maximum of one Bulky Gear.
Campaign – A series of linked scenarios.
Character – A capable member of a team, typically with multiple Action Tokens and special abilities.
Character Card – A card that shows the game rules of a specific character model.
Climb – Moving up or down a vertical barrier.
Command Action – An action that allows a character to activate another model, outside of the normal exchange of Control.
Control (of the Battlespace) – The active player is said to have Control. Only the player with Control can activate a model.
Complex Action – Complex actions may not be attempted if there are enemy models within RED.
Crit – A "critical hit;" the highest value on each die. Crits are usually an "automatic success" and may trigger additional effects.
Cyber-Character – A character with Cybergear equipped.
Dangerous Action – If a model rolls a Fumble when attempting a Dangerous action, they take a wound.
Deadly Attacks – Deadly attacks deal an additional wound when they hit.
Deadly Crits – Attacks which deal an additional wound if a Crit is rolled.
Defense [Skill X] – A bonus to the listed Skill that only applies when the model is opposing (defending against) an action.
Deploy – To place a model on the table, to enter the Battlespace during a game.
Difficult Action – A particularly complicated action; a character can only use each Difficult action once until the team is Inspired.
Discard – After using an action with Discard, the Gear or Loot card with the action is discarded.
Drag – Using a move action to relocate a rival or other object. Dragging is limited to the RED range regardless of the color of Action Token used.
Easy Action – Easy actions are actions that do not require a roll (an Action Token is still used).
EB – "Eurobucks," the currency of Combat Zone; used when creating your team.
Escape – Using a move action to leave a Brawl. Uses Reflexes opposed by a rival's Reflexes, unless you outnumber your rivals in the Brawl.
Exhaust – To flip a card face down; exhausted cards effectively have no text and cannot use any abilities or effects until they are refreshed.
Faction – One of the groups competing to control the Combat Zone. A team can only include members of a single faction (plus Mercs).
Fail – To unsuccessfully execute an action by having a lower, or equal, total than the Opposed Roll.
Fall – When a model involuntarily moves vertically down. This may cause it to suffer wounds.
Friendly – Your models are considered "friendly" to each other.
Free / For Free Actions – An action that can be taken without using an Action Token.
Fumble – The lowest value on each Action die. Fumbles are an "automatic failure" and may trigger additional effects.
Gear – Equipment or weapons a model can use during the game. Gear can give a model additional actions and/or other abilities.
Gonk – A novice member of a team, representing rank-and-file grunts or muscle.
Gonk Card – A card that shows the game stats and rules for a type of Gonk model.
Hacked – When a Netrunner gains access to a rival's cyberware, they place a Hacked token on that target. A target with a Hacked token is more susceptible to some programs.
Heal, Healing – The act of removing a wound from a model; when a wound is healed, one Action Token is restored to its normal color.
Impact Token – A marker used to indicate the center point of a Blast.
Indirect – An action that ignores obstacles in the Path of Attack.
Inspire Your Team – One of two options a player has when they gain Control; allows you to activate each of your Gonks (Gonks may take one action when they activate) while your characters refresh their Action Tokens.
Install – To assign a program to a Netrunner. A Netrunner can only run programs they have installed.
Jump – A model may attempt to jump across a gap between scenery up to RED.
Keyword – A descriptive word displayed on some actions and Character cards that is referenced by other rules.
Launch (a Program) – To use a program's effect. Launching a program does not use an action. If it is successfully launched, flip it to its Running side and resolve its effects.
Leader – The centerpiece of a team and often its most powerful member. Each team must have one and only one Leader.
Limiter – The measuring device used in the game, divided into GREEN, YELLOW, and RED lengths; the width of the Limiter measures the within reach distance.
Loaded – A program that is available to use, i.e., it has the Loaded side up.
Long Range – The area of the Battlespace beyond the GREEN range of the Limiter. Some actions have a black range icon and may target models beyond GREEN.
Loot, Looted, Looting – Taking a piece of Gear or drawing a Loot card from a model that has been taken out; also, something acquired by looting.
Loot Card – A card that shows a random trinket acquired through the act of looting.
Luck Token – A token that a player may spend to re-roll a single die roll. Each player typically starts with 3.
Memory Leak – When a Netrunner Fumbles a program, it must suffer Stun 1 or take a wound.
Merc – A character who is not loyal to a single faction. Can be included in any team.
Model – A single combatant, represented in the game by a miniature.
Move Action – An action that allows a model to change location within the Battlespace.
Netrunner – A character that has the ability to Hack rivals and install programs.
Obstacle – A piece of scenery that a model can move through or over, such as a low wall or rubble.
Obstacle Die – A black 10-sided die used for an Opposed Roll when an action does not target a rival model.
Opposed Roll – A die roll made by the active player's target to determine if the action the Active Model is attempting succeeds or fails.
Path of Attack – An imaginary straight line between the Active Model and its target, the width of the Limiter.
Pierce – Pierce attacks reduce the value of the target's Armor.
Program – A special type of action available only to Netrunners. Programs have effects when you Launch them.
Push – A Push action moves the target model RED directly away from the Active Model.
Quarter – One fourth of the Battlespace.
Range – The distance between the Active Model and its target. Most actions have a maximum range: you cannot choose a target that is a greater distance away from the Active Model.
Rapid – Rapid actions allow you to take the same action without using additional actions.
Rarity – The maximum number of a single Gear or Program card your team may have.
Reach – The width of the Limiter, representing "hand-to-hand" range.
[RE]action – A special action a character may take immediately after being wounded by a rival's action.
[RE]action System – The name of the game rules and mechanics.
Ready – A "face up" Action Token, which can be spent to take an action.
Red-Lined – A character that has only RED Actions Tokens remaining (due to wounds).
Refresh – The act of flipping Used Action Tokens to their Ready side, usually as part of an Inspire Your Team turn; also the act of flipping exhausted cards face up so their text is available again.
Reload – To flip a program card to the Loaded side so it is again available for use.
Reserve / In Reserve – A model that is not deployed at the beginning of the game, but saved to deploy later.
Rival – The opposing player; a model controlled by an opposing player.
Scenario – A single "game" of Combat Zone; the parameters for a scenario are described on each scenario sheet.
Scenario Sheet – A page that describes the special rules, setup, and goals for a single scenario.
Scenery – Any object or terrain located in the Battlespace; a piece of scenery can either be an obstacle or a barrier.
Silent – [RE]actions to Silent actions may only target the attacker if the Path of Attack is not obscured.
Skill – One of six core abilities that a model can use when attempting an action: Reflexes, Ranged, Melee, Medical, Tech, and Influence.
Specialist – Specialists are rare individuals. Your team may only include one of this model (but may include other Specialist models).
Street Cred – A measure of a team's or character's reputation; needed to gain access to some Gear or characters. Street Cred is gained by winning scenarios & completing Objectives.
Stun – Stun actions can force a character to flip Ready Action Tokens or prevent a Gonk from acting during Inspire Your Team.
Succeed – To execute an action by having a higher roll total than the Opposed Roll.
Suppression – Characters may only [RE]act to Suppression attacks with a move action.
Taken Out – A model that has suffered too many wounds and been knocked out of the combat. When a model is taken out, it is replaced with a Body token, which can be looted.
Target – The intended recipient of an action's effects.
Team – All of the models controlled by a single player.
Torrent – Torrent actions target all models in their Path of Attack, both friend and rival.
Unwieldy – Do not add the model's Skill to Unwieldy actions.
Used – A "face down" Action Token, which cannot be spent to take an action.
Visible – Something is visible if a Path of Attack can be drawn to it (regardless of range) without being fully blocked by a barrier.
Vulnerable – A model that is Vulnerable has all of their Skills, except Tech, reduced to 0.
Walking Fire – A penalty to Rapid actions when targeting multiple models.
Wound, Wounded – Primarily the effect of a successful attack, a wounded character must replace one of their Action Tokens with a RED token. If they cannot, they are eliminated. A single wound will eliminate a Gonk.
Game Summary
-
Determine the Size of Your Game. Agree with your opponent about how many EB each player is going to spend on their team. 100, 150, or 200 are good amounts, depending on how long you want to play.
-
Build Your Team. One Leader, multiple characters, plus some Gonks (limited by your character's combined Influence).
-
Choose Your Scenario. Each scenario will contain details of how to set up the Battlespace and what you need to do to win.
-
Play the Game. At any one time, one player will have Control and will take actions with their models. Control passes clockwise between players. Scenarios determine who has Control first.
-
Winning the Game. Play continues until someone wins by completing the goals of the scenario.
Player Turns
Taking Control. When you take Control, you have to choose between Activating a Character or Inspiring Your Team.
Activating a Character. Choose a character with Ready Action Tokens and take actions with them (the Active Model). Characters can choose from any of the six basic actions (below) and may have more available, depending on their Character card and Gear. When your Active Model is finished taking actions, Control passes to your opponent.
- Move: Move up to your action color. If the move is unobstructed, it doesn't require a Skill Roll.
- Melee Attack: Attempt to wound a rival within RED. Opposed by target's Melee Skill.
- Ranged Attack: Attempt to wound a rival within YELLOW or GREEN range. Opposed by target's Reflexes.
- Basic Med: Attempt to Heal 1 from another Red-lined target within reach.
- Basic Tech: Remove 1 Hacked Token from friendly target.
- Basic Influence: Activate Friendly Model (Characters Only).
Inspiring Your Team. Activate each of your Gonks who have not been taken out of action by taking a single action with each of them. – AND – Refresh all your characters' Used Action Tokens.
Using the Limiter
Ranges in Combat Zone are measured with the Limiter. Most actions picture a color range and can only target models within that range. When you move, you move within the color range of the action token you used to move.