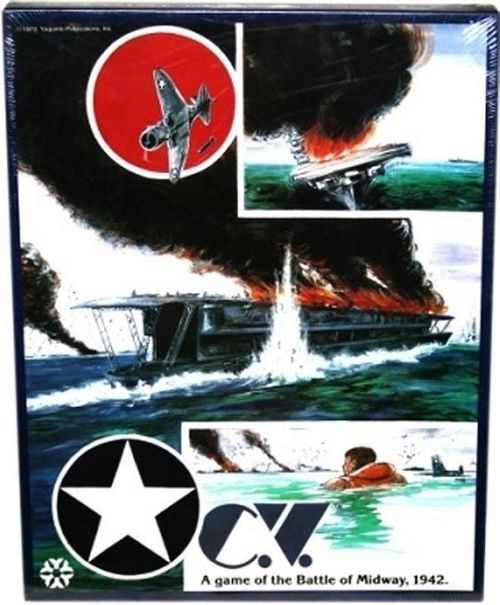
C.V.: A Game of the Battle of Midway
C.V.: A Game of the Battle of Midway Rulebook
Table of Contents
Table of Contents
Introduction to the Game
I. General Introduction
(The text of this section is the introductory paragraph set reproduced in the Table of Contents block above.)
CV recreates, in game form, the famous and decisive Battle of Midway in June, 1942. The game covers all the ships and planes used in the actual battle, units that could have been present, and all the key elements of the actual event. Although the battle was historically an American victory, the side that wins a game is in no way predetermined, and games will not necessarily follow the historical course of events. The players take command at certain points in time, and their actions and decisions will determine the results of each game.
CV is basically a two-player game, although multiple commanders can be used on both sides. Information is provided for setting up a number of different situations, or scenarios, as well as "what-if" situations to provide a great variety of games that can be played using the same rules. The various scenarios allow for games of varying duration to be played.
These rules may seem formidably long and complex, but their bulk is deceptive. Much of the booklet is concerned with historical data to familiarize the reader with what may be unfamiliar events, weapons, and tactics. The rules need not be memorized, only carefully and thoroughly read. The most commonly used information is given on the Game Card. The rules should be used as reference for questions that arise during the playing of a game, and a Table of Contents is included for ease in locating needed rules. The rules do not have to be learned at one sitting. Games can and should be played using only the Basic Game Rules, with selected Optional Rules introduced as the players' mastery of the game increases.
II. Game Scales
Each hex on the mapboard is roughly twenty miles across. Each Ship unit represents one actual ship, each Air Factor represents two or three actual operational planes, and each Ground Factor represents forty to sixty actual ground troops. Each Turn equals one hour of actual time.
III. Game Components
The following components are used for the play of the game. Please inspect these components carefully and familiarize yourself with them while reading through this section.
A. MAPBOARD: The cardboard mapboards show the ocean area over which the Battle of Midway was fought. A hexagonal grid has been superimposed on the map (which shows mostly ocean) to regulate and facilitate movement and observation, and to allow for precise positioning of the playing pieces. Individual hexagons are called "hexes". Each hex contains a four-digit identification code as its designation. The mapboard is the playing surface on which the unit counters are placed and moved. The mapboard features are as follows:
1. MAPBOARD HALVES: The mapboard has two twenty-one by twenty-seven and one-half inch halves, labeled A and B. Counter-folding the existing creases will allow the mapboard to lay flat. Each mapboard half is divided into four sectors by the creases and cuts. In each sector is a Directional Hexagon to show directions, each containing a Roman numeral that identifies the sectors. The mapboard is laid together as shown:
Mapboard diagram: Sectors I, II, III, IV are on the top row (half A on the left, half B on the right) and sectors V, VI, VII, VIII are on the bottom row. NORTH is at the top and SOUTH at the bottom.
2. DIRECTIONAL HEXAGONS: Each hexside is identified by a directional notation, that direction corresponding to the same side of the Directional Hexagons.
- N : NORTH
- S : SOUTH
- NE : NORTHEAST
- SE : SOUTHEAST
- NW : NORTHWEST
- SW : SOUTHWEST
3. TIME RECORD CHART: This is used to record the game time by placement of the Time Record units.
4. POINT RECORD CHART: This is used to record both side's Victory Point totals.
5. AIR ENTRY HEXES: These are hexes where Air units may enter or exit the mapboard. They contain a number and a letter. The number gives the number of Turns required to reach the hex from the off-board base. The letter gives the name of the off-board base that uses the Air Entry Hex:
- H : Hawaii Base
- J : Johnston Island Base
- M : Marshalls Base
- W : Wake Base
6. SHIP ENTRY AREAS: These are hexes where Task Force units enter or are placed on the mapboard. Each area consists of a connected group of shaded hexes identified by the letters "a" through "i".
7. ISLANDS: The few islands (all on mapboard half B) are shown on the mapboard in green. Midway Island in hex B2117 (mapboard half B, hex number 2117) is the most important point on the mapboard. (Midway is actually two islands, but no distinction is made in the game.)
8. LATITUDE, LONGITUDE, TROPIC OF CANCER, INTERNATIONAL DATE LINE: The various dashed lines on the mapboard play no part in the game, but are included for reference only.
B. UNIT COUNTERS: Die-cut counters of contrasting colors are provided for the play of the game. There are two sheets of these extra-thick (for ease of handling) counters, and, when punched out, they provide 800 separate half-inch counters. These are your playing pieces, and are called units. Keep these units separated by color and type once punched out, as this greatly speeds the set up and play of the game.
The units show the various ships, planes, and ground troops available, as well as units needed for the mechanics of the game. The red units show the Japanese forces, the gray units show the American forces, and the blue units are for use by either side. Base units for both sides contain small flags to show nationality. The units contain information needed to play the game. Examine the examples below:
1. PLANE UNITS: Each plane unit shows a pictorial symbol, a plane type, a function, and an air factor. A "BAR" indicates a land-based plane.
Plane types (general categories for reference only; they play no part in the game):
- DB : Dive Bomber
- F : Fighter
- FB : Flying Boat
- FP : Floatplane
- HB : Heavy Bomber
- MB : Medium Bomber
- TB : Torpedo Bomber
2. SHIP UNITS: Each ship unit shows a ship type, a name or numerical designation, a pictorial symbol, an AA (anti-aircraft) factor, a gunnery factor, a torpedo factor, and a movement factor.
Ship types:
- AP : Transport
- AS : Submarine Carrier (carries Midget Submarines)
- AV : Seaplane Tender
- BB : Battleship
- CA : Heavy Cruiser
- CAV : Cruiser Seaplane Tender
- CL : Light Cruiser
- CV : Aircraft Carrier
- CVL : Light Aircraft Carrier
- DD : Destroyer
- MS : Midget Submarine
- PG : Gunboat (Light Escort)
- SS : Submarine
3. GROUND UNITS: American ground units and Japanese ground units each show a ground factor and a pictorial symbol.
4. IDENTIFICATION UNITS: Task Force units show a designation number (for example TF12). Air units show a pictorial symbol. Submarine Patrol units (Optional Rules) show a pictorial symbol and a designation number.
5. BASE UNITS: There is an American base unit (flag design) and a Japanese base unit (flag design).
6. RECORD KEEPING UNITS: These include Victory Point units, Time Record units (Turn units and Day units), Anchor units, and Dispersal units (Optional Rules).
7. WEAPON UNITS: Armor Piercing Bomb units and High Explosive Bomb units are collectively referred to as Bomb units. Torpedo (T) units are also provided.
Hit units: There are four types of hit units: 1 Hit unit, 20 Hits unit, Reduced Speed unit, and Cripple unit.
8. WEATHER UNITS: (Optional Rules) Wind Direction units and Cloud units.
9. CHANCE UNITS: (Optional Rules) There are two sets of Chance units, a red set and a gray set, each set consecutively numbered from one to sixteen.
C. UNIT SORTING AND STORAGE TRAYS: Two compartmented plastic trays are included for the separation and storage of the units.
-
SORTING AND LABELING: Sort the Japanese units and some of the blue units into one tray, and the American units and some of the blue units into the other tray. It is helpful to label each pocket with a china marker. Sorting the units greatly speeds the set up of the game, and the location of units during play.
-
BOX LAID FLAT: If the game box is to be kept flat, simply lay out the trays in the bottom of the box, stacked one on top of the other. The mapboards and other game components laid on top of these will hold the units in their proper pockets.
-
BOX LAID ON EDGE: If the game box is not kept flat, or is usually carried on its side, care must be taken to prevent the units from falling out of their proper pockets. Cardboard "lids" should be made for the trays, secured at the sides with cellophane tape "hinges".
D. GAME CARDS: Printed on each card is the most frequently needed information used in playing the game. Two cards are provided so that each side has one available for reference.
E. HOLDING BOX CHARTS: The red-printed chart is for the Japanese player, and the blue-printed chart for the American player. The holding boxes on these charts are used to hold and organize the Ship, Plane, and Ground units of both sides.
F. MOVEMENT PAD: Each player needs one sheet from this larger pad per game. Each sheet has two sides, the Air Record, on which information regarding Air units is both printed and recorded, and the Plot Map (a reduced mapboard copy), on which the movement of Task Force units is drawn.
G. SHIP PAD: Each player needs one sheet from this smaller pad per game. Each sheet has two sides. The American player uses the American Ship Record Sheet, and the Japanese player uses the Japanese Ship Record Sheet.
H. RULEBOOK: This book contains all the rules for playing CV, information for the scenarios, and additional reference material.
I. DICE: Two dice are included, one die for each side.
J. OTHER: Not included in the game, but necessary for play, is a pencil for each player. Pencils are recommended over pens to allow erasing.
Set Up and Preparation for Play
I. Scenario and Side Selection
A. SCENARIO SELECTION: Select a scenario from the scenario section of this rulebook. All information necessary for the set up is listed in the individual scenarios. The scenarios are listed in order of length, and it is suggested that players use the first, and shortest, scenario for their first game, then move on from there as experience is gained. CV is a big, long game in the Campaign scenario, and this should not be attempted until some game experience is gained.
B. DETERMINING SIDES: After a scenario is selected, the players can decide who will command each side by mutual agreement, or by rolling the die for choice.
II. Mapboard Set Up
A. PLAYING AREA: CV can be played on any smooth level surface, but a large table is best. There should be room on the table for the mapboard halves, and for all other needed game components. The Japanese player should sit at the south edge of the mapboard, and the American player at the north edge. The Holding Box Charts should be set up so that they cannot be seen by the opposing player - either prop up a box half between the two charts to form a screen, or place the Holding Box Charts on chairs or small tables below the level of the main table.
B. UNITS PLACED ON MAPBOARD: Place the Time Record units on the Time Record Chart on the starting day and hour of the scenario being used. Place the Victory Point units for both sides, one each for each side in the "0", "00", and "000" boxes of the Point Record Chart. Place the American Base unit on the mapboard in the Midway hex (B2117).
III. Holding Box Charts Set Up
A. AIR UNITS: Place the Air units numbered 1-27 in the Air Boxes with the corresponding numbers. These Air units are used on the mapboard to represent any Plane units placed in their box.
B. TASK FORCE UNITS: Place the Task Force units (numbered 1-12 for the Americans and 1-14 for the Japanese) in the upper portions of the Task Force Boxes with the corresponding numbers. These Task Force units are used on the mapboard to represent any Ship units placed in their box.
C. SHIP, PLANE, AND GROUND UNITS: Players should now select the Ship, Plane, and Ground units listed for the scenario being played. All these units are placed on the appropriate Holding Box Charts.
-
SETTING UP SHIP UNITS: Divide the Ship units and place them in the Task Force Boxes. Place in the left hand sides (the rectangular portion containing the number) of these boxes. Ship units can be organized into Task Forces as desired, with these restrictions:
- a. The Ship Entry Areas where each Ship unit must be placed are listed in the scenarios, so this will effect what Ship units can be present together in a Task Force Box for set up.
- b. No American Task Force Box may have more than fifteen Ship units placed in it.
- c. No Japanese Task Force Box may have more than ten Ship units placed in it.
- d. All the Ship units used in the scenario must be placed in Task Force Boxes at the start of the game. You do not have to use all Task Force Boxes, but the total number of organized Task Forces may not exceed the number of Task Force Boxes provided for each side.
-
SETTING UP PLANE UNITS: The Plane units are now placed on the Holding Box Charts. Plane units can be placed as desired, with these restrictions:
- a. Plane units placed in the same Task Force Box as an Aircraft Carrier Ship unit and/or floatplane carrying Ship unit are based on board those Ship units. Plane units placed in a Base Box are based there. Sea-based Plane units must be placed in the Task Force Boxes of the Ship units that can handle them in the correct Ship Entry Areas. Land-based Plane units must be placed in their assigned Base Boxes.
- b. Carefully check the Plane Capacity of the Ship units in a Task Force Box to avoid placing too many Plane unit at any one place.
- c. Sea-based floatplanes must be placed with floatplane carrying Ship units. All other sea-based Plane units must be placed with Aircraft Carrier (CV and CVL) Ship units.
- d. Plane units may be placed in the A (Just Landed), B (Refueling and Rearming), or C (Ready to Launch) sections of their Task Force or Base Boxes. Normally, you will want to place all or most of your Plane units in the C sections at the start of a game.
D. SUBMARINE PATROL UNITS: The Submarine Patrol Boxes are not used for the Basic Game, and nothing is placed in them. Their use is explained in the Optional Rules.
E. SAMPLE HOLDING BOX CHART SET UP FOR PLAY: (Diagram: a sample Holding Box Chart shows a Task Force unit at the top, a Ship in the Task Force Box, Plane units in the CAP box, and the A, B and C sections labelled Just Landed, Refueling and Rearming, and Launch. Ships in the Task Force Box are placed in the box; Plane units armed and in the C section are placed in the Launch section.)
IV. Plot Map Set Up
The Plot Map on one side of the Movement Pad Sheet is prepared for play by secretly marking the starting locations of your various Task Force units on it. This is done by writing the Task Force number designation inside the hex. For Task Force units that have not yet entered the mapboard, write their number designation in the hex where you plan to bring them on.
The Basic Game Rules
I. Basic Game Introduction
The Basic Game Rules cover the play of CV in its simplest form. Even in its simplest form, CV is a complex game. After reading through the Basic Game Rules and carefully studying the components, new players should try a game using the Short Scenario first.
The Basic Game is concerned with the mechanics of the game. The Optional Rules add additional topics, and also add additional detail to concepts that have become familiar through play of the Basic Game. Not needed to play the Basic Game are the Submarine, Dispersal, Wind Direction, Cloud, Submarine Patrol, and Chance units.
II. Units Per Hex Limitations
A. SHIP UNITS PER HEX: There are no limits on the number of Ship units that may be present in the same hex at the same time. However, remember that no American Task Force may contain more than 45 Ship units, and no Japanese Task Force may contain more than 10 Ship units. There may be any number of separate Task Force units and/or unorganized Ship units in the same hex.
B. PLANE UNITS PER HEX: There are no limits on the number of Plane units that may be present in the same hex at the same time, as long as all of those Plane units are "flying". There may be any number of separate Air units in the same hex.
-
The number of Plane units "on the ground" and/or "on board" in the same hex at the same time is limited to the listed Plane Capacities of the Base and/or Ship units located in that hex.
-
PLANE UNIT SUBSTITUTION: Plane units with various Air Factors are provided for the players' convenience, avoiding large stacks of unit counters when strong forces are placed together, and providing easy breakdown when losses must be removed. Plane units with a large Air Factor may replace a number of smaller Air Factor units of the same type or vice-versa, at any convenient times, as long as the number of Air Factors remains the same. For example, one "5" Air Factor Kate unit could be exchanged for two "2" Air Factor Kate units and one "1" Air Factor Kate unit.
C. GROUND UNITS PER HEX: There are no limits on the number of Ground units or Ground Factors that may be present in the same hex at the same time. Similarly to Plane units, the Ground units have various Ground Factors, and can be exchanged at any time, as long as the number of Ground Factors remains the same.
III. Rules of Observation
Hidden units must be "observed" to be placed on the mapboard. Task Force unit positions are marked on the players' Plot Maps, and enemy units must be close enough to "observe" them before they must be placed on the mapboard. Air units, although usually positioned on the mapboard, are of unknown strength and composition until "observed". A single unit may "observe" any and all enemy units that are close enough. There are Conditions of observation at various distances. Task Force units that have been "observed" are kept on the mapboard as long as the observation continues. They may be removed from the mapboard as soon as the observation ends.
A. GENERAL OBSERVATION PROCEDURE: As a moving unit enters each new hex on the mapboard, the player moving the unit should be informed if any enemy units can be observed from a hex. A player may also move closer to an observed enemy unit to obtain additional information. It is also necessary to immediately reveal any moving unit that moves to a hex where it can be observed.
B. THE OBSERVATION TABLES: These Tables, found on the Game Cards, show the conditions of observation at various distances from various units. The higher the condition number, the more information must be given about the observed unit.
-
Crossgrid the type unit making the observation with the distance to the unit being observed to find the conditions of observation. For example, if a Ship unit or units observes an enemy unit at one hex distance (an adjacent hex), the condition numbers are "3/2". Distances never include the hex containing the observing unit, but always include the hex containing the observed unit.
Example: distances counted from the sample unit (hex 1 is the sample unit; the adjacent hexes are 2, and the next ring is 3).
-
The upper number is the condition number if a Surface unit (Ship, Base, non-flying Plane units, and/or Ground unit) is being observed. The lower number is the condition number if a flying Air unit is being observed. For example, if the condition numbers are "3/2", any Surface units observed will reveal Condition 3 information, and any Air units observed will reveal Condition 2 information.
-
The top three lines on the Observation Tables are visual. They were performed by lookouts, using their eyes and various optical aids. The last line is radar, which was carried only by American Battleships (BB), Aircraft Carriers (CV), and also the American Midway Base. Radar is a method of detecting distant objects by bouncing radio waves off of them, and is superior to visual observation in many cases.
a. The Air Observation condition number for radar applies only to Air units at High Altitude. The radar condition number for Low Altitude Air units is always "0".
b. Although American Battleships ((BB) may use their radar for observation, Air-to-Air Combat is not possible in hexes that can be observed only by the Battleship's radar, as they did not carry fighter director teams. Air-to-Air combat is possible only in hexes where there is visual observation by Ship or Base units, or in hexes where there is radar observation by the American Base unit or American Aircraft Carrier units.
c. Always use the best possible condition number for observation. For example, if night modifiers dropped visual observation numbers to "0/0", but radar observation was "3/2", use the higher condition numbers available from radar.
Examples of observation numbers: For a High Altitude Plane unit, the adjacent hexes show "5/5", "2/-" and "1/-" at increasing distance. For an American CV unit (radar in parenthesis), the hexes show "5/5 (4/3)", "2/2 (3/2)", "(-/2)" and "(-/1)" at increasing distance.
C. CONDITIONS OF OBSERVATION: The player whose unit is observed must reveal varying amounts of information, depending on the condition number.
-
CONDITION 1: All that is revealed is that there is something there, and that it consists of flying Plane units (an Air unit) or Ship units. No information as to numbers or types is revealed, and no information regarding Ground units or non-flying Plane units is revealed.
-
CONDITION 2: The player with the observed units must reveal the strength of the unit(s) which may be announced as any number from one-half (for odd numbers, round fractions up) to double the actual number of Ship units or Air Factors present, or any number between these extremes.
- a. For surface units, no information regarding Ground units or non-flying Plane units is revealed. For Ship units, only the number is announced, not the types present.
- b. For Air units, the types of flying Plane units are not revealed, only their number is announced.
-
CONDITION 3: The types of Ships or flying Plane units are still not revealed, but the exact and accurate number of Ship units or Air Factors must be announced. No information regarding Ground units or non-flying Plane units is announced. It must be announced if Ship units are anchored, and the altitudes of Plane units.
-
CONDITION 4: An exact and accurate number of Ship units or flying Air Factors must be revealed.
- a. For surface units, no information regarding Ground units or non-flying Plane units is revealed. It must be announced if Ship units are anchored. For Ship units, their sizes must be announced, giving the exact number of Capital Ship units, Major Ship units, and Small Ship units present. See the Ship Sizes And Functions Chart on the Game Cards to see which categories the various Ship units fall into. For example, a force of 2BB, 1CV, 1CA, 1AV, 1CL, and 4DD Ship units is announced as having 3 Capital Ships, 3 Major Ships, and 4 Small Ships. If there are more than one Task Force and/or Unorganized Ship units in the observed hex, their division between these various organizations is revealed.
D. NIGHT OBSERVATION MODIFIERS: There is only one Basic Game Observation Modifier, "night", all other modifiers being Optional. Night Turns are shaded on the Time Record Chart on the mapboard. The modifiers indicate the numbers to be subtracted from the normal "clear day" condition numbers. For example, if the normal condition numbers were "5/5", and the Night Modifiers were "-2/-2", the condition numbers would be reduced to "3/3". If modified to Condition 0, or less, there is no observation.
E. LOW OBSERVATION COMBATS: It is possible to have Combats with less than Condition 5 observation.
-
CONDITION 1 AND 2 COMBAT: No Combats are possible in Conditions 1 or 2.
-
LOW OBSERVATION COMBAT AGAINST SHIP UNITS:
- a. CONDITION 3 COMBATS: All Ship units are inverted, and the player in Combat with them must announce how many Factors are used against each unit without information about each unit.
- b. CONDITION 4 COMBATS: The Ship units are still inverted, but the player in Combat with them is told the size of each Ship unit.
-
LOW OBSERVATION COMBAT AGAINST PLANE UNITS: Condition 3 and Condition 4 Combats are handled identically for Plane units. All units are inverted, and sorted into groups, depending on their Air unit organization and altitudes, and the plane types. The player in Combat with them is told how many Air Factors are in each group and which are Escorts Interceptors, and Bombers, but that is all.
F. SUNRISE AND SUNSET: Sunrise is the Time Record Phase when the Turn unit is moved from the last night box to the first daylight box, and Sunset is the Time Record Phase when the Turn unit is moved from the last daylight box to the first night box. This causes an immediate change in conditions of observation, and players should immediately announce any new or improved observations at Sunrise, and remove from the mapboard all units no longer observed at Sunset.
IV. Sequence of Play
Play begins when all set up is completed. CV is played in Turns, each scenario being a specified number of Turns in length. Each Turn is divided into several Phases which must be performed in the sequence described below. Some Phases are further divided into Steps and Segments.
A. PLANE READINESS AND AIR UNIT ORGANIZATION PHASE: This Phase is performed simultaneously by both sides. This Phase is carried out in the following order:
-
PLANE READY STEP: Non-flying Plane units are moved from section to section in the Task Force and Base Boxes. The number of Air Factors that can be moved is limited by the Ready Factor of the Base Box or Ship units in a Task Force Box.
- a. READY TO LAUNCH SEGMENT: Air Factors are moved from B to C section.
- b. REFUELING AND REARMING SEGMENT: Air Factors are moved from A to B section.
- c. WEAPON CHANGE SEGMENT: Air Factors are moved from C to B section. Remove Weapon units stacked with the Plane units moved in this way.
-
FORM AIR UNITS STEP: Plane units from the C (Ready to Launch) sections of Task Force and Base Boxes are moved into Air Boxes on the Holding Box Charts. This shows that they are organized and ready to take off. The Air units removed from the Air Boxes used are set aside to be placed on the mapboard during the Air Unit Movement Phase. The Air Record Sheet side of the Movement Pad Sheet is filled out for every new Air unit used.
- a. Carefully check what Plane units you plan to land in a Task Force or Base Box during the Air Unit Movement Phase to avoid exceeding the Launch Factors.
- b. Planes may move into the C section and into an Air unit Box during the same Turn.
- c. Plane units must take off (move from the C section to an Air Box) from the same hex in order to be placed in the same Air Box.
- d. Fill out the Air Record Sheet as each Air unit is organized.
B. PLANE HANDLING TABLES AND OPERATIONS: The information for the plane handling for all ships and bases on a side is listed on their respective Plane Handling Tables printed on the Air Record Sheet. Note that both sides have information for a Midway Base. The Japanese information only applies if the Japanese capture Midway and place their Base unit in the Midway hex. The explanation for the listed information is as follows:
-
PLANE CAPACITY: The Plane Capacity number is the maximum number of Air Factors that may be present on a particular ship or base at any one time. The Plane capacity of a Task Force will be the sum of all Plane Capacities of the Ship units in that Task Force Box. For example, the Plane Capacity of the Akagi is "30". No more than thirty Air Factors may be present aboard this Ship at any one time.
-
READY FACTOR: The Ready Factor number is the maximum number of Air Factors that may be moved from one section of a Task Force or Base Box to another during a Turn. The Ready Factor of a Task Force will be the sum of all Ready Factors of the Ship units in that Task Force Box. Legal moves would be from the B section to the C section, from the A section to the B section, or from the C section to the B section (to change the Weapon units on Plane units currently in the C section). No individual Air Factor may be moved into more than one section during the same Turn. If a Plane unit is to be armed, the Weapon unit must be stacked with it as it is moved into the C section. Arming Plane units with Weapon units is done as follows:
- a. Place the appropriate Weapon unit on top of a Plane unit or stack of units to show its armament. The possible ways a specific Plane unit can be armed can be determined by examining the Possible Armaments column of the Air Hit Tables. Listed with each Plane type are the Weapon units that Plane may use.
- b. A Plane unit does not have to be armed with a Weapon unit to move into the C section, but if you later decide to arm it, or if you wish to change the type of Weapon unit, the Plane unit must first be moved back to the B section. The Plane units moved back to the C section can then be armed or rearmed on the following Turn when they advance again into the C section.
-
PLANE TYPES: This indicates the Plane units that may land and take off from a particular Ship or Base unit.
- a. LAND-BASED PLANES: All Plane units that may operate from Bases have a "bar" running across the unit counter under the name. All other Plane units may operate from Bases or Ships.
VI. Ship Plotting and Movement Phase
All Ship units are moved during this Phase, which is performed simultaneously by both sides.
A. SHIP MOVEMENT SEQUENCE: Ship units normally do not move individually, but are kept in Task Force Boxes on the Holding Box Charts, and represented on the mapboard by an identically numbered Task Force unit. Movements are marked on the Plot Maps, and observed units are also moved on the mapboard (exactly as already marked on the Plot Map). This Phase should be carried out in the following order:
-
PLOT SHIP MOVEMENT STEP: Mark the movement of all units on the Plot Maps by drawing an arrow from the hex containing the unit to the hex it is to move into.
- a. Task Forces are identified by marking the appropriate arrows with the Task Force numerical designations.
- b. Ship units not organized into a Task Force are identified by marking the Ship names or other identification by the appropriate arrow - abbreviations can be used.
The example below shows three Turns marked for Task Forces No. 7 and No. 10, and an unorganized force of three Destroyer Ship units. (Example diagram on the Plot Map omitted.)
-
SHIP UNIT MOVEMENT AND SHADOWING STEP: All observed units are moved on the mapboard. Previously unobserved units that move into observation are now placed on the mapboard. Plane and Ship units announcing Shadowing are moved at this same time. Previously observed units that move out of observation may be removed from the mapboard.
- a. Move observed units exactly as marked on the Plot Map. Ship units not organized into Task Forces are always considered to be observed.
- b. If Shadowing is announced, a Shadowing Ship or Plane unit is moved at the same time as the observed unit or units to keep them under observation.
-
GROUND UNIT UNLOADING STEP: The Midway hex (B2117) is the only place on the Mapboard where Japanese Ground units may be unloaded. One Japanese Ground Factor per Turn may be unloaded from each Transport (AP) Ship unit that is anchored in the Midway hex.
- a. On the Japanese Ship Record Sheet, make a mark in the Troop column next to the number designation of the unloading Japanese Transport Ship. This indicates that one Ground Factor has been unloaded.
- b. The number of Ground Factors carried by each Transport is listed under the column. A Transport may continue to unload until all Ground Factors on it are marked off.
B. GENERAL SHIP MOVEMENT RULES:
-
Each Ship unit has a maximum number of hexes it can move during a Turn. This Movement Factor is printed on the unit counters. All Ship units in the game have a Movement Factor of "1" or "2", except for Midget Submarines which have a Movement Factor of "0".
-
A player may move as many or as few of his Ship units during a Turn as desired, and may move them any number of hexes, up to the limits of their Movement Factors. Every Ship unit does not have to be moved. A Ship may use only part of its Movement Factor, if desired. Movement is always completely voluntary.
-
Ship units may move in any direction or combination of directions. Movement from hex-to-hex must be consecutive; a unit may not skip hexes.
-
Movement Factors may not be transferred from unit to unit nor accumulated from one Turn to another. The dice are not used to determine movement.
-
To keep a Task Force together, all Ship units in the Task Force must move at the speed of the slowest Ship unit in the Task Force.
C. TASK FORCE REORGANIZATION: Task Forces may be reorganized by adding, subtracting, or exchanging Ship units at any time during the Ship Plotting and Movement Phase, but at no other time. Ship units can be exchanged between Task Forces in the same hex, one Task Force can be split into two or more smaller Task Forces, individual Ship units added or detached, etc.
D. UNORGANIZED SHIP UNITS: Ship units placed directly on the mapboard instead of in a Task Force Box are called Unorganized Ship units. Such Ship units are always considered to be observed. They can be removed from the mapboard, placed in a Task Force Box, and replaced by a Task Force unit at any time during the Ship Plotting and Movement Phase. Plane-carrying Ship units must always be kept in Task Force Boxes as long as they carry Plane units.
E. AIRCRAFT CARRIERS MOVING INTO THE WIND: Aircraft Carriers (CV and CVL Ship units) must move at least one hex into the Wind Direction during any Turn in which the total number of Air Factors that land and/or take off from these Ships equals the Normal or Maximum Launch Factor.
-
THE WIND DIRECTION ARROW: The white arrow in the Directional Hexagon of each mapboard sector shows the Wind Direction.
-
The CV or CVL Ship unit must move into the Wind Direction. For example, if the Wind Direction Arrow points "SE" (Southeast), the CV or CVL would have to move at least one hex in the "NW" (Northwest) direction during its movement.
-
If the CV or CVL is initially located in a hex split by a mapboard cut or fold, the Ship unit may move into the Wind Direction of any of the mapboard sectors that it intersects.
-
Moving a hex into the Wind Direction is not required if the number of Air Factors that land and/or take off during a Turn does not exceed the Minimum Launch Factor. Movement into the Wind Direction is required only on CV and CVL Ship units; other Ship units operating floatplanes do not have to make these movements.
F. SHIPS ENTERING AND EXITING THE MAPBOARD: Ship units may enter or exit the mapboard from the edge hexes of the mapboard.
-
SHIPS ENTERING THE MAPBOARD: All Ship units are not present on the mapboard at the start of each scenario, and some units are introduced to the game during later Turns. Exactly when and in what Ship Entry Area these units enter the mapboard is listed in the scenario.
- a. At the start of the game, the players must mark the Task Force designations of the late-arriving units on their Plot Maps in the exact hexes where they will enter the mapboard.
- b. On the Turn when a late-arriving unit enters the mapboard, it reaches the noted hex, and makes no further movement during the Turn.
- c. The Ship units may begin normal mapboard movement the Turn after entering the mapboard.
-
SHIPS EXITING THE MAPBOARD: Ship units may exit the mapboard along any edge, but may not re-enter the mapboard later, and are out of the game for good. Exited Ship units are not considered to be eliminated when counting Victory Points, but any Hits on these Ship units do count for Victory Points.
G. SHADOWING MOVEMENTS: Shadowing may be done by Ship and/or Plane units. It represents the ability of units to follow and keep under observation previously observed enemy Ship units.
-
A unit or units may Shadow enemy Task Force or Unorganized Ship units that it can already observe when the Ship Plotting and Movement Phase begins.
-
Before the observed enemy unit is moved on the mapboard, announce that it will be Shadowed, and what unit or units will be used.
-
After the observed enemy unit is moved, move the Shadowing unit or units in such a way that the Shadowed enemy unit stays observed during the entire movement.
-
While Shadowing, the Shadowing unit may move closer to the Shadowed unit, move further away, or even attack it, as long as the Shadowing unit keeps it continually under observation.
-
The Shadowing movement is the complete move for that Turn for the Shadowing units. Shadowing Plane units are not moved during the Air Unit Movement Phase, as their move is already completed.
-
Plot Maps are marked normally for Shadowing Ship units, but these moves may be changed later to conform to the actual movements. If Ship units mutually announce their intention to Shadow one another, a die must be rolled for both sides. Low roll side must move as marked on the Plot Map, and the high roll side may Shadow.
H. CONTACT WITH ENEMY SHIPS: Players normally try to keep the locations of their Ship units secret, and this can make it impossible to use unobserved Ship units for observation. Unobserved Task Force units could pass through the same hex without either side being aware of it. Combat occurs between Ship units only when observed Ship units from both sides end their movement in the same hex. This is called Combat Contact. When this happens, movement ends in the hex where Combat Contact occurs (if necessary, change the moves on the Plot Maps to reflect incomplete movement), and Surface Combat will take place during the Combat Phase. Combat Contact can occur if both sides end their movement in the same hex, or if both sides enter the same hex during the first hex of their movement.
I. ANCHORING: All Ship units may anchor. Anchoring may only be done in the Midway hex.
-
ANCHORING PROCEDURE: Ship units may anchor during any Turn that they remain in the Midway hex. To show which Ship units are anchored, stack an Anchor unit on the Ship units, or, if all units in a Task Force Box are anchored, place an Anchor unit in the Task Force Box. Anchor units may be placed or removed only during the Ship Plotting and Movement Phase, and Anchor units may be removed and the Ship units moved during the same Turn.
-
TEMPORARY JAPANESE SEAPLANE BASES: Seaplane Tender (AV) Ship units must anchor to establish a Temporary Seaplane Base in the Midway hex. A Temporary Seaplane Base is established the same Turn as a Seaplane Tender Ship unit anchors.
- a. A Temporary Seaplane Base may not be established until Midway is captured by the Japanese. A Temporary Seaplane Base remains established as long as one or more Seaplane Tender Ship units are anchored in the Midway hex.
- b. A Seaplane Tender Ship unit that has established a Temporary Seaplane Base has a doubled Plane Capacity and doubled Launch Factors. It can also handle Seaplane (Mavis) Plane units.
-
JAPANESE MIDGET SUBMARINE BASES: Submarine Carrier (AS) Ship units must anchor to establish a Midget Submarine Base in the Midway hex. A Midget Submarine Base is established the same Turn as a Submarine Carrier Ship unit anchors.
- a. A Midget Submarine Base may not be established until Midway is captured by the Japanese. A Midget Submarine Base remains established as long as one or more Submarine Carrier Ship units are anchored in the Midway hex.
- b. When a Submarine Carrier Ship unit has established a Midget Submarine Base, a Midget Submarine Ship unit may be placed in the hex, and is available for any Combat in the hex. One Midget Submarine Ship unit is provided for each Submarine Carrier Ship unit, and is considered loaded on it at game's start. If, after establishing a Midget Submarine Base, the Submarine Carrier leaves the hex, the Midget Submarine, if not eliminated, is removed from the mapboard and considered re-loaded. If a Submarine Carrier Ship unit is eliminated, its Midget Submarine Ship unit is also considered to be eliminated, even if not loaded.
VII. Air Unit Initiative Roll Phase
This Phase determines which side moves first during the Air Unit Movement Phase. Each side rolls one die. Break ties by rolling again. The high roll side will move first during the Air Unit Movement Phase.
VIII. Air Unit Movement Phase
This Phase of play simulates the movement of Planes in the air, and is performed alternately. One side moves all of its Air units first, then the other side moves all of its Air units. All Air units may be moved during this Phase, except for those which already made Shadowing moves during the Ship Plotting and Movement Phase.
A. AIR UNIT MOVEMENT SEQUENCE: Plane units are always kept in Air Boxes on the Holding Box Charts, and are represented on the mapboard by an identically numbered Air unit. Air units are moved on the mapboard, and never marked on the Plot Maps. An Air unit must always contain at least one Air Factor. When all Air Factors in an Air unit are eliminated or have landed, the Air unit is immediately removed from the mapboard. To avoid confusion, this Phase should be carried out in the following order:
-
LANDING STEP: First, move all Air units that are landing this Turn and remove them from the mapboard. Units do not have to land at the same place as where they took off.
- a. Remove the landed Plane units from the Air Box, and place them in the A section of the Task Force or Base Box where the landings took place.
- b. If all the Plane units in it have landed, remove the Air unit from the mapboard, and place it in its Air Box on the Holding Boxes Chart. The Air unit remains on the mapboard (or, possibly, in the CAP Box) until all of its Plane units have landed.
- c. Remember, the Launch Factors include both landings and take offs. Check that the Launch Factors are not exceeded by both the landings in this Phase, and the take offs that were performed during the Plane Readiness And Air Unit Organization Phase (take offs can be checked on the Air Record Sheet). Landings can not be made if they prevent take offs.
-
NORMAL AIR UNIT MOVEMENT STEP: Move all remaining Air units on the mapboard.
-
TAKE OFF STEP: Place all new Air units on the mapboard and make their moves. These are the Air units that were organized and noted on the Air Record Sheet during the Plane Readiness And Air Unit Organization Phase. These new Air units must take off at this time, unless the player discovers (a mistake) that he must use the Normal or Maximum Launch Factors from CV or CVL units, and did not move these a hex into the Wind Direction. In this case, no take offs may take place from these Aircraft Carriers.
B. GENERAL PLANE MOVEMENT RULES:
-
A player moves only his own units, never any enemy units. Each Plane unit has a maximum number of hexes it can move during a Turn. This Movement Factor is printed in the MF column next to the Plane names in the Plane Data Chart on the Air Record Sheet.
-
A player may move as many or as few of his Plane units during a Turn as desired, and may move them any number of hexes, up to the limits of their Movement Factors. When several different types of Plane units are in the same Air unit, the whole Air unit may not exceed the Movement Factor of the slowest Plane unit present. Movement is always completely voluntary.
-
Air units may move in any direction or combination of directions. Movement from hex-to-hex must be consecutive; a unit may not skip hexes.
-
Movement Factors may not be transferred or accumulated from one Turn to another. The dice are not used to determine movement.
C. DEFINITIONS-INTERCEPTORS, ESCORTS, AND BOMBERS:
-
INTERCEPTORS: Fighter (Buffalo, Wildcat, and Zero) units that are in a hex that contains no other friendly Plane units, or in a hex that permits any kind of reorganization (contains a friendly Base and/or CV or CVL Ship units) are defined to be Interceptors.
-
ESCORTS: Fighter units that do not meet the Interceptor definition, but are in the same hex as other types of friendly Plane units are defined to be Escorts. Fighter in a hex that permits all kinds of reorganization may be either Escorts and/or Interceptors, at the player's option.
-
BOMBERS: All other types of Plane units are defined to be Bombers, unless operating as Special Interceptors.
-
SPECIAL INTERCEPTORS: Avenger, Dauntless, Dave, Jake, Judy, Pete, and Val Plane units may serve as Special Interceptors. To serve as Special Interceptors, these units must be carrying no Weapon unit, be at Low Altitude, and be in a hex that contains a friendly Base, CV, and/or CVL unit. Special Interceptors perform as Interceptors in Air-to-Air Combats, except that they may not avoid Combat with enemy Interceptors.
D. PLANE ALTITUDE: Plane units may be at either High Altitude or Low Altitude.
-
HOW TO INDICATE ALTITUDE: Altitude is indicated by the placement of the Plane units in their Air Boxes. Plane units placed in the Low section of an Air Box are at Low Altitude. Plane units placed in the High section of an Air Box are at High Altitude.
-
ALTITUDE CHANGES: Plane units may change their Altitude at any time during their portion of the Air Unit Movement Phase by moving the Plane units from section to section in their Air Boxes.
-
DIFFERENT ALTITUDES MOVING TOGETHER: Some Plane units in an Air Box may be at High Altitude, while other Plane units in the same Air Box are at Low Altitude.
-
EFFECTS OF INITIATIVE ON ALTITUDE: Interceptors may move to High Altitude during the same Turn as they take off only if their side has the initiative and moves first during the Air Unit Movement Phase. To show this, move the Interceptor Plane units to the High section of their Air Box. The side moving second must stay at Low Altitude with all Plane units that took off that Turn. All Bombers and Escorts must be kept at Low Altitude during the Turn of take off, regardless of initiative.
-
HIGH ALTITUDE FEATURES: High Bombing Combat must be made from High Altitude. Dive Bombing Combat starts at High Altitude (which is where they must be Intercepted), but ends at Low Altitude. After resolving Dive Bombing Combat, the Dive Bombing Plane units must be moved to the Low section of their Air Boxes. Interceptors must be at High Altitude to have Air-to-Air Combat with enemy Plane units at High Altitude - Interceptors at Low Altitude may not attack enemy Plane units at High Altitude.
-
LOW ALTITUDE FEATURES: Torpedo or Low Bombing Combat must be made from Low Altitude. Radar does not observe Low Altitude Plane units. Interceptors must be at Low Altitude to have Air-to-Air Combat with enemy Plane units at Low Altitude - Interceptors at High Altitude may not attack enemy Plane units at Low Altitude. If all Plane units in an Air unit are at Low Altitude, announce the fact while moving on the mapboard. Otherwise, it can be assumed that at least some of the Plane units in an Air unit are at High Altitude.
E. ENDURANCE FACTORS: The Endurance Factors of all Plane units can be found in the EF column on the Plane Data Charts on the Air Record Sheet.
-
The Endurance Factor shows the number of Turns that a Plane unit can remain "in the air". The filled-in Air Record Sheet will show the last possible Turn a Plane unit may land.
-
Plane units that fail to land by the required Turn are eliminated at the end of the Air Unit Movement Phase. Plane units may not engage in Combat during the Turn they land, unless attacked by enemy Interceptors.
-
Endurance Factors may not be transferred to other units, nor accumulated from one Turn to another. The Endurance Factor sets the number of Turns a Plane unit may remain "in the air", regardless of the number of hexes moved each Turn.
-
ENDURANCE FACTOR EXPENDITURE IN COMBAT: Endurance Factors are expended in certain types of Combat.
- a. INTERCEPTORS AND ESCORTS: One Endurance Factor is expended by Interceptors and Escorts for every Turn in which they engage in Air-to-Air Combat. Only one Endurance Factor is expended per Turn, even if the Planes engage in more than one Air-to-Air Combat during the Turn.
- (1) Only Interceptors, Special Interceptors, and Escorts expend Endurance Factors in Air-to-Air Combat. Bombers do not expend Endurance Factors in Air-to-Air Combat.
- (2) Interceptors must expend an Endurance Factor to attack and engage in Air-to-Air Combat.
- (3) Interceptors and Escorts have the option not to expend an Endurance Factor if attacked, but this modifies their Air-to-Air Combat Basic Hit Table by "-6".
- b. BOMBERS: Bombers do not expend Endurance Factors in Air-to-Air Combat, but do expend an Endurance Factor in Low Bombing, Torpedo Bombing, and Dive Bombing Combats. No Endurance Factor is expended in High Bombing Combat.
- c. ENDURANCE FACTOR EXPENDITURE PROCEDURE: The expenditure of Endurance Factors is recorded on the appropriate column of the Air Record Sheet by erasing the previous landing time notation, and rewriting it on the next line up. Any Endurance Factor expenditures should be marked immediately.
- a. INTERCEPTORS AND ESCORTS: One Endurance Factor is expended by Interceptors and Escorts for every Turn in which they engage in Air-to-Air Combat. Only one Endurance Factor is expended per Turn, even if the Planes engage in more than one Air-to-Air Combat during the Turn.
F. AIR UNIT REORGANIZATION: Air units may be reorganized by adding or subtracting Air Factors at any time during the player's portion of the Air Unit Movement Phase, but at no other time. Plane units may be exchanged among several Air units in the same hex, several Air units could be combined into one Air unit, one Air unit could be split into several smaller ones, etc.
-
AIR UNIT REORGANIZATION PROCEDURE: Switch the Plane units in the Air Boxes to accomplish the reorganization. Make any needed changes on the Air Record Sheet. If a reorganized Air unit contains Plane units of the same name that must land on different Turns, be sure to separate the Plane units to avoid confusion.
-
AIR UNIT REORGANIZATION LIMITATIONS: Reorganization is allowed only in certain hexes:
- a. All kinds of reorganization may be done in a hex that contains a friendly Base and/or CV or CVL Ship units.
- b. Interceptors become Escorts in any hex where they join friendly Bomber units.
- c. A reorganization that either divides an Air unit into several smaller Air units, or which subtracts Plane units from an Air unit may take place in a hex that contains enemy Base and/or Ship units. Escorts may not become Interceptors in one of these reorganizations, but must accompany at least some of the other friendly Plane units they were with.
G. AIR UNITS ENTERING AND EXITING THE MAPBOARD - OFF-BOARD BASES:
-
The American Bases of Johnston and Hawaii and the Japanese Bases of Wake and Marshalls are located off the mapboard. Some time is required for Air units that take off from these Bases to reach the edge of the mapboard. Air units that take off from these Bases are placed in any of their indicated Air Entry Hexes along the edge of the mapboard on the indicated Turn after take off. For example, an Air unit that took off from the Hawaii Base could be placed in any of the "6H" Air Entry Hexes six Turns (including the take off Turn) after take off. If take off was on the 0700 Turn, it could be placed in a "6H" Air Entry Hex on the 1200 Turn. There is no further movement the Turn an Air unit is placed in an Air Entry Hex. Normal movement may begin the Turn after it is placed on the mapboard. Air units that take off from off-board Bases may enter the mapboard only at the Air Entry Hexes containing their letter symbol.
-
Landings are accomplished at off-board Bases by reversing the entry procedures. They are moved to an Air Entry Hex on one Turn, then removed from the mapboard on the next Turn. They land at the off-board Base the indicated number of Turns from the time they reach the Air Entry Hex (this includes the Turn they reach the Air Entry Hex and the Turn they land). For example, an Air unit that reached a "3J" Air Entry Hex on the 1300 Turn, would land at the Johnston Base on the 1500 Turn. This exit to land at off-board Bases is only possible at Air Entry Hexes. Plane units that exit the mapboard in any other manner are eliminated, and count for Victory Points.
-
The usual Plane Ready Step procedures are followed in off-board Base Boxes. Off-board Bases may not be attacked by enemy units.
-
IN FLIGHT BOXES: Air units that are not on the mapboard travelling to or from off-board Bases should be placed in the In Flight section of the off-board Base Box they are leaving from or travelling to. It is helpful to note with a "0" on the Air Record Sheet the Turns on which an off-board Air unit will reach the mapboard or land.
H. SPECIAL PLANE MOVEMENT RULES:
-
SPECIAL TAKE OFF AND LANDING MOVEMENT: On Turns when an Air unit lands or takes off from an unobserved hex, it does not have to be moved across the mapboard grid. Instead, it may simply be removed from the mapboard when landing or simply placed on the mapboard when taking off. This hides the exact location of the Base or Task Force unit from which it is taking off or landing.
-
CAP - AIR UNITS OVER FRIENDLY TASK FORCE AND BASE UNITS: Air units, unless observed, in the same hex as friendly Base and/or Task Force units do not have to be placed on the mapboard. They may instead be placed in the CAP (Combat Air Patrol) Box of the appropriate Base or Task Force Box to note their location with that unit. They may be moved with their Task Force during the Ship Plotting And Movement Phase, and also moved during the Air Unit Movement Phase, minus the number of hexes moved with the Task Force unit.
-
AIR UNITS OVER ENEMY BASE AND/OR SHIP UNITS: Air units may never remain in a hex that contains an enemy Base and/or Ship units, and does not contain a friendly Base and/or Ship units the Turn after they engage in Bombing Combat or any Combat that expends an Endurance Factor in that hex. They must exit the hex on the Turn following the Combat and, without entering any other hexes containing an enemy Base and/or Ship units (if possible - these enemy occupied hexes may be entered if no alternative exists), return to a hex where they may land (landing is not necessary, but the hex must be entered) before the Plane units involved may again enter an enemy hex.
-
PLANE UNITS JETTISON WEAPONS: Flying Plane units with Weapon units may Jettison (discard, and remove from play) their Weapon units at any time during their portion of the Air Unit Movement Phase. This is not Bombing Combat, and no Hits can be made when Weapon units are Jettisoned.
-
NIGHT LANDING LOSSES: Pilots at the Battle of Midway were not well-trained in night landings, and technical aids were primitive. Many of the Plane units that attempt night landings could be lost.
I. AIR UNIT MOVEMENT PHASE AIR-TO-AIR COMBAT: See the Air-to-Air Combat Step for further details on procedure. Some Air-to-Air Combat can be resolved during the Air Unit Movement Phase instead of during the Combat Phase. There are two cases when Air-to-Air Combat is resolved during the Air Unit Movement Phase:
-
If the side moving first in the Air Unit Movement Phase has Interceptors already in a hex with enemy Plane units, the Interceptors may attack instead of moving. If the Interceptors attack, the Air-to-Air Combat must be resolved before the other side may leave the hex during the second portion of the Air Unit Movement Phase. The Interceptors may attack only if not required to exit the hex (see rule VIII. H. 3.).
-
When Air units move through, but do not remain in a hex containing enemy Interceptors, the Interceptors have the option (if at the same altitude) to attack the moving Air unit or units, if Air-to-Air Combat is possible in the hex. This does not apply when units start in the same hex, and one side leaves the hex. This Air-to-Air Combat must be resolved before the moving Air units complete their movements. This situation applies to units attempting to land or take off from the hex in question. The Interceptors may attack only if not required to exit the hex (see rule VIII. H. 3.). If more than one Air unit passes through the same hex, the Interceptors may Combat one, some, or all of them as one Combat.
IX. Combat Phase
This Phase resolves the various forms of Combat that take place during Battles. For large Battles, the involved Plane and Ship units should be removed from their Air and Task Force Boxes, and spread out on an open stretch of table or mapboard for quick visual reference.
A. GENERAL RULES OF COMBAT:
-
Units must occupy the same hex to have Combats.
-
All Combat Steps and Segments that occur in the same hex are collectively called a Battle. These Combat Steps and Segments are resolved in the exact order listed in the Sequence Of Play (rule IV. E.). Skip Combat Steps and Segments that do not apply in a particular Battle.
-
The players must always decide exactly what enemy units they are attempting to Hit, and announce how their Factors are divided before rolling the die.
-
Players may resolve separate Battles in any convenient order. All Combat Steps in an individual Battle must be completed before starting to resolve another Battle.
B. INTERPRETING THE HIT TABLES: The Air Hit and Surface Hit Tables are used to find the Basic Hit Tables (BHT) for Combat.
-
THE AIR HIT TABLES: The Air Hit Tables display all the BHTs for the Plane units on each line involved in various Combats. If there is no BHT, that Plane unit may not engage in that type of Combat, and/or use that type of Weapon unit for that type of Combat.
- a. AIR-TO-AIR COLUMN: This shows the BHT of each Plane unit for Air-to-Air Combat in the Air-to-Air Combat Step.
- b. AIR MODIFIER COLUMN: This shows the modification to the BHT for Air-to-Air or AA Combat against each Plane unit in the Air-to-Air and AA Combat Steps.
- c. AIR VERSUS MIDWAY COLUMNS: These show the BHTs of each Plane unit for Bombing Combats on Midway in the Bombing Combat Step.
- d. AIR VERSUS SHIP COLUMNS: These show the BHTs of each Plane unit for Bombing Combats on Ship units (including, in the Basic Game, Midget Submarine Ship units) in the Bombing Combat Step.
- e. AIR VERSUS SUB COLUMN: This shows the BHTs of each Plane unit for Bombing Combat on Submarine units in the Bombing Combat Step. This column is used with the Optional Rules, and is not used in the Basic Game.
- f. POSSIBLE ARMAMENTS COLUMN: This shows the types of Weapon units with which each Plane unit may be armed.
- g. HIGH BOMBING COLUMNS: These are used for High Bombing Combat in the Bombing Combat Step.
- h. LOW/DB BOMBING COLUMNS: These are used for Low or Dive Bombing (DB) Combat in the Bombing Combat Step. If only one BHT is listed, it is for Low Bombing Combat, and the Plane unit cannot make Dive Bombing Combats. If two BHTs are listed (ie. "6/8"), the first is for Low Bombing Combat, and the second is for Dive Bombing Combat.
C. RESOLVING COMBATS: Combats are resolved similarly for all types of Combat. The procedure for all Combats is as follows:
-
Find the BHT to be used by crossgridding the unit with the type of Combat. For example, a Fortress making High Bombing Combat with HE Bomb units versus Midway would have a BHT of "13".
-
Modify the BHT by all applicable Modifiers. The modified BHT number is called the Hit Table number. For example, continuing the Fortress example above with a BHT of "13", assume that the Bombing takes place during a night Turn (Modifier C = "-6"). This reduces the BHT of "13" to a Hit Table of "7". If the Hit Table number is larger than "16", use Hit Table "16" for the Combat. If the Hit Table number is "0" or less, the Combat fails, and no Hits can be scored.
-
For Ground, Air-to-Air, and Surface Combats both sides are assumed to be making their die rolls to resolve Combat simultaneously, although they can be made in any convenient order (simply ignore the effects of Hits until all Combat in the Step or Segment is complete). This is unnecessary for AA and Bombing Combats, where only one side rolls the die.
-
The Combat Results Tables are used for all Combats. The Hit Table numbers running across the top of the Tables contain the Hit Tables used in the Combats. The Number of Factors column running down the left side of the Tables lists the number of Factors (Air Factors for Air-to-Air and Bombing Combats, AA Factors for AA Combat, Gunnery Factors for Ship-to-Ship and Bombardment Combats, Torpedo Factors for Surface Torpedo Combat, and Ground Factors for Ground Combat) used in a Combat. If the number of Factors exceeds "50" by any amount, use the "51+" line on the Tables.
-
In a Combat, crossgrid the correct Hit Table number with the number of Factors used. The number found in the Tables is the Base Number. The Base number is the average number of Hits that will be scored. For example, if the Hit Table is "4", and the number of Factors is "14" (see the "13-15" line), the Base Number is "2".
-
Once the Base Number is found, one die is rolled. If a "1" or "2" is rolled, subtract one from the Base Number. If a "3" or "4" is rolled, the Base number is unchanged. If a "5" or "6" is rolled, add one to the Base number. The result is the number of Hits scored. For example, if the Base Number is "4", and a "2" is rolled, the number of Hits scored is "3". If the Base Number is an "*", a "6" must be rolled to score one Hit; any other number rolled scores no Hits.
D. AIR-TO-AIR COMBAT STEP: In this Step the Combats between opposing Plane units are resolved. Only Plane units participate in these Combats.
-
AIR-TO-AIR COMBAT CONDITIONS: Air-to-Air Combat takes place only if all of the following conditions are met:
- a. The Battle hex must contain a Base or Ship units; or be observed by a Base or AV, CAV, CV, and/or CVL Ship units.
- b. The Plane units must be at the same altitude.
- c. One or both sides must have Interceptors present. Only Interceptors may attack to initiate Air-to-Air Combat. Escorts or Bombers may not initiate Air-to-Air Combat. If both sides have only Interceptors in the hex, both sides must announce that they wish to have Combat, or no Air-to-Air Combat will occur. Interceptors are never forced to initiate Combats, and may avoid them at any time.
- d. It is possible for Plane units to be involved in up to two Air-to-Air Combats during a Turn; once during Air Unit Movement Phase Air-to-Air Combat, then again during the Combat Phase.
-
INTERCEPTOR-TO-INTERCEPTOR OR INTERCEPTOR-TO-ESCORT COMBAT SEGMENT: Air-to-Air Combat is resolved in two Segments. In the first, the Interceptors and Escorts have Combat, and the Bombers are ignored. If only Interceptors are present on both sides, their Combat, if made, will complete the Air-to-Air Combat Step. The Interceptor-to-Escort Combat determines if the Interceptors will reach the Bombers; if they can, or, if there are no Escorts, then the second Segment is resolved. All Interceptors and Escorts at the same altitude will participate in the same Combat, even if they are organized into several different Air units.
- a. When Interceptors Combat Escorts, the Interceptor side has the option to split the Interceptors into two groups for the attack - one of which is announced to attack the Escorts (Escorts must be attacked), and the other to attack the Bombers. All Interceptors may be used against the Escort, if desired.
- b. Resolve the Interceptor versus Escort Combat first, then compare the surviving Air Factors.
- (1) If the surviving number of involved Interceptor Air Factors has a 2-1 or better ratio over the surviving Escort Air Factors, they may join the other group of Interceptors (if any) in an attack on the Bombers for the second Segment.
E. AA (ANTI-AIRCRAFT) COMBAT STEP: In this Step, the firing of AA by Ship and/or Base units at attacking enemy Bomber units is resolved. Interceptor and/or Escort Plane units take no part in this Combat Step, and may suffer no Hits from it.
-
AA Combat may only occur when Weapon unit-armed Plane units announce Bombing Combat against a Base and/or Ship units. AA Combat does not occur with enemy Plane units in the hex that do not announce Bombing Combat.
-
Bombing Plane units can choose which enemy Base and/or Ship units to attack. The attacking Plane units may attempt to Bomb just one unit, just some units, or all units in the hex. The Bombers may divide in any manner if more than one unit is to be attacked. The division of the Air Factors and their intended targets must be announced before AA Combat is resolved. When the Midway Base unit is Bombed, the Air Factors may Combat the Base itself, or the Ground units there, or divide in any manner to Bomb both.
-
Units may engage in AA Combat only against Plane units that are directly attacking them or the units of their Task Force. The specific units that may engage in an AA Combat are as follows:
- a. Any Unorganized Ship unit directly attacked by Bombers. Any Unorganized Ship units that are not directly attacked may not engage in AA Combat.
- b. Ship units in a Task Force in which any other Ship units are attacked. Task Forces of which no Ship units are attacked may not engage in AA Combat.
- c. The Midway Base unit that is directly attacked. If the Midway Base unit is considered to be part of an anchored or partially anchored Task Force, it may engage in AA Combat if any of the anchored Ship units are attacked, and the anchored Ship units may engage in AA Combat if the Midway Base unit is attacked.
-
The side with the Base and/or Ship units counts all involved AA Factors, and checks the Surface Hit Tables under the AA column to find the BHT (always "5"). If the attacking Bombers are split to attack more than one target, the AA Factors may be split to Combat separate groups of Bombers.
-
If more than one Air unit is attacking, the side with the AA Factors may engage the Plane units in each separately with all their AA Factors. For example, if three different Air units were attacking Ship units in a Task Force, the total number of AA Factors in the Task Force could be used three different times for AA Combat with each of the attacking Air units.
F. BOMBING COMBAT STEP: In this Step, the attacks by Weapon unit-armed Plane units against Base and/or Ship units are resolved. The exact units to be Bombed were already announced during the AA Combat Step, and these Combats by the surviving Plane units determine the Hits scored on the target units.
-
Only Plane units armed with Weapon units may make Bombing Combats. They must attack the units announced during the AA Combat Step.
-
Each attack on a separate unit is resolved as a separate Combat, and each different Hit Table number will require a separate die roll.
-
TYPES OF BOMBING COMBAT: There are several types of Bombing Combat that can be made, depending on the Plane units' altitudes, the types of Weapon units they carry, and the Plane units' characteristics.
- a. HIGH BOMBING COMBAT: This uses the High Bombing columns of the Air Hit Tables to find the BHT, and can be made by Plane units at High Altitude. HE or AP Bomb Weapon units may be used.
- b. LOW BOMBING COMBAT: This uses the Low/DB Bombing columns of the Air Hit Tables to find the BHT, and can be made by Plane units at Low Altitude. HE or AP Bomb Weapon units may be used.
- c. DIVE BOMBING COMBAT: This uses the Low/DB Bombing columns of the Air Hit Tables to find the BHT, but can only be made by Plane units at High Altitude which have a Dive Bombing BHT. HE or AP Bomb Weapon units may be used. After the Bombing Combat is resolved, the Plane units are moved to Low Altitude (which is where they "drop" their Bombs).
- d. TORPEDO BOMBING COMBAT: Actually a variant of Low Bombing Combat, this uses the Low/DB Bombing columns of the Air Hit Table to find the BHT, and can be made by Plane units at Low Altitude. Only T Weapon units may be used.
-
Resolve the Combats and remove eliminated units and/or mark Hits for each separate Combat on the Ship Record Sheets. Show that the Weapon units have been used ("dropped") by removing them from play. When all Combats are resolved, the Bombing Combat Step is completed.
G. SURFACE COMBAT STEP: In this Step the Combats between Base and/or Ship units are resolved. Surface Combats between opposing Ship units take place when Combat Contact occurs. All Ship units in a hex may participate in Surface Combats, regardless of their organization or the number of Task Force units present.
-
SHIP-TO-SHIP GUNNERY COMBAT SEGMENT: Ship-to-Ship Combat involves only Ship units. The Ship units involved must be taken from their Task Force Boxes and spread out in an open area to resolve Ship-to-Ship Combats. Procedure is as follows:
- a. SURFACE COMBAT SET UP: Using hands or Game Cards to screen the view, both sides should secretly arrange their Ship units for Combat.
- (1) The Ship units that you wish to keep out of Combat should be placed behind the Ship units that you want to use. The Ship units placed to the rear are defined as Screened, and will not engage in Ship-to-Ship Combat unless enemy Ship units Breakthrough. Normally, such units as CVs, CVLs, APs, and Ship units to be used for Bombardment, plus any severely damaged Ship units are Screened. All other Ship units are Engaged, and are used in the Combat.
- (2) Place any Engaged Ship units that you wish to use for Surface Torpedo Combat in a group with a Torpedo unit to show that this is their intended use.
- (3) Place all remaining Ship units, if any, in a line in front of the Screened Ship units.
- (4) Both sides then take a die and secretly place it with their Ship units. The die may be set with any number showing.
Below is a sample secret set up for Ship-to-Ship Combat: (Diagram: a SCREEN line is shown above the Engaged Ship units and the Surface Torpedo units (Engaged), with the Screened Ship units behind the line.)
- b. SURFACE COMBAT PROCEDURE: Ship-to-Ship Combat can now be resolved.
- (1) Both sides remove their screens, and display their dispositions and dice numbers. The BHT for Ship-to-Ship Combat is the sum of the numbers shown on both dice. For example, if the Japanese side had a "4" showing on their die, and the American side had a "6" showing on their die, the BHT would be "4 + 6" equals a BHT of "10".
- (2) Both players now count all of their Engaged Gunnery Factors. They then announce how many Gunnery Factors will be used against each enemy Ship unit. The Factors may be divided in any manner against one, any, or all of the Engaged enemy Ship units. Each Ship unit that Gunnery Factors are used against is resolved as a separate Combat.
- a. SURFACE COMBAT SET UP: Using hands or Game Cards to screen the view, both sides should secretly arrange their Ship units for Combat.
H. GROUND COMBAT STEP: This Step resolves Combats between opposing Ground units on Midway. Only the Ground units in the Midway Base Box are used in these Combats.
-
Ground Combat will take place as long as both sides have Ground units in the Midway Base Box. Combat will take place on every Turn that this situation exists.
-
Both sides count their Ground Factors in the Midway Base Box. All Ground Factors present must participate.
-
The American Ground units always defend, and the Japanese Ground units always attack the entrenched Americans. Therefore the American Ground units always have a BHT of "9", while the Japanese always have a BHT of "3".
-
Resolve Ground Combat, and remove eliminated Ground Factors from play. After Combat, remove all Hit units placed with the Ground units, as they modify the BHT for only the one Turn. When this Combat is finished, the entire sequence of Combat in a single Battle is complete. When all Battles are finished, the Combat Phase is completed.
-
On the Turn when the last American Ground Factor is eliminated, the American Base unit is removed from the Midway hex, and replaced by the Japanese Base unit, showing that the Japanese have captured Midway. Once Midway is captured, the Japanese player may use any empty Task Force Box to represent the captured Base. The captured Midway Base uses the information found in the Japanese Plane Handling Tables. All Hit units from the American Base Box are transferred to the new Japanese Base Box, and count against the Japanese Base.
I. HIT TABLE MODIFIERS: All Modifiers, when they apply, change the BHT number to the Hit Table number. If no Modifiers apply, the BHT and Hit Table numbers are identical. Small case circled letters in the Air and Surface Hit Tables indicate when specific Modifiers apply. If more than one Modifier applies, their results will be cumulative. For example, if (c) ("-6") and (b) ("+2") Modifiers both applied, the cumulative Modifier would be "-4". If the BHT in this case was "7", the Hit Table would be "3". If the cumulative Modifiers reduces the Hit Table number to "0", or less, no Hits can be scored.
-
AIR HIT TABLE MODIFIERS: These Modifiers apply to BHTs found in the Air Hit Tables.
-
a. Modifier (a) subtracts "6" from Plane units used in the following cases:
- (1) Escorts or Interceptors have Air-to-Air Combat without expending an Endurance Factor.
- (2) Escorts and/or Interceptors have Air-to-Air Combat during a night Turn and/or at the same altitude as Clouds or Storms (see Optional Rules).
Both cases are cumulative, if both apply.
-
b. Modifier (b) adds "2" for Bombing Combats against Ship units that are anchored or "dead in the water" (unable to move).
-
c. Modifier (c) subtracts "6" for Bombing Combats during a night Turn and/or from the same altitude as Clouds or Storms.
-
d. Modifier (d) shows that each Plane unit's Air Modifier is used for Air-to-Air Combat. The given Air Modifier is added or subtracted from the BHT of any enemy units in Combat against that Plane unit. For example, any Plane unit in Air-to-Air Combat against a Fortress unit will have its BHT reduced by "2".
-
e. Modifier (e) is used for Bombing Combat versus Ship units. If both Low and/or Dive Bombing Combat is combined with Torpedo Bombing Combat against the same Ship unit, the BHTs for all the Bombing Combats against that Ship unit are increased by "1".
-
-
SURFACE HIT TABLE MODIFIERS: These Modifiers apply to BHTs found in the Surface Hit Tables.
- a. Modifier (a) subtracts "3" for AA Combats against Plane units at High Altitude. Dive Bombers, although they start at High Altitude, are considered to be at Low Altitude for AA Combat.
J. RECORDING HITS: Hits are recorded by removing eliminated units from play, marking them with Hit units, or marking them on the Ship Record Sheets.
-
RECORDING HITS ON PLANE UNITS: Hits on Plane units are recorded by eliminating Air Factors that equal the number of Hits.
-
RECORDING HITS ON GROUND UNITS: Hits on Ground units caused by Bombing or Bombardment Combat are recorded by placing a Hit unit or units with the Ground units. The number printed on a Hit unit corresponds to the number of Hits scored. Any combination of Hit units may be used, as long as their sum equals the number of Hits. Hits on Ground units caused by Ground Combat are recorded by eliminating Ground Factors that equal the number of Hits.
-
RECORDING HITS ON BASE UNITS: Hits on the Midway Base are recorded by placing a Hit unit or units in the Base Box.
- a. As long as the American Base unit is on the mapboard, place all Hit units in the American Midway Base Box.
- b. When the Japanese Base unit replaces the American Base unit on the mapboard, transfer all Hit units from the American Base Box to the Task Force Box used as the Japanese Base Box. Following that, place all new Hit units for the Base in the Japanese Base Box.
-
RECORDING HITS ON SHIP UNITS: All Ship units have a Hit Factor listed in the Hits column of their Ship Record Sheet. When the number of Hits scored on a Ship unit equals or exceeds its Hit Factor, the Ship unit is eliminated. Any lesser number of Hits is recorded by marking the Hits in the Hits column next to the Hit Factor.
- a. Any Ship unit with enough Hits to reduce its Movement Factor must have a Reduced Speed unit placed on it as a reminder.
- b. Any Ship unit with a Hit Factor of "3" or more must have a Cripple unit placed on it when only one more Hit is required to eliminate it.
K. THE EFFECTS OF HITS: Hits have different effects on different units.
-
EFFECTS OF HITS ON PLANE UNITS: Eliminated Air Factors are removed from the game, and play no further part.
-
EFFECTS OF HITS ON GROUND UNITS: Hit units placed with Ground units as a result of Bombing and/or Bombardment Combats reduce the BHT of the Ground units for Ground Combat (see Surface Hit Table Modifier h). Ground Factors eliminated by Ground Combat are removed from the game and play no further part.
-
EFFECTS OF HITS ON BASE UNITS: Each Hit on a Base unit has several effects.
- a. Each Hit will reduce the Maximum Launch Factor by two and the Normal and Minimum Launch Factors by one each. Plane units may not land or take off if all Launch Factors are reduced to "0" or less.
- b. Each Hit will eliminate one Air Factor, if any are present, for each Hit scored by Low or Dive Bombing Combat, or for every two Hits scored by High Bombing and/or Bombardment Combats (round any fractions down - eg., for three Hits, one Air Factor is eliminated). For Hits scored by High Bombing and/or Bombardment Combats, or by any Bombing during a night Turn, the player taking the Hits may choose exactly which Air Factors to eliminate. For Hits scored by Low or Dive Bombing during daylight Turns, the player making the Hits may choose exactly which Air Factors to eliminate.
- c. Each Hit will reduce the Base Gunnery Factor by one.
- d. Each Hit will reduce the Base AA Factor by two.
-
EFFECTS OF HITS ON SHIP UNITS: Each Hit on a Ship unit has several effects.
-
a. A Ship unit is eliminated ("sunk") when the number of Hits equals or exceeds its Hit Factor.
-
b. When the number of Hits is equal to one-half or more of the Ship unit's Hit Factor, a Reduced Speed unit should be placed on it and its Movement Factor is cut in half.
-
L. COMBAT EXAMPLES: This section demonstrates the resolution of various Combats. Players should read through this section while checking the Tables on the Game Card to familiarize themselves with the Combat procedures.
-
AIR-TO-AIR COMBAT EXAMPLES:
-
a. INTERCEPTOR VERSUS INTERCEPTOR EXAMPLE: The Japanese have 9 Zero Air Factors, and the Americans have 7 Buffalo Air Factors, all at Low Altitude. Since both sides have Interceptors, both must announce they will attack, or no Combat will take place. The Zeros have a BHT or "11", and the Buffaloes have a BHT of "7". No Modifiers apply, so the BHTs will equal the Hit Table numbers. The Base Number is "3" for the Zeros, and "2" for the Buffaloes. The Japanese player rolls a "5", giving 4 Hits, and the American player rolls a "1", giving only 1 Hit. Four Buffalo and one Zero Air Factors are eliminated.
-
b. ESCORTED BOMBERS EXAMPLE: The American Air unit 20 has 10 Wildcat Air Factors. The Japanese Air unit 5 has 2 Zero, 4 Val, and 4 Kate Air Factors, and the Japanese Air unit 6 has 3 Zero, 4 Val, and 6 Kate Air Factors. The Zeros and Vals are at High Altitude, and the Kates are at Low Altitude. The Wildcats are High Altitude Interceptors, and announce their attack. A total of 5 Zero Air Factors are available as Escorts, since all are used in one Combat at their altitude, even though they are in different Air units.
-
(1) INTERCEPTOR-TO-ESCORT COMBAT EXAMPLE: The American player announces he will use 7 Air Factors against the Escort, and send 3 Air Factors against the Bombers. The Zeros have a BHT of "11", but the Wildcat Air Modifier of "-1" applies, so their Hit Table is "10". The Wildcats use Hit Table "9". This gives both sides Base Numbers of "2". The Japanese player rolls a "2", giving 1 Hit, and the American player rolls a "6", giving 3 Hits. Three Zero and one Wildcat Air Factors are eliminated. This leaves 6 Wildcat to 2 Zero Air Factors, more than the 2:1 ratio required, so the 6 surviving Wildcat Air Factors join the other 3 in attacking the Bombers.
-
(2) INTERCEPTOR-TO-BOMBER COMBAT EXAMPLE: The Wildcats may not attack the Kates, as they are at Low Altitude. The American player decides to attack only the Vals in Air unit 5, so no other Japanese Planes may participate in the Combat. The Wildcats again have a BHT and Hit Table of "9". The Vals have a BHT of "3", but the Wildcat Air Modifier again applies, giving a Hit Table of "2". The Base Number is "2" for the Wildcats, and "*" for the Vals. The American player rolls a "3", giving 2 Hits, and the Japanese player rolls a "5", giving 0 Hits. Two Val Air Factors are eliminated.
-
-
X. MIDWAY BASE REPAIR PHASE
This Phase of play simulates the repairs that can be made to the Midway Base.
A. Repairs may only be made by the American side while the American Base unit is on the mapboard, and by the Japanese side while the Japanese Base unit is on the mapboard.
B. Repairs may be made only if the Base unit or the Ground units were not involved in Bombing or Bombardment Combat during the Turn, and if there was no Ground Combat during the Turn. Repairs may not be made even if the Bombing, Bombardment, or Ground Combats failed to make any Hits.
C. Repairs are made by adjusting the Hit units to display one less Hit. This completely removes the effects of that Hit on the Launch, AA, and Gunnery Factors of the Base, if any effects.
D. Repairs may be made only to remove Hit units, not to a Base with no Hits.
XI. VICTORY POINTS COUNTING PHASE
The Victory Points gained by both sides during the Turn are counted in this Phase. Both sides perform this Phase together, although the Japanese, on the south side of the mapboard and more convenient to the Point Record Chart, should actually place the Victory Point units.
A. HOW TO WIN THE GAME: To win, one side must have at least 100 Victory Points more than the other side at game's end. Otherwise, the game is a "draw".
B. USING THE POINT RECORD CHART: The Victory Point total for the American side is indicated with the three gray Victory Point units, and for the Japanese side with the three red Victory Point units. The Victory Point units are placed in appropriate boxes to indicate the current number of Victory Point for both sides. For example, a score of "426" is indicated by placing one Victory Point unit in the "400" box, one in the "20" box, and one in the "6" box. The best way to count the Victory Points every Turn is to place the eliminated units near the Point Record Chart during the Turn, then record their values during this Phase, before removing them completely.
C. VICTORY POINTS EXPLANATION: Players can gain Victory Points for their side in a number of ways, as explained below:
-
ELIMINATED SHIP, PLANE, AND GROUND UNITS: Eliminating the other side's units is worth Victory Points.
- a. Two Victory Points are awarded for each enemy Air Factor eliminated.
- b. Two Victory Points are awarded for each enemy Ground Factor eliminated.
- c. A varying number of Victory Points are awarded for eliminated Ship units, depending on the importance of each class of Ship. Note that when AV, BB, CAV, CV, or CVL Ship units are eliminated with Air Factors aboard, or AP Ship units are eliminated with Ground Factors aboard, the Air or Ground Factors are also eliminated and count for Victory Points.
-
HIT SHIP UNITS: The Victory Points for Ship units that were Hit, but not eliminated during the game, are counted only at the end of the scenario. A varying number of Victory Points are awarded for these Hits, depending on the Ship unit Hit. For example, a CV with three Hits would be worth 45 Victory Points (15 Victory Points per Hit on CV Ship units).
-
THE MIDWAY BASE UNIT: Whichever side has their Base unit in the Midway hex at the end of the game gets 200 Victory Points. These Victory Points are counted only at the end of the game. These Victory Points are not counted when the Short Scenario is played.
-
UNNECESSARY AIR FACTOR LOSSES: When a player loses an Air Factor unnecessarily, the opponent gets eight Victory Points, in addition to the normal two Victory Points received for eliminating the Air Factor. This applies to Air Factors eliminated by player error or choice in not being able to reach a hex where landing is possible. This does not apply to Air Factors that reach a hex where landing is or was possible, but cannot land due to the elimination of or Hits on the Base or Ship unit, or for insufficient Launch Factors. It does apply to Plane units on the mapboard at the end of the game which could not reach a possible landing hex were the game to continue. These Victory Points force players to pay close attention to their Movement and Endurance Factors, and prevents the unrealistic launching of one-way suicide missions.
XII. TIME RECORD PHASE
The Japanese player should record the completion of a Turn on the Time Record Chart.
A. The completion of one Turn and the start of the next Turn is recorded on the Time Record Chart by moving the Time Record units. The Turns represent one hour time periods during a day, and the time is recorded by placing the Turn unit in the correct box. The date is recorded by placing the Day unit in the box containing the correct date.
B. The shaded boxes on the track are night Turns. The unshaded boxes on the track are daylight Turns. The Turn unit is advanced one box every Time Record Phase. When the 2400 Turn is completed, advance the Day unit one box to the right, and move the Turn unit to the 0100 Turn.
C. A game ends after the last Turn listed in the scenario is completed.
D. Check observation changes at "Sunrise" and "Sunset".
The Optional Rules
I. Introduction to the Optional Rules
These rules build on the Basic Game Rules to add greater scope and realism to the game, and add new concepts to play. Some Optional Rules have a minor effect on the game, while others greatly change how the game is played. Some are quite simple, and others are complex and time-consuming. Each section of the Optional Rules is separate, capable of being used alone, or together with other sections. The individual players must decide for themselves which of the Optional Rules they wish to use, depending on what interests them. Some new Steps and Segments are added to the Sequence of Play with use of some of these Optional Rules, and the complete Sequence of Play With All Optional Rules is printed on the back page of this rulebook. Simply ignore any Segments that do not apply if their Optional Rules sections are not used.
II. Small Main Guns
Many ships carried main gun batteries that were too small to seriously damage a heavily armored battleship. Therefore, AS, AV, CL, CVL, and DD Ship units may not use their Gunnery Factors for Ship-to-Ship Combat against BB Ship units.
III. Long Range Bombardment
Many ships carried main gun batteries with a longer effective range than the gun batteries on Midway, and could have blasted the island from long range without being subjected to return fire. This is Surface Hit Table Modifier (g), and it subtracts "4" for Bombardment Combats by BB, CA, and CAV Ship units. The Midway Gunnery Factors may not be used in this long range Bombardment Combat.
IV. Bombing Combat with Screening Ship Units
Planes that bomb ships on the edge of a task force formation will be subjected to less anti-aircraft fire than planes that bomb ships in the center of a task force formation.
A. TASK FORCE ORGANIZATION: Historically, task forces under bombing attacks formed this formation: (Diagram: CORE - the Ship units that the rest of the Task Force must protect; SUPPORT & HEAVY - more powerful Ship units, formed closely around the Core; SCREEN - the smallest and outermost light Ship units in the formation.)
The Task Force Functions of all Ship units are shown in the Function column of the Ship Sizes and Functions Chart on the Game Card.
-
If there are no Core Ship units in a Task Force, the Heavy Ship units are defined to be Core Ship units in that Task Force.
-
If there are no Core or Heavy Ship units in a Task Force, the Support Ship units are defined to be Core Ship units in that Task Force.
-
AA and Bombing Combats are handled normally if there are no Core, Heavy, or Support Ship units in a Task Force.
B. BOMBING COMBAT WITH SCREEN SHIP UNITS: Plane units that announce Bombing Combat with a Screen Ship unit may be engaged in AA Combat only by the AA Factors of the Screen and Support Ship units in that Task Force. This is Surface Hit Table Modifier (e).
V. Critical Hits
Critical Hits are those which, due to luck, cause more damage than would normally be expected. There are two Critical Hit Tables on the Game Cards, to be used during the Critical Hits Step of the Combat Phase. Sometimes both Tables must be used for the same Ship unit during the same Turn.
A. CRITICAL HIT TABLE ONE: Any Ship unit Hit during a Turn must have reference to Table One. A die is rolled once for each Ship unit that was Hit, regardless of the number of Hits taken, and Table One consulted. The results are applied to the Ship unit immediately.
B. CRITICAL HIT TABLE TWO: This Table is used only for Ship units that have been Hit during the Turn, and whose total number of Hits equals 51% or more of the Ship unit's Hit Factor. Two dice are rolled, Table Two is consulted, and the results applied to the Ship unit immediately.
C. CRITICAL HIT TABLE RESULTS: The results are explained in the Tables. Table One results apply only during the next Turn, while Table Two results apply for the rest of the game. If the Critical Hit result must be remembered, use the letter codes assigned to such Hits, and write these in the Hits column on the Ship Record Chart. For example, if a "3" is rolled on Table One, an "A" is written on the Ship Record Chart.
D. CRITICAL HIT MEMORY HELP: If many Combats are fought in a Turn, and many Ship units are Hit, it can be difficult to remember which need to be checked for Critical Hits. Below is a sequence that can help:
-
As Ship unit Hits are marked on the Ship Record Sheet, mark them very lightly.
-
Start the Critical Hits Step by erasing all Critical Hit notations "A", "B", "C" and/or "D" (all from Table One), as their Turn of effect on the Ship unit has ended.
-
As each Ship unit is checked on the Critical Hit Tables, darken the Hit marks on the Ship Record Sheet while marking the Critical Hits results.
VI. Rescue Ships
When large ships were sunk, other ships would, if possible, rescue the survivors.
A. SURVIVOR FACTORS: The Survivor Factors for large Ship units are the circled numbers next to the Ship type abbreviations on the Ship Record Charts. For example, the Survivor Factor for American CV Ship units is 5, and for Japanese CV Ship units it is 4.
B. RESCUE: When a large Ship unit is eliminated, other Ship units may "rescue" the Survivor Factors.
-
Each rescue Ship unit may "carry" one Survivor Factor.
-
To rescue a Survivor Factor, the Ship unit must remain for one Turn in the hex where the large Ship was eliminated. Invert eliminated Ship units in their hex to locate their positions. Ships may rescue friendly or enemy Survivor Factors.
-
When a Survivor Factor is rescued, record it by circling the rescue Ship's name or numerical designation on the Ship Record Sheet. This shows that it now carries a Survivor Factor. Show which eliminated Ship unit the Survivor Factor comes from by marking a "X" in the eliminated Ship unit's Hits column on the Ship Record Sheet - this tells how many Survivor Factors have been rescued from a particular Ship unit.
-
If a Ship unit carrying a Survivor Factor is eliminated, the Survivor Factor it carries may be rescued by another Ship unit.
-
OPTIONAL VICTORY POINTS: When the game ends, each rescued Survivor Factor is worth two Victory Points to the side carrying it.
VII. Plotted Air Units
Moving all of the Air units on the mapboard sometimes reveals more than a player wants known in the Basic Game. This option gives players more secrecy and chances to surprise the opposition.
A. Players may mark the movements of selected Air units on their Plot Maps instead of moving those Air units on the mapboard. Air unit moves are marked the same as Task Force unit moves. The Air unit movement is plotted during its side's portion of the Air Unit Movement Phase.
B. Players may, if they wish, allow more than two Air units to be marked on the Plot Maps, but this can become quite time consuming.
-
No side may have more than two Air units marked on the Plot Map during any Turn. Plotted Air units must be placed on the mapboard when observed. At the start of their portion of the Air Unit Movement Phase, players may voluntarily reveal the locations of previously plotted Air units, in order to secretly mark the moves of other Air units.
-
To avoid confusing Task Force and Air units on the Plot Map, only mark Air units whose designation numbers are larger than any Task Force or Submarine Patrol (if that Optional Rule is used) designation numbers.
VIII. Variable "Luck"
Players may determine how substantial the factor of "luck" will be in their games. The decision is up to the players to decide if the Basic Game system, the Maximum Luck System, or the Minimum Luck System is to be used.
A. THE MAXIMUM LUCK SYSTEM: This increases the role luck plays in the game. Luck played a large role in the historical action, and use of this option gives the truest simulation of actual events. To use this option, only the effects of the die rolls for Combat resolution are changed.
- A die roll of "6" adds two to the Base Number.
- A die roll of "5" adds one to the Base Number.
- Die rolls of "3" or "4" add zero to the Base Number.
- A die roll of "2" subtracts one from the Base Number.
- A die roll of "1" subtracts two from the Base Number.
- A die roll of "6" is still required for one Hit with Base Number "*".
B. THE MINIMUM LUCK SYSTEM: This decreases the role luck plays in the game. The reduced effects of luck actually makes the game less realistic, but allows for precise planning.
-
INITIATIVE ROLL: Instead of rolling for the Air Unit Initiative, have the Americans always move first on even-numbered Turns, and the Japanese always move first on odd-numbered Turns.
-
COMBAT RESOLUTION: Two options are given here, the second allowing more luck than the first.
- a. OPTION ONE: No die is used to resolve combat. Let the Base Number always equal the number of Hits ("*" and "0" always give no Hits).
- b. OPTION TWO: The same as Option One, only allow the normal die rolls for Base Numbers of "*" and "0".
-
"LUCKY" OPTIONAL RULES: Use no Optional Rules that require a die roll.
IX. Midway Plane Dispersal
Planes in dispersal are spread out, emptied of gasoline and ammunition, hidden, and/or placed in shelters on Midway, and are harder to destroy.
A. Dispersal can be done only on the Midway Base.
B. Placing Plane units in Dispersal, or taking them out of it expends one Ready Factor per involved Air Factor.
-
Air Factors must be in the B section for Dispersal. Plane units in Dispersal may not be moved into other sections.
-
Place Dispersal unit on top of involved Plane units to show their situation.
-
To remove a Plane unit from Dispersal, simply remove the Dispersal unit. This uses one Ready Factor per Air Factor, and such Plane units may not move into the C section on the same Turn.
C. Plane units in Dispersal suffer only half the normal effects of Hits. Round fractions down.
D. Always count Hits against Plane units that are not in Dispersal, and eliminate all of these before counting any Hits against Plane units that are in Dispersal.
X. Plane Repairs
The Air Factors listed in each scenario represent only the "operational" Planes - those which are fit to fly and fight. A large number of "non-operational" or "down" Planes were also present. Also, eliminated Air Factors represent not only destroyed Planes, but also those which returned home too damaged for quick repairs (ie. they are "down"). For the longer scenarios, a considerable number of these "down" Planes can be repaired and used.
A. Both sides receive their repaired Air Factors on the 0100 Turn each day. Place these new Air Factors in the A sections of Task Force and/or Base Boxes which can handle them and have spare Plane Capacity. This is done at the very start of the Plane Readiness And Air Unit Organization Phase, and these Plane units are treated as if they had landed on the previous Turn.
B. The use of this option calls for keeping a record of all eliminated Air Factors. The easiest way to do this is to just place the eliminated Air Factors in a pile until it is time to count them. All Air Factors lost during the previous day must be counted (count no earlier losses). One-third of all eliminated Air Factors of each type may be returned to play as repaired - round all fractions down when computing the one-third number.
XI. Submarines
Submarines played a modest role in the Battle of Midway, and could have played a more important role if placed differently. Submarines are Ship units in all respects, with the exceptions covered below:
A. SUBMARINE SET UP: The Submarine units are set up after all other units are placed on the mapboard or marked on the Plot Maps. Submarine units are never placed directly on the mapboard, but are kept in Submarine Patrol Boxes on the Holding Box Charts, and represented on the mapboard by Submarine Patrol units. Any number of Submarine units can be kept in a single Submarine Patrol Box. The following restrictions apply to Submarine set up:
-
No more than three Submarine units per side may be set up in a single mapboard sector.
-
No more than two Japanese Submarine units may be set up in the A mapboard half.
-
No Japanese Submarine unit may be placed closer than five hexes from the Midway Base.
-
No Submarine units may be placed closer than five hexes from a Ship Entry Area hex.
B. SUBMARINE MOVEMENT: Submarine units may never be organized in a Task Force Box, they always operate independently in Submarine Patrol Boxes. The Submarine Patrol units are moved during the Ship Unit Movement And Shadowing Step.
-
Submarine units adjust their "depth" by moving the units into the different sections in their Submarine Patrol Boxes. A Submarine unit may be at Surface Depth, Periscope Depth, or Deep Depth. Submarine units at Periscope or Deep Depth are defined to be "submerged". Any desired depth changes may be made during the Ship Unit Movement And Shadowing Step.
-
Submarine units that begin the Ship Unit Movement And Shadowing Step at Deep Depth may change their depth, but must remain in their hex. Submarine units that begin the Ship Unit Movement And Shadowing Step at Periscope or Surface Depths may change their depth and their Submarine Patrol unit may be moved one hex on the mapboard.
-
Submarine Patrol units may be used to Shadow.
-
Submarine Patrol units are usually kept on the mapboard at all times. However, if players wish, they may mark the movements of selected Submarine Patrol units on their Plot Maps instead of moving them on the mapboard. Submarine Patrol unit moves are marked the same as Task Force unit moves, and at the same time.
- a. No side may have more than two Submarine Patrol units marked on the Plot Map during any Turn. Plotted Submarine Patrol units must be placed on the mapboard when observed. At the start of the Plot Ship Movement Step, players may voluntarily reveal the locations of previously plotted Submarine Patrol units, in order to secretly mark the moves of other Submarine Patrol units.
- b. To avoid confusing Task Force, Air, and Submarine Patrol units on the Plot Map, only mark Submarine Patrol units whose designation numbers are larger than any Task Force designation numbers.
C. SUBMARINE OBSERVATION: Submarine units at Surface Depth may observe and be observed exactly the same as other Ship units. The observation rules for Submarine units at other depths are somewhat different.
-
PERISCOPE DEPTH: Submarine units at Periscope Depth may observe only Ship units in their hex. They may not observe Air units, or Ship units in adjacent hexes. They may be observed only by Low Altitude Plane units or DD Ship units in their hex using the Periscope Modifiers on the Observation Tables. For example, a Low Altitude Plane unit has a "-2" Observation Modifier against Submarine units at Periscope Depth, and could make a Condition 3 observation against Submarine units in the same hex.
-
DEEP DEPTH: Submarine units at Deep Depth may not observe at all. They may be observed only by DD units in their hex using the Deep Modifiers on the Observation Tables.
D. SUBMARINE COMBATS: Submarine units at Surface Depth may engage in Ship-to-Ship and/or Surface Torpedo Combats the same as other Ship units, and those with a Gunnery Factor of "1" may even participate in Bombardment Combats. If attacked by Plane units they may engage in AA Combats normally, being treated as Unorganized Ship units, and be Bombed normally as a Ship unit. However, Submarine units may avoid these Combats completely if they are at Periscope or Deep Depths.
-
Submarine units are allowed to change their depths from Surface to Periscope or Deep, or from Periscope to Deep at the start of the Combat Phase. This depth will be the one used for all Combats with the Submarine unit.
-
BOMBING COMBAT VERSUS SUBMARINES: Bombing Combat against Submarine units at Periscope Depth uses the Air Versus Sub column on the Air Hit Tables. Only Low Bombing Combat may be used for this Combat, and only HE Bomb units. The Submarine unit does not use AA Combat against the attacking Plane units. Bombing Combat against Submarine units at Deep Depth is an automatic "miss", although the Bomb unit is still expended.
-
ANTI-SUBMARINE COMBAT SEGMENT: This Segment comes during the Surface Combat Step, after the Bombardment Combat Segment. This Combat resolves the attacks by DD Ship units (armed with depth charges) on submerged Submarine units.
- a. Anti-Submarine Combat occurs when DD Ship units announce that they are attacking a submerged Submarine unit or units in the hex. DD Ship units used for Anti-Submarine Combat may not have been used for other Surface Combat during the same Turn. The DD Ship units may be divided in any way if more than one Submarine unit is attacked.
- b. The Anti-Submarine Combat is then resolved. The DD Ship units count for one Depth Charge Factor per attacking Ship unit. The BHTs listed in the Anti-Submarine column of the Ship Hit Tables are used. The following Surface Hit Table Modifiers apply to Anti-Submarine Combats:
- (1) Modifier (i) subtracts "1" from the BHT for Anti-Submarine Combats during night Turns or in a Storm hex.
- (2) Modifier (j) adds "1" to the BHT against the Submarine unit if it is at Periscope Depth.
- (3) Modifier (k) subtracts "1" from the BHT if the Submarine unit is at Deep Depth.
-
SUBMARINE TORPEDO COMBAT SEGMENT: This Segment comes right after the Anti-Submarine Combat Segment. This Combat resolves the Torpedo attacks on Ship units by submerged Submarine units.
E. MIDGET SUBMARINES: Midget Submarine units have their own Submarine Patrol Box to be placed in, although no Submarine Patrol unit is provided, as they must always remain in the Midway hex. Midget Submarine units operate under the same rules as regular Submarine units, although they may never move out of the Midway hex, and may not go to Deep Depth.
XII. Torpedo Reloads
Japanese destroyers and Japanese and American submarines carried a complete reload of torpedos.
A. To reload Torpedos, cross out the "R" box in the Torp column of the Ship Record Sheet, and erase the mark made when the original Torpedos were expended.
B. The reloading of Torpedos is recorded during the Ammunition Recording Segment. It may be done only if the Ship unit was involved in no Combats during the Combat Phase.
C. Midget Submarine units have an unlimited supply of Torpedos, but must reload between each use.
D. Reloaded Torpedos may be used for Surface or Submarine Torpedo Combats in the normal manner.
XIII. Mapboard Weather - Wind and Clouds
This section of the Optional Rules is concerned with the weather on the mapboard.
A. CHANGING WIND DIRECTIONS: The white Wind Direction Arrows printed on the mapboard show the normal Wind Directions in their sectors of the mapboard. The Wind Direction is not constant, but may change.
-
SET UP: Place a Wind Direction unit with its arrow facing in the same direction as the Wind Direction Arrow in each Directional Hexagon at the start of the game.
-
WIND DIRECTION CHANGES STEP: Whenever the Turn unit is advanced into a box containing a "*" on the Time Record, Wind Direction changes are checked for during that Time Record Phase. The American player rolls the die once for each mapboard sector, and the Wind Direction Changes Chart checked on the Game Card for each. Clockwise and counter-clockwise are determined when looking north on the mapboard. While the American player rolls the die and calls out the results, the Japanese player should be turning the Wind Direction units to face in their new directions. The arrows on the Wind Direction units now show the new Wind Direction.
B. CLOUDS: The Cloud units represent High Altitude Cloud Formations that can effect observation. The Cloud units are placed on the mapboard in the hexes listed for each scenario.
-
CLOUD SIZES: Clouds occupy the hex that the Cloud unit is in and also all adjacent hexes. (Diagram: a Cloud unit in the centre hex, with the six adjacent hexes shaded to show the size of each Cloud.)
-
CLOUD MOVEMENT: During the game, the Cloud units must be moved one hex during the Cloud Movement Step of the every even-numbered Turn. Cloud units move in the direction of the Wind Direction Arrow in the last sector in which they were completely located. The location of a Cloud is always determined by the hex containing the Cloud unit. As Cloud units enter new mapboard sectors, their movement will be determined by the Wind Direction in the new sector.
-
STORMS: Any hex where two or more Clouds overlap is defined to be a Storm hex. The Night Landings Chart is used for Plane units attempting to land in Storm hexes.
-
ALTITUDES OF CLOUDS AND STORMS: Clouds are defined generally at High Altitudes. Storms are defined to be at both High and Low Altitudes, and on the Surface.
-
EFFECTS ON COMBAT: Air-to-Air and/or AA Combats are effected if the involved Plane units are at Altitudes that contain Clouds or Storms, so that Air Hit Table Modifiers a and c apply, and Surface Hit Table Modifier b. Note that although Plane units in Dive Bombing Combat are engaged in AA Combat as if they were at Low Altitude, Modifier b applies if they were in Clouds at High Altitude at the start of the Dive Bombing Combat. Air Hit Table Modifier b only applies if the Plane unit is at the same altitude as the Cloud or Storm when it drops its Bombs. Dive Bombers drop bombs from Low Altitude. Storms effect Anti-Submarine, Submarine Torpedo, and Surface Torpedo Combats the same as night Turns.
-
EFFECTS ON OBSERVATION: The Optional Rules section of the Observation Tables show the Observation Modifiers of both Clouds and Storms.
XIV. Multi-Player Rules
CV, being a large and complex game, lends itself well to play by teams of players on both sides. The game not only moves along faster as each player has less to do each Turn, but some additional realism can be added to the game. Here are some suggested rules for games with several players per side:
A. THE ASSIGNMENT OF PLAYERS: The suggested methods for dividing up the players are given below:
-
THREE PLAYER GAME: Have one American player, and one Japanese player to command the forces that start on the northern half of the mapboard while the other Japanese player commands the forces that start in the center and southern half of the mapboard.
-
FOUR PLAYER GAME: Divide up two Japanese commands as for the three player game. Have one American player command the naval forces, and the other American player command the land-based forces.
-
FIVE OR MORE PLAYER GAMES: For five or more player games, the naval forces on both sides should be divided up as evenly as possible among the players. There should always be one American player to command the land-based forces. If there is an odd number of players, the odd player should always be on the Japanese side.
B. An individual player controls only the units assigned to his command. No player may move another player's units.
C. PLAYER COMMUNICATIONS: Communications in World War II were generally handled by radio, but, since radio sources could be traced, fleets usually tried to maintain radio "silence". Radio messages could be unreliable and long delayed, and real coordination between commanders was difficult. These rules simulate some of these problems:
-
Before the game starts all the players on a side should meet to discuss their general strategy for the game. Once the game starts, no talking is allowed unless the players are "together" in the same hex.
-
Each naval commander needs a flagship, which should always be a BB, CAV, CA, or CV unit, if possible, although other types may do if necessary. The Ship units selected are not revealed to the enemy. The land-based American player has his headquarters at Midway. The selected Ship or Base unit is the player's headquarters, and represents that player's position on the mapboard. If players wish to talk together, their units must be present in the same hex.
-
If a player's flagship is eliminated, or if Midway is captured by the Japanese, that player may not send or receive messages for the rest of the game.
-
Written messages are sent to simulate the use of radio. Fold the paper a message is written on, and write the name of the player it goes to. Then roll one die, the number rolled being the number of Turns until the message can be received. Write the Turn number when the message can be delivered under the player's name.
-
Messages are sent and received only at the start of the Readiness And Air Unit Organization Phase. A player may send one message to each of the other player's on the side each Turn.
-
The location of the message-sending unit must be revealed whenever a message is sent. Players who wish to avoid revealing their location may do the following:
- a. Write the message or messages, then place these notes under a Ship unit in the same hex.
- b. Move the Ship unit with the messages some safe distance from the flagship before sending them on some later Turn. The messages Turns of arrival are not rolled for until they are actually sent. If flagships were close together, the Ship unit could serve as a "courier", carrying the messages to a hex containing another flagship. If the message is delivered in this manner, it is not a radio message.
- c. A written message could be sent with an Air unit serving as a "courier", if Plane units could land and take off from both hexes containing the flagships. This is not a radio message.
XV. The "Blind" Game
This option requires the services of an extra person who will play for neither side, but will serve as "Umpire", and run the game. These rules are suggestions for the "Umpire" in running such a game.
A. Separate the players or teams of players so they are out of sight of each other. Each side must have a separate copy of the game, and the Umpire must have a third copy. This option can work beautifully if all participants are at their homes, and the game is played by phone.
B. The Umpire's copy of the game should display all information, and all units for both sides should be placed on his mapboard. Normally, the Umpire does not have to monitor both side's Holding Box Charts, as these can be studied at any time, unless the game is run by phone. Then, the players must tell the Umpire of all changes made on their Holding Box Charts.
C. The game is played normally, although all information must go through the Umpire. All movements should be told to the Umpire, or noted for him on Plot Maps, and the Umpire must report back with all observations. All Air, Task Force, and Submarine Patrol units are hidden, and only the Umpire knows exactly where all units of both sides are located.
D. The Umpire has a lot to do, and must be skilled with the rules, tactful, and able to use imagination in many situations. The Umpire should handle all die rolls, and report results back to both sides. Some suggestions for the Umpire are:
-
INITIATIVE ROLLS: The Umpire should roll one die, and allow the Americans to move first if even, and the Japanese to move first if odd.
-
RADIO MESSAGES: All radio messages should go through the Umpire, who will roll for their delivery times, interceptions, etc.
-
VICTORY POINTS: The Umpire should count all Victory Points. Let the players know as little about these as possible.
-
TIME RECORD: The Umpire should handle the Time Record, and tell all players at the start of each Turn what the time is.
-
OBSERVATION: The Umpire should reveal observation information.
-
COMBAT DIE ROLLS: The Umpire should handle all die rolls for Combat, and should not reveal the number of Hits scored to the player who would normally roll the die, or when units are eliminated. Each side should be aware only of their own losses.
XVI. "What If?" - Random Entry
The CV game contains a large number of Ship units that were included specifically for use with this rule. These Ship units were not actually present at the Battle of Midway, but, one way or the other, could have been under slightly changed circumstances. This rule also permits more of the "fog of war", as the Japanese player is never sure exactly what American units are present.
A. THE RANDOM ARRIVAL CHART: The Random Arrival Chart, shown below, is used during game set up to determine what units will arrive and when they will arrive on the mapboard.
B. RANDOM ARRIVAL CHART PROCEDURE: The Chance units are used to determine results on the Random Arrival Chart.
-
Separate the red and gray Chance units, invert them in their separate groups, and mix thoroughly.
-
Both sides now randomly draw one gray and one red Chance unit.
-
The Random Arrival Chart line that matches the numbers on the drawn Chance units gives the information. The information concerns only that side's forces, it does not effect enemy forces at all.
- a. The Japanese player must tell the American player what was drawn for the Japanese side.
- b. The American player keeps his draw a secret, keeping his two Chance units from view, and revealing them only after the end of the game to verify his draw.
- c. Both sides take any extra units they may have gotten, remove any units they may have lost, adjust for new arrival times, and set up normally. The American player may ask the Japanese player to leave the room for a short period so that the American units can be adjusted secretly.
C. INTERPRETING THE RANDOM ARRIVAL CHART: The first two columns on the chart show the Chance units drawn. The information on that line shows the results.
- SEA FORCES COLUMNS: The four columns headed by Roman numerals name specific forces on either side.
-
a. "I" is for American Forces IA and IB, or for Japanese Forces IA, IB, IC, ID, and IE.
-
b. "II" is for the following:
- (1) AMERICAN FORCE II: 2 CA: Indianapolis, Louisville. 3 CL: Honolulu, Nashville, St. Louis. 4 DD: DD18-21.
- (2) JAPANESE FORCE II: 1 CV: Junyo. 1 CVL: Ryujo. 1 AV: Kimikawa. 3 CA: Maya, Nachi, Takao. 2 CL: Abukuma, Tama. 8 AP: AP16-23. 12 DD: DD43-54. Sea-Based Air: 10 Zero, 6 Val, 6 Kate, 2 Jake. Ground Units: 40 Ground Factors aboard AP16-23.
Historically, both of these forces were involved in operations in the Aleutians.
-
c. "III" is for the following:
- (1) AMERICAN FORCE III: 1 CV: Saratoga. 2 CA: Chester, Chicago. 7 DD: DD22-28. Sea-Based Air: 8 Wildcat, 15 Dauntless, 4 Avenger.
- (2) JAPANESE FORCE III: 1 CV: Zuikaku. 1 CA: Aoba. 4 DD: DD55-58. Sea-Based Air: 6 Zero, 6 Val, 4 Kate.
Historically, the Saratoga had just finished repairs on the United States west coast, and was held back due to an incomplete air complement and problems finding a suitable escort. The Zuikaku had just returned from the Battle of the Coral Sea, and was short of both planes and escorts. Both air groups and escorts are hypothetical, and based on what could have been quickly gathered.
-
d. "IV" is for the following:
- (1) AMERICAN FORCE IV: 5 BB: Colorado, Idaho, Mayland, Mississippi, Tennessee. 2 CL: Detroit, Raleigh. 7 DD: DD29-35.
-
| Force | Arrival | Scenario III | Scenario IV |
|---|---|---|---|
| Force IA & IB | X | Anywhere in board B. | Anywhere in sectors IV and/or VIII. |
| Force IA & IB | D | Anywhere in sectors IV and/or VIII. | (c) and/or (i), 1200 June 3. |
| Force II | X | Anywhere in sectors IV and/or VIII. | (c), 1600 June 3. |
| Force II | D | (c), 0400 June 4. | (c), 0400 June 4. |
| Force III & IV | X | Anywhere in sectors IV and/or VIII. | (c) and/or (i), 1600 June 3. |
| Force III & IV | D | (c) and/or (i), 0400 June 4. |
  *The circled letters in this table are read as the Ship Entry Areas "a" through "i" shown on the mapboard.*

  - (2) **JAPANESE FORCES:**
| Force | Arrival | Scenario III | Scenario IV |
|---|---|---|---|
| Force IA | X or D | (b) | (a), 1500 June 3. |
| Force IB | X or D | (a), 0400 June 4. | (a), 0400 June 4. |
| Force IC | X | (d) | (f), 0500 June 3. |
| Force IC | D | (f), 0200 June 4. | (f), 0200 June 4. |
| Force ID | X or D | (e) | (f), 0400 June 3. |
| Force IE | X | (h) | (f), 1500 June 3. |
-
SS COLUMN: The SS column indicates the number of Submarine units available for the game, if the Submarine option is being used. Ignore the numbers of Submarine units listed as available in the scenarios, and substitute the numbers given here. The Submarine units taken must be numbered sequentially, starting with SS 1.
-
GD COLUMN: The GD column indicates the number of Ground Factors available to the Americans on Midway. The Japanese player can ignore this column on his draws. Substitute the number of Ground Factors given here for the number listed as available in the scenario.
XVII. Land-Based Dauntless Plane Units
The pilots of these planes were not trained for dive bombing. Therefore, the land-based Dauntless Plane units may not be used for Dive Bombing Combat.
XVIII. American Radar Early Warning
American radar sets at Midway, although primitive by later standards, could often provide early warning of incoming air attacks to allow planes to take off before the attack arrived.
A. When the American side moves second during the Air Unit Movement Phase, and any Japanese Plane units at High Altitude are Bombing, the American player may take off any Plane units in the C sections of any Base and/or CV Ship units in the attacked hex, even if they were not organized into Air units during the Form Air Units Step. These Plane units are making an Emergency take off.
B. Emergency take off Air units are formed normally. These take offs may not exceed the Launch Factors. Any Interceptors that make Emergency take offs may have Air-to-Air Combat only with Japanese Plane units at Low Altitude. Any Special Interceptors that make Emergency take offs may not be used as Interceptors during the Combat Phase.
Random Arrival Chart (Chance Unit Draws)
Circled numbers in the SS column: the Americans use twice the listed number of Submarine units. Notes printed with the chart: Japanese get 16 Submarines if 16, 18, or 20 is listed in the SS column. "*" (Americans only): Force IB is delayed, IA is normal. "#" (Americans only): Force IB is not used; IA is delayed.
Left half of chart
| Gray | Red | I | II | III | IV | SS | GD |
|---|---|---|---|---|---|---|---|
| 1-4 | 1-16 | X | — | — | — | (4) | 50 |
| 5 | 1-16 | X | — | — | — | 8 | 50 |
| 6-7 | 1-16 | X | — | — | — | 10 | 50 |
Right half of chart
| Gray | Red | I | II | III | IV | SS | GD |
|---|---|---|---|---|---|---|---|
| 13 | 11-13 | X | — | DDD | — | (8) | 50 |
| 13 | 14-15 | X | — | DDD | — | 10 | 50 |
| 13 | 16 | X | — | DDD | — | 16 | 50 |
The Scenarios
I. Introduction to the Scenarios
The separate scenarios all use this common set of rules. Each scenario lists the information needed to set up and play the game. There are three separate scenarios, which allow for games of different sizes and lengths. The information given in each scenario is in the following format:
A. GENERAL INFORMATION: This gives the information needed to set up the mapboard.
- TIME: This tells the starting and ending Turns, and the game length.
- WEATHER: This lists the hexes in which Cloud units should be placed if the Mapboard Weather Optional Rule is used.
B. AMERICAN INFORMATION: This gives the American forces and their starting positions for the scenario. Air are given in Air Factors.
C. JAPANESE INFORMATION: This gives the Japanese forces and their starting positions for the scenario. Air are given in Air Factors.
II. The Short Scenario
This scenario has a reduced number of units and number of Turns to be played. It is intended to be an introduction to the game, and should be played using only the Basic Game Rules.
A. GENERAL INFORMATION:
- TIME: 0100 June 4 - 1800 June 4 (18 Turns).
- WEATHER: This option is not used.
B. AMERICAN INFORMATION:
-
NAVAL FORCES:
- a. FORCE IA: 2 CV: Enterprise, Hornet. 5 CA: Minneapolis, New Orleans, Northampton, Pensacola, Vincennes. 1 CL: Atlanta. 11 DD: DD1-5, DD7-9, DD15-17. Sea-Based Air: 18 Wildcat, 25 Dauntless, 10 Devastator. Starting Position: Anywhere on mapboard half B.
- b. FORCE IB: 1 CV: Yorktown. 2 CA: Astoria, Portland. 6 DD: DD6, DD10-14. Sea-Based Air: 8 Wildcat, 12 Dauntless, 4 Devastator. Starting Position: Anywhere on mapboard half B.
-
LAND FORCES:
- a. LAND-BASED AIR: Midway: 7 Buffalo, 2 land-based Wildcat, 6 land-based Dauntless, 5 Vindicator, 2 Avenger, 1 Marauder, 3 Fortress, 6 Catalina.
- b. GROUND UNITS: No Ground units are used in this scenario.
C. JAPANESE INFORMATION:
-
NAVAL FORCES:
- a. FORCE IA: 4 CV: Akagi, Hiryu, Kaga, Soryu. 2 BB: Haruna, Kirishima. 2 CAV: Chikuma, Tone. 1 CL: Nagara. 12 DD: DD1-12. Sea-Based Air: 28 Zero, 30 Val, 23 Kate, 1 Judy, 2 Jake, 3 Pete. Starting Position: Ship Entry Area (b), at start.
- b. FORCE IB: 1 CVL: Hosho. 3 BB: Mutsu, Nagato, Yamato. 2 AS: Chiyoda, Nisshin. 1 CL: Sendai. 9 DD: DD13-21. Sea-Based Air: 3 Kate. Starting Position: Ship Entry Area (a), 0400 June 4.
- c. FORCE IC: 1 CVL: Zuiho. 2 BB: Hiei, Kongo. 4 CA: Atago, Chokai, Haguro, Myoko. 1 CL: Yura. 8 DD: DD22-29. Sea-Based Air: 4 Zero, 4 Kate. Starting Position: Ship Entry Area (d).
- d. FORCE ID: 1 CL: Jintsu. 3 PG: PG1-3. 15 AP: AP1-15. 10 DD: DD30-39. Starting Position: Ship Entry Area (e).
- e. FORCE IE: 2 AV: Chitose, Kamikawa. 4 CA: Kumano, Mikuma, Mogami, Suzuya. 3 DD: DD40-42. Sea-Based Air: 10 Pete, 3 Dave. Starting Position: Ship Entry Area (h).
-
LAND FORCES:
- a. LAND-BASED AIR: Marshalls: 3 Mavis. Wake: 1 Betty, 1 Nell.
- b. GROUND UNITS: No Ground units are used in this scenario, and you may assume that there are none aboard the Japanese AP Ship units.
III. The Battle of Midway Scenario
This scenario covers the major days of the Battle of Midway in terms of fighting and losses.
A. GENERAL INFORMATION:
- TIME: 0100 June 4 - 1800 June 5 (42 Turns).
- WEATHER: A2825, A2921, A3223, A3220, A3418, A3521, A3515, A3717, A3820, A3814, A3911, A4016, A4118, A4113, A4210, A4315, A4412, A4407, A4614, A4609, A4705, A4811, B1107, B1309, B1304, B1407, B1706, B1902, B2005, B2304, B2202, B2703.
B. AMERICAN INFORMATION:
-
NAVAL FORCES:
- a. FORCE IA: 2 CV: Enterprise, Hornet. 5 CA: Minneapolis, New Orleans, Northampton, Pensacola, Vincennes. 1 CL: Atlanta. 11 DD: DD1-5, DD7-9, DD15-17. Sea-Based Air: 18 Wildcat, 25 Dauntless, 10 Devastator. Starting Position: Anywhere on mapboard half B.
- b. FORCE IB: 1 CV: Yorktown. 2 CA: Astoria, Portland. 6 DD: DD6, DD10-14. Sea-Based Air: 8 Wildcat, 12 Dauntless, 4 Devastator. Starting Position: Anywhere on mapboard half B.
- c. SUBMARINES: SS1-12.
-
LAND FORCES:
- a. LAND-BASED AIR: Midway: 7 Buffalo, 2 land-based Wildcat, 6 land-based Dauntless, 5 Vindicator, 2 Avenger, 1 Marauder, 3 Fortress, 8 Catalina. Hawaii: 1 Liberator, 8 Fortress. Johnston: 2 Catalina.
- b. GROUND UNITS: 50 Ground Factors on Midway.
C. JAPANESE INFORMATION:
-
NAVAL FORCES:
- a. FORCE IA: 4 CV: Akagi, Hiryu, Kaga, Soryu. 2 BB: Haruna, Kirishima. 2 CAV: Chikuma, Tone. 1 CL: Nagara. 12 DD: DD1-12. Sea-Based Air: 28 Zero, 30 Val, 23 Kate, 1 Judy, 2 Jake, 3 Pete. Starting Position: Ship Entry Area (b), at start.
- b. FORCE IB: 1 CVL: Hosho. 3 BB: Mutsu, Nagato, Yamato. 2 AS: Chiyoda, Nisshin. 1 CL: Sendai. 9 DD: DD13-21. Sea-Based Air: 3 Kate. Starting Position: Ship Entry Area (a), 0400 June 4.
- c. FORCE IC: 1 CVL: Zuiho. 2 BB: Hiei, Kongo. 4 CA: Atago, Chokai, Haguro, Myoko. 1 CL: Yura. 8 DD: DD22-29. Sea-Based Air: 4 Zero, 4 Kate. Starting Position: Ship Entry Area (d).
- d. FORCE ID: 1 CL: Jintsu. 3 PG: PG1-3. 15 AP: AP1-15. 10 DD: DD30-39. Starting Position: Ship Entry Area (e).
- e. FORCE IE: 2 AV: Chitose, Kamikawa. 4 CA: Kumano, Mikuma, Mogami, Suzuya. 3 DD: DD40-42. Sea-Based Air: 10 Pete, 3 Dave. Starting Position: Ship Entry Area (h).
- f. SUBMARINES: SS1-4.
-
LAND FORCES:
- a. LAND-BASED AIR: Marshalls: 5 Mavis. Wake: 1 Betty, 1 Nell.
- b. GROUND UNITS: 120 Ground Factors aboard AP1-15.
IV. The Midway Campaign Scenario
This scenario covers the entire period of fighting at the Battle of Midway.
A. GENERAL INFORMATION:
- TIME: 0100 June 3 - 1800 June 6 (90 Turns).
- WEATHER: A1622, A1718, A2020, A2017, A2215, A2318, A2312, A2514, A2617, A2611, A2708, A2813, A2915, A2910, A3007, A3112, A3209, A3204, A3411, A3406, A3502, A3608, B1107, B1309, B1304, B1407, B1706, B1902, B2005, B2304, B2202, B2703.
B. AMERICAN INFORMATION:
-
NAVAL FORCES:
- a. FORCE IA: 2 CV: Enterprise, Hornet. 5 CA: Minneapolis, New Orleans, Northampton, Pensacola, Vincennes. 1 CL: Atlanta. 11 DD: DD1-5, DD7-9, DD15-17. Sea-Based Air: 18 Wildcat, 25 Dauntless, 10 Devastator. Starting Position: Anywhere on mapboard sectors IV and/or VIII.
- b. FORCE IB: 1 CV: Yorktown. 2 CA: Astoria, Portland. 6 DD: DD6, DD10-14. Sea-Based Air: 8 Wildcat, 12 Dauntless, 4 Devastator. Starting Position: Anywhere on mapboard sectors IV and/or VIII.
- c. SUBMARINES: SS1-12.
-
LAND FORCES:
- a. LAND-BASED AIR: Midway: 7 Buffalo, 2 land-based Wildcat, 6 land-based Dauntless, 5 Vindicator, 2 Avenger, 1 Marauder, 3 Fortress, 8 Catalina. Hawaii: 1 Liberator, 8 Fortress. Johnston: 2 Catalina.
- b. GROUND UNITS: 50 Ground Factors on Midway.
C. JAPANESE INFORMATION:
-
NAVAL FORCES:
- a. FORCE IA: 4 CV: Akagi, Hiryu, Kaga, Soryu. 2 BB: Haruna, Kirishima. 2 CAV: Chikuma, Tone. 1 CL: Nagara. 12 DD: DD1-12. Sea-Based Air: 28 Zero, 33 Val, 23 Kate, 1 Judy, 2 Jake, 3 Pete. Starting Position: Ship Entry Area (a), 1500 June 3.
- b. FORCE IB: 1 CVL: Hosho. 3 BB: Mutsu, Nagato, Yamato. 2 AS: Chiyoda, Nisshin. 1 CL: Sendai. 9 DD: DD13-21. Sea-Based Air: 3 Kate. Starting Position: Ship Entry Area (a), 0400 June 4.
- c. FORCE IC: 1 CVL: Zuiho. 2 BB: Hiei, Kongo. 4 CA: Atago, Chokai, Haguro, Myoko. 1 CL: Yura. 8 DD: DD22-29. Sea-Based Air: 4 Zero, 4 Kate. Starting Position: Ship Entry Area (f), 0500 June 3.
- d. FORCE ID: 1 CL: Jintsu. 3 PG: PG1-3. 15 AP: AP1-15. 10 DD: DD30-39. Starting Position: Ship Entry Area (f), 0400 June 3.
- e. FORCE IE: 2 AV: Chitose, Kamikawa. 4 CA: Kumano, Mikuma, Mogami, Suzuya. 3 DD: DD40-42. Sea-Based Air: 10 Pete, 3 Dave. Starting Position: Ship Entry Area (f), 1500 June 3.
- f. SUBMARINES: SS1-4.
-
LAND FORCES:
- a. LAND-BASED AIR: Marshalls: 6 Mavis. Wake: 1 Betty, 2 Nell.
- b. GROUND UNITS: 120 Ground Factors aboard AP1-15.
V. Japanese Free Set Up Scenario
This scenario assumes that the American Intelligence information was not as good as it actually was.
A. GENERAL INFORMATION: Use the General Information from any of the other scenarios, depending on the length game preferred.
B. AMERICAN INFORMATION: Use the American Information as it stands from the scenario that the General Information is from.
C. JAPANESE INFORMATION: The Japanese player can set up his units in any desired manner in Ship Entry Areas (a), (b), (d), (e), (f), (g), and/or (h). Any off-board units may enter the mapboard at Ship Entry Areas (a) and/or (f). If the Random Arrival Chart is used, the Japanese player does not have to tell the American player what the results were.
Game Reference Material
I. Historical Summary
A. THE CAMPAIGN: "Victory Fever" the Japanese would call it later, referring to the overconfidence that seized them in the spring of 1942. There seemed to be no end to the series of one-sided victories. This overconfidence, with a mistaken underestimation of United States intentions and capabilities, led the Japanese to undertake the Midway campaign with only a fraction of their available carrier forces. More had been won with less in the recent past.
The April Doolittle raid on Japan had been a severe blow to Japanese pride, and demonstrated a gap in their defensive barrier. Midway, in Japanese hands, would provide an invaluable outpost to watch Hawaii and to search the intervening waters. Midway Island was important enough to draw out the United States Navy for a decisive battle with the far stronger Japanese fleet.
What the Japanese high command never realized was that American cryptologists had deciphered JN-25, the Japanese Navy's operational code, and knew exactly when and where the Japanese offensive was due. While the American commander, Admiral Nimitz, knew the Japanese plans in some detail, the Japanese were operating under some serious misconceptions.
Unaware that his arrangements were monitored by the Americans, Imperial Japanese Navy commander, Admiral Yamamoto, devised an intricate plan intended to surprise and confuse the Americans. Such was the virulence of the "Victory Fever", that the plan depended for success as much on American adherence as on Japanese. The small sketch map shows the main movements involved in the Japanese plan (all Japanese forces are identified as they are in the game). A feint at the Aleutians would strike first, drawing American attention and forces to the north. Then, the main blow would fall on lightly-defended Midway, to which the main Japanese fleet could give its undivided attention. The American fleet at Pearl Harbor would then react, and, after sailing through and being attacked by a screen of Japanese submarines (which would also report the American movements), be destroyed by the superior Japanese fleet, in Yamamoto's desired "decisive" battle. Japanese intelligence services reported that CV Saratoga was being repaired, and was not available. It was believed that both carriers Lexington (which was) and Yorktown (only damaged) had been sunk in the Battle of the Coral Sea in May. The loss of CVL Shoho, the damage to CV Shokaku, and the severe losses to CV Zuikaku's air complement in that same battle were not regarded as serious, as the Americans were expected to have only carriers Enterprise and Hornet, and possibly a half-dozen battleships available off Midway. The Japanese fleet, backed by the planes on the new Midway base, should win easily.
(Sketch map omitted: it shows Kamchatka, the Aleutians and Alaska, the Japanese Forces II, IV, IA, IB, IC, ID and IE, Midway, the American response, and the Japanese submarines.)
Admiral Nimitz, armed with precise information on the Japanese plans, directed Admiral Spruance with Task Force 16 (Enterprise, Hornet, and escorts), and Admiral Fletcher with Task Force 17 (Yorktown and escorts) and overall tactical command to sail immediately to Midway. Midway itself, already considerably strengthened since the start of the war, was being rapidly built-up with all available land and air forces. The Americans planned an "ambush" on the unsuspecting Japanese carrier force. The American ships passed through the Japanese submarine patrol area before the submarines were in position, and joined 350 miles northeast of Midway at "Point Luck" without being detected. All was ready, and the Japanese were right on time.
B. THE BATTLE: The Battle of Midway was one of the truly decisive battles of World War II. In one battle, the Japanese lost half of their total carrier strength, and the finest of their pilots and aircrews. The battle's high points are briefly mentioned below:
JUNE 3: A Catalina from Midway spotted the Japanese transports early in the day. That afternoon, nine Flying Fortress bombers from Midway bombed and missed the ships from high altitude (claiming to have hit two battleships or heavy cruisers and two transports!!).
JUNE 4: June 4, 1942 proved to be the decisive day of the battle.
0430: Everybody launched search planes. One Jake floatplane from Tone did not get away until 0500 due to catapult problems. By 0445, the Japanese tactical carrier commander Admiral Nagumo had also launched 108 planes to attack Midway.
0520-0530: A Catalina spotted the Japanese carrier force. All details were known to Admiral Fletcher by 0700. The American and Japanese carrier forces were then about 200 miles apart.
0553: Midway radar picked up the Japanese attack. All planes on Midway took off as rapidly as possible.
0616: Marine fighters on Midway intercepted the Japanese planes heading for Midway. Of 26 American fighters, 17 were lost and 7 others severely damaged. The Japanese bombers attacked Midway, causing damage, but encountered unexpectedly heavy anti-aircraft fire. By 0700, the air commander radioed Admiral Nagumo to report that another attack would be required to destroy Midway's defenses.
0702: The American CVs started launching their planes to attack the Japanese ships. Due to time and range, they are sent off in separate groups. Yorktown launched last, after recovering search planes, about 0820.
0705: The 6 Avengers and 4 Marauders from Midway attacked the Japanese CVs with torpedos. The Zero CAP and heavy anti-aircraft fire left only 1 Avenger and 2 Marauders after the attack. No hits were scored on the Japanese ships. The Japanese bombers on the carrier decks were ordered below to replace their torpedos with bombs for another attack on Midway.
0728: The delayed Tone Jake spotted the American fleet. No American aircraft carriers were reported. After a brief order to again arm the planes with torpedos and armor piercing bombs, Nagumo changed his mind and ordered the planes armed to attack Midway.
0800: In rapid succession, dive bombers and Fortress heavy bombers from Midway attacked the Japanese carriers. None of the formidable heavy bombers were lost, but 7 Dauntless bombers were lost to Zero CAP and anti-aircraft fire. Again, no Japanese Ship was hit.
0820: The United States submarine Nautilus attacked, but scored no hit. About this same time, Nagumo finally heard from Tone's Jake that there was an American aircraft carrier present.
0830: The Japanese Midway strike returned, and both those planes plus some of the Zero CAP landed. Plane recovery lasted until 0918. Nagumo decided to get all planes ready to launch a massive strike on the American carrier.
0930-1010: The three Devastator squadrons from all three American CVs found and attacked the Japanese carrier force. The 15 Devastators of Hornet's Torpedo 8 were wiped out. Only one pilot, Ensign George Gay survived, watching the rest of the battle while clinging to a rubber seat cushion. Of the 26 Devastators from Enterprise and Yorktown, only 6 survived. Still no hits!
1024: At this point in the battle, the Japanese seemed well on their way to victory. The American advantages had been thrown away in near suicidal piecemeal attacks. Massacring the Devastators had brought all of the Zero CAP down to low altitude. When the Dauntless dive bombers appeared at 19,000 feet, there was no opposition, and their attacks could be pressed home. In five minutes, the Japanese CVs Akagi, Kaga, and Soryu, their decks packed with armed planes, were in flames, doomed by the explosions of their own bombs and fuel.
1040: The Hiryu, untouched by the American dive bombers, launched an attack force of 18 Vals and 6 Zeros, followed at 1245 by one of 10 Kates and 6 Zeros.
1159-1230: The Yorktown's Wildcat CAP and heavy anti-aircraft fire destroyed most of Hiryu's first strike force, but the skilled Japanese still managed to severely damage the Yorktown. Fletcher, his flagship useless, turned over tactical command to Spruance. Yorktown, left dead in the water, managed to resume 20 knots by 1340.
1442: Hiryu's second strike force hit the Yorktown again. By 1500, "abandon ship" was ordered, and Yorktown was out of the battle for good.
1530: Spruance ordered Hornet and Enterprise to launch another strike.
1700: Hiryu was fatally struck by the Dauntless dive bombers. After recovering planes, Spruance ordered a retirement to the east to avoid a possible night engagement with the superior Japanese surface fleet. By 0900, June 5 all four of the Japanese CVs were sunk. The last of their planes had crashed into the sea long before.
JUNE 5: June 5, 1942 saw the Japanese fleet in full retreat.
0255: Admiral Yamamoto ordered the Midway operation cancelled.
0342: The sighting of United States submarine Tambor caused the Japanese heavy cruisers Mogami and Mikuma to collide while turning away.
The damaged Mogami and Mikuma were attacked all day with little success by American carrier planes and Midway dive bombers.
JUNE 6: June 6, 1942 saw the last fighting of the Battle of Midway.
0800, 1045, 1330: Successive strikes were launched at the two damaged Japanese cruisers. Mikuma was sunk, and Mogami limped to safety.
1330: The abandoned Yorktown, still afloat, was torpedoed by the Japanese submarine I-168. Destroyer Hammann was also hit, and sank quickly. Yorktown finally sank 0600, June 7.
C. THE MEN: Even as early as June, 1942, the different American and Japanese policies for crewing their planes were apparent. The Japanese aircrews, mostly from a rigorously-trained pre-war elite that was heavily seasoned by repeated combat missions, were the finest group of carrier aircrews of the war. They were also irreplaceable, and their experience and skill died with them. The American pre-war pilots, on the other hand, held key posts and provided leadership for their carrier air groups, but the bulk of them were already at home training a new generation of naval aviators and passing on their hard-earned experience. The bulk of the American carrier aircrews at Midway were young naval reservists, not nearly as experienced as their Japanese counterparts. The Marine pilots on Midway, lacking fuel for training, were generally inexperienced and using obsolescent equipment. The Air Force crews failed to score a single hit during the battle, although for the duration of the war this was not realized.
D. MIDWAY: Midway was a much tougher proposition than the Japanese realized. The Japanese transports carried about 5,000 of their tough landing troops, but the Japanese really had little experience in assault landings on heavily fortified beaches. They lacked the specialized landing craft used by the Allies later in the war. Allied doctrine later in the war called for a minimum 3-1 numerical advantage and much specialized equipment. To face the 5,000 Japanese, there were roughly 3,000 Americans on Midway. Although not all the Americans on the islands were combat troops, there were numbers of U.S. Marines, including a company of the elite Marine Raiders. Material had been poured onto the base in anticipation of the attack, and Midway had a formidable number of anti-aircraft and shore battery guns, a network of trenches, pillboxes, and bunkers, and beaches covered with barbed wire and mines. Any ground combat on Midway would have been long and costly, and would have required all the support the Japanese could have mustered.
E. THE LEADERSHIP: The Japanese commanders, from Yamamoto on down, were well-trained professionals. On the whole, they were also a rather conservative group, and fond of devising intricate plans featuring precise timetables and numerous converging forces. Although they had been pioneers in the use of the aircraft carrier, they still relied on their battleships to provide the decisive firepower in their anticipated "showdown" with the American fleet off Midway. Nagumo, the most experienced carrier Admiral in the Japanese navy proved to be very indecisive in deciding the targets for his planes - showing the effects of an unexpected development on a too-rigid plan of operations.
The American commanders, left after Pearl Harbor with no other alternative, swiftly adopted the doctrine of aircraft carrier supremacy in sea warfare. Nimitz gave carrier tactics his full backing, and his subordinates followed suit. Fletcher had already commanded in an all carrier battle in the Battle of the Coral Sea, and, although not a driving commander, made the right decisions for the initial attack. Spruance was commanding aircraft carriers for the first time, and his prudent tactics completed and preserved the victory. In contrast to the Japanese commanders, it is important to realize that both Fletcher and Spruance were agreed not to use their battleships in the battle, but to use only their carriers against the whole Japanese fleet.
F. THE WARSHIPS: The Japanese and United States navies followed entirely different training programs with their ships. The Japanese practiced torpedo attacks and night actions. The Americans emphasized gunnery and daylight actions.
The Japanese and American battleships were basically similar, although the Japanese had more and generally faster types available in June, 1942, and the Americans already had radar mounted on theirs. The Japanese Kongo class (Kongo, Hiei, Kirishima, Haruna) were extensively modernized World War I battlecruisers of British design that could use their speed to accompany the fast carriers. Admiral Yamamoto's flagship, the Yamato, was the newest ship in the Japanese fleet, and the largest and most powerful battleship in the world.
American cruisers were pure gunnery ships, intended for surface actions, except for Atlanta, built to provide anti-aircraft protection to the ships she accompanied. Japanese cruisers carried batteries of their excellent "long lance" torpedoes, in addition to their main guns. The Japanese heavy cruisers were larger and more powerfully armed than the same American classes, which had been built to conform to the 10,000 ton limits of pre-war naval treaties, although in both navies they carried eight-inch guns. American light cruisers, excepting the Atlanta, were armed with awesome batteries of six-inch guns, and were equal in tonnage to their heavy cruisers. The older Raleigh and Detroit were smaller and less heavily armed than other American light cruisers. The Japanese light cruisers were smaller, much inferior in armament, and intended for use as flagships for destroyer squadrons.
American destroyers were their only torpedo-carrying surface ships, and were roughly equal to their Japanese counterparts, although the Japanese destroyers carred [sic] their superior "long lance" torpedo, and the American destroyers carried much better anti-submarine equipment. Japanese and United States submarines were again roughly equal, although, also again, the Japanese torpedoes were superior.
The Japanese and American CVs and CVLs were all large floating airfields, vulnerable to any hit. The American ship-board plane handling and damage control was superior to that on the Japanese ships. The Japanese use of floatplanes for search purposes to save the carrier planes for strikes was sound in theory, but broke down due to the lack of sufficient numbers of modern (Jake) floatplanes. The older Petes and Daves lacked the range to be very useful.
G. THE PLANES: Japanese planes were generally more lightly armored than American planes. Japanese planes were generally built for range and/or maneuverability, while equivalent American types sacrificed those qualities for protection.
BETTY AND NELL: These were long-range, two-engine Japanese Medium bombers used for search missions and torpedo attacks. The small numbers stationed at Wake Island took no part in the historical fighting.
DAVE AND PETE: These were obsolete biplane floatplanes that the Japanese used for search missions. Their range was too limited compared to the newer carrier types for them to be really useful.
JAKE: This was the latest Japanese floatplane and featured a useful range. Few were available for the Midway operation.
JUDY: This was the newest Japanese carrier dive bomber, slated to replace the ageing Val. Limited 1942 production meant that only a handful were available for use as fast scouts in the Midway operation.
KATE: This was the standard Japanese carrier torpedo bomber. An excellent plane, the Kate featured much superior speed and range characteristics compared to its American counterpart, the obsolescent Devastator.
MAVIS: This was very long range Japanese flying boat. Heavily armed and armored for a Japanese plane, the Mavis was poorly evaluated by the American intelligence service at the time. It was believed that the Mavis had a much shorter range, and, operating from Wake Island, could not search north of Midway, which is where the American fleet concentrated. The American fleet was beyond the range of the Mavis, but for the wrong reasons, as the Mavis search flights actually originated from the Marshall Islands far to the south. Many even recently published books repeat the error that Japanese flying boats were based at Wake. The Mavis could carry a heavy bomb load, or two torpedoes.
VAL: This was the standard Japanese carrier dive bomber. An excellent airplane, but already approaching obsolescence in June, 1942.
ZERO: This was the standard Japanese carrier fighter, and the best fighter in the Pacific in June, 1942. The Zeros featured a long range, although not quite as long as the land-based Japanese Zero pilots could manage, still longer than the range of any American fighter. Fast and maneuverable, the Zero, in the skilled hands of the Japanese carrier pilots, was the terror of the Pacific skies.
AVENGER: Midway was the Avenger's combat debut. Slated to replace the Devastator, the Avenger was superior to the Kate, but not available in enough strength to make any real difference.
BUFFALO: This was an obsolescent carrier fighter used by the Marines (who were not trained for carrier landings) to defend Midway. They were all but annihilated by the Zero escort when they intercepted the Japanese Midway strike.
CATALINA: Inferior to the Japanese Mavis, the Catalina was still an excellent and dependable long range search plane, much cheaper to build and maintain than its Japanese counterpart. The Catalina could carry two torpedoes, and the planes were operated by some fo [sic] the best aircrews in the United States Navy.
DAUNTLESS: This was the standard American carrier dive bomber. It was tough and maneuverable, sturdy and reliable, and destined to serve through the entire war, although replaced on carriers by newer types in 1944. The Dauntless was much superior to the Japanese Val.
Sequence of Play With All Optional Rules
A. PLANE READINESS AND AIR UNIT ORGANIZATION PHASE
-
PLANE READY STEP
- a. READY TO LAUNCH SEGMENT
- b. REFUELING AND REARMING SEGMENT
- c. WEAPON CHANGE SEGMENT
-
FORM AIR UNITS STEP
B. SHIP PLOTTING AND MOVEMENT PHASE
-
PLOT SHIP MOVEMENT STEP
-
SHIP UNIT MOVEMENT AND SHADOWING STEP
-
GROUND UNIT UNLOADING STEP
C. AIR UNIT INITIATIVE ROLL PHASE
D. AIR UNIT MOVEMENT PHASE
-
LANDING STEP
-
NORMAL AIR UNIT MOVEMENT STEP
-
TAKE OFF STEP
E. COMBAT PHASE
-
AIR-TO-AIR COMBAT STEP
- a. INTERCEPTOR-TO-INTERCEPTOR OR INTERCEPTOR-TO-ESCORT COMBAT SEGMENT
- b. INTERCEPTOR-TO-BOMBER COMBAT SEGMENT
-
AA COMBAT STEP
-
BOMBING COMBAT STEP
-
SURFACE COMBAT STEP
- a. SHIP-TO-SHIP GUNNERY COMBAT SEGMENT
- b. SURFACE TORPEDO ATTACK COMBAT SEGMENT
- c. BREAKTHROUGH COMBAT SEGMENT
- d. BOMBARDMENT GUNNERY COMBAT SEGMENT
- e. ANTI-SUBMARINE COMBAT SEGMENT
- f. SUBMARINE TORPEDO COMBAT SEGMENT
- g. AMMUNITION RECORDING SEGMENT
F. MIDWAY BASE REPAIR PHASE
G. VICTORY POINTS COUNTING PHASE
H. TIME RECORD PHASE
-
CLOUD MOVEMENT STEP (even Turns)
-
WIND DIRECTION CHANGES STEP (*)
DEVASTATOR: This was the standard American carrier torpedo bomber. Slow, short ranged, and tragically vulnerable, the Devastator was clearly obsolescent.
FLYING FORTRESS (B-17) AND LIBERATOR (B-24): These were long range four-engine heavy bombers. The Liberators saw no action in the actual battle, although four landed at Midway on June 6. The original design of the Fortress called for it to fly far out to sea and to destroy enemy fleets with high altitude bombing. This is exactly how they were used at Midway, but no hits were scored although many were claimed. So much for pre-war theories. Both American "heavies" could prove to be almost too much for the lightly armored Zeros to handle. The B-17s used at Midway were generally newer, better maintained, and could carry more fuel than those based elsewhere in the Pacific.
MARAUDER (B-26): This was a fast, "hot", two-engined medium bomber. Normally capable of carrying a variety of bombs, the Marauders on Midway were specifically modified to carry only torpedoes.
VINDICATOR: This was another obsolescent type used by the USMC pilots on Midway. The Vindicator was less efficient than the newer Dauntless in most respects.
WILDCAT: This was the standard American carrier fighter. Better protected than its more nimble Zero adversary, the Wildcat pilots at Midway were just starting to develop effective tactics to deal with the Zero.
II. HINTS ON PLAY
CV duplicates the most important aspects of air and sea warfare at the Battle of Midway. As such, the historically successful tactics are also those which will prove successful in the game. There are numerous possibilities regarding plans and tactics that may be tried, and this section can only provide a few general hints and observations.
First, pay close attention to observation, as this is the key to the game. Avoid wasting units searching areas where the enemy cannot be, or areas too distant to matter. Make thorough searches by placing the search planes close enough together so that all intervening hexes can be observed. Keep some search planes in reserve to replace others as fuel runs low. It is almost impossible for the Japanese to avoid a well-conducted American search, so the Japanese players must make every effort to find the American fleet before they are found themselves.
Second, keep a CAP of fighters over all important task forces and over the Midway base during all day Turns. The Japanese player should not neglect to keep fighters over their transports, as these are especially vulnerable to American strikes. If an attack threatens, get all planes into the air, and reinforce the CAP with every available plane.
Third, organize your task forces very carefully. A large air strike can breakthrough almost any defenses, and score hits. Each carrier should be placed in its own task force to force attackers to split their numbers and face more AA Combats in order to attack more than one carrier. Keep carriers and transports out of surface engagements, even if screened. Form special task forces for surface missions, and keep the vulnerable, high Victory Point value ships to the rear.
The American side definitely has the initiative in the game. There are a number of viable plans that can be tried. The American fleet can be placed north of Midway for an early strike on the Japanese carriers, as was done historically. The fleet can be placed to the south to attack the Japanese transports, but this plan risks early sighting by the Japanese Mavis units, and risks disaster if planes cannot be recovered before the Japanese carriers can react with a strike on the American carriers. The American side could also choose to remain in the eastern end of the mapboard, and allow the Japanese side to get heavily involved against Midway before striking. The Japanese player must react to any American plan, preferably by finding the American CVs early.
Last, remember that these hints are only suggestions, not rules. The game is very much a "player's game" and allows for experimentation and unorthodox plans. A plan that works perfectly in one game can fail miserably in the next. Surprise can be decisive! It was in the actual battle.
III. DESIGNER'S NOTES
As many readers of these rules may be aware, CV is my second game on carrier warfare in World War II. The first, FLATTOP, done for Battleline Publications two years ago covered the battles in the Coral Sea - Guadalcanal area. CV reflects two more years of research, playtesting, and just plain thinking and arguing about the topic of World War II carrier operations. This game is the result of those efforts, and provides a detailed model of the events that led to and caused the decisive Battle of Midway. I hope you find the game as interesting to play as I found it interesting to design.