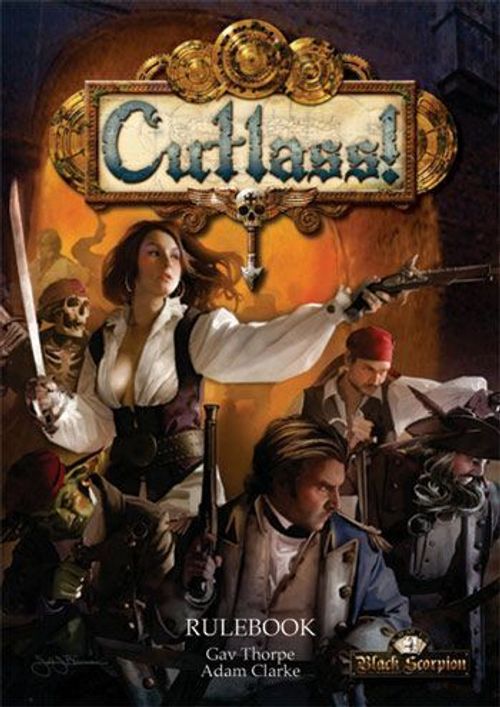
Cutlass!
Cutlass! Rulebook
Table of Contents
Table of Contents
- Updated Preface (2018)
- Introduction
- Measurements and Dice
- Profiles and Attributes
- Sequence of Play
- Actions
- Skills and Weapons
- Encounters
- Campaigns
- Creating a Gang
- The Royal Navy
- Pirates
- Privateers
- Orc and Goblin Pirates
- Dwarf Pirates
- Elf Pirates
- Undead Pirates
- Female Pirates
- Equipment Costs
- Special Characters
- Campaign Sequence
- Injuries
- Fame/ Infamy
- Work Out Funds
- New Recruits and Outcasts
- Buying Weapons and Equipment
- Upgrade Headquarters
- Leadership Challenges
- Ending the Campaign – The Final Reckoning
- Special Campaign Encounters
- Gangs for One-off Games
- Pirate Names
- Errata and Clarifications
Updated Preface (2018)
Cutlass was originally released in 2011, our first game and a great success. The original system was designed to be adapted for both Cutlass and Tombstone (our old west game), with Cutlass being more combat focused and Tombstone more shooting focused.
We released Tombstone in 2018 after a hugely successful Kickstarter and translated it into French, Spanish, Italian and German. By this time we knew of a large number of updates/changes and improvements we would like to make to Cutlass, having implemented most of them into the Tombstone system, book and design.
So there are plans to release a new version of Cutlass one day, when we will no doubt re-release a new printed book. Until then due to demand we're releasing the current PDF Cutlass for free!
At the back of the book you'll find some errata and corrections. We encourage you to have fun with the system, make some house rules and tweak things as you like.
I add here an option you might like to try, the Tombstone system of action points. In Cutlass as is the two players both roll a die for action points meaning they'll have different amounts of points to use (the idea being it balances out over the game, creating dynamic play). What this can mean is one player can be unlucky and get destroyed quickly! I would suggest trying the Cutlass system though as it can be a lot of fun.
For the more competitive gamer here's the Tombstone system of action points you can easily use for Cutlass:
Tombstone Action Point System: Both players roll Au as normal, the highest is active first. But BOTH players use that high roll as their action point total. Meaning both players will always have the same amount of action points to use and the game becomes more about using them wisely.
If you haven't tried our Tombstone old west game it's available printed in English and as a PDF download for purchase in the languages mentioned above. If you are familiar with Tombstone you may wish to introduce more of that system into Cutlass (as will be the case in the new version).
You'll also notice in this book some models which have since been discontinued, such as the giant and Orcs. We plan to release new versions of models such as Orcs and the undead captain (we're not sure about a new giant yet!).
Hope you enjoy the book!
Introduction
Welcome to Cutlass, a tabletop miniatures game that allows you to lead a band of scurvy dogs, servants of the king or perhaps a crew of Orcs, Undead, Dwarfs or Elves, in a war for supremacy. Using the Cutlass rules you can assemble a gang of fighters, mount raids and ambushes, build up your fame (or infamy!) and expand your dominion over a distant island. Members can die and be recruited, headquarters can be built, bounties and ransoms paid, new weapons acquired, injuries sustained and all manner of other fun stuff. Seeing your gang progress from no-name scum to the terror of the island is the best part of playing with the Cutlass rules.
The Cutlass game rules have been designed to allow a dynamic, fast-playing game that rewards movement, planning and initiative. A typical Cutlass gang is between 10 and 30 models in number, and a normal encounter can be played in an hour or two.
Land Based
Cutlass games are designed to take place on land, in port or similar. There's no reason why you can't use the combat and campaign system within a ship based game though. When using ships they tend to be the main focus and require dedicated rules. Our focus is on the miniatures themselves.
This rulebook contains several distinct chapters, each of which details a particular part of the Cutlass game system. This first part is the Introduction and Rules that contains what you need to know to resolve an encounter between your gangs over a miniatures battlefield. At first glance there may seem quite a lot to take in, but the basic mechanics of moving, shooting and fighting in hand-to-hand combat all follow simple principles that are easy to pick up. The rules section details how to move and fight with your models on the tabletop, with a section at the end that explains the rules for different weapons as well as special skills that your gang members might possess.
Overview
The Cutlass rules system has been designed to use 28mm-32mm scale miniatures, in particular the Black Scorpion range of pirates and their adversaries. Unlike many other games, there is no 'player turns' in which one player gets to do all of their stuff and then sits back while the other player does the same. Cutlass uses a dynamic system of actions and reactions to ensure that players can never be sure if they'll get to act next, making the prioritisation of actions a large part of the game.
The next part of the book is devoted to Encounters. These are the situations that will pit the players' gangs against each other. An encounter might be one gang ambushing another, or a raid into enemy territory to kidnap an important person, or it can involve both gangs embarking on an armed treasure hunt. The encounters have been created to provide relatively fast games with straightforward objectives for the gangs to achieve and deliberately leave a lot to the players to add to the story-telling. Players are always encouraged to devise new encounters and to share them with the rest of the gaming community.
Broadly speaking, when a player is 'active' they can choose whether some of their models will move, shoot their guns or fight in hand-to-hand combat. This is resolved using an 'action total' that is expended as the player's miniature warriors fight the battle. As the player continues to perform actions with his models his options become more limited and the chance of his opponent seizing the initiative become more likely. The key to success is knowing when to stop, saving some of your action total to interrupt your opponent's plans. The balance between acting and reacting will shift as the game progresses and fortune favours one side or the other.
Last, but certainly not least, is the Campaigns chapter. In some ways this is the heart of Cutlass games. The campaign rules allow a group of players to fight encounters with each other that will have a lasting effect on their gangs. Members can die and be recruited, headquarters can be built, bounties and ransoms paid, new weapons acquired, injuries sustained and all manner of other fun stuff.
You will notice that a gang's leader is very important. He (or she!) represents the player on the tabletop both as a leader and a fighter, and will be pivotal to a gang's success. Cutlass is about creating the story of your in-game representative, charting his successes and failures on a journey to fame or infamy.
What You Will Need to Play Cutlass!
In order to play you will need a tabletop and some scenery. 17th or 18th century, fantasy buildings or anything resembling a port will be ideal. But you can use whatever you have to hand. Having some buildings and incidental terrain like barrels and crates will also help.
You'll need a tape measure, some dice (see below). Obviously you'll also need to choose which faction you want to fight with and get some miniatures!
Measurements and Dice
All measurements are given in inches and centimetres. Both players should use the same unit of measurement as we have rounded off some of the metric measurements for simplicity and so they are not exactly the same as the Imperial distance. When measuring distances always round down to the nearest inch or multiple of 2.5cm.
Players are free to measure distances at any time. All distances between models are measured from base to base.
The players use a variety of dice to determine the success of the model's actions. These are four-sided, six-sided, eight-sided, ten-sided, twelve-sided and twenty-sided dice. For the sake of space these are referred to respectively as D4, D6, D8, D10, D12 and D20.
Dice Modifiers
Often a model's chances of succeeding in their action will be improved or reduced by the quality of their weapons, their physical state and other factors. There are two types of modifiers used and which ones apply to a roll are detailed in the relevant rules sections.
The first type of modifier is a level increase or decrease. This modifier changes the type of die rolled. For example, +1 level changes a D6 to a D8; -2 levels would reduce a D8 to a D4. A level cannot be reduced to less than a D4 or more than a D20.
The second type of modifier is a bonus die. This allows the player to roll one or more additional dice and choose the one with the highest result. Any and all dice rolled are open-ended and it is the final highest score that is used. For example, a model may have a Dam of D6 and be granted a bonus damage die. This allows the model to roll two open-ended D6 and choose the highest final score.
Die rolls are 'open-ended'. This means that if a player rolls the highest possible score on a die, he is allowed to roll the die again and add the result of the second roll to the score. If this second roll is also the highest possible score, he can roll a third time, and so on until a final total is reached. For example, a player rolls a D6 and scores a 6. He then rolls a 4, for a final total of 10. If he rolls a D4 and scores a 4 and then another 4 and then a 1, his total score would be 9.
Anyone achieving bonuses that would make them exceed a level of D20, instead receives a bonus die for every modifier taking them over D20. E.g. A model with Acc D12 who has a close range and skill bonus that both grant +1 Acc level, would roll a D20 plus a D20 bonus die and choose the highest result.
D4 is always the lowest you can roll regardless of modifiers making it lower, i.e. you DO NOT roll bonus D4 dice and choose the lowest result.
Profiles and Attributes
Most actions require the model to take an attribute test, often in opposition to another model. For instance, to hit a target with shooting a model must make an Acc roll against a Dex roll by the target, while in hand-to-hand combat fighters will use opposed Com rolls. To take a test, simply roll the type of die equal to the attribute, bearing in mind any level modifiers and bonus dice.
Each warrior's physical and mental characteristics are defined by a profile that consists of seven different attributes. These attributes are:
- Reactions (Re): This measures the fighter's speed of thought and action. Higher Reactions allow a model to respond quickly to events.
- Accuracy (Acc): This value represents the warrior's ability with ranged weapons. A higher Accuracy improves the chances of the model hitting when shooting.
- Combat (Com): A measure of a model's skills in hand-to-hand fighting. A model with a higher Combat value is more likely to land a successful blow.
- Dexterity (Dex): A model's ability to avoid enemy shooting and negotiate difficult terrain and obstacles is measured by Dexterity.
- Constitution (Con): The Constitution attribute rates the warrior's ability to withstand injury and continue fighting.
- Damage (Dam): The amount of harm the model can do when he strikes in hand-to-hand combat depends on the Damage value. This measures not only raw strength, but also the fighter's canniness in where he lands his blows.
- Daring (Dar): Some may call it bravery, others foolhardiness. Daring represents how willing the fighter is to confront a fearful situation and continue fighting against the odds.
In addition to these attributes, each side's leader has an Authority (Au) value that embodies the leader model's determination, tactical acumen and the loyalty of those serving under him.
Attributes are rated in levels represented by a die type. The lowest level is D4, followed by D6, D8 and so on. The highest an attribute can go is D12 (the exception being certain characters), though it is possible for a level to be increased to D20 by modifiers as explained above.
Example profile: 0+ Able seaman, $36 (level 1). Re D6, Acc D4, Com D6, Dex D6, Con D4, Dam D6, Dar D4. Skills: none. Equipment: up to two common.
Facing and Line of Sight
Each model has a front facing and can see in a 90 degrees arc to the front. A model also has 90 degrees arcs to the side and rear which become relevant in hand-to-hand combat.
The modelled scenery we use on the tabletop is treated as being a true representation of the terrain the models are fighting across, with exception of area cover that will be discussed a little later. In order for one model to see another, you must be able to draw a line between the two that does not cross any obstruction. In most cases this will be obvious, but sometimes you may have to get down near the tabletop and have a model's eye view. As our miniature fighters are static, unable to crouch, bend and peer around corners like normal folk, we give a little leeway to represent this. In order to draw a line of sight to a model, you must be able to see at least 25% of it. Players should exercise their common sense when judging this – seeing a hand or tip of a hat over a hedge should not count as being visible. In addition, players should note that models are able to hide, as explained in the special actions rules later.
Figure: less than 25% of the model is visible, so it cannot be seen.
Some modelled terrain does not work very well with these 'true' line of sight rules, so as a compromise we suggest that some types of scenery are designated as area cover. Things like fields, marshes and similar features may be modelled in such a way that they physically prevent a model being partially concealed from view. In such circumstances, when the players are setting up their table ready for a game, they should agree which areas of terrain grant cover to models inside them and how much of a model will be obscured.
Sequence of Play
Swirling combat and acts of derring-do can become a chaotic affair, with victory often going to the quickest-witted. In order to bring some kind of structure to the anarchy of combat, we use the Authority of the leaders and the Reactions values of models to determine the sequence in which they perform their actions.
Active Phase
Play follows a succession of phases during which the players can move and fight with their models. During each phase one player has the active gang and the other has the inactive gang. At the start of the game, after the models have been set up as explained in the Encounters chapter, the two leaders make Au rolls. The leader that scores highest becomes active – re-roll ties. Both players need to keep a note of this score, this is their action total. You will find an action chart at the back of the book.
A leader's Au always remains the same throughout the game and is not affected by any modifiers. The leader's Au roll is the only roll in the game that is not open ended. I.e. you don't roll again with a maximum result.
The active gang can perform a number of actions dependent upon its action total as described in the next section and this involves moving models, shooting, fighting in hand-to-hand combat and so on.
Once all of the active gang's actions have been performed, the roles swap and the other gang becomes active. They can then perform a number of actions equal to their action total. A player can voluntarily become inactive before their action total is used up. The other gang becomes the active side. If both players pass in succession, a recovery phase is played (see later on for details). If you're wondering why you might want to do this, read on.
Reactions and Changes of Active Gang
People don't just stand around and let their opponents run about and shoot without interference. To represent this, models in the inactive gang have a chance to react to the actions of the enemy.
We'll go into a little bit more detail about when they can do this and how they can react in the following sections, but for the moment all you need to know is that normally the inactive model must take a Re test. On a score of 3 or less, the model fails to react; on a score of 4 or more the model may react.
Reaction Roll Modifiers. The following modifiers apply to the Re rolls of the models.
| Modifier | Effect |
|---|---|
| No line of sight to the opposing model* | -1 level |
| Reacting model is injured | -1 level |
*In the case of reacting to a model being taken out, this is applied if the reacting model cannot see the enemy that took out their companion.
If the model fails to react, the inactive gang reduces its action total by one, the reacting model is given a 'surprised' marker and play continues as normal with the active gang.
If the inactive model successfully reacts, it is allowed to make an action in response. The particular actions allowed are discussed in the relevant sections later. If a reaction is successful the inactive gang becomes active, using their current action total, reduced by 1 for the reacting model's action.
Surprised Models
A model that attempts to react and fails becomes surprised. The fighter is caught off-guard, is wrong-footed or otherwise confused for a moment. A surprised model may not make any reactions, but suffers no other penalties.
A surprised marker is removed from a model when it is engaged in hand-to-hand combat or whenever the active and inactive status of the gangs changes sides.
Exception: Whether successful or not, a gang's leader may react for free – no reduction is made to the gang's action total. In addition, leaders are never given surprised markers. You still need to roll the Re test to see if you become the active gang.
Reaction Summary Table
The reaction summary table summarises the circumstances in which a model is allowed to react and the action it can take if it is successful.
| Circumstance | Reaction |
|---|---|
| Enemy approaches within 6"/15cm* | Shoot or engage approaching enemy |
| Enemy shoots and misses | Targeted model may move (may engage shooting model in combat) |
| Friendly model is 'taken out'** within 6"/15cm by an enemy | May shoot or move to engage the enemy model that took out the friendly model |
| Model rolls counter attack result in combat | May attack or break away from combat (no action expended if counter-attack Reaction fails) |
* Only one model may react to this action. If an enemy moves within 6" of several models, or a friendly model is taken out within 6" of several models, choose which will try to react.
** 'Taken out' is a possible injury result as explained later.
If a gang's leader has been taken out or has left the tabletop, leadership falls to the remaining model with the highest worth (worth is discussed in the Campaigns chapter). This model has a temporary Au value of D4.
Zero Action Totals and Recovery Phases
It is possible for a gang to be reduced to an action total of zero. In this circumstance, no model except the leader may make reactions.
If the opposing player has no action total the active player must use up his entire action total or may declare his turn over after completing any action. When both gangs have no actions remaining, or both pass their turn, a special 'recovery phase' takes place.
During the recovery phase the following events take place in the order described below. These are explained in more detail in the relevant sections later on.
- Stunned models attempt to recover. A 4+ is required on a D6. No modifiers apply.
- Fleeing and Spooked models attempt to recover. A 3+ is required on a Dar test. Normal modifiers apply. If a spooked model is hidden, the test is automatically passed.
- Fleeing models that do not recover will run away as described later.
- Surprised models lose their markers.
- Any other special effects are resolved as detailed in their specific rules.
- The gang leaders both take an Au test to determine their new action totals and play continues with the gang with the highest action total. In the case of a tie, play resumes with the gang who were the latest to be active.
Effect Markers
A number of markers are used during the game to indicate the status of the fighters, such as when they are injured or running away. A model never has more than one of a given marker, even if another of the same type would be placed. For example, a stunned model that takes another stunned damage result suffers no additional penalties.
Actions
This chapter details the actions models can perform. As the gang's leader barks out orders his followers will act accordingly. In this way several models can act at the same time but must perform similar types of action.
The sequence the active player uses is as follows:
- Declare action type.
- Nominate first model to perform action.
- Resolve action and possible reactions.
- Repeat 1. and 3. until all desired actions of the declared type have been performed (maximum is the current action total) or the enemy gang becomes active through a reaction.
- Deduct action total by one.
- Return to 1. with the active gang.
Declare Action Type
The different actions that can be performed by models are defined as movement, shooting and hand-to-hand combat, as well as a catch-all category we call 'special actions' that represent other actions such as reloading guns, out-of-the-ordinary events, or using strange weapons and abilities.
The active player declares a type of action for his models to perform. The number of models that can perform this action is the gang's current action total. For example, a player with an action total of 5 declares a shooting action. He nominates a shooting action that will allow up to five models to shoot. He continues to be active after all of the shooting actions have been resolved, and as his action total is reduced to 4 up to four models can perform the next action declared.
Each model performs and completes its action independently and in any order decided by the player. The player does not have to nominate all of the acting models – he can wait to see the outcome of an action before nominating the next model to act.
An action can be declared as many times as a player wishes, but a model can only act once during each declaration. For instance, a player could nominate two movement actions in succession and one or more models can move twice – once for each declared action.
Movement
When performing a move action a player can move a model up to 4"/ 10cm. Models cannot move through other models and may not move within 1"/ 2.5cm of an enemy model unless engaging in hand-to-hand combat as discussed below.
Terrain
Encounters do not take place over flat bowling greens, and so at some point it is likely that the player will want his models to climb over things, move through marshes, jump over fences and so on. Terrain is broken down into two types: obstacle and difficult terrain.
Obstacles are pieces of scenery that can be crossed, such as walls, hedges and fences. It also includes such things as jumping over crates and barrels, clambering through windows and crossing ditches and trenches. If a piece of terrain is less than 1"/ 2.5cm in width, it is probably an obstacle rather than difficult terrain.
When a model attempts to move over an obstacle it must make a Dex check. If the obstacle is 1-3"/ 2.5-7.5cm high/ deep a -1 level penalty is applied. Obstacles over 3"/ 7.5cm in height or depth must be climbed as explained later. Consult the following chart.
Crossing Obstacles
| Dex check | Result |
|---|---|
| 1-3 | Models must stop before crossing and lose remaining movement. |
| 4-6 | The model crosses the obstacle and must then stop. |
| 7+ | The model may cross the obstacle and then continue moving. |
Difficult Terrain: Pretty much any scenery that is not open ground or an obstacle is difficult terrain. This includes undergrowth, rocks, soft sand, steep hills, stairs, streams, marshes, crop fields, scattered debris and so on.
When a model moves over difficult terrain it must make a Dex check. Every 2 points scored (or part) allows 1"/ 2.5cm movement (up to the normal allowance of 4"/ 10cm). If the model started its movement outside the difficult terrain the distance already moved is deducted from the result. If this results in a distance of 0 or less, the model is allowed to enter the difficult terrain but move no further.
For example, a model starts 2"/ 5cm from a patch of scree. Making a Dex check the model scores 5, allowing 3" of movement. The model is therefore allowed to enter the difficult terrain and make a further 1" move.
Terrain can have additional levels of difficulty to represent particularly treacherous footing. For example, ladders, a steep sand dune or a fast-flowing river are examples of possible very difficult terrain. When entering such terrain, the model's Dex check is -1 level for very difficult terrain, -2 levels for extremely difficult terrain and so on. We urge players to be cautious when using too much difficult terrain as it will slow down the models' movement considerably. Decide before the game exactly what terrain is difficult etc.
Climbing without a ladder is very difficult (that is, difficult terrain with a -1 level to the Dex check). As it is usually impractical to balance models halfway up a wall, players will have to mark the current position of climbing models or otherwise make a note.
If a climbing model scores 1 or 2 on its Dex check it will fall off. A falling model must take another Dex check and deduct the distance fallen to determine what sort of damage die is rolled for possible injury.
Falling Damage
| Dex-distance | Dam dice |
|---|---|
| 0 or less | D12 |
| 1-3 | D10 |
| 4-6 | D8 |
| 7-9+ | D6 |
| 10+ | D4 |
Impassable Terrain
The players may wish to nominate some terrain features as impassable – that is, models cannot enter or cross it at all. Impassable terrain could be deep lakes and rivers, or the sea, as well as cliff faces and camp fires.
Sprinting
We generally assume that models are moving at a quick pace but also remaining aware of their environment and trying not to fall flat on their faces. A model may sprint over open ground instead of normal movement. The distance moved whilst sprinting depends on a Dex check for the model. Nominate a point toward which the model will be sprinting before you roll.
| Dex roll | Movement |
|---|---|
| 1 | Stumbles. The model moves D4" and is stunned. |
| 2-3 | 5"/ 12.5cm |
| 4-6 | 6"/ 15cm |
| 7-9 | 7"/ 17.5cm |
| 10+ | 8"/ 20cm |
Moving and Hand-to-hand Combat
A model may move into base contact with an enemy as part of a normal move or a sprint action. Once in contact with an enemy, both models are said to be engaged in hand-to-hand combat. Engaged models may only attack or attempt to break from combat, they can perform no other actions.
If the target is behind cover that is 1"/ 2.5cm or less in height the attacker may engage the enemy by moving into contact with the obstacle, directly opposite the target. Being behind an obstacle gives a bonus to the defending model, so if the attacker wishes to, he can attempt to cross the obstacle as normal before engaging, so that the defender gains no benefit. There is a -1 level penalty when attempting to cross an obstacle into combat. If an attempt to cross such an obstacle to engage an enemy fails, place the moving model so that it is not touching the obstacle to show that neither model is engaged.
Breaking from Combat
A model engaged in hand-to-hand combat may attempt to break away as part of a movement action (only if his side are currently the active gang of course). The model attempting to break away and all enemy models in base contact with it take a Re check. Compare the moving model's Re test to the highest Re score of its opponents.
| Re check | Result |
|---|---|
| Breaking model scores twice or more | Breaking model may make a normal move away, this may be used to engage another enemy. |
| Breaking model scores higher | Breaking model may make a normal move away. |
| Breaking model scores equal or lower | Model may not move and the action is wasted. |
| Breaking model scores half or less | Model may not move, the action is wasted and the enemy in contact with the highest Re check may immediately make an attack action. This is not a reaction as such and does not change the status of the active gang. |
Reacting to Movement
An inactive model may attempt to react when an enemy model finishes its movement within 6"/ 15cm. If the model successfully reacts it may either shoot at the model that triggered the reaction or the reacting model may make a normal move if this would allow it to engage the approaching model in hand-to-hand combat. Only one model may attempt to react for each approaching enemy. A 4+ is required on a Re test, normal modifiers to reacting apply.
Shooting
In order to shoot, a model must be able to draw a line of sight to its target.
To resolve a shooting action, nominate the firing model and one enemy model within the firer's line of sight. A model may not shoot at an enemy engaged in combat. The target makes a Dex check to determine how difficult he is to hit. The firer then makes an Acc test and deducts the result of the target's Dex score. Look up the result on the following chart.
Regardless of the success of the action, the firing model is then given a reload marker and may not shoot again until it has been removed. It takes a special action to reload a gun as explained in the special actions section later.
Shooting Chart
| Acc minus Dex | Result |
|---|---|
| 0 or less | Miss. |
| 1-4 | Hit. |
| 5+ | Critical hit. |
Miss. The firer has missed the target. The target may attempt to react.
Hit. The target has been hit. Proceed with damage resolution as explained later. The target is also spooked unless he rolls 3+ on a Dar test.
Critical Hit. The firer has hit the target in a particularly vulnerable area (we were thinking the head, what you were thinking might be more delicate...). Resolve damage as explained later, with one bonus damage die. The target may also be spooked (as Hit result).
Shooting Modifiers
| Target's Dex check | Modifier |
|---|---|
| Injured | -1 level |
| Target has been taken out | Level is D4 |
| Firer is out of Line of Sight | -1 level |
| Firer's Acc check | Modifier |
|---|---|
| Injured | -1 level |
| Point blank | +1 level |
| Long range | -1 level |
| Target in cover (less than 75% of model visible) | -1 level |
| Weapon Bonus | Variable |
At least 25% of the model is in cover so the -1 level modifier applies.
Range Chart
Measure the distance between the firer and target and use this chart to determine if the firer is at point blank or long range. The firer's basic Acc level is used, before any modifiers. Point blank range is the listed distance or less, while long range is the listed distance and further. Any other distance is normal range.
| Firer's Acc | Point blank range | Long range |
|---|---|---|
| D4 | 4"/ 10cm | 12"/ 30cm |
| D6 | 6"/ 15cm | 16"/ 40cm |
| D8 | 8"/ 20cm | 20"/ 50cm |
| D10 | 10"/ 25cm | 24"/ 60cm |
| D12 | 12"/ 30cm | 28"/ 70cm |
Some weapons cannot fire at long range, or have a specific firing range detailed in the weapons section. Otherwise the maximum range of a weapon is considered to be 32"/81cm. If the target is beyond this range the shot is a miss.
Reacting to Shooting
If a model is shot at but the shot misses, it may attempt a reaction. If the reaction is successful, the targeted model may make a normal move action for free – to get into cover, for instance (the reacting model's gang also then becomes active). If the firer is close enough, this reaction may be used to engage the firing model in hand-to-hand combat. A 4+ is required on a Re test and normal modifiers apply.
Hand-to-hand Combat
When two models are in base contact with each other they are said to be engaged in hand-to-hand combat. An engaged model may attempt to hit its opponent when a hand-to-hand combat action is declared. If a model is engaged with more than one enemy, the player must nominate which it is attacking.
The models on the right are in base contact and in combat. The models to the left are not in base contact so are not allowed to move within 1" of the enemy unless engaging in combat.
A model can only attack another model that is in its line of sight. Before the attack is made, the model may be turned on the spot for free to face the enemy you wish to attack.
The active model is known as the attacker and the target model is the defender. The Com attribute of both models is used to determine whether the attack is successful and, if not, the possibility that the defender can retaliate.
Both models must make a Com check. The following modifiers apply to this check.
Hand-to-hand Combat Modifiers
| Defender's Com check | Modifier |
|---|---|
| Injured | -1 level |
| Defender has been taken out | Level is D4 |
| Parry bonus | Variable |
| Weapon bonus | Variable |
| Attacker's Com check | Modifier |
|---|---|
| Injured | -1 level |
| Defender is behind obstacle | -1 level |
| Attacking from side | +1 level |
| Attacking from rear | +2 levels |
| Weapon bonus | Variable |
Compare the final scores of the attacker's and defender's Com checks on the hand-to-hand combat chart.
Parrying
If a defender is facing his attacker, he may choose to parry before the Com check is made. The defender makes a Dex check and consults the chart below. A target that attempts to parry may not later counter or riposte and such results from the hand-to-hand combat chart are treated as a miss.
Parry Modifiers and Results
| Modifier | Level |
|---|---|
| Defender is injured | -1 level |
| Defender is behind cover | +1 level |
| Weapon bonus | Variable |
| Dex score | Result |
|---|---|
| 1 | Fumble! The attacker gains a bonus die to his Com check. |
| 2-4 | Missed parry. There is no additional modifier. |
| 5-8 | Parry. The defender gains a bonus die for his Com check. |
| 9+ | Feint. The defender gets two bonus dice for his Com check. |
In the case of a successful counter attack or a riposte, this is a reaction, so the inactive gang then becomes active. Note that unlike other reactions combat reactions do not use an action point.
Hand-to-hand Combat Chart
Rows are the attacker's Com roll; columns are the defender's Com roll.
| Com roll | 1 | 2 | 3 | 4 | 5 | 6 | 7 | 8 | 9 | 10 | 11 | 12+ |
|---|---|---|---|---|---|---|---|---|---|---|---|---|
| 1 | Hit | Miss | Miss | Miss | Cntr | Cntr | Cntr | Rip | Rip | Rip | Rip | Rip |
| 2 | Hit | Hit | Miss | Miss | Miss | Cntr | Cntr | Cntr | Rip | Rip | Rip | Rip |
| 3 | Hit | Hit | Hit | Miss | Miss | Miss | Cntr | Cntr | Cntr | Rip | Rip | Rip |
| 4 | Crit | Hit | Hit | Hit | Miss | Miss | Miss | Cntr | Cntr | Cntr | Rip | Rip |
| 5 | Crit | Crit | Hit | Hit | Hit | Miss | Miss | Miss | Cntr | Cntr | Cntr | Rip |
| 6 | Inj | Crit | Crit | Hit | Hit | Hit | Miss | Miss | Miss | Cntr | Cntr | Cntr |
| 7 | Inj | Inj | Crit | Crit | Hit | Hit | Hit | Miss | Miss | Miss | Cntr | Cntr |
| 8 | Inj | Inj | Inj | Crit | Crit | Hit | Hit | Hit | Miss | Miss | Miss | Cntr |
| 9 | Inj | Inj | Inj | Inj | Crit | Crit | Hit | Hit | Hit | Miss | Miss | Miss |
| 10 | Out | Inj | Inj | Inj | Inj | Crit | Crit | Hit | Hit | Hit | Miss | Miss |
| 11 | Out | Out | Inj | Inj | Inj | Inj | Crit | Crit | Hit | Hit | Hit | Miss |
| 12+ | Out | Out | Out | Inj | Inj | Inj | Inj | Crit | Crit | Hit | Hit | Hit |
- Miss = Miss.
- Hit = Hit. Roll for damage as normal using model's Dam.
- Crit = Critical Hit. +1 damage bonus die on the damage roll.
- Inj = Injured. Target is injured without a damage roll.
- Out = Taken Out. Target is taken out without a damage roll.
- Cntr = Counter attack. The defender takes a Re test. On a score of 4+, the defender may now make an attack or automatically break from combat with a normal move. Note that no surprised marker is placed or action total expended regardless of the success of the Re test.
- Rip = Riposte. As counter attack, except that no Re test is required.
(In the cases of Cntr and Rip if the defending model's gang becomes active.)
Reacting to Hand-to-hand Combat
The possibilities of reacting to a hand-to-hand combat attack are already included in the hand-to-hand combat chart. Counter attacks and ripostes are the only reactions a model can make while engaged as their attention is concentrated on their immediate opponent.
Damage and Injuries
Hitting the target does not guarantee that an attack will cause an injury. All ranged weapons have a Dam value used for shooting attacks, while hand-to-hand is resolved using the Dam value of the attacking model.
The attacker makes a Dam roll and compares this on the chart below to a Con roll made by the defender.
Damage Chart
| Dam roll | Con 1 | Con 2 | Con 3 | Con 4 | Con 5 | Con 6 | Con 7 | Con 8 | Con 9 | Con 10 | Con 11 | Con 12+ |
|---|---|---|---|---|---|---|---|---|---|---|---|---|
| 1 | Stun | N/E | N/E | N/E | N/E | N/E | N/E | N/E | N/E | N/E | N/E | N/E |
| 2 | Stun | Stun | N/E | N/E | N/E | N/E | N/E | N/E | N/E | N/E | N/E | N/E |
| 3 | Stun | Stun | Stun | N/E | N/E | N/E | N/E | N/E | N/E | N/E | N/E | N/E |
| 4 | Inj | Stun | Stun | Stun | N/E | N/E | N/E | N/E | N/E | N/E | N/E | N/E |
| 5 | Inj | Inj | Stun | Stun | Stun | N/E | N/E | N/E | N/E | N/E | N/E | N/E |
| 6 | Inj | Inj | Inj | Stun | Stun | Stun | N/E | N/E | N/E | N/E | N/E | N/E |
| 7 | Inj | Inj | Inj | Inj | Stun | Stun | Stun | N/E | N/E | N/E | N/E | N/E |
| 8 | Inj | Inj | Inj | Inj | Inj | Stun | Stun | Stun | N/E | N/E | N/E | N/E |
| 9 | Inj | Inj | Inj | Inj | Inj | Inj | Stun | Stun | Stun | N/E | N/E | N/E |
| 10 | Out | Inj | Inj | Inj | Inj | Inj | Inj | Stun | Stun | Stun | N/E | N/E |
| 11 | Out | Out | Inj | Inj | Inj | Inj | Inj | Inj | Stun | Stun | Stun | N/E |
| 12+ | Out | Out | Out | Inj | Inj | Inj | Inj | Inj | Inj | Stun | Stun | Stun |
- N/E = No effect. The target is unharmed.
- Stun = Stunned.
- Inj = Injured.
- Out = Taken Out.
Stunned
The model is given a stunned marker. Stunned models are at -1 level to all tests and cannot make reactions. In each recovery phase every stunned model may attempt to remove its stunned marker by scoring 4+ on a D6, no modifiers apply (this is a straight test on a D6 that applies to all rather than a test on any attribute). Models that are stunned and spooked must remove their stunned marker first and cannot remove both in the same recovery phase.
Injured
The model is given an injured marker. Injured models are at -1 level to all checks. Injured markers cannot normally be removed. If the model is already injured, the marker is flipped over and the model is taken out.
Taken Out
The model is taken out of action. Lay it down or place a taken out marker. The model may play no active part in the game – it cannot react or perform actions – although it can be shot at and attacked by the enemy. A model that has been taken out rolls a D4 for all attribute checks it is forced to take, and no other modifiers are applied.
Models that have been taken out ignore being stunned and spooked, they are already in enough trouble as it is!
If a model that has been taken out is subsequently injured or taken out again, it is crippled and the model is removed from the game. Crippled models have a greater chance of suffering permanent injuries in a campaign, but crippling enemy models will also earn a gang a notorious reputation.
Reaction to Models Taken Out. Any model within 6"/ 15cm of a model that gets taken out or crippled must pass a 3+ Dar check or be spooked. These tests are taken before any attempts to react.
If a model is taken out or crippled, friends nearby can try to help out or scatter for sanctuary. One model within 6"/ 15cm can attempt to react, and if successful can either shoot at the model that took out his friend, or make a normal move; this movement may be used to engage the model that took out his friend if possible, but not to engage any other model.
Knockback
Some weapons pack a powerful punch and can inflict knockback. If the Dam roll of such an attack is equal to or higher than double the target's Con roll, the target is knocked 2"/ 5cm directly away from the attack.
If this causes the target model to move off the edge of a building, into a ditch or otherwise over a drop, it may suffer falling damage. The falling model must take a Dex test and deduct 1 for every inch/ 2.5 cm fallen. Look up the final score to determine what sort of Dam roll is made against the target's Con (the falling damage chart is in the section on climbing near the start of this chapter).
Spooked and Fleeing Models
It is not easy keeping a level head while swords are swinging and bullets are flying. A fighter may lose his nerve for a variety of reasons already explained, and in this circumstance is given a spooked marker to show the model's nervous disposition.
Spooked models may not voluntarily engage the enemy in combat, shoot or react.
If a spooked model is not in cover, it may move as part of a normal move action but its movement cannot bring it closer to a visible enemy than it was at the start of the action. Spooked models already in cover may not move but they may hide if possible.
Spooked models may perform special actions (such as reloading and hiding), as long as such actions do not bring them any closer to a visible enemy.
If engaged spooked models must attempt to parry if normally allowed to do so.
Exception: Leaders are never spooked.
Fleeing
If a spooked model is spooked again, flip the marker to its fleeing side.
A fleeing model must immediately move toward the closest table edge in such a way that it does not come closer to any visible enemy models. It must sprint if able to do so. This movement is free and does not use up any of the gang's action total or a reaction if the gang is inactive.
E.g. a spooked model is shot and hit, and spooked for a second time. It then immediately flees as above.
The only action a fleeing model can take is to move, and only if this will take them closer to the nearest table edge and no closer to a visible enemy. They may do nothing else, and if engaged in combat they must attempt to parry if possible.
Spooked and fleeing models can attempt to regain their bottle by rolling a 3+ on a Dar test during each recovery phase; the usual modifiers for injury apply. If the test is passed it can flip/ remove its marker. If a spooked model is in cover during the recovery phase this test is automatically passed. Any model not recovering in the recovery phase will immediately flee again when his gang is next active.
Special Actions
As part of any movement, shooting, hand-to-hand action one or more models (within the maximum number allowed to act) may instead perform a special action. Common special actions are detailed next. Other special actions are discussed in the relevant sections later. E.g. If you declare a shooting action and have an action total of 5 (so up to 5 models can act), 3 might choose to shoot and 2 choose to reload, or 2 shoot, 1 reload, 1 hide etc etc.. A model may also perform a special action as a reaction instead of moving (i.e. if a reaction would normally allow the model to move).
Models in base combat (as printed) with an enemy fighter may not perform the following special actions, they're too busy with the task at hand!
Reloading
A model may remove/ flip its reload marker. Most guns require one reload action to reload.
Recover Wits
A spooked model may make an immediate Dar check. If it scores 3+ the spooked marker is removed. If the spooked model is hidden the check is passed automatically. Note that fleeing models may only attempt to recover during a recovery phase. Models also stunned must first remove the stunned marker in the recovery phase.
Hide
A model behind cover may hide (place hidden marker). Line of site [sic] can only be drawn to the model if more than 50% of it can be seen.
The hidden marker is removed as soon as the model performs any other action or an enemy can draw LOS to more than 50% of the hiding model. Enemy models may not react to a model that begins an action with a hidden marker and for shooting purposes the recently hidden model counts as being out of line of sight of the target for that next action (imposing a -1 level penalty on the target's Dex check).
Stand Ready
The model waits for the ideal opportunity to strike (place ready marker). A model with a stand ready marker gains +1 level to its next Re test and may react without a point being spent from the gang's action total. The marker is lost if the model performs any other action except that it may turn in place as a movement action.
Drag
A model can help a friend who has been taken out get to safety. The two models must be in contact with each other. Both may make a normal movement action, but cannot sprint or cross any obstacles or move through difficult terrain. They must stay together for the entirety of the move.
Regroup
When all around are losing their heads... This action may only be performed by a leader. The leader takes an Au test. The score is the number of friendly models that may remove/ flip a spooked/ fleeing marker. A fleeing model can only recover to being spooked during a single regroup action. Models that are also stunned must first remove their stunned marker in the recovery phase.
Skills and Weapons
As well as their basic attributes, models may have a variety of skills that represent their particular abilities. There are also faction specific skills you will see with each faction list. How these skills are gained is detailed in the Creating a Gang section of the Campaigns chapter. All models also will be carrying one or more weapons, and the rules for these different weapons as well as other types of equipment they might acquire are given in the second part of this chapter.
Weapon representation: Whenever possible you should try to represent the weapons that your models have. However, we suggest being flexible with this. For example, pistols, daggers and grenades can easily be hidden in clothing. Some miniatures come with parrots, monkeys etc. This doesn't mean you have to have the parrot equipment option, consider it a pet or similar. Orcs carry very large pistols, these can be used as a blunderbuss or pistols (obviously you have to buy and choose which one before hand!).
We supply a weapon sprue to help equip your figures appropriately, but the rule is be flexible and tell your opponent of any equipment should he ask.
Likewise, many models have hooks or peg legs. These can be used to represent an injury, but equally you can use them as any normal crew member. It's assumed they've learnt to use their new leg or hook without any handicaps!
List of Skills
Backstabber – When engaged with a single enemy and attacking, the model may be moved from the front of the enemy to the side, or the side of the enemy to the rear, before any parries are made.
Beguiling – Enemies cannot counter-attack against this model, and riposte results are treated as a counter-attack.
Commanding Presence – Leaders only. Grants a bonus die when making Au rolls for the gang's action total.
Dead-eye – The model gains a bonus die for all shooting Dam rolls.
Deadly – The model gains a bonus die for all hand-to-hand Dam rolls.
Foolhardy – The model gains a bonus die for all Dar checks.
Headlong Charge – If the model moves to engage an enemy model over open ground, it may make an immediate attack as part of the same action. This does not apply if the defender is behind an obstacle.
Inspirational – Leader only. Any friendly model within 6"/ 15cm cannot be spooked. Spooked models that move within range lose their marker at the end of their movement. Has no effect on fleeing models.
Intimidating – Any enemy wishing to engage the model must first pass a 3+ Dar check. If the check is failed, the enemy model does nothing and the action is wasted.
Marksman – The model gains a bonus die for all Acc checks.
Medic – May perform a special action when in base contact with an injured model. A Dex check of 6+ by the medic allows the model to remove its injured marker. Cannot heal self.
Pistoleer - Negates the -1 penalty for using a brace of pistols.
Quick-witted – The model cannot be surprised.
Sleight-of-hand – After both models have made their Com checks in hand-to-hand combat, the model may force a re-roll. The first result is discarded and both models roll again (with all of the previous modifiers) and the second result is used.
Sneak – Enemy must be able to see at least 75% of the model to stop it being hidden. Not spotted by spyglasses.
Surgeon - Re-roll an injury on the campaign injury table once for one model post game (not on himself). You must accept the second result. If you have another surgeon he can re-roll for another injured model, but never twice for the same model.
Shooting Weapons
Ship's Pistol – Dam: D6. Cannot fire at long range, shots at long range count as automatic misses.
Duelling Pistol – Dam: D6. Cannot fire at long range, shots at long range count as automatic misses. Point blank range is increased by 4"/ 10cm.
Brace of pistols – A model with two or more pistols must keep track of firing and reloading each one separately. If a model has two loaded pistols they may be fired together in a single shooting action. Each shot is resolved separately with an additional -1 Acc level penalty.
Musket – Dam: D8 – No penalty for long range and no bonus for point blank range.
Blunderbuss – Max 12"/ 30cm range. Targets beyond this are automatically missed. Damage starts at D20 and loses one level for every full 4"/ 10cm to target. May not be reloaded.
Hand-to-hand Weapons
Unarmed – A model fighting without weapons suffers a -1 Dam level penalty in hand-to-hand combat.
Club, maul, etc – No special rules.
Dagger – A model with a dagger gains +1 Com die. May not parry.
Cutlass – +1 bonus die for Dam rolls in hand-to-hand combat.
Longsword - +1 bonus die for parry rolls in hand-to-hand combat.
Axe - +1 Dam level in hand-to-hand combat. May not parry.
Hammer – Knockback. May not parry.
Bastard sword – Two-handed. +1 Dam level in hand-to-hand combat.
Great hammer – Two-handed. Knockback. +1 Dam level in hand-to-hand combat. May not parry.
Great axe – Two-handed. +1 Dam level and +1 bonus die to Dam roll in hand-to-hand combat. May not parry.
Spear/ bayonet – Two-handed. The length of this weapon grants +1 Com level unless attacking a model also armed with a spear or bayonet.
Fighting with two weapons. A model armed with two weapons gains +1 bonus die to its Com rolls when attacking, but must choose which weapon's rules apply before any dice are rolled. E.g. a model with a cutlass and an axe may have either +1 Dam bonus or knockback. When defending, models armed with two hand-to-hand weapons gain one bonus die for parrying if both weapons can be used to parry. Obviously, only a single two-handed weapon can be wielded at a time...
Equipment
Amulet - Anyone wearing an amulet is immune to the undead 'raise the dead' rule. i.e. they can never be converted to the Undead.
Fowler's rum – This potent and famous rum is a secret recipe. Supplied in a small but powerful dose! One use per game: Gives the user +1 level in Com, Con and Dam but -1 level in Acc, Re and Dex. Can be taken at any point during the game without using an action point. Lasts until the next recovery phase.
Parrot – The screeching and biting distracts enemies at close quarters. When defending in combat a model with a parrot gains a bonus die to its Com roll.
Powder Monkey – The fighter has a monkey trained to help reload his guns. A model with a powder monkey may make a reload action whilst performing a normal movement action.
Spyglass – A model with a spyglass may make a special action to reveal hidden models. When the action is performed, any enemy models that are within line of sight that are hidden are immediately revealed. Remove hidden marker. This means other models can now also see the newly revealed figure (as the spyglass bearer shouts the location!). When carried by a leader, a spyglass also adds a bonus die to the first Au check of the game.
Lucky charm – May be used once per game to grant a bonus die for any attribute check taken by the model. You may choose to use the lucky charm after seeing the results of a roll.
Grenade – One use only. May be thrown up to 12". Nominate target point and make Acc check:
- 1 – Grenade explodes in model's hand!
- 2 – Grenade travels D6"/ D6x2.5cm past target point.
- 3 – Grenade travels D6"/ D6x2.5cm short of target point (if it lands on or behind thrower it's assumed it hit a rock or similar and bounced back!)
- 4+ Grenade explodes on target.
All models within 4" of final landing point are hit with D8 Dam attack and are stunned regardless of Dam rolls.
Encounters
Anatomy of an Encounter
A game of Cutlass is called an encounter. The encounters we present here are just some of the many ways you can field your Cutlass gangs, doubtless players will devise their own and share them with the gaming community.
Encounters may use all of a gang or just some, and will see the players pitted against each other in a wide variety of situations, from treasure hunts to bare knuckle brawls. A good player knows how to use his gang regardless of circumstance.
Each encounter contains the following information.
- Sides: This section details whether the encounter requires an attacker and a defender, and any restrictions applied to the gangs taking part.
- Location: A brief description of the terrain that should be used on the tabletop.
- Deployment: Here you will find out how to set up your models before the encounter begins.
- Objectives: What both gangs are trying to achieve and how to determine the winner.
- Special Rules: The particular circumstances of the encounter are reflected in the special rules applied during the game, such as claiming objectives, one side being surprised, reinforcements arriving and so forth.
- Campaign Aftermath: The consequences of winning and losing the encounter when playing in a campaign are given here. In one-off games, the only consequence is victory and bragging rights!
We envisage encounters to take place on a playing surface of 48" by 48" (roughly 120cm by 120cm). This gives enough room for the gangs to manoeuvre, but ensures that the action is short and to the point. If players want to field particularly large gangs or use a wider gaming area, they should modify the deployment rules accordingly.
In campaigns, the encounter that takes place between two gangs is determined by their fame and choice of whether to attack their enemy, patrol contested territory or defend their headquarters. These factors also determine who is attacking and defending in those encounters where it is relevant.
In one-off games, the encounter is determined by rolling a D8 or by the agreement of the players. If an encounter requires an attacker and defender, randomly determine which player is attacking and which is defending before proceeding to choose sides. There is a section at the end of the Campaigns chapter that deals with creating gangs for one-off games.
Pitch Battle
Should you wish to have a simple one off game or basic game within the campaign system you can choose to play the pitch battle scenario. Otherwise you can roll on the scenario table.
Random Encounters
| D8 Roll | Encounter |
|---|---|
| 1 | Ambush |
| 2 | Brawl |
| 3 | Escort |
| 4 | Raid |
| 5 | Running Battle |
| 6 | Skirmish |
| 7 | Swoop |
| 8 | Treasure Hunt |
Two opposing crews have run into each other or purposely sought out the other to do battle.
Location: Anywhere
Deployment: Roll a D6, the winner can choose who sets up first. You can set up anywhere within 12"/30cm of your table edge. All your crew may take part.
Objectives: This is a straight up fight. Try to take out as many of the enemy as you can and make them cut their losses and run!
Aftermath: Standard post battle experience.
Winning the game: Each encounter has specific objectives to win the game. But for 'pitch battle' or any encounter you come up with without a set objective you can use the 'cut your losses' rule. This works as follows: In the recovery phase if any player has 25% or more models taken out or fleeing you must take an AU test. You must score equal to or more than the number of models taken out/fleeing or you 'cut your losses' and lose the game. If both players need to test, the player with more models out tests first. If equal roll to see who tests first.
Ambush
One gang has been informed that their enemies are leaving their headquarters to make a foray into the wilderness. The attackers have located two potential ambush sites and must divide their forces to cover both areas. The unwitting defenders are not expecting trouble and are taken by surprise.
Sides: Attacker and defender.
The attacker must divide his gang into two parts (not including his leader). He is free to split his gang in any way he chooses. Before deployment, randomly determine which of the two groups the defenders have run into (plus the gang leader).
The defender has his leader plus a random number of gang members. Roll a D6 for each gang member. On a roll of 1-3, the gang member is not present. On a roll of 4-6 the gang member takes part in the encounter.
Both players can choose to leave any gang members out of the encounter before any rolls are made.
Location: The ambush takes place in an area of wilderness, away from any prying eyes that might spoil the surprise. Ensure there is plenty of cover for the attackers to hide behind.
Deployment: The defender deploys his models first. All models must be deployed at least 16"/ 40cm from any table edge. The attacker then deploys. All attacking models must be within 8"/ 20cm of a table edge and out of LOS of a defending model.
Objectives: The defenders must try to extricate as many fighters as possible from the ambush, while the attackers are attempting to do as much damage as they can. The game ends when all of the defending models have either left the table or been taken out or crippled. The defender wins if more of his models voluntarily leave the table than are taken out, crippled or flee from the fighting. If he does not do this then the attacker has won.
Special Rules: Any attacking models may start the game hidden. The attacking gang starts active, even if the defender scores higher on the initial Au checks. All defending models begin the game surprised (except the leader). Models may leave the table but may not return.
Campaign Aftermath: If the attacker wins, the defenders are scattered and the attacker has captured the defending models that were taken out or crippled. Captured models may be ransomed or given up for bounty as detailed in the campaign rules.
If the defender wins, they are able to return in force with the rest of the gang and drive off the attackers. Any attacking models that were taken out or crippled must be surrendered by the attacker and are captured as explained above.
You still roll for any injuries as normal and standard post game experience.
Brawl
The two gang leaders and their most trusted henchmen have run into each other whilst out drinking, buying equipment, seeking recruits or otherwise not expecting trouble. There are lots of other folks around who might interfere, but they can't just walk away from each other... This has to be settled fist-to-fist!
Sides: Each gang consists of its leader and up to five other gang members of the player's choice.
Location: The encounter takes place on the dockside, or in an otherwise populated part of town. There should be several buildings around, with one placed near the centre of the table outside which the gangs have met.
Deployment: The two gangs have almost run into each other before they realise they have company. Both players roll a die. Starting with the lowest scoring player, the players take turns to each place one of their models on the table. The first model placed must be the leader of the player who scored lowest, who must be placed within 6"/ 15cm of the central building's front door. The opposing leader must be placed 10"/ 25cm directly in front of his foe. Other gang members must be within 3"/ 7.5cm of their leader and no closer than 8"/ 20cm to an enemy model.
Objectives: The two sides must attempt to incapacitate the other in order to prove their superiority. The encounter continues until all of the models from one side are either injured, taken out, crippled or have left the table. The side with the last uninjured man standing wins.
Special Rules: All models are unarmed at the start of the encounter, give them each a reload marker. Even models without a gun must 'reload' for an action before their weapons are ready. However, this is a fistfight, and shooting and drawing weapons will cause a loss of respect. If a model shoots or attacks an enemy with a weapon, his gang automatically loses the encounter – in a campaign game you should continue to resolve the encounter until one side has been done over as described in the objectives section.
Campaign Aftermath: The winner gains bragging rights. A famous gang that wins gains +1 fame for each opposing model injured, taken out, crippled or fled, while an infamous gang will deduct 1 fame for the same. The loser loses 1 fame for each model that was injured, taken out, crippled or fled if famous, or adds 1 fame for each beaten up model if infamous.
In addition, if a gang loses because it used weapons first, it deducts an additional 5 fame and may not attempt to recruit new members in the following campaign turn.
Standard post battle experience.
Escort
One of the gangs has been entrusted with a special cargo to deliver – a travelling nobleman, a consignment of tobacco, rum for the governor's officers, a new cannon for the fort... Unfortunately, their route forces them to pass through the territory of their opponents, who decide that they deserve to be the recipients of the reward that comes from handing over this important delivery.
Sides: Attacker and defender.
The defender can use any available members of their gang. The attacker can use up to half the available gang members (rounding up).
Location: This encounter could take place anywhere.
Deployment: The defender deploys his whole gang first, anywhere within 8"/ 20cm of a single table edge. The attacker then deploys his whole gang anywhere at least 12"/ 30cm from the opposite table edge and 18"/ 45cm from the defenders.
Objectives: The defenders start with the cargo in contact with one of their models – use a pony, wagon or other suitable model. The cargo must be led off the opposite table edge from which it is deployed. The gang that leads the cargo from the table are the victors.
Special Rules: The cargo cannot be moved on its own, it must be led by another model in base contact. A model leading the cargo may not perform any action other than move, and may not sprint. If engaged, stunned, injured, taken out or spooked, a model cannot lead the cargo. Any model that starts a move in contact with the cargo may lead it as long as there are no enemy models also in contact.
Campaign Aftermath: The gang that manages to take possession of the cargo can receive the reward for its delivery. This gains them +5 fame and $75.
Standard post battle experience in addition: Model that removes cargo from table: +5 exp.
Raid
One gang has set out to claim something for their own – a notable personage to kidnap, the contents of a vault, a secret arms cache or similar. This should have been 'easy in, easy out', but due to bad luck or poor timing, their intended target has got some more protection than they expected and some sneaking around will be required.
Sides: Attacker and defender.
The defender uses his entire gang. The attacker must decide how many of his gang members he wants to send on the raid. The more he sends, harder it will be to prevent the alarm being raised, but the more fighters he will have at his disposal once the action kicks off. The attacking gang must include a leader and at least five other gang members (unless the entire gang is smaller than this!), up to half the gang (rounding up).
Location: The scenery must include at least one building close to the centre of the table in which the prize is hidden. The attackers need to be able to sneak around for a while, so make sure they have plenty of cover to move about in.
Deployment: Before putting down any models, the attacker secretly notes down from which table edge he will launch his raid. The defenders deploy first. Starting with the defending player, the players take it in turns to place a defender on the table, at least 8"/ 20cm from any table edge, until all defenders have been place. The attacker then deploys his entire gang within 4"/ 10cm of the table edge he noted earlier.
Objectives: The attackers are after something inside the central building – ideas include the governor's daughter, a chest of treasure, crates of weapons, or a smuggler with information about local pirates. The possibilities are restricted only by your imagination.
An attacking model must enter the central building, successfully search for the prize and then remove the prize from the battlefield. If they do this, the attackers win. At the start of any recovery phase the attacker can call off the raid, in which case the encounter ends, the objective is lost and the defenders win.
Special Rules: The defenders start the encounter unaware that they are about to be attacked. The defending gang starts with no action total – the attacker rolls an Au check as normal to determine his starting action total. If this is expended before the alarm is raised, there is a special 'move sentries' phase as described next. If the alarm has still not been raised, the attacker rolls an Au test for a new action total and play continues for the attackers.
If the attacker expends his entire action total before the alarm is raised, the defending models will continue on their patrols. Working through each defending model, nominated in turn by the defending player, each player rolls a D6 and the highest scoring player can move the model up to 1"/ 2.5cm for every point by which they won. For example, if one player rolls a 4 and the other a 2, the first player can move the model up to 2". If the scores are tied the model is not moved. Defending models must face their direction of travel during movement (no walking them backwards or anything silly like that) but they can be turned to face any direction at the end of their move.
Raising the Alarm – Play continues like this until the alarm is raised. As soon as the alarm is raised, any remaining actions for the attacker are lost and the leaders make Au checks as if the encounter had just started. Play continues using the normal rules.
The alarm is raised in the following circumstances:
- Any attacker shoots or engages an enemy in hand-to-hand combat. Using the bloodcurdling roar skill also raises the alarm!
An attacker moves into line of sight of a defender at any time or a defender ends his movement with line of sight to an attacker.
An attacker sprints and any part of his movement takes him within 6"/ 15cm of a defender, or he suffers a stumble result while within 12"/ 30cm of a defender.
Gimme the prize – An attacking model must enter the central building and expend a special action searching for the prize. To find the prize requires a 4+ on a Re test. Once the prize is found, place a suitable marker with the model that found it. The prize must be carried (or dragged if it's an unfortunate person). A model carrying the prize may not perform any action other than move, and may not sprint. If engaged, stunned, injured, taken out or spooked, the model will drop the prize. Any model that ends a move in contact with a dropped prize may pick it up.
Campaign Aftermath: If the attacker wins, they will be able to make off with their prize. In the following campaign turn, the prize can be exchanged for income – the victim is ransomed off, the stolen guns sold on, the money from the vault shared amongst the gang or whatever is appropriate. The prize is worth a number of dollars equal to the fame or negative fame of the defending gang, plus $25. For example, if the defenders were an infamous gang with a fame of -23, the prize would be worth $48 in total.
If the defender wins, they are well rewarded for the protection provided and they receive a number of dollars equal to the fame or negative fame of the attacking gang, plus $5 for each attacker that was taken out or crippled during the raid.
Standard post battle experience in addition: Model that removes the prize: +5 exp.
Running Battle
Going about their normal (or illicit) business, the two gangs come across each other without warning. As the fighting escalates, more and more gang members are drawn in from the surrounding area.
Sides: Each player makes an Au test for their leader. This is the number of models from their gang that begins the encounter, chosen by the player. The rest of the gangs may turn up during the course of the encounter and any model may be left out of the encounter before dice are rolled.
Location: This encounter could take place anywhere.
Deployment: Both players roll a die. The highest scoring player places his gang leader anywhere at least 12"/ 30cm from a table edge. He then deploys the other starting gang members within 4"/ 10cm of their leader. The losing player then does the same, with the additional restriction that his models are at least 12"/ 30cm from any opposing gang member.
Objectives: This a straight-up fight with both gangs trying to do as much damage to their opponents as possible whilst minimising their losses.
At the start of any recovery phase, either player can choose to cut their losses and end the game – the other player is declared the winner!
Special Rules: At the end of every recovery phase, each player rolls a D6 for each gang member not yet on the tabletop. On a roll of a 5 or 6, they turn up. The gang that was last inactive arrives first – players take it in turns to place these arrivals touching any table edge at least 6"/ 15cm from an enemy model. The same is then done for the new arrivals of the other gang.
Campaign Aftermath: Captured models may be ransomed or given up for bounty as explained in the Campaigns chapter. Killed models are removed from the gang. If a gang kills the models out of hand, they reduce their fame by 2 points for every model executed.
Standard post game battle experience.
Skirmish
Whilst patrolling the area around their respective camps, the two gangs come across each other. They are too far away to send for help, but neither side is willing to back down – to do so would be to surrender territory to their opponents.
Sides: Each player secretly notes down which gang members he has sent on patrol, which must include the leader and at least five other gang members. The larger the patrol he has sent, the more damage he will have to do to his opponent's gang to gain victory.
Location: This encounter could take place anywhere.
Deployment: The gang with the highest number of models in the patrol must deploy first – if there are the same number in both gangs, roll a D6 each with the lowest scoring player deploying first. The first player places his leader anywhere on the tabletop. The other player then places his leader at least 18"/ 45cm away. The players then alternate placing their models, no more than 4"/ 10cm from an already-placed friendly model and no closer than 18"/ 45cm to an enemy model.
Objectives: Both gangs are trying to stamp their mark on the contested territory. To do so, they have to prove themselves the better fighters. At the start of every recovery phase, both players count up the number of enemy models that are injured, taken out, crippled or have fled the table. If this is more than half the number of models the gang started the encounter with (rounding up) the gang has won the skirmish. If both players meet this objective at the same time, the gang that has inflicted the most casualties are the winners.
Special Rules: After deployment, every model must pass a 4+ Re test or starts with a surprised marker (excluding leaders).
Campaign Aftermath: The winner gets to claim a new piece of territory to add to his domain. This gives the gang a free headquarters upgrade of a random type. If the gang's headquarters already has the upgrade generated, they instead gain $50 bonus income in the following campaign turn.
Roll a D8:
| Score | Headquarters upgrade |
|---|---|
| 1 | Storehouse |
| 2 | Lockup |
| 3 | Trading Post |
| 4 | Surgery |
| 5 | Watchtower |
| 6 | Drinking Hole |
| 7 | Legitimate Business/ Barracks |
| 8 | Player's choice (or can choose the $50 income bonus). |
Swoop
There's been a rumour going around that something of value has turned up in town – a visiting dignitary, a map showing the location of a pirate lair, the keys to the governor's wine cellar or something like that. One of the local gangs has taken it upon themselves to procure this item for themselves. If only they knew where to find it. Unfortunately, the gang hired to protect this valuable commodity aren't so sure themselves where it is either...
Sides: Attacker and defender.
Both gangs may field all available members.
Location: This encounter takes place in a well populated area. The table should have at least six buildings or other easily identifiable areas for the attackers to search. You will need some suitable counters numbered 1 to 6 to mark the possible sites of the loot.
Deployment: The defender deploys first, placing his gang members anywhere on the table at least 8"/ 20cm from any table edge. The attacker then deploys his gang anywhere within 4"/ 10cm of two adjacent table edges.
Objectives: The attackers must search the area looking for the loot, and escape with it when they have found it. If the attackers remove the loot from the table they have won. Alternatively, the attacker can choose to give up the search at the start of any recovery phase and hand victory to the defenders.
Place the six loot counters face down and mix them up so that neither player knows which ones they are. Starting with the defender, the players then take it in turns to place one of the counters on the table, each in a separate building or other location agreed when the table was being set up.
Roll a D6 at the start of the encounter to determine which of the markers represents the real loot. Only attacking gang members can reveal a loot marker, and they do this by ending a move in contact with the marker. Once the loot has been revealed it must be carried. A model carrying the loot may not perform any action other than move, and may not sprint. If engaged, stunned, injured, taken out or spooked, the model will drop the loot. Any model that ends a move in contact with dropped loot may pick it up.
Special Rules: The attackers choose the right moment to start the search and are very focussed on the task at hand. The attacking leader gains +1 level to his Au for the duration of the encounter.
Campaign Aftermath: If the attacker makes off with the loot, they can fetch a pretty sum for it. The loot adds $50 to the gang's income for the next campaign turn, plus an additional $10 for each dummy marker that was revealed before the loot was found.
If the defenders keep hold of the loot, they earn $50 from the real owner, plus $10 for each loot marker that was not revealed by the end of the encounter.
Standard post game experience in addition:
A model receives +3 bonus experience point for every loot marker they reveal.
+5 experience for the model that removes the real loot from the table.
Treasure Hunt
The dream of every man on the island has come true! A treasure map has surfaced showing the location of a hoard of gold and gems. Perhaps it is the buried treasure of an old pirate, or a gold galley from the Spanish Main has run aground. Two gangs close in on the location, determined to snatch as much as possible for themselves.
Sides: Both players are free to field any available gang members.
Location: The treasure hunt takes place in an out-of-the way area such as an isolated cove or deep in the wilderness. There should be plenty of scattered small cover for the gangs to use as they search the area.
Deployment: Start by taking 5 appropriate models or counters to mark the location of the treasure. Both players roll a D6 and starting with the lowest scoring player, the players take it in turns to place the treasure markers. The treasure markers can be placed anywhere that is at least 12"/ 30cm from a table edge and 12"/ 30cm from another treasure marker.
The highest scoring player then deploys his entire gang within 4"/ 10cm of one table edge. The other player deploys second, within 4"/ 10cm of the opposite table edge.
Objectives: The gangs must retrieve the treasure before their adversaries. Once all five treasure markers have been dug up and are in the possession of the gangs at the start of any recovery phase, the encounter ends as they both leave with their booty. The gang whose models are carrying the most treasure markers has won.
Special Rules: To take a treasure marker a model must move into contact with a marker and then spend a special action digging it up. Once dug up, the treasure must be carried. A model carrying treasure may not perform any action other than move, and may not sprint. If engaged, stunned, injured, taken out or spooked, the model will drop the treasure. Any model that ends a move in contact with a dropped treasure marker may pick it up.
Campaign Aftermath: Each treasure marker held by a gang is worth a random amount of money. In the income phase of the campaign turn, each treasure marker is worth $D10x10.
(Optional alternative: Each treasure/ loot marker could represent a piece of equipment or weapon, mark down beforehand what each one contains. What you find is what you keep!)
Standard post battle experience in addition:
+3 experience points for a model that has treasure at the end of the game.
Campaigns
A campaign is a system that allows several players to fight encounters against each other over a period of time, keeping track of the results. The players fight encounters accumulating experience, wealth, injuries, new members, lost companions and fame (or infamy!). When one gang becomes too powerful or too well known, all of the gangs in the area will take a side for the final reckoning to see who comes out as top dog!
Campaigns are a great way to add a bit more meaning to your games of Cutlass. Rather than each encounter being an isolated event, every confrontation adds to the story of your gang. We've made organising a campaign as simple as possible so that the players can concentrate on the important things – playing games and developing their gangs. All you need to get started are some players, a table, some scenery and your miniatures.
The setting for a Cutlass campaign is an island, town or some far flung place. Very often it's an island not on any official map being explored by Royal Navy, Pirates, only to encounter Orcs, Elves, Dwarfs, the Undead and more!
Although not strictly required, it is useful to appoint one player as the campaign governor. The governor can help the players organise their games, keep track of which models have been placed in gaol, perhaps run special encounters and events, and run the final reckoning part of the campaign.
Creating a Gang
To start a campaign you need a gang. Each player has $500 to start the bid for power. Initial gang members are chosen from the faction list of your choice, with the profiles and costs listed of the different types of crew members available. These are the leader's closest companions, and as such they are hand-picked. Within the number limitations given.
The models must also be armed and equipped out of the starting money, as indicated in the profiles that follow and the Equipment Costs chart. Any money not spent goes into the gang's treasury.
As the campaign progresses, new recruits will become available, but you can never guarantee the quality or attributes of these newcomers, so the style of your starting gang will set the tone for the campaign. Do you go for a small, highly dangerous band and hope that you do not suffer too many casualties early on, or hire less skilful underlings who you can raise up yourself?
Each model also has a level. This is to show his starting experience on the experience chart. E.g. a leader has level 7 and starts with 31 experience.
Model and Gang Worth
Each gang member has a 'worth' given as a $ value. This is equal to the sum of his attribute levels, taking into account any permanent serious injuries (i.e. D6 is worth $6, D10 is worth $10), plus the value of any weapons and equipment, plus $10 for each skill the model has. Models that start with skills already have those incorporated into their cost.
The total of all the worth of the gang members, any headquarters upgrades, plus any money in its treasury is the gang's total worth. If a gang's total worth ever reaches $5,000 or more, regardless of its fame or infamy, the final reckoning event is triggered (details of this are given later on).
Fame/ Infamy
Depending on your actions your crew will either become 'famous' or 'infamous'! You start with a fame level of zero but must decide at the start which you are. Any type of crew can be famous or infamous though obviously some are more suited to the correct side of the law than others!
You will find a Faction Roster at the end of the chapter. Feel free to photocopy this to keep a record of your gang's details.
Currency
For ease of reading we use the $ symbol to represent currency throughout the book. In reality it could be gold pieces or any other type of bartered goods!
The Royal Navy
The Navy serve to expand the Empire and keep trade routes open and free from piracy! Well trained, equipped and loyal, they are a force to be reckoned with. Navy crews would normally be 'famous' rather than 'infamous'. However should you wish to have a corrupt Captain and crew that's up to you with the Cutlass rules!
Navy Special Rules: Whilst your crew is famous the crew has absolute respect for the chain of command and would never mutiny. Therefore there will never be a leadership challenge unless your crew is infamous.
Royal Navy Skills Table
- Combat Drilled: The Navy are well trained and well drilled. Anyone with this skill will never be spooked or surprised.
- Trained: Models with the trained skill get +1 bonus dice to their reaction tests.
- Quick Shot: Anyone with quick shot has practised reloading over and over and can do it with lightning speed. Therefore they don't need to use an action point to reload. The weapon is considered always loaded. Cannot be used with brace of pistols, i.e. you can fire 2 pistols but will need to reload them as normal.
- Grenadier: An expert at prepping and throwing grenades. This skill gives them +1 when rolling on the grenade chart. So it will never explode in their hands.
1 Royal Navy Captain – $86 (level 7)
| Re | Acc | Com | Dex | Con | Dam | Dar |
|---|---|---|---|---|---|---|
| D6 | D8 | D8 | D6 | D6 | D6 | D8 |
Au: D8
Skills: Leader. Inspirational, Marksman.
Equipment: Any.
0-4 Officers – $58 (level 5)
| Re | Acc | Com | Dex | Con | Dam | Dar |
|---|---|---|---|---|---|---|
| D6 | D8 | D8 | D6 | D6 | D6 | D8 |
Skills: Combat Drilled.
Equipment: Any common. One uncommon.
1+ Royal Marines – $44 (level 3)
| Re | Acc | Com | Dex | Con | Dam | Dar |
|---|---|---|---|---|---|---|
| D6 | D8 | D6 | D6 | D6 | D6 | D6 |
Skills: (none listed in the source)
Equipment: Any common.
0+ Able seaman – $36 (level 1)
| Re | Acc | Com | Dex | Con | Dam | Dar |
|---|---|---|---|---|---|---|
| D6 | D4 | D6 | D6 | D4 | D6 | D4 |
Skills: (none listed in the source)
Equipment: Up to two common.
Pirates
Pirates murder, pillage and plunder! Often attacking and seizing larger and better ships that enables them to sail to far off places in search of more fortune and infamy! It's a tough life in a Pirate crew and mutiny is never far away!
Pirate Special Rules: Mutiny! Mutiny is always in the air with pirates! Therefore if any model in your crew comes within 10 points of worth of the captain there will be a leadership challenge (as detailed later).
Pirate Skills Table
- Unscrupulous: Pirates are truly mean and intend to kill their enemy! Whilst in combat taken out results automatically become critical. Remove enemy model from play.
- Armourer: Pistols only: An armourer likes to meddle and convert his pistols. Anyone with this skill may shoot pistols at long range with a -1 to Acc role [sic]. This is in addition to any minus for using a brace of pistols. Only the model with this skill may use converted weapons. You may not pass them on to others in the gang.
- Last stand: This Pirate doesn't know when he's beat! If he is 'taken out' during the game as a special action he may fire one pistol at close range only (even if he has armourer). As with all taken out models his Acc (along with all stats) will be D4. He can keep doing this as a special action until he is made critical. He can also (and must if he wants to fire again) re-load as a special action.
- Swashbuckler: This Pirate is very skilled with a blade. Add +1 bonus dice when making a Dex check on the parry table for combat. In addition this skill cancels the 'beguiling' skill of an opponent during combat.
1 Pirate Captain – $86 (level 7)
| Re | Acc | Com | Dex | Con | Dam | Dar |
|---|---|---|---|---|---|---|
| D6 | D8 | D6 | D6 | D8 | D6 | D8 |
Au: D8
Skills: Leader. Swashbuckler, dead-eye.
Equipment: Any.
0-4 Hardened Pirate – $58 (level 5)
| Re | Acc | Com | Dex | Con | Dam | Dar |
|---|---|---|---|---|---|---|
| D6 | D8 | D8 | D6 | D6 | D6 | D8 |
Skills: Unscrupulous.
Equipment: Any common. One uncommon.
1+ Pirates – $44 (level 3)
| Re | Acc | Com | Dex | Con | Dam | Dar |
|---|---|---|---|---|---|---|
| D8 | D6 | D6 | D6 | D6 | D6 | D6 |
Skills: none listed in the source.
Equipment: Any common.
0+ Rogues – $36 (level 1)
| Re | Acc | Com | Dex | Con | Dam | Dar |
|---|---|---|---|---|---|---|
| D6 | D4 | D4 | D6 | D6 | D6 | D4 |
Skills: none listed in the source.
Equipment: Up to two common.
Privateers
Privateers are often ex Navy or even Pirates, hired by a wealthy individual or Governor for trade or some other undertaking. Of course any sensible Privateer Captain would do a little trade of his own on the side!
Privateer Skills Table
- Combat Drilled: The model is well trained and well drilled. Anyone with this skill will never be spooked or surprised.
- Armourer: Pistols only: An armourer likes to meddle and convert his pistols. Anyone with this skill may shoot pistols at long range with a -1 to Acc role [sic]. This is in addition to any minus for using a brace of pistols. Only the model with this skill may use converted weapons. You may not pass them on to others in the gang.
- Grenadier: An expert at prepping and throwing grenades. This skill gives them +1 when rolling on the grenade chart. So it will never explode in their hands.
- Last stand: This Privateer doesn't know when he's beat! If he is 'taken out' during the game as a special action he may fire one pistol at close range (even if he has armourer). As with all taken out models his Acc (along with all stats) will be D4. He can keep doing this as a special action until he is made critical. He can also (and must if he wants to fire again) re-load as a special action.
1 Privateer Captain – $86 (level 7)
| Re | Acc | Com | Dex | Con | Dam | Dar |
|---|---|---|---|---|---|---|
| D6 | D8 | D6 | D6 | D8 | D6 | D8 |
Au: D8
Skills: Leader. Inspirational, Armourer.
Equipment: Any.
0-4 Seasoned Hands – $58 (level 5)
| Re | Acc | Com | Dex | Con | Dam | Dar |
|---|---|---|---|---|---|---|
| D6 | D8 | D6 | D6 | D8 | D6 | D8 |
Skills: Grenadier.
Equipment: Any common. One uncommon.
1+ Mariners – $44 (level 3)
| Re | Acc | Com | Dex | Con | Dam | Dar |
|---|---|---|---|---|---|---|
| D6 | D6 | D8 | D6 | D6 | D6 | D6 |
Skills: none listed in the source.
Equipment: Any common.
0+ Deck hands – $36 (level 1)
| Re | Acc | Com | Dex | Con | Dam | Dar |
|---|---|---|---|---|---|---|
| D6 | D4 | D6 | D6 | D4 | D6 | D4 |
Skills: none listed in the source.
Equipment: Up to two common.
Orc and Goblin Pirates
Orcs and goblins are ferocious, with a fine line between fearlessness and stupidity they're a dangerous crew! The Orcs are very much in charge, the Admiral ruling with an iron fist. They use the goblins to do all the stuff they don't want to do! Very rarely a very powerful crew will entice a mighty Giant to join them, at some risk..
Orc Goblin Special Rules: Orcs never need test when a goblin is taken out within 6" as normally would be the case. They've come to expect it from their weaker friends.
Orc/Goblin Skills Table
- Stomp: Changes a 'taken out' result to critical in combat.
- Loot: If a model with loot takes out an opponent in combat both players make a Dex role. If the loot players is higher he steals one piece of randomly decided weaponry / equipment from the victim! Remove from the opponents roster and add to yours.
- Bite: Orcs and Goblins bite and scratch in combat with razor sharp teeth! Adds +1 Com bonus die.
- Bloodcurdling Roar: The model may unleash a dread-inspiring bellow as a special action. Any enemy model within 6"/ 15cm must score 3+ with a Dar test or be immediately spooked.
1 Admiral – $86 (level 7)
| Re | Acc | Com | Dex | Con | Dam | Dar |
|---|---|---|---|---|---|---|
| D6 | D6 | D6 | D6 | D8 | D8 | D8 |
Au: D8
Skills: Leader. Bloodcurdling roar, Bite.
Equipment: Any.
0-4 Orc Veterans – $58 (level 5)
| Re | Acc | Com | Dex | Con | Dam | Dar |
|---|---|---|---|---|---|---|
| D6 | D8 | D6 | D6 | D8 | D6 | D8 |
Skills: Stomp.
Equipment: Any common. One uncommon.
1+ Orcs – $44 (level 3)
| Re | Acc | Com | Dex | Con | Dam | Dar |
|---|---|---|---|---|---|---|
| D6 | D6 | D6 | D6 | D8 | D6 | D6 |
Skills: none listed in the source.
Equipment: Any common.
0+ Goblins – $36 (level 1)
| Re | Acc | Com | Dex | Con | Dam | Dar |
|---|---|---|---|---|---|---|
| D6 | D4 | D6 | D6 | D4 | D6 | D4 |
Skills: none listed in the source.
Equipment: Up to two common.
Dwarf Pirates
Dwarfs are small, stocky and very tough! The first Pirates to discover them on the island dismissed them out of hand, to their cost..
Dwarf Special Rules
- Short: Due to their short size Dwarfs are unable to sprint.
- Stubborn: Dwarfs require 2+ on Dar tests rather than the standard 3+. Normal modifiers still apply.
Dwarf Skills Table
- Tough as Nails: The model gains a bonus die for all Con checks.
- Stocky: The model gains a bonus die to Com checks.
- Hard headed: The model cannot be stunned.
- Armourer: Pistols only: An armourer likes to meddle and convert his pistols. Anyone with this skill may shoot pistols at long range with a -1 to Acc role [sic]. This is in addition to any minus for using a brace of pistols. Only the model with this skill may use converted weapons. You may not pass them on to others in the gang.
1 Dwarf Captain – $86 (level 7)
| Re | Acc | Com | Dex | Con | Dam | Dar |
|---|---|---|---|---|---|---|
| D6 | D6 | D6 | D6 | D8 | D8 | D8 |
Au: D8
Skills: Leader. Stocky, hard headed.
Equipment: Any.
0-4 Venerable Dwarf – $58 (level 5)
| Re | Acc | Com | Dex | Con | Dam | Dar |
|---|---|---|---|---|---|---|
| D6 | D6 | D6 | D6 | D8 | D8 | D8 |
Skills: Stocky.
Equipment: Any common. One uncommon.
1+ Dwarf Pirates – $44 (level 3)
| Re | Acc | Com | Dex | Con | Dam | Dar |
|---|---|---|---|---|---|---|
| D6 | D6 | D6 | D6 | D8 | D6 | D6 |
Skills: none listed in the source.
Equipment: Any common.
0+ Dwarf Rogues – $36 (level 1)
| Re | Acc | Com | Dex | Con | Dam | Dar |
|---|---|---|---|---|---|---|
| D6 | D4 | D4 | D6 | D6 | D6 | D4 |
Skills: none listed in the source.
Equipment: Up to two common.
Elf Pirates
Elves are tall, agile and fast. They pride themselves on their smart appearance and elegant clothing. Their equipment and attire are eagerly sought after by Privateers looking to sell on to the wealthy upper classes.
Elf Skills Table
- Agile: The model is agile and fast, it adds +1 to its movement allowance and +1 to the sprint Dex roll.
- Acrobatic: The model gains a bonus die when making Dex checks for crossing obstacles and Re checks for breaking from combat. All falling damage suffered by the model is reduced by one level.
- Fleet-footed: Bonus die for sprinting. Ignores terrain penalties (unless impassible).
- Knife thrower: Whilst charging or being charged by an opponent the model can attempt a quick knife throw! It does not require the use of an action or reaction point. For the purposes of this knife throw use the stats Acc D4 and Dam D4. Roll to hit as normal resolving any damage. If the enemy being charged is taken out, you may choose to continue the charge (if you wish to try for critical) or move half the charge distance in another direction. If you take out a charging enemy, he stops at half his charging distance. Otherwise the charge continues as normal.
1 Elf Commodore – $86 (level 7)
| Re | Acc | Com | Dex | Con | Dam | Dar |
|---|---|---|---|---|---|---|
| D8 | D6 | D6 | D8 | D6 | D6 | D8 |
Au: D8
Skills: Leader. Agile, Marksman.
Equipment: Any.
0-4 Lieutenant – $58 (level 5)
| Re | Acc | Com | Dex | Con | Dam | Dar |
|---|---|---|---|---|---|---|
| D8 | D6 | D6 | D8 | D6 | D6 | D8 |
Skills: Agile.
Equipment: Any common. One uncommon.
1+ Ensign – $44 (level 3)
| Re | Acc | Com | Dex | Con | Dam | Dar |
|---|---|---|---|---|---|---|
| D6 | D6 | D6 | D8 | D6 | D6 | D6 |
Skills: none listed in the source.
Equipment: Any common.
0+ Midshipman – $36 (level 1)
| Re | Acc | Com | Dex | Con | Dam | Dar |
|---|---|---|---|---|---|---|
| D6 | D4 | D4 | D8 | D4 | D6 | D4 |
Skills: none listed in the source.
Equipment: Up to two common.
Undead Pirates
The dead walk on this island. The deceased from other crews have formed together as Undead, led by a powerful Captain that strikes fear into all who glance eyes upon him. With dark magic they try to recruit new members into their deathly crew!
Undead Special Rules
- No fear: The Undead feel no fear and will never be spooked.
- Brittle bones: Undead are brittle and easily hurt. All undead suffer a -1 penalty to the result when rolling on the campaign injury chart. Note this isn't -1 level but -1 to the result. E.g. an Undead with a Con of D8 might roll a 4. This would be the 'wounded' result, once the -1 penalty is applied it becomes 3 and would be 'seriously wounded'. They also suffer -1 on the serious injury table. Undead may never use the medic or surgeon skills, (re-roll these results, rather than choose any skill). Nor may they have the 'surgery' territory.
- Raise the Dead: Any enemy model suffering a critical injury and being removed from play in combat with an Undead may be converted to the Undead! Both models in the combat make a Dar check. The Undead suffers -1 level and the target receives +1 level modifier as he tries to resist the Undead! If the Undead scores more than the opponents score he has been converted to the Undead and joins their roster! He suffers -1 Con as normal for crippled models but doesn't roll on the injury table as he normally would… he's already dead! All equipment is lost and the new Undead model must be re-equipped. He keeps his stats and skills but from now on rolls using the Undead faction skills. Note: Any model with an Amulet is immune to Raise the Dead. (Of course Undead also recruit in the normal way like other crews in the post battle sequence).
- Captured: Undead can never be captured. Any undead being captured is automatically killed and removed from the roster.
1 Undead Captain – $86 (level 7)
| Re | Acc | Com | Dex | Con | Dam | Dar |
|---|---|---|---|---|---|---|
| D6 | D8 | D6 | D6 | D8 | D6 | D8 |
Au: D8
Skills: Leader. Ghost, Necromancer.
Equipment: Any.
0-4 Wraiths – $58 (level 5)
| Re | Acc | Com | Dex | Con | Dam | Dar |
|---|---|---|---|---|---|---|
| D6 | D8 | D6 | D6 | D8 | D6 | D8 |
Skills: Ghost.
Equipment: Any common. One uncommon.
1+ Undead Pirates – $44 (level 3)
| Re | Acc | Com | Dex | Con | Dam | Dar |
|---|---|---|---|---|---|---|
| D6 | D6 | D6 | D6 | D6 | D8 | D6 |
Skills: none listed in the source.
Equipment: Any common.
0+ Undead Rogues – $36 (level 1)
| Re | Acc | Com | Dex | Con | Dam | Dar |
|---|---|---|---|---|---|---|
| D6 | D4 | D6 | D6 | D4 | D6 | D4 |
Skills: none listed in the source.
Equipment: Up to two common.
Undead Skills Table
- Previous life: This model remembers a thing or two from his life! Roll a D8: 1-4 = the first 4 Navy skills in order, 5-8 = the Pirate skills in order. E.g. a roll of 6 would mean he gets the Armourer skill, a 4 would mean he gets 'Grenadier' from the navy skill list.
- Ghost: The ghostly appearance of the model makes him a hard target! Anyone shooting at him suffers -1 level to Acc in addition to any other modifiers.
- Dead man walking: When taken out the model may crawl up to 3". In addition in each recovery phase roll a D6. On a roll of 6 he goes from taken out to injured. The -1 penalty for being injured is cumulative.
- Necromancer: A necromancer knows some truly dark magic! He can cancel ONE skill of an opponent shooting or engaging in combat with him. I.e. If the opponent has 2 skills that help him in shooting or combat the Necromancer can choose one to negate. It's only for the duration of that test, the skill is unaffected for the rest of the game. Note: This skill negates other skills NOT equipment, e.g. Amulet.
Female Pirates
There's no set faction list for female pirates. You can add them to any existing crew should you wish, e.g. Pirates, Privateers or Navy. Really as any rank you like, how you form your crew is down to your imagination!
Should you wish to have an all Pirate girl crew, we suggest you use the standard Pirate faction list for them.
Equipment Costs
| Item | Cost |
|---|---|
| Dagger | $4 |
| Ship's Pistol | $6 / $12 brace |
| Musket | $7 |
| Cudgel/ club/ maul | Free ($3 as second weapon) |
| Cutlass | $4 |
| Longsword | $5 |
| Axe | $4 |
| Hammer | $3 |
| Spear/ bayonet | $5 |
Uncommon Equipment (brace counts as 1 uncommon item)
| Item | Cost |
|---|---|
| Duelling Pistol | $8 / $16 brace |
| Blunderbuss | $10 |
| Bastard sword | $8 |
| Great hammer | $7 |
| Great Axe | $7 |
| Parrot | $10 |
| Powder Monkey | $10 |
| Spyglass | $15 |
| Lucky charm | $5 |
| Grenade | $20 |
| Fowler's Rum | $5 |
| Amulet | $5 |
Special Characters
There are some characters of such renown that their name and exploits has spread far and wide! For the right price they will join a crew and fight with them. They do not earn experience or have stat increases like normal models on your roster. Nor can you give them any extra weapons. There's no rule that two opposing forces can't use the same character, (we would assume it's someone different with the same stats). However, you may wish to make a house rule to avoid this. We make the miniatures to represent these characters, however you could use the same model as any normal crew member should you wish.
Some characters can only be recruited by certain factions. It may seem that some of the more infamous characters shouldn't be able to join navy crews. But some captains will recruit whomever they can in desperate times, or your navy crew may have gone infamous!
Even though some characters may hold the rank of Captain or Admiral, your standard leader remains in charge. They are just along for the ride, or to observe. They will never make leadership challenges.
Some characters have D20 on their stats (note that ordinary crew members can only achieve a max of D12), in the event of a +1 level to a maximum stat they get +1 bonus die instead. For shooting range purposes anyone with an Acc of D20 uses the D12 range, but D20 for the other roles.
Hiring Characters and Hired Hands
Characters or hired hands can be recruited in the post game phase like other figures. You may not choose special characters/hired hands in a starting gang. If you are eligible for recruits after rolling on the table, you may instead choose one character or hired hand (assuming you have the funds). Regardless of how many recruits you rolled, if you choose a character/hired hand that's the only recruit you can have that campaign turn. No crew may have more than 10% special characters and not more than 25% of the crew may be hired hands.
Giant
0-1 Giant – $240
| Re | Acc | Com | Dex | Con | Dam | Dar |
|---|---|---|---|---|---|---|
| D6 | D8 | D20 | D4 | D20 | D20 | D20 |
Orc and Goblin crews only.
On occasion a Giant will join an Orc and goblin crew for the right price. Getting him to turn up to fight or not kill his own crew is a different matter!
Equipment: Giant anchor, rocks, fists.
Giant Special Rules
- Giant stride: The giant's huge size means despite being slow he covers a lot of ground! He may never sprint but has a standard movement of 8"/ 20cm.
- Combat: The giant works in combat like other models, he uses his anchor, fist, whatever he feels like! He uses his Dam of D20 for combat.
- Large target: The giant is truly huge. He makes a large and attractive target. Anyone shooting at him receives +1 level Acc for that role. Anyone with an Acc of D20 receives a bonus dice.
- Hide: The Giant may never hide.
- Spooked: The giant will never be spooked.
- Reactions: The giant may only make reactions in combat, i.e. counter attack and riposte. He may not make reactions to shooting or movement, it's too insignificant to him!
- Rocks: The giant uses rocks, barrels and other debris to throw at his enemy! This works as a shooting action. They have a maximum range of 20"/ 50cm with no close or long range. Dam D12. Resolve as a normal shooting action. Rocks require 1 reload action as he selects another from the ground.
- Anchor: The giant can choose to swing his giant anchor from its chain as a shooting action. Any model within 4"/ 10cm from a 180 degree arc from the front of his base can be affected. Roll for each model within the swinging arc like a normal shooting action. The giant has an Acc of D8. The anchor has a Dam of D12. Normal cover rules apply as if from ground level. The Anchor needs 1 reload action as the giant winds the chain back up for another swing!
- Pick up: When the Giant is in combat with an opposing figure he may choose to attempt to pick it up as a special action (this special action may be done despite being in base contact). Both players make a Dex roll. If the enemy is higher (re-roll equal) he dodges the giant hand swiping at him! If the giant is higher roll a D4 on the following table.
| Roll | Result |
|---|---|
| 1 | He takes a look at this tiny being and doesn't find it interesting...placing it back harmlessly where it was. |
| 2 | Chew and spit. Giants don't like the taste of humans. But they don't find this out until they've had a little chew on them. The model suffers a D10 Dam hit and is spat out back where he started. |
| 3 | Throw. The giant throws the model 10"/ 25cm directly forward. The model suffers a D10 damage hit. Any model lying in the path of the flying missile is assumed to jump out the way. |
| 4 | Capture. The Giant likes pets. He tucks the model in his belt and takes it away with him! Follow the standard rules for a captured figure post game. |
- Bad mood: Giants can be quite sulky at times and don't like being told what to do! Every time the giant makes a shooting action (throws a rock or swings his anchor) roll a D10. On a roll of a 1 he will turn and throw a rock at the nearest friendly model instead! Resolve action as normal.
- Miniature world: The human sized world is small and insignificant to a Giant. He ignores all terrain and may step over building half his size or less if movement will allow. I.e. It costs him the distance in movement equal to the length of the building.
Skills: Bloodcurdling roar (as orcs).
Named Characters
0-1 Mad Jim Jones – $166
(Pirates, Privateers only)
Mad Jim is one of the most infamous Pirates around. Many claim to have met him or be him. In reality few are a match for this ruthless Pirate!
| Re | Acc | Com | Dex | Con | Dam | Dar |
|---|---|---|---|---|---|---|
| D8 | D10 | D10 | D8 | D10 | D8 | D20 |
Skills: Unscrupulous, Swashbuckler, Pistoleer.
Equipment: 2x Cutlass, Musket, Brace ship's pistols. Fowler's rum, Lucky charm, Amulet, Grenade.
0-1 Blackjack Davey – $132
(Pirates, Privateers, Navy only)
Blackjack is known for his cunning and leadership. Despite losing a hand and a leg he carries on like nothing ever happened! The hook and peg leg are like medals of honour!
| Re | Acc | Com | Dex | Con | Dam | Dar |
|---|---|---|---|---|---|---|
| D8 | D8 | D10 | D6 | D12 | D10 | D12 |
Skills: Tough as nails, Intimidating, Deadly, Beguiling.
Equipment: Duelling pistol, ship's pistol, cutlass, Amulet, Cudgel.
0-1 Captain McBride – $147
(Pirates, Privateers only)
Rumour has it that McBride was once a serving navy officer or even a captain turned bad. No one knows for sure but he's certainly wanted by a number of authorities.
| Re | Acc | Com | Dex | Con | Dam | Dar |
|---|---|---|---|---|---|---|
| D8 | D10 | D10 | D6 | D10 | D10 | D10 |
Skills: Backstabber, Marksman, Intimidating, Hard headed.
Equipment: Duelling pistol, Cutlass, grenade, ship's pistol, amulet.
0-1 Diamond Joe – $132
(Pirates, Privateers, Navy only)
Renowned for his remarkable accuracy with a pistol, Diamond Joe lost his ship during an encounter with an entire navy fleet. He now makes his living on land, often in the taverns at night causing trouble.
| Re | Acc | Com | Dex | Con | Dam | Dar |
|---|---|---|---|---|---|---|
| D10 | D20 | D8 | D8 | D10 | D8 | D12 |
Skills: Dead-eye, quick shot.
Equipment: Spyglass, cutlass, brace ship's pistols, amulet.
0-1 Governor – $109
(Navy, Pirates, Privateers only)
Sometimes a Governor will wish to join his Privateer crew on an exploration, for adventure, fame, riches or perhaps some underhand reason!
| Re | Acc | Com | Dex | Con | Dam | Dar |
|---|---|---|---|---|---|---|
| D6 | D10 | D12 | D8 | D8 | D8 | D10 |
Skills: swashbuckler, Beguiling, quick shot.
Equipment: cutlass, duelling pistol, Amulet.
0-1 Governor Daughter – $113
(Navy, Pirates, Privateers only)
Did she sneak on to the ship dressed as a cabin boy seeking adventure or did her naive father bring her along? Either way she can get involved in your adventures.
| Re | Acc | Com | Dex | Con | Dam | Dar |
|---|---|---|---|---|---|---|
| D10 | D6 | D6 | D8 | D6 | D6 | D10 |
Skills: Foolhardy, medic, surgeon.
Equipment: Brace ship's pistols, dagger, amulet, lucky charm, fowler's rum.
0-1 Elros Yavetil – $193
(Elf crew only)
Elros is an extremely agile and fast elf. His exploits and speed are the stuff of legend.
| Re | Acc | Com | Dex | Con | Dam | Dar |
|---|---|---|---|---|---|---|
| D20 | D12 | D6 | D20 | D10 | D6 | D12 |
Skills: Agile, Acrobatic, Fleet footed, Knife thrower, marksman, dead eye, pistoleer.
Equipment: Brace of duelling pistols, cutlass, amulet, lucky charm, musket.
0-1 Nuria Del Fuego – $158
(Navy, Pirates, Privateers only)
Nuria made her fame during her time leading an all female Pirate crew, their exploits became famous far and wide. Now she joins any crew with the right asking price.
| Re | Acc | Com | Dex | Con | Dam | Dar |
|---|---|---|---|---|---|---|
| D20 | D12 | D4 | D12 | D8 | D6 | D10 |
Skills: Pistoleer, Quick shot, Dead eye, Acrobatic.
Equipment: Spyglass, dagger, brace ship's pistols, amulet, lucky charm, fowler's rum.
0-1 Captain Ogring – $178
(Dwarf crew only)
The legendary dwarf captain first made his name through arm wrestling in local bars. Rumour has it he beat Mad Jim Jones in drunken fist fight!
| Re | Acc | Com | Dex | Con | Dam | Dar |
|---|---|---|---|---|---|---|
| D8 | D10 | D20 | D6 | D20 | D20 | D12 |
Skills: Deadly, Headlong charge, Tough as nails, Hard headed.
Equipment: great hammer, blunderbuss, grenade, amulet.
0-1 Jack-a-Roe Jones – $159
(Undead crew only)
Jack-a-Roe was a well-respected and wealthy Privateer in life. Reports that this ghostly figure is indeed him has caused fear and panic as to what foul demons are at work on the island.
| Re | Acc | Com | Dex | Con | Dam | Dar |
|---|---|---|---|---|---|---|
| D8 | D10 | D10 | D10 | D12 | D10 | D20 |
Skills: Fear, Ghost, Dead man walking, Necromancer, Pistoleer.
Equipment: Brace of ship's pistols, cutlass, cudgel, blunderbuss.
0-1 Admiral Dylan-Lloyd – $185
(Navy, Privateer only)
The Admirals career and respect has reached such levels within the Navy that he chooses his own postings and assignments. Often choosing to oversee the most dangerous missions or those of the highest secrecy.
| Re | Acc | Com | Dex | Con | Dam | Dar |
|---|---|---|---|---|---|---|
| D12 | D20 | D10 | D10 | D10 | D8 | D20 |
Skills: Pistoleer, Quick shot, Marksman, Dead eye, Swashbuckler, Combat drilled.
Equipment: Cutlass, Brace of duelling pistols, lucky charm, amulet, dagger.
0-1 Navigator – $46 (level 4)
| Re | Acc | Com | Dex | Con | Dam | Dar |
|---|---|---|---|---|---|---|
| D6 | D4 | D4 | D6 | D6 | D6 | D4 |
Special rules: A navigator isn't only skilled at navigating the oceans! If your navigator wasn't taken out during the game he adds a bonus die to the leader's Au roll when searching for equipment.
Skills: none listed in the source.
Equipment: Any common.
0-1 Surgeon – $56 (level 6)
| Re | Acc | Com | Dex | Con | Dam | Dar |
|---|---|---|---|---|---|---|
| D6 | D4 | D4 | D6 | D6 | D6 | D4 |
Skills: Surgeon, Medic.
Equipment: Any common.
0-1 Cabin Boy – $43 (level 1)
| Re | Acc | Com | Dex | Con | Dam | Dar |
|---|---|---|---|---|---|---|
| D4 | D4 | D4 | D4 | D4 | D4 | D4 |
Skills: none listed in the source.
Equipment: Up to two common, Spyglass.
Hired hands: Only Pirate, Privateer or Navy crews may recruit hired hands. They may be given weapons and earn experience like any standard model on the roster. The total number of hired hands can never equal more than 25% of your whole crew.
0-1 Missionary – $58 (level 4)
| Re | Acc | Com | Dex | Con | Dam | Dar |
|---|---|---|---|---|---|---|
| D6 | D4 | D4 | D6 | D6 | D6 | D6 |
Special rules: Divine power. Any friendly models within 6" will not be affected by fear or be spooked. (If the missionary is taken out this no longer applies.) The missionary will never be affected by fear or be spooked.
Skills: none listed in the source.
Equipment: Any common. Amulet.
0-1 Chef – $48 (level 3)
| Re | Acc | Com | Dex | Con | Dam | Dar |
|---|---|---|---|---|---|---|
| D6 | D4 | D4 | D6 | D6 | D6 | D4 |
Skills: none listed in the source.
Equipment: Any common. Meat cleaver (works same as great axe), Fowler's rum.
0-2 Cannon – $45 + crew
Only Pirates, Privateer, Navy and Dwarf crews may use a cannon.
You must assign 2 crew members to operate the cannon. During the game only they can operate it. Before games you can change which crew are assigned to it. The crew operate like any other gang member and can gain experience etc. They can at any point during a game leave their cannon duties and fight like other models. While operating the cannon they may not shoot their own weapons.
The cannon can be fired as part of a shooting action. Choose a direction to fire the cannon.
You can then alter the distance you wish to fire by choosing either D4, D6, D8, D10, D12, D20 + 12"/ 30cm.
E.g. for maximum range you would roll a D20 and add 12"/ 30cm to that roll.
The explosion at the final point affects a 4"/ 10cm diameter (use grenade template). Any models 100% under the template suffers D20 Dam hit. Any model partially hit (any part of the base is under the template) suffers a D12 Dam hit. Any model lying within the direct path of the shot direction is not hit unless within the final explosion area, it's assumed it whizzed over their heads!
Buildings: Should a building lye directly in the path of a cannon shot it will explode on the side of the building with the usual blast area. It will fly over any other terrain.
Reload: It takes 2 re-load actions to reload the cannon. Should the crew be reduced to 1 it takes 4 re-load actions.
Misfire: The cannon isn't always reliable or well maintained! When firing a roll of a 1 is always a misfire.
Roll a D4:
| Roll | Result |
|---|---|
| 1 | Destroyed! The cannonball explodes dramatically in the cannon! . Both crew suffer a D20 Dam hit. Remove the cannon from your roster (the crew stay but suffer damage as described). |
| 2 | Damaged: Something has gone wrong. The cannon doesn't get a shot off and may not be used for the remainder of the game. Both crew suffer D12 Dam hits from debris. |
| 3-4 | Misfire, The shot is a dud. Otherwise the cannon may fire again during another shooting action, once reloaded. |
Cannon movement: If both crew are still active you may move the cannon 3"/ 7cm during a movement action. A single crewmember cannot push the cannon by himself!
Well trained: While operating the cannon the crew cannot be spooked. If the cannon is re-loaded they may react (if a reaction is allowed) by firing the cannon. They cannot personally fire back while operating it. If a crewmember becomes stunned or injured this does not affect the cannon (unless a crew member is taken out of course!). The crewmember himself suffers the normal penalties but as long as he is still standing he can operate the cannon.
Campaign Sequence
A campaign is made up of a series of encounters between the gangs, each of which starts a 'campaign turn'. There is no rigid series of campaign turns, they occur as part of organising the games between players. Each campaign turn follows these phases:
- Challenge
- Determine Encounter. a. Choose to attack, defend or patrol. b. Look up encounter type. c. Set up table and scenery. d. Deploy gangs. e. Play encounter.
- Aftermath
- Resolve injuries
- Gain experience
- Calculate fame
- Work out funds a. Generate income b. Resolve ransoms, bounties c. Convert prisoners and collect fees
- Recruit
- Recruit members
- Buy equipment a. Upgrade headquarters b. Find next opponent!
Challenge
Players are free to organise their games amongst themselves as they see fit, on whatever timetable suits them. If two players can get together for a game of Cutlass, they can play through a campaign turn together. Although players with a bit more time to play may have a chance to get ahead through earning more money and experience, there is also more of a chance that they will lose gang members to injury and death and it will probably all balance out in the end.
Determine Encounter
Each player secretly chooses whether to attack their opponent's gang, defend their territory or patrol the island to look for opportunities and trouble. The two choices of the players are then looked up on the appropriate table below to determine the encounter type.
In certain circumstances the players may opt for one of the special campaign encounters given later, to rescue captured gang members, attack another's headquarters or determine the final reckoning.
We'll talk a bit more about famous and infamous gangs later. For the moment, all starting gangs can choose whether they want to be famous (mostly law-abiding and moral) or infamous (piratical and dastardly). In the case of famous vs. famous and infamous vs. infamous encounters, use any method you like to determine who counts as player 1 and player 2 – there is no advantage either way.
Once the players have the encounter type determined, and who is attacking and defending when relevant, simply look up the encounter in the previous Chapter to get started. The players play through the encounter as explained in the encounter description, until one side has won or lost as determined by the objectives.
Aftermath
Each encounter contains a description of what happens to the winners and losers during a campaign. This generally includes being able to capture opposing gang models, earning extra dollars and gaining bonus experience.
Encounter Charts
Infamous Vs Famous
| Infamous gang \ Famous Gang | Attack | Defend | Patrol |
|---|---|---|---|
| Attack | Running Battle. | Raid. Infamous gang attacks. | Ambush. Famous gang attacks. |
| Defend | Raid. Famous gang attacks. | Brawl. | Swoop. Infamous gang attacks. |
| Patrol | Ambush. Infamous Gang attacks. | Swoop. Famous Gang attacks. | Skirmish. |
Famous Vs Famous
| Famous gang 2 \ Famous Gang 1 | Attack | Defend | Patrol |
|---|---|---|---|
| Attack | Running Battle. | Treasure hunt. Famous Gang 2 Attacks. | Ambush. Famous Gang 1 attacks. |
| Defend | Treasure hunt. Famous Gang 1 Attacks. | Town defence. (special encounter) | Escort. Famous Gang 2 is the defender. |
| Patrol | Ambush. Famous Gang 2 attacks. | Escort. Famous Gang 1 is the defender. | Skirmish. |
Infamous Vs Infamous
| Infamous gang 2 \ Infamous Gang 1 | Attack | Defend | Patrol |
|---|---|---|---|
| Attack | Running Battle. | Raid. Infamous gang attacks. | Ambush. Famous gang attacks. |
| Defend | Raid. Famous gang attacks. | Brawl. | Swoop. Infamous gang attacks. |
| Patrol | Ambush. Infamous Gang attacks. | Swoop. Famous Gang attacks. | Skirmish. |
Transcribed as printed. The publisher's errata (see Errata and Clarifications at the end of this rulebook) states that, on the Infamous Vs Infamous chart, where it says 'Famous gang attacks', this refers to 'Infamous gang 1'.
Injuries
Both players go through the following phases together, witnessing each other's rolls and amendments to their Gang Log.
Any model that is taken out during an encounter may suffer a permanent injury. During this phase of the campaign turn, models that were taken out must make a Con check. Models that were crippled reduce their Con by one level permanently, applied before taking the test. (Of course it is possible for them to get an increase at a later date on that stat, and still achieve the maximum D12 on that stat). Look up the result on the Campaign Injury Chart.
Campaign Injury Chart
| Con score | Result |
|---|---|
| 1 | Dead. |
| 2-3 | Seriously Wounded. |
| 4-6 | Wounded. |
| 7+ | Fine. |
Fleeing an Encounter
A model that flees from the tabletop may have escaped immediate danger but that is no assurance that they will make it back home safely. Roll a D6 for each model that left the table whilst fleeing and consult the consequence of cowardice chart.
Consequence of Cowardice
| D6 roll | Consequence |
|---|---|
| 1 | Fell in a ditch. The model had a bad experience and is injured – treat this as if they had been taken out during the encounter and roll on the injury chart. |
| 2-3 | Fugitive. If the opposing gang won the encounter, the model has been captured trying to escape. If the opposing gang lost, the model manages to elude capture but is not available for the next encounter while he lays low. |
| 4+ | Lives to fight another day. The model makes it back to the gang's headquarters without incident. |
Dead
A dead model is removed from the gang and his weapons and equipment are lost (unless you have a storehouse, as explained in the Headquarters Upgrades section). You may wish to compose a short eulogy. But probably not, life is harsh.
If a leader is killed, the surviving model with the highest worth takes over as leader, with an Au equal to one level lower than the Au of the leader who died. If two models have equal worth, a leadership challenge is resolved (see later).
Seriously Wounded
Roll a D20 and consult the chart below to find out what has happened. Injuries that last 'until the next campaign turn' are in effect during the gang's following encounter.
- If a model suffers the same marked result twice (for example he loses both eyes) he is too crippled to continue and is retired from the gang, just as if he had died. The same happens to any model that suffers any combination of 4 or more marked results. It's assumed that if you roll the same marked result it's the other eye, leg etc.. not the already injured one!
If a model has a skill that contradicts the effect of an injury (such as hard-headed and punch drunk) the injury takes precedence and the skill has no effect. In terms of bonus dice and levels, injuries and skills are cumulative and may count against each other as normal.
Wounded
A model that is wounded suffers no lasting damage but is taken out of action for a short while. A wounded model may not take part in the next encounter. If forced to do so (for example his gang is set upon in a Headquarters Raid encounter) the model starts the encounter with an injured marker.
Absent Leaders: If for any reason a leader is unable to take part in the next encounter, the model with the next highest worth is given temporary control. They act as leader in the encounter, with an Au value one level lower than the real leader's.
Wound Chart
| D20 | Serious Wound |
|---|---|
| 1* | Punch drunk. The model is stunned whenever he is hit, in addition to any other results. |
| 2* | Lost a hand. The model may not use two-handed weapons or two weapons at a time and loses 1 level of Dex. |
| 3* | Lost an eye. The model loses 1 level of Acc. |
| 4* | Lost a leg. The model may not sprint, cross obstacles or climb. |
| 5* | Pierced Lung. The warrior loses 1 level of Con. |
| 6* | Broken back. The model loses 1 level of Re. |
| 7* | Broken shoulder. The model loses 1 level of Dam. |
| 8* | Cracked skull. Before each encounter, the warrior must pass a 4+ Con check. If failed, he does not take part (or is injured if forced to start). If a leader fails this test he struggles to the encounter but is at -1 level of Au for the duration. |
| 9* | Weak Heart. If the model is injured, he must pass a Con check of 4+ in each subsequent recovery phase or be taken out. |
| 10 | Broken Arm. Until the next campaign turn, the model may not use two-handed weapons or wield two weapons and loses 1 level of Dex. |
| 11 | Busted face. Until the next campaign turn, the model loses 1 level of Acc. |
| 12 | Broken Leg. Until the next campaign turn, the model may not sprint or cross obstacles. |
| 13 | Fractured Ribs. Until the next campaign turn, the model is at -1 level of Con. |
| 14 | Deep cut. The model is wounded (see below) for the next two encounters. |
| 15 | Suppurating wound. The model is wounded (see below) until it can pass a 4+ Con check in a subsequent campaign turn. |
| 16 | Stitched up. Until the next campaign turn, if the model sprints or becomes engaged in hand-to-hand combat he will immediately become injured. |
| 17 | Nerves shot. The model loses 1 level of Dar. |
| 18 | Twisted back. Until the next campaign turn, the model loses 1 level of Re. |
| 19 | Dislocated shoulder. Until the next campaign turn, the model loses 1 level of Dam. |
| 20 | Terrible scars. The model is wounded (see below) but gains the intimidating skill! |
Gain Experience
As crew members progress through battles they improve, learn new skills and sustain injuries or worse!
After each game add up the experience of each model using the chart below. Then check the crew levels chart to see if they have earned an upgrade.
Each fighter earns experience points in the following way:
| Event | Experience |
|---|---|
| Causing a 'stunned' result on an enemy model | +1 |
| Causing an 'Injured' result on an enemy model | +2 |
| Taking out an enemy model | +3* |
| Critical result on an enemy | +1 |
| Survives the battle (not taken out, fled or critical) | +D4 |
| Winning leader | +5 |
* only +1 if causing a second injury to cause the 'taken out' result.
Each model has a starting level depending on his status within a crew. For example a leader starts at level 7, a lowly able seaman for a navy crew at level 1. Check the rosters to see the starting level for each type of model. Each faction has a different name for its level of fighters, so for generic purposes we call the 4 levels, Lubber, ordinary hand, seasoned hand and leader.
Use the chart below to see if any models get a level up post game. The different levels also dictate how many and what type of weapons the model can select, i.e. common and uncommon weapons.
No fighter can go higher than level 21. You can continue to write down experience points though.
Level-up Chart
| Level | Experience | Weapons choice |
|---|---|---|
| 1 (Lubber) | 0-5 | Up to two common |
| 2 | 06-10 | Up to two common |
| 3 (ordinary hand) | 11-15 | Any common |
| 4 | 16-20 | Any common |
| 5 (seasoned hand) | 21-25 | Any common 1 uncommon |
| 6 | 26-30 | Any common 1 uncommon |
| 7 (Leader starting level) | 31-40 | Any |
| 8 | 41-50 | Any |
| 9 | 51-60 | Any |
| 10 | 61-70 | Any |
| 11 | 71-80 | Any |
| 12 | 81-90 | Any |
| 13 | 91-100 | Any |
| 14 | 101-120 | Any |
| 15 | 121-130 | Any |
| 16 | 131-150 | Any |
| 17 | 151-170 | Any |
| 18 | 171-190 | Any |
| 19 | 191-210 | Any |
| 20 | 211-230 | Any |
| 21 | 231+ | Any |
Level Up
For each level a model goes up after a game roll a D6:
- 1-4 = attribute raise. Roll a D8 and refer to the result below:
| D8 | Result |
|---|---|
| 1 | +1 Re level |
| 2 | +1 Acc level |
| 3 | +1 Com level |
| 4 | +1 Dex level |
| 5 | +1 Con level |
| 6 | +1 Dam level |
| 7 | +1 Dar level |
| 8 | Choose any attribute to raise (inc Au for leader) |
Note the maximum level any fighter (except certain special characters) can achieve is D12, though you can roll a D20 via any +1 level bonuses that may apply. (If you roll on a stat increase that is already at the maximum, i.e. D12 you may choose any stat to increase.)
- 5-6 = new skill. Roll a D20 on the New Skills chart below: (or leader may choose +1 Au level instead of skill).
If you roll a skill that you already have, you may choose from any of the skills listed here including your faction specific skills.
Once you have rolled for any upgrades update your roster sheet with any new stats skills. It's a good idea to mark down experience that a model earns during the game on the side of the roster sheet next to the appropriate model, then update the total in the experience box at the end. Your opponent should witness all roles.
New Skills Chart
| D20 | Skill |
|---|---|
| 1 | Backstabber – When engaged with a single enemy and attacking, the model may be moved from the front of the enemy to the side, or the side of the enemy to the rear, before any parries are made. |
| 2 | Beguiling – Enemies cannot counter-attack against this model, and riposte results are treated as a counter-attack. |
| 3 | Commanding Presence – Leaders only. Grants a bonus die when making Au rolls for the gang's action total. (Re-roll die if not a leader) |
| 4 | Dead-eye – The model gains a bonus die for all shooting Dam rolls. |
| 5 | Deadly – The model gains a bonus die for all hand-to-hand Dam rolls. |
| 6 | Foolhardy – The model gains a bonus die for all Dar checks. |
| 7 | Headlong Charge – If the model moves to engage an enemy model over open ground, it may make an immediate attack as part of the same action. This does not apply if the defender is behind an obstacle. |
| 8 | Inspirational – Leader only. Any friendly model within 6"/ 15cm cannot be spooked. Spooked models that move within range lose their marker at the end of their movement. Has no effect on fleeing models. (Re-roll die if not a leader) |
| 9 | Intimidating – Any enemy wishing to engage the model must first pass a 4+ Dar check. If the check is failed, the enemy model does nothing and the action is wasted. |
| 10 | Marksman – The model gains a bonus die for all Acc checks. |
| 11 | Medic – May perform a special action when in base contact with an injured model. A Dex check of 6+ by the medic allows the model to remove its injured marker. Cannot heal self. |
| 12 | Pistoleer – Negates the -1 penalty for firing a brace of pistols. |
| 13 | Quick-witted – The model cannot be surprised. |
| 14 | Sleight-of-hand – After both models have made their Com checks in hand-to-hand combat, the model may force a re-roll. The first result is discarded and both models roll again (with all of the previous modifiers) and the second result is used. |
| 15 | Sneak – Enemy must be able to see at least 75% of the model to stop it being hidden. Not spotted by spyglasses. |
| 16 | Surgeon – Re-roll an injury once for one model post game (not on himself). You must accept the second result. If you have another surgeon he can re-roll for another injured model, but never twice for the same model. |
| 17 | Faction skill 1. – The first skill on your faction specific skill list. |
| 18 | Faction skill 2. – The second skill on your faction specific skill list. |
| 19 | Faction skill 3. – The third skill on your faction specific skill list. |
| 20 | Faction skill 4. – The fourth skill on your faction specific skill list. |
Fame/ Infamy
A gang has a fame score that will change depending upon its successes and its deeds during encounters. As this increases or decreases the gang's fame or infamy will change accordingly, bringing benefits such as easier recruiting but also downsides like unwanted attention from their enemies.
If a gang has a negative fame score it is infamous, if it has a 1 or greater fame score it is famous. Gangs start with a fame of 0 and when created the player must choose whether they start as infamous or famous.
In each campaign turn, a gang gains and loses fame depending on its actions, as listed in the Fame Chart.
Gangs continue to gain and lose fame throughout the campaign. Look up their current fame value on the chart below to find out their standing and any effect this has on their income and recruiting prospects, plus any other special circumstances that may apply to them. These special circumstances are cumulative. For example, a gang at the rating level 'Buccaneers' have all bounties doubled and their hideout is known.
Fame Chart
| Action | If gang is famous | If gang is infamous |
|---|---|---|
| Winning an encounter | +5 fame | -5 fame |
| Defeat a gang with higher worth | +1 fame for every full $50 difference | -1 fame for every full $50 difference |
| Each enemy taken out | +1 fame | -1 fame |
| Each enemy crippled | -1 fame | -1 fame |
| Each enemy fled | +1 fame | +1 fame |
| Enemy leader taken out | +5 fame | -5 fame |
| Enemy leader crippled | +10 fame | -10 fame |
| Encounter-specific actions | Variable | Variable |
| Each member taken out or crippled | -1 fame | +1 fame |
| Leader taken out or crippled | -5 fame | +5 fame |
| Lost an encounter | -5 fame | +5 fame |
| Defeated by a gang with lower worth | -1 fame for every full $50 difference | +1 fame for every full $50 difference |
Work Out Funds
Gangs will earn money to pay for equipment and recruit new members, and can also improve its headquarters/ hideout. Any money not spent goes into the gang's treasury.
Income
Income comes from several sources, including monies earned from raids and treasure hunts, ransoms and bounties. A gang's source of income also depends on whether it is famous or infamous. Famous gangs earn money by being paid by local authorities and receiving donations from prominent members of society; infamous gangs get their cash from extortion and robbery.
The amount of income a gang generates in each campaign turn is determined by their leader's Authority. Make an Au test for the gang's leader and multiple the result by 5 to determine how many dollars the gang has earned for that campaign turn. Bonuses for the gang's fame and anything earned from the encounter are then added to this total.
Gang Fame Ratings Chart
| Fame | Gang type | Income | Recruit | Special circumstances |
|---|---|---|---|---|
| -75 or less | Traitors | +$100 | 2 | A gang reaching this level triggers the final reckoning event. |
| -74 to -60 | Buccaneers | +$75 | 1 | This gang's hideout is known. |
| -59 to -45 | Pirates | +$50 | 1 | All bounties on this gang are doubled. |
| -44 to -30 | Bandits | +$25 | - | Bounties can be earned on this gang. |
| -10 to -29 | Thugs | +$10 | -1 | None |
| 9 to -9 | Nobodies | None | -1 | None |
| 10-29 [printed as 'Oct-29'; corrected per the publisher's errata] | Do-gooders | +$10 | -1 | None |
| 30-44 | Protectors | +$25 | - | Ransoms can be paid for this gang. |
| 45-59 | Enforcers | +$50 | 1 | All ransoms on this gang are doubled. |
| 60-74 | Lawmakers | +$75 | 1 | Headquarters are known. |
| 75+ | Saints | +$100 | 2 | A gang reaching this level triggers the final reckoning event. |
Captives, Bounties and Ransoms
Models can be captured by victorious enemies in some encounters. What happens to them depends on whether they are infamous or famous, and whether their captors are infamous or famous.
Infamous models captured by a famous gang can be turned in for a bounty if the gang they come from is infamous enough (see the Gang Fame Ratings chart). A model's bounty is its value, excluding equipment. This may be doubled if the gang is infamous enough. This money comes from the authorities and is simply added to the gang's treasury. Infamous models exchanged for bounty are put in the gaol (see Rescue Attempts later on).
Famous models captured by a famous gang must be returned to their gang intact. However, the gang whose model is being returned must either pay $25 as a gratuity to the gang returning them or lose 2 points of fame for each member returned to them (the gang may pay for some and take the fame hit for others, as the player wishes).
Models captured by an infamous gang must be ransomed back to their leader if they are famous enough. The maximum the capturing gang can ask for is equal to half the model's value, excluding equipment (unless this is increased by the gang's fame level). The players involved are free to negotiate a lesser amount as they see fit.
If the owning player does not wish to pay the ransom, the infamous gang may attempt to recruit the captive to their cause. The leader makes an Au test and multiplies the result by 5. If this is higher than the captive's worth (excluding equipment) the captive agrees and becomes a member of the gang. If this check is less than the captive's worth they must either be executed (removed from the campaign for -2 fame each) or they can be kept locked up if the gang has the facilities to do so - another attempt to convert them can be made in the following campaign turn. It is possible to recruit humans to fantasy factions and vice versa (the only exception being Undead can't be recruited to other gangs, see the Undead faction rules). When trying to convert someone of a different race your leader's Au roll is at -1 level penalty. The new recruit keeps any skills, stats he has and uses the normal special rules from his faction, including the faction specific skills should he roll one as an advance. It's best to get an appropriate model to represent the recruit… we doubt your opponent will be in the best of moods and let you use theirs…
A leader that is exchanged, or given up for bounty or ransom, loses one level of Au in addition to everything else. Leaders recruited to another gang lose their Au attribute.
Gang members from gangs not yet infamous or famous enough to be worth a bounty or ransom can either be executed (-2 fame for each model executed) or they must be released. If released, they cannot take part in their gang's next encounter.
All equipment of a captive model is lost unless the capturing gang has a storehouse, in which case it can add the gang member's equipment to their stash.
Rescue Attempts
A gang that has had members captured and sent to gaol, or kept in a lockup (see the headquarters upgrades), can choose to make a rescue attempt instead of following the normal encounter procedure. To rescue members from the gaol the infamous gang must play the rescue attempt encounter against any famous gang. If the gang members are being held in another gang's lockup, the rescue attempt must be against that gang, but can only occur once the other gang's headquarters are known.
New Recruits and Outcasts
As a gang goes about its work earning money and establishing its reputation it will attract all manner of folk who wish to join them. The number and quality of these would-be gang members is sporadic, though the better known a gang is, the higher the quantity and quality of its potential recruits. Each campaign turn, make an Au roll for your leader and look up the score on the recruitment chart. All results are cumulative.
For example: A roll of 7 offers up a total of two Lubbers and one Ordinary Hand.
Bonuses from Fame are bonus dice; if a -1 bonus is listed for the gang's fame rating, the leader must make two Au rolls and use the lowest result.
A leader may actively seek recruits by paying $10 to grant a bonus die (or offset a minus die). Up to $30 can be spent for a total of +3 bonus dice.
Each faction uses a different name for the four ranks, so for generic purposes we use:
- Lubber = level 1 / 0 experience
- Ordinary hand = level 3 / 11 experience
- Seasoned hand = level 5 / 21 experience
Recruitment Chart
| Au Roll | Number of recruits available |
|---|---|
| 1-2 | No recruits. |
| 3-4 | 1 Lubber. |
| 5-6 | 1 Lubber. |
| 7-8 | 1 Ordinary Hand. |
| 9-10 | 1 Lubber, 1 Ordinary Hand |
| 11 | 1 Ordinary Hand, 1 Seasoned Hand. |
| 12+ | 1 Seasoned Hand |
Recruits have the profile given for starting gangs.
Recruits have the same worth as listed in the starting gangs section, and come with a free mace or cudgel. The cost of their recruitment must be paid for from the gang's funds, as must any equipment given to the recruits. Recruits may only be given common equipment when first recruited (unless the gang has a trading post in its headquarters). The player is free to recruit some, none or all of the fighters who offer their services, providing he can pay the price from his funds. Those he is not willing to recruit will head off to seek their fortune elsewhere and play no further part in the campaign.
Buying Weapons and Equipment
During a campaign, between games, a player is free to swap equipment between his fighters as he sees fit, simply make the adjustments to your gang log to account for this. Common equipment can be purchased and added to the gang at any time.
If a player wishes to purchase uncommon equipment, his leader must go looking for it. Nominate one piece of uncommon equipment and make an Au test. A 6+ is required to find the equipment. The player can expend up to $30 dollars to help with the search, with each $10 spent adding a bonus die to the roll.
All weapons and equipment of captured or dead gang members is lost unless a gang has a storehouse (see below). Gang members that are retired (made outcast) take their equipment with them.
Upgrade Headquarters
As well as recruiting new members, a gang can spend its money on fitting out its headquarters with additional features. A headquarters can only have one of each upgrade listed.
Storehouse – $125
Normally when a model dies or a captive is taken his weapons and equipment are lost. If a gang has a storehouse, it may keep weapons and equipment that are not being carried by any particular model and those of dead models and captives. These items can be distributed to gang members and swapped with fighters' equipment during any campaign turn. List these items in the 'stash' section of the gang log.
In addition, the storehouse allows the gang to protect its treasury. A gang with an intact storehouse at the start of a Headquarters Raid encounter can prevent a quarter of its money being looted by the attacker.
Lockup – $100
A lockup allows a gang to keep prisoners. Infamous gangs can attempt to recruit prisoners to their cause in each campaign turn, while famous gangs earn a $10 holding fee for every prisoner they have in the income phase of each campaign turn.
Trading Post – $175
A trading post brings much needed supplies to the gang. A gang with a trading post can purchase uncommon items without need for the leader to go looking for them. In addition, they can sell unwanted items from models or a storehouse at 50% of their normal cost (these are removed from the gang log).
Surgery – $200
Though not necessarily that clean or well-equipped, a surgery does give the gang a dedicated space to treat their wounded. A surgery allows one re-roll per campaign turn on the Campaign Injury Chart. This works in the same way as the Surgeon skill. So you can make additional rolls for each surgeon, but must accept the second result and can never role more than once for the same model.
Watchtower – $100
A watchtower allows the gang to keep an eye out for attackers, giving them advance warning of a headquarters raid. The presence of a watchtower means that defending gang members start the encounter on the table on a D6 roll of a 3+ rather than a 4+.
Drinking Hole – $75
Perhaps not the most salubrious establishment, the drinking hole nevertheless attracts the right sort of person to the area, and its wares make the patrons more amenable to becoming gang members. A gang with a drinking hole at their headquarters gain +1 level recruitment bonus.
Legitimate Business – $100
Whether it's a chandler, warehouse, brothel or other establishment, having a legitimate business provides a useful cover for the gang's illegal activities. While this does limit the gang's business a little, it also lessens unwelcome attention. A gang with a legitimate business may ignore up to -10 points of fame deduction in each campaign turn. Only an infamous gang may purchase a legitimate business.
Barracks – $100
Being able to quarter your men away from the general populace stops rumours spreading quite so quickly, making the gang's plans and intentions more secret. The downside is that their efforts may go unnoticed by their superiors. A gang with a barracks may ignore up to +10 points of fame earned in each campaign turn. Only a famous gang may purchase a barracks.
Leadership Challenges
If a model ever gets a greater worth than his leader, i.e. his total worth including weapons/ skills (skills are worth $10 each) a leadership challenge ensues. (Note the Mutiny rule for Pirates that means another model only needs to come within 10 points of the leader for a challenge). If a leader is killed or captured, the model with the next highest worth becomes the new leader, with an Au equal to one level lower than his predecessor. If a captured leader is later returned, he resumes control unless the stand-in leader had gained higher worth, in which case a leadership challenge is resolved between them.
In an infamous gang a leadership challenge takes the form of a fight with weapons. Both models make a Re test to see who attacks the other, with the winner striking first. If neither are taken out by this round of fighting, including any counter-attacks and ripostes, the initial defender becomes the attacker and fights back; swap attacking and defending until one of the models is injured or taken out. The owning player takes the part of the leader and another player takes the part of the challenger. If the challenger is victorious he becomes the new leader with an Au equal to one level less than the model he has just beaten (who is no longer leader and loses his Au attribute and any related skills). Models taken out in a leadership challenge must test for campaign injury as normal.
In a famous gang, the leader must make an Au check against a Dar test taken by the challenger. If the challenger equals or beats the leader's Au score he ousts him in a bloodless coup and becomes the new leader, with an Au equal to one level less than the model he has just beaten (who is no longer leader and loses his Au attribute and any related skills).
If a model loses in a leadership challenge, he gains the 'loyal' skill. A loyal model never challenges for leadership. A defeated leader becomes loyal to the new leader but any existing loyal characters lose the skill if another model takes over. This can mean that anarchy ensues if a challenger ousts a leader as previously unsuccessful challengers try their hand again at the new top man!
If there are potentially multiple challengers, the highest worth model challenges first. Once this is resolved, the situation is assessed again and if there are still models with a higher worth another leadership challenge is resolved until all models are either loyal or have a lower worth than their new leader.
Ending the Campaign – The Final Reckoning
Once a gang reaches a certain level of fame or infamy, or has amassed enough wealth and fighters, it is in a position to claim overall power on the island. The other gangs recognise this and there is a last scramble for control before the final reckoning between the most powerful gangs.
When a gang passes the criteria for the final reckoning, all of the players in the campaign must come together to organise the endgame. The last stage of the campaign is similar to a knock-out tournament, with the gangs fighting it out until one remains the overall victor. In each round, the gangs are paired off against each other, fight the final reckoning encounter, and then are either banished from the island or proceed to the next round.
In this phase, we use a new measurement of the gang's power that takes into account both their fame and their wealth. Multiply the gang's fame by 10 (convert negative fame into positive for this purpose) and add the result to the gang's worth for their total gang value.
For example, a gang with -47 infamy and a total worth of $1,246 has a gang value of 1716 (470+1246).
In each round the gang with the highest value is pitted against the gang with the lowest value, the gang with the second highest value goes against the second lowest value and so on. In the unlikely event that two gangs have exactly the same value, randomise which one will face the other gang.
If there are an odd number of gangs in a round, the gang with the highest value is given a bye into the next round. Although this may seem like quite an advantage, this is offset by the fact that a gang that does not fight an encounter in a round does not get to complete a campaign turn and so will not earn any extra experience or money, giving the lower-ranked gangs a chance to catch up.
Each encounter is played out as detailed in the final reckoning encounter, and is part of a normal campaign turn. Once enough rounds have been played to whittle the remaining gangs down to two, the last gangs have a final reckoning against each other to determine the overall winner and ruler of the island!
Special Campaign Encounters
These encounters represent unique options and situations that arise during campaign play and so have not been included in the Encounters section. Rescue Attempts and Headquarters Raids are available to players in certain situations as explained in their description. The Final Reckoning scenario is used to conclude the campaign once a gang reaches a fame / infamy of 75 / -75, or has a total worth of $5,000 or more.
Campaign Scenario – Rescue Attempt
One gang is attempting to liberate their companions from incarceration. Of course, there is a good chance that a few other incarcerated individuals may gain their freedom along the way.
Sides: Attacker and defender.
The defender uses his entire gang. The attacker must decide how many of his gang members he wants to send on the raid. The more he sends, the harder it will be to prevent the alarm being raised, but the more fighters he will have at his disposal once the action kicks off. The attacking gang must include a leader and at least five other gang members (unless the entire gang is smaller than this!), up to half the gang (rounding up).
Location: The scenery must include at least one building close to the centre of the table that represents the gaol or lockup where the prisoners are being held. There should be plenty of buildings and other cover for the attackers, representing the area around the gaol or the defender's headquarters.
Deployment: Before putting down any models, the attacker secretly notes down from which table edge he will launch his raid. The defenders deploy first. Starting with the defending player, the players take it in turns to place a defender on the table, at least 8"/ 20cm from any table edge, until all defenders have been place. The attacker then deploys his entire gang within 4"/ 10cm of the table edge he noted earlier.
Objectives: The attackers are trying to rescue their fellow gang members from the prison.
An attacking model must enter the gaol or lockup and successfully open the cells. The freed prisoners can then attempt to escape. If all of the models belonging to the attacking gang are freed from the cells, the attacker wins. At the start of any recovery phase the attacker can call off the rescue attempt, in which case the encounter ends and the defenders win.
Special Rules: The sentry and alarm rules from the Raid encounter are used.
Freedom! – An attacking model must enter the central building and expend a special action unlocking a cell. One random model being held prisoner is released – note that this includes all prisoners being held in the gaol or by the defending gang, not just those from the attacking gang! If the released model is from another gang, it flees immediately and takes no part in the encounter (and will rejoin his own crew). If the freed model is from the attacking gang, it is placed inside the building and can join in from then on, but is unarmed. Once all prisoners are freed the game ends at the next recovery phase and the attacker wins.
Campaign Aftermath: All freed prisoners are returned to their gangs with no equipment. If the attack was against the gaol (rather than a gang's lockup) the defenders earn $10 for each prisoner still held at the end of the encounter.
Standard post battle experience in addition:
Each freed prisoner earns +2 experience.
A model that unlocked a cell receives +5 experience.
Campaign Scenario – Town Defence
The two gangs find themselves fighting side-by-side when the town is attacked by brigands. Although they have a common enemy, each is still striving to outdo the other by seeing off the highest number of determined foes.
Sides: Both players may use any gang members that are available. You will also need other models to represent the attacking brigands – if you ask the other players in the campaign nicely, perhaps you can borrow theirs!
Location: The encounter takes place on the outskirts of the town. One half of the table should contain several buildings, while the other should have a scattering of cover for the attacking brigands.
Deployment: Both players roll a D6. The player that rolls highest deploys his gang anywhere within the half of the table that represents the town. When he is done, the other player may deploy his whole gang.
The players then take it in turns, starting with the highest scoring player, to place a brigand model touching the opposite table edge, until ten brigands have been placed.
Objectives: Both gangs are trying to put down as many of the attacking brigands as possible. Each player needs to keep track of the number of brigands taken out or made to flee by his gang. The encounter ends when there are no brigands left on the table. The players score one point for each brigand caused to flee or taken out, and -1 point for each of their own gang taken out/ crippled or fled from the table. The gang that scores highest are the winners.
Special Rules: The two gangs cannot attack each other, only brigands, and can only react to actions performed by the brigands. All brigands have the following profile:
| Re | Acc | Com | Dex | Con | Dam | Dar |
|---|---|---|---|---|---|---|
| D6 | D6 | D6 | D6 | D6 | D6 | D6 |
Each brigand is armed as indicated by the models used.
Any brigand that is taken out or is fleeing is immediately removed from the table and the player that caused their removal earns a point. Brigands never react.
At the start of each recovery phase, D6 brigands appear. Starting with the player who had the latest active gang, the players take it in turns to place these new arrivals touching the table edge where the brigands were first deployed. Keep a running total of the number of brigands that attack (including those deployed at the start), as this will be used to calculate the gang's reward at the end of the encounter.
The players share control of the brigands. When the active player declares an action, he is doing so for both his gang and the brigands. He performs an action as normal with one of his gang members, and once it has been completed must perform a similar action with a brigand model as if it was one of his gang members. This can include any of the special actions as appropriate. When the brigand has performed its action, the player returns to perform an action with one of his gang and so on. The other player can react to the actions of brigands, or the active player can choose to become inactive as normal.
For example, a player declares a shoot action with an action total of 4 remaining. He can shoot, or perform a special action, with up to four of his own models and four brigands.
Campaign Aftermath: Each gang earns $15 for each brigand they took out or caused to flee. In addition, both gangs receive a bonus to their fame depending on the number of brigands that attacked. As the story spreads, the actions of the more impressive gang are inflated. The winner gains 1 point of fame for every full five brigands that attacked; the loser gains 1 point of fame for every full ten brigands involved.
Standard post battle experience in addition: A model receives +1 experience for each brigand he took out/ caused to flee (in addition to the normal experience earned for this).
Campaign Scenario – Headquarters Raid
If the players get a raid result from the encounter tables, and the defender's headquarters are known, the attacker can choose to mount a headquarters raid instead of a normal raid. Unlike a normal raid, this is a full-on attack.
One of the local gangs is getting a bit too powerful and needs taking down a peg or two. One brave gang leader has taken it upon himself to administer this punishment by launching an attack against the other gang's headquarters. Of course, he sensibly waits until some of the gang are busy elsewhere before the assault begins.
Sides: Attacker and defender. The attacker can field any available gang members. The defender starts with his gang leader and a random number of gang members. Roll a D6 for each and every gang member in the defending gang (including those injured); on a roll of a 4+ the gang member must start the encounter. Other defending gang members will turn up during the course of the encounter as explained in the special rules.
Location: The scenery should represent the camp of the defending gang, with at least five buildings and other features that seem suitable for the headquarters the defenders possess.
Deployment: The defender deploys his gang first, anywhere at least 8"/ 20cm from any table edge. The attacker then deploys his entire gang, anywhere touching a single table edge.
Objectives: The attackers are trying to cause as much damage and mayhem as possible, by looting and burning the headquarters buildings. The attacker chooses to end the raid at the start of any recovery phase. Attacking models gain loot markers and inflict raze points during the attack. In order to win, the combined total of loot points and raze points must be higher than the number of models that launched the attack, otherwise the defender wins.
Special Rules: All attackers can perform the special actions 'loot' and 'raze' when they are inside a building. Each special action earns them a loot point or a raze point. Loot points steal money from the defending gang, while raze points do damage to their headquarters, as discussed in the aftermath section. Each building can only be razed or looted a certain number of times. Keep track or place markers on the table for the number of loot points and raze points earned for each building. Every time a model attempts to raze or loot a building, roll a D6. If the score is more than the total of raze and loot points taken from the building, the action is successful and the attackers gain another loot or raze point; if it is equal to or less than the combined total of loot and raze points, no extra points are earned and no more points can be earned from that building during this encounter.
At the start of every recovery phase, the defender receives reinforcements. Half the number of models not yet on the table will turn up (rounding up). These models are decided randomly from amongst those not yet involved in the encounter. This includes all available gang members, even those that must start the encounter injured because they are suffering from wounds.
The defenders have the advantage of fighting on well-known turf and will fight hard to protect their homes. The defending leader has +1 Au level for the duration of the encounter and defenders can never be spooked.
Campaign Aftermath: After the encounter, total up the number of loot points and raze points earned by the attacker. Each loot point is worth $D10, roll for each point, which is taken directly from the defender's treasury. If all of the defender's money is taken, any additional loot points are wasted. If the defender has a storehouse, he may protect one quarter of his treasury – this money cannot be taken by the attacker.
Each raze point may have done permanent damage to the defender's buildings. Roll a D6 for each raze point, on a score of 5+ one randomly determined headquarters upgrade has taken a damage point. An upgrade with one or more damage points cannot be used until it has been repaired, at a cost of $25 for each damage point.
Additional Detail: If the players have appropriate scenery and don't mind a little extra book-keeping, they can keep track of individual raze points on separate headquarters upgrades. Rather than randomly allocating damage, it can be rolled for each particular upgrade that suffered the raze points. For example, the storehouse suffers 3 raze points, roll three D6 and inflict a damage point for each 5+ scored.
Standard post battle experience in addition: For each Loot or Raze action a model performs +2 experience.
Campaign Scenario – The Final Reckoning
One gang has made its bid for power and all of the others are jostling for position to take over. As anarchy and confusion engulf the island, old allegiances mean nothing and the only repercussions are survival or extinction. Two of the contesting gangs square off in an attempt to rid themselves of their opponents.
Sides: Both gangs can field any available members.
Location: Fighting has broken out all over the island; in the docks, in the towns, out in the countryside and around the plantations. This encounter could take place anywhere.
Deployment: The gang with the highest gang value deploys first, as their greater reputation makes their movements more widely known. The player chooses any table edge and deploys his gang members anywhere up to 18"/ 45cm from that table edge. His opponent then deploys anywhere on the table, at least 18"/ 45cm from any enemy gang member.
Objectives: Both gangs are trying to hurt or drive off the other. This is a fight to the end. The gang that has all of its members taken out or crippled, or fled the table, loses the encounter.
Special Rules: No quarter is asked or expected, but once the tide swings against them, the gang members will start to realise that perhaps it is better to live to fight another day. Make a note of the number of starting gang members for each gang. Once the number of gang members that are not crippled, taken out or fled the table drops below half this number, the gang is said to be broken. Members of a broken gang cannot recover when they flee. If a model flees, simply remove it from the table.
Campaign Aftermath: The winner will go on to fight in the next round of the final reckoning; the loser is out of the campaign. The winner has a normal campaign turn after the encounter.
Standard post battle experience.
Gangs for One-off Games
Players may wish to play one-off encounters (perhaps because they have been knocked out of a final reckoning and are waiting for the other players to decide a winner!). The players simply agree a number of dollars to spend on their gangs and use the rules given in the starting gang section of this chapter. We recommend starting with a bit more money for one-off games, perhaps $750 or $1000.
However, to make things a bit more interesting, the players have the option to give their gangs a bit of ad-hoc experience. The players do this just before they resolve which encounter they will play, and should make their rolls in front of each other in the interests of openness. Each is free to make a number of experience increases to their gang. Nominate a gang member and roll a D6. A roll of 1-5 allows the player to increase one random attribute while a score of a 6 gives the gang member an additional skill (use the Recruits Attributes and Skills chart). Experience comes with its risks though. For every experience increase given to the gang, the player must also roll on the Serious Injuries chart for a random gang member. Generate each skill increase and associated injury at a time; the player is free to stop adding experience when they choose.
A Note on Openness and Good Sportsmanship
The miniatures the players use should make it clear what weapons and equipment the gang members have. However, players may not be aware of the particular capabilities of their opponents. Thus the players are not obliged to share any gang information other than equipment. However, with lots of models on the table it can sometimes be confusing to remember who is who and what your opponents models are capable of. Thus it is in good spirit and in the interests of courtesy for a player check revealed information with his opponent – such as saying 'Is that the model with D10 Com?' or 'I've forgotten which one of those two has the bloodcurdling roar...' If in doubt, err on the side of openness.
Pirate Names
Below is a list of Pirate names, some from history some not, to help you name your crew members. Feel free to mix and match and add titles to create unique names!
Anne Bonney, Bartholomew Roberts, Bartholomew Sharp, Benjamin Hornigold, Black Bellamy, Calico Jack (Jack Rackham), Captain William Kidd, Charles Vane, Edward England, Edward Teach (Blackbeard), Enrique Brower, George Booth, Grace O'Malley, Jan de Bouff, John Morris, John Morris, John Nutt, John Ward, Mary Read, Peter Easton, Richard Sawkins, Richard Worley, Thomas Paine, Thomas Tew, Tobias Bridge, James Kelly, John Bowen, Abigail Scurvacious, Akita Rains, Alvilda, Baginda Roco Greenberg, Benito De Soto, Benito Zaragoza, Black Bart, Black Max, Broderick Roughknuckles, Captain Berry Silvey, Captain Manuel Pardel Rivero, Carlsen Short, Charles Anand, Cordelia Simonova, Daniel Elfrith, Diabolitio, Diaz Fuente, Dirty Yuma Mancuso, Duke Hemphill, Eddie Bravo, Edgar Slashface, Enrique Xavi, Fedor Silva, Felipe Dylan, Fernando Montero, Frances Connolly, Frances Fischer, Fritz Pearls, Gooch Levin, Heathcliff Taylor-Jones, Henry Every, Henry Morgan, Houdini Karjakin, Jamaica Jim, John Calles, Jon Delucia, Jonah Brand, Leon Blackmore, Mad Felix Searcy, Madame Xena Velasco, Magnus Giri, Melba Qualls, Montgomery Mc.Humphrey, Nathaniel Butler, Norbie Campbell, Norton Guthrie, Nyai Di Mclain, Raja Mick Fincher, Red legs Greaves, Red Shaw lacey, Rickson Rybka, Roberto Cofresi, Ronaldo Pires, Tina Sommer, Tiny Butch Cutler, Tuan Silverman, Tyler Stovall, Vassily Belous.
Errata and Clarifications
Printed at the back of the book by the publisher.
- Page 90, and in the quick rules on gang fame ratings, there is an errata: instead of 'Oct-29' it should be '10-29'.
- Grenades: they are one use per game, not one use and then you have to buy it again! The blast uses the template at the back, so it is a 4" diameter blast like the cannon.
- What happens to a model that is crippled and removed from play (i.e. suffering a permanent -1 Con) and that already has a Con of D4? Answer: As D4 is the lowest a stat can go it doesn't get any worse. Remember you still roll for injury and the same result on the serious injury chart twice, or 4 marked results = dead! (If you wanted to make a house rule that a model with Con D4 is dead on receiving a crippled you can.. though harsh!)
- Post game rolls for experience etc are NOT open ended.
- Undead character 'fear skill' can be used as the intimidating skill.
- Character skills: Some characters use faction specific skills. So if you can't find it under the main skills table look through the factions. We should have made it clearer where they are but people will quickly learn what skill does what.
- P83 Infamous v Infamous table: where it says 'Famous gang attacks', this refers to 'Infamous gang 1' on the chart.