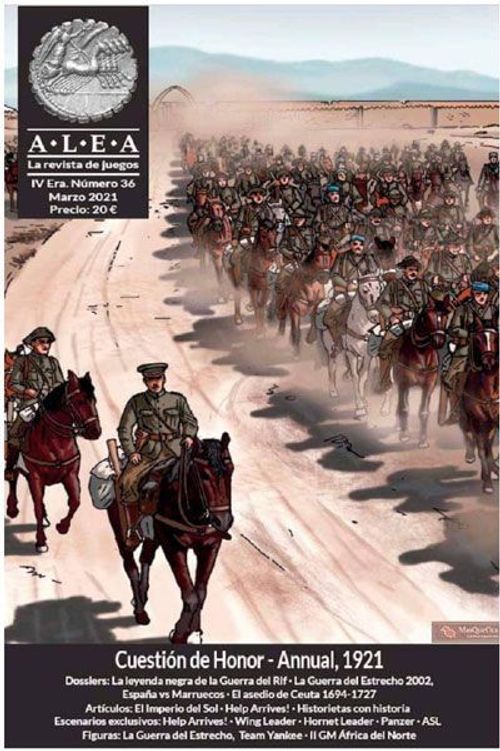
Cuestión de Honor: Annual 1921
Cuestión de Honor: Annual 1921 Rulebook
Table of Contents
Table of Contents
1. Introduction
The game, A Question of Honor, Annual 1921, is a wargame for two players that simulates the events that occurred in the Spanish withdrawal from Annual during the colonial war of the Rif of 1921, which was fought between the Spanish army and the rebellious local guerrilla army led by Abd-el-Krim.
One of the most epic and at the same time terrible events was the cavalry charge that the 14th Alcántara Regiment carried out against the enemy to ensure the safe withdrawal of the Spanish troops and that ended with the death of almost all of the horsemen of this unit, thus becoming one of the most epic cavalry charges in history, comparable to those of Balaclava, the 7th American Cavalry, Las Navas de Tolosa or Gaugamela.
2. Game Components
The game has a map of 40x55 cm, 1 help sheet for the players with tables and deployment, a sheet of 216 counters and punched markers, and these rules.
Map
The map represents a specific area of the Rif (Morocco), where the fighting took place. It is overprinted with a hexagonal pattern that regulates the movement of the counters. Each hexagon represents 750 m. and displays the main characteristics of the terrain where the action took place.
The game lasts 15 turns, and each one is about 12 hours of real time representing the actions between July 22 and 29, 1921.
Counters and Markers (see Figure 1)
The counters of the combat units represented correspond to both the Spanish army (brown tones) and the Riffian guerrillas (blue color). The order of battle of Annual, 1921 is the historical one, where infantry, cavalry and artillery units are present. The size of the Spanish units ranges from sections (25 men), to cavalry companies / squadrons (100 men). All of them are encompassed within a regiment as a larger nominal unit. In the case of the Riffian units, they are battalions, companies, sections of guerrillas on foot and squadrons of cavalry, organized in Harkas (tribes).
The markers control the various states of the units and general functions of the game.
Types of Combat Units
See Figure 2, for the details of the factors of the units and their capabilities.
- Officers / Warlords: includes the names of historical officers and warlords as their identities are known. On the face of the token they carry the image of the leader (when it has been possible to obtain it) and on their back they become a generic Officer / Chieftain token that comes into play when the original leader is eliminated. Its capabilities include that of favoring the combat of units under its command, as well as recovering them from panic.
- Infantry / Guerrilla on foot: includes the Spanish infantry and the Riffian guerrillas on foot. These are the main units of both armies.
- Engineers: Spanish units with special capabilities to establish improved defensive positions, in addition to fighting as infantry. They have a yellow identifier icon (castle) in the upper right hand side of the card.
- Cavalry: units on horseback with specific combat capabilities.
- Artillery: indirect fire support units, the rules additionally establish the possibility that the Spanish pieces can be captured.
- Machine guns: fire support units. Spanish units of this type can also be captured.
On the back of combat unit counters (Infantry, Engineers and Cavalry), the fatigue of the units is indicated by the accumulation (steps) of casualties that they acquire and are identified with a red band. A counter on its obverse is considered intact (2 steps). If it is hit with 1 loss it will be turned over (it now has 1 step), and if it is hit again it is eliminated from the game. See Figure 3.
Artillery has no casualty steps, so if they take casualties they are eliminated from the game.
- Officers / Leaders: they have factors that have to do with their abilities to exercise command. The reverse of these units shows an officer in generic mode assuming command when the titular officer is eliminated. Generic officers tend to have more modest characteristics. See Figure 4.
Types of Markers
- Dismounted cavalry. When cavalry acts "dismounted" it is indicated with a marker. When the player decides to "mount" the unit, the marker is removed from play. There is no limitation on the use of these markers.
- Captured units (artillery and machine guns, counters with a white background).
- Column.
- Disorganized unit (DS).
- Unit in panic (PA).
- Improved defenses, (defenses with a red stripe at the top).
- Defenses under construction, (defenses).
- Deserting units, (Indigenous Police with white background).
- Turns (T).
- Leadership Control (marker with symbols +, - with the image of Abd-el-Krim).
3. Sequence of Play
The game is divided into 15 turns. And each turn has the following phases:
- Reinforcement Phase.
- Command Control Phase.
- Initiative Phase.
- Phase of Activation and Execution of Actions.
- Administrative Phase.
Reinforcements Phase
Both players receive reinforcements throughout the game at the entry locations detailed on the help sheet that comes with the pack. Reinforcements can begin their actions during the same turn they are activated.
The reinforcements of the Spanish army are not really such, but troops in retreat from the different positions established in the area. The Navarro and Cheif columns are considered reinforcements. Both columns start the game in panic status (PA marker).
Indigenous Police units that, after passing the initial desertion roll, are still in Panic (AP) at the end of the first turn must NOT recheck morale this turn.
The reinforcements for the Riffian guerrilla side can come into play in a normal way or in a different way depending on two events:
a) The success of the enlistment of the leader Abd-el-Krim.
NB. He is the guerrilla leader who historically was able to rally around him, and his harka (Beni Urriaguel), the rest of the nomadic tribes of the Rif against the Spanish. The game represents his leadership ability with a control table located on the game map, which we call Abd el-Krim's Leadership Control.
This table has several numbered squares that go from 0 to 5, through which the leadership marker runs. Some of the events that occur during the game affect this marker at the end of each turn as follows:
- If the number of Spanish pieces eliminated is greater than that of the Guerrilla and / or a Spanish fort is captured, the marker moves one position in favor of the Riff (for example, it goes from 1 to 2).
- If the number of counters eliminated from the Riffian guerrilla is greater than the Spanish eliminated, the marker moves to the left, unfavorable to the Riffian (it goes from 3 to 2).
- An equal number of casualties produced leaves it without effect.
Once the maximum leadership level is reached (marker sits in box 5), the Guerrilla player will be able to assign new irregular troops from nearby Kabilas to his cause. This control of Guerrilla reinforcements is carried out every turn. This is in addition to the reinforcements established normally in general deployment.
For each turn that Abd-el-Krim's leadership control is at level 5, one Riffian unit may be recovered from the total of those eliminated at the Riff player's choice. It will have no effect on the calculation of victory conditions.
If there are no eligible eliminated tokens in the casualty box (on the map) that can be entered as reinforcement, this is not done, and the opportunity is lost.
b) Desertions of indigenous troops from the Spanish side
Another way to increase the troops of the Guerrilla faction is through desertions of the local African units (only the Spanish Indigenous Police) and only if they are in a panic status (PA).
Checking of the Indigenous Police units: before starting the initiative phase of the first turn, Cos (mias) (Companies) 5th, 6th, 10th and 11th of the Indigenous Police must roll 1d6 for desertions for each one of them. 8th Co deployed in El Batel does not make a desertion roll.
Results:
- 1—4: Desert (do not come into play).
- 5—6: They are still in the column.
Units affected by desertions become part of the reinforcement box, entering (one per turn) when the leadership table level is at 5.
NB. This unit, with the majority of Spanish commanders, had a high percentage of Rif natives among its troops, so historically it had a high number of desertions during the war.
If these units are in a panic, they must carry out the morale check in the administrative phase. If the result of the morale check (see Morale Check) results in Desertion, it is removed from the hex where it is and the unit is placed (in its desertion version, white background) in any hex where there is a nearby Guerrilla leader.
Command Control Phase (chain of command)
At the beginning of this phase, both players will simultaneously check which units are in command and which are not.
Any (combat) unit that is at a distance equal to or less than the command range value is considered under command.
The distance is calculated without counting the hex where the officer is up to the hex where the unit is the object of the check (inclusive), and without the terrain affecting to where it is traced, except for an enemy ZOC (Zone of Control).
The command range is the numerical value on the officer counters within a yellow hexagon (see Figure 4).
Any officer can try to put more distant units in command by sending orders via runners. For this he will need to roll 1d6.
The distance to the hex with the unit will be subtracted from the officer's command range value. Combine this value and the roll of 1d6. If it is greater than the distant hex, then the order arrives and the unit can be activated. See Example 1.
In the situation at the beginning of the command control phase, the Spanish units A, B and C check if they are in command of any of their two closest commanders Z and Y.
Unit C is in command of Y despite being a generic officer, its value is 1, but it is enough to reach it since it is adjacent. On the other hand, unit B is not within command range, and it cannot attempt to make a successful command link roll either, as these generic commanders do not have that ability.
Commander Z can also command unit C when he is 3 hexes away (same as his command rank of 3), although it is not necessary because he is already in command. Unit B is not in range of either of the two commanders, but Commander Z can try to link it when he is within 6 hexes and does a dice roll that results in a 4, which added to his command value (3) gives a total of 7 hexes away. With Unit B only 5 hexes away, it can take orders in the next phase without any problems.
Unit C is 9 hexes from the only commander with the possibility of sending him a runner to link him to the chain of command (Z), but the maximum distance a link can be sent is 6 hexes, so this unit stays without command. It can only defend itself if it is attacked in the next movement phase.
If the officer trying to check command control is from another regiment / harka of the unit to be commanded, he will have a -1 penalty to the die result. Out of command units more than 6 hexes away can never be linked with orders.
Generic officers do not have the ability to send links to activate. Units not in command may not perform offensive actions or move except in panic.
Initiative Phase
Players will have to determine who has the initiative on each turn, that is, who has the ability to activate units first on that turn.
A die will be rolled to determine initiative, with the following die modifiers:
- If the player won the initiative the previous turn, +1 to the die.
- Abd el-Krim's leadership table adds +1 to the Riffian player if it shows a value greater than 2.
Both modifiers can be totalled together. In the event of a tie, the die is rolled again.
Activation and Action Phase
In this phase, and once the initiative of the turn has been determined, the player who has it can initiate the activation of an officer, which will be done alternately with the opponent. The player with the initiative activates his commanders and units in command and when finished, the other player does his activation.
An officer can activate as many units that are under his command or within linking range of his chain of command, but he can only do so once per turn.
These alternate officer activations will be at the discretion of the players, being able to activate one, some or none. When neither player wishes to activate any of their officers, or there are no more activations possible, the turn ends.
Actions:
- Move
- Move and combat
- Move and assault
- Artillery bombardment
- Improve positions
When an officer activates units in his phase (provided they are in command) he may take 1 action with them each turn. Units that have already taken the action can defend themselves if they are attacked later in the same turn.
The actions will be carried out in the order that the player determines, except for: the artillery support fire, which in melee assaults or cavalry charges must be resolved prior to the assault. If the player who does not have the initiative is attacked with an assault or cavalry charge, he could take an action with those units in reaction to the enemy attack. The types of actions that players can take in this phase are explained in their corresponding sections.
Administrative Phase
This is carried out either once all the actions of active units are finished or because both players do not want to perform more actions in that turn. The phase controls the following scales:
- Control of casualties and Leadership Table of Abd el-Krim. The losses of both players are counted and the Leadership Table is updated.
- Morale check. Panic Units (PA) can be recovered.
- Withdrawal of markers. Disorganized (DS) markers are removed.
- Victory conditions check. If any of the conditions are met, the game ends on that turn.
4. Terrain
The map represents several types of predominant terrain in the area. These influence movement and / or combat. Rivers that are crossed by main roads do not have a penalty for the type of terrain they cross.
The types of terrain and their modifiers are listed on the Help Sheet. The types of land are:
- Open Land.
- Hills.
- Mountains.
- Main river.
- Wadi (Dry riverbed).
- Green area.
- Fortifications / Urban areas.
- Roads.
- Track.
- Improved positions.
Terrain heights have an effect on combat, as shown in the terrain effects table, except when both units (attacking and defending) are at the same level.
5. Stacking
In each hex a maximum of 5 stacking points is allowed for both sides. An infantry company, a cavalry squad, and an artillery battery each equal 1 stacking point. Commanders do not count for stacking purposes. These rules must be adhered to at any stage of the game.
If at the end of each turn there are excess stacking points in a hex they are removed from the game. Stacks have an effect on the results of artillery fire in the form of a modifier when this type of fire is used. The higher the density of units in the hex, the greater the chance of bombardment damage.
Exceptions: at the beginning of turn 1 and as a result of the entry of reinforcements, there are stacks that exceed 5 points. During the development of the activations of turn 1, no stacking can exceed this limit.
A hex occupied by a column cannot be occupied by any other unit, except in the Dar Drius fortification. This hexagon can exceed the stacking limit up to a maximum of 11 points.
6. Movement
During his Movement Phase, a player can move any number of his units as he wishes, with the maximum capability given by his movement factor (MP, movement points). Movement takes place through contiguous hexes in any direction or combination of directions.
Movement can be affected by terrain and by enemy ZOCs, and can be increased by special movement procedures. If a unit does not have enough movement points to enter a specific hex, it will not be able to do so. During the Combat Phase, units on both sides may advance or retreat; this is not considered "movement" and does not consume MP.
MPs cannot be stacked from turn to turn, nor can they be "loaned" to another friendly unit. Units cannot enter a hex where an enemy unit is unless it is an assault. The cost to enter each hex type is listed on the Terrain Effects Table found on the Player Aid Sheet.
An activated unit or stack of units must end its actions before another unit or stack initiates theirs.
Types of Movement
Depending on their characteristics, the units have different movement capabilities. The range of a unit's movement is indicated by its Movement Rating. There are three types of units depending on how they move: foot, cavalry, and transported artillery.
-
Normal movement: the one carried out by the units according to their movement factor and the terrain they travel through. The movement cost of each terrain type is listed on the Terrain Effects Table on the Player Aid Sheet.
-
Movement in column: only the Spanish player can do it, and it reduces the movement of all the units that make up the column to the factor of the counter with the lowest movement factor. The columns do not increase their movement by traveling on roads. To form a column there must be at least 5 units.
The phasing player must have the units he wishes to incorporate into the column stacked in the same hex at the beginning of the movement phase. Declare the formation of the column or inclusion / exclusion of units and place a column token in the starting hex, temporarily removing the grouped units off the map so that their factors can be consulted in case of combat.
The columns may not end this type of movement adjacent to an enemy unit, or attack in the same turn with any of the units that make it up (except cavalry).
-
Movement on roads: cavalry units that move along roads, as long as they do not do so as part of a column with other units, increase their movement factor by 1 point. This "bonus" cannot be used and attack in the same turn.
-
Infiltration movement (Riffian guerrilla): NB: Infiltration was a special movement tactic employed by the foot troops of the Abd-el-Krim guerrillas exclusively. Knowledge of the terrain led to movements not detectable by the Spanish.
The Riffian infantry units are the only ones capable of this type of movement. It is performed during the own movement phase, ignoring enemy ZOCs that would otherwise affect it. Infiltration means that the infiltrating unit, when entering an enemy ZOC, is not obliged to stop. But if you use this type of movement, you cannot attack that turn, or end up adjacent to an enemy unit, but you can defend yourself.
-
Counters and movement mode: artillery units have the particularity that they do not have the "weakened" mode on their back, but this is used to indicate the "moving" mode instead of the "deployed" mode.
Zones of Control (ZOC) and Movement
They are the set of 6 adjacent hexes around a unit that is not Disorganized or in Panic. ZOCs affect unit movement in several cases.
A unit stops moving immediately upon entering an enemy ZOC with normal status. Entering a ZOC has no additional MP expense, but exiting it costs +1.
Your own ZOC does not affect your units' movement.
A unit occupying a hex in an enemy ZOC at the beginning of its Movement Phase may leave that hex and enter another hex in an enemy ZOC, but only after first moving to a hex that is free of enemy ZOC.
The Rif guerrilla units in infiltration movement are not affected by the ZOCs.
7. Combat
There are various forms of combat depending on both the type of attacking and defending units.
Units use their combat factor (see Figure 2) to attack. Units with a value of "0" cannot attack.
In artillery units this value is colored red and is its bombardment factor. It is used for artillery support fire. All units defend with their defensive factor (see Figure 2).
In addition to the combat factor, the units have another factor marked on the counters within a yellow circle, which is their combativity value (see Figure 2). Combativity factors are compared between attacking and defending units, and the difference between their values is used to increase or decrease the dice roll that resolves combat.
If more than one unit attacks more than one enemy unit, both players decide which unit leads the fight with its combativity rating. If that produces casualties, the units leading the combat are the first to assume them (see chapter 8, Losses due to casualties).
If there are several units with different combativity, the attacker first and then the defender chooses the combativity factor of each side (that is, which unit bears the weight of the combat). The difference between these will affect the combat dice roll. Defender combativity in assaults / cavalry charges is not taken into account.
Normal Combat
Normal combat is the one that occurs when one's own unit or own stack is adjacent to an enemy unit or stack. It is generally carried out by infantry units, engineers, dismounted cavalry and machine guns, establishing a combat ratio between the two, a difference in the combativity factor and then applying different modifiers that affect the roll of the dice.
Resolving Combat
Regardless of the type of combat, the resolution is carried out according to the following procedure:
-
The attacker declares an attack, units involved, type of attack and target units (some attacks can provoke enemy reaction movements: assaults, cavalry charges and attacks on columns).
-
The fire factors of the participating units are added, differentiating the units that carry out an indirect artillery bombardment (these combats are resolved first), and allows us to know if the target unit/s have been disorganized.
-
The combativity values chosen by the players for that combat are compared.
-
The total Combat Rating of both units is compared. The result of the proportion is rounded to the whole number: to the upper integer (up) if the remainder is greater than or equal to 0.50, and to the lower integer (down) if it is less than 0.50. A final combat ratio is obtained, which is selected in the columns of the Combat / Round Table. This ratio (column) can be altered by a modifier that slides it to the right or left depending on the type of combat. The final column intersects the row for the 2d6 roll value (including the difference in combativity and other die modifiers).
-
The results of the Combat or Assault resolution table are applied as the case may be. The possible casualties for both players in the form of steps, turning the pieces to their weakened side, retreating and / or marking the enemy piece with any specific status that the attack may have brought on it. And then the actions are continued, if any, of this or the next determined combat.
Bombardment: Group 1 artillery bombards the enemy hex, from 5 to 6 hexes away. Being at different distances, the reference range is always the furthest unit. The bombardment factors are 12 (8 + 4), 6 hexes away. The artillery is supported by a commander with a leadership value of +1 that will be added to the die roll. The objective is on hills and the artillery is on flat ground, giving the defender a +1 to their favor on the die roll. There is no penalty for stacking against the defender (4 or more units). The differences in modifiers are +1 for a leader for the Spanish, +1 for different heights for the Riff, that is to say, 0. The die (only one, since it is a bombardment) gets a 5, which in the Table indicates a DS (disorganized). The marker (DS) is placed on the hex. It affects all enemy units.
Attack: in this case they do not charge, since there is a machine gun unit, from the two adjacent Spanish units. The attack factors are (5 + 3) = 8, while the defenders (4 + 2) = 6, which when DS is divided in half, remaining at 3. The proportion of 8 vs 3 is reduced to 3 vs 1 to the factor of the Combat Table. The Spanish chooses who leads the attack and his combativity is 3. The Riffians have in the best of cases a combativeness of 2, which must be reduced by -1 due to the effect of the DS. Although the Riffian leader is in the hex of the attack, he cannot contribute his leadership value for that cause either.
The result of the die roll (two in this case, since it is a normal combat) is 9, +2 for the difference in combativity and -1 for the difference in heights in the combat, leaving the result at 10. Consulting the table, the result indicated is D1R1: the Riff must take 1 casualty, and the first is obliged to do it with the one who led his defense, with which he will turn over the infantry unit counter and retreat 1 hex with the entire group to complete the second part of the table result.
Attack on Spanish Columns
Group 3 of enemy units, an infantry harka supported with a section of machine guns and a leader, is attacked by the Spanish units of groups 1 and 2.
All Spanish units are on orders and have moved to the positions that we see in the illustration. The attack is resolved with two sequential actions during the combat phase.
If a column is attacked, it is defended with a joint defense factor that is obtained by adding all the defense factors (*) of the units that make it up (Commanders / Leaders units are not included), and the result is divided by the units that contribute their factors.
* In attacks on columns, combativity is not counted in the sum of the defense factors.
The attacker adds all the units participating in the combat and divides it by 2, rounding down. Column attacks have a bonus of one column shift to the left on the Combat Table (defender friendly) for the defenders' compact defense.
If there are cavalry units in the column (that are not in Panic mode), they can react to the enemy attack if the attacked player so wishes. In this case they do not contribute their defense factor to the joint defense of the column.
The defensive reaction is resolved first before the attack on the column (see Defensive Fire), but the result of the reaction is not considered for the attack on the column previously declared. In other words, the consequences for both sides are in unison, even if they come from separate battles.
Important: the reaction of the cavalry in an attack on its column occurs when the cavalry units are part of the column itself. Any protection units adjacent to the column that are not part of it, if they enter combat, are treated as in normal combat or charges.
Units in a column may not make a tactical retreat as a reaction. The only possible reaction is indicated if the column has cavalry units in normal mode and the defensive player so decides. The column can be withdrawn as a result of combat, and all the units that make it up can do so together in this case.
NB: Often when an advancing column was attacked, the only force capable of immediately activating for protection was the cavalry, which could break out of formation and deploy offensively and draw enemy fire or attack if required.
On the Riff player's movement turn, two harkas A and B in command have moved adjacent to a Spanish column C (whose composition and status of their units is broken down in the box in the illustration).
The Riff declares that he will attack together with his two harkas. Harka B is weakened from previous fights, and it has its factors reduced.
The Spanish player then declares that he is going to make a reaction with the cavalry unit D that is inside the column. The reaction is resolved before the attack on the column. In the reaction, the Spanish player chooses to attack the Riffian unit A and proceeds to compare their combat factors (it is not a cavalry charge).
The Regular cavalry, D's combat factor is 4, the Riff's defense factor 3.
Combativity is not taken into account in this type of reaction. There are no terrain modifiers that affect it, nor does the Spanish leader support with his leadership (it only affects normal combat and charges).
The 4:3 ratio is reduced to 1:1. The dice roll is an 8, which on the Defensive Fire Combat Table has a D1 result. The Riff player must take a kill with harka A, which will be effective when the main attack ends. Then the main attack on the column is resolved. The defensive factors of the column are 3 + 2 + 1 (the latter is the unit in panic that has its value reduced to 1).
The cavalry unit is not counted now, as it has been employed before. The total defense factor is divided by the number of units that contribute factors, 6/3 = 2. The Riff has an attack factor of 5 + 3 = 8 and is reduced by half per column attack (this does not take into account possible damage previously suffered by cavalry action).
The ratio remains 4:2, which is reduced to 2:1 for the Riff. The Spanish player benefits from a shift to the left in the Compact Defense Combat Table (for columns only), so the final attack ratio is 1:1. There are no more modifiers to the die. The Riff's roll is a 10, which results in a D1R1. The Spanish player assumes a casualty step (eliminating the engineer unit) and removes the column 1 hex in the opposite direction to the Riff units.
Artillery Support
The Riffians called them "stone killers". Artillery units do support fire against enemy hexes, but do not participate in the infantry attack, or in charges or assaults.
The maximum range of artillery fire is 6 hexes for both sides.
That is, first the artillery support fire declared by the attacking player is elucidated, and only then the main attack (infantry). The artillery attacks the enemy hex with the aim of producing casualties and leaving the enemy "weakened and disorganized", so that later the main attack (either normal or assault) has more options for success. Artillery units are not eligible to lead an attack and defend against attacks on their hex with their Defense Rating. Multiple artillery units can pool their bombardment factors if they are in range of the target.
If two or more artillery units are at a different range, the one with the longest range will be taken as a reference to resolve the combat. Otherwise they can bombard individually by the choice of the attacking player.
The table of artillery bombardment will be used; see Help Sheet to consult the results. Depending on the power of the attack and the distance to the target, the possibility of damaging the enemy is different.
The stacking level of the bombed hex has a +1 modifier if the number of existing troops exceeds or equals 4 stacking points. The terrain occupied by the defender will modify the die by -1 if a fort is bombarded (see Table of artillery bombardment).
Bombardment (artillery only). Artillery units can also bombard the enemy without necessarily being associated with any subsequent attack by friendly units. The procedure is the same for artillery support, and as long as they are not behind a hexagon that prevents spotting their location.
Close Combat (Assault and Cavalry Charges)
General rule. Hand-to-hand combat (assault) represents a very close or hand-to-hand fight with the objective of overwhelming, destroying and / or putting the enemy to flight in the hex where he is.
The player can assault an enemy hex from adjacent hexes with valid units for it (infantry or cavalry), as long as they have not conducted any other type of attack that turn.
To determine the result of the assault, the Assault Factor (value within a black square in units with that capacity) and the attacker's Combativity factor (that of the defender in assaults / charges is disregarded) are added together. The value obtained is compared with the defense factor of the units against which it is assaulting / charging, and the proportion of the attack is found. Any unit that does not have an assault rating cannot conduct assaults. Columns cannot be assaulted.
If the charge is made against machine gun units and / or Improved Defenses hexes, the defender has a defense bonus of one column shift to the left, which is cumulative if he chooses to remain at his post/s. Machine gun units cannot participate in assaults on enemy hexes, although they can advance to the hex vacated by an enemy unit as a result of a friendly unit assault. In defense they use the defensive factor to solve the combat.
If there are disorganized units (DS marker), they reduce their factor by half. Artillery units in an assaulted hex defend with their defense factor and cannot fire artillery. In assaults and charges, the player being attacked can always react previously to the outcome of the attack just after it being declared by the attacker.
The player in his reaction can:
a) Do defensive fire.
The defending player chooses from among his units the one that will carry out the defensive fire, as well as the target unit participating in the charge. Only one per side (the one that carries out the reaction and the target unit of it). Their combat and defense factor are compared (not including combativity) and resolved on the Combat Table (see Help Sheet).
Important: in Reaction Fire, the player who fires becomes the attacker for this attack solely for the purposes of results on the Combat Table. The result will be applied immediately.
Charging as a reaction by the defender is not allowed. The defending unit participating in the defensive reaction fire can only participate in the subsequent defense if there is an assault with a defensive value of 1, in the case that it survives the reaction combat.
Subsequently, it will be the attacking player who ultimately decides to continue with the planned assault. If canceled, the units involved cannot make another attack that turn (but they can defend themselves).
b) Carry out a tactical retreat.
Units that voluntarily react with an eviction move from the target hex are considered in a "tactical retreat".
This type of movement differs from a forced retreat as a result of combat (called Panic, AP marker). This action does not consume movement points, nor do terrain penalties affect it, and it must be carried out by all units present in the hex (except those that cannot be deployed).
Units in tactical retreat may only do so once and within 2 hexes. A second reaction (either defensive fire or tactical retreat) cannot be applied to a unit already subject to an exploitative charge by cavalry.
A unit that makes a tactical retreat exhausts its movement that turn.
Cavalry Assaults (Charges)
Assaults where at least one cavalry unit is included are called "cavalry charges", regardless of whether there are more units involved.
If the assault succeeds in dislodging the enemy from the hex (either by voluntary withdrawal or by combat), the cavalry, and only it, will be able to voluntarily carry out an exploitative movement against the new hex to which the enemy has withdrawn, with the subsequent additional combat having no penalty for the attacker for this extra combat. If they choose to charge again, the units making the second charge will do so and become Disorganized.
The Spanish stack formed by units A, B, C, D and E adjacent to the enemy units W, X, Z and Y and in turn, declares an assault on the Riffian hex with the intention of dislodging them from that hex and at the same time producing casualties. The Riff player declares in turn that he will carry out a reaction (green arrow) as Defensive Fire (he could have chosen tactical retreat). For this he chooses the Riffian unit W, and A will be the target unit. The defensive fire ratio is 2:2, which is reduced to 1:1. Now the attacking unit is the Riff. There are no extra modifiers, although the terrain is a dry riverbed (it has no effect), and the leaders of both also do not provide bonuses at this time. The roll of the dice is 8, which in the Combat Table column of DF is 1 loss for the attacker.
Then the charge is resolved. Spanish units charge with an Attack Rating of 17 (5 + 8 + 2 + 2). The Riffians defend with 8 (4 + 3 + 1). The Riff unit that participated in the reaction will always defend with a defensive factor of 1. The attack ratio 17:8 is reduced to 2:1.
The column modifiers are applied first, since the attacker uses cavalry units (2 columns to the right) and the defender has machine gun units (one column to the left). The net offset is 1 column to the right, so the final ratio is 3:1. The dice will have a modifier for leaders of -1 for the Riff and +2 for the Spanish, so it will finally be +1 for the attacker. The roll of the dice is 9 + 1 = 10, which is indicated on the Assault Table as D1R*. The defender has a casualty, which he chooses to take with the machine gun unit (X), which cannot be retired in a cavalry charge with that result. The harka (Y) and leader (Z) retreat one hex and the Panic marker is placed.
Rounds in which cavalry units participate have an assault bonus from the 2-column shift to the right in the Assault Results Table (see Help Sheet). Subsequent combats from pursuing do not benefit from the bonus and are treated as normal attacks.
All Spanish units may advance to the vacant hex left by the Riff's retreat, since they participated in the charge. The Spanish player decides to exploit the success of the charge and, since he has 2 cavalry units A and B, he declares an attack on the enemy again (tokens Y and Z). This action means that you have DS in these two units. Attack factors are halved by DS: (4 + 2) / 2 = 3. The defender, when in Panic, always defends with 1. The attack ratio is 3:1 and the combativeness is +4 for the attacker (which is reduced by -1 by DS) and 0 for the defender (in Panic). There are no leader bonuses and no terrain effects. The dice roll is 7, the result of which on the combat table is D1, so the defender loses one step, and the operation ends.
Editor's note on the source: the opening words of this charge example sit beside the illustration in the printed PDF; the sentence above is reassembled in printed order.
Rifian Shooters, "Paco"
NB: The "Pacos" were how the Spaniards vulgarly called these Riffian shooters who did precision fire. They took that name from the sound with echo (Pah-Coh), which was heard when they fired their bolt-action rifles.
This type of fire can only be carried out by the Riffian player: dismounted infantry and cavalry units, (placing a "Paco" marker above the unit). They are not units as such, but fire type markers.
The effects it can produce on the target hex are:
a) Disorganize the hexagon with this type of fire, since more than casualties it produced chaos by not knowing its origin.
b) Elimination of an officer if found in the target hex. An elimination result in urban areas / fortifications will be ignored; it is considered as having no effect.
The result of this type of attack is checked in the "Paco" Shooters Table. These markers are associated with any Riffian token. When the Riffian player decides to carry out an attack of this type, he places the "Paco" marker in the hex where the fire comes from (there must be friendly units in it). This type of attack can only be made once per turn against a hex. Results are applied immediately. If there is more than one officer in the hex, it is randomly decided which one receives the casualty.
Effects of Combat
Losses due to Casualties
Units can take casualties as an effect of combat (loss of steps). Most units (except artillery and officers) have the values considered at full capacity on their obverse, while their reverse (indicated by a horizontal red band at the bottom of the counter) shows the unit, but in its "weakened" mode. When a unit takes a casualty it is turned on its reverse side. If it takes another casualty, it is eliminated from the game. Units cannot recover from their losses during the game.
Exception: Riffian Guerrilla units can return to the game as reinforcements in their normal mode, although they still count as casualties for the calculation of Victory Points.
The map has a casualty control box for both players where the eliminated counters accumulate throughout the game turns. Each box has a differentiated sector to accumulate casualties in the current turn, which once computed (for the purposes of Abd-el-Krim's Leadership Counter) will be placed in the consolidated casualty zone.
Casualties are used to count the points that determine the levels of victory at the end of the last game turn.
Disorganization (DS)
Occurs as a result of an attack against a hex containing one or more enemy units. A second DS result on a tile or stack is not cumulative, nor does it have additional effect. A hex can be disorganized (affecting all the units that are in it) by: artillery fire, machine guns, assault and fire from Riffian marksmen. DS units are marked by placing the corresponding marker on top.
Effects:
a) They move and fight at half their normal factors. b) They cannot conduct assaults or cavalry charges. c) Combativity is reduced by -1 for normal combat. Combativity cannot be less than 1. d) Officers do not add the leadership bonus in any type of combat. But they are not affected by this marker. e) ZOC do not apply. f) They cannot use Infiltration movement.
When a hex is disorganized, it cannot take additional damage from other artillery bombardments. Disorganized units do not need to pass a morale check (only those that are in panic).
Retreated for Combat
Units that have to retreat as a result of combat must do so towards hexes that do not have enemy ZOCs.
Units out of Command
They are units that are not in range of hexes to receive orders from an officer. They cannot attack or move (except as a product of combat), but they defend themselves normally.
Units in Panic (PA)
Units may panic as a result of an adverse dice roll when entering as reinforcements (for the Spanish side only) or as a result of assault or charge combat (affects both sides). When a hex is vacated because of an assault or cavalry charge, one of the combat results can be "Panic". The retreating units will be identified by placing an AP marker on them.
If units in Panic are attacked, they defend with a combativity factor of 0 and a defensive factor of 1. Units in Panic cannot attack. They can defend themselves. They cannot move within 2 hexes of an enemy unit that is in a normal state (unless they are part of a column with units in good order). If Panic affects Indigenous Police units, they could suffer a desertion result on the Morale Table during the Morale Check phase. A deserting unit is removed from the board of the Spanish side and placed in its "deserter unit" mode (white background), along with a Riffian leader closer to the hex it originally occupied. These defectors are redeployed on the next turn and must comply with the stacking rules; otherwise they are stacked with the next eligible leader.
Captured Units
When as a result of an assault on an enemy hex, it is dislodged (by a retreat) and there are enemy artillery units deployed and machine guns, these units do not retreat as infantry would and may be captured by the enemy.
Procedure: 1d6 is rolled with the following results:
- 1-4: They are captured.
- 5-6: They are considered to have been destroyed.
A captured unit is removed from the map and stacked in the captured version (white background), on the next game turn next to a leader of its own closest to the hex where it was captured. Only deployed artillery and machine guns can be captured.
Officier Casualties
If an officer is attacked in a hex where he is alone or is targeted by marksman fire (Pacos), he can be eliminated. The token of the eliminated officer is turned over to his "generic officer" face and placed next to any friendly units from the next turn. Officers defending alone in a hex always have a defense factor of 1. If as a result of combat, units stacked alongside a leader retreat from the hex in its entirety, the leader does so as well. If a generic leader is eliminated again during the game, he automatically regenerates with another leader using the procedure described above.
NB: The highest ranking officer in the unit becomes the commander of the unit "de facto", but with lower levels of qualities than the original command.
Dismounted Cavalry
Cavalry units may, at the discretion of the players, operate dismounted, so their factors and capabilities vary. Cavalry units can only be dismounted at the beginning of the movement phase and cannot carry out charges in that state as such (but yes as infantry).
Dismounted units are treated the same as infantry units. When a cavalry unit dismounts, a dismounted marker is placed on the counter to indicate the change of status. The assault value is not usable during the actions that the unit is dismounted, and its defense factor increases by 1 point.
8. Morale
Morale Check
As a result of combat, all units on both sides may see their morale status deteriorate and Panic. A high value for your morale factor means that you have optimal morale to perform your military capabilities. Panicked units need to make a morale check roll in the administrative phase to determine if they can return to their normal morale status.
Combat in Terrain Without Visibility
Fighting through mountain hexes or urban areas is prohibited if one of these hex types stands between the attacker and the defender. On the other hand, combat can occur if the attacker or defender is in one of these hexes.
Officers, through their Leadership Factor, intervene in this process. To check the morale of a panicked unit, an officer can help regain it if they are in the same or adjacent hex. If they are not within that distance, do not apply their factor to the recovery check.
If there are multiple panicked units in the same hex, they must be checked individually. To check morale, calculate the combative value that unit has based on the fighting value of the unit - casualty steps that it has suffered + officer quality +, - modifiers.
The roll of 2d6 is computed so that one die is ten and the other is one. So, for example, a roll of 6 and 1 would be a result of 61 on the table. The results that can be obtained are Desertion, No Effect, and Recovery. If the morale check is passed, the panic marker is removed and the unit is fully operational again.
Morale Check in a Column
A column is in panic when one or more of the units that comprise it are in this mode. The PA marker is placed on the column counter. The morale check will be made in identical fashion to units not in column, and only to those that are in panic. If there are healthy units in the column, the morale check will have a favorable modifier of one shift to the right of the morale table.
9. Special Rules
Improved Defenses
Spanish engineer units have the ability to place improved defenses in any hex. To do this, an engineering unit must stay 2 turns in a row in the same hex that has been declared under defensive improvements (the marker with the text Defenses will be placed). When finished, the marker is rotated to its completed position (image with the finished construction). Defenses add +1 to the defender's die roll when fighting with enhanced defenses.
The fortification hexes (Dar Drius, El Batel, and Kandusi) cannot be upgraded, but have an extra column shift to the left for charges / assaults against them.
Fog of War
Players cannot see the opponent's stacks at any point in the game. Only when a combat is resolved can units be identified.
General Navarro Column (Annual Column)
NB: General Navarro's column came from the positions attacked in the vanguard (Annual area) and it was retreating precipitously due to the pressure of the Rifeña Guerrilla.
This column corresponds to the one historically withdrawn from the vanguard positions in the Annual area. Their initial composition is indicated on the Deployment Aid Sheet. The column, unlike that of Cheif or others that are organized during the game, has no limitations on the maximum number of units that make it up (although it does have a minimum, which as a general rule is 5). Any unit can be added to a column at the beginning of the movement phase, as long as it is in the same hex at the beginning.
The column can reorganize once it reaches Dar Drius, but it will have to do so before turn 7 to avoid a sudden Spanish defeat.
If he manages to retreat from the map through the lateral zone marked in red (south of the river Kert), before turn 15 a total Spanish victory will be achieved.
Confusion of the Spanish High Command
NB: The news of the events in Annual reached the Melilla headquarters at the end of the 21st, but the doubts and the delay in the decisions about whether to continue the withdrawal and prevent the vanguard troops from being captured or staying in the established strongholds made the situation critical.
Dar Drius's fortress hex has a total stacking limit of 11 points (as an exception to the general stacking limit). The units that make up the columns arriving at Dar Drius do not count towards this limit as long as they continue to form a column.
When the Annual column enters Dar Drius, it must wait until turn 8 to be able to leave the garrison with the units that the Spanish player has (always with the minimum composition required). The new column can be formed with those that arrived in retreat as well as new units that the Spanish player decides to include. Any panicked unit that is part of these columns can attempt to regain its normal status while inside the plaza, using the Morale Check. Otherwise they must remain in the square until they regain their normal status.
Important: as long as they are not disaggregated from the columns in Dar Drius, they cannot carry out any action outside this hexagon. The conquest of the Dar Drius square by the Riffian side, if it occurs as a result of a total evacuation of it, does not bring victory points.
Officers / Leaders
The Officials / Leaders (initials, or the "anonymous" because of casualties of the originals) have the capacity to carry out the following activities:
a) Activate units to perform actions. See section on Command Control.
b) Support with a modifier in the combats in the hexagon where they are. If a unit or stack of units that is not DS attacks or defends with an Officer in its hex, it will have a modifier according to its Leadership Rating, and that will be added to / subtracted from the die roll before checking the result in the tables.
c) Help to recover units that are in panic, by means of the Morale Check when they are in the same or adjacent hex and make a Morale Check roll. The Leadership Factor is used.
Rule (Regulars of Melilla)
NB: These units, together with the Alcántara cavalry, were the most powerful Spanish units in the area. Both were entrusted to assist in the withdrawal from Annual, but the Regulars Regiment, with 75% indigenous troops among its ranks, was withdrawn from combat and disarmed for fear of an increase in desertions.
Regulars' units must be removed from play at the start of turn 6, regardless of their in-game status. Losses suffered during their stay in play are computed in the usual way.
Optional rule (Regulars are not removed from the game): The Riff player automatically gains as many victory points as regular units remain in play, and this unit's casualties suffered during play count towards the victory conditions in the usual way.
10. Victory Conditions
Once all turns are over, both players must count their losses during the game (units eliminated) as follows:
Spanish Army, for each unit:
- Unit infantry: 1 point.
- Unit cavalry: 3 points.
- Unit machine guns and artillery: 2 points.
- Officials: 3 points.
Guerrilla Rifeña, for each unit:
-
Unit infantry: 1 point.
-
Unit cavalry: 2 points.
-
Unit machine guns and artillery: 1 point.
-
Leader: 3 points.
-
Captured units are also counted as casualties.
-
Generic leaders do not generate victory points.
Victory Levels
Total Spanish victory if at the end of turn 15 they have managed to remove the Navarro Column in its minimum composition from the map by any hex on the east side of the map (marked with a red stripe south of the river Kert), and have suffered a maximum of no more than 20 loss points.
Total victory of the Riffian Guerrilla if it reaches one of these 2 conditions:
- The Navarro (or Annual) column does not enter the Dar Drius hex before the start of turn 7. Spanish Sudden Defeat is declared and therefore total Rif Victory.
- If at the end of turn 15, the Rif guerrilla has produced 30 or more Spanish casualty points and Abdelkrim's popularity level is 4 or 5.
Tactical Victory. The side that suffered the fewest loss points.
Designer Notes
Matter of Honour - Annual, 1921
When designing a historical wargame of the Rif war, the first thing that comes to mind after documenting the events that occurred during the summer of 1921, is the disastrous withdrawal organized by the Spanish army, once seen that the system of establishing strongholds and positions on the ground were not valid tools to control the territory, as General Silvestre, second commander of Melilla, so claimed.
Of all the military operations to simulate in a wargame on this campaign, from the designer's point of view, there are only the options of making an operational game with great importance of the logistical element or, on the contrary, in some event, battle or skirmish where the military aspects prevail over what we might call a simple rout of an army on hostile land. Having ruled out the operational simulation of the entire campaign, which will remain for the future, we chose to simulate one of the most important events that occurred in that war: the cavalry charge of the 14th Alcántara Regiment, which was awarded (91 years later!!!) the Laureate, for the courage of all the horsemen who charged against the enemy. In these charges 95% of the unit fell on active service.
The design of the wargame could not be limited to recreating a cavalry charge, so we have further expanded the time and tactical viewpoint to give the players all the protagonism. For this reason we represent the withdrawal from Annual of the most advanced troops towards the Spanish positions in the rear, with stable camps and with the possibility of readdressing the war situation. This, then, is the temporal space that we simulate in the game, and all this on a map that shows the area between the west of Dar Drius and Tistutin, of 25 x 18 km, where each hexagon represents approximately 700 meters, and each turn is 12 hours of real time.
Regarding the construction of the order of battle of the sides, we must indicate that the information of the Spanish army is well documented. The Spanish order of battle has been dissected to use only those units that actively participated in this phase of the retreat (July 22-29), leaving aside those that initially perished or that withdrew on their own initiative to further points in the region. For this reason, many Spanish units in retreat partially offer their nominal composition of units.
As for the composition of the Riff troops of Abd-el-Krim, a local leader, the information about their number, characteristics and capacities is a complete mystery, although some information is available from the Spanish authorities in the area. These troops of zonal affiliation (kabilas) gathered around the so-called harkas or semi-nomadic tribes that lived in those areas, and were initially poorly armed, although later the number of weapons grew in quantity and quality, often from spoils of war or as a product of arms smuggling.
The Spanish army, a priori professionalized in its commands, was mostly misdirected and with replacement troops with little military preparation, except for some specific units. The main unit was the Regiment, and its subordinate units were in charge of controlling the positions of the different kabilas. Often three or four companies of infantry were sufficient to defend these positions. In the most important points additional units and command headquarters were concentrated.
Based on the existing information in the sources on the capacities of the units represented, we have constructed a scale of values that make up all the factors of actions of the units and that are related to each other. Thus, the base of the troops is made up of the infantry, with a little more military capacity for the Spanish, but with less movement capacity in an area generally unknown to the entire Spanish contingent, in addition to the problem they had of supplies.
The Spanish army also had artillery units (7.5 and 8 cm howitzers) scattered throughout the area to reinforce established positions, as well as Hotchkiss machine gun units for protection. The tactical use of these units was more a mere exercise in a display of military might than a rational use of these weapons, mainly for the artillery that the Riffians called "stone killers". In this game we have rationalized the artillery capacity as a weapon with the capacity to disorganize, rather than to produce real casualties; for this reason the artillery has a specific combat result box differentiated from the one used for normal infantry combat. Machine guns are used as an element to enhance defensive positions and can have decisive capabilities in defensive combat.
Therefore, their defense values show the automatic fire capabilities of these weapons, mainly against assaults or charges. This type of weapon was commonly captured by the guerrillas, if the Spanish side was not capable of rendering them useless in its retreat, so we have represented in the game the ability of the rebels to "capture" these types of units and use them from that moment for their benefit. Normally the values of these captured units are lower, showing the lack of learning in the use of this type of weaponry, especially with the artillery.
On the other hand, the game shows in all the units a factor that we have called combativeness, which is related to the combat capacity of the units. This element must always be considered in conjunction with the capabilities of their commanders. In general, the combativity of the Spanish army is based on its belief that it has more training and weapons at its disposal than the enemy, which they consider to be an army without any tactical control in its way of moving and fighting. This is something that was fatally called into question in this Rif campaign. On the other hand, the combativeness of the rebel side was more related to their fanaticism when fighting against the colonial power, more a product of their perception of numerical superiority over the enemy, as well as the idea of fighting for the area they live in, both for the combatant and for their families.
The movement of the units in this theatre of war for the Spanish army was limited to marches along precarious roads in the so-called "columns", from which smaller units were highlighted in the planned positions. Unit movements once in these positions were minimal and only concerned with access to water sources, which were often no more than 1-2 kilometers apart in the worst case.
The Riffians did not suffer significant losses in their commands, mainly because they were not so exposed to combat and their officers were blurred amongst the masses of the rebel troops. The poor information about guerrilla commanders other than the tribal chiefs of each of the main harkas and their relatives gives rise to showing more standard values in Riff officials. Another element that we represent is the famous rifleman sniper fire of the rebel troops (the pacos), which often produced casualties or nervousness due to the difficulty of detecting this type of threat. It is another way of compromising the good order of the Spanish units, the result of which can lead to an officer becoming a casualty.
Rifian Infantry
The Riffian side does have more developed movement factors, especially the units on foot. This is mainly based on their better knowledge of the terrain and access to areas that are impractical for the Spanish. The Spanish artillery units, as well as the impedimenta of these units, were generally transported by cattle. The horse is presented here as the fastest means of moving through this type of terrain. Both armies have reasonable movement capabilities in this game.
The cavalry is one of the "star weapons" in this contest, although it is already in general decline with the appearance of automatic weapons and armored units. That is why we can see in this wargame cavalry charges on enemy hexes with the intention of expelling the enemy from their positions (in this case, the hex they occupy). Thus, the cavalry, and especially the Spanish (14th Alcántara Regiment and Tabor Regulars of Melilla), are some of the main units in this game and should be used correctly. The Rif cavalry is less qualified but is also powerful as an element of attack.
The commanders in this contest did play a determining role, if not to favor the combativeness of the units under their charge, then on the contrary for their inability to correctly read the development of the military operations that were involved. The values of the represented officers show their level of leadership (for combat and recovery of morale), as well as their level of command control (ability to give orders to the troops under their command, measured in hexes).
The Riffian side was established based on the representative people of each harka; their tribal chiefs were their officers, and below them there was no structured command organization. This shows that almost all Riffian officers have the same leadership capacity and command control, except for the leader Abd-el-Krim.
The loss of some officers in combat was another element that generated command problems on the Spanish side. In such a rigid and structured army with such a great difference between commanders and troops, the units were easily disorganized by the death of their main commanders. When this happened, any available higher-ranking officer had to take command (often lieutenants and captains). To represent this new supervening command role, generic officers with reduced capabilities in both leadership and command control are put into play when the historical officer is a casualty. They simply cannot command if they are not in the same hex or adjacent to the troop.
Looking for the simulation rather than the simplicity of a game with a military setting, I have tried to represent all the elements that occurred in this campaign, but also focused on the period that the game occupies, from July 22 to 29, 1921, and whose summary would be like a tactical withdrawal "more or less" ordered by the Spanish side, where the enemy player must get the greatest number of casualties to win and for this the Spanish side must protect those who withdraw in the most effective way possible.
In this environment, the already large casualties are complemented by other states of the units. A counter can go through a weakened state (it has had casualties in its troops), be disorganized, can panic depending on the degree of combativity and the effects of combat, as well as desert and go to the opposite side (which occurred in some Spanish contingents that had indigenous troops enlisted, such as the Indigenous Police or the Regulars).
As we have indicated before, the application of the logistics element has been removed. This reduces the complexity of the simulation to focus on the tactical aspects, which is what will determine the final result of the game. Players, however, must bear in mind this element as one of the key parameters in this type of campaign, where colonial troops, often surrounded, had to withstand attacks for several days when supplies were not enough for more than two days of combat.
The Rif War was no exception. In short, few wargames exist that deal with this campaign, and fewer in our language. This is designed to be a first touchstone for future games with a more operational vision, which occupy all operations including an amphibious landing such as the one in Al Hoceima Bay. There is still a lot of cloth to cut in this of the colonial wars of Spain... and others.
Good luck