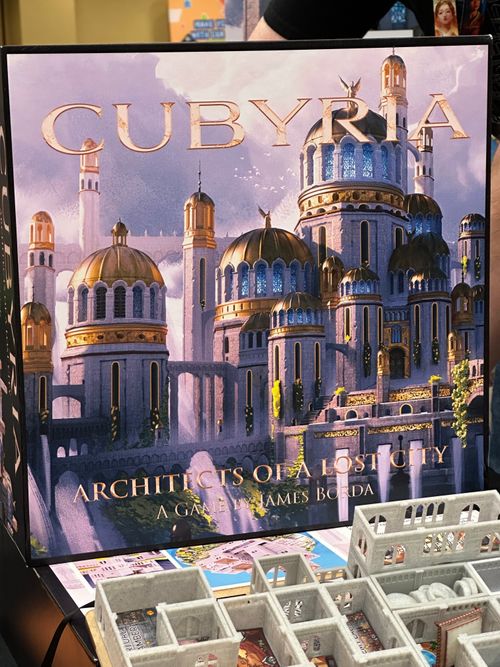
Cubyria: Architects of a Lost City
Cubyria: Architects of a Lost City Rulebook
Table of Contents
Table of Contents
Overview
Think of Cubyria as "3D Competitive Tetris."
In Cubyria, players take the role of Architects who compete to please the Mad Vizier by building the most spectacular additions to his palace.
Each physical Building Component (Room, Roof, Stairs, etc.) is paired with a Building Card. Architects draw these cards and play them from their hands to add the corresponding components to the board, earning points. By placing Building Components carefully, Architects can maximize their point total, pleasing the Vizier.
Architects also receive a secret Whimsy Card which functions as a personal building goal. When an Architect completes a card, she doubles her points for that round. Then all Whimsy Cards are reshuffled into the Whimsy Deck and a new one is dealt to each Architect.
The Endgame is triggered when the Building Deck is depleted. Each Architect gets one last turn to build. The Architect with the most points is showered in gold and glory, while the rest are doomed to their unimaginable fates...
Game Components
Game Board
The round, rotating board is where all the action happens.
The Board Graphic (A2) is cardstock with a lush garden image on one side and a simpler design on the opposite side to assist the visually impaired. Choose which side you want and place it face-up on the Top Spinner (A3). Fit the Clear Grid (A1) on top of that. Both the Board Graphic and Clear Grid have cutouts which fit keys in the Top Spinner for a perfect fit.
Finally, fit the centre spindle of the Top Spinner into the hole in the centre of the Base (A4). The Top Spinner should now rotate freely.
Storage Trays
One large and one small tray with a grid of inset shapes. These trays are designed to make Building Components easy to find during play. One set of the Floor Stickers (see below) should be placed in the trays to match the Components that belong in each slot. The proper placement is shown in the "Building The Game" booklet.
The small tray sits atop the Building Components in the Large Tray when they are stored in the box. The large tray has looped ribbons attached to help remove both trays as a unit.
To unpack the game, just remove the Trays from the box, set them alongside the Board, and you're ready to play!
Building Cards
The 80 cards of the Building Deck match the 80 Building Components. There is one card per component. An explanation of how to read these cards is in the next section.
Building Components
The game pieces that are played onto the board to form the palace. There are five types: Rooms, Roofs, Stairs, Support Columns, and External Staircases.
Rooms
The most common Building Component, Rooms are open-topped cubes or combinations of cubes. They are identified by their colourful Floor Graphics (see Room Floor Graphics).
Rooms come 'flat-packed' and must be built before your first game. See the "Building the Game" booklet.
Roofs
Sculpted components in metallic colours that cap the Rooms.
'Roof' is a generic word for this type of component. The Clock Tower, Watch Tower, Aviary, Tesseract and Beacons are all Roofs.
Stairs
Small round tokens which look like flatted spiral staircases.
Support Columns
Cubic pieces with double arches on each side. They look similar to Rooms but have no Floor Graphic.
External Staircases
Sculpted components which look like staircases.
Whimsy Cards
The 18 cards in this deck represent the Vizier's capricious demands. During play Architects will each have a secret Whimsy Card, which functions as a personal building goal.
Room Floor Graphics
Two sheets of colourful (TBD: stickers or cardstock chits) which are to be placed on the floors of the Rooms and the segmented slots of the Storage Trays. These identify the Rooms and help players return the Building Components to the Trays quickly when the game is over.
A guide for how to place these is in the "Building the Game" booklet.
Score Pad
We designed this pad to make tallying quick and easy.
Pencil
Crafted by the Vizier's finest pencil-smiths, this is a thin cylinder with a core of carbon material which ablates onto any surface it's scraped across, leaving a dark trail. You write with it.
Rulebook
You're reading it.
Reference Sheet
A single double-sided reference sheet for use during play.
"Building the Game" Booklet
Your guide to putting it all together.
Setup
The Cubyria Core Game is a game for 2-5 players. If you'd rather try our Introductory 'Zen Mode' (which is great for teaching kids), skip ahead to Play Variants. The Cooperative and Solo games are explained there too.
Go through the Building Cards and remove those with the cube icon in the lower right. Shuffle these and remove ten without looking at them. These ten cards become the Helper Deck. (The Helper Deck cards always match to a component with a footprint of 1 square, so drawing from this deck virtually guarantees that you will get a low-value card which is useful as a support.)
Shuffle the remainder back together with the other Building Cards. This is the Building Deck.
Place the two decks side-by-side with the bottom card of the Building Deck turned horizontal to show it's the last card. Draw the top two cards from the Building Deck and place them face-up alongside the two decks -- these are the Open Cards.
From the Building Deck, deal 3 cards face down to each Architect. (Note: some players prefer to keep their Building Cards face-up, and to select the matching pieces from the storage trays so they can physically handle them while they plan their turns. This is a game with minimal long-term strategy, so it is not greatly affected by the visibility of these cards.)
Shuffle the Whimsy Cards and deal one face-down to each player. (To keep the game surprising Whimsy Cards should always be hidden from other players, even in games where the Building Cards are open).
On one edge of the board is a small building with a blue dome -- the "Blue Pavilion of Destiny". Spin the board. Whoever is closest to the Pavilion when the board stops spinning goes first.
Order of Play
On each turn the active player may do three actions. Each is optional, but they must be done in order.
- Build. Play any number of cards from your hand to place building components onto the board. You must adhere to the Building Rules (see page 8). a. If you have fulfilled the conditions on your Whimsy Card, turn it face up and announce your success. b. Tally your score (see 'Scoring.') Cards used for building go into the 'Dead Pile' and are out of the game.
- Draw 2 cards from either of the decks (Building or Helper) or from the Open Cards, to a hand limit of 7. a. If you draw the last card from the Building Deck, your turn immediately ends and the Endgame begins (see The Endgame).
- Discard and draw again at a 2-to-1 ratio. (You may discard as many as you like, but only draw 1 new card for each 2 discarded.) Discarded cards go face-up in the 'Discard Pile,' which is separate from the Dead Pile. These cards are out of the game until the Endgame is triggered. Architects can look through the Discard Pile any time they wish.
Order of Play diagram captions: COMPONENTS with active Affinities still on the board (see Affinities); DEAD PILE (face down); DISCARD PILE (face up); BUILDING DECK (thick), with the LAST CARD marked; HELPER DECK (thin); OPEN CARDS (drawn from Building Deck).
After each turn, perform 'card maintenance:'
- If any Open Cards have been taken: a. Replenish them from the Building Deck, unless there is only one card left, in which case: b. Replenish them from the Helper Deck if there are any cards remaining. c. Otherwise, don't replenish. The Endgame can only be deliberately triggered by an Architect who draws the final card.
- If you fulfilled your Whimsy Card: a. All Architects' Whimsy Cards are collected and reshuffled into the Whimsy Deck. Deal 1 new Whimsy Card to each player.
Play then proceeds to the next player clockwise around the table.
Reading a Card
Each Building Card is paired with a Building Component.
In the upper left of each card is that component's Base Point Value. If the BPV icon is gold, the component is a Room; if it's copper, the component is a Roof. Rooms and Roofs are the only components that score points directly; the other Building Components are helpers with a white Base Point Value icon.
Key to Building Card Graphics (starting at NAME and proceeding clockwise; graphics that are crucial to reference during gameplay are highlighted in red):
- Name. The name of the card and its associated Building Component. If the component is a Room, the name also appears on the Room's Floor Graphic.
- Main Graphic. Helps identify the associated Building Component.
- Score Table (Rooms and Roofs only). A simple lookup table to help speed scoring calculations. The left hand column is the floor the component is placed on (for Rooms) or above (for Roofs) and the right hand column is the raw score earned. Some components have an asterisk below or in place of this table to remind players that the component has special scoring rules. See the Notes section on the card and in this Rulebook.
- Notes. If there are any special reminders that will help a player use the card, they are written here.
- Glyph (Roofs, Support Columns and some Rooms). There are two glyphs: Cube (a cube symbol) and Roof (a roof symbol). Ten cards with the Cube glyph are separated out before play begins to form the Helper Deck (see Setup). The Roof glyph indicates that the card is a Roof and reminds players that its scoring rules differ from Rooms.
- Tray Coordinates. The coordinates where the matching Building Component can be found on the Storage Trays.
- Set Icon. Cards from future expansions will have different Set Icons to identify their origin.
- Card Number. Each card has a unique ID number.
- Floor Preference (Rooms only). This indicates on which floors of the palace the Vizier prefers this Room to be placed. (See Building.) From bottom to top, these markers represent the 1st floor, 2nd, 3rd, and 4th and all floors above.
Building
The first Building Component played may be placed anywhere on the board. After that, every component must be played according to the Building Rules (see page X).
The "floor" (how high on the building a Component is placed) is a key consideration in the game. For mathematical convenience Cubyria uses the American convention -- the ground floor (touching the board) is 1, above that is 2, etc. There is no limit to how high you can build.
Skillful play in Cubyria involves identifying how to maximize the value of the components you place to the board in combination with one another. In the Core Game, each turn you can play as many of the Building Cards in your hand as you wish.
Only Rooms and Roofs directly earn points. They only earn points for the Architect who places them, and only on the turn they are placed. Your point total each turn can be greatly enhanced by taking advantage of Cubyria's bonuses and multipliers.
Rooms
Rooms earn their Base Point Value multiplied by the floor on which they are placed.
However, the Vizier has some preferences about where he wants some Rooms. For example, he only wants his Dungeon on the 1st floor, and he only wants his Balconies on the 2nd floor or above. This is represented by the Card's Floor Preferences.
Any Room can be played on any floor, but if you play a Room on a floor that displeases the Vizier -- marked by a red minus sign [ - ] -- you must take a penalty equal to the Room's Base Point Value.
Roofs
Roofs earn their Base Point Value plus the number of floors they cap. For example, the Clock Tower placed atop Floor 3 earns its Base Point Value of 5 plus 3 = 8 points.
Roofs may not be placed directly on the board.
Other Building Components
The other Building Components do not earn points directly, but are used to enhance the value of the Rooms and Roofs that are played alongside them. See the Building Rules.
Bonuses & Multipliers
The board has 8 doubling squares which double the value of Rooms placed on them. (Indicated on the Board Graphic by bright pink trees -- the Vizier hates these trees and is pleased when a Room demolishes them.)
External Staircases double the value of Rooms they connect with (see Building Rules).
Components with matched Affinities get bonus points when they are played connected (see Affinities).
Finally, if you complete your Whimsy Card, your entire score for the turn is doubled (see Whimsy Cards).
Continue to the Building Rules before proceeding.
Affinities
Affinities represent the style or function of a Room or Roof. Not all components have an Affinity, and some have more than one. The Vizier finds it convenient and aesthetically pleasing when components with the same Affinity are connected to one another.
The Affinities of a component are shown on its card and on the Floor Graphic of Rooms.
[Designer placeholder, printed in red in the draft: Add graphic here of Crypt card and floor graphic]
There are 8 Affinities: Art, Death, Luxury, Magic (top row); Security, Servants, Spirit, Water (bottom row).
Any Room that is connected directly to another Room with which it shares an Affinity (via the contiguous path -- see Building Rules), gets a point bonus equal to its own Base Point Value. This includes connections via Stairs and External Staircases. Likewise, if a Room is capped by a Roof with a shared Affinity, it gets the same bonus.
Affinities are even more valuable for Roofs -- if a Roof caps a Room with a shared Affinity, its point value is doubled.
If a Room is not played on its Preferred Floors, it does not get an Affinity bonus. However, it can still convey an Affinity Bonus to other components which connect to it.
Example: The Crypt's Floor Preferences indicate that it is discouraged from being played on any floor above the 1st. It has the Death, Luxury and Spirit Affinities. The Shrine is acceptable on any floor, and also has the Spirit Affinity. If an Architect were to connect these Rooms on the 2nd Floor, the Crypt would get its normal -3 point penalty for being on a discouraged floor, and no Affinity bonus. However, the Shrine would get an Affinity bonus.
- Shrine, 2nd Floor (4) + Affinity Bonus (2) = 6 points.
- Crypt, 2nd Floor = -3 points.
Rooms can only get one bonus per Affinity. But if a Room has more that one Affinity, it can get the bonus once for each of them.
Example: An architect connects the Crypt to the Bone Passage on one side (with the Death Affinity) and the Shrine on another (the Spirit Affinity), all on the 1st Floor. The Shrine and Bone Passage both receive an Affinity bonus, while the Crypt gets two bonuses -- twice its Base Point Value -- for matching two Affinities.
- Bone Passage, 1st Floor (2) + Affinity Bonus (2) = 4 points.
- Shrine, 1st Floor (2) + Affinity Bonus (2) = 4 points.
- Crypt, 1st Floor (3) + 2x Affinity Bonus (6) = 9 points.
Rooms' Affinities are still 'active' on the board as long as the Room has not been completely enclosed on top. (If you can see its Floor Graphic through any part of its 'ceiling', its Affinities are still active.) Though it cannot earn points after the turn it's placed, it can still confer an Affinity bonus to components that connect to it subsequently.
Example: Using the previous example, let's presume the Crypt is already on the board. If an Architect plays the Bone Passage and Shrine as above, he receives the Affinity Bonus for each of them, but no points for the Crypt as it was previously played. On a later turn, the Crypt is capped by another Room. Now it can no longer grant Affinity bonuses to any other component.
Table of Affinities
| Component | Art | Death | Luxury | Magic | Security | Servants | Spirit | Water |
|---|---|---|---|---|---|---|---|---|
| Alchemy Lab | ✓ | ✓ | ||||||
| Aviary | ✓ | |||||||
| Beacon |
Roofs' Affinities remain active as long as they cap a Room with an active Affinity. This has no game effect except in the rare case that the Roof can be used as part of a chain that completes a Whimsy Card (see next section).
(You can keep track of which components on the board still have active Affinities by placing the matching cards in an array near the draw decks. Later in the game, when their Affinities are no longer active, the matching cards can be sent to the dead pile).
Whimsy Cards
These cards represent the capricious and sometimes insane ideas of the Mad Vizier.
At the start of the game, each player gets one Whimsy Card which is kept secret from the other players. This card acts as a personal building goal.
If a Whimsy Card contains an instruction which violates the core rules of the game, the Whimsy Card predominates.
On the turn in which an Architect completes the goal on her card, her total score for that turn is doubled. Then every architect's Whimsy Card is collected, the deck is reshuffled, and a new Whimsy Card is dealt to each player. (The Vizier is so delighted he forgets everything else he asked for and starts making new demands.)
The conditions on a Whimsy Card must be completed entirely by the Architect who completes the card, and all in a single turn, unless the card mentions Affinities.
Whimsy Cards and Affinities
If an Architect draws a Whimsy Card with Affinities on it, he may make use of active Affinities on the board to complete it.
If a card requires you to connect components with specific Affinities, then all of the components must be connected in a single chain (Rooms connected directly to one another via the contiguous path (including via Stairs or External Staircases) and Roofs directly atop one of these Rooms) and all of the mentioned Affinities must be present in the chain.
Example: You have drawn the Whimsy Card shown above. The Sculpture Gallery, with the Art and Luxury Affinities, is already on the board. You connect the Bone Passage to it by its secret door, and place the Clock Tower on top of it. The Clock Tower shares one Affinity with the Sculpture Gallery (Art), so it gets its Affinity bonus. The Bone Passage does not get an Affinity bonus because it does not share an Affinity with any connected component. You get no points for the Sculpture Gallery as it was already on the board. But you have created a chain which fulfilled the requirements of your Whimsy Card, so your total score for the turn is doubled.
- Bone Passage (2) + Clocktower (12) + Whimsy Card Bonus (x2) = 28 points.
- Clock Tower: caps 1st Floor (6) + Affinity Bonus (x2) = 12 points.
- Bone Passage: 1st Floor = 2 points, No Affinity Bonus.
- Sculpture Gallery: Previously Played = 0 points.
The completion of Whimsy cards is the only situation in which a Roof's Affinity might come into play after the Roof is played.
Example: Let's presume that the previous example has been played to the board. As long as any of the three squares remaining on the Sculpture Gallery are uncovered, both the Sculpture Gallery's and Clock Tower's Affinities remain active. As soon as the rest of the squares on the Sculpture Gallery are covered, both its and the Clock Tower's Affinities are inactive for the rest of the game.
Scoring
To tally your score at the end of a turn, do the following in order:
For each Room played:
- Check its Floor Preferences. If it has been played on a discouraged floor, take a score penalty of -1 times the Room's Base Point Value and skip the remaining steps.
- Get the Room's base score (Base Point Value x the floor it's placed on). Use the lookup table on the right hand side of the card if that helps.
- Check for Affinities. If the Room is connected to any Rooms or Roofs that share its Affinities, add its Base Point Value again for each shared Affinity.
- Check for multipliers:
- If the Room is placed on a doubling square on the board, double its score.
- If it's connected to one or more External Staircases, double the score for each connected Staircase.
For each Roof:
- Tally its base score (Base Point Value plus one for each floor it caps). Again, you can use the lookup table on the card.
- If it shares an Affinity with the Room it caps, double the score.
Finally, if you have completed your Whimsy Card, double your total for the turn.
The Building Rules
The logic of the building rules is simple and intuitive once you are used to it. All building rules stem from the principle of the Contiguous Path:
There must be a continguous path inside the palace from every room to every other room.
The design of the Building Rules ensures that no matter how large or complex the palace gets, there is never any need for Architects to remember what's inside. You only need to consider the features on the outside of structure and the floors of the Rooms which are still visible (see Affinities).
When first learning these rules, it might be helpful to pick up the corresponding Building Components and physically place them to match the illustrations.
Rooms
Rooms are constructed of five different types of walls: Wall, Door, Secret Door, Gallery Windows, and Balcony Rail.
Some (like Doors) extend the contiguous path when placed side-by-side (marked with a green check on the chart below). Others may face each other but do not extend the path (a yellow check); still others may not be placed adjacent to one another due to the Vizier's aesthetic tastes (a red X).
The wall-to-wall chart is printed on page 12 of the draft as a grid of the five wall types (Wall, Door, Secret Door, Gallery Windows, Balcony Rails). Read across each row against each column:
| Wall | Door | Secret Door | Gallery Windows | Balcony Rails | |
|---|---|---|---|---|---|
| Wall | Yellow check | Yellow check | Green check | Red X | Red X |
| Door | Yellow check | Green check | Green check | Red X | Red X |
| Secret Door | Green check | Green check | Green check | Red X | Red X |
| Gallery Windows | Red X |
KEY: Green check = Forms a Contiguous Path. Yellow check = Can be placed together but don't extend the Contiguous Path. Red X = May not be placed together.
Walls and Doors
Most Rooms contain only Walls and Doors, so most often you will be connecting rooms Door-to-Door. Consider these two Rooms:
They could be placed together in many configurations.
In the following case there is no contiguous path between them, so in isolation these Rooms may not be placed this way: Door-to-Wall, Wall-to-Wall.
By adding a third Room, a contiguous path can be formed between all three. There are many ways in which these three rooms could be placed with the contiguous path connecting them: Door-to-Door, Door-to-Door, Door-to-Wall, Door-to-Door, Door-to-Door, Door-to-Wall, Door-to-Door, Door-to-Door.
It's fine for some Doors to be blocked by Walls. As long as there is one connection between Rooms that extends the contiguous path, it's a valid placement.
Secret Doors
Secret Doors are versatile. They extend the contiguous path when they are paired with Walls, Doors, and other Secret Doors.
Secret Door-to-Door, Secret Door-to-Wall, Secret Door-to-Secret Door.
Don't forget that you don't need to play a Room with Secret Doors to make use of them. If there are open Secret Doors on the board, you can place ordinary Doors or Walls against them to extend the contiguous path.
Secret Door-to-Door, Door-to-Wall.
Balcony Rails and Gallery Windows
The Vizier loves a grand vista almost as much as he loves a good beheading. He doesn't like it when his views are blocked.
Gallery Windows can look down onto Balconies, and Balcony Rails can abut one another, but in neither case does this extend the contiguous path. Gallery Windows and Balcony Rails may not be placed against any other type of wall.
- Door-to-Door, Door-to-Balcony Rail: This is not valid. Though there is a contiguous path through the Doors, Balcony Rails may not face Doors.
- Door-to-Door, Windows-to-Balcony Rail: This is a valid placement.
- Door-to-Door, Window-to-Window, Balcony Rail-to-Balcony Rail: Note that if you switch the places of the Eastern Balcony and Colonnade, the Colonnade is not longer legal. Gallery Windows are for framing a grand vista outside; the Vizier doesn't want to look through them into another Room.
Stairs
The easiest way to build upward is to use Stairs.
A Stair card allows you to take a Stair token and place it in a Room. When you stack that Room on top of another, it extends the contiguous path vertically between the two rooms. (Diagram caption: Stair token creates a vertical path between the Rooms.)
Once a Room has been placed on a higher floor, more Rooms may be connected to it using the normal Building Rules. It is not necessary for a Room to have a Stair token if it connects to the contiguous path on its own floor.
The contiguous path goes from the Room the Stair token is in to the Room directly below the token. It only bridges two Rooms, and it does not go 'up.' This rarely occurs, but be sure you don't leave an 'orphaned' room when you place a Room with a Stair token. (Diagram captions: Stair token connects Library with Hall of the Orrery; Alchemy Lab remains isolated.)
All Rooms Must Be Fully Supported, except Rooms with 'balconies' or 'bridges'
If a Room has any Balcony Rails, the squares adjacent to the Rails are called 'balconies' (some rooms have both balconies and non-balcony squares).
Balconies may be unsupported as long as 1/2 of the total footprint of the Room (rounding up) is supported.
A balcony may overhang a Building Component below it, or even an area 'off the board' where there is no slot to place a component.
A Building Component may be placed under a balcony on subsequent turns if it adheres to the other Building Rules.
Some tall Rooms have balconies or bridges attached (see Tall Rooms). Bridges, like balconies, can be unsupported.
Roofs
Roofs are placed atop other Building Components. They do not require Stairs.
There are no restrictions as to which Components may be placed beside Roofs, but Roofs do not extend the contiguous path.
For obvious reasons, nothing can be built above a Roof besides a balcony or bridge.
You may not place a Roof on the 1st (ground) floor.
Support Columns
Support Columns are wild cards; they can be placed anywhere, and do not require Stairs. However, the contiguous path does not pass through a Support Column.
Diagram captions: "As long as these 3 Rooms are connected vertically by Stairs, this is a valid construction" (valid); "Support Columns block the contiguous path horizontally and vertically" (not valid).
Tall Rooms
All Rooms, no matter how tall, are considered to have a contiguous path throughout their interior.
This is a valid play. There is no need for Stairs since all Rooms are contiguous throughout their interiors.
Rooms that are taller than one story must still be placed with Stairs if they are atop another Room and there is no contiguous path connecting it to Rooms on its own floor.
Even though the physical models of tall Rooms usually have a floor surface on the upper story, this is just to make it easier to place and remove Stair tokens. A token here still represents a contiguous path to the Room directly below the token.
Likewise, though some tall Rooms have spiral staircases in their Floor Graphic, that is just a visual reminder that the Room is contiguous within, and does not represent a connection with any Rooms below. There are no Rooms which automatically connect to Rooms below them without Stair tokens.
Some tall Rooms have balconies or bridges. These are indicated by corner supports that prevent Rooms from fitting beneath them. Rooms cannot go here. Other Building Components may be placed here if they physically fit. Balconies and bridges need not (because they cannot) be supported.
(Diagram caption: Corner Supports block Building Here.)
For Scoring, a tall Room is considered to be on the lowest floor it occupies.
A few Rooms offer bonus points for each empty cube space beneath their balconies or bridges. This includes the empty space where the corner supports are. These bonuses are noted on the Room's Card.
Scoring example: The Bridge Tower has a Base Point Value of 4, plus a 4-point bonus for each empty space beneath its bridge. Here it would be worth (4 [Base Point Value] x 2 [2nd Floor]) + 8 [2 empty spaces beneath its bridge] = 16 points.
External Staircases
External Staircases (and their cousins, the Clockwise and Anticlockwise Stairs), are like Rooms in that they must extend the contiguous path to be valid. The path goes from the top to the bottom of the Stairs, which are treated as Doors. The other faces are treated like Support Columns -- they can be placed without restriction alongside any other Building Component.
External Staircases double the point value of the Rooms they connect to. This only applies to Rooms that are played on the same turn or after the External Staircase -- no one gets points for any Room on a turn after it's played (see Scoring).
The doubling also stacks! If you connect more than one External Staircase to a Room, or string multiple External Staircases together, the Rooms they connect to are worth 4x, 8x, etc.
Scoring example: The Red Passage would receive a 4x multiplier, while the Porphyry Passage would get 8x.
If the Architect placed only the bottom two External Staircases and the Porphyry Passage, he would get points for the Porphyry Passage only, but with the full 8x bonus.
You do not have to connect both sides of an External Staircase when you play it. However, you cannot play one in such a way that it would be impossible to complete the open side. For example, the open side of the Staircase may not:
- border the edge of the board
- lead to a void above a Roof, balcony or another External Staircase
If an External Staircase is played legally, but a subsequent play makes it impossible to complete, so be it. The Vizier has odd tastes anyway.
Beware that you do not accidentally break the contiguous path with External Staircases. It can feel right intuitively to build External Staircases straight down to the board, but remember that the path only traverses the inside of the palace. (Diagram captions: This Room is isolated; two possible fixes.)
Placing a Stair token in the Porphyry Passage, or completing the path via another Room connection, would alleviate this problem.
You can only connect External Staircases with each other in one direction. No roller coasters! (Diagram caption: Instant Beheading.)
Play Components In Any Order, Together or Apart
You can play your Building Components onto any part of the palace; they do not need to connect to one another. Likewise, they may be placed in any order. As long as each Component you play is fairly placed at the end of your turn, it's a valid move.
The Endgame
When an Architect draws the last card in the Building Deck, she must announce that the Endgame has begun. Her turn immediately ends.
The Endgame is every Architect's last chance to build. It consists of two phases:
- Draw phase. All of the cards in the Discard Pile (not the 'Dead Pile' -- see Order of Play) are turned face-up on the table, along with the Open Cards and Helper Deck, if any of these remain. Starting from the Architect to the left of the Architect who triggered the Endgame, Architects take turns selecting one card at a time until there are no more on the table. During the Endgame there is no hand limit, and players may not pass or discard when it's their turn to pick. There may be an uneven number of cards distributed in this phase.
- Build phase. Starting with the Architect to the left of the player who triggered the Endgame, each Architect has one final turn to build using all cards available to her.
Any cards that are left in an Architect's hand after her final turn are scored against her (-1 times the Component's Base Point Value).
The rules for Whimsy Cards apply as normal during the Endgame!
The Winner
...is the Architect with the most points. You may gloat wickedly as the Vizier flings your rivals from the rooftops into the gardens below.
Play Variants
These variants that can bring a very different flavour and trajectory to the game.
Introductory Game - "Zen Mode"
This is a more relaxed way to play, and it's great for introducing kids to Cubyria. Zen Mode strips the game down to its essence: just building a cool construction together.
To set up Zen Mode, shuffle all the Building Cards together. You will not use the Whimsy cards.
Deal four Building Cards to each player, and four cards, face-up, into a 'Common Pool' alongside the board. Spin the board as per the Complete Game to see who goes first.
The Order of Play differs from the Core Game. On an Architect's turn she may:
- Discard and redraw at a 2-to-1 ratio (for each 2 cards discarded she may draw 1 new card). She may only discard from her hand, not from the common pool. Discarded cards are places in a separate pile and return in the Endgame.
- Build. The Architect may play up to 5 cards from her hand or the Common Pool, in any combination, to build onto the board.
Both actions are optional, but they must be done in order.
Refer to 'Reading a Card,' 'Building,' 'The Building Rules,' and 'Scoring' from the Core Game. These rules are unchanged in Zen Mode. You may optionally also add the 'Affinities' rules.
After an Architect builds, she tallies her score and her turn ends. New cards are dealt first to the Architect who just played, then to the Common Pool, refilling both to a total of four. Play continues until the deck is depleted, at which point the Endgame begins.
During the Endgame, any cards in the discard pile are combined face-up with the Common Pool. The players then draft these cards one at a time in turn order, starting from the player whose turn would have been next (had the Endgame not begun). In the Endgame there is no hand limit and every card must be drawn. When all the cards have been drafted, each player has one more turn to play to the board, using all their cards, starting with the player who drew first in the draft. When the last Architect has built, the game is over -- tally your scores and see who will stay out of the Vizier's dungeon!
Kids as young as 8 enjoy playing Cubyria. In Zen Mode there's a simple handicap you can use to even the odds between children and adults -- the older player plays fewer cards each turn. Experiment with how many - some kids can only beat their parents when the adults are playing 2 cards per turn, and some can give you a run for your money at 3 or 4. (Or 5, of course. Not all adults can match a kid with strong spacial visualisation skills!)
Sudden Death
If the experience of pleasing the Vizier is not harrowing enough, add this simple rule:
Any player who falls more than 100 points behind the leader is eliminated from the game.
When a player is eliminated, any Building Cards in his hand are shuffled back into the Building Deck, and his Whimsy Card is returned as well.
You cannot be eliminated in the Endgame.
Cooperative and Solo Cubyria
These two versions play the same, regardless of the number of players.
Decide your level of difficulty:
| Easy | Average | Difficult | Very Difficult | Ludicrous |
|---|---|---|---|---|
| 50 | 60 | 75 | 100 | 150 |
| 100 | 120 | 150 | 200 | 300 |
| 150 | 180 | 225 | 300 | 450 |
| 200 | 240 | 300 | 400 | 600 |
| 250 | 300 | 375 | 500 | 750 |
Shuffle the Whimsy Cards and deal them out, face-down, in a 3-by-3 grid. Turn the center card face-up.
In order to win, you need to complete three Whimsy cards in any row, horizontal, vertical or diagonal, before you run out of Building Cards.
You may turn another Whimsy Card face-up every time you cross a threshold of points in the chart above. For example, if you are playing at 'Difficult' level, you turn your first Whimsy card over when you reach 75 points, the next at 150, etc. You may turn up any face-down card you choose.
Cooperative and Solo modes use the same Order of Play as "Zen Mode". Affinities are always used.
As in Zen Mode, each player gets four cards in her hand and there are four cards in the Common Pool. (So effectively, when playing solo, you have a hand of eight cards to play with). All cards are dealt face-up for all players to see.
Players take turns playing up to five cards to the board. In Cooperative/Solo Mode you can discard as normal. The Endgame also unfolds as in Zen Mode.
Architects are encouraged to discuss their moves and plan together, but each Architect has the final decision on how to play during his or her turn.
FAQ
Drawing Cards
In the draw phase, when you have six cards in your hand do you just draw one, or draw two and discard down?
Just draw one.
Building
Can you build under a balcony once it's been built?
Yes. (As long as the Component physically fits there - some Roofs are too tall to fit directly below a balcony, and the corner supports of the Juliet Balcony prevent Rooms from being built there too).
If the balcony section of the Juliet Balcony is hanging off the play area, does it score its bonus points or not since it's technically not over an 'empty' buildable area?
Yes, it scores the bonus.
Can you place multiple Stair tokens in a Room to connect with more than one Room beneath it?
Yes, a large Room can connect to more than one Room on the floor directly beneath it.
Doubling Squares
If you play a stack of Rooms over a doubling square, do they all get the bonus?
No, only the first floor Room gets the bonus.
If you put a Room that is 'discouraged' on the first floor on a doubling square, what happens?
You get the ordinary penalty of -1 times the Room's Base Point Value.
Affinities
Can you play a Stair token in a Room that doesn't necessarily need it to gain an Affinity bonus?
Yes.
If you fully cover a Room on your turn can you still get the Affinity bonus from it?
Yes, on that turn only.
If two Rooms have two matching Affinities and you play them connected to one another, do both Rooms get both Affinity bonuses?
Yes.
Does the Affinity bonus apply to Rooms stacked vertically?
Only if those Rooms are directly connected via the contiguous path (so via Stairs or External Staircases). Rooms stacked without a direct path connection do not earn the bonus.
Whimsy Cards
If I happen to be dealt a Whimsy Card with an Affinity combination on it, and I see on my turn that that combination is already present on the board, can I declare the Whimsy Card completed?
Yes.
What if it's the exact same Whimsy Card that was just completed by the Architect who went before me?
Lucky you!
Expanded Placement Chart
This chart expands the chart on page XX to include the rules for horizontal placement of all Building Components.
| Wall | Door | Secret Door | Gallery Windows | Balcony Rails | Roofs | Support Columns | External Staircases (top and bottom) | External Staircases (other faces) | |
|---|---|---|---|---|---|---|---|---|---|
| Wall | Yellow check | Yellow check | Green check | Red X | Red X | Yellow check | Yellow check | Yellow check | Yellow check |
| Door | Yellow check | Green check | Green check | Red X | Red X | Yellow check | Yellow check |
- External Staircases extend the contiguous path when they connect with one another, as long as they are going the same direction. They may not be placed in vertical zig-zags.