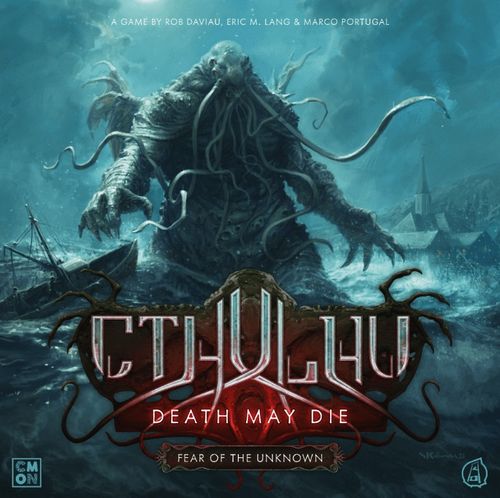
Cthulhu: Death May Die – Fear of the Unknown
Cthulhu: Death May Die – Fear of the Unknown Rulebook
Table of Contents
Table of Contents
- Components
- Overview
- Set Up
- Dice and Checks
- Turn Sequence
- Death of an Investigator
- Disrupting the Ritual
- Fighting the Elder One
- Component Limitation
- Resolving Ties and Ambiguities
- Checking Distance
- Ending the Game
- Unknown Rules
- Adjusting the Difficulty
- Skill Codex
- Episode Lore
- Rules Summary
Components
- 1 Double-Sided Unknown Board
- 1 Story Board
- 23 Unknown Monster Cards
- 16 Double-Sided Tiles
- 8 Insanity Cards
- 12 Unknown Relic Cards
- 3 Standard Dice
- 5 Bonus Dice
- 4 Unknown Mythos Cards
- 5 Color Bases
- 30 Tentacle Markers
- 57 Tokens:
- 26 Wound Tokens
- 3 Gate Tokens
- 1 Progression Token
- 4 Random Location Tokens
- 12 Fire Tokens
- 2 Staircase Tokens
- 2 Tunnel Tokens
- 6 Level 1 Skill Tokens
- 1 Starting Space Token
Elder One Box - Tsathoggua
- 1 Tsathoggua figure
- 2 Amorphous Scion figures
- 26 Fatigue Tokens
- 8 Mythos Cards
- 1 Minions Card
- 4 Elder One Stage Cards
Elder One Box - Azathoth
- 4 Dancer of Azathoth figures
- 1 Azathoth figure
- 8 Cosmic Tokens
- 8 Mythos Cards
- 1 Minions Card
- 4 Elder One Stage Cards
6 Episode Boxes
(Contents displayed on the back of each box.)
10 Investigators
Julien, Mike, Leon, Ruth, Huikong, Sally, Stella, Sandra, Agatha, Peters — plus 10 Investigator Boards.
10 Cultists
3 + 3 + 4 Cultist figures.
18 Monsters
- 5 Ghast
- 5 Serpent Man
- 2 Fisher from Outside
- 2 Gyaa-Yothn
- 2 Gug
- 1 The Unnamable
- 1 Dhole
Overview
At the start of each game, players choose an Episode box and an Elder One box and combine their components. The Episode box provides the map layout, the ritual they are trying to disrupt (and how to disrupt it), as well as the abilities of the monsters in the game. The Elder One box provides the big boss they will fight, with its own challenges, along with its special minions.
Familiar with the Death May Die rules? You can skip to the Unknown Rules section to check the new content and rules for Fear of the Unknown.
Free Digital Content: Face new Unknown monsters with free online content! CMON.COM/Q/DMD006/R
In Cthulhu: Death May Die - Fear of the Unknown, 1 to 5 players control investigators, cooperating to win or lose the game together. In each game, the goal remains the same: disrupt the ritual, then kill the Elder One.
Episodes
Each Episode has its own Episode cards, Mythos cards, and Discovery cards, as well as special tokens.
The Episode card shows:
- Flavor text to be read at the start of the Episode.
- How to disrupt the ritual and make the Elder One vulnerable to attack.
- What happens when the Elder One advances along its track (the track is discussed in the Story Board section).
- Two special actions that investigators can take during this Episode.
- Additional rules that must be followed during this specific Episode.
The back of each Episode card shows how to set up the Episode. This is discussed in detail in the Tiles and Spaces and Set Up sections.
Elder Ones
Each Elder One comes with its own flavor of Cultists and monsters, its own Mythos cards to mess with Investigators, and Elder One cards in different Stages that will unfold as the game goes on. Investigators cannot attack the Elder One until the ritual is disrupted, even if it's been summoned to the board!
Story Board
The Story board, used in every game, is the hub of information.
The Summoning track shows the progression of the Elder One as it manifests into our world. The Elder One figure starts on the left part of the track and progresses to the right. When it enters a red space, it will be summoned (or earlier if the ritual is disrupted). After the Elder One is summoned to our world, the Progression token is placed on the track and moved instead of the figure. If the Progression token reaches the end of the track, the Elder One dominates the world and the investigators lose!
The Story board holds:
- The Elder One's 4 Stage cards. Stacked in order and faceup.
- The Episode card and its monsters card.
- The Elder One minions: Cultists and a special monster.
Discovery Cards
Each Episode has 15 Discovery cards. These include Items, Companions, and Conditions that can help or hinder the investigators. Most Discovery cards can be claimed by fulfilling the requirements listed in the card's central section. Investigators claim either the left or right side of the card, tucking them under their investigator board on the appropriate side. Discovery cards are further explained in the Investigate or Fight! section.
If it's not specified when the player may use an effect on a Discovery card, it may be used anytime during their turn. However, it cannot be used while resolving another card, effect, or during a roll.
Investigators may have more than one Discovery card on each side of the investigator board.
Mythos Cards
Mythos cards drive the horrors of each game. Players will grow to hate them. Half the Mythos cards in a game come from the Episode box and the other half comes from the Elder One box.
Each turn, after taking their actions, the active player will draw a Mythos card. Some will move and/or summon enemies. Others will drive investigators mad. There are also ones that aren't as kind. They are explained in detail in the Draw Mythos Card section.
Most Mythos cards have an Elder One Summoning symbol on them. When there are 3 Summoning symbols in the Mythos discard pile, the Elder One advances along the Summoning track (see Check the Elder One Summoning).
Enemies
The term "enemies" refers to Cultists, monsters, and the Elder One (once it's summoned to the board). Any enemy that's not a Cultist or the Elder One is a "monster". Anything that refers to Cultists affects Cultists only. Anything that refers to monsters affects monsters only. Anything that refers to the Elder One affects the Elder One only.
Enemy cards show their health, the dice they use when attacking, and a special ability that may come into effect in different circumstances. The cards also show the total number of figures that should be available in the pool. If an Episode uses specific monsters, all its figures that are not present in the setup are kept in reserve, ready to be summoned.
Investigators
Each investigator has a board with a wound track, a stress track, a sanity track, and 3 skills. All are tracked with plastic tentacle markers in the investigator's color. There are also slots on the right and on the left of the board to insert Claimed Discovery cards. There is no limit to the number of cards that can be slotted to an investigator.
The investigator board shows: the Sanity track, the Insanity Threshold spaces, a Turn Summary, the Stress track, the Wound track, the Skills and their Skill Level, and the slots for Claimed Discovery cards.
Stress
Stress is used to try and push situations in the investigator's favor. Players may always increase investigator's stress to reroll 1 die they just rolled. Many Discovery cards also require investigators take stress in order to Claim them. Generally, the only consequence of being at maximum stress is that the investigator can't take more stress (though some effects may deal wounds instead). Investigators can take a maximum of 4 stress without healing.
Wounds
If the marker ever reaches the skull at the end of the wound track, the investigator is dead (see "Death of an Investigator").
NOTE: An investigator or Companion may not take more wounds than their remaining health.
Skills
The investigator's 3 skills allow them to bend the rules in their favor. The top one is their signature skill, unique to each investigator, while the other 2 skills come from a common pool (so other investigators may have the same ones). All skills start at the first level, but investigators will increase them when they level up. Some skills replace a lower-level skill as they level up, while others extend them, as described on the skill. The description of each of the common skills is in the Skill Codex.
Sanity
Whenever an investigator loses sanity, the marker on their sanity track advances to the right. If it reaches the skull at the end, the investigator is consumed by madness and eliminated (see "Ending the Game").
The track has Insanity Threshold spaces that will activate the investigator's insanity and level up a skill. Some of them also give investigators permanent bonus dice. When an investigator loses more sanity (from dice rolls, Discovery, or Mythos cards) than required to hit the next Insanity Threshold, the marker stops at the Insanity Threshold and all excess sanity loss is ignored.
Gaining Bonus Dice. 4 of the Insanity Threshold spaces display a green Bonus die under them. Once each of these is reached, the investigator adds +1 Bonus die to any rolls they make for the rest of the game, except for rolls against themselves (see Bonus Dice).
Activating Insanities. Each investigator gets an insanity card at the start of play. Every time their marker on the sanity track reaches an Insanity Threshold, that insanity activates. Perform the symptoms on the card. If multiple investigators reach an Insanity Threshold at the same time, they activate clockwise from the current player.
Leveling up Skills. When the marker reaches an Insanity Threshold, after activating their insanity, the investigator levels up 1 of their skills. Choose 1 skill and move its marker 1 space to the right.
Tiles and Spaces
Each tile is double-sided and labeled with a code to help with setup.
Spaces are defined by walls and passages.
Some tiles contain 1 space while others contain 2 or 3.
On the board, investigators may only move through passages that have connecting arrows on both spaces. If there is only a passage on one side (or a passage leading off the board) and nothing on the other side, investigators cannot go through it.
There is no limit to the number of figures that may occupy each space.
A space is adjacent to another if they are one space away from each other. In other words, if it is possible for any figure to move between 2 spaces, they are considered adjacent.
If an effect allows an investigator to treat spaces as adjacent, those spaces are only considered adjacent for that investigator and only when specified by the card (usually during a Run action).
Each map has 3 Gates - Red, Yellow, and Blue, where enemies are summoned.
Some maps contain a staircase or a tunnel. Investigators may move from a space with one of these tokens to a space with the matching token. Spaces linked like this are considered adjacent for all purposes. If one of the tokens is removed for any reason, the spaces stop being adjacent.
Safe Spaces
A space is Safe when there are no enemies in it.
Set Up
-
Set out the Story Board, tokens, and dice.
-
Choose an Elder One. From its box, place the Elder One figure on the starting space of the Summoning track. Place the Minions reference card on the Story Board. Set out the 8 Mythos cards and any tokens. Place the Elder One Stage cards in order, faceup, on the Story Board. Stage I goes on top.
-
Choose an Episode. From its box, take out its 8 Mythos cards, 15 Discovery cards, Episode card, and tokens. Place the Monsters reference cards on the Story board.
-
Take out ALL figures for the enemies shown on the reference cards (other monsters won't be used unless playing with Unknown Monsters - see the Unknown Rules section).
-
Set up the board according to the instructions on the back of the Episode card, including arranging the tiles and placing enemy figures and tokens in the indicated spaces. Then, turn over the Episode card and place it on the Story board. Any Cultist and monster figures not placed on the board stay in reserve next to the Story board, ready to be summoned later.
-
Shuffle the 16 Mythos cards together and place them facedown.
-
Shuffle the Episode's Discovery deck and place it facedown.
-
Have each player select an investigator board and its figure. Attach a color base on the figure to help the player remember which figure is theirs. Place the figures on the starting space for the Episode. In a SINGLE-PLAYER game, choose 2 investigators. The player will control both, alternating turns between them.
-
Place the 6 tentacle markers of the player's color on their investigator board: 3 on the first level of the investigator's skills and the other 3 in the leftmost space of the wound, stress, and sanity tracks.
-
Shuffle the insanity cards and deal 1 to each investigator, putting away the rest. Players place this card, faceup, near their investigator boards.
-
Randomly determine a starting player. That player takes the Mythos deck and will take the first turn.
Dice and Checks
Throughout the game, players roll dice to determine the outcome of certain actions or effects. The most common times to roll dice are when players are told to make a roll and when an enemy attacks.
Make a Roll. Some actions and Discovery cards tell players to "make a roll". When players make a roll, they always roll 3 standard black dice (and may also be allowed to add bonus green dice).
Enemy Attack. Enemies roll a specific number and type of dice for their attacks as indicated on their reference card.
Rolls Against Yourself. Some effects and abilities specify "rolls against yourself". Rolls against a player are rolls where each success is detrimental to the player. Enemy attacks and rolling for Fire (see Fire!) are examples of "rolls against yourself".
Each die has 4 different possible results:
- Success: This means that the investigator (or the enemy) succeeded at their attempt (or partially succeeded). If the investigator was attacking, it means they hit. If an enemy is attacking, it means they hit. In some cases, players need to reach a target amount of successes in a single roll.
- Elder Sign: These mean nothing unless an investigator has a skill or card that uses them.
- Tentacle: Madness! For each tentacle, the investigator loses 1 sanity, moving their tracker 1 space to the right.
- IMPORTANT: Tentacles on EVERY roll cost investigators sanity, whether they're attacking, being attacked, or just "making a roll".
- Blank: No effect most of the time.
Bonus Dice
Certain skills and cards may give investigators bonus green dice, as noted on their description. Some checks may also give investigators bonus dice if they have a related ability. Finally, reaching certain Insanity Thresholds will add permanent bonus dice to ALL of that investigator's rolls, except against themselves.
NOTE: The bonus dice do not contain a tentacle icon.
NOTE: There is no limit to the number of regular dice and bonus dice that may be added to a roll (if players run out of dice, denote the results and roll the same dice again).
NOTE: When rolling dice, players cannot choose to roll less dice than they are allowed to roll (unless the effect is optional).
Taking Stress to Reroll
After rolling dice, players may take 1 stress to reroll 1 die, ignoring its original result. Players may do this as often as they like on any roll they make, until the investigator's stress is at the maximum. When enemies attack, players roll for them and may also take stress to reroll their dice.
Modifying Rolls
Some effects or abilities may be applied to rolls. Unless stated otherwise, those abilities are applied to ALL rolls an investigator makes, including against themselves. Note, though, that some of them are optional.
Applying Results
Once a player is done using any rerolls, tally the number of each result obtained (note that some die faces contain 2 results). Make sure to apply any symbol changes from abilities (such as counting Elder Signs as successes).
NOTE: If an effect counts an icon as another icon (e.g. Arcane Mastery), that icon stops counting as the original icon, unless stated otherwise in the effect. That means an icon cannot be changed by 2 different abilities, unless one of those abilities says the icon keeps counting as the original one.
Then, apply the results of the dice roll in this order:
1. Use Any Successes:
- If an investigator is attacking, these successes are wounds applied to their target.
- If an enemy is attacking, successes are also wounds applied to their target (usually an investigator).
- If players are told to "make a roll" by an action or effect, they must follow the instructions on the corresponding action or effect. Sometimes, they must match or exceed the number of successes indicated on the card to be successful. In other cases, for each success rolled, players get to do something.
Example: This Episode allows the investigator to make a special action. While they are in a space without Cultists, make a roll. Then, they move the nearest Cultist 1 space towards them for each success rolled.
2. Resolve Effects:
- Resolve any effects that may be tied to the result of the roll.
Examples: "If wounded…", "If it survives an attack…", "When the enemy dies…", etc.
3. Apply Any Tentacles:
- Lose 1 sanity for each tentacle rolled (move the marker 1 space to the right on their sanity track).
- If the investigator reaches an Insanity Threshold space on their sanity track, stop moving the marker (even if they didn't lose the full amount of sanity), activate their insanity, and level up a skill (see "Sanity").
Turn Sequence
- Take 3 Actions
- Draw Mythos Card
- Investigate or Fight!
- Resolve End of Turn
1. Take 3 Actions
On the active investigator's turn, they may take 3 actions. They may take the same action more than once. There are 4 actions that are available in every Episode and 2 that are unique to each Episode. Also, some effects may give players access to free and special actions.
Some actions can only be done while in a Safe space. A Safe space is a space without enemies.
Free Actions
Some abilities and effects can be used as a free action. They can only be used during this phase of the turn before or after other actions.
Special Actions
Some abilities and effects can be used as a special action. They can only be used during this phase of the turn and players must spend 1 of their actions to use it.
Run
Move up to 3 spaces. Investigators can only move between spaces if there is a passage on both tiles (as indicated by arrows on both sides). They may also pass between two spaces that both have a staircase or tunnel token.
When investigators leave a space with enemies, ALL enemies in that space follow them to their new space (even if there were other investigators in the original space). When investigators leave a space with Fire tokens, place 1 Fire token from the reserve onto their investigator board for each token on the space, leaving the tokens on the board untouched (see "Fire!").
NOTE: Unless stated otherwise, when an investigator moves while not on a Run action, they catch Fire and enemies follow as well, even if it's not their turn. The only exception are effects that "place" an investigator in another space, in which case the investigator is placed directly at that space, they do not catch Fire, and enemies do not follow.
EXAMPLE: 1- Mike uses a Run action to move up to 3 spaces. He first moves into a space with a Cultist that has a wound. 2- He keeps moving and the Cultist follows him to the new space. The second space has 2 Fire tokens, but no enemies. 3- Mike finishes his Run by moving into a third space, which contains a Fisher from Outside. Again, the Cultist follows him. He is also leaving a space with 2 Fire tokens, so he takes 2 Fire tokens from the reserve and places them on his investigator board. He is now in a space with a Fisher from Outside and the Cultist who followed him. He is also on Fire. Pretty typical evening.
Attack
Target a single enemy in the investigator's space and make a roll (see Dice and Checks). Each success rolled causes 1 wound to the target. Place wound tokens next to the base of the figure attacked. If this number equals (or exceeds) their health, they die. Remove their figure from the board. Keep in mind that if the Elder One is on the board, it can only be attacked after the ritual is disrupted (see Disrupting the Ritual).
EXAMPLE: 1- Mike uses an action to attack a Cultist and a Fisher from Outside. Normally, he would have to target either the Cultist OR the Fisher from Outside, but his level 2 Brawling skill enables him to target ALL enemies in his space, so he doesn't have to choose.
2- He takes 3 standard dice (players always take 3 standard dice when making a roll) and 1 bonus die for his Brawling skill.
3- He rolls and gets a blank, a success + tentacle, a tentacle, and an elder sign. Mike doesn't have a skill that utilizes the elder sign, so it has no effect. Mike takes a stress to reroll the elder sign, since it would make him lose a stress anyway because of the Fisher from Outside's special ability and gets a blank. Mike's signature skill, Proficient, allows him to reroll an additional die. He could reroll the same die again, but chooses to reroll the blank result on the standard die and gets a success! He decides to stop rerolling.
4- The Cultist can take 2 wounds, and has already taken 1, and the Fisher from Outside can take 3. Mike has 2 successes to distribute as hits. He decides to use 1 to kill the Cultist, removing the figure and, using his Brawling skill, applies the last success as a hit to the Fisher from Outside.
NOTE: If the investigator didn't have the Brawling skill, he would have to deal all wounds to a single enemy (chosen before rolling dice), even if excess wounds would go ignored with no effect.
5- Finally, Mike loses 2 sanity from the tentacles rolled. Two steps closer to madness.
Rest (only on a Safe space)
If an investigator is in a Safe space (there are no enemies with them) they may heal their stress and/or wounds up to 3 spaces (in any combination). This is 3 spaces total, not 3 spaces for each track. Investigators may perform the Rest action more than once per turn.
IMPORTANT: SANITY CANNOT BE HEALED BY RESTING!
EXAMPLE: Agatha is at full stress and has taken 1 wound. She spends an action to Rest. She could choose to heal 1 wound and 2 stress, but decides to heal 3 stress instead, leaving her health where it is.
Trade
The active investigator and all investigators in their space may trade any number of Items or Companions with each other (either giving or receiving). While some Discovery cards have Items or Companions on both the left and right side of the card, a traded card must remain on the same side as it was originally. Investigators may not trade Conditions.
Episode Actions
Each Episode has 2 unique actions as shown on the Episode card. These work just like the standard actions and will help investigators disrupt the ritual or help them survive.
2. Draw Mythos Card
Draw the top Mythos card from the deck and resolve it. Then, place it on a faceup discard pile.
Mythos cards may have several different steps to them, divided into 3 types. Players must perform these steps in order, from top to bottom, before discarding the card. If players can't perform a step on the card, skip it and move on to the next.
Elder One Summoning
The Elder One Summoning symbol has no effect when the card is drawn, but may cause the Elder One to advance on its track at the end of the turn (see Check the Elder One Summoning). If the card has this symbol, make sure it remains visible when discarded.
Special Effects
Mythos cards have all sorts of different special effects to make life hell. Unless stated otherwise, these effects only affect the investigator whose turn it is, ignoring all others. Any choice that needs to be made is up to the active investigator, such as choosing which nearest figure to move.
When an effect moves an enemy towards a space, it should be moved by the shortest path to that space. Count how many spaces the enemy would move in all possible paths and choose the shortest one. In case of a tie, the active investigator chooses. The enemy must always be moved as much as allowed towards its target, but stops when it reaches it.
Summon Enemies
Finally, the bottom of some cards will indicate a Gate color and the specific enemy that must be summoned there. If players have the corresponding figure available in reserve, place it at the indicated space. Otherwise, ignore this step. If there are multiple Gates and enemies indicated, perform the summonings in order. Skip any remaining Gates if there are no more enemy figures available to summon.
This Mythos card has an Elder One Summoning symbol at the top which has no effect when drawn, but will be checked during the End of Turn. The first thing to do on this card is move each Fisher from Outside on the board 2 spaces towards the active investigator's space. Also note that if the investigator has a Paranoid Condition, the Fishers move until they reach the space. If there are no Fishers from Outside on the board, skip this step. Finally, summon a Fisher from Outside at the space with the Yellow Gate. If all the Fisher from Outside figures are already on the board, skip this step.
This card has a special effect that affects all investigators. Note that it affects all investigators, not just the player whose turn it is.
NOTE: If an effect summons multiple enemies at the same time without specifying an order (e.g: Summon 1 Cultist at each Gate), the active investigator chooses the order in which to summon the enemies. This is particularly relevant when there are not enough figures to be summoned.
3. Investigate or Fight!
This phase varies depending on whether there are enemies in the active investigator's space or not.
If the active investigator is in a Safe space, INVESTIGATE the space: Draw the top card of the Discovery deck and read the text in the center box aloud.
Some cards have a statement of something the investigator must do if they have a Condition or a certain Companion. Most offer choices of what the player can do. Some cards result in CLAIMING a Companion, Item, or Condition. Claiming means to slide the card under the investigator board, becoming part of the investigator's inventory (or, when it's a Condition, changing their mental state). If the investigator cannot or, in case it's optional, does not want to Claim either side of the card, discard the card.
When a player first draws a Discovery card, read the central text out loud. The card above has a bit of speech from the Strong Patient. Then, they have a choice of taking 2 stress to Claim the Strong Patient. If they CANNOT take 2 stress or do not want to take it, they MUST Claim the Paranoid Condition.
COMPANIONS: Any wounds investigators take may instead be applied to Companions they currently have. This still counts as the investigator taking wounds for card effect purposes. Companions can never be healed. If their wounds equal the health listed on their card, the Companion is discarded and any benefit they gave is immediately lost. Companions may also give investigators a level in a skill. If the investigator doesn't have that skill, they gain level 1 in that skill while they have this Companion with them and take the corresponding level 1 skill token. If they already have the skill, move the skill level marker 1 level forward. If they lose the Companion, move the marker 1 level back.
Noah, the Strong Patient, gives investigators 1 level in Brawling while they have him. He also can take 1 wound (which would kill him).
Some Discovery cards have effects that allow players to take the other side of the card. This means that players remove it from the side it currently is on the dashboard and slide it under the other side. If it's a Companion, any wounds on it are discarded.
NOTE: If the Discovery deck has no cards, it is not possible to investigate anymore.
NOTE: Investigators must always investigate if they are Safe, even if they wouldn't want to.
If the active investigator is not in a Safe space, the enemies FIGHT: Do not draw a Discovery card. Instead, each enemy in this space attacks the active investigator in any order the player chooses (ignoring all other investigators) until all enemies in the space that could attack have done so.
IMPORTANT: If an effect changes the state of the active investigator space while the phase is being resolved, the changes are immediately considered to continue to resolve the remainder of the phase.
If an active investigator enter a space with an enemy, or an enemy enter that investigator's space while resolving other attacks, this new enemy attacks even if it was not present at the beginning of this phase. Conversely, if an enemy exits the space before attacking, it doesn't attack anymore. If an effect makes the space Safe during this phase, enemies stop attacking. The investigator cannot investigate, since the space wasn't Safe at the start of the phase. Note that the opposite is also true: if after investigating, there's an enemy on the active investigator's space for any reason, enemies DO NOT attack, since the space was Safe at the start of this phase and the investigator already investigated.
Defending Against Enemies
When an enemy attacks, roll the number and type of dice as shown on its reference card. Each success gives the investigator 1 wound. Each tentacle costs the investigator 1 sanity. Elder signs only have an effect if either the investigator or the enemy have an ability that uses it. Investigators may use stress to reroll these dice and may use any of their skills to help avoid or minimize the attack.
EXAMPLE: After resolving the Mythos card, Mike has a Fisher from Outside in his space. So, he does not draw a Discovery card. The Fisher from Outside attacks! It rolls 1 standard die and 2 bonus dice when attacking. Mike's player rolls those dice, getting a blank, a success, and another success.
Mike uses his level 1 Toughness skill to reroll 1 of the successes and obtains a success again. He takes 1 stress to reroll it again and rolls a blank instead.
Since his signature skill, Proficient, is only at level 1, he doesn't receive any additional rerolls when attacked. He takes 1 wound for the remaining success.
4. Resolve End of Turn
1. End of Turn Effects
Any effects that happen at the end of the turn, except for Elder One effects, are resolved, in any order the active investigator chooses.
2. Fire!
Investigators may be on Fire. This will have happened if they left a space that contains Fire tokens. It may be that a monster set them on Fire. At this point, it really doesn't matter, does it?
At the end of a player's turn, they roll 1 standard die for every Fire token on their investigator board, as a single roll. They may use stress to reroll dice. Take 1 wound for each success and lose 1 sanity for each tentacle.
Then, they discard all Fire tokens from their investigator's board.
NOTE: Enemies don't catch Fire when leaving a space with Fire tokens.
RUNNING OUT OF FIRE: The number of Fire tokens on the board is limited to the number of Fire tokens available. If players need to add a Fire token to the board but there are none left, ignore the effect. However, Fire tokens on investigators are not limited. If a player needs to add a Fire token to their investigator board but there are none left, use a wound token instead. If there are no Fire tokens in reserve, but there are Fire tokens on investigator boards, replace them with wound tokens to make Fire tokens available to place on the board.
3. Check the Mythos Discard Pile
If there are 3 or more cards in the discard pile that have the Elder One Summoning symbol, the Elder One advances towards ultimate power!
If there are 3 or more Elder One Summoning symbols: Advance the Elder One along the Summoning track. If the Elder One is already on the board, move the Progression token along the track instead. The revealed Elder One Stage cards and the Episode card list what to do when the Elder One advances. Resolve the Elder One effects first. It doesn't matter whether it's the Elder One figure or the Progression token advancing on the Summoning track. The effects are resolved in the same manner.
After the Elder One advances, all of the discarded Mythos cards are shuffled back into the deck.
4. Check the Elder One Summoning
The Elder One is summoned if:
- The Elder One entered the first red space on the track.
OR
- The ritual was disrupted this turn.
When the Elder One is summoned to the world, move the Stage I card aside, revealing the Stage II card underneath. Resolve its reveal effects, which will specify where the Elder One must be summoned. The Stage I effects remain in play until the end of the game.
Place the Progression token on the Summoning track on the space previously occupied by the Elder One figure. Use this Progression token to mark the Elder One's progress until the end of the game.
EXAMPLE: At the end of Ruth's turn, there are 4 cards in the discard pile and 3 of them have Elder One Summoning symbols. The Elder One advances, triggering the corresponding effects on both the Elder One and Episode cards.
Ruth's player moves the Elder One on the track. It has reached the red space and is summoned into the world. Ruth's player reveals the Stage II card and performs its reveal effects. She replaces the Elder One figure with the Progression token and places the figure in her space.
The Progression token will move along the track from now on and, if the token reaches the end, the game will be lost. Finally, she shuffles the 4 Mythos cards from the discard pile into the Mythos deck to reset the Mythos deck.
5. Elder One End of Turn Effects
As the Elder One progresses through its Stages, there may be End of Turn effects visible on its Stage cards. Resolve all effects on each Stage card in the order of the Stages: First I, then II, then III, and then Final. Any effect that refers to "you" is referring solely to the active investigator.
The turn is now over and the investigator to the left takes their turn. Continue taking turns like this until the investigators either win or lose.
Death of an Investigator
When an investigator is killed or consumed by madness, the game is immediately lost if the Elder One is still on the Summoning track. If, however, the Elder One has already been summoned to the board, the other investigators may continue playing and trying to win the game. First, discard all Discovery cards, tokens and other components the now-deceased investigator had. The Episode may specify something to do with any special tokens the investigator had been holding.
If the investigator died during their turn, skip all the following turn phases except for the Check the Mythos Discard Pile phase. If there are 3 Elder One Summoning symbols, the Elder One advances and its effects are applied (if it is needed to determine the position of the dead investigator, use the space where they died). From now on, that player's turn is skipped entirely.
Disrupting the Ritual
Each Episode describes the tasks investigators must accomplish in order to disrupt the Cultists' ritual and make the Elder One mortal, even if only for a short time. The Elder One cannot be attacked or damaged until the ritual is disrupted (though it can attack investigators if it's on the board)!
If investigators disrupt the ritual, the Elder One is summoned at the end of the turn (see "Check the Elder One Summoning").
Fighting the Elder One
Once the Elder One is summoned to the board, it acts like any enemy, attacking investigators who end their turn in its space. The number and type of dice the Elder One rolls is the total of all dice displayed on all its revealed Stage cards.
Until the ritual is disrupted, the Elder One cannot be attacked or damaged, even if it's already been summoned to the board by reaching the red space on the summoning track! After the ritual is disrupted, the Elder One can be attacked and damaged like any other enemy. The Elder One has multiple Stages, with individual health totals, which must be defeated one at a time until it's ultimately destroyed.
Starting with Stage II, each card displays:
- A one-time effect that takes place when that card is revealed.
- An ongoing effect that remains in play until the end of the game.
- Health showing how many wounds that Stage can take.
- The number and type of dice that Stage adds to the Elder One's attacks.
When a Stage has wounds equal to or greater than its health, that Stage is defeated. Any effect triggering when an enemy dies or is killed also take effect here. Move that Stage card aside to reveal the next and resolve its "When Revealed" effect. Any excess wounds do NOT carry over to the next Stage. Remember that all of the previous Stages' effects and dice remain in play until the end of the game!
EXAMPLE: An investigator attacks Tsathoggua while it is in Stage II. That Stage already has 9 wounds from earlier attacks. The attacking investigator does 5 wounds! This new total of 14 is enough to defeat this Stage's 12 health. The Stage II card is moved aside, next to Stage I, revealing Stage III. Even though the investigator only needed 12 wounds to defeat the Stage and did 14, the extra 2 wounds do NOT carry over to Stage III. Tsathoggua is moved to the Yellow Gate and each investigator gains 1 Fatigue token unless they take 2 stress. Tsathoggua now rolls 3 bonus dice AND 2 standard dice when attacking!
Component Limitation
With the exception of dice and wound tokens (and consequently, Fire on investigators), all components are limited. If there are not enough tokens (or other components), use as many as possible for the effect, but do not add substitutes for the missing components. Also, if a component is discarded/removed, it returns to the pool of available components, unless stated otherwise.
When mixing components from different Cthulhu: Death May Die core boxes, players should increase the Fire token pool. For example, since Cthulhu: Death May Die comes with 8 Fire tokens and Cthulhu: Death May Die - Fear of the Unknown includes 12, players using both boxes have access to 20 total Fire tokens.
Note this is not true for other components. For example, the total number of Cultists in an Episode is always limited to 10, as stated on the Elder One Minions card.
Resolving Ties and Ambiguities
If there are multiple ways to resolve an effect, unless stated otherwise, the active player always chooses how to resolve it. For example, if an effect moves the nearest enemy and there are multiple enemies at the same distance, the active player chooses 1 of them to move. Also, if multiple effects trigger at the same time, the active player chooses the order in which they are resolved.
Checking Distance
For several effects players must determine the nearest or farthest element (space, figure, or token) from their investigator or another element on the board. When determining the nearest or farthest element, always use the shortest path to the space where the element is. Distance to the same space is always 0. So, if an element is in the investigator's space, it is the nearest element. If there are multiple elements of the specified type at the same distance, the active player selects 1 of them.
Effects that block passages, like Lock tokens, should be considered when checking the shortest path, the path cannot pass through blocked passages. The only exception is if the effect would move a figure that can ignore the restrictions. For example, on Season 3 - Episode 2: Isle of the Damned, the Cultists can pass through Lock tokens. If an effect would move the nearest Cultist towards you, even though other figures cannot move through the Lock tokens, ignore those tokens when checking which Cultist is the nearest, since they can pass through Locks. However, effects that affect which spaces are adjacent to each other in specific circumstances, like the Mysterious Key Relic, are ignored when checking the shortest path.
Ending the Game
Players win the game when they kill the Elder One by defeating its Final Stage. If multiple end-game triggers happen at the same time, winning conditions have precedence.
EXAMPLE: The Elder One and the last investigator die at the same time. The players saved the world and win the game.
Players lose the game when 1 of the following happens:
- An investigator is killed or consumed by madness before the Elder One is summoned to the board (Stage I card).
- All investigators are killed or consumed by madness after the Elder One is summoned (Stage II onward).
- The Progression token reaches the last (8th) space of the Summoning track.
Unknown Rules
If players want to try a more challenging game, they can add this special set of rules to any game of Cthulhu: Death May Die. These rules allow players to add different monsters to any Episode and/or introduce unique Relics that the investigators can access. Please note that these rules increase the difficulty of the overall game and are not recommended for unexperienced players. When including the Unknown Rules for the first time it is recommended to use only 1 Unknown Monster instead of 2 (check Adjusting the Difficulty).
Additional Concepts
Unknown Board
When playing with the Unknown Rules, place the Unknown Board next to the Story Board. The Unknown Board contains a summary of the End of Turn phase, including the extra steps added by the Unknown Monster cards. It also contains 2 slots for Unknown Monster cards with different icons on each slot. Those icons are used to reference the different monsters (the first Unknown Monster symbol and the second Unknown Monster symbol).
Unknown Monsters
Just like other enemy cards, Unknown Monster cards show their health, the dice they use when attacking, their special ability, and the total number of figures available in their pool.
They also show Setup summoning information (see Additional Setup) and a special effect that happens when the Elder One advances.
Unknown Monsters are treated as regular monsters during the game. Any effect that affects monsters also affect them.
When the Elder One advances, after resolving the Elder One and Episode effects, resolve the Unknown Monsters effects in order. First, the first Unknown Monster's effect and then the second Unknown Monster's effect.
NOTE: This box comes with Unknown Monster cards not only for the monsters from Cthulhu: Death May Die - Fear of the Unknown, but also for all monsters from the Cthulhu: Death May Die core box and Season 2 Expansion!
Unknown Mythos Cards
When playing with the Unknown Rules, shuffle the 4 Unknown Mythos cards into the Mythos deck. These cards move the Unknown Monsters, and players must draw another card after the Unknown Mythos card is resolved.
When players draw a card with the draw-another-Mythos-card icon, after resolving it, discard it. Then, draw and resolve another Mythos card. Keep drawing and resolving until a card without this icon is resolved.
NOTE: If any game effects have players resolving a card with the draw-another-Mythos-card icon without drawing it (e.g. the Recurring Trauma insanity from Cthulhu: Death May Die core box), players resolve its effect but DO NOT draw and resolve another card.
Unknown Relics
In addition to monsters, Unknown Relics are also added to the game. Each investigator starts with 1 Relic that has a unique ability. Relics begin with their regular (white) side faceup. As soon as an investigator reaches their 3rd Insanity Threshold, the Relic transforms and is flipped to the transformed (black) side, revealing an upgraded effect. This represents the loss of sanity, making the investigator believe that the Relic is more than a simple artifact.
IMPORTANT: Relics are not considered Items or Discovery cards and cannot be discarded or traded.
Additional Setup
After performing the game setup, perform the following additional steps:
-
Place the Unknown Board to the right of the Story Board.
-
Randomly choose 2 Unknown Monsters that are different from the monsters already present in the Episode. Place both cards randomly on the Unknown Board slots and retrieve ALL their corresponding figures from the box.
-
Summon 1 figure from each Unknown Monster at a different random Gate: Take the 4 Random Location tokens and remove the one showing the Starting space from the pool, leaving only the 3 one showing Gate icons. Randomly select 1 of the tokens and place 1 figure from the first Unknown Monster at the corresponding Gate. Discard that token and randomly select 1 of the 2 left. Set 1 figure from the second Unknown Monster at the corresponding Gate.
NOTE: Some Unknown Monsters have additional setup summoning information. Make sure to apply them when summoning.
-
Shuffle the 4 Unknown Mythos cards into the Mythos deck.
-
Randomly select a number of Unknown Relics equal to the number of investigators. Beginning with the starting player and going clockwise, each player chooses 1 Relic and places it next to their investigator board with the regular side faceup.
Adjusting the Difficulty
If players want to adjust the difficulty of the game, they can implement some of the following changes:
Separating the Unknown Rules
Although the Unknown Relics and Monsters were designed to be played together, players may choose to use them independently if they want an easier or harder game.
- Unknown Relics: Easier Game. If players want an easier game of Cthulhu: Death May Die, they may add the Unknown Relics without the Unknown Monsters. If they choose to do so, only add the Relics to the game (step 5 of the Additional Setup) and ignore the other Unknown components.
- Unknown Monsters: Harder Game. On the other hand, if players want a harder game, they may add the Unknown Monsters without the Unknown Relics. In this case, ignore the Relics and skip step 5 of the Additional Setup.
Random Elder One Summoning
(Uses the 4 Random Location tokens: Blue Gate, Red Gate, Yellow Gate, and Starting space.)
After playing against the same Elder One multiple times, the Elder One's behavior may become predictable. To add another level of challenge, players can use the Random Location tokens to randomize where the last 2 stages are summoned.
- When Stage III of the Elder One is revealed, instead of moving it to the specified space, randomly select 1 of the 4 Random Location tokens and move it to that space. Remove that token from the pool.
- When the Elder One's Final Stage is revealed, instead of moving it to the specified space, randomly select 1 of the 3 remaining Random Location tokens and move it to that space.
Single Unknown Monster
For an easier game, players may choose to add only 1 Unknown Monster to the game instead of 2.
Changes to the Additional Setup:
- Use the back of the Unknown Board with only 1 Unknown Monster slot.
- Select only 1 Unknown Monster to be added to the game.
- Select only 1 random Location token to summon 1 figure from the first Unknown Monster.
- Only the 2 Unknown Mythos cards with the first Unknown Monster symbol should be shuffled into the Mythos deck during the setup.
Skill Codex
Arcane Mastery
- Level 1: When making any roll, you may count 1 Elder Sign as a success.
- Level 2: Instead, you may count any number of Elder Signs as successes.
- Level 3: Heal 1 stress for each Elder Sign you count as a success.
- Level 4: You may count any number of Elder Signs as 2 successes each.
Arcane Mastery can be used for any roll, including rolls against themself, if the player wants.
Brawling
- Level 1: Gain 1 bonus die when attacking a target in your space.
- Level 2: When you attack, you may target ANY NUMBER of figures in your space (split the wounds as you like).
- Level 3: You have 2 free rerolls when attacking a target in your space.
- Level 4: When you attack figures in your space, deal the full wounds to EACH target.
With Brawling Level 2 or higher, players must choose the targets of their attack before rolling dice. If the investigator attacks multiple targets, all enemy "When attacked" effects are triggered. The active player chooses the order in which they are resolved.
Marksman
- Level 1: You may attack a target 1 space away.
- Level 2: Gain 2 bonus dice when attacking a target not in your space.
- Level 3: You may attack a target 1 additional space away (2 total).
- Level 4: You may perform 1 free attack per turn against a target not in your space.
A target 1 space away is a target that is in a space that can be accessed with 1 movement. Similarly, a target 2 spaces away is in a space that can be accessed with 2 movement. A space that is inaccessible for any reason cannot be targeted.
With Marksman Level 4, the investigator gains a free attack action during their turn that can only be used against a target not in the investigator's space.
Stealth
- Level 1: When you Run, you may Sneak once (1 enemy doesn't follow you).
- Level 2: Instead, when you Run, you may Sneak 3 times.
- Level 3: Deal 1 wound to each enemy you Sneak past.
- Level 4: Instead, you may Sneak any number of times.
Stealth specifies the investigator may only Sneak during a Run action. If any other effect would make them move, enemies follow as usual, unless stated otherwise.
To Sneak means that when leaving a space, the investigator may ignore 1 of the enemies that would follow them (player's choice). Instead, that enemy stays on the space they were leaving.
Stealth Level 2 allows the investigator to Sneak up to 3 times per Run. Since investigators can choose to use it at any point of the Run action, they can, for example, make 3 enemies follow them through 2 spaces, and with their last move, leave the enemies behind. They could also choose to leave each enemy in a different space by Sneaking each of them when leaving a different space. Investigators may also Sneak past the same enemy more than once if they return to the original space and leave it again. Notice, though, that Sneaking the same enemy twice would spend 2 of the Sneaks.
With Stealth Level 4, the investigator keeps Level 3's ability to deal 1 wound to each enemy they Sneak past.
Swiftness
- Level 1: When you Run, you may move 1 additional space.
- Level 2: You have 1 free Run action each turn.
- Level 3: During a Run, you may take 1 investigator with you when leaving a space.
- Level 4: You have 1 extra action each turn.
With Swiftness Level 3 or higher, the decision of taking an investigator or not is made independently for each space the investigator leaves during a Run.
Example: Leon starts his Run action in the same space as Julien. When making his first move, he takes Julien with him. For the second move, he decides to leave Julien in that space and takes no one with him when entering a space where Mike and Ruth are. For his 3rd move, he decides to take Mike with him. Then, he decides to stop.
Toughness
- Level 1: You have 1 free reroll when attacked or rolling for Fire.
- Level 2: Instead, you may reduce wounds taken and loss of sanity by 1 when attacked or rolling for Fire.
- Level 3: Instead, you may reduce wounds taken and loss of sanity by 1 from ANY SOURCE.
- Level 4: Instead, you may reduce wounds taken by 2 and loss of sanity by 1 from ANY SOURCE.
With Toughness Level 2 or 3, the investigator may prevent either 1 wound, 1 sanity, or both 1 wound and 1 sanity from the same source.
Episode Lore
Episode 1 – Top of the Mourning
Kilkenny never recovered from its witch trials, and the punishment faced by Petronilla de Meath and Alice Kyteler - one of them unjustly accused. Even though their bodies burned to ash centuries ago, their unquiet souls still linger, fueled by eldritch power and resentment.
Their prosecutors, sharing their curse, roam the haunted streets of the city looking for final justice. Meanwhile, cultists feed on the power left behind. Look for the clues that were once ignored, for only a new trial and truth uncovered can bring peace to the witch city.
Episode 2 – Isle of the Damned
A storm is brewing on a small isle near Venice, and thunder drowns out the cries of those called insane by those who could not see the true horrors that lurk beneath. Once a place of treatment, this hospital has become a prison. Doctors and guards mere excuses for cultists and torturers, madness used as fuel for nefarious intentions.
Locked doors must not stop you, and unusual allies can be found in darkened corridors and forgotten rooms. You must break free before their ritual is completed, even if the whispering shadows become too much to bear. Don't believe for a second what the doctors tell you: the monsters are real, and they are getting close.
Episode 3 – Deliver Us from Evil
Deep down the Parisian catacombs, in the place where time and death come to cross their scythes, malicious intent defiles old bones and new blood alike. A cursed altar has been erected, rendering innocent passersby and the ghosts of different eras equal victims of cultists and their masters.
Don't get lost in the labyrinthine corridors. Ignore how heavy are the bones you carry in your arms, and the sound the walls make as they close in around you. To protect the living and restore the silence of the catacombs, the altar must be destroyed at all costs.
Episode 4 – By Request of the Queen
It's no secret that stone bathed in blood retains the memories of those slain upon it. Such is the case with this castle, the semi-mythical home of Vlad the Impaler, lost in the mists of legends and even more terrible truths.
Thirst is the only thing known to these walls and their inhabitants - both the original occupants and the cultists who now reside here, harnessing ancient powers. The only way to stop them is to blow the place to the ground, and let old malice return to dust.
Episode 5 – Festival of Death
For eldritch desires to be fulfilled, innocence must be defiled. It's easy to get drunk in the colorful lights and the children's laughter, but take this carnival for what it truly is: a trap laid by cultists to serve their rituals.
With a touch of luck and a measure of skill, you must face the challenges yourself. Play their games and try to win while keeping the townsfolk away. Its the only way to keep them safe.
Episode 6 – Die Schöne und das Biest
The thorny origins of a fairy-tale, sweet love turned sour by jealousy and bitter murder. Pay heed to the cries of the ghosts who tell this story over and over again. Look for the lady who believed in beauty within - and paid dearly for it.
A Beast hides down below, both captive and warden of spirits, waiting to be fed. By its hands the castle became haunted, its powers now coveted by cultists. To stop them, you must become their predator instead of prey.
Rules Summary
Turn Sequence
1. INVESTIGATOR TAKES 3 ACTIONS
- Run - Move up to 3 spaces - Enemies follow. Add 1 Fire token to the investigator board per Fire token in the spaces they leave.
- Attack - Make a roll against 1 enemy in the investigator's space.
- Rest - Safe space only: Heal 3 stress/wounds.
- Trade - With investigators in the same space.
- Episode actions - Described on the Episode card.
2. DRAW MYTHOS CARD
- Keep Elder One Summoning symbols visible
- Resolve special effects
- Summon enemies at Gates (if available)
3. INVESTIGATE OR FIGHT!
- If in a Safe space, draw a Discovery card.
- If there are enemies in investigator's space, they all attack (roll dice shown on their card).
4. RESOLVE END OF TURN
- End of Turn Effects
- Fire! - Roll 1 standard die per Fire token on investigator, then discard them.
- Check the Mythos Discard Pile - If there are 3 Elder One Summoning symbols, the Elder One advances. Apply Elder One and Episode card effects. If using Unknown Monsters, resolve first Unknown Monster and second Unknown Monster behavior. Then, reshuffle Mythos deck.
- Check Elder One Summoning - If a red space is reached or the ritual is disrupted, move the Stage I card aside and resolve the Stage II Reveal effects, summoning the Elder One.
- Elder One End of Turn Effects - Resolve effects of all revealed Stages in order.
Dice and Checks
Make a roll: Roll 3 standard dice + any applicable bonus dice.
- Success - Deals 1 wound when attacking.
- Elder Sign - Requires an ability to have any effect.
- Tentacle - Lose 1 sanity.
On ANY roll, the active investigator may take 1 stress to reroll 1 die (as many times as they want and can).
Sanity
When marker reaches an Insanity Threshold:
- Ignore any remaining sanity loss.
- Activate the investigator's insanity.
- Level up 1 of the investigator's skills.
- If there's a bonus die symbol, investigator now adds +1 bonus die to all their rolls.
Fighting the Elder One (Summary)
- Once summoned, if the Elder One attacks, roll the dice on all revealed Stages together.
- The Elder One can only be attacked after the ritual is disrupted.
- Once the current Elder One Stage loses all its health, move that card aside and resolve the Reveal effect of the next Stage.
Ending the Game (Summary)
Investigators all win if:
- They defeat the Final Stage of the Elder One.
Investigators all lose if:
- An investigator is eliminated before the Elder One is summoned.
- All investigators are eliminated.
- The Progression token reaches the final Summoning track space.