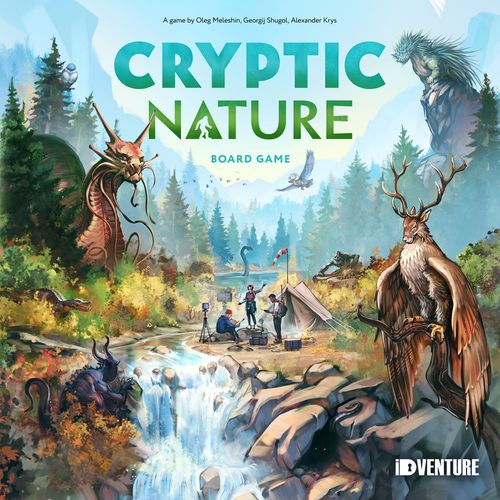
Cryptic Nature
Cryptic Nature Rulebook
Table of Contents
Table of Contents
Components
- 16 cryptid cards, level I
- 15 cryptid cards, level II
- 12 cryptid cards, level III
- 13 contract cards
- 4 player boards
- 1 game board
- 10 bonus rumors
- 32 evidence tokens
- 1 sanctuary board
- 51 terrain tiles: 17 brown (mountains), 17 blue (water), 17 green (forests)
- 43 cryptid tiles: 13 green, 14 brown, 13 blue, 3 special
- 3 sanctuary fences (for 2-3 players)
- 4 cryptozoologists
- 8 bid markers (2 for each player)
- 20 coins worth 1, 10 coins worth 3
- 8 request tokens
- 4 assistants
- 32 cryptid markers (8 for each player)
- 8 action markers (2 for each player)
- 40 skill markers
- 20 experience tokens worth 1, 10 experience tokens worth 2
Wolpertinger module: 11 Wolpertinger tokens, 1 Wolpertinger card
- 5 assistant dice
- 2 tracking dice
- 1 evidence bag
- 4 player aid cards
- 1 scorepad
Plus solo mode components (see "Against the Poacher (Solo Mode)").
Setup
General Setup
-
Place the game board in the center of the table.
-
Place the sanctuary board next to the game board.
-
Put all evidence tokens into the bag and shuffle them.
Note: Do not put bonus rumors into the bag.
- Draw 3 evidence tokens from the bag and place them in the evidence market on the game board face down (location number must be on top).
- Check the location number on the right-most token in the evidence market — it shows where you will place your next token. Draw a token from the evidence bag and put it face down in the corresponding location on the game board. Continue laying out evidence until there are 7 tokens on the game board (excluding the market). To find out the location of every following evidence token, always check the location number on the last token placed. As a result, you might have up to 2 evidence tokens at the same location.
- Turn all evidence tokens face up.
-
Shuffle the cryptid cards into 3 separate decks, one for each level. Place them face down next to the game board.
-
Lay out 6 face-up cryptid cards (level I) next to the game board. Some cryptids have a question mark. If you have any face-up cryptid cards with this icon, cover it with an evidence token from the bag:
- If there is a question mark at the bottom left of the card, place an evidence token face down on this symbol to reveal the location number.
- If there is a question mark on the right, place an evidence token face up to reveal the type of evidence required.
-
Place 2 tracking dice next to the cryptid cards.
-
Split the cryptid tiles into piles according to their colors and place them face up next to the cryptid card decks.
-
Make a supply of coins, experience and bonus rumors (they show the same icon on both sides). Place them in the designated area at the bottom left of the game board.
-
Shuffle the contract cards. Reveal 1 card and place it in the designated area at the bottom right of the game board.
-
Shuffle the request tokens and place 4 of them face up in the slots on the sanctuary board.
-
Split the terrain tiles into 3 piles by color and place them face up in the designated areas on the sanctuary board.
-
Place the assistant dice near the initiative track of the game board:
- for 2 players — 3 dice
- for 3 players — 4 dice
- for 4 players — 5 dice
-
In a 3-player game, place the fences for 2–3 players on the sanctuary board as shown in Picture A.
In a 2-player game, place the fence for 2 players and the fences for 2–3 players as shown in Picture B.
Player Setup
- Each player chooses a color and places their assistant on the left part of the initiative track, one after the other in random order, starting from the highlighted spot. The initiative track shows the order in which players take turns, starting from the top.
- Each player receives the following components:
a. Player board
b. 2 action markers
c. 10 skill markers
d. 8 cryptid markers
e. 2 random contract cards, placed face down — only you may look at your cards
f. 2 bid markers
g. Cryptozoologist
h. Assistant
i. Player aid card
j. 1 bonus rumor — place it in an empty slot on your player board
k. Regardless of the total number of players, everyone gets a certain amount of coins according to their position on the initiative track:
- 1st player — 1 coin
- 2nd player — 2 coins
- 3rd player — 2 coins
- 4th player — 3 coins
- On your player board, place the action markers in the red spaces of the Main Action and the Main Movement slots.
- Place 1 skill marker in the "flight ticket" slot. Set the other 9 markers aside.
- Starting with the first player and proceeding in the order of the initiative track, do the following: 5a. Place your cryptozoologist in any unoccupied city on the game board. 5b. Put your bid markers on any 2 revealed cryptid cards (even if there are already other player markers on it). 5c. Choose any 3 terrain tiles of different colors and place them face up in the designated slots at the bottom of your player board.
Note 1: During the game, you may track only those cryptids that have your bid markers on them. However, you will be able to move these markers later on in the game.
Note 2: At the end of the game, you will have to discard 1 of your contract cards, so you will score reputation points from only 1 contract.
Cryptid Cards
Cryptid cards are the key element of the game. You are going to find and relocate cryptids. Cryptid cards are divided into 3 levels based on the difficulty of tracking them. Here's the common structure of a cryptid card:
-
Name and description of the cryptid.
-
Reputation points gained for finding this cryptid.
-
Level of the cryptid.
-
Location on the game board: To capture a certain cryptid, your cryptozoologist must be at this location.
Some cryptids inhabit cities — you will see a city symbol and the name of the city.
There are also cryptids with a question-mark sign instead of the location. These are runaway cryptids who have left their original habitat. Whenever you reveal such cryptid cards, draw an evidence token from the bag and put it face down on the question-mark sign to determine the location of this cryptid in the current game.
Note: The values on evidence tokens laid in place of the question mark do not count toward contracts, requests and powers of other cryptids.
-
Evidence required to track this cryptid. Some cryptids have a question-mark sign instead of evidence. Whenever you reveal such cryptid cards, draw an evidence token from the bag and put it face up on the question-mark sign to determine the required evidence for this cryptid in the current game.
-
Reputation points gained for settling this cryptid in the sanctuary.
-
Type of cryptid: There are 4 types. Some cryptids combine 2 types.
-
Color and shape of cryptid tile: When you settle a cryptid in the sanctuary, you have to place its unique cryptid tile over terrain tiles of a certain type. Cryptids inhabit 1 of 3 terrains — water (blue), mountains (brown) and forests (green). Some cryptids have special settlement rules written on the card, so the color of their cryptid tile might be different from the standard ones.
-
Special power: Cryptids can provide a bonus or require a special condition when tracked or relocated. There are several types of powers.
- This power will trigger at the end of the game during scoring. Example — GAME END: If you have obtained all skills, score 2 reputation points.
- This power is resolved if you have just failed an attempt to find this cryptid with dice. Example — IF YOU FAIL TO FIND THIS CRYPTID: Gain 2 coins.
- This power is resolved when you settle this cryptid in the sanctuary or use it to fulfill a request. Example — WHEN RELOCATED: Gain 1 experience.
- This power is immediately resolved when you successfully find this cryptid. Example — WHEN FOUND: Gain an evidence token from the bag.
The effects of cryptid powers always prevail over the general game rules.
Game Overview
The game is played over a series of rounds. Each round consists of 2 phases: the Cryptozoologist Phase and the Assistant Phase. At the beginning of each phase, determine the turn order according to the position of players' assistants on the initiative track, starting from the topmost player. After all players have taken their turns in the Cryptozoologist Phase, the Assistant Phase begins. After all players have taken their turns in the Assistant Phase, the Cryptozoologist Phase begins again.
Example: The first player in the Cryptozoologist Phase will be white, then orange and blue. After the blue player finishes their turn, the Assistant Phase begins.
I. Cryptozoologist Phase: Use your cryptozoologist to travel around the game board, collect evidence, and find and relocate cryptids. At the end of your turn, move your assistant to the space immediately to the right on the initiative track.
II. Assistant Phase: Move your assistant up or down the initiative track and gain resources or spend them on skills. At the end of your turn, place a terrain tile on the sanctuary board and reactivate your actions. Then move your assistant back to the left on the initiative track.
The game-end condition is triggered when players cannot place any more terrain tiles in the sanctuary. The current round is played till the end, and the next round becomes the final one. After the final round, the game ends and scoring begins. The player who gains the most reputation points wins.
I. Cryptozoologist Phase
At the beginning of the Cryptozoologist Phase, the starting player rolls all assistant dice.
On your turn perform 1 Main Movement and 1 Main Action of your choice:
- Movement
- Collect evidence
- Track a cryptid
- Relocate a cryptid
- Reset evidence and cryptids
Additionally, at any time during your turn, you can use your skills.
Main Action, Main Movement and the use of skills can be performed in any order.
Whenever you perform an action, move or use skills, slide the action marker or the skill marker to the right on your player board from the ready state (visible green) to the spent state (visible red).
Movement
Cryptozoologists have to travel a lot while looking for traces of cryptids and trying to track them, in order to prove their existence to the world.
Move your cryptozoologist to another location, connected by lines, up to 2 spaces from your current location. There can be multiple cryptozoologists in the same location.
There are 2 types of locations:
- Regions — in these locations, you can find evidence of cryptids' presence and track down cryptids.
- Cities — this is where you can relocate cryptids.
Note: During the game, it is possible to boost your movement by obtaining up to 2 "movement range" skills, which allows you to move up to 3 locations (with 1 skill) or up to 4 locations (with 2 skills). See "Using skills."
Important: Movement cannot be split. If you decide to move only 1 location and then perform another action, you will not be able to move 1 more location again, since your movement action has already been completed.
Note: During the game, it is possible to obtain the skill "interrupt movement." It allows you to use some of your available movement points, make a stop to use an action or skills, and then continue movement to use up your remaining movement points (see "Using skills").
Important: The rules described in this section apply both to the Main Movement and the movement performed as a Main Action. They are considered different actions, so you can also use skills in between these 2 types of movement.
If you do not want to move on your turn, mark your Main Movement as spent and remain in your current location.
Collect Evidence
To track down cryptids, you have to find proof of their existence. The most popular traces of cryptids are rumors. You can also find many curious objects in local private collections.
Pick up 1 evidence token from the location where your cryptozoologist is standing. Put that evidence in an empty slot on your player board.
If there are no available slots on your player board, you may not perform this action.
EVIDENCE TOKENS
There are 7 types of evidence. The 6 main ones are: victim, bones, eyewitness, footprint, silhouette in the sky, outline in the water. The number on their face shows the cost of purchase and sale in the evidence market (see "Buy and sell evidence").
The seventh type of evidence, rumor, is special. Like other evidence, it is required for tracking certain cryptids, but it can also be used as a wild token: you can spend 2 rumors instead of 1 other evidence.
Advice: This feature is especially useful for tracking level II and level III cryptids, as they require much evidence. But it may also come in handy for level I cryptids if you can't gain necessary evidence.
Important: If you've taken the last evidence from the board, immediately place 7 new evidence tokens on the board, drawn from the bag (see "Reset evidence").
Note: In the Assistant Phase, it is possible to obtain the skill "collect evidence from an adjacent location." This will allow you to pick up evidence from the neighboring connected locations while taking the action or skill "collect evidence."
Track a Cryptid
As a true cryptozoologist, you are trying to find cryptids in order to resettle them in a safer habitat. You can search hard for evidence to be sure that you will find a cryptid, or push your luck and try to track a cryptid without knowing much about it. But in the latter case, you might return empty-handed.
To track a cryptid, you must fulfill all of the following conditions:
- Your bid marker must be on the card of the cryptid you want to track.
- Your cryptozoologist must be in the location shown on the cryptid card.
- You must have at least 1 of the required evidence shown on the cryptid card.
Advice: Remember, you can always use 2 rumors as 1 evidence of any other type.
If you have all required evidence, you may find a cryptid. Alternatively, you can attempt to find a cryptid if:
- you have only part of the required evidence
- you have all required evidence tokens but want to keep some of them
FIND A CRYPTID (with all evidence)
-
Discard all required evidence tokens from your player board and put them near the evidence bag. Remove players' bid markers from the chosen cryptid card and return them to their owners. Take the cryptid card and place it next to your player board. Find and take the cryptid tile shown on the cryptid card.
-
Draw a new cryptid card from the appropriate deck and put it in place of the found cryptid as follows: If you found. . .
- a level I cryptid, replace with level II
- a level II cryptid, replace with level III
- a level III cryptid, replace with another level III
Note: In rare cases, level III cryptid cards may run out, both in the deck and in the discard pile; then, there will be fewer than 6 available cryptids in the game.
-
If your cryptid has a "When found" power, activate it.
Note: Players may place their removed bid markers on a new cryptid card at any time but must do so before the round ends.
ATTEMPT TO FIND (with dice)
Roll 1 tracking die for each missing evidence token. The cryptid will be found only if all dice show success.
Example: Your chosen cryptid requires 3 evidence: silhouette in the sky, bones and footprint. You use 2 rumor tokens as a replacement for bones. You have to roll 2 dice because you are still lacking silhouette in the sky and footprint.
Note: If you have 2 out of 3 required evidence, you may still choose to roll 2 dice as if you only had 1 evidence. This option might be useful if you want to keep more evidence and believe in your success.
Dice values:
- Success
- Failure
- Failure, BUT if you have the skill "luck," you can activate it, and this face value will be considered success for all rolled dice (see "Using skills").
Note: If you have the skill "second chance," you may activate it to reroll the failed dice (see "Using skills").
Success: Discard all used evidence tokens and put them near the evidence bag. Then, follow the same procedure as in "Find a cryptid."
Failure:
-
Discard 1 of the evidence tokens used for the attempt to find a cryptid; put it near the evidence bag.
Note 1: If you used 2 evidence to track a cryptid that requires 3 evidence, discard 1 token of your choice and keep the other.
Note 2: If you used 2 rumors as a replacement for 1 evidence, you have to discard both rumor tokens. But if you used 2 rumors + 1 other evidence (as 2 out of 3 required evidence), you may choose to discard either 2 rumors or 1 other evidence.
-
Gain 1 experience from the supply.
-
If your chosen cryptid has an "If you fail to find this cryptid" power, activate it.
Relocate a Cryptid
After you have finally tracked down the cryptid, you are hurrying to the nearest city in order to contact the local wildlife protection organization and arrange the cryptid's resettlement. The unique cryptid sanctuary is ready to welcome new inhabitants. Plus, some environmental associations established an award for the cryptozoologists who can fulfill the request for conservation of certain species.
You can perform the relocation action only if your cryptozoologist is located in a city and you have an unsettled cryptid (with an available cryptid tile) in your player area. Relocation can be performed in 1 of 2 ways:
- Settle 1 cryptid in the sanctuary.
- Fulfill the request for 2 cryptids of a certain type.
SETTLING A CRYPTID IN THE SANCTUARY
To settle a cryptid, you have to place its tile on suitable terrain in the sanctuary. At the beginning of the game there are no terrain tiles in the sanctuary yet, but at the end of each player's turn in the Assistant Phase, new terrain tiles will be placed, making it possible to settle cryptids.
To perform this action, the sanctuary must contain terrain tiles matching the color of your cryptid tile (blue for water, green for forests, brown for mountains), with enough vacant space on them. This condition is considered fulfilled if the cryptid tile can entirely cover the terrain tiles of the necessary type without covering any other cryptid tiles. A cryptid tile can be rotated but cannot be laid face down.
If there is no suitable vacant space in the sanctuary, you cannot take this action.
Note: Some cryptids have special rules of settlement written on their card (e.g., they must be placed on spaces without any terrain or on 2 terrains at the same time, or even cover other cryptid tiles). Check if your cryptid card has a "When relocated" power.
- Place the cryptid tile in the sanctuary. On top of it, place a cryptid marker of your color.
- Gain all bonuses for each covered symbol on the terrain tiles:
- experience symbol — gain 1 experience
- coin symbol — gain 1 coin
- initiative symbol — (optional) move your assistant on the initiative track 1 space up or down. If there is another player's assistant in your way, jump over it and end on the nearest unoccupied space. Do not gain any extra bonuses (such as assistant dice or skills) for this bonus movement.
- If your cryptid has a "When relocated" power, activate it.
Example: The orange player can settle Tulikettu or the Beast of Gévaudan by rotating Beast's tile 90°. There is no suitable place for Cochlea Sarmatica in the sanctuary, so it cannot be settled yet. The player settles Tulikettu in the sanctuary, then gains 1 experience and 1 coin for covered symbols on the terrain tiles. On top of the cryptid tile, the orange player places their cryptid marker.
FULFILLING A REQUEST FOR 2 CRYPTIDS
At the beginning of the game, there are 4 request tokens on the sanctuary board. Players can use their relocation action to fulfill these requests and gain reputation points.
To perform this type of relocation, you must have 2 unsettled cryptids matching the symbol on 1 of the available request tokens. Request symbols show either the habitat region or the type of cryptid.
If you do not have a suitable pair of cryptids, you cannot perform this action.
Take the following steps:
-
Remove the cryptid tiles of these cryptids from the game.
-
Take the chosen request token, turn it face down and cover the symbols of reputation points gained for settling these 2 cryptids. Instead of the points indicated on the cards, you will receive 4 reputation points for this token at the end of the game.
-
If either of the used cryptids has a "When relocated" power, activate it.
-
Optional: You can replace up to 2 cryptid cards without any players' bid markers on them. Discard the chosen cryptid card to the discard pile corresponding to its level. Then draw and put a new cryptid card of the same level in place of the removed one.
Note: If all cryptids have at least 1 bid marker, you cannot perform this optional action.
-
Choose and gain one of the following bonuses:
- 3 coins
- 1 experience
- move your assistant up to 2 spaces up or down the initiative track
Reset Evidence and Cryptids
Sometimes you have to take a break in your pursuit of cryptids and evidence. Old traces are ending, but new ones are appearing on the horizon and worth paying attention to!
To perform this action, there must be fewer than 7 evidence tokens on the game board (the ones in the evidence market do not count). If there is no evidence at all, the evidence must be reset (see "Automatic evidence resetting"). Take the following steps:
- Remove 1 of the evidence tokens of your choice from the evidence market and place it near the bag. Draw a new evidence token out of the bag and place it face down in the evidence market. On the back of this token, you can see the location number of the place where you have to put your next evidence.
- Draw the next evidence from the bag and put it face down at the location determined in the previous step. Now this newly laid token shows the location number for the next token. Continue laying out evidence at the locations indicated on each previous token, until there are a total of 7 evidence tokens on the game board.
- When you finish, turn all tokens face up.
AUTOMATIC EVIDENCE RESETTING
If at any moment of your turn there are no more evidence tokens on the game board (apart from the ones in the evidence market), immediately place new evidence until there are a total of 7. This does not count as an action. The player on whose turn this occurs must complete steps 1, 2 and 3 of the resetting evidence action but SKIP steps 4 and 5.
Using Skills
In addition to the Main Action and the Main Movement, you can use skills. At the beginning of the game, only 1 skill is available to each player — "flight ticket."
In the Assistant Phase, you will be able to spend your accumulated experience to gain new skills.
The cost of obtaining skills is indicated next to each skill on the player board. To obtain a skill, you have to spend experience, not coins. Coins are only used for the reactivation of already obtained and used skills.
Important: In a 2-player game, the cost of obtaining new skills is always +1 from the basic cost. This is marked with a special symbol.
Advice: In your first 2-player game, we recommend ignoring the additional cost of skills and paying only the basic cost. This way, your first game will run more smoothly.
In the Cryptozoologist Phase, you can only use skills. New skills are obtained in the Assistant Phase (see "Moving up"). There are 2 general types of skills:
ACTIVE SKILLS — Once obtained, these skills can be used for only a single activation. In order to use this skill again, you have to refresh it by paying 1 coin in the Assistant Phase. To use an active skill, slide its skill marker to the right — from the ready state (visible green) to the spent state (visible red).
- Flight ticket — When using this skill, move your cryptozoologist to any location on the game board, regardless of distance. This skill is available to all players from the beginning of the game.
- Collect evidence — The same as the corresponding Main Action (see "Collect evidence"). Cost: 1 experience (+1 in a 2-player game).
- Track a cryptid — the same as the corresponding Main Action (see "Track a cryptid"). Cost: 2 experience (+1 in a 2-player game).
- Luck — Use this skill after a dice roll while attempting to find a cryptid. Consider all failure symbols on the tracking dice as success for the current tracking attempt. Cost: 1 experience (+1 in a 2-player game).
- Second chance — Use this skill after a dice roll while attempting to find a cryptid. In case of failure, reroll the dice of your choice (if you also have the "luck" skill, activate it only after you have finished rerolling). Cost: 2 experience (+1 in a 2-player game).
- Relocate a cryptid — the same as the corresponding Main Action (see "Relocate a cryptid"). Cost: 2 experience (+1 in a 2-player game).
Note: Remember to slide the skill marker to the right when you use any skill.
PASSIVE SKILLS — After obtaining these skills, you can always use them at no additional cost. Passive skills are not independent actions; they modify other actions or active skills.
- Movement range — This passive skill allows you to move up to 3 locations instead of 2 whenever you perform movement (either by using Main Movement or Main Action). There are 2 identical "movement range" skills; if you obtain both, you can move up to 4 locations. Cost: 1 experience (+1 in a 2-player game).
- Interrupt movement — This passive skill allows you to split your movement. When you spend only some of your movement points, you may stop to take another action or use skills, then continue moving with the remaining movement points. If you have many available movement points, due to the "movement range" skill, you can split your movement into more than 2 parts. Cost: 1 experience (+1 in a 2-player game).
- Collect evidence from an adjacent location — This passive skill allows you to take evidence from any neighboring connected locations whenever you take the "collect evidence" action or use the "collect evidence" skill. Cost: 1 experience (+1 in a 2-player game).
Important: At the end of your turn, move your assistant to the space immediately to the right on the initiative track, then pass the Cryptozoologist Phase turn to the topmost player on the left track. When all players have taken their turns and all assistants moved to the right, the Assistant Phase begins.
II. Assistant Phase
Assistant Actions
Perform 1 mandatory action, plus take optional actions. You do not have to start with the mandatory one; all these actions can be performed in any order:
- Mandatory: Move your assistant 1 step in 1 of the directions:
- DOWN the initiative track to gain a bonus from 1 of the assistant dice
- UP the initiative track to obtain new skills for experience and refresh spent skills for coins
- Optional: Spend any number of coins to move your assistant that number of spaces on the initiative track, up or down.
- Optional: Spend coins to reset evidence or cryptids.
- Optional: Purchase and/or sell evidence in the evidence market.
- Optional: Change a bid.
MOVING THE ASSISTANT (MANDATORY)
The movement of assistants on the initiative track can change the turn order for the next phase.
Move your assistant 1 space up or down the initiative track. If the next space is occupied by another player, move to the nearest vacant space in the chosen direction. Different players may never occupy the same space.
Note: You have to skip another player's assistant, even if it is on the opposite side of the track. Two assistants may not stand on the left and the right sides of the same spot.
If there are no vacant spaces above or below your assistant, you may not move in that direction and must move in the other direction. According to the chosen direction, apply the movement effect.
MOVING DOWN
When you move your assistant down, choose 1 of the available assistant dice rolled at the beginning of the round, and gain the bonus shown on its top face.
Set aside this die; it will be unavailable to other players in this round.
Assistant dice values:
-
gain coins (2 or 3)
-
gain experience (1 or 2)
-
refresh 2 skills for free — if you have any spent skills, move up to 2 skill markers from the spent state (visible red) to the ready state (visible green)
Note: This bonus allows you to refresh an already used skill, not to obtain a new skill.
-
gain 1 bonus rumor from the rumor supply; if all your evidence slots are occupied, you may not gain this bonus
Note: Bonus rumors are used in the same way as rumors: You can use them to track cryptids, 2 of them make a wild token (or 1 rumor + 1 bonus rumor) and they can also be sold and purchased. There is only one exception: When you discard a bonus rumor token (either from your player board or from the market), return it to the rumor supply. Bonus rumors must never go into the evidence bag.
MOVING UP
When you move your assistant up the initiative track, you may spend experience to obtain new skills and pay coins to refresh spent skills.
You may obtain and refresh any number of skills; you are limited only by the amount of experience and coins in your personal supply.
Obtaining new skills
To obtain a skill, pay its cost by discarding the necessary amount of experience. The cost is indicated on your player board next to each skill.
Note: In a 2-player game, the cost of obtaining new skills is always +1 from the basic cost. This is marked with a special symbol. For a detailed description of the skills and their cost see "Using skills."
If you obtain an active skill, put a skill marker in the left red slot. This way, the skill is in the ready state (visible green).
If you obtain a passive skill, just place a skill marker in the single slot.
Refreshing skills
If you have an active skill in the spent state (after using it), you can pay 1 coin to toggle it back to the ready state. You can refresh multiple skills as long as you have coins.
Note: The Main Action and the Main Movement are automatically refreshed at the end of your turn; you never pay coins for this.
Example: The player moves their assistant up the initiative track. Now they want to obtain the skill "collect evidence." There are 3 players in the game, so the cost of this skill is 1 experience. The player returns 1 experience to the supply and puts a skill marker in the left slot of the skill "collect evidence." Then they spend 1 more experience to put a skill marker in the slot of the passive skill "collect evidence from an adjacent location." On their player board there is 1 active skill in the spent state — "flight ticket." The player decided to return 1 coin to the supply to toggle the "flight ticket" skill back to the ready state.
SPEND COINS TO MOVE THE ASSISTANT EXTRA (OPTIONAL)
You can spend any number of coins to the supply in order to move your assistant up or down the initiative track. Pay 1 coin for each space you want to move. The direction of this movement does not have to be the same as the direction of your mandatory movement.
Do not gain any bonus effects, such as assistant dice or skills, for this optional movement.
Advice: This action can be useful to change the turn order for the next phase or to get out of the edge space on the track.
Important: If you start your Assistant Phase turn in the top space, you are not allowed to end it there, even by paying coins to move additionally.
SPEND COINS TO RESET EVIDENCE OR CRYPTIDS (OPTIONAL)
You may spend 1 coin to do one of the following:
- Replace all evidence tokens in the evidence market with 3 new evidence from the bag. Place the removed evidence near the bag.
- Discard up to 2 revealed cryptid cards without players' bid markers on them and replace them with new cryptids of the same levels. Alternatively, you can replace 1 cryptid twice.
You may perform both types of resetting multiple times.
Refilling the evidence bag: Whenever the evidence bag is empty, put into the bag all evidence tokens set aside next to it and reshuffle them.
Cryptid discard piles: Keep all discarded cryptids in separate discard piles per level. Whenever any cryptid deck runs out, shuffle the corresponding discard pile to form a new deck.
BUY AND SELL EVIDENCE IN THE EVIDENCE MARKET (OPTIONAL)
You can buy and sell multiple evidence tokens for coins during this action and do it in any order. The number indicated on the face of evidence tokens is both the purchase and sale price.
To buy new evidence:
- Return to the supply the amount of coins indicated on the desired evidence token in the market.
- Put the purchased evidence in an empty slot on your player board.
Note: If all evidence slots on your player board are occupied, you cannot buy more evidence. But you can do one of the following:
- Sell an evidence token before buying a new one.
- Sell and buy evidence simultaneously.
To sell your evidence:
- If there is no empty slot in the evidence market, first remove 1 evidence token of your choice from the evidence market and put it near the evidence bag.
- Put the evidence you want to sell in an empty slot in the evidence market.
- Gain the amount of coins shown on the token you have sold.
Important: You may not buy back the evidence that you sold in the current Assistant Phase nor sell the evidence you've just purchased.
To sell and buy evidence simultaneously:
- Swap an evidence token on your player board for an evidence token from the market.
- Pay or receive the difference in the cost.
Advice: Simultaneous purchase and sale can be useful when you do not have enough coins to buy evidence or there are no available slots on your player board.
CHANGING A BID (OPTIONAL)
You can move 1 of your bid markers from a cryptid to another cryptid.
Advice: This option can be useful when you notice that your collected evidence is more suitable to a cryptid card that does not have your marker on it.
Important: If you have an available bid marker (as a result of you or another player finding a cryptid), you must place it on a cryptid card before the end of the round. Even if you place an available marker this turn, you can still change your other bid.
End of Turn
In the meantime, you've been managing a large-scale construction of the unique wildlife sanctuary, where you tried to create an environment close to cryptids' natural habitat, for their safe resettlement.
At the end of your Assistant Phase turn, take the following mandatory steps:
- Replenish the evidence market (only if it is not already full).
- Place 1 terrain tile in the sanctuary from your player board.
- Refresh your Main Action and Main Movement by sliding your action markers to the left slot.
- Move your assistant to the left spot on the initiative track.
1. REPLENISHING THE EVIDENCE MARKET
If there are any empty slots in the evidence market due to your purchases, fill them with new evidence tokens from the bag, placing them face up.
2. PLACING A TERRAIN TILE
Choose 1 of 3 terrain tiles on your player board. Place it face up in the sanctuary, following the rules of the construction. Then choose and draw a terrain tile of the same type and put it face up in the empty slot on your player board to replace the tile you used. If the pile of that terrain type is exhausted, draw a tile of a different type instead.
RULES OF CONSTRUCTION IN THE SANCTUARY
The first terrain tile placed in the sanctuary should cover at least 1 square of the starting space, marked with a darker color. The first terrain tiles of different types should be placed in different starting spaces.
Note: When playing with 2 or 3 players, there will be fences on the sanctuary board, so only 1 square will remain visible on some of the starting spaces.
Afterward, you must place new terrain tiles next to tiles of the same type. Terrain tiles cannot cover a starting space reserved for another terrain type.
There are 3 types of terrains — water (blue), mountains (brown) and forests (green). Terrain tiles have bonus symbols on them: coins, experience and initiative. Upon their construction, you do not gain these bonuses; instead, they are activated only when a player covers these spaces with a cryptid tile (see "Relocate a cryptid").
Advice: Lay out the tiles with bonus symbols next to each other if you are about to settle your cryptid there, or place bonus-free tiles if you want to prevent your opponents from gaining an advantage.
If it is not possible to place a new terrain tile of a certain type (for example, all terrain tiles of that type are blocked by another terrain), all players (including you) must discard all terrain tiles of that type from their player boards and replace them with other tiles. The terrain tiles of the unusable type can no longer be drawn.
If you place a terrain tile such that it leaves no space in the sanctuary for future terrain tiles, the game-end condition is triggered. The construction of the sanctuary is complete, so players no longer draw or place terrain tiles.
Note: The game does not end immediately when the game-end condition is triggered. Continue playing the current round till the end as normal. Then play 1 more round, which becomes the final one.
3. REFRESHING THE MAIN ACTION AND THE MAIN MOVEMENT
Slide both of your action markers to the left slot (back to the ready state, with the green side visible).
Important: Do not confuse action markers with skill markers. Action markers are used for the Main Action and the Main Movement and have your player color. In contrast, all skill markers are black.
Skills are not refreshed automatically at the end of turn; you have to pay coins to refresh them.
4. MOVING THE ASSISTANT TO THE OPPOSITE SLOT
At the end of your turn, move your assistant to the left slot on the initiative track. Then pass the Assistant Phase turn to the next player whose assistant is above all other players on the right track.
Example: The purple player moved their assistant down during the Assistant Phase. At the end of their turn, they moved their assistant to the left. Now it is the orange player's turn.
After all players have taken their turns in the Assistant Phase and all assistants moved to the left, a new round begins, starting with the topmost player on the initiative track.
Turn Example
Cryptozoologist Phase
On the initiative track, the orange player is the highest, followed by white, then blue. The orange player goes first, so they roll the assistant dice at the beginning of their turn. They use their Main Movement to move their cryptozoologist from Aachen to region E1, where the bones evidence is located. They slide both of their action markers to the right and choose to collect evidence as their Main Action — they pick up the bones from the game board and place the token on their player board. So they end the Cryptozoologist Phase without using any extra skills and move their assistant to the right spot on the initiative track.
The white player goes second in the Cryptozoologist Phase. They use the "flight ticket" skill to move from region S1 to region E3. Then the white player uses the "track a cryptid" skill and wants to track Karadag Snake in region E3.
The player's cryptozoologist is in the necessary location and their bid marker is on the card of Karadag Snake. The white player has all required evidence on their player board — eyewitness and outline in the water — so they find the cryptid. They remove the eyewitness and water evidence from their board and return the bid markers on the card back to the respective players. Then the player takes Karadag Snake card and the corresponding cryptid tile to their player area. The player also receives 1 experience because of Karadag Snake's "When found" power. Karadag Snake is a level II cryptid, so the white player draws a new card from the level III cryptid card deck and puts it in place of the removed card.
As their Main Action, the white player chooses to reset evidence and cryptids. There are already 5 evidence tokens on the board, so 2 more tokens must be placed to make a total of 7. The white player chooses to remove the rumor token from the evidence market to put a new token from the bag in its place. The next evidence is placed according to the location number indicated on the first drawn evidence token, in the location N3. The following evidence is placed according to the location number on the last drawn evidence, in the location W4. Now there are 7 evidence tokens on the game board, so the player does not place any more evidence. They turn the placed evidence face up.
Then the white player resets cryptid cards. They want to replace 1 level I cryptid. Trochus has the blue player's bid, so it cannot be replaced. There are no bid markers on Lomie, so the white player replaces it for a new level I cryptid card from the deck. As a bonus, the player chooses to move their assistant 2 spaces up the initiative track, which allows them to jump over the orange player and become the first player in the next phase.
With their Main Movement, the white player moves 2 locations forward — from E3 to E2. Using the "collect evidence" skill, the player picks up the footprint evidence and puts it on their player board. Finally, they move 2 more spaces to the city of Aachen. The white player moved 4 locations in total, owing to their 2 passive skills "movement range" and has split their movement into 2 parts to collect evidence in between with the skill "interrupt movement."
At the end of their Cryptozoologist Phase, the white player moves their assistant to the right side of the initiative track and passes the turn to the blue player.
Assistant Phase
The white player begins the Assistant Phase. During the game, the player has managed to obtain all possible skills. They move their assistant up for their obligatory movement along the initiative track. Now they return 4 coins to the general supply and slide all their 4 spent skills to the left in order to make them ready again.
Since the white player moved up, they do not gain any assistant dice, and the next player will have a choice of 4 assistant dice on their turn. Passive skills used by the player do not require refreshing; they are always available. The player has no money and does not want to sell evidence on the market, so they end their assistant actions. At the end of their Assistant Phase turn, the white player must place their available bid marker. They could have done it before but decided to postpone it until the end of their turn. The player chooses to put their bid marker on Habior, since they already have the footprint evidence to track this cryptid. At the same time, the orange player, without waiting for the end of the round, places their available bid marker on Mahwot.
The white player then places a water terrain tile in the sanctuary next to another water tile and draws a new tile. They slide their action markers to the left, in the ready position, with green visible, then move their assistant to the left spot on the initiative track and pass the Assistant Phase turn to the orange player.
Now it is the orange player's Assistant Phase turn. They first decide to sell the footprint evidence and buy the rumor in place of it. The footprint costs 3 coins, and the rumor costs 2 coins. Therefore, after visiting the evidence market, the player receives 1 coin from the supply. The player uses this coin to move their assistant on the track 1 space up. And only after that, the orange player performs the mandatory action — moves their assistant down. They choose 1 of the assistant dice and receive the bonus from it — 2 experience.
At the end of their Assistant Phase, the orange player places a mountain terrain tile in the sanctuary next to the already laid mountain terrain and draws a new tile. They move the action markers to the left, with green visible, to refresh their Main Movement and Main Action. Finally, they move their assistant to the left side of the track and pass the turn to the blue player.
Game End
The game-end condition is triggered when there is no more available space for placing terrain tiles in the sanctuary. The round in which this condition is triggered is played till the end as normal. After that, 1 more full round is played and then the game ends.
Scoring and Victory
Use the scorepad to add together your reputation points.
-
Count the reputation points for all your found cryptids. The number is shown on the top right of the card.
-
Count the reputation points for all your cryptids settled in the sanctuary. These points are shown on the bottom right of the card.
-
Every fulfilled request token gives you 4 reputation points.
-
The general contract gives 1 reputation point to every player for each of their cryptid cards that meet the contract requirements.
-
Compare the reputation points for your 2 personal contracts. Score the reputation points from only 1 contract, whichever gives you more reputation points, and discard the other contract.
There are 3 types of contracts:
- The first type (A) gives you 1 point for every found cryptid that has the shown type of evidence on the card (it does not matter whether you used this evidence for tracking).
- The second type (B) gives you 1 point for every found cryptid that lives in the shown habitat.
- The third type (C) gives you 1 point for every found cryptid of a certain type.
Note: 1 cryptid can give you points for multiple contracts.
-
If your cryptids have game-end powers, check if you fulfilled their conditions and score the indicated reputation points for them.
-
Count the number of cryptid markers of each player in the sanctuary. The player with the most markers gets 2 reputation points. In case of a tie, the player with the largest total area covered with their cryptid tiles scores 2 reputation points. If the tie is still not resolved, all players in the tie score 2 reputation points.
-
Score 1 reputation point for every 3 remaining experience tokens in your personal supply.
-
Sell your remaining evidence if any. Score 1 reputation point for every 5 remaining coins in your personal supply.
The player with the most reputation points wins. In case of a tie, players compare the number of found cryptids, and the player who found the most cryptids wins. If there is still a tie, the winner is the player who relocated the most cryptids (both in the sanctuary and by fulfilling requests). If there is still a tie, the player who has the most experience and coins in total wins. If the tie is still unresolved, all players in the tie share the victory.
Game Modes
Wolpertinger
The game module Wolpertinger increases the role of cities. You can add this module as soon as you figure out how the base game works.
Wolpertinger is a legendary hare with deer antlers and bird wings. From ancient times, there were legends about this creature. But instead of proving its existence, taxidermists made bizarre stuffed hares and distributed them among collections. In this module, cryptozoologists face this hoax and collect stuffed Wolpertinger specimens across Europe to expose the deception.
This game mode adds the following steps to the game setup:
- Place the Wolpertinger card next to the game board.
- Shuffle the 11 Wolpertinger tokens face down.
- Place 1 random Wolpertinger token in each city.
A new type of tracking action is available for all players: When your cryptozoologist is in a city with a Wolpertinger token, you can attempt to find a stuffed Wolpertinger.
To take this action, discard 1 rumor, then take the Wolpertinger token from your current location and place it face up next to your player board.
Note: This action can be taken either as the Main Action or the "track a cryptid" skill.
On the faces of the tokens you can find:
- (6 tokens) — stuffed hare. At the end of the game, score 1 reputation point for each of these tokens.
- (2 tokens) — you can discard this token to get 4 coins from the supply.
- (2 tokens) — you can discard this token to get 1 evidence token from the bag.
- (1 token) — while attempting to find a cryptid, you can discard this token to reroll the dice of your choice.
The following steps are added to the scoring:
- Gain 1 reputation point for each token with the stuffed hare on its face.
- The player with the most collected stuffed hares gains the Wolpertinger card, which gives that player 2 reputation points. If there is a tie, check which of the tied players has more unspent Wolpertinger tokens (not with the hare images on their face). If there is still a tie, no one gets the card.
Note: If none of the players has a token with the stuffed hare on its face, no one gets the card, even if players have other Wolpertinger tokens.
Against the Poacher (Solo Mode)
The world of Cryptic Nature is dangerous — not everyone wants to save mysterious rare species. Someone is hunting cryptids. These rules will allow you to play Cryptic Nature alone against a virtual opponent — the Poacher.
OVERVIEW
Learn the base game rules before competing against the Poacher. This mode adds the following features to the gameplay:
- The Poacher has only 1 meeple that moves along the initiative track.
- The Poacher does not move on the game board. Well, he moves, but we can't see it.
- The Poacher does not use bid markers — he tracks the same cryptids as the player.
- The Poacher does not settle cryptids in the sanctuary. He hunts cryptids for private sponsors who have their own hidden agenda, different from yours.
- The Poacher uses proven methods — he hunts cryptids only if he has all the required evidence. This is one of the ways to counteract the Poacher: Attempt to find cryptids faster than he manages to collect sufficient evidence.
- The Poacher can hunt cryptids that the player has already found if they are not relocated yet. Until you provide the cryptid with a new habitat in the sanctuary, the creature cannot feel safe.
- If the Poacher has 4 evidence on his board, he can capture any cryptid. Strong connections on the black market enable the Poacher to trade superfluous evidence for the required types.
- The Poacher always follows the algorithm specified on the current active Poacher card. If the Poacher cannot do anything from the algorithm according to his number of evidence, he does nothing. In fact, he is taking some hidden actions that do not affect you.
- In the Assistant Phase, the Poacher can get an assistant die but he gains no bonuses from it except for rumors. We don't see what he does with his money and experience. But we know very well how he can use the evidence.
- In the Assistant Phase, the Poacher meeple always moves toward the player's assistant and ends movement on the space next to it (below or above). The Poacher keeps his finger on the pulse and monitors us. If he needs to outmaneuver us, he will spare no expense.
- The Poacher wins if he successfully captures 3 cryptids corresponding to 1 of the player's contracts OR any 5 cryptids. He does not score any reputation points. Unlike you, who strive to protect the rare species, the Poacher's only goal is profit. He inflicts irreparable damage on nature in the process.
COMPONENTS
- 1 Poacher board
- 1 Poacher meeple
- 1 resetting action overlay
- 15 Poacher cards
SETUP
General setup
Set up the game as normal for 2 players (place all fences in the sanctuary and use 3 assistant dice). Do not place a contract card on the game board.
Player setup
Take only 1 set of components for yourself. You will be the first player, so gain 1 coin and place your assistant in the highlighted spot for the first player on the initiative track. When you get 2 contract cards, ensure that at least 1 of them contains evidence. If neither card depicts evidence, discard the last drawn card and draw cards from the deck until you get 1 contract with evidence. Place both contracts face up next to your player board.
Then, take the following steps:
- Place the Poacher board within reach.
- Shuffle the Poacher cards and place them face down next to the Poacher board.
- Place the Poacher meeple on the initiative track, in the space below your assistant.
- Place the resetting action overlay below the evidence market on the game board. It changes the action "reset cryptids" in the Assistant Phase. Now you can spend 3 coins to reset only 1 cryptid card.
TURN OVERVIEW
In each phase, you will perform your own turn and the turn of the Poacher. Your turn will proceed as in the regular game for 2 players (which means you have to spend extra to obtain skills), with the following change: Whenever you find a cryptid, you must place your bid marker immediately after replacing the cryptid card with a new one from the deck.
CRYPTOZOOLOGIST PHASE
If you are first on the initiative track, perform your Cryptozoologist Phase turn fully. Then, perform the turn of the Poacher.
If you are second on the initiative track, perform the turn of the Poacher first. After that, perform your own Cryptozoologist Phase turn.
After you have completed both turns in the Cryptozoologist Phase, proceed to the Assistant Phase.
The turn of the Poacher in the Cryptozoologist Phase consists of 3 consecutive steps:
- Reveal the top Poacher card and place it adjacent to the Poacher board. This is the active card for the current round.
- Perform an action from the top part of the card, according to his number of evidence (see below).
- Move the Poacher meeple to the right on the initiative track.
In the Cryptozoologist Phase, the Poacher can collect evidence, reset it and capture cryptids. In this phase, his actions are determined by the number of evidence on his board.
Select 1 of the 5 lines in the top part of the card according to the current number of evidence on the Poacher board and perform the action shown.
- 1st line — if the Poacher has no evidence
- 2nd line — if the Poacher has 1 evidence
- 3rd line — if the Poacher has 2 evidence
- 4th line — if the Poacher has 3 evidence
- 5th line — if the Poacher has 4 evidence
Each line usually presents multiple options, but only 1 action must be taken. The Poacher always selects the leftmost action; if unable to perform it, proceed to the next action to the right and so forth, until the end of the line. See the description of all icons in "Action symbols in solo mode."
Note: In rare cases, if the Poacher is unable to perform any of the actions listed in the line, he remains inactive during the current phase.
The column on the right is the region priority. It shows the region where the Poacher prefers to collect evidence during the current Cryptozoologist Phase. Refer to this priority if there is more than 1 relevant evidence on the game board. First, check if there is relevant evidence in the topmost region. If none, proceed down to the next priority region and so forth, until the bottom.
The left column is the cryptid priority. It shows which cryptid the Poacher prefers to capture in the current Cryptozoologist Phase. The Poacher can only capture cryptids from his priority list. Check if he can capture the highest-priority cryptid using his evidence; if not, move to the next one. There are 3 types represented on the cryptid priority:
- Cryptids found by the player but not yet relocated
- Cryptids matching the player's contracts
- Cryptids with the player's bid marker on them
ASSISTANT PHASE
If you are first on the initiative track, perform your Assistant Phase turn fully. Then, perform the turn of the Poacher.
If you are second on the initiative track, perform the turn of the Poacher. After that, perform your own Assistant Phase turn.
After you have completed both turns in the Assistant Phase, proceed to the Cryptozoologist Phase of the next round.
The turn of the Poacher in the Assistant Phase consists of the following steps:
- Perform an action from the bottom part of the active Poacher card, according to the current position of the Poacher on the initiative track at the moment of his turn.
- 1st line – if the Poacher is above your assistant
- 2nd line – if the Poacher is below your assistant
- Move the Poacher meeple just below or just above your assistant according to the sign at the end of the line.
- Take a terrain tile of the shown type from the general supply and place it in the sanctuary wherever you prefer, following the rules of construction.
- Move the Poacher meeple to the left on the initiative track.
In the Assistant Phase, the Poacher can take an assistant die, move along the initiative track, purchase evidence and reset the evidence market.
As in the Cryptozoologist Phase, the Poacher always selects the leftmost action; if unable to perform it, proceed to the next action to the right and so forth, until the end of the line.
ACTION SYMBOLS IN SOLO MODE
- The Poacher takes an evidence token required to track a cryptid that has the player's bid marker on it.
- The Poacher takes an evidence token corresponding to 1 of the player's contract cards.
- The Poacher takes an evidence token from the location with the lowest number in the priority region.
- The Poacher takes an evidence token from the location with the highest number in the priority region.
- Reset evidence on the game board up to a total of 7, following the standard rules of evidence resetting. The Poacher does not gain any bonus and does not reset any cryptids.
- Reset the evidence market. Note: Usually, this action is accompanied by another action of taking evidence. Before resetting, check the market for relevant evidence meeting the requirement of that action. If there is one, the Poacher gets that evidence and then resets the market without getting new evidence.
In the Cryptozoologist Phase, the Poacher takes evidence from the game board according to the region priority. If there is more than 1 relevant evidence in the priority region or even in the same location, take 1 of your choice.
In the Assistant Phase, the Poacher takes evidence from the evidence market. If he does, fill the evidence market up to a total of 3.
Note: Rumor is always considered relevant evidence, but the Poacher takes it only if there is no other, more expensive relevant evidence.
The evidence is placed in the slots on the Poacher board. If there are no available slots, the Poacher does not take new evidence.
- The Poacher captures a cryptid that requires 2 evidence and discards the corresponding evidence from his board. If the Poacher does not have evidence required for tracking this cryptid, this action is not performed.
- The Poacher captures a cryptid that requires 3 evidence and discards the corresponding evidence from his board. If the Poacher does not have evidence required for tracking this cryptid, this action is not performed.
- The Poacher captures a cryptid regardless of evidence and discards all evidence from his board.
Note: 2 rumors can be used as a wild token.
Note: Determine which cryptid the Poacher intends to capture according to the cryptid priority. Some cryptids may not be captured (e.g., if they neither belong to any contract nor have the player's bid marker on them). If multiple cryptids satisfy the priority, the Poacher captures the one that would bring him closer to victory (by collecting 3 cryptids for the same contract). If none of them would achieve this, the Poacher captures the cryptid that would bring the player the most victory points for finding it. If there are multiple equally valuable cryptids in this regard, you may choose any of them yourself.
Important: When the Poacher captures a cryptid, replace it with a card from the deck as if a player had found it.
- Place the Poacher meeple just above your assistant on the initiative track.
- Place the Poacher meeple just below your assistant on the initiative track.
Note: If the Poacher meeple is already occupying the required space, or it cannot move because the player's assistant is in the topmost or bottommost space, the Poacher meeple does not move.
If the line shows the values of the assistant dice, the Poacher removes 1 of the available assistant dice that matches the shown value. If the Poacher removes an assistant die with a bonus rumor, he also gets a bonus rumor. In other cases, the Poacher does not gain any bonuses from the assistant dice.
Note: If the Poacher has to remove a die with coins or experience, he chooses the die that shows the largest amount.
GAME END
You lose immediately if:
- The Poacher has captured 3 cryptids that fulfill the requirements of a single contract card. It's not sufficient for him to have 2 cryptids for 1 contract and 1–2 cryptids for another; all 3 cryptids must align with the same contract.
- The Poacher has captured any 5 cryptids.
You win if the game ends according to the usual game rules (the sanctuary is completed, followed by 1 additional round). You managed to disrupt the Poacher's evil plans in time. He will be judged harshly, and all captured cryptids will be released.
Now, evaluate your success as a cryptozoologist. Score the reputation points according to the usual game rules with the following changes:
- Score both of your contracts.
- Score 2 reputation points for the majority of cryptid markers in the sanctuary if you have placed at least 1.
- Bird of Vergisson's game-end power gives you reputation points if you have fewer cryptids than the Poacher.
- Get the Wolpertinger card if you have found at least 1 stuffed hare.
Then compare your results with the table below:
- ≤11 — Still an intern.
- 12–15 — Not bad for a newbie.
- 16–19 — Mediocre cryptozoologist.
- 20–25 — Great work of a true cryptozoologist.
- 26+ — A monument in the sanctuary has been erected in your honor!
Mode Without Bid Markers
In later games, you can try playing without bid markers for a more unpredictable game.
- During the setup, do not place bid markers. Return them to the box.
- When taking the "reset evidence" action, you may not replace cryptid cards.
- In the Assistant Phase, you may not spend coins to reset cryptid cards.
- When tracking a cryptid, you can choose any of 6 revealed cryptid cards.
Advice: In this mode, be aware that another player can track the cryptid you were collecting evidence for.
Note: This mode is not compatible with solo mode.
Clarifications on Some Cryptid Powers
Gulon: If you buy evidence, immediately replenish the evidence market. You may not use this ability to buy and sell evidence simultaneously.
Korkodil: When scoring habitat-related contracts, this cryptid is considered to inhabit the terrain its tile occupies. If Korkodil is unsettled, it has no habitat.
Lagopus, Zitiron: Place these cryptids on top of other cryptid tiles without gaining terrain bonuses. They may cover spaces of 2 cryptid tiles. If there is not enough space for the cryptid marker on the lower tile, move the marker to the top tile.
Tatzelwurm, Caladrius: The resetting action cannot be performed if there are 7 evidence tokens on the board.
Water Leaper: When fulfilling a request, place this cryptid's tile in the sanctuary instead of discarding it. Perform settlement as usual and gain 1 reputation point at game end, in addition to 4 reputation points from the request token.
Icon Overview
- Experience
- Reputation point
- Coin
- Move the assistant up or down the initiative track
- Second chance
- Luck
- Flight ticket
- Movement range
- Interrupt movement
- Track a cryptid
- Relocate a cryptid
- Reset evidence and cryptids
- Collect evidence from an adjacent location
- Collect evidence
- Place an evidence token from the bag in place of this icon
- Type of cryptid
- Region
- City
- Port. Used in the expansion "Islands"