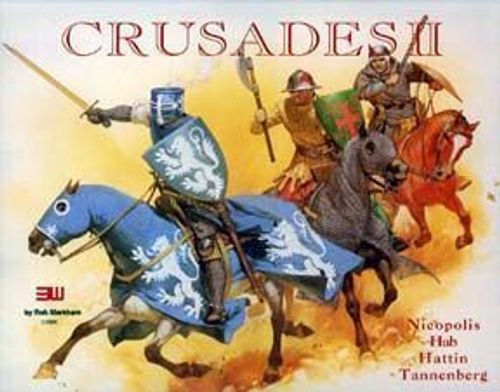
Crusades II
Crusades II Rulebook
Table of Contents
Table of Contents
- 1.0 Introduction
- 2.0 Game Components
- 3.0 Sequence of Play
- 4.0 Leaders
- 5.0 Command
- 6.0 Facing and Zones of Control (ZOC)
- 7.0 Stacking
- 8.0 Movement
- 9.0 Combat
- 10.0 Morale
- 11.0 Victory Conditions
- The Scenarios
- 12.0 Hattin
- 13.0 Hab
- 14.0 Nicopolis
- 15.0 Tannenburg
- 16.0 Advanced Rules
- 16.1 Advanced Crusades Sequence of Play
- 16.11 Action Chits
- 16.12 Off Map Leader Boxes
- 16.13 "Turn Ends" Chit (Optional)
- 16.2 Melee Odds Modifiers
- 16.3 Split Commands
- 16.4 Berserk Units
- 16.41 Effects of Going Berserk
- 16.42 Exhaustion
- 16.43 Exhaustion Removal
- 16.5 Optional Victory Conditions
- 16.6 Unit Type Modifier Table (Optional)
- 17.0 Game Credits
- Designer's Notes
- Record Sheets
1.0 Introduction
Crusades II includes four battles: Hattin, Hab, Nicopolis, and Tannenburg. All four games use a common system that reflects the battlefield tactics of the day.
2.0 Game Components
Each copy of Crusades II includes the following:
- 1 22" by 34" map, backprinted
- 400 die-cut counters
- 1 rulebook
- 1 player aid sheet
- 1 ten-sided die
➤ Note: When using the ten sided die, a result of 0 is treated as a 10 result.
2.1 Game Map
The game map is a representation of the historical battlefields; a hexagonal grid has been superimposed to regulate play.
2.2 Game Counters
Game counters represent combat units, leaders, and informational counters.
Combat Unit. A combat unit counter shows its Unit Type, Name, Setup, Color Code (band) indicating Command, Combat Strength, Morale, and Movement.
Leader Unit. A leader counter shows the leader's Name, Command Rating, Command Span, Setup, and Combat Bonus.
Crusader Heavy Cavalry. Crusader heavy cavalry counters are two-sided. The FRONT (non-charging side) and the BACK (charging side) each show a Unit Type, Name, Setup, Morale, Combat Strength, Movement, and a Color Code (band) indicating Command.
Overall Leaders. Overall Leader counters show a Name, Setup, Command Span and Combat Bonus (no Command rating; see 4.1).
Informational Counters. The informational counters are: Rout, Game Turn, Berserk, One Step Loss, Exhaust, Holy Cross, Out of Command (OC), and Turn Ends.
Command Chits. There are six command chits: Advance, Retreat, Reserve, Stand, Attack, and Muster.
Action Chits. There are two action chits: Fire and Move.
➤ Leaders and the units they control are color-coded for ease of play. Set-up sections will also note which combat units are controlled by which leaders.
➤ Note that all Crusader and Teutonic Knight cavalry, apart from mounted bowmen, are heavy cavalry; their opponents have no heavy cavalry. Militia appear only in Hattin. The only Men-at-Arms are Wallenrod e-g, Lichtenstein e and f and Baldwin h-1. Skirmish units are always identified as such by a white horizontal band across the counter.
2.3 Game Charts
The rulebook contains a number of charts and tables that are needed to play the game. It is recommended that these be photocopied before play.
3.0 Sequence of Play
Crusades II uses the following Sequence of Play for each game turn. The number of turns varies according to the battle and scenario chosen. The player whose turn it is is referred to as the phasing player, his opponent as the non-phasing player.
Game Turn:
I. ORDER PHASE
- A. Initial Placement of Command. At the beginning of a scenario, players place a Command Chit of their choice under each leader.
- B. Command Change. Players may attempt to change the current commands that each or any of their leaders are currently using.
II. FIRST PLAYER MOVEMENT PHASE
➤ Each scenario lists which player moves first.
- A. The first player checks to see if any units are out-of-command. Those units out of command are marked with an out-of-command marker.
- B. The first player then moves all eligible units that he desires to move.
III. FIRST PLAYER COMBAT PHASE
- A. Fire Combat Phase
- Defensive Fire—All non-phasing units that have enemy units within their range may fire.
- Offensive Fire—All phasing units that have enemy units within their range may fire.
- B. Melee. During the Melee Phase the attacker may conduct melee attacks against adjacent enemy units.
- Attacker checks morale of attacking units.
- Defender checks morale of defending units being attacked by enemy units which have passed their morale check.
- Melee combat is resolved between attacking and defending units that have passed morale in steps 1 and 2. Both players roll on the Melee Table and resolve results simultaneously.
- Attacking Crusader heavy cavalry units that were successful may now move up to 4 movement points and engage in a second melee.
IV. FIRST PLAYER RALLY PHASE
- First player attempts to rally eligible routed units.
- Starting with game turn 5, the second player checks to see if he rolls for victory.
V. SECOND PLAYER MOVEMENT PHASE
Second player now checks his units for being out of command and then moves.
VI. SECOND PLAYER COMBAT PHASE
Second player conducts offensive fire and melee, while first player conducts defensive fire.
VII. RALLY PHASE
- Second player attempts to rally eligible routed units.
- Starting with game turn 5, the first player checks to see if he rolls for victory.
4.0 Leaders
There are two types of leaders in Crusades II—leaders and Overall Leaders. Overall Leaders are in command of their side's entire force, whereas leaders are in command only of those units assigned to them. Each scenario will designate the Overall Leaders and the combat units assigned to the leaders.
4.1 Leader Ratings
Leaders have three ratings: Command, Command Span, and Combat Bonus; Overall Leaders have only two ratings: Command Span and Combat Bonus.
4.11 Command. This rating is used to determine if a command chit can be changed or not (see 5.0).
4.12 Command Span. This is the number of hexes a combat unit may be away from the leader and still be in command (see 5.31).
4.13 Combat Bonus. This is a die-roll modifier used during Melee. Only one leader per side may confer this benefit in a single combat; if more than one are present, owner chooses which to use.
4.2 Leader Casualties
A leader stacked with a combat unit or units that are eliminated during Melee is killed if no friendly units remain in the hex. The leader is flipped to his replacement side. He is then moved to the nearest friendly combat unit under his command. Leaders that do not have a replacement side (such as some Overall Leaders) are removed from play.
A leader alone in a hex that is entered by an enemy combat unit is flipped to his replacement side and is then moved to the nearest friendly combat unit under his command.
➤ Replacement leaders alone in a hex that is entered by enemy combat units are immediately moved to the nearest friendly combat unit under their command.
➤ Leaders which are stacked with units that are forced to retreat, must retreat with those units.
If a leader is eliminated and no units of his command remain on the map, he is removed from play. Note that the 3 victory points awarded to the other side when a leader becomes a casualty, are awarded once only per leader counter (see 11.0).
4.3 Overall Leaders
Overall Leaders have special abilities (in some scenarios, they are used to control specific combat units just as leaders do, but in all scenarios Overall Leaders also have special abilities). Their special abilities are as follows:
- Overall Leaders stacked with a friendly leader during the Command Phase automatically allow the Command chit of that leader to be changed.
- Leaders who are within the Command Span of their Overall Leader during the Command Phase, get a -1 die-roll modifier on any attempt to change their Command Chit.
- Overall Leaders may change their own Command Chit without a die-roll.
- Combat units assigned to other friendly leaders may trace command to their Overall Leader, instead.
5.0 Command
During the initial Command Phase of each game, each leader commanding combat units (color coded to show control) has a Command Chit placed under the leader counter. Overall Leaders without combat units assigned to them do not receive Command Chits. This does not have to be shown to the opposing player. During ensuing Command Phases, these Command Chits may be changed (see 5.2).
5.1 Command Chits
There are six different Command Chits; each has a different effect on the combat units.
5.11 Attack Command Chit. All combat units in command using the Attack Command Chit, must move at least, half their movement allowance (rounded up) and must end their movement closer to enemy units than they began; if they began the movement phase adjacent to an enemy unit, they simply remain adjacent. Combat units with an Attack Command Chit receive a +1 die-roll modifier if attacking in Melee Combat. Combat units in enemy zone of control (ZOC) must perform combat, either fire and/or melee. Crusader heavy cavalry units have special abilities (see section 5.6).
5.12 Advance Command Chit. All combat units in command using the Advance Command Chit may move up to their full movement allowance during the Movement Phase. They must end the turn one hex closer to (or remain adjacent to) the nearest enemy combat unit. Combat units receive no Melee Combat die-roll modifiers for having an Advance Command Chit.
5.13 Stand Command Chit. All combat units in command using the Stand Command Chit may move one hex (only) during the Movement Phase. Combat units receive a +1 die-roll modifier during Melee Combat, if defending.
5.14 Retreat Command Chit. All combat units in command using the Retreat Command Chit may move up to their full movement allowance during the Movement Phase. They must end the Movement Phase at least one hex further away from enemy combat units than they started. They receive no Melee Combat die-roll modifiers.
5.15 Reserve Command Chit. All combat units in command using the Reserve Command Chit may move up to their full movement allowance during the Movement Phase. They may never enter a hex that is closer to an enemy unit than 5 hexes away; to determine this 5 hex range, count the enemy-occupied hex, but not the hex to be entered by the friendly unit. Reserve combat units that begin a turn closer than 5 hexes to an enemy unit, must, if they move, do so in such a way that at the end of the Movement Phase they are 5 or more hexes away from the closest enemy combat unit. Reserve combat units receive no Melee Combat die-roll modifiers.
5.16 Muster Command Chit. During the Command Phase of any turn in which at least two combat units of a leader's force are either routed or destroyed, the Command Chit of the leader may be changed to Muster without the necessity for a Command die-roll. Combat units with a Muster command may move up to their full movement allowance during the Movement Phase. They may never enter a hex that is closer to an enemy combat unit than 5 hexes. Muster units that begin a turn closer than 5 hexes to an enemy unit, must move if possible so that they are at least 5 hexes away at the end of the turn (if this is not possible, they must conform to this requirement as nearly as they can). Leaders with a Muster command have their Command Span increased by one hex. Muster combat units receive no Melee Combat die-roll modifiers.
➤ Note: In some cases, a situation in the game will create a position where the player will not be able to comply with the movement restrictions of a Command Chit. In such a case, the player must reveal the Command Chit and demonstrate to the opposing player that certain units cannot perform the chit's requirements. Play then resumes with the Command Chit unchanged.
5.2 Changing Command Chits
During the Command Phase of each turn, a leader's Command Chit may be changed. To do so, a die is rolled and compared to the leader's Command Rating. If the die result is equal to or less than the Command Rating of the leader, the Command Chit may be changed. If the die-roll is greater than the Command Rating, the Command Chit remains unchanged (see 5.16 for automatic change to Muster Command).
➤ An Overall Leader may change his own Command Chit without a die-roll (this only applies when the Overall Leader has combat units assigned directly to him at the beginning of a scenario).
5.21 Effects of Overall Leaders on Changing Command Chits
➤ If a leader is within the command span of an Overall Leader, he receives a -1 die-roll modifier.
➤ A leader stacked with an Overall Leader during the Command Phase may automatically change his Command Chit.
5.3 Combat Units and Command
At the beginning of each Movement Phase all combat units, apart from Skirmishers, must check to see if they are within the Command Span of their leader. Combat units that are not in command are considered out of command and are marked so.
5.31 Command Span. Each leader has a Command Span Rating. The rating indicates the number of hexes from a leader that a combat unit can be, and still be in command. When tracing command span, count the hex the combat unit is in, but not the hex the leader is in, and trace from the leader to the combat unit. Enemy zones of control block command span, unless occupied by a friendly combat unit. Hexes occupied by enemy combat units block command span.
5.32 Command Span Extension. A combat unit outside its leader's Command Span may be in command if it is adjacent to a friendly adjacent in-command unit under the command of the same leader, or if it can trace through a series of such adjacent friendly combat units to a combat unit that is in command.
Command Span Extension Example: The printed diagram shows the leader Toktagin (C, B, 4 6+1) on a row of hexes, with units labeled IN COMMAND (within span), IN COMMAND BY EXTENSION (in command through an adjacent in-command unit), and OUT OF COMMAND (beyond the chain). The diagram itself is not reproduced here; see the printed rulebook.
5.33 Effects of Being Out of Command. Combat units which are out of command suffer the following restrictions:
➤ They may not move adjacent to an enemy combat unit.
➤ If in an enemy zone of control, they may not move.
➤ They receive no die-roll modifiers for their Command Chit during Melee Combat.
➤ If they move, they must move within command span of their leader, or as close to this as possible.
➤ Charging Crusader heavy cavalry units flip to their non-charging side, unless they are in an enemy zone of control. In that case, they remain on their charging side.
5.34 Overall Leaders and Command Span. Combat units may trace command from an Overall Leader even if not assigned to an Overall Leader (treat him as a regular leader when tracing command). When tracing to an Overall Leader with no command chit, the combat units may follow their own leader's command chit, or they may move only one hex and in the next turn's Command Phase the owning player may place a command chit under the Overall Leader, to be used by all units tracing command to the Overall Leader. If the Overall Leader has a Command Chit, any unit tracing command to him must abide by that Command Chit.
➤ Example: A combat unit under the command of Hugh has to trace command to Godfrey, the Overall Leader. Godfrey has an Advance Command Chit, whereas Hugh has an Attack Command Chit. The combat unit would use Godfrey's Advance Command Chit.
5.4 Skirmishers and Command
Skirmish units (foot or spear bowmen or militia) are moved independently and ignore the Command Chits. Skirmish units have the following restrictions and abilities:
➤ They may not enter an enemy combat unit's zone of control.
➤ They may move adjacent to an enemy skirmish unit, as long as they are not entering another enemy unit's ZOC.
➤ They may always retreat up to 3 hexes from an enemy infantry unit's zone of control before the Combat Phase begins (i.e. before the start of Fire Combat—and therefore before they themselves can fire).
➤ They may retreat up to 3 hexes from an enemy cavalry unit's zone of control before the Combat Phase begins, but only if the owning player rolls an 8, 9, or 10 for the skirmish unit.
➤ Skirmish units may retreat through enemy zones of control.
5.5 Routed Combat Units and Command Chits
Routed combat units follow no commands. Instead they may be moved up to half their movement allowance away from the closest enemy combat units during the Movement Phase.
5.6 Crusader Heavy Cavalry Units and the Attack Command
Unlike other combat units, Crusader heavy cavalry units do not have a reduced strength side. Instead, they have a non-charging and a charging side. When they are subject to an Attack Command, they may be flipped to their charging side if they successfully check morale during the initial Command Phase (i.e. roll a die and have the result equal to or less than their non-charging morale rating). Charging Crusader heavy cavalry units that fail a morale check in melee (either during commitment or as a result of combat) are flipped to their non-charging side. They may only attempt to flip to the charging side again (by making a morale check) at the start of a Command Phase in which they are not in an enemy zone of control. If their leader changes his command to a command other than Attack, the Crusader heavy cavalry unit is flipped to its non-charging side during the Command Phase (Exception: It does not flip if it is in an enemy ZOC; it does so instead at the start of the next turn in which it is not in an enemy ZOC and the leader's order is other than Attack.)
6.0 Facing and Zones of Control (ZOC)
All combat units except Skirmish units and routed combat units have zones of control and facing.
6.1 Facing
A combat unit must face (point) in a specific direction at all times. All combat units must be faced toward a vertex (joint) of the hex it is in, not a hexside, as seen in the diagram below. All units in the same hex must face in the same direction.
[Diagram: a hex with FRONT on two hexsides, FLANK on two, and REAR on two. A unit faces a vertex between its two Front hexsides.]
6.11 Facing determines which of the unit's hexsides are Front, which are Flank, and which are Rear. There are always two of each (Exception: Skirmishers; see 6.14).
6.12 A combat unit may change facing—in any direction—only during the Movement Phase and at the end of the Combat Phase if they took part in Melee Combat. If a combat unit wishes to change facing without moving from the hex it is in, it may do so. Exception: Crusader heavy cavalry units that are charging may not change facing, except at the end of the Combat phase. Non-charging Crusader heavy cavalry units may change facing.
6.13 Facing affects a combat unit's Zone of Control (6.2) and combat (9.0).
6.14 Skirmish units have no facing; all hexsides are considered Front.
6.15 Combat units may only move through one of their frontal hexsides. The first change of facing during the Movement Phase therefore is free. Each ensuing change costs one movement point. A unit may change facing at no cost and then move, but if it proceeds to change facing after that it costs one movement point to do so. A change of facing through any number of hexsides within a single hex, counts a single change. Since skirmish units have no facing, they never pay such costs.
6.16 At the end of Melee Combat, facing changes have no cost.
6.2 Zones of Control (ZOC)
Combat units exert Zones of Control; leaders and skirmish units do not.
6.21 ZOC and Facing. Combat units exert ZOCs through their Front and Flank hexsides: they do not exert a ZOC through their Rear hexsides. Note that routed units have no ZOCs.
6.22 ZOC Extension Restrictions. ZOCs do not extend through hexsides or into hexes against which that combat unit could not normally move.
6.23 ZOC and Out of Command Units. Out of command combat units may not leave an enemy ZOC.
6.24 Effects of ZOC.
➤ A unit must stop when it enters an enemy ZOC. It may not move further in that Movement Phase regardless of how many movement points it has remaining.
➤ A friendly combat unit negates the effect of an enemy ZOC for purposes of tracing a Command Span, but it does not do so for movement or retreat purposes.
➤ If more than one combat unit exerts a ZOC into the hex, there is no additional effect.
➤ A unit may never leave one enemy ZOC and move directly into another enemy ZOC.
6.25 Leaving a ZOC. A combat unit that begins a Movement Phase in any enemy ZOC may move out of that ZOC if it has a Retreat, Stand, Muster, or Reserve Command, and it is in command. Routed units may also leave an enemy ZOC.
7.0 Stacking
Stacking refers to having more than one combat unit in a hex at any given time. Unless stacked together at the beginning of a scenario, only one combat unit is allowed per hex. A combat unit may not move through another combat unit, unless the combat unit moving is a skirmish unit. There are no stacking restrictions for Leaders or Overall Leaders. Stacking limits apply at all times during the turn.
7.1 Stacked Units
Two combat units of the same type (i.e. infantry, cavalry, etc.) may begin the game stacked together. Combat units may unstack. Unstacking is voluntary, but restacking is not allowed; when combat units unstack, they may not restack for the remainder of the game.
7.11 Stacking Restrictions
➤ Stacked combat units are treated as one combat unit for melee combat and movement, while stacked together.
➤ Stacked combat units fire separately during Fire Combat.
➤ A stack moves with the movement allowance of its slower component combat unit.
➤ Combat units may not change their position in a stack. The lower combat unit in the stack is exposed when the upper unit is destroyed.
➤ Leaders do not count for stacking purposes.
7.12 Stacking and Morale Checks
When required to do so, each unit in a stack checks morale separately, starting with the top unit.
8.0 Movement
During a friendly Movement Phase, a player may move all, some or none of his units, at his discretion.
8.1 Movement Allowance
All combat units have their movement allowance printed on the counter. The Movement Allowance represents the total number of Movement Points (MP) that the unit may use in any one Movement Phase (within Command Chit restrictions). These MPs may not be saved or transferred in any way. A unit does not have to use all of its Movement Allowance, but it may never expend more. Combat units must always move through their frontal hexes (since skirmish units have no facing, they may move in any direction). Leaders have no printed Movement Allowance—it is 8.
8.2 Terrain and Movement
Each battlefield has different terrain, with each type of terrain having its own costs to enter. Each type of unit has different costs to enter the various terrain types of terrain. Roads tend to speed up movement or make it easier; to take advantage of a road, a unit must enter that type of hex from a similar, connecting, and contiguous hex (i.e. it must move along the road). The different types of terrain and their effects are listed on the Terrain Effects Chart.
Terrain Effects Chart
| Terrain Type | Infantry | Cavalry | Leaders (8 MP) | Heavy Cavalry | Skirmishers | Defensive Modifier: Fire | Defensive Modifier: Melee |
|---|---|---|---|---|---|---|---|
| Clear Level 1 | 1 | 1 | 1 | 1 | 1 | - | - |
| Clear Level 2 | 1 | 1 | 1 | 1 | 1 | - | - |
| Clear Level 3 | 1 | 1 | 1 | 1 | 1 | - |
NA = Not Allowed. Defensive Modifiers are added to Fire Combat and Melee Combat die-rolls of combat units attacking into or through the hex or hexside listed.
8.3 Enemy Units and Movement
A friendly combat unit may never enter a hex occupied by an enemy combat unit. A friendly combat unit may enter a hex containing only an enemy leader (see 4.2).
9.0 Combat
During each Combat Phase, combat is resolved in the following order:
- A. Defensive Fire
- B. Offensive Fire
- C. Melee
9.1 Fire Combat
Combat units with an asterisk (*) after their Combat Strength have the ability to perform Fire Combat. Combat units may only fire through frontal hexsides (skirmish units may fire in any direction). To conduct Fire Combat, eligible units check line of sight (see 9.2) and the Range Table. The owning player then rolls a die and adjusts the result by means of the modifiers on the Fire Table and Terrain Chart. Each unit fires separately, even units stacked together. Combat units may be fired at more than once during a single Fire Combat Phase, but combat units may only fire once during each phase. All Fire Combat in a single target hex must be resolved before resolving Fire Combat in another hex. No unit may fire at a range greater than the maximum range for that type of unit. Skirmish units retreating from an enemy ZOC before combat do so before Fire Combat (see 5.4).
The results on the Fire Table are as follows:
| Result | Effect |
|---|---|
| Miss (-) | No effect. |
| Morale Check (M) | All combat units in the target hex must make a morale check. |
| Step Loss (1) | The top combat unit in the target hex suffers a step loss, then all combat units in the hex check morale. |
Fire Table (DR = die roll; columns = type of unit firing)
| DR | Bow | Mounted Bow | Light Cavalry | Cannon | Crossbow | Militia |
|---|---|---|---|---|---|---|
| 0 | - | - | - | - | - | - |
| 1 | - | - | - | - | - | - |
| 2 | - | - | - | - | - | - |
| 3 | - | - | - |
Fire Combat Table Results: "-" = No Effect. "M" = Morale Check; all combat units in the target hex must check morale. "1" = The top combat unit in the target hex suffers a step loss and all combat units in the hex check morale.
Fire Table Modifiers: -1 if target is Crusader Heavy Cavalry. -1 if target is Men-at-Arms.
Range Modifiers: see Range Table. Terrain Modifiers: see Terrain Effects Chart.
9.11 Range Table
The Range Table lists ranges for different types of combat units firing. When firing, players cross-index the type of unit firing with the distance in hexes to the target. The result is then applied to the combat. When calculating this distance, count the target hex, but not the firing unit's hex.
Range Table (distance in hexes)
| Type | 1 | 2 | 3 | 4 | 5-6 |
|---|---|---|---|---|---|
| Bow | +1 | - | - | X | X |
| Mounted Bow | - | -1 | X | X | X |
| Light Cavalry | - | X | X | X | X |
| Cannon | +1 | - | - | - | -1 |
| Militia |
Results: "-" = May fire; no die-roll modifier. "-1, +1" = May fire; add the number as a die-roll modifier. "X" = May not fire; out of range.
9.12 Defensive Fire
During the Defensive Fire Segment of the Fire Phase, all non-phasing combat units with Fire capability and within range and line of sight of enemy units may fire.
9.13 Offensive Fire
During the Offensive Fire Segment of the Fire Phase, all phasing combat units with Fire capability and enemy units in range and line of sight may fire.
9.2 Line of Sight
Combat units firing at 2 hexes or more may fire only at targets to which they can trace a line of sight (LOS); i.e. they must be able to see it. LOS is traced from the center of the firing hex to the center of the target hex. If LOS is blocked, fire is not possible.
9.21 Combat Units Firing at Enemy Units on the Same Elevation. The following block LOS when firing and target units are at the same elevation:
- A wooded or town hex at the same elevation
- Combat units on the same elevation
- A hex of higher elevation
9.22 Combat Units Firing at Enemy Units on a Different Elevation. The following types block LOS when firing and target units are at different (higher or lower) elevations:
- An intervening hex higher than both target and firer.
- Intervening woods or town.
- Intervening combat units adjacent to the target unit.
9.3 Melee Combat
During Melee Combat, the phasing player may attack enemy combat units in one of his combat unit's two Front hexes (see 6.1). Out of Command, Routed, and Skirmish units may not initiate melee. More than one unit may attack a single enemy combat unit; defending units must be in a single hex, but attackers may be in more than one hex.
9.31 Melee Requirements. A unit does not have to melee, but if it does there are certain requirements:
- If a combat unit fired during Offensive Fire, it must melee the combat unit(s) it fired at.
- All combat units in the defending hex must be attacked as one unit.
- In order to initiate melee, units must have an Advance, Stand, or Attack command.
9.32 Melee Procedure. The following procedure is used to resolve Melee Combat:
- Attacker announces which combat units are attacking and which enemy combat units will be attacked.
- The attacking combat units check their morale. If a unit fails morale it does not rout, but neither does it attack. Charging Crusader heavy cavalry units that fail morale are flipped to their non-charging side. Units which pass the morale check must attack.
- Cavalry units which have a Retreat or Stand command and which are about to be attacked by infantry, may now retreat 1 to 3 hexes (owning player's choice). Skirmish units being attacked by cavalry units may retreat on a die-roll of 8, 9, or 10. The attacker must then advance at least one unit into the vacated hex.
- Units defending against attackers who have passed their morale check now check morale. If they fail the morale check, they rout and retreat 3 hexes to their rear. Defending units that pass morale accept combat.
- Both players now total the combat strength of their units involved, and each player rolls a die. The results are modified by the leader combat bonus of any leaders present (i.e. stacked with) attacker or defender, as well as by terrain, Command Chit, and the presence of routed units (if any). Defender applies results first, then the attacker. Note that the results of the defender's die-roll is applied to the attacker, and vice versa (just as in fire combat).
- Morale checks as required are now made. If all defending combat units vacate the hex, at least one attacking unit must advance (if two are stacked together, both may do so).
- Charging Crusader heavy cavalry units that were attacking and advanced as per step 6 may now move up to 4 movement points. At the end of their movement they may attack any enemy units in their frontal zones of control, using the melee procedure. At the conclusion of this new combat, they do not receive further movement points.
➤ Example: A Crusader heavy cavalry unit that has been flipped to its charge side is attacking a Turkish cavalry unit. First the Crusader and then the Turkish cavalry check their morale. Both pass. Both then roll on the Melee Table. The Turkish cavalry unit rolls a no effect on the Crusader unit, while the Crusader unit achieves a "Morale Check" result on the Turk. The Turkish cavalry unit retreats 3 hexes, and the Crusader cavalry advances into the hex. Since it successfully advanced into the hex, the Crusader unit now may move 4 more movement points (not counting the hex advanced into). It does so. At the end of this movement a Turkish infantry unit is in the Crusader's frontal ZOC. Both units check and pass their morale. Both then roll and check the Melee Table. The Crusader achieves a "step loss" result on the Turkish unit, while the Turk achieves a "Morale Check" result on the Crusader. The Turkish unit is flipped to its reduced side, fails its morale check, and retreats two hexes (see 9.5). The Crusader unit passes its morale check and advances into the vacated hex. Combat has concluded.
9.4 Melee Table
The Melee Table has a number of columns that correspond to the combat strength of the attacking or defending units. When resolving Melee Combat, each player finds the column that corresponds to the strength of his unit(s) and then rolls a die. The result is modified by the strength of the unit(s) involved, in order to obtain a melee result. Die-rolls modified to less than zero are resolved using the zero line, die-rolls modified to greater than 12 are resolved using the 12+ line.
Melee Table (columns: Number of Combat Strength Points; rows: Die-Roll; "-" no effect, "M" morale check, number = step losses)
| Die-Roll | 1-3 | 4-6 | 7-10 | 11-15 | 16-20 | 21-25 | 26-30 | 31-40 | 41-45 | 46+ |
|---|---|---|---|---|---|---|---|---|---|---|
| 0 | - | - | - | - | - | - | - | - | M | M |
| 1 | - | - | - | - | - | - | - | M | M |
Melee Table Modifiers:
- Cavalry with an Attack Command when attacking has a +1 die-roll modifier.
- Infantry with an Attack Command when attacking has a +1 die-roll modifier.
- Defending combat units with a Stand Command have a +1 die-roll modifier.
- Routed units have a -1 die-roll modifier.
- Leaders stacked with attacking or defending units add the Leader Combat Bonus as a die-roll modifier (see 4.13).
- Units attacking defending units through the defender's rear or flank hexside have a +1 die-roll modifier (a single such unit is sufficient to confer this benefit on an entire multi-unit attack).
- Check Terrain Effects Chart for other modifiers.
Unit Type Modifier Table (attacker down the side, defender across the top; the printed table is referenced from 16.6)
| Attacker \ Defender | Men-At-Arms | Infantry | Heavy Cavalry | Cavalry | Light Cavalry | Bow Cavalry | Skirmishers* |
|---|---|---|---|---|---|---|---|
| Men-At-Arms | - | +1 | - | +1 | +2 | +2 | +3 |
| Infantry | -1 | - | -1 | - | +1 | +1 | +2 |
| Heavy Cavalry | - | +1 | - | +1 | +2 | +2 |
- Skirmish units include crossbow, bow, and militia.
Note: 1. There is no type modifier when cannon is attacked in the Melee Phase (and artillery cannot melee offensively).
Note: 2. In the Nicopolis scenario there are mounted bowmen who are designated as skirmishers; for the purposes of the Unit Type Modifier Table they count as bow cavalry.
9.41 Melee Combat Results
Results on the Melee Table are as follows:
| Result | Effect |
|---|---|
| - | No effect. |
| M | All the owning player's combat units present must check morale. |
| 1, 2 | Number of step losses that the combat units must take, starting with top units. If the attacking units are in more than one hex and defender rolls this result, the owning player decides which top units will take the losses. All combat units then check morale (using their new lower morale). |
9.42 Step Loss
All combat units with a reverse side have two possible steps to lose. Units with no reverse side (those with only 1 combat strength point) are eliminated by a single step loss. Crusader heavy cavalry is explained separately (See 9.43).
- For the first step lost, flip the unit to its "Reduced Side." The unit will now have a lower combat strength, movement allowance, and morale rating. If there is no reverse side, the unit is eliminated.
- For second step lost, the already flipped combat unit is permanently removed from play.
9.43 Crusader Heavy Cavalry Step Losses
Unlike other combat units, when a Crusader heavy cavalry unit suffers losses the following procedure is used:
- For the first step lost, place a One Step Loss marker under the Crusader Heavy Cavalry unit. The unit has its combat strength, movement allowance, and morale rating each reduced by one.
- For the second step lost, flip the One Step Loss marker to its Two Step Loss side. The unit has its combat strength, movement allowance, and morale rating each reduced by two (i.e. by an additional one each).
- For the third step lost, the unit is permanently removed from play.
9.5 Advance and Retreat
A combat unit that is forced to retreat as a result of Melee Combat, retreats 1 to 3 hexes, with the following restrictions:
- It cannot move across a hexside or into a hex which it would not be able to move across or into during movement.
- It cannot enter an enemy occupied hex.
- It cannot enter an enemy ZOC, even if occupied by a friendly unit.
- It cannot retreat off the map.
- It cannot enter a friendly-occupied hex, unless it is occupied only by a leader.
Combat units that are required to retreat but cannot, instead lose an additional step. No rout marker is placed on such units. If a defender vacates a hex as a result of pre-melee morale check (see 9.32), melee, or a pre-combat skirmisher or cavalry unit withdrawal, the attacker must advance at least one combat unit into the hex vacated (if the attacker has two combat units stacked together, he may advance both).
10.0 Morale
During Fire Combat and Melee a combat unit's morale may need to be checked. Units make only one morale check per type of combat phase, even if required to make more than one check. For example, if a unit, in the course of a single Fire Combat Phase, were required to make three checks, it would in fact only have to make one. To check a unit's morale, owning player rolls a die, subtracts one from the result if a leader is attacked with the unit, and compares the result to the unit's morale rating. If the die-roll is equal to or less than the morale rating, the combat unit has passed the morale check. If the die-roll is higher, the combat unit routs. A rout marker is placed upon it, and the unit is retreated from 1 to 3 hexes (owning player making the decision).
10.1 Effects of Rout
A combat unit that has routed suffers the following restrictions:
- Routed units cannot enter enemy ZOC.
- Routed units cannot initiate melee combat.
- Routed units have their movement allowance halved, with any fractions rounded down.
- Routed units suffer a -1 die-roll modifier when defending in Melee Combat.
- Routed units may not take part in Fire Combat.
- Routed units forced to check morale, have a +1 added to their die-roll.
- Routed units have no ZOCs.
- Crusader heavy cavalry units that are charging and fail morale are flipped to their non-charging side.
10.2 Recovery
During the Recovery Phase of each game turn, routed units within the command span of their leader or their overall commander, and not in an enemy ZOC, check morale. If the die-roll is equal to or less than their Morale Rating, the rout marker is removed. If the result is greater than their Morale Rating, they continue to rout and are retreated three hexes. Leaders stacked with routed units cause a -1 die-roll modifier when the unit checks morale.
11.0 Victory Conditions
Each scenario lists the number of combat strength points a side may lose before their opponent begins checking for victory. To count losses, the player totals the strength points of eliminated units by using the front (larger) combat strength of the unit. For Crusader heavy cavalry units, the charging side's combat strength is used. To this is added 3 points for each leader eliminated, and 5 points for an Overall Leader that is eliminated. Then examine combat units still on the map, but with their reduced side uppermost. Subtract the reduced combat strength from the unit's original full combat strength, and add the difference to the loss total. Finally, the full combat strength of currently routed units is added to the loss total.
Starting with turn 5 or when losses reach the indicated level, whichever is sooner, opponent checks for victory during his Rally Phase and each turn after that, by rolling one die and comparing the result to the scenario's victory table. This continues until end of the game is reached or the die-roll has yielded a victory.
The Scenarios
12.0 Hattin
[Historical background narrative that opens the Hattin scenario section is omitted here as flavour text; the scenario rules follow.]
12.1 Battle Scenario
This game begins at the 1900 of July 3rd turn and ends at the conclusion of the 1130 of July 4th game turn (15 game turns).
Set Up. The only units set up on the map are the Muslim militia units, Mat a-j. They set up within 3 hexes of 1110.
Reinforcements. Reinforcements enter with the leader having either an advance or reserve command. The first unit entering one of the designated map hexes expends the normal movement cost to enter such a hex. The next unit to enter the hex pays the cost to enter the hex plus one extra movement point. The third unit pays the normal cost to enter the hex plus 2 extra movement points, and so on. Units stacked together count as one for this purpose. For the first three turns of the game, players using the Advanced Sequence of Play use one action chit per leader on the map or entering the map as a reinforcement for the current turn. After turn three, the standard procedure of placing all chits in the opaque container is followed.
➤ Example: Raymond and his force are entering the map. His first two units, Ray a and b are stacked together. They enter hex 2828 and expend 1/2 a movement point. Ray c enters 2828 next and pays 1 and a half movement points (1/2 for a road hex and 1 for being the second to enter such a hex). If Ray d and e were stacked together and entered the hex 2828 next, they would pay 2 and a half movement points.
Crusaders
- On game turn one (1900): Raymond and all Ray a-m units enter at hexes 2228 to 3127.
- On game turn two (1930): King Guy, the Holy Cross, Guy a-c, Guy e-k, Acre, and Lidde enter at hexes 2228 to 3127.
- On game turn three (2000): Balian d'Ibelin and the remainder of the Crusaders enter at hexes 2228 to 3127.
Muslims
- On game turn one (1900): Taqi al-Din and units Ta a-j enter at hexes 1400 to 2200.
- On game turn two (1930): Saladin and units Sal a-j enter at hexes 3409 to 3413.
- On night turn one: Gokbori and Gk a-k may enter at hexes 2228 to 3127, 3409 to 3413, or 1009 to 1014.
The Muslim player (only) may withhold reinforcements for as many turns as he chooses.
Order of Movement. The Crusader is the first player, the Muslim the second.
Commands. In the battle scenario, players choose their own command chits at the beginning of the scenario. To use the historical commands, players should use the following:
Crusader Command Chits: Raymond—Advance. King Guy—Advance. Balian d'Ibelin—Advance.
Muslim Command Chits: Saladin—Advance. Gokbori—Advance. Taqi al-Din—Advance.
Berserk Levels. Crusaders: 6-10. Muslims: 8-10.
Victory Conditions. To win, check the following tables:
Crusader Victory Table
| Muslim Losses | Die-Roll Needed for Victory |
|---|---|
| 70 - 75 | 10 |
| 76 - 86 | 9 - 10 |
| 87 - 96 | 8 - 10 |
| 97 - 116 | 7 - 10 |
| 117 - 122 | 6 - 10 |
| 123 - 126 | 5 - 10 |
| 127 - 135 | 4 - 10 |
| 136 + | 3 - 10 |
Muslim Victory Table
| Crusader Losses | Die-Roll Needed for Victory |
|---|---|
| 70 - 75 | 10 |
| 76 - 95 | 9 - 10 |
| 96 - 105 | 8 - 10 |
| 106 - 112 | 7 - 10 |
| 113 - 136 | 6 - 10 |
| 137 - 147 | 5 - 10 |
| 148 - 156 | 4 - 10 |
| 157+ | 3 - 10 |
If at the end of the last game turn, neither player has achieved victory on the above tables, the game is considered a marginal victory for the Muslims, since the Crusaders would be forced to withdraw and the siege would continue.
12.2 Special Rules
There are three special rules for Hattin: night turns, the Holy Cross, and Crusader cavalry charges.
12.21 Night Turns. During night turns, all leaders have Reserve or Muster commands. Units in enemy zones of control must retreat during movement or take a step loss. There is no fire combat during night turns, and units may not enter enemy zones of control. Only one chit per leader is placed in the cup and only the move or pass options may be used. On the first turn after the last night turn, each player may change the commands for each of his leaders. It is assumed that during the night both Saladin and King Guy have contacted their subordinates and explained the course of action for the next day.
12.22 The Holy Cross. The Holy Cross was believed to be the true cross on which Christ was crucified. The Holy Cross counter is carried by whatever unit it is stacked with. The unit or units it is with have their strengths doubled if they have a Stand command and their morale rating is increased by one at all times. If during melee, all units with the Holy Cross are eliminated, the Muslim units have captured the cross and it is removed from play. It counts as 30 points of losses for the Crusaders.
12.23 Crusader Cavalry Charges. For Hattin only, each time a Crusader heavy cavalry unit is given an attack command and is successfully flipped to its charging side, the unit must be checked to see if it goes berserk.
13.0 Hab
[Historical background narrative that opens the Hab section is omitted here as flavour text.]
13.1 Battle Scenario
The game begins at the beginning of the 0800 turn and ends at the conclusion of 1900 game turn (23 game turns).
Set Up
Crusaders
- Units with an E set up designation are placed on the three "E" set up hexes on the map so that one unit is in each set up hex.
- Units with an F set up designation set up within 3 hexes of the F set up hex.
- All other units set up within one hex of their designated set up hexes.
Turks
- All Turkish units are placed on the map within 3 hexes of their designated set up hexes.
Order of Movement. The Turk is the first player, the Crusader the second.
Commands. In the battle scenario, players choose their own command chits at the beginning of the scenario. To use the historical commands, players should use the following:
Crusader Command Chits: Baldwin—Stand. Antiochene—Stand. Fulcoy—Stand. Pons of Tripoli—Stand.
Turk Command Chits: Il-Ghazi—Attack. Toktagin—Advance.
Berserk Levels. Crusaders: 8-10. Turks: 7-10.
Victory Conditions. To win, check the following tables:
Turkish Victory Table
| Crusader Losses | Die-Roll Needed for Victory |
|---|---|
| 85 - 110 | 10 |
| 111- 124 | 9 - 10 |
| 125 - 135 | 8 - 10 |
| 136 - 145 | 7 - 10 |
| 146 - 155 | 6 - 10 |
| 156 - 162 | 5 - 10 |
| 163 - 170 | 4 - 10 |
| 171+ | 3 - 10 |
Crusader Victory Table
| Turkish Losses | Die-Roll Needed for Victory |
|---|---|
| 75 - 80 | 10 |
| 81 - 88 | 9 - 10 |
| 89 - 95 | 8 - 10 |
| 96 - 103 | 7 - 10 |
| 104 - 109 | 6 - 10 |
| 110- 120 | 5 - 10 |
| 121 - 125 | 4 - 10 |
| 126+ | 3 - 10 |
If at the end of the last game turn, neither player has achieved victory on the above tables, the game is considered a draw.
14.0 Nicopolis
[Historical background narrative that opens the Nicopolis section is omitted here as flavour text.]
14.1 Battle Scenario
This game begins at the beginning of the 0930 turn and ends at the conclusion of the 1500 game turn (12 game turns).
Set Up
Crusaders
- All units with an F set up designation set up within 3 hexes of the F set up hex.
- All other units set up within 1 hex of their set up hex.
Turks
- All units with an A or B designation set up within 4 hexes of their set up hex.
- Units with a C designation set up within 2 hexes of their set up hex.
- Units with a D designation set up within 3 hexes of their set up hex.
Order of Movement. The Turk is the first player, the Crusader the second.
Commands. In the battle scenario, players choose their own command chits at the beginning of the scenario. To use the historical commands, players should use the following:
Crusader Command Chits: Sigismund—Reserve. Jean Sans Peur—Attack. Burgrave—Reserve. Mirtcha—Reserve.
Turkish Command Chits: Bayezid—Stand. Prince of Serbia—Reserve.
➤ Note: In order to gain some historical insight, the Crusader player is encouraged to play with the historical command for Jean Sans Peur at least once, before trying something more logical.
➤ Note: In the Turkish army in this scenario (only), mounted bowmen are regarded as skirmishers.
Berserk Levels. Crusaders: 7-10. Turks: 8-10.
Victory Conditions. To win, check the following tables:
Crusader Victory Table
| Turkish Losses | Die-Roll Needed for Victory |
|---|---|
| 58-68 | 10 |
| 69-80 | 9-10 |
| 81-95 | 8-10 |
| 96-110 | 7-10 |
| 111-125 | 6-10 |
| 126-140 | 5-10 |
| 141-155 | 4-10 |
| 156+ | 3-10 |
Turkish Victory Table
| Crusader Losses | Die-Roll Needed for Victory |
|---|---|
| 55-68 | 10 |
| 69-80 | 9-10 |
| 81-95 | 8-10 |
| 96-110 | 7-10 |
| 111-125 | 6-10 |
| 126-140 | 5-10 |
| 141-155 | 4-10 |
| 156+ | 3-10 |
If there is no winner according to the above by the end of the last game turn, the Turk is declared the winner if there are Turkish non-routed combat units occupying road hexes that would block a clear path for the Crusaders either to Arsouf [sic, as printed] or to the northern edge of the game map. These units must also be in command. Otherwise, it is considered a Crusader victory.
15.0 Tannenburg
[Historical background narrative that opens the Tannenburg section is omitted here as flavour text.]
15.1 Battle Scenario
The game starts at the 0930 game turn and ends at the conclusion of the 1800 game turn, or 18 game turns.
Set Up
Teutonic Knights
- All units with a D set up designation set up within 1 hex of the corresponding set up hex on the map.
- Units with an E or F set up designation set up within 3 hexes of their set up hex.
Slav Army
- All units set up within 3 hexes of their set up hex.
Order of Movement. The Slav army player is the first player, while the Teutonic Knight player is the second player.
Commands. In the battle scenario, players choose their own command chits at the beginning of the scenario. To use the historical commands, players should use the following commands:
Teutonic Knights Command Chits: Ulrich von Jungingen—Stand. Wallenrod—Stand. Lichtenstein—Stand.
Slav Army Command Chits: King Wladyslaw—Advance. Zyndram—Attack. Witold—Advance.
Berserk Levels. Teutonic Knights: 8-10. Slavs: 7-10.
Victory Conditions. For the Teutonic Knights to win, check the following tables:
Teutonic Knights Victory Table
| Slav Losses | Die-Roll Needed for Victory |
|---|---|
| 88 - 104 | 10 |
| 105 - 122 | 9-10 |
| 123 - 138 | 8-10 |
| 139 - 154 | 7-10 |
| 155 - 170 | 6-10 |
| 171 - 180 | 5-10 |
| 181 - 195 | 4-10 |
| 196 + | 3-10 |
Slav Victory Table
| Teutonic Knights Losses | Die-Roll Needed for Victory |
|---|---|
| 76 - 90 | 10 |
| 91 - 106 | 9-10 |
| 107 - 112 | 8-10 |
| 113 - 118 | 7-10 |
| 119 - 134 | 6-10 |
| 135 - 150 | 5-10 |
| 151 - 168 | 4-10 |
| 169+ | 3-10 |
If at the end of the last game turn, neither player has achieved victory according to the above tables, the game is considered a draw.
16.0 Advanced Rules
These rules are intended to address some of the limitations of the basic system for The Crusades. These rules may be used with any of the games in the system. They do add some playing time and some complexity. Players may pick and choose which of the rules to use with the basic system. These rules are meant to be added to and expanded upon in future games in the series, while the basic game will remain standard.
16.1 Advanced Crusades Sequence of Play
When using the Action Chits (see 16.11) use the following Sequence of Play. It will lengthen play, but it will also create more tension and add more challenge to the game.
I. Command Phase. Both players may attempt to change command chits. All action chits provided in the game countermix are then placed in an opaque container; the exception is the Hattin scenario (see its reinforcement rules for details).
II. Action Phase. Players alternate drawing action chits from an opaque container, beginning with the Crusader player. As each chit is drawn, the owning player chooses a leader and his units to either move or conduct combat, or passes. After the action concludes, the next chit is drawn, the owning player performs an action or passes. When all action chits have been drawn or the "pass" option has been chosen twice sequentially, the Action Phase concludes.
III. Rally Phase. Both players attempt to rally their disrupted and routed units.
IV. End Phase. Both players check for automatic victory. If only one player makes a successful die-roll, that player wins. If either both players or neither, make successful die-rolls play continues and the next turn begins. The game-turn marker is adjusted on the game turn track.
16.11 Action Chits
Action chits are color-coded to indicate which side they apply to (pink for Crusaders/Teutonic Knights, green for their opponents). Action chits have two sides, moved and fired. When an action chit is drawn from an opaque container, the owning player has three options—pass, move, or combat. During the course of a turn, each leader's command may move once and engage in combat (fire and melee) once.
Pass Option. When choosing the Pass option, the action chit is placed to one side, and another chit is drawn. If the next player chooses a pass option then the turn is over (even if the same player has passed twice).
Movement Option. The owning player may move all of the units of one leader's command, plus any skirmish and/or artillery units. At the end of movement, the moved side of the action chit is placed on the leader or on the Moved/Fired box of the appropriate leader on the off-map chart. Players must note which skirmish and artillery units have moved; these units may not move again during the current turn. Out of command units may move when their leader is activated, but must follow the basic rules for out of command units.
Combat Command. The owning player may conduct combat (fire and melee) with all the units of one leader's command, plus any skirmish units and/or artillery units. Fire combat is conducted first, followed by melee. At the end of combat, the fired side of the action chit is placed on top of the leader or on the appropriate leader's box on the off-map chart. Players must note which skirmish and artillery units have engaged in combat; these units may not engage in combat again during the current turn.
16.12 Off Map Leader Boxes
Each leader has an off-map box on which his current command can be recorded, and on which action chits may be placed. These boxes may be used to avoid cluttering up the map with markers, and thus ease play.
16.13 "Turn Ends" Chit (Optional)
For added frustration and enjoyment, players may choose to use this optional rule when using the Advanced sequence of play. After 5 action chits have been drawn, the "Turn Ends" chit is placed in the opaque container with the remaining action chits (those that have not yet been drawn in the current turn). Whenever the "Turn Ends" chit is drawn, the Action Phase of the current turn ends.
16.2 Melee Odds Modifiers
Before resolving melee, the attacker should compare his attacking strength points to the total strength points of the defender. A ratio is created and rounded in favor of the defender (for example, if an attacker with 5 strength points is attacking a defender with 2 strength points, the ratio would be 2 to 1. The attacker receives a die-roll modifier of +1 if the ratio is 2 to 1, +2 if the ratio is 3 to 1, or +3 if the ratio is 4 to 1 or greater. The defender receives a die-roll modifier of +1 if the ratio is 1 to 2 or less. Melee is then resolved in the normal way, but with these additional modifiers being applied to the die-rolls.
16.3 Split Commands
Leaders controlling both infantry and cavalry may at their discretion split their command when subject to an "attack" command chit. The cavalry (only) may act in accordance with the "Attack" command, while the infantry act as if they have a "Stand" command. When a force is split in this way, the leader must be moved with the cavalry. The choice of this option must be announced at the beginning of a turn. At the beginning of any turn in which the leader is in command span of the infantry or cavalry that did not move, the player may announce that the rest of his force now has the "Attack" command as well.
16.4 Berserk Units
Whenever 2 step losses are taken in combat, each player checks for each of his units to see if any of them go berserk. Each scenario lists the die numbers needed for a unit to go berserk. If a unit goes berserk, a berserk marker is placed on the unit and a second combat takes place against an adjacent enemy unit (it does not have to be the opposing unit from the initial combat, unless both become berserk, in which case the initial attacker is still considered the attacker).
16.41 Effects of Going Berserk
Berserk units have the following qualities:
➤ Berserk units gain a 2 column shift to the right in melee combat when attacking.
➤ Defending berserk units gain a 2 column shift to the left in melee combat.
➤ Berserk units of the phasing player function as heavy cavalry in respect to having the possibility of a second movement and attack (see 9.32 #7). Unlike heavy cavalry, they may attack a second time even if the defender's hex is not vacated at the end of the initial Melee Combat.
➤ Berserk units that fail a Morale Check or that are required to retreat as a result of combat, become exhausted and have the "berserk" marker replaced by an "exhausted" marker.
➤ Berserk units gain a -1 die-roll modifier when checking morale.
➤ Berserk units are not affected by command chits.
• Note that even a single berserk unit attacking or defending confers the advantage column shift; it is not necessary for both defenders or all attackers to be berserk.
16.42 Exhaustion
When a berserk unit becomes exhausted, the following effects must be observed:
➤ During movement, it may move 1 hex, but may not enter enemy ZOCs.
➤ If at the beginning of movement an exhausted unit is in an enemy ZOC, it must retreat one hex, unless by doing so it would move into an enemy ZOC. If it would move into an enemy ZOC, it does not retreat.
➤ It may not attack.
➤ If defending, an exhausted unit has a 1R column shift during Melee Combat. [sic: "1R" as printed]
➤ It has a +1 die-roll modifier for Morale Checks.
➤ While exhausted, the unit ignores all commands.
16.43 Exhaustion Removal
During the Rally Phase, the owning player may check exhaustion removal for each exhausted unit not in an enemy ZOC. To do so, roll one die and add the unit's current morale to the result. If the total is 14+, then the unit is no longer exhausted. Otherwise, the unit remains exhausted.
16.5 Optional Victory Conditions
Players follow the normal victory procedures, except that when one player makes a successful victory roll, his opponent may do one of three things:
- Concede; OR
- Immediately check morale for every unit on the map—units that fail, rout (units already routed immediately retreat three hexes or take a step loss; then their morale is checked and if they fail, another step loss is taken); OR
- Change any one leader's command to "retreat," and place rout markers on all of that leader's units (units already routed immediately retreat three hexes or take a step loss).
This occurs every time either player rolls a victory, until one player concedes, or until one player runs out of units.
16.6 Unit Type Modifier Table (Optional)
To use the Unit Type Modifier Table, before resolving Melee Combat cross-reference the type of unit attacking with the type of unit defending. The result is the die-roll modifier for the attacking unit.
17.0 Game Credits
[Credits block omitted per the transcription policy: designer, playtester, editing, art, and copyright attribution.]
17.1 Recommended Reading
- Delbruck, Hans. Medieval Warfare
- Gabrieli, Francesco (ed.). Arab Historians of the Crusades
- Hay, Denys. The Medieval Centuries
- Heath, Ian. Armies of Feudal Europe 1066-1300 A.D.
- Joinville and Villehardouin. Chronicles of the Crusades
- Nicole, David. Hattin 1187
- Oman, Charles. The Art of War in the Middle Ages, Vol. 1
- Regan, Geoffrey. Decisive Battles
- Riley-Smith, Jonathan. Atlas of the Crusades
- Riley-Smith, Jonathan. The Crusades
- Runciman, Steven. A History of the Crusades Vol. 1-3
These books should give you a good overview of the period. If you can only read one, let it be Runciman.
Designer's Notes
The printed Designer's Notes (page 11) are transcribed below. The acknowledgement paragraph and sign-off are omitted as credits.
The major change from Crusades to Crusades II is the addition of the advanced rules. Of course, the main change with the advanced rules is the interactive chit system. We have found in play testing that it creates more tension in the game, as neither player knows what will happen when. The addition of the "Turn Ends" chit makes each turn even more unpredictable. I therefore encourage you to use that rule as well. The one drawback to the advanced rules is, of course, that there is an increase in playing time. Using the basic system, all four games play from beginning to end in about 2 to 3 hours. Using the advanced system, you can add an hour or more. My suggestion is to use the basic rules when time is an issue if the game is being used in a tournament. Beginning players should also stick to the basic game until the main concepts of the game are understood. When you have the time to get really involved in the game, try the advanced version with all of the rules.
Each of the battles in this quad were selected because of the situation. I have tried to vary types of battles. This can be tough since many of the battles were "line up and go at it" types. Tannenburg and Hab fit that bill, although the battle of Hab has an interesting set up, where the Crusaders' flanks are in jeopardy from turn one. Nicopolis is very similar to Crécy (see 3W's The Black Prince), while Hattin is a meeting engagement (one of my personal favorite types of battle). I have expanded the scope of the Crusades taking one battle (Nicopolis) from Central Europe and one battle (Tannenburg) from Eastern Europe. This has opened up the possibility of a third quad somewhere down the road. Between now and then, I'll be accumulating information on the different battles of the period. If you have a distinct favorite and would like to see it done drop a line to me through 3W. Of course, it would be even better if you had some sources that would help me expand my base of knowledge. I've found through researching this period that the more I delve the more there is to know and question. Until the next time, I wish you all good gaming.
Record Sheets
Turn record tracks and leader boxes, as printed on the final two pages of the manual (pages 17-18). Each leader box has COM, MOVE and FIRE boxes.
12.0 Hattin
- Turn record track, first row: 1900, 1930, 2000, 2030, Night 1, Night 2, Night 3.
- Turn record track, second row: 0800, 0830, 0900, 0930, 1000, 1030, 1100, 1130.
- Leader boxes, Crusaders: King Guy, Raymond, Balian d'Ibelin.
- Leader boxes, Muslims: Saladin, Gokbori, Taqi al-Din.
13.0 Hab
- Turn record track, first row: 0800, 0830, 0900, 0930, 1000, 1030, 1100, 1130.
- Turn record track, second row: 1200, 1230, 1300, 1330, 1400, 1430, 1500, 1530.
- Turn record track, third row: 1600, 1630, 1700, 1730, 1800, 1830, 1900.
- Leader boxes, Crusaders: Baldwin, Antiochene, Fulcoy, Pons of Tripoli.
- Leader boxes, Turks: il-Ghazi, Toktagin.
14.0 Nicopolis
- Turn record track, first row: 0930, 1000, 1030, 1100, 1130, 1200, 1230, 1300.
- Turn record track, second row: 1330, 1400, 1430, 1500.
- Leader boxes, Crusaders: Sigismund, Jean Sans Peur, Burgrave, Mirtcha.
- Leader boxes, Turks: Bayezid, Prince of Serbia.
15.0 Tannenburg
- Turn record track, first row: 0930, 1000, 1030, 1100, 1130, 1200, 1230, 1300, 1330.
- Turn record track, second row: 1400, 1430, 1500, 1530, 1600, 1630, 1700, 1730, 1800.
- Leader boxes, Teutonic Knights: Ulrich von Jungingen, Wallenrod, Lichtenstein.
- Leader boxes, Slavs: Wladyslaw, Zyndram, Witold.