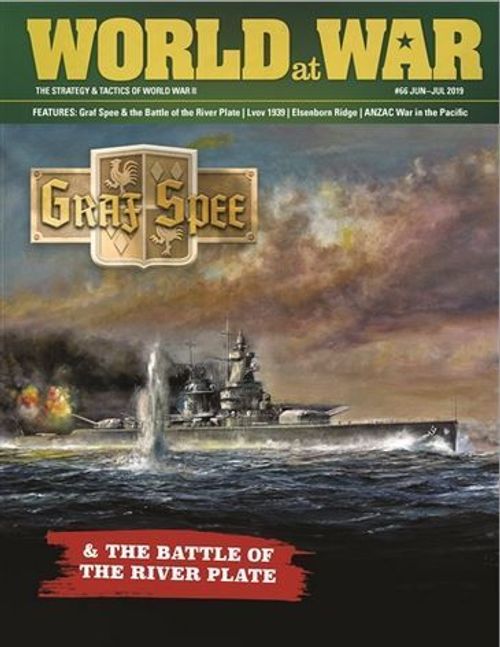
Cruise of the Graf Spee
Cruise of the Graf Spee Rulebook
Table of Contents
Table of Contents
- 1.0 Introduction
- 2.0 Components
- 3.0 Set-Up
- 4.0 Sequence of Play
- 5.0 Allied Alert Level
- 6.0 German Pocket Battleships
- 7.0 Outfitting
- 8.0 Cargo
- 9.0 Ports
- 10.0 Repairs
- 11.0 Intelligence
- 12.0 Ship Movement
- 13.0 Incidents
- 14.0 Naval Combat
- 14.1 Naval Combat Procedure
- 14.2 Voluntary Break-off
- 14.3 German Gunfire
- 14.4 Allied Gunfire
- 14.5 German Torpedo Fire
- 14.6 Allied Torpedo Fire
- 14.7 Maximum Fire
- 14.8 German Ammo/Torpedo Expenditure
- 14.9 Multiple Targets
- 14.10 Damage Marker Effects
- 14.11 Auxiliary Cruisers & Combat
- 14.12 Naval Air Units & Combat
- 15.0 Royal Navy Redeployment
- 16.0 Shore Bombardment
- 17.0 Winning the Game
- 18.0 Variable Initial Deployment (Optional)
- 19.0 KMS Deutschland (Optional)
- 20.0 Anti-Aircraft (Optional)
- 21.0 Night (Optional)
- 22.0 Mines (Optional)
- 23.0 Campaign Game (Optional)
- Player Aid Card
1.0 Introduction
Cruise of the Graf Spee puts you, the player, in command of KMS Graf Spee, the German battlecruiser that made a historically epic voyage through the South Atlantic during the opening days of World War II. This is a solitaire game; in which you must accomplish a specific randomly drawn objective to win the game.
You must manage the various supply, repair and other functions of KMS Graf Spee (and possibly its sister ship, the KMS Deutschland). As you fight your way through the South Atlantic and potentially the Indian Ocean, you will encounter various Allied warships, merchantmen for raiding, and unexpected opportunities and objectives. These are represented by Incident markers.
German ships in the game are shown in detail. Allied ships are shown in a more abstract manner because you, the player, are seeing the situation from the standpoint of Captain Langsdorff, the commander of the Graf Spee. The possibility of running into enemy warships will be increased via the Alert Level, which represents how much the Royal Navy's Admiralty is concentrating its resources against your ship(s). But you will have various advantages that you may possibly employ, notably intelligence information that you can gather along the way, as well as marine companies that can be dispatched for special purposes. When you encounter enemy warships, you resolve combat via the naval combat procedures. The game will end when you accomplish your objective or are sunk trying.
1.1 General Course of Play
Cruise of the Graf Spee contains multiple scenarios that can be linked together to form a campaign game. In all cases, the player performs the command of KMS Graf Spee (and possibly KMS Deutschland 19.0). The player also resolves the actions of various enemy forces via the procedures designated in the Sequence of Play and other game sections. The game can also be played with two players, one in command of the Graf Spee, and one in command of the Deutschland. In that case, all the decisions for each ship's actions are only decided by the player who is playing that ship, although the two players are not competing; they must always cooperate to win the scenario or campaign.
1.2 Game Scale
Each turn represents one full day. Nautical spaces are about 100 nautical miles apart. Most warship counters represent one ship each.
1.3 Important Definitions
The below definitions will be utilized throughout the game.
- Cargo: A general term for the various brown markers which represent equipment that may be added to the German ships (such as anti-aircraft armament).
- Draw: Pick at random from the designated marker pool.
- Incident Pool: A wide mouthed opaque container in which the incident markers are kept until drawn and played.
1.4 Naval Unit Abbreviations
The below abbreviations are printed on the ship counters. These abbreviations generally have no impact on game play, but are included for historical reference purposes.
- BB: Battleship
- BC: Battlecruiser
- CA: Heavy cruiser
- CL: Light cruiser
- DD: Destroyer
- KMS: Kriegsmarine Schiff (German Navy Ship)
- Auxiliary Cruiser: A ship that can provide supply to German ships
2.0 Components
The components to Cruise of the Graf Spee include these rules, a 22 x 34 inch map and one counter sheet of 176 counters. Players will need to provide themselves at least one six-sided die, but a handful of dice would be useful.
Important: All charts and tables not appearing on the map are located on the center pages of these rules. Players should separate the center four pages, creating a four page player aid card.
2.1 The Game Map
The game map is composed of various elements.
- Operational Area: This is a map of the South Atlantic and the Indian Ocean where you sail the Graf Spee (and the Deutschland, if in play). The map shows a series of Navigation Lines with Plotting Spaces. A German ship must begin the game in the North Atlantic Plotting Space and then be moved along those Navigation Lines to sail to other Plotting Spaces. Some Navigation Lines are connected to ports wherein German ships can be resupplied and/or outfitted.
- Map Errata: Terrain Effects Chart. On the Allied Patrol Zone Line, under the title, should read: (Red hex with white letter)
- (Errata, Sept 11 2019: Terrain Effects Chart, Allied Ports line, Incident Effects column, replaced with the following:) Increase the Allied Alert Level one space higher when entering space, if the port has not been captured. (The Terrain Effects Chart is printed on the map sheet, not in this rules document; the errata is recorded here so the change is not lost.)
- There is one space mid-map that is marked (UK). Ignore the lettering in the space.
Important: When the Incident Effects column on the Terrain Effects Chart states "None", that signifies there are no additional effects for that space.
- Map Key: This key identifies the map symbols.
- Record Tracks: These are used to record information during the game:
- Alert Level: This is the measurement of the Royal Navy Admiralty's ability to respond to the German's activity.
- Victory Point Track: This is a measurement of victory points earned and/or lost during the game.
- Missions Completed: This is a tally of the missions that the Germans have accomplished during a campaign game.
- German Ship Displays: This is a graphical representation of each German ships' departments. Each of the two German Ship Displays has the following tracks that are used to track the status of the separate departments during the game:
- Leadership: This is a measure of the captain's skill.
- Primary Guns: This is the firepower of a ship's fore turret (representing three 280mm guns).
- Secondary Guns: This is the firepower of a ship's aft turret (representing three 280mm guns).
- Tertiary Guns: This is the firepower of a ship's starboard and port turrets (representing numerous 150mm guns).
- Torpedo Tubes: This is the firepower of a ship's torpedo mounts (representing one torpedo salvo each).
Note: Full explanations of each of these nine ship departments are itemized and detailed in 6.2.
2.2 Game Pieces
The various types of game pieces (counters) included are as follows:
- German Warships: Pocket Battleship Graf Spee; Pocket Battleship Deutschland.
- Allied Units: Allied Warship; Auxiliary Cruisers.
Note: The game includes a variety of enemy (primarily British and some French) warships which are actuated by the game system, but are otherwise not shown in detail.
Important: Auxiliary cruisers are used to provide additional supplies to the German warships while at sea, as well as lay mines in Plotting Spaces (if optional rule 22.0 is in play). There are two auxiliary cruisers included in the game. They are not warships. When the rules refer to German ships or warships, they do not apply to auxiliary cruisers unless specifically stated.
- Ship Display Markers: Ship display markers are placed on the ship tracks to record the status of each ship's various departments. Each ship has one of the following markers: Leadership, Engines, Primary Guns, Hull, Secondary Guns, Ammunition, Tertiary Guns, Fuel, Torpedo Mounts, Torpedo Reloads.
- Administrative Markers: The game includes numerous administrative markers to be used as mnemonics during the game.
- Time Marker: Used to indicate the current game turn on the Turn Record Track. It is also used in conjunction with the optional Day/Night marker to indicate if it is currently daytime or nighttime.
- Port Visited Marker: Used to indicate a neutral port that a German ship has visited and thus, cannot return to thereafter because of international neutrality laws.
- Naval Battle Marker: Indicates a Plotting Space where a naval battle is occurring. One is provided for the Graf Spee and another is provided for the Deutschland (if it is in play, and is in a different Plotting Space.
- Mines Marker (Optional): Indicates a Plotting Space where an auxiliary cruiser has deployed sea mines.
- Allied Alert Level Marker: Indicates the Allied awareness of a German ship's whereabouts.
- End of Mission Turn Marker: Indicates which game turn a scenario will automatically end.
- Cargo Markers: Cargo markers are placed in the Cargo Available Box from where they can be requisitioned and assigned to the German ships (within the limits of each ship's hull capacity). See Cargo Chart on the player aid card.
Counter Errata: There is one port defense marker that is blank on the back. It should have the same markings as the other port defense markers. HMS Hermes should have a rating of 0-0-1-0. It did not have torpedoes.
3.0 Set-Up
Set-up the game as follows:
-
Place the Allied alert level marker in the "1" space on the Allied Alert Level Track.
-
Place the five Allied naval air units (Ark Royal, Eagle, Furious, Glorious, Hermes) in the Naval Air Box. These units only appear on the map when their parent aircraft carrier (CV) is encountered.
-
Place Allied warships face up in the listed Plotting Spaces.
- Force Y Patrol Zone: Hermes (CV), Strasbourg (BB)
- Force K Patrol Zone: Ark Royal (CV), Clyde (SS), Hostile (DD), Neptune (CL), Hereward (DD), Hero (DD), Hardy (DD), Renown (BB)
- Force G Patrol Zone: Exeter (CA), Ajax (CL), Achilles (CL)
- Force H Patrol Zone: Shropshire (CA), Sussex (CA), Dorsetshire (CA)
- Seychelles Patrol Zone: Eagle (CV), Cornwall (CA)
- Falklands Port: Cumberland (CA)
Note: The Indefatigable is provided for possible future variant scenarios.
Designer's Note: The Germans had a fairly good idea of which British and French naval units were arrayed against the Graf Spee, and even approximately where they were, and so most of the Allied set-up is therefore not randomized. However, these ships will redeploy under certain circumstances (15.0).
- Place the following counters in a cup and randomly draw six. Place the drawn counters face down (do not examine the counters placed, nor the counters left in the cup) in the Ascension Patrol Zone. All counters (including quiet seas markers) that are not drawn are set aside to be used when the Royal Navy redeploys (15.0). Drawn quiet seas markers are immediately placed in the Incident Pool.
- Glorious (CV)
- Malaya (BB)
- Furious (CV)
- Repulse (BB)
- Dupleix (CA)
- Foch (CA)
- 5 x Quiet Seas Incident Markers
- Place the following counters in a cup and randomly draw three. Place the drawn counters face down (do not examine the counters placed, nor the counters left in the cup) in the Mozambique Channel Patrol Zone. All counters that are not drawn (including quiet seas markers) are set aside to be used when the Royal Navy redeploys (15.0). Drawn quiet seas markers are placed in the Incident Pool.
- Gloucester (CL)
- Liverpool (CL)
- Manchester (CL)
- 3 x Quiet Seas Incident Markers
-
Place all the port defense markers in the Port Defenses Box.
-
Place all the orders markers in a draw cup. Draw one at random. Place the marker face up in the Scenario Orders Box. This is the German mission for the current scenario. All the other orders markers are irrelevant unless playing the campaign game (23.0).
-
Consult the Orders Chart (on the map) to determine the turn length (in terms of days) for those orders. This is the number of days in which you must successfully accomplish the orders you received. Failure to do so before the end of that last game turn means that you have lost the game (whether playing a single scenario or the entire campaign game).
-
Place the time marker in the Day 1 box of the Turn Record Track, and then place the end of mission turn marker in the last turn box as determined by the Orders Chart for the current orders.
-
Place each of the ship display markers (2.2) on each German ship's department tracks in the specific numerical spaces as indicated below. A ship display marker can be moved up or down its track by various occurrences during the game. A ship display marker can never be lower than zero or higher than the highest numerical space on its track.
KMS Graf Spee
- Leadership: 3
- Primary Guns: 3
- Secondary Guns: 3
- Tertiary Guns: 1
- Torpedo Mounts: 2
- Engines: 6
- Hull: 6
- Ammo: 6
- Oil: 6
KMS Deutschland
- Leadership: 4
- Primary Guns: 3
- Secondary Guns: 3
- Tertiary Guns: 1
- Torpedo Mounts: 2
- Engines: 5
- Hull: 6
- Ammo: 6
- Oil: 3
-
Decide if each German ship will have torpedo reloads or not. If so, place the torpedo reloads marker in the torpedo reloads space on the Torpedo Mounts Track, and reduce the ammo marker from the "6" space to the "5" space. So long as that ship has the torpedo reloads marker, its Ammunition Track may never be increased to the "6" space.
-
Place all cargo markers in the Cargo Available Box. Outfit each German ship with cargo markers (2.2) by selecting seven unique cargo markers of your choice from the Cargo Available Box. Place each such marker in each of that ship's seven Hull Track spaces (including the "0" space). If a ship suffers hull damage during combat, each reduced space on the Hull Track will lose the cargo marker in that space. Therefore, be mindful to place the cargo markers with the assumption that the marker placed in the "6" space will be lost first if that ship suffers hull damage, and then the "5" space will be lost next, and so on.
-
Place one auxiliary cruiser in the Altmark Resupply Area space. This space functions as a German port so long as an auxiliary cruiser is present there. Then place a second auxiliary cruiser in any High Seas Plotting Space of your choice on the map.
-
Place the Graf Spee (and the Deutschland, if in play) in the North Atlantic Plotting Space. It is from here that the German ship(s) will start the game.
-
Commence the Sequence of Play (4.0).
4.0 Sequence of Play
Each scenario consists of turns known as Days. Each scenario lasts a different number of days. When the turn marker reaches the last day of that scenario, the game ends. If the German ship(s) have not achieved the objective for that scenario, the Germans have lost the game.
4.1 Phases
Each game turn (i.e., day) consists of six phases that must be conducted in the order given below.
- Outfitting/Repairing Phase: You may attempt to do any or all the following actions, in any order:
- Refuel/Rearm Ship: (Errata, Sept 11 2019, replaces the original text: "This may be done at a neutral or friendly port, or in the Altmark Resupply Area if an auxiliary cruiser is present there (7.2).") Ships may refuel in neutral ports, and may rearm and refuel in friendly ports or in the Altmark Resupply Area (if an auxiliary cruiser is present in the Altmark Area).
- Transfer/New Cargo: This may be done at sea or, more effectively, in port (8.4 & 8.5).
- Repair Damage: This may be done at sea or, more effectively, in port (10.0).
Important: If you do any of the above actions, the German ships cannot move during the ensuing Movement Phase.
-
Intelligence Phase: You may attempt an intelligence action (11.0).
-
Movement Phase: You may now move your eligible ship(s) sequentially along any connected Plotting Space(s) up to a maximum of five Plotting Spaces (or fewer if its engines have been damaged). If moving fewer than five Plotting Spaces, no oil is expended from that ship's Oil Track. If a ship moves five Plotting Spaces, its oil marker must be decreased one space on its Oil Track.
Important: The Graf Spee (not the Deutschland) can be moved up to six Plotting Spaces (if its engines are not damaged), but its oil marker must then be decreased an additional space on its Oil Track (in addition to being decreased for moving five Plotting Spaces). It must then undergo a damage check the instant that it enters the sixth Plotting Space (12.3).
- A ship must temporarily stop in a Plotting Space whenever it enters an Allied Patrol Zone that contains Allied ships and then:
- a) Roll for possible contact and if no contact is made the ship may continue movement.
- b) If contact is made, naval combat ensues, and no further movement is allowed.
- Once all movement or naval combat is complete, one or more incident markers are drawn and then resolved (13.0).
- If the entrance into any Plotting Space causes an increase to the Allied Alert Level, that increase is in effect instantaneously (5.4).
- If naval combat occurred or if any German ship was repaired, Royal Navy Redeployment occurs (15.0).
-
Shore Bombardment Phase: (Errata, Sept 11 2019, replaces the original text, which read "If a German ship is occupying an Allied Port or Allied Naval Base Plotting Space, you must conduct you may conduct a shore bombardment (16.0).") If a German ship is occupying an Allied Port or Allied Naval Base Plotting Space, you must conduct a shore bombardment (9.0 & 16.0).
-
Auxiliary Cruiser Movement Phase: The German player may move his auxiliary cruiser(s) from their current Plotting Space(s) to any other High Seas Plotting Space(s) (or to the Altmark Resupply Area Space if no auxiliary cruiser is present there). No more than one auxiliary cruiser may ever be placed into the same Plotting Space. Auxiliary cruiser movement may be any distance and is automatic. No incident marker is ever drawn when placing an auxiliary cruiser.
-
Orders Achievement Phase: If either of your ships is presently occupying a Plotting Space that is a requisite of your current orders marker (as indicated under the requisite column of the Orders Chart for that marker), you may now evaluate if you have sufficient victory points to achieve that orders marker's requisite. If not, continue playing the game (if there are any game turns remaining for that scenario). If playing the campaign game and if you have sufficient victory points to win, implement the results for achieving that orders marker.
5.0 Allied Alert Level
The Allied alert level represents the Allies' awareness of your ship's whereabouts on the map, as well as their commitment of resources to hunt you down and sink you.
5.1 Allied Alert Level
The Allied alert level marker always begins a scenario in the "1" space, unless playing the campaign game (whereby it will fluctuate during the campaign).
5.2 Maximum & Minimum Alert Level
The Allied alert level may never be reduced to less than "1", and it may never go higher than "6". If some combination of events both raise and lower the Allied alert level during the same turn, the net result of those events is therefore the current alert level.
5.3 Alert Level Effects
The Allied alert level has the following effects:
- When your ship(s) are required to draw from the incident pool, the number of incident markers that are to be drawn for that Plotting Space is always equal to the current Allied alert level.
- If that Plotting Space contains any enemy ships, the current Allied Alert Level will modify contact (14.1) and voluntary break-off attempts (14.2).
5.4 Alert Level Immediacy
If any occurrence(s) cause the Allied Alert Level to be raised and/or lowered, it occurs immediately.
6.0 German Pocket Battleships
6.1 Deployment
If playing with the Graf Spee and the Deutschland, they may be moved together or separately. If moving them separately, they must each complete the Movement and Shore Bombardment Phases separately. The player may always decide which ship's Sequence of Play is completed first.
6.2 German Ship Departments
The map is printed with a track display for the Graf Spee and for the Deutschland. Each ship's track display contains seven specific departments of that ship.
- Leadership: The leadership marker may go up along the Leadership Track for winning a naval battle (14.13), successful intelligence (11.0), and for achieving orders when playing a campaign game (23.0). The leadership marker may go down along the Leadership Track due to damage during a naval battle (Allied Gunnery Hit Table), and for failure to achieve orders when playing a campaign game.
- Guns: There are three types of guns (primary, secondary, and tertiary). A gun marker may go down along its Gun Track because of damage during a naval battle. A gun marker can never go up. Exception: When repairs have taken place.
- Torpedoes: The torpedo marker is moved down the Torpedo Track as they are expended when firing torpedoes during naval combat. The torpedo marker only goes up the track when the ship is resupplied.
- Engines: The engine marker may go down along the Engine Track due to damage during naval combat, or damage caused by using emergency speed (12.3). The engine marker can never go up. Exception: When repairs have taken place.
- Hull: The hull marker may go down along the Hull Track due to damage during naval combat. The hull marker can never go up (except when repaired).
- Ammo: The ammo marker will go down on the Ammunition Track due to firing guns during naval combat. The ammo marker can never go up. Exception: When repairs have taken place.
- Oil: The oil marker will go down on the Oil Track due to that ship moving at its maximum speed (12.2) or emergency speed (12.3). The oil marker can never go up (except when resupplied).
Note: Markers can go down to zero (0) on their respective track, in which case that department is no longer functional, though no marker can ever go lower than zero.
Example: A ship cannot move its maximum movement if its oil marker has gone down to zero.
Important: Damage that occurs against a department that is already at zero is ignored.
7.0 Outfitting
Supplying and repairing a ship, called outfitting, can only occur during the Outfitting/Repairing Phase (4.1). Outfitting can occur in any Plotting Space (except Allied Naval Bases). Outfitting will be less difficult in some Plotting Spaces and more difficult in others, or not possible at all (Outfitting Effects column of the Terrain Effects Chart). There are three types of outfitting that can occur.
- Repairing: If your ship occupies an appropriate Plotting Space (such as the Altmark Resupply Area), a ship that has suffered damage may potentially be repaired (10.0).
- Refueling: If your ship occupies an appropriate Plotting Space (such as the Altmark Resupply Area), you may roll one die to refuel each German ship. The die roll indicates how far the oil marker may be moved up along that ship's Oil Track. Regardless of the die roll, a ship's maximum oil capacity is "6".
- Rearming: If your ship occupies the Altmark Resupply Area or a captured port (not a neutral port) you may roll one die to rearm each German ship. The die roll indicates how far the ammunition marker and/or torpedoes marker may be moved up along that ship's Ammo and/or Torpedo Mounts Track (distributed amongst the two tracks however you prefer). Regardless of the die roll, a ship's maximum ammo is "6", and a ship's maximum torpedo mounts is "4".
Designer's Note: It is not to be assumed that a captured port inherently possesses the right type of ammunition for German warships; rather, it is assumed that one or more of the various German auxiliary cruisers that roamed the Atlantic has been dispatched to that port to unload the correct ammunition.
7.1 Torpedo Reloads
If a ship's track display has the torpedo reloads marker, its maximum ammunition is "5" (not "6").
- A torpedo reloads marker may be expended (removed from that ship's track display, permanently) during its Outfitting/Repairing Phase, thereby automatically rearming that ship's torpedoes to its maximum space of "4" on its Torpedo Mounts Track (Errata, Sept 11 2019, replaces the original parenthetical, which read "regardless of a rearming die roll, and regardless of that ship's starting torpedo track position") (regardless of rearming die roll and regardless of that ship's starting or current torpedo track position).
- If a torpedo reloads marker is expended, that ship's maximum ammunition is "6". Once expended, a torpedo reloads marker may never be added to a ship again.
7.2 Auxiliary Cruisers
Auxiliary cruisers represent disguised resupply vessels that have been secretly deployed to the South Atlantic to provision German ships. Their presence in a Plotting Space diminishes the die roll penalty when a German ship outfits out at sea (in that auxiliary cruiser's Plotting Space).
- They have no other capabilities during the game; they do not cause incidents to be drawn, they cannot achieve orders, cannot conduct shore bombardment, and they cannot participate in naval combat. Exception: An auxiliary cruiser may be used to place sea mines if playing with the mines optional rule (22.0).
- If naval combat occurs in an auxiliary cruiser's Plotting Space, that auxiliary cruiser will be eliminated automatically if any Allied ships (or naval air) survive the naval combat there.
- Auxiliary cruisers can potentially be eliminated if the auxiliary cruiser sighted incident marker is drawn.
8.0 Cargo
Cargo represents additional equipment and personnel that can be added to a German ship to increase its effectiveness and capabilities. Cargo is never necessary to operate any ship. Most of the cargo markers represent improved equipment, their absence does not imply the lack of such equipment.
- Cargo is free to add to each German ship.
- The maximum number of cargo markers that a German ship may carry is equal to the hull spaces on its Hull Track (include the 0 space).
- If a ship loses any of its hull spaces because of naval combat, it will lose cargo accordingly.
8.1 Outfitting Your Ship
To outfit your ship when the game begins, select seven of the 11 different types of cargo/equipment. A ship may never be outfitted with two of the same cargo markers.
- Dummy Funnels: This represents fake fabrications to alter the appearance of the ship. Extra funnels provide a die roll modifier on the Contact Chart in favor of the Germans.
- Reserve Crew: This represents additional sailors to increase the ship's effectiveness.
- Radar: This represents the improved Seetakt (Dete-1) radar.
- Damage Control: This represents men and equipment devoted to controlling fires, flooding, et cetera.
- Range Finder: This represents improved range finders and target designators, et cetera.
- Decoders: This represents wireless monitoring and decoding equipment and crew (B-Dienst).
- Float Plane: This represents the new Ar-196 model of float plane.
- Anti-Aircraft: This represents additional anti-aircraft armament.
- Marine Kompanie: This represents German marines to capture enemy ports.
- Enigma Cipher: This represents cipher equipment and technicians.
- Prize Crew: This represent additional sailors who are trained to operate captured enemy ships.
Note: See the Cargo Chart for the effects of each type of cargo marker.
8.2 Space Available for Cargo
Each cargo marker must be placed in one of the seven spaces (including the "0" space) on the Hull Track.
8.3 Cargo & Damage
If a hull marker is reduced because of damage, the cargo marker that occupied that space is destroyed and removed from the track display. Place it in the Cargo Available Box. It is for this reason that you should place your cargo markers on the Hull Track in such a way that the cargo is placed along the Hull Track in the order of most important to least important (the least important cargo markers being placed in the "6" space). Destroyed cargo markers can be reacquired during the Outfitting/Repairing Phase if that ship's hull is repaired (10.0).
8.4 New Cargo
When a ship occupies a friendly or neutral port, you may remove and/or add cargo markers (of any type), but only within the limits of the available hull space. Place any removed cargo markers in the Cargo Available Box.
Important: A captured port is defined as a friendly port.
8.5 Transferring Cargoes
If the Graf Spee and the Deutschland occupy the same friendly or neutral port during the Outfitting/Repairing Phase, you may trade out or transfer any of their cargo markers, if they do not exceed the available hull space on either ship and provided that neither ship has two of the same cargo markers.
Important: Cargo may not be transferred or traded if the ships are not in a port. Cargo cannot be moved from one hull space to another hull space on the same ship. Trade out allows ships that have all hull boxes filled with cargo to trade those cargos.
9.0 Ports
There are three categories of ports in the game: Neutral Ports, Allied Ports, and Allied Naval Bases.
- (Errata, Sept 11 2019, replaces the original first bullet, which read "A German ship may not conduct to conduct outfitting/repair or to conduct cargo operations in an uncaptured Allied port, or Allied naval base.") A German ship may not conduct outfitting/repair or cargo operations in an uncaptured Allied port, or Allied naval base.
- German ships can conduct outfitting/repair in a captured Allied port (Allied naval bases cannot be captured).
- A German ship is permitted to enter each neutral port once per game (9.1) to conduct outfitting/repair or conduct cargo operations.
- Ports are useful for purposes of repairing, refueling, and rearming. Though some repairing, refueling, and rearming can occur at sea, it is accomplished much more effectively in port (Outfitting Effects column of the Terrain Effects Chart).
9.1 Neutral Port
A German ship may enter any neutral ports during a scenario.
- It may repair and refuel (not rearm) while there.
- Owing to international maritime regulations, a German ship may never reenter the same neutral port after it has moved out of that port Plotting Space.
- To signify this, place a port visited marker atop that neutral port; no German ship may ever enter that same neutral port again.
- Neutral ports can never be captured.
- A German ship may remain in a neutral port any number of game turns.
- This rule applies separately to each neutral port on the map, regardless of the nationality of that port. A German ship may leave one neutral port and is permitted to enter a different neutral port, even if those ports are of the same nationality.
Designer's Note: Historically the Graf Spee was only granted 72 hours to remain in Montevideo's harbor. This was longer than international law stipulated. A German ship in this game may remain in a neutral port indefinitely, it risks running out of time to achieve its orders.
9.2 Capturing an Allied Port
A German ship that is outfitted with a Marine Kompanie cargo marker may attempt to capture an Allied port (not Allied naval base) by entering that port's Plotting Space during that German ship's Movement Phase.
- During the Shore Bombardment Phase the Allied port conducts a port defense attack (9.3).
- If the German ship survives the port's defense attack, the ship then must conduct shore bombardment (16.0).
- If the shore bombardment is successful, the Marine Kompanie cargo marker may then be removed (disembarked) from that German ship and placed atop that Allied port. The Allied port is then captured and is considered a friendly port for German ships.
- If that Marine Kompanie remains disembarked and atop that Allied port, the port is a German port in every regard. It may function to repair, refuel, and rearm any German ship in that Plotting Space normally.
Note: Neutral ports, Allied ports occupied by an Allied ship and Allied naval bases may never be captured.
- After a Marine Kompanie has been disembarked, it is permissible for a German ship to be outfitted with a new cargo marker during its Outfitting/Repairing Phase (including the Marine Kompanie that has been disembarked).
- That German ship is permitted to move out of that captured port Plotting Space (leaving the Marine Kompanie there) during its next Movement Phase.
- That Marine Kompanie can never move over-land to capture any other port.
- If the Marine Kompanie is re-embarked aboard a German ship, that port immediately becomes an Allied port again.
9.3 Port Defenses
If a German ship occupies an Allied port or Allied naval base Plotting Space at the beginning of the Shore Bombardment Phase, the German ships must be attacked by the port's defenses.
- To resolve a port defense attack, randomly draw one port defense marker from the Port Defenses Box (on the map) and place it face up atop that port or naval base symbol.
- Roll one die (per German ship) and compare the die roll to that port defense marker's printed number (the number printed within its orange shield icon).
- If the die roll is higher than the number printed on that port defense marker, there is no effect to German ship.
- If the die roll is equal to or less than that port defense marker's printed number, roll another die and consult the Allied Gunnery Hit Table to determine what damage has occurred to that German ship.
- The damage is applied prior to any shore bombardment and any Marine Kompanie disembarkation.
- If an German ship survives a port defense's attack (it is not sunk), it must conduct shore bombardment of that port or naval base's port defenses (16.0).
- If the ship is in an Allied Port Plotting Space, and the port's defenses are destroyed, the German ship may then disembark its Marine Kompanie cargo marker (9.2).
Exception: A Marine Kompanie may never capture an Allied naval base.
10.0 Repairs
A ship that has suffered damage can potentially be repaired during its Outfitting/Repairing Phase. A repair may be attempted anywhere on the map where the ship can legally be present. The location of a ship when its repair(s) are attempted will modify the number of repair dice that ship is entitled to.
Important: Only guns, torpedo mounts, engines and the hull can be repaired. Torpedo reloads, ammunition and oil can be resupplied (Terrain Effects Chart).
- Each successful repair moves a display marker up along its track (incrementally) towards the rightmost space on that track, depending on the severity of the damage and the effectiveness of the repair. No department of a ship's display track can ever be repaired beyond its rightmost numerical space.
- Repair may be attempted each Outfitting/Repairing Phase.
- Any repair attempt, regardless of the result, disallows that ship from moving during its own Movement Phase of that same game turn.
10.1 Repair Procedure
To repair a ship's damage, you must roll a number of dice equal to the current leadership rating of that ship.
- If the ship is outfitted with a damage control and/or reserve crew cargo marker, add one more die to the leadership dice for each such cargo marker.
- Add or subtract repair dice depending on the type of Plotting Space that ship presently occupies (Outfitting Effects column of the Terrain Effects Chart).
10.2 Repair Results
If a repair die roll is "5" or "6", that result entitles you to immediately repair any department of that ship (except torpedo reloads, ammunition and oil) of your choice up one space higher along that track (though never beyond the highest numerical space on that track) per each such die roll result. Multiple die rolls of "5" or "6" may be used to repair different departments or the same department (in whatever apportionment you prefer). If a repair die roll is 1-4, that result does not repair any damage.
11.0 Intelligence
During a German ship's Intelligence Phase, you may (but are not required to) attempt to gain an intelligence advantage by rolling one die roll per German ship. Consult the Intelligence Table on the map and roll one die, modifying the result using the die roll penalties listed below the table. Implement the results.
Designer's Note: Historically, the German captain of the Graf Spee, Hans Langsdorff, was deceived about the composition of the British fleet, and this faulty intelligence directly influenced his decision to scuttle his ship in Montevideo harbor. In game terms, the leadership rating of the Graf Spee is a "3" and therefore subject to an intelligence die roll penalty (representing Captain Langsdorff's faulty judgment, as it were). The leadership rating of the Deutschland is higher (4) and not therefore subject to an intelligence penalty. This is not necessarily meant to suggest that the captain of the Deutschland (Paul Wenneker) was a better skipper. We have no way to know how Wenneker would have performed under the same exact circumstances (and, as it went, he handled the Deutschland ably enough during the Norwegian Campaign). However, history has recorded Captain Langsdorff's fatal misjudgment, and so that is the only data from which to form a conclusion and then assess the two relative capabilities in game terms.
12.0 Ship Movement
During a ship's Movement Phase, a ship may be moved from its current Plotting Space into any successive linked and adjacent Plotting Spaces on the map.
- The maximum distance that a ship may move during each Movement Phase is equal to the numerical space of that ship's current engine display marker.
Exception: A ship that was outfitted or repaired cannot move during that same turn.
12.1 Cruise Speed
If a ship moves four Plotting Spaces or fewer, it is known as cruise speed. Cruise speed does not reduce its ship's oil, nor does it require an engines damage check.
12.2 Maximum Speed
If a ship moves five Plotting Spaces, it is known as maximum speed. Maximum speed decreases the ship's oil marker one space to the left on its Oil Track. It does not require an engines damage check.
Important: A ship cannot move at maximum speed if its oil marker is already on the "0" space of its Oil Track.
12.3 Emergency Speed
The Graf Spee (only) may move up to 6 Plotting Spaces. This is known as emergency speed. Emergency speed decreases the ship's oil marker an additional space to the left on its Oil Track (two, total). Emergency speed requires an engines damage check when that emergency speed movement is completed.
Important: The Graf Spee cannot move at emergency speed if its oil marker is already on the "0" or "1" space of its Oil Track.
- To determine if the ship's emergency speed movement has caused any damage to the engines, roll one die:
- If the die roll is "1", the ship's engines are damaged. Decrease the ship's engines marker one space to the left on its Engines Track.
- If the die roll is "2", the ship's engines have become severely damaged, and its engines marker must be decreased two spaces to the left on its Engines Track.
- Any other die roll has no effect.
12.4 Damage Effects on a Warship's Speed
If a ship's engines are damaged (whether caused by combat or the use of emergency speed), the maximum distance that ship may be moved is reduced accordingly (equal to that ship's engines marker's position on its Engines Track) until repaired.
12.5 Plotting Spaces
The various types of Plotting Spaces on the map occasionally affect movement differently (Terrain Effects Chart). All Plotting Spaces are connected by Navigation Lines which represent principle shipping lanes, and a ship may only ever move from a Plotting Space to another Plotting Space via a connected Navigation Line:
- High Seas: Blue circle sea Plotting Spaces wherein all movement is normal.
- Allied Patrol Zones: Are like High Seas Plotting Spaces except that a ship must temporarily halt to check for contact (and possible naval combat) before it can move further. Exiting an Allied Patrol Zone has no effect on movement.
- Allied Naval Base: Are enemy coastal locations. A ship must end its movement when entering any such Plotting Space. Exiting an Allied naval base has no effect on movement. A ship that enters an Allied Naval Base Plotting Space is subject to port defenses normally (9.3), and that ship may conduct shore bombardment there (16.0). An Allied naval base cannot be captured. A Marine Kompanie may not be disembarked there (9.2).
- Ports: Are coastal locations. A ship must end its movement when entering any such Plotting Space. Exiting a port has no effect on movement. A ship that enters an enemy port Plotting Space is subject to port defenses normally (9.3), and that ship may conduct shore bombardment there (16.0), as well as disembark a Marine Kompanie to capture the port. A ship that occupies a neutral or friendly port (including an enemy port that has been captured by a Marine Kompanie) may be outfitted in that port (8.0).
- Altmark Resupply Area: This space represents the secret rendezvous location with the German auxiliary cruiser Altmark. If an auxiliary cruiser is present there, this Plotting Space functions as a German port for all intents and purposes.
13.0 Incidents
Incidents represent potential encounters at sea and are represented by incident markers. Incident markers are set aside as a pool to be drawn randomly when a German ship ends its movement in any Plotting Space on the map except a neutral or friendly port (and even if that ship did not move). Auxiliary cruisers do not trigger events.
13.1 Incident Procedure
Once all German ship movement is ended and/or possible naval combat has been conducted during the Movement Phase, blindly draw a number of incident markers equal to the current Allied Alert Level.
Important: Draw the above number of incident markers for all spaces occupied by German warships, unless the line item on the Terrain Effects Chart states to not draw an incident.
- When an incident marker is drawn, examine it and then consult the Incident Chart to determine what occurs. Incident effects occur immediately (in the order the markers are drawn).
- If the Intel from Berlin or Limited Visibility markers are drawn the player may substitute them by the Allied Convoy Sighted incident. If the substitution is made, the Allied Alert increases by 2. This option may not be taken if the Allied Alert Level is currently 6 (prior to the incident draw).
- After an incident marker is implemented, it is immediately returned to the Incident Pool. Incident markers are never expended or removed from play.
Exception: Some incidents remain in effect for the duration of the current game turn. Those incidents only occur the moment that they are drawn from the Incident Pool but remain in effect for the entirety of that same game turn. Those incidents are therefore not immediately returned to the Incident Pool.
14.0 Naval Combat
Naval combat may occur when a German ship(s) enters an Allied Patrol Zone that contains any Allied ships, or when an incident marker triggers naval combat.
14.1 Naval Combat Procedure
Resolve naval combat as follows:
- Determine if contact occurs by rolling one die and consulting the Contact Chart.
- If contact does not occur, naval combat is not resolved in that Plotting Space. If the contact check was made due to a German ship moving into an Allied occupied Patrol Zone, the German ship may continue its movement. Do not check for incidents if the German ship continues movement. If contact occurs, the German ship(s) may be eligible to break-off voluntarily (14.2). If contact occurs and the German ships do not voluntarily break-off, naval combat occurs, and incident markers are drawn.
- If the Royal Navy Flotilla Sighted event occurs, combat only occurs if the contact check allows it and/or a German voluntary break-off does not occur.
Note: If playing with the optional Deutschland rule, contact is only rolled once for both ships (not once for each).
-
Place the naval combat marker in the Plotting Space where naval combat is occurring, and then remove all the engaged ships from the map.
-
The side that has First Salvo first fires the primary guns of all its present ships (but only if the firing ship's ammunition marker is not on the "0" space). Inflict any damage immediately (14.3). Ships that are sunk by First Salvo primary guns are removed from play immediately and permanently. They may not fire any guns or torpedoes.
-
The side that does not have First Salvo fires the primary guns of all its present (and surviving) ships (but only if the firing ship's ammo marker is not on the "0" space). Inflict any damage immediately (14.3). Ships that are sunk by primary guns are removed from play immediately and permanently. They may not fire secondary guns, tertiary guns, or torpedoes.
-
The side that has First Salvo fires the secondary guns of all its present ships (only if the firing ship's ammo marker is not on the "0" space). Inflict any damage immediately (14.3). Any ships that are sunk are removed from play immediately and permanently. They may not fire secondary guns, tertiary guns or torpedoes.
-
The side that does not have First Salvo fires the secondary guns of all its present (and surviving) ships (only if the firing ship's ammo marker is not on the "0" space). Inflict any damage immediately (14.3). Any ships that are sunk are removed from play immediately and permanently. They may not fire tertiary guns or torpedoes.
-
The side that has First Salvo fires the tertiary guns of all its present (and surviving) ships. Inflicting any damage immediately (14.3). Any ships that are sunk are removed from play immediately and permanently. They may not fire tertiary guns or torpedoes.
-
The side that does not have First Salvo fires the tertiary guns of all its present (and surviving) ships. Inflict any damage immediately (14.3). Any ships that are sunk by tertiary guns are removed from play immediately and permanently. They may not fire torpedoes.
-
The side that has First Salvo fires the torpedoes of all its present (and surviving) ships (but only if the firing ship's torpedoes marker is not on the "0" space). Inflict any damage immediately (14.4).
14.2 Voluntary Break-off
If contact has occurred and prior to any naval combat calculations, the German ship(s) may voluntarily break-off automatically instead of engaging in a naval battle if the following requisites exist:
- If the German ships have First Salvo.
- If the Allied bomber attack or carrier launches swordfish incident marker has not been drawn (or if that incident marker has been negated by anti-aircraft).
- If that German ship's engines marker is on a space that is at least equal to or greater than any of the movement numbers of all Allied ships in that same Plotting Space. If there are two German ships present, and only one of them has the required speed, then only that German ship may break off.
- If the German player elects to voluntarily break-off (assuming a German ship is eligible to do so), no naval combat occurs and all incident markers (including those that were yet to be implemented) are immediately returned to the Incident Pool. If the voluntary break-off was conducted prior to the draw of incident markers, do not draw any incident markers. German ship's Movement Phase ends in that zone.
Note: Voluntary break-off can be conducted even if the German ships conducted repairs that game turn and cannot move.
14.3 German Gunfire
When a type of gun is to be fired, you must first select a single target of your choice for that type of gun and then compute a firing solution to determine how many dice that gun may roll as its attack. The firing solution calculation is the net total of the conditions listed on the German Gun Firing Solution Calculation Chart.
Exception: An Allied naval air unit may never be targeted (14.12 & 20.0).
Note: The same gun may not target two different enemy ships, regardless of how many dice it is entitled to roll.
14.4 Allied Gunfire
Each Allied ship must be fired during the Naval Combat Procedure (14.1) at any German ship present during that naval combat, and each Allied ship must fire its primary, secondary, and tertiary guns (printed as the first, second, and third orange number, respectively, along the top of each Allied ship counter). You do not use the firing solution for Allied ships, but instead simply roll a number of dice equal to the type of gun being fired (14.1). If that type of gun is printed as a "0" (or if reduced to zero after becoming crippled), no dice are rolled for that gun.
Example: The BB Malaya is printed with a "5 0 2 4" along the top of its ship counter, meaning that it must roll five dice during the primary gun step of the Naval Combat Procedure, but no dice during the secondary gun step (because its secondary gun number is "0"), and then two dice during the tertiary gun step.
- If there are multiple Allied ships present during the same naval combat, all of the surviving Allied ships that are printed with a primary gun number must fire their primary guns first, followed by all of the surviving Allied ships that are printed with a secondary gun number (during the secondary gun step of the Naval Combat Procedure), and then followed by all of the surviving Allied ships that are printed with a tertiary gun number (during the tertiary gun step of the Naval Combat Procedure).
- Each roll of "6" is a hit on that targeted German ship. Immediately roll another die and consult the Gunnery Hit Table to determine the effects of that hit.
14.5 German Torpedo Fire
Torpedo fire is resolved differently than gunfire, and no firing solution calculation applies to torpedo fire. Use the German Torpedo Firing Solution Calculation Chart.
14.6 Allied Torpedo Fire
Allied torpedo fire (14.1) is resolved exactly like Allied gunfire, but you must roll a number of dice that is equal to the last (rightmost number) printed along the top of each Allied ship or naval air unit counter. If that Allied ship's torpedo number is printed as a "0" (or if reduced to zero after being crippled), no dice are rolled for that ship. Consult the Allied Torpedo Hit Table.
14.7 Maximum Fire
When determining the primary or secondary (not tertiary) gun's firing solution, you may opt to conduct maximum fire. This will double that gun's firepower number. Maximum fire will require that ship's ammo marker to be moved two spaces to the left (instead of one space) on its track.
14.8 German Ammo/Torpedo Expenditure
After a German ship has fired its primary guns, and again after it has fired its secondary guns (not after firing its tertiary guns), that ship's ammunition marker must be decreased one space on its Ammunition Track. The number of dice that gun rolled when it fired has no bearing on the number of spaces moved. Decrease the marker two spaces on its Ammo Track if it was maximum fire (14.7). If that ammunition marker is moved to the "0" space on the track, that ship's primary and secondary guns cannot be fired until that ship has been rearmed (7.0).
After a German ship fires torpedoes, the torpedo mounts marker is moved one space to the left on the track. Once the torpedo mounts marker reaches zero, that ship's torpedoes mounts cannot be fired until that ship has been rearmed (7.0 & 7.1).
14.9 Multiple Targets
If there are two German ships present during the same naval combat, you decide which Allied ship fires at which German ship (until one German ship or the other is sunk, after which all Allied fire must target the remaining German ship).
14.10 Damage Marker Effects
If a damaged marker is printed with Ship is Sunk on the back, that hit Allied ship is removed from the game permanently. It is not returned to any Allied Patrol Zone or redeployed. Other damage markers are explained below.
Exception: The Allied naval unit Clyde (a submarine) can never be sunk or crippled. It may be targeted like any other Allied naval unit normally, if it is hit, no damage marker is drawn, it is assumed to have drawn a ship retreats damage marker automatically.
- Ship is Crippled: All that Allied ship's printed ratings are immediately halved (round any fractions down) for the remainder of that naval combat. That Allied ship will then be redeployed when that naval combat is concluded, and all its printed ratings are returned to full again. Subsequent Ship is Crippled markers have no further effect.
Important: Determine victory points for crippled and/or sunk ships at the end of combat.
- Ship Retreats: That Allied ship is immediately removed from that naval combat (after resolving all pending die rolls). That Allied ship will then be redeployed when that naval combat is concluded, but otherwise suffers no other effects.
14.11 Auxiliary Cruisers & Combat
An auxiliary cruiser cannot participate in naval combat. However, if any German ship(s) are sunk in a Plotting Space where an auxiliary cruiser is also present, that auxiliary cruiser is automatically sunk, as well.
14.12 Naval Air Units & Combat
If an Allied CV type ship is present during naval combat, pick its same-named naval air unit from the Naval Air Box and include it in that naval combat.
- That naval air unit only participates in naval combat during the torpedoes step of the Naval Combat Procedure (14.1), but it will be eliminated (before the attack) if its parent aircraft carrier is sunk (only).
- Naval air units cannot be targeted during naval combat and can only ever be shot down by anti-aircraft (20.0). A naval air unit is eliminated immediately if its parent aircraft carrier is sunk.
- When naval combat ends, any naval air unit there is then immediately returned to the Naval Air Box (unless it has been shot down by anti-aircraft or unless its parent aircraft carrier was sunk), even if its parent aircraft carrier was crippled or retreated.
14.13 End of Naval Combat
Naval combat automatically ends when every ship in that Plotting Space has fired during each step (if eligible to fire) of the Naval Combat Procedure (14.1).
- Allied ships that were sunk or crippled immediately award victory points, and the loss of the Graf Spee and/or the Deutschland will immediately deduct victory points. See the Victory Point Chart printed on the map.
- If a German ship survives naval combat in a Plotting Space, it remains there until the next game turn. All surviving Allied ships must then be redeployed (15.0).
- Finally, move the leadership marker of each participating (and surviving) German ship one space to the right along its Leadership Track (even if no Allied ships were sunk, crippled, or retreated during that naval combat). The leadership marker is not moved up if that German ship chose voluntarily to break-off.
15.0 Royal Navy Redeployment
Though most Allied naval unit locations are predetermined when the game begins (based on their historic positions and accurate German intelligence about their locations), their positions will change after any naval combat is concluded, or at the end of the Movement Phase, after the Graf Spee and/or the Deutschland undergoes any repair, regardless of the Graf Spee's and/or Deutschland's location on the map when being repaired, and regardless of the outcome of the repair attempt (10.0).
15.1 Redeployment Procedure
To redeploy the Royal Navy, collect all the surviving (not sunk) named Allied naval units listed under 3.0 (including the counters remaining in the cup from the random draws) and place them face down. Blindly mix them up and then deploy them randomly in the spaces and in the order listed below (do not examine these units).
- Force Y Patrol Zone: Three Allied naval units
- Force K Patrol Zone: Three Allied naval units
- Force G Patrol Zone: Four Allied naval units
- Force H Patrol Zone: Six Allied naval units
- Seychelles Patrol Zone: Four Allied naval units
- Ascension Patrol Zone: Six Allied naval units
- Mozambique Channel Patrol Zone: Two Allied naval units
If there are insufficient remaining Allied naval units to redeploy to these spaces in the numbers indicated, prioritize redeployment from the top of the list downwards.
16.0 Shore Bombardment
Allied ports and naval bases may be bombarded during the Shore Bombardment Phase of a German ship's turn.
- To do so, you must move a German ship into that Allied port's or naval base's Plotting Space during the Movement Phase and survive the port defenses (9.3).
- Then decrease the ammo marker one space to the left on its track and roll two separate dice: one for the ship's primary guns and one for its secondary guns.
Note: Maximum fire is not possible for purposes of shore bombardment, and it is not possible to ever avoid expending ammo by only firing one of the ship's guns, et cetera.
- If either die roll is equal to or less than its gun marker's number on that gun's track, the port defenses are eliminated (permanently) by that shore bombardment. The port defense marker must be flipped over to its "No Port Defenses" side (where it remains for the duration of the game).
- If both die rolls are higher than the respective gun marker's number on the guns' track, that German ship's shore bombardment is ineffective for that game turn. It may attempt another shore bombardment during any subsequent game turn normally, but it is subject to that port defense's attack again (9.3).
- If there is more than one German ship present in the same Allied port or naval base Plotting Space, each ship may attempt its own shore bombardment each turn, but each ship is also subject to a separate attack from the port defense marker.
17.0 Winning the Game
The Orders Chart (see map) describes what must be accomplished by the German player to win a given scenario based on the orders marker drawn. Example: Occupying a specific Plotting Space with the Graf Spee or the Deutschland, accruing a set quantity of victory points, and the number of game turns available to achieve the orders.
Note: Having zero or fewer victory points or less is not a so-called sudden death defeat.
- Victory is checked in the Orders Achievement Phase of each turn.
- If the Graf Spee or Deutschland successfully achieve the specific requirements to achieve the orders, you have won that scenario, and the game ends.
- If by the end of the last game turn, you have not achieved the requirements, then you have lost that scenario, and the game ends.
18.0 Variable Initial Deployment (Optional)
Instead of setting up the German warships in the North Atlantic Plotting Space automatically, roll on the Task Force Variable Initial Deployment Table and place your ship(s) in the indicated Plotting Spaces instead. If playing with the Deutschland, both ships could (due to the die roll) end up in the same space.
Transcriber note: The Task Force Variable Initial Deployment Table is printed on the map sheet and is not part of the rules document, so it is not reproduced here.
19.0 KMS Deutschland (Optional)
The KMS Deutschland (aka Lutzow) had also sortied into the North Atlantic before the war but was subsequently ordered to return to participate in the German invasion of Norway where it was damaged and then subsequently torpedoed while en-route back to Germany for repairs. If these events had not occurred, the Deutschland may have potentially rendezvoused with the Graf Spee, and the two of them together may have proven to be a formidable duo.
The German player may opt to add the Deutschland ship marker to the game (to be set-up in the North Atlantic Plotting Space along with the Graf Spee). If this option is taken, "-25 " victory point deduction must be made when the game begins. When playing the campaign game, this deduction is only taken once, not for each mission.
20.0 Anti-Aircraft (Optional)
If a German ship is attacked by any Allied naval air, that naval air may be shot down (eliminated permanently) if that German ship is outfitted with an anti-aircraft cargo marker.
- When Allied naval air is present during naval combat, roll one die if the German ship that is being targeted by that naval unit is currently outfitted with an anti-aircraft cargo marker.
- If the die roll is "1", the naval air is shot down (eliminated immediately), before it conducts its torpedo attack.
- If the die roll is "2", the naval air will be shot down (eliminated), but only after it has conducted its torpedo attack.
- A die roll of "3-6" has no effect.
- If naval air is shot down, it is removed from the game immediately. This also causes that naval air's parent aircraft carrier (the CV of the same name) to be removed from the game immediately. These removals do not award any victory points.
21.0 Night (Optional)
When all German ship movement is completed, there is a possibility that night will occur. Prior to drawing any incident markers, roll one six-sided die If the die roll is "1-2", place the day/night marker on the current game turn box.
Important: Night cannot occur during two game turns in a row. At the end of the current turn, place the night/day marker in the next game turn box with its day side up as a reminder that night cannot occur during that next game turn. Once that game turn is completed the day/night marker is placed to the side.
21.1 Night Effects
Night will modify the contact die roll. Night also prohibits any naval air from participating in that naval combat.
22.0 Mines (Optional)
Whenever an auxiliary cruiser is placed in a Plotting Space during the Auxiliary Cruiser Movement Phase, you may (but are not required to) place a single mines marker in that same space at that time.
- A mines marker cannot be placed in a Neutral Port Space.
- The entire map is limited to a maximum of seven mines markers.
- There is a maximum of one mines marker per space, regardless of which auxiliary cruiser placed it.
Note: This rule is not associated with the mines sighted incident marker.
22.1 Mines Effects
A mines marker will modify the contact die roll and will add one die to a German ship's firing solution in a Plotting Space where a mines marker is present.
23.0 Campaign Game (Optional)
The campaign game is a combination of multiple scenarios in sequence. To play the campaign game, randomize all the orders markers and blindly line them up in a row, face down, from left to right. You may only view one orders marker per scenario (the leftmost marker) as you are conducting that mission. You may not know what orders you will receive until you are ready to begin that next scenario.
Important: If playing with the Deutschland optional rule (19.0) the VP subtraction is applied at the beginning of the campaign game (not each scenario).
- The effect of the campaign game is that the success or failure of preceding missions will affect the subsequent scenarios.
- If you have achieved your orders during a scenario, all German ships increase their leadership rating one space higher along their track automatically. Place the orders marker in the Missions Completed Box; it may not be used again during this campaign. Implement any bonuses gained by the victory achieved for winning that scenario (which lasts for the duration of the game). Bonuses are indicated on the Orders Chart.
- If you have not achieved your orders during a campaign game scenario, the German ship(s) have their leadership rating decreased by one space along their track (but never to lower than one). A scenario may not be replayed. There is no other penalty, however ending a scenario with negative VP is not an immediate end to the campaign game; it is merely a deficit that is carried over to the next scenario.
Example: If you have a deficit of -50 VP, and the next scenario requires you to achieve 50 VP to successfully achieve those orders, you would therefore be required to acquire 100 VP to accomplish that objective (i.e., to pay for the -50 VP deficit, and then accomplish the requisite 50 VP to successfully achieve the current orders).
Note: Any neutral ports that were visited during any scenario remain marked with a port visited marker throughout the campaign game.
- Any ships that have been sunk during a scenario remain sunk permanently throughout the campaign game, no display markers are reset when the next scenario begins, and no cargo markers are added.
- Port defense markers remain unchanged. Those that have been destroyed remain on the map (on their "no port defenses" side), and the others remain in the Port Defenses Box.
23.1 New Alert Level
When beginning the next scenario, the current Allied Alert Level is equal to the number of successfully achieved orders thus far (although the Allied Alert Level can never be lower than "1", nor be higher than "6").
23.2 German Ship Basing
After a scenario is finished and after your orders for the next mission is revealed, the German ship(s) may be returned to the North Atlantic and/or the Altmark Resupply Area on the map. Otherwise, it remains in its present location (where it ended its previous mission, whether successful or not). Auxiliary cruisers that were sunk are placed back in their starting space.
23.3 Royal Navy Redeployment
Surviving Allied ships are automatically redeployed (15.1) at the end of each scenario; whether the orders were achieved or not.
23.4 VP Surplus & Deficits
Any surplus VP that are accumulated during a scenario (i.e., beyond which was required to achieve the current objective) is carried over to following scenarios and tallied as a starting VP allotment.
- The specific quantity of VP that were required to achieve an objective are never carried over. They are considered expended within the context of the campaign game. In this way, surplus VP may be applied toward the accomplishment of that new objective requisite.
Example: A scenario required 50 VP and you achieved 75 VP. 25 VP would be carried over to the next scenario. You would not carry over the total 75 VP.
- Conversely, any VP deficit for failing to achieve an objective is not lost when new orders are drawn; the VP requisite for the previous (failed) objective must still be achieved; in addition to the VP requirement for the current objective. Accordingly, a VP deficit can accumulate throughout the campaign. There is no debt forgiveness when it comes to VP.
Example: The Raid Allied Merchant shipping in the Indian Ocean Mission, garnered you 87 VP. You failed the mission and still require 13 VP. You would start the next mission with "-13" VP. If the next mission was Indian Ocean Breakout, you would now be required to earn a total of 38 VP to succeed at that mission.
23.5 Winning the Campaign Game
As of the last scenario, the quantity of orders achieved will determine the success or the failure of the campaign.
- 0-3 Orders achieved: Failure: You are relieved of command.
- 4 Orders achieved: Draw: You are assigned to Japan as a Naval Attaché.
- 5+ Orders achieved: Victory: You are promoted and famous.
For each German ship that has been sunk, downgrade the above levels to one level lower.
Example: Six orders were achieved but one German ship had been sunk during the game, a victory would be downgraded to a draw.
Transcriber note: The Orders Chart, Intelligence Table, Victory Point Chart and Terrain Effects Chart are printed on the map sheet and are not part of the rules document, so they are not reproduced here.
Player Aid Card
The rules text above refers to the charts on the four-page center player aid card (pages R7 to R10 of the magazine). They are reproduced here in order.
Contact Chart
| DR | Result | Modifier | Condition |
|---|---|---|---|
| 1 | Contact: Allies have the First Salvo | +1 | If either German ship is outfitted with the radar cargo marker. |
| 2 | Contact: Allies have the First Salvo | +1 | If either German ship is outfitted with the float plane cargo marker. |
| 3 | No Contact | +1 | If either German ship is outfitted with the decoders cargo marker. |
| 4 | No Contact | +1 | If either German ship is outfitted with Dummy Funnels. |
| 5 | Contact: Germans have the First Salvo | +1 | If Mines are present in this Plotting Space (Optional rule 22.1). |
| 6 | Contact: Germans have the First Salvo |
Note: Modified results of less than "1" are treated as "1". Modified results greater than "6" are treated as "6".
German Gun Firing Solution Calculation Chart
- Firepower: Count that firing guns' current firepower; this is the position of the gun's marker (Primary, Secondary, or Tertiary) on its respective track.
- Max. Fire: x2: Decide if this is a Maximum Fire; If this is a Maximum Fire (14.7), double the above firepower number (except when firing a Tertiary gun).
- Mines: +1: Add one (+1) If there is a mines marker in that Plotting Space (Optional rule 22.1).
- Reserve Crew: +1: Add one (+1) if this ship has been outfitted with a reserve crew cargo marker.
- Range Finder: +1: Add one (+1) if this ship has been outfitted with a range finder cargo marker.
- + Leadership: Add (+) the number in the space where the leadership display marker is located.
- - Armor: Subtract (-) target's Armor; i.e., Subtract the number printed within the target ship's yellow box.
German Torpedo Firing Solution Calculation Chart
- Torpedo Mounts: Count the ship's torpedo mounts (the number in the space where the torpedoes marker is on the Torpedo Mounts Track).
- + Leadership: Add that ship's leadership (the number in the space where the leadership marker is on the Leadership Track).
The result of the above equals the number of dice rolled.
- 6 = Hits: For each die roll of "6", a hit is achieved against the targeted enemy ship.
- Damage: For each such hit, blindly draw one damaged marker from the Damaged Pool to determine if that ship is sunk, crippled, or retreats (refer to the back side of that drawn damaged marker). (Errata, Sept 11 2019, replaces "See 14.5." with "See 14.10.") See 14.10.
Incident Chart
| Incident Marker | Effects |
|---|---|
| Air Patrol Reports Position | If a German ship is currently located in a Patrol Zone Space, an Allied Port Plotting Space or an Allied Naval Base Plotting Space, raise the Allied Alert Level by one. |
| Allied Bomber Attack (see note 1)* | For each German ship that occupies a Plotting Space that is adjacent and connected by a Navigation Line to an Allied Port or Naval Base Plotting Space, roll one six-sided die, resolved as follows: 1-3: Bombers Miss; no effect. 4: One Hit; lower the hull display marker one space. 5: Two Hits; lower the hull display marker two spaces. 6: Several Hits; lower all display markers on each German ship one space to the left. |
| Allied Convoy Sighted | Roll three dice and add that die roll result to the Victory Point Track, then roll one die and halve the result (round up). The result is the number of merchant ships sunk. Roll one die for each ship sunk and add the total to the Victory Point Track; for each die roll of 6, apply the Allied Merchant Captured result to one additional ship. |
| Allied Merchantman Captured | If a German ship is outfitted with a prize crew cargo marker, move that German ship's oil display marker one space to the right on the Oil Track. Apply the Merchant Ship Sighted result and double the result. If a German ship is not outfitted with prize crew cargo marker, apply the same procedure but do not double the result. |
| Allied Sub Attack | Roll one die, resolved as follows: 1-2: False Report; no effect. 3-4: Evasive Action; for each German ship in this space, lower its oil display marker one space. 5-6: Torpedo Attack; roll one die on the Allied Torpedo Hit Table and apply the result to each German ship. |
| Auxiliary Cruiser Reported |
Note 1: Disregard this incident marker if any German ship in this Plotting Space is outfitted with the anti-aircraft cargo marker.
Note 2: If this incident is drawn, the player may instead conduct an Allied Convoy Sighted incident. If this option is taken, increase the Allied Alert Level by 2. This option may not be used if Allied Alert Level is currently 6.
Allied Gunnery Hit Table (roll once for each hit)
| Die Roll | Damage Effects |
|---|---|
| 1 | Primary Guns Damage: Move the primary guns display marker one space lower on the Primary Guns Track. |
| 2 | Secondary Guns Damage: Move the secondary guns display marker one space lower on the Secondary Guns Track. |
| 3 | Hull Damage: Move the hull display marker one space lower on its Hull Track. Lose that lost hull's cargo marker, if any. |
| 4 | Engines Damaged: Move the engines display marker one space lower on its Engines Track. Ship speed is thus reduced. |
| 5 | Bridge Damaged: Move the leadership display marker one space lower on the Leadership Track. |
| 6 | Critical Hit: Roll one die and reduce the hull and engines display markers on the Hull and Engines Tracks by a combined total. |
Note: If a German ship's hull display marker is ever reduced to "0" on its Hull Track, it sinks immediately.
Allied Torpedo Hit Table (roll once for each hit)
| Die Roll | Damage Effects |
|---|---|
| 1 | Dud: No effect. That hit is ignored. |
| 2 | Hull Damage: Move the hull display marker one space lower on its Hull Track. Lose that lost hull's cargo marker, if any. |
| 3 | Hull Flooding: Move the hull display marker two spaces lower on its Hull Track. Lose those lost hulls' cargo markers, if any. |
| 4 | Engines Damaged: Move the engines display marker one space lower on its Engines Track. The ship's speed is thus reduced. |
| 5 | Engines Flooding: Move the engines display marker two spaces lower on its Engines Track. The ship's speed is thus reduced. |
| 6 | Critical Hit: Roll one die and reduce the hull and engines display markers on the Hull and Engines Tracks by a combined total. |
Cargo Chart
| Cargo Item | Note | Rules Ref. | Effect |
|---|---|---|---|
| Anti-Aircraft | Incident Chart | 20.0 (Optional) | Disregard Allied Bomber Attack & Swordfish Attack incidents. |
| Damage Control | Repair Procedure | 10.1 | Add 1 die to the number of repair dice rolled. |
| Decoder (B-Dienst) | Intelligence Table & Contact Chart | 11.0 & 14.1 | -1 DRM to Intelligence DR if not present. +1 DRM to Contact DR if present. |
| Dummy Funnels | Contact Chart | 14.1 | +1 DRM to Contact DR. |
| Enigma Cipher | Intelligence Table | 11.0 | -1 DRM to Intelligence DR if not present. |
| Float Plane | Intelligence Table & Contact Chart |
Example: If the bad luck and the good luck incident markers were drawn (in that order), you must implement the bad luck's effect before the good luck's effect.