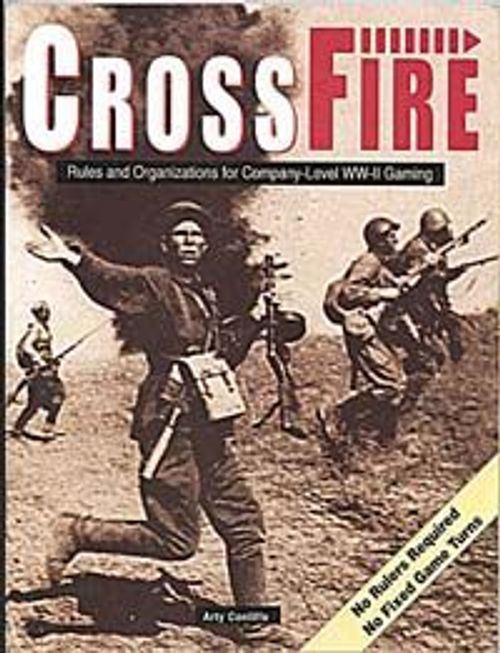
CrossFire: Rules and Organizations for Company Level WW II Gaming
CrossFire: Rules and Organizations for Company Level WW II Gaming Rulebook
Table of Contents
Table of Contents
- 1.0 Prepare to Play
- Game Organization
- 2.0 Organization
- 3.0 Initiative and Squad Actions
- 4.0 Movement/Command Control
- Group Movement
- Building Complexes
- Depressions
- 6.0 Direct Fire
- LOS/Arc of Fire
- Reactive Fire
- Firegroups
- Crossfires
- 7.0 Indirect Fire
- Smoke Screens
- 8.0 Close Combat
- Close Combat
- 9.0 Rallying Pinned/Suppressed Squads
- 10.0 Engineers and Obstacles
- 10.1 Minefields
- 11.1 Barbed Wire
- 10.3 Entrenchments, Bunkers & Hardpoints
- 11.0 Vehicles, Guns and Bazookas
- 11.1 Vehicular Actions
- 11.1.1 Towed Weapons
- 11.1.2 APC Passenger Capacity
- 11.2 Gun Fire
- 11.2.1 Anti-Vehicle Fire
- 11.2.2 Anti-Personnel Fire
- 11.3 Bazooka Fire
- 11.4 Hull-Down Positions "HD"
- 11.5 Vehicular Close Combat
- 12.0 Organizations
- Germany
- Leg Infantry Battalion (1939-'42)
- Leg Infantry Battalion (1943)
- Leg Infantry Battalion (1944-'45)
- Motorized Infantry Battalion (1943-'45)
- Motorized Recon Company (1943-'45)
- Armored Infantry Battalion (1943)
- Armored Infantry Battalion (1944-'45)
- Armored Recon Company (1943-'45)
- Engineer Company (1939-'45)
- Volksgrenadier Battalion (1944-'45)
- Fallschirmjäger Battalion (1943-'45)
- Airlanding Company (1941-'42)
- Italy
- Japan
- France
- Belgium
- Great Britain
- Leg Infantry Battalion (1939-'45)
- Motor Infantry Battalion (1939-'41)
- Royal Navy Commando Troop (1942-'45)
- Motor Inf. Battalion (1942)
- Motor Inf. Battalion (1943-'45)
- Royal Army Commando Troop (1940-'45)
- Royal Marine Commando Troop (1942-'45)
- Airlanding Battalion (1944-'45)
- Parachute Battalion (1944-'45)
- Russia
- United States
- Finland
- Hungary
- Poland
- 13.0 Scenario Generator
- Terrain Arrangement/Density
- Meeting Engagement
- Bridgehead
- 14.0 Bonus Selections
- Germany
- Italy
- Japan
- France
- Great Britain
- Russia
- United States
- Tank/ATG Generation Tables
- Data Sheets
- Stalingrad
- Action Sequence Example
- Advanced Rules
1.0 Prepare to Play
The following items are needed to play CF:
- Two opposing Player-commanders; see Advanced Rules (pg. 44) for Multi-player games.
- Several six-sided dice per player.
- Figures. To play the game, miniatures are used. See the ads for suppliers of these miniatures.
- A table or other gaming surface.
- A Scenario. See our Scenario Generator and sample scenario provided later.
Ground Scale/Time Scale
Instead of fixed scales, CROSSFIRE scales are defined by the tactical possibilities present in the movement, terrain, firepower inter-relationship. The action takes place within the effective range of small arms.
Figure Scale
A single "stand" of infantry represents a Squad of 9-12 men. A single machine-gun model represents a section of several machine-guns, a single vehicle or gun represents 1 actual weapon. CROSSFIRE works with any scale of castings.
Basing Your Miniatures
There are many advantages to basing your figures. Each stand can become a beautiful diorama finished with groundwork and coded with colors, symbols and/or prototype for organizational identification. The figures can then be moved without touching the painted surfaces.
- CROSSFIRE may be played with any figure scale and on any table space from a card table to an entire floor. The number of figures you glue on a base is up to you. We recommend the following basing:
- All stands are the same size for each Squad type.
- 15-20mm infantry / weapons are based 3 figures on a 1-1/4" square. Larger figures may be based 2 figures on a stand if necessary.
Note: This 1-1/4" stand width is also used as game aid for certain aspects of movement, firing and rallying. This is explained later in those sections.
- Squads, HMGs and Company Commanders in 1/285 (or 1/300) scale may be based on a thin material 1-1/4" square.
- Platoon Commanders and Forward Observers are based 5/8" x 1-1/4".
- Vehicles and guns may be based — if basing them is desired — as deep as necessary.
- The terrain Features are scaled to accommodate your base sizes; see Terrain Features, 4.5.
Squad Status Markers
It is helpful during play to note the various effects of combat with markers. While players may use simple counters or "hit rings", in the interest of preserving the beauty of the tabletop, we use special castings to represent various combat results, which will be explained later in the appropriate sections.
Game Organization
Figure Basing
3 Figures showing Company and Platoon designations, 1st Company, 2nd Platoon — Any Squad
1 HMG and 2 Crewmen showing Company designation only, 1st Company — Heavy Machinegun Section
2 Figures showing Company and "Command" designations, 1st Company — Company Commander (use 2 figs. for Battalion Commanders)
1 Figure showing Platoon and Company designation, 1st Company, 1st Platoon — Platoon Commander
Notes: This is a recommended figure basing for 10-20mm 3mm figures; may be based as desired. Companies may be differentiated by color-coding the numerals or the bolts.
Figures need not be re-based; basing is a format providing it is consistent.
Squad Status Represented:
| Figure used | Status Represented |
|---|---|
| Figure upright | Ground-Hugging Squad |
| Prone Figure | Pinned Squad |
| Wounded Figure | Suppressed Squad |
| Dead Figure | NO-FIRE Squad |
| Shell Crater/Rubble | — |
2.0 Organization
Battalion and Company organizations have been included; see sec. 12.0.
2.1 Squads and Platoons
The basic fighting unit in the game is the Squad, representing about 10 men. Squads of the same Platoon may operate in cooperation with each other; see Movement/Command Control, sec. 4.0.
2.2 Heavy Weapons
These include Heavy Machineguns (HMGs), 81mm Mortars, and Infantry Guns (IG). Each model/stand represents 2-3 actual pieces. Each unattached Heavy Weapon operates independently. Each Heavy Weapons type has special characteristics described in later sections.
- The term Squad will be used to describe game procedures that apply equally to both Squad and Heavy Weapons stands.
2.2.1 Heavy Machineguns (HMGs)/Attachment
HMGs are the most common crew-served weapons in CROSSFIRE. A HMG stand may operate independently or may be Attached to a particular Platoon. Up to 3 HMGs may be Attached to any one Platoon.
- An Attached HMG is treated as another Squad in that Platoon for purposes of Command Control (sec. 4.0), Direct Fire (sec. 6.0), and Rallying (sec. 9.0).
- An Attached Weapon may combine its fire with that of the other Squads in the Platoon under the guidance of the Platoon Commander (PC); see Firegroups sec. 6.6, and Crossfires, sec. 6.4.1. This is an important advantage.
Heavy Machineguns and Company Commanders (CCs)
A CC may control all of the unattached HMGs assigned to his organizational Company (up to 3 HMGs). A CC may form a Crossfire with these HMGs and only them. Only the controlling CC may assist an unattached HMG in Rallying or Close Combat, sec. 9.0.
2.2.2 Mortars and Artillery
Artillery, Mortars and Infantry Guns must be off-table permanently, or if permitted on-table in a special scenario, each weapon must establish a permanent firing position at the beginning of play.
- Mortars (and Guns) may not be Attached, and each Mortar operates in conjunction with a Forward Observer, see Indirect Fire, sec. 7.0. If used on-table only the appropriate CC (or PC) may assist a Mortar in Rallying or Close Combat.
2.3 Commanders
These represent the leader and a few subordinates. Platoon (PC) and Company Commanders (CC) are used to assist Squads and HMGs directly subordinate to them in fighting. Commanders vary in quality and therefore in their ability to assist subordinate Squads; see Organizations, sec. 12.0.
- Battalion Commanders (BC) are used rarely and function like CCs except that they may assist any Squad in their Battalion.
Commander Movement
Commanders move the same way Squads do, see sec. 4.0. PCs and CCs do not count as Squads for purposes of Structure Capacity; see sec. 4.4.1.
Commander Assistance
When assisting a subordinate Squad in Close Combat, Rallying, or crossing Barbed Wire, a Commander must be within 1 stand width (1-1/4" say) to his Squads; just "eyeball" the distance. If more than one Commander is present, use the modifier (either a +1 or +2) of the best one; see Close Combat, sec. 8.0, and Rallying, sec. 9.0. PCs may also establish Crossfires as per sec. sec. 6.4.1.
- Suppressed Commanders may not provide assistance, but may be assisted by other Commanders.
- All Commanders may not fire.
2.3.1 Platoon Commanders (PCs)
The PC may assist only those Squads within his organizational Platoon unless these have all been eliminated. Thereafter, he may assist Squads from another Platoon by being reassigned permanently to that Platoon.
- A PC is required to coordinate the Squad movements of all nationalities except for German Squads; see Movement and Command Control, sec. 4.0.
- If within 1 stand of a subordinate Squad, a PC may assist it in Rallying it from a Pin or a Suppression (sec. 9.5.1), or assist it in Close Combat.
- An isolated PC is eliminated (captured) automatically if contacted in Close Combat; see sec. 8.2.
2.3.2 Company Commanders (CCs)
A CC may assist only those Squads within his organizational Company unless these have all been eliminated. Thereafter, he may assist Squads from another Company by being reassigned permanently to that Company.
- A CC may fight in Close Combat as a normal Squad; he is not eliminated on contact (like a PC is); see sec. 8.2. This is to represent the presence of a small staff which accompanies the officer.
- If within 1 stand of a subordinate Squad, a CC may assist it in Rallying from a Pin or a Suppression, or assist it in Close Combat.
2.3.3 Killed Commanders
Commanders may be targeted — and therefore risk being Killed — when other non-commander targets are unavailable; see Target Proximity, sec. 6.3. If an Unattached PC (not a CC) is engaged in Close Combat he is captured; see sec. 8.2.
Killed PCs
If a PC is Killed he may be replaced by one of two methods, at the option of the owning player.
- The appropriate CC may assume command of the Killed PC's Platoon. He then assumes the role of that PC permanently but "fights" as a CC and may assist Squads in only that Platoon using his CC bonuses.
- Alternately, a player may remove one Squad or HMG from that Platoon and replace it — at that exact location — with a PC equal in quality to the previous PC; see Organizations.
- PC replacement occurs immediately when that side next possesses the Initiative. It does not constitute movement nor a surrendering of Initiative; see Initiative and Squad Actions, sec. 3.0.
- When a Squad is exchanged for a new PC it counts as 1 Squad lost for purposes of Victory Conditions; see Scenario Generator.
Killed CCs
A Killed CC (or BC) may not be replaced.
2.5 Troop Quality
There are three troop quality levels: Veterans, Regulars and Green troops. Troop quality comes into play when Squads enter Close Combat, and when they attempt to Rally from Suppression; see sections 8.0 and 9.0, respectively for the appropriate mechanics.
3.0 Initiative and Squad Actions
Initiative represents tactical momentum. A side maintains Initiative by performing consecutive successful Actions, see Actions, sec. 3.1. Throughout the game, Initiative is continually gained and lost. The skill in CF lies in retaining the Initiative as long as possible, and knowing when to risk losing the Initiative to gain a tactical advantage. It is possible, though highly unlikely, that a side may begin the game with the Initiative and never lose it.
- The side that begins play with the Initiative is that of the Phasing Player. Game starting Initiative is specified by the Scenario Generator, sec. 13.0.
The Phasing Player
The Phasing player has the Initiative and every game Action is impelled by him. A Movement Action may be potentially halted with a Direct Fire Action from the Non-Phasing player, see below.
- The Phasing Player retains the Initiative as long as he performs consecutive, successful Actions.
- A successful Action entitles his side to another Action. When an Action is unsuccessful (it Fails), the Initiative passes to his opponent — thereby becoming the new Phasing Player — and the procedure is repeated.
The Non-Phasing Player
The Non-Phasing player may perform no Action except to fire at a Phasing player's Squad if eligible to do so; see Reactive Fire, sec. 6.2.1.
- If Reactive Fire results in a Suppression (or Kill), the Non-Phasing player seizes the Initiative becoming the Phasing player. If the fire results in a No Result, or a Pin, the Phasing player retains the Initiative.
3.1 Actions
Actions are the operations of Squads performed by the Phasing Player which permit Squads to move, Fire, and Rally. Actions are performed one Action at a time for one Squad (or weapon) at a time.
- An Action may be followed — immediately — by another Action — by the same Squad — or another Squad — but only if the Action is successful, i.e. if it does not Fail, see below.
- Actions may also be taken by groups of Squads/weapons; see Group Movement, sec. 4.2 and Direct Fire Procedures, sec. 6.4.
Actions are:
- Move (sec. 4.2)
- Retreat Move (sec. 4.5)
- Ground Hugging/Standing Up (sec. 4.1.2)
- Direct Fire/Recon by Fire (sec. 6.0, 6.7)
- Rally (sec. 9.0)
- Indirect Fire — Barrage/Smoke (sec. 7.0)
Note that Consecutive Move Actions or Fire Actions by the same Squad may be performed until they fail.
Failed Actions are:
- If a moving Squad is Suppressed or Killed (by a Non-Phasing player's Reactive Fire).
- Failure to Suppress (or Kill) the target when performing Phasing Direct Fire (not Indirect Fire).
- Failure to Detect enemy through Recon by Fire (sec. 6.7).
- Failure to Rally.
- Losing a Close Combat (sec. 8.0).
- Hung-Up in Barbed Wire, or Suppressed by Mines.
- Voluntarily surrendering Initiative; i.e. performing no Action and "passing".
- Special Actions may also be performed by Engineers; see sec. 10.0.
Initiative / Action Summary
The Phasing Player possesses the Initiative. He may perform Actions with his Squads. The non-Phasing Player may only perform Reactive Fire. When an Action Fails, the Initiative shifts immediately and the procedure is repeated.
4.0 Movement/Command Control
The following rules reflect national command control flexibility by determining how Squads (and Attached HMGs) may move.
US / British / Japanese
A Squad must have LOS to its PC if it wishes to move. It may end the move out of LOS of its PC but may not move again until LOS is re-established. See Line of Sight (LOS), sec. 5.2.
Russian / Italian / French (and all others)
A Squad must have LOS to its PC if it wishes to move and must end its move within LOS of its PC.
German and Special Units (see Organizations)
A Squad may operate independently from its PC at all times; LOS to its PC is not required to move.
- All unattached HMGs, Vehicles and Guns may move independently from a PC.
4.1 Movement/Actions
Squad Movement is performed straight — from point to point — on the tabletop. The direction in which a Squad is facing is important with regards to its ability to move and fire, see Arc of Fire, sec. 6.1.
-
The Phasing player performs his move by first indicating with his finger the intended move path of his Squad(s) — from the Move's beginning to its end point. This permits his opponent to claim potential Reactive Fire, see sec. 6.2.1.
-
A Squad may move only in the direction it is facing. A Pivot is a turning movement which permits a Squad to face a new direction. Pivoting does count as a Move Action. A Squad may Pivot up to 180°.
-
Unless stopped by enemy Reactive Fire (Pinned, Suppressed or Killed; sec. 6.2.1), a Squad may move voluntarily as far as desired — in a straight line — until it enters, or is stopped outside of, a Terrain Feature (sec. 4.5). If the entire move is across open ground, or entirely inside a single terrain Feature, a Squad may stop where desired unless halted by Reactive Fire as per above.
-
A Squad may not enter and exit a terrain Feature in a single Move Action. A Squad may not move in between two Features unless the stand fits.
-
A Squad may move through friendly Squads, but may not end its move overlapping another Squad.
Move Action Example:
The Phasing Player wishes to Move a Squad. He indicates the path, Pivots if necessary, then moves straight to the endpoint. No Reactive Fire is taken. Because he still has the Initiative, he may now perform another Move Action with that same Squad, and then another until his Action Fails and he loses the Initiative. Of course, he could perform other Actions with different Squads.
4.1.1 Heavy Weapons Movement
Heavy Weapons are Machineguns, Mortar or Infantry Gun Sections. They move like any other independent Squads when these are permitted on the tabletop. Vehicle and Gun movement is described in sec 11.0.
4.1.2 Ground Hugging
Ground Hugging represents going prone — literally hitting the dirt. It is a special Move Action (for the Phasing player) permitted to only Rifle and SMG Squads, all Commanders and FOs; crew-served weapons may not Ground Hug.
- This tactic is permitted only by stationary Squads in Open Ground and any terrain Feature that does not offer Protective Cover from all forms of Fire; see 4.4 and 6.5.4. Ground Hugging Squads are considered in Protective Cover from all forms of Fire.
Procedure
The Phasing player announces which Squad (or Squads if using Group Movement, see below) is Ground Hugging. Reactive Fire may not be performed against Ground Hugging Squads. Use a marker to indicate Ground Hugging Squads (we use a single prone figure).
- Squads that have been Pinned may Ground Hug. Suppressed Squads may not Ground Hug.
- If a Ground Hugging Squad(s) wishes to move it must first Stand-Up; Standing Up is a separate Action. Reactive Fire may be performed against Squads Standing Up. If at least a Pin result is achieved it remains grounded; it may not attempt to Stand Up until the Pin is Rallied-off, see sec. 9.0.
- Squads Hugging the Ground may fire normally if otherwise permitted to do so, see Direct Fire sections.
Group Movement
4.2 Group Movement
Squads/HMGs/Commanders may move one at a time, as just described, or they may move in groups.
A Group Move is a Move Action performed by one or more Squads, PCs or Attached HMGs of the same Platoon only. A CC or FO may also move as part of any group in his Company. The LOS requirements from non-German PCs to their subordinate Squads remain in effect for Group Moves.
Group Move Procedure
The Phasing player indicates any Squad/HMG/PC or CC as the Group Leader (GL). All other Squads/HMGs within 1 stand of the GL are also eligible to move. A CC may not be a GL unless it has replaced a Killed PC. An FO may not be a GL.
- Each participating Squad entitled to move does so one Squad at a time. Each Squad may also be attacked by Reactive Fire, see sec. 6.2.1. If at least one of the moving Squads is Suppressed or Killed by Reactive Fire, the Initiative shifts — but only after all participating Squads get a chance to move.
- Indicate the movement path for the GL and mark the desired end point of the move. If the GL is not stopped by Reactive Fire it moves exactly to the designated end point.
- Each participating Squad also indicates its path towards the designated end point. Each Squad not stopped by Reactive Fire moves to within 1 stand of the designated end point. Each Squad that is stopped is Pinned/Suppressed/Killed at the point where the fire occurs.
Group Move example: The Rifle Squads and the PC may participate in the Group Move. The Attached HMG has not participated in the Group Move because it is beyond 1 stand of the Group Leader. If the Group Leader Squad is not stopped by Reactive Fire it moves to the endpoint. Each Rifle Squad (based on the PC) not stopped by Reactive Fire moves to within 1 stand of the endpoint. LOS/PC movement requirements remain in effect as per normal.
4.3 Terrain Features
Natural ground Features are Hills, Woods, Depressions, Rough Ground and Fields. All other Features are Structures such as Buildings or Bunkers. Note that roads do not affect play in CF.
4.4 Feature Capacity/Protective Cover
A natural ground feature should be large enough to contain at least 4-6 Squads as determined by the size of your stands. A Squad is considered entirely inside or entirely outside a Feature based on the location of the center point of the Squad.
- Features are capable of Blocking visibility (LOS) and all may provide initial concealment; see Hidden Placement, sec. 5.3. But not every Feature type Blocks LOS or provides protective cover from all fire. The following is an overview of the qualities of terrain Features defined more fully in later sections.
Hills (representing crestlines, rises, ridges, etc.)
Blocks LOS. Hills provide Protective Cover from Direct Fire only.
Fields (representing at least partially "grown" fields)
Blocks LOS. Fields provide Protective Cover from Direct Fire only.
Woods
Blocks LOS. Woods provide Protective Cover from All Fire. Also represents heavy brush, bushes, etc.
Rough Ground
Does not Block LOS. This represents rubble, burned buildings, partially cleared farmland, etc., and provide protective cover from All Fire.
Depressions
Does not Block LOS. Depressions provide invulnerability from All Fire from enemy outside the Depression — except from Squads on Hills which may spot and fire on them with no penalty. See Spotting, Depression and Rough Grounds, sec. 5.2.1.
Bocage/Hedges/Walls (Protective Cover)
Some fields may be lined with tall, dense foliage called Bocage. A Squad is immediately stopped when it contacts a Bocage/Hedge/Wall. On its next Move Action, it may occur on the very next Action, it may cross the Feature but only to the opposite side. Thereafter, it may move normally.
- Vehicles may not enter through Bocage, but may move over hedges/walls as described above.
- Bocage and Hedges Block LOS. Walls do not.
Streams
Streams do not Block LOS. A Squad is immediately stopped when it contacts a Stream. On its next Move Action, which may occur on the very next Action, it may cross the Stream but only to the opposite side — just clearing the water.
Ground Hugging
Provides protective cover from All Fire.
4.4.1 Buildings (structures)
A Building may be occupied by up to 2 Squads/HMGs unless otherwise specified for larger capacity. PCs, CCs, FOs, and Snipers do not count as Squads for purposes of Building Capacity. Buildings may be entered / exited from any side.
- Occupants of a Building may be initially Hidden; see sec. 5.3. Buildings are considered wooden Structures one story tall unless special scenario conditions apply. Occupants inside a building do not see "over" intervening terrain.
- Buildings Block LOS and provide Protective Cover. Squads and MGs from different Platoons. All occupying Squads and HMGs are "lumped" together into any Close Combat when defending inside a Building or Hardpoint; see sec. 8.4.
Building Direct Fire
- All occupants fire out of a Building using the Building's center point as the firing point. Squads using Direct Fire shoot at a specific occupying Squad and target the Building's center point. Rifle and SMG Squads may fire out from a Building from any direction, i.e. 360°. For Indirect Fire against Building occupants see Barrage Fire / Structures, sec. 7.1.2.
Building Complexes
Building complex diagram notes: Squads may move diagonally from buildings A/B or B/C. Squads may not move directly from building A to C diagonally within the complex, but may move from LOS. Squads in buildings A, B, C may not fire at each other except with Recon by Fire from A/B and B/C. Squads in B or C may fire at D, and one never because D is not contiguous with B or C. All fire is measured to/from the building's center point.
Machinegun Fire from Buildings
HMGs may fire out of only one side of a Building. A HMG must move (Pivot) to face and fire out of another side, and this Pivot may be prevented by Reactive Fire as per sec. 6.2.1, unless it is inside a Building Complex, see below.
4.4.1a Building Complexes
A Building Complex contains at least two contiguous Buildings, and represents either the interior compartmentation of single large structure like a Factory. Building Complexes should be reserved for special scenario conditions like our "Stalingrad" scenario.
- Movement within a Building Complex — from Building to adjacent Building — does not draw any Reactive Fire. But Movement to a Building or Structure (from unadjacent areas) may draw Reactive Fire, whether it is part of a Building Complex or not; see sec. 6.2.1. Also see Close Combat, secs. 8.4, 8.5.
- Only Phasing Fire from non-adjacent areas may be directed at occupants of a Building Complex.
- A Squad in a Building may not fire at a contiguous building except with Recon by Fire; see sec. 6.7.
- In a Building Complex that contains at least 3 Buildings, Squads may not Move or perform Fire Diagonally to a "contiguous" building; see diagrams.
4.4.2 Hardpoints, Bunkers and other Structures
A Hardpoint may hold only 2 Squads/Weapons, not counting PCs, CCs, FOs, and Snipers. Targeting a/from Hardpoints is done as for single Buildings. A strong stone Building may be treated as a Bunker.
- Hardpoints (like pillboxes) offer protection to 1 or more sides as indicated in a scenario. Unless assaulted in Close Combat, they may be entered/exited only from any of the open "unprotected" sides.
- A Bunker offers protection to all 4 sides, but may be entered and exited only from the rear. Hardpoints and Bunkers may be attacked in Close Combat from any side. Occupants of Bunkers and Hardpoints may be initially Hidden; see Hidden Placement, sec. 5.3.
4.5 Retreat Movement
A Retreat Move permits a player to reposition a Squad without incurring Reactive Fire at the beginning of the Squad's move.
- A Squad performing a Retreat Move must begin the move inside a terrain Feature. It must retreat towards its rear 180° (as defined by its current facing) as far as desired as permitted by terrain and potential enemy Reactive Fire. A Squad performing a Retreat Move may pivot at the beginning of its movement as part of its Move Action.
- When a Squad retreats from a Structure, the rear 180° is considered towards its own rear table edge.
- A Squad performing a Retreat Move may not be targeted while inside the initial feature. However, a fleeing Squad may target a retreating unit at any point after it has exited the initial feature.
5.0 Spotting
Spotting refers to the sighting and identification of enemy Squads. Spotting occurs when, no matter how briefly, an enemy Squad lies within Line of Sight of an observing Squad.
5.1 Arc of Visibility
The Arc of Visibility for all Squads is 360°. That is, a Squad may "see" in any direction limited only by its Line of Sight, also see Arc of Fire, sec. 6.1.
5.2 Line of Sight "LOS"
In order to Spot an enemy Squad, the observing Squad must have unobstructed LOS to it. LOS is measured from the center point of the Spotting Squad to the center point of the target Squad. If necessary, a thin string pulled taught between Squads may be used to check LOS.
- A Squad may Spot from anywhere inside a Feature to a target in the Open, or to a target occupying another Feature, providing the Spotter's LOS is not Blocked; see diagrams.
- LOS is Blocked by an intervening terrain Feature, even when Spotting from a Hill or Structure. LOS is Blocked by Woods, Fields, Hills, Bocage Hedges, and all Structures. LOS is not Blocked by friendly or enemy Squads.
Depressions
5.2.1 Depressions and Rough Ground
Depressions have the following special characteristics. A Squad inside a Depression is invisible to enemy outside the Depression unless the enemy is on a Hill.
- A Squad on a Hill that has LOS to a Squad inside a Depression spots it normally and vice versa.
- Opposing Squads inside the same Depression spot each other Normally.
- Depressions do not Block LOS like other terrain Features do. A Squad may see "over" a Depression and therefore fire on enemy across it.
- Rough Ground is rubble, ruins, partially cleared farmland, etc. Rough Ground does not Block LOS. It counts as Protective Cover against all fire.
- Rough Ground does not Block LOS. A Squad may see "over" Rough Ground and therefore fire on enemy across it. All Fire may be performed against occupants inside Rough Ground like other terrain Features.
5.3 Hidden Placement
As determined by the scenario conditions, a number of Squads/weapons may be placed Hidden inside any terrain Features or Structures prior to the beginning of play.
-
A Hidden Squad is placed on the tabletop immediately — and permanently — when Spotted. A Hidden Squad is revealed only under the following circumstances:
-
When it Moves.
-
When it Fires.
-
When it is detected by Recon by Fire; sec. 6.7.
-
When an enemy enters the Feature it occupies.
5.3a Recording Hidden Squads
Place a numbered marker (poker chip, counter, etc.) in every Feature where a side is permitted to place Squads by the scenario conditions. Some markers will represent real Squads, others are dummy markers. Each marker should be numbered and corresponds to the number of Squads/weapons actually present in that Feature. Record this information secretly in the space provided on the QRS sheet.
ALL Hidden Squads in a particular Feature are detected immediately when:
- Any one of the Hidden Squads Move or Fire,
- If an enemy Squad enters the Feature,
- If any occupying Squads in the Feature are detected with Recon by Fire.
Once detected, the Squads may be arranged within that Feature as desired by the owner.
Dummy markers are removed if an enemy enters the Feature or if Recon by Fire reveals the marker to be a Dummy; see sec. 6.7.
5.3.1 Platoon Commanders and Hidden Placement
Since all non-German Squads require PCs to Move, if they are Hidden, the location of the appropriate PC must be revealed when their subordinate Squads move, but no other Hidden Squads in that Feature need be revealed at that time.
6.0 Direct Fire
Weapons capable of firing shells or bullets on a flat trajectory are Direct Fire weapons. This ability to fire over "open sights" distinguishes them from Indirect Fire (i.e. Mortars and Artillery), which normally fire in a high arc. Some weapons, such as Infantry Guns and Anti-tank guns are capable of both Direct Fire and Indirect Fire; see the Data Sheets.
- Direct Fire is always Optional, and may be claimed only against a target which the firer can Spot. As with Spotting, firing is performed from the center of the firing stand to the center of the target stand.
- Each Direct Fire Action, whether performed by the Phasing player or Reactive Fire must use one of the three firing Modes indicated in sec. 6.4.
6.1 Arc of Fire
A Squad may fire only at a Spotted target that lies within its Arc of Fire and its LOS. Squads and weapons "see" 360° (Arc of Visibility), but the Arc of Fire is determined by the specific characteristics of the firing Squad. Consequently, a Squad may Spot an enemy but not be able to fire at it. There are two different Arcs of Fire in the game:
- Rifle and SMG Squads: 360°
- All Heavy (crewed) Weapons (MGs, etc.): 45°
Vehicular Arcs of Fire are given in sec. 11.2.
LOS/Arc of Fire
Diagram example: The HMG may fire upon Target A. The HMG may not fire on D — it is outside its Arc of Fire, but has LOS to it. A Rifle or SMG-armed Squad could fire on D because its Arc of Fire is 360°. LOS between the HMG and B is Blocked by the Woods Feature. Target C is the closest eligible target and the HMG may fire only upon it; see Target Proximity, sec. 6.3.
- A Squad/weapon may fire through a gap (between terrain Features or friendly units) regardless of how small the gap is. But when placing terrain Features make sure that the gap is clearly visible.
6.2 Fire Eligibility (Phasing Fire and Reactive Fire)
The Phasing player's Squad(s) may fire at a target within LOS and Arc of Fire, subject to the Target Proximity rules in sec. 6.3, and the Direct Fire Prohibitions in sec. 6.6.
6.2.1 Reactive Fire
A single Move Action by the Phasing player may be countered by a single Fire "re-action" by his opponent. Any enemy Squad, Commander, or FO which passes through, exits from, or ends its movement within the Arc of Fire of an eligible firer may be fired upon by the Non-Phasing player using Reactive Fire.
- When performing Reactive Fire, the firer may shoot at any point during the target's movement that he can claim LOS (within its Arc of Fire); i.e. when the target begins to pivot, or move a fraction of an inch, or after it has stopped moving, or anywhere in between — LOS/Arc of Fire permitting.
- Each Reactive Fire "re-action" must use one of the three firing Modes indicated in sec. 6.4.
Reactive Fire
- Reactive Fire is not subject to the Target Proximity rules in sec. 6.3.
- Reactive Fire may not be applied against Squads Hugging the Ground, but may be applied against Squads attempting to Stand Up; see sec. 4.1.2.
Reactive Fire Procedure
The Phasing player performs his move by first indicating with his finger the intended move path of his Squad(s). The Non-Phasing player then declares which Squad(s) is firing — selecting one of the 3 firing modes in sec. 6.4 — and at precisely what point during the target's move. It is helpful to dialogue with your opponent to see — before a Squad is moved — if a shot can be taken against a moving Squad.
- If the firer Pins or Suppresses the target, the target is stopped at the point in its move that the fire was claimed against it — in the precise direction it was moving; see Fire Procedure 6.4 and Fire Effects 6.5.
Reactive Fire Limitations and "NO FIRE"
Each time a Squad achieves a Pin result (or better) using Reactive Fire it is entitled (but not required) to fire again during that Initiative if another movement is attempted by the Phasing player.
- A Squad that fails to achieve at least a Pin result may not fire again during that particular Initiative; the Squad should be marked for "NO FIRE".
Reactive Fire Prohibitions
Movement within a Building Complex — from Building to adjacent Building — does not draw any Reactive Fire; see sec. 4.4.1a. Movement to a Building or Structure (from unadjacent areas) may draw Reactive Fire, whether it is part of a Building Complex or not.
- Only Phasing Fire from non adjacent areas may be directed at occupants of a Building Complex.
- Reactive Fire may not be claimed against a target performing a Retreat Move as described in sec. 4.5.
Examples of Reactive Fire
- A 3-stand Group is moving through the LOS of 1 enemy Rifle Squad. The Rifle Squad fires at the first target Squad and Pins it; it fires again at the second target Squad and misses; Therefore, it may not fire at the third target Squad, which then moves to within 1 stand of the designated endpoint. (Remember that fire is always optional; a player need not attack every eligible target in a move, and risk a Miss and NO FIRE result at an inopportune time.)
- A 3-stand Group is moving through the LOS of a 2-Squad enemy Firegroup (or Crossfire). Both forces attack the first target Squad. The first fire scores a Pin, the second misses; for the second attack, only 1 Squad may fire. If it scores at least a Pin, this entitles it to attack the second target Squad; if it Pins the second Squad it may attack the third. (If both firers had scored Pins or better on the first target Squad, both would be eligible to attack the second, etc.)
- If at least one Suppression or Kill is scored the Initiative shifts after the fire attacks are adjudicated.
6.3 Target Proximity (for Phasing Fire only)
A fire attack must be applied against the closest spotted target. If this target is not obvious, roll a die to decide the debate. All Squads in Structures are equidistant to a fire; any one Squad may be targeted. Commanders, FOs, and Target Proximity: Commanders or FOs may be targeted only under the following circumstances:
- If they are the closest targets in the "Open."
- If they are in / on a Feature, are the closest targets in that Feature, and there are no other Squads in that Feature. Otherwise, target the next closest Squad.
Exception: the Target Proximity rules are ignored when the Non-Phasing player performs Reactive Fire.
6.3.1 Target Priority (when using vehicles/guns)
This rule controls target selection when there are different target types available, and it overrides the Target Proximity rule.
- An infantry Squad may not fire at Vehicles if there are any Dismounted infantry or Crew-served Weapons that can be targeted. Fire is then directed at the closest Dismounted Squad.
- A Tank or Anti-tank Gun may not fire at Infantry if there are any enemy Vehicles that can be targeted. Fire is then directed at the closest Vehicle.
- The Target Priority rule waived for Infantry Guns (IG) — these fire at the closest target, see sec. 11.2.
Exception: the Target Priority rule is waived when the Non-Phasing player performs Reactive Fire.
6.4 Fire Procedures
There are 3 different Direct Fire modes. These modes are differentiated primarily by the number of participating Squads or HMGs firing at a single target during a single Direct Fire Action.
- A Target is defined always as a single Squad or crew-served weapon (or vehicle).
- Each firing mode constitutes a single Fire Action. Each mode may be used to perform either Phasing Fire or Reactive Fire. The 3 modes are:
- An attack by a Single Squad or HMG against a single target.
- A Firegroup consists of 2 or more Squads or attached HMGs. The owning player designates 1 Squad as the Firegroup Leader (FGL). Any and all eligible Squads or Attached HMGs of the same Platoon within 1 stand width from the FGL may also fire at the same target Squad.
- For Proximity Target selection purposes, the enemy Squad closest to the FGL is considered the Proximity Target for all Squads.
- A Crossfire consists of 2 or more Squads or Attached HMGs of the same Platoon — under the direction of their PC — firing at a single target. See Crossfires, sec. 6.4.1.
Firegroups
Diagram example: The 3 Rifle Squads may participate in the Firegroup because all are within 1 stand of the Firegroup Leader. The Attached HMG may not participate in the Firegroup because it is beyond 1 stand of the Firegroup Leader. So the firing player has a choice: fire at the HMG with a Basic Dice fire attack, or does he attack the Squads with 3 Basic dice per attack? Note that the target being in Protective Cover will influence this decision; see Fire Procedures, sec. 6.4.
Firing Dice
For each of the 3 firing modes one Direct Fire attack is adjudicated for each participating Squad or HMG.
- A Rifle-Armed Squad rolls 3 Dice per attack.
- A HMG rolls 4 Dice per attack.
Example: a Firegroup or Crossfire of 3 Rifle Squads performs 3 attacks (of 3 Dice each).
Successful Fire Actions
If any one of the participating Squads or HMGs in the attack Suppresses (or Kills) the target, the Fire Action succeeds and all firers may fire again (but see NO FIRE in sec. 6.2.1). Firegroups and Crossfires provide more chances (attacks) to Suppress or Kill a target, and therefore, to retain/seize Initiative.
6.4a Firegroup/Crossfire Limitations
A Squad may not participate in a Firegroup or Crossfire if the target is behind the firer, i.e. if the target lies to the rear 180° of the firer's current facing. Instead, only 1 Squad may fire to the rear.
Exception: Non-HMG Squads in Buildings may fire 360°.
6.4.1 Crossfires
A Crossfire permits a player to fire with up to all the Squads of a Platoon — plus any HMGs Attached to it — at a single target. Unlike with Firegroups, participating Squads or HMGs may be widely separated.
- A PC is required to direct the fire of his — and only his — subordinate Squads/HMGs; the location of the PC is crucial, see below.
Crossfire Requirements / Eligibility
Any or all eligible Squads may participate in a Crossfire attack. The PC and each of his Squads must have LOS to the target. Any Squads that do not have LOS to the target may not participate in the attack. The PC must also have LOS to each of his participating Squads; those outside of his LOS may not contribute their fire. A player is not required to perform a Crossfire even if he has satisfied all the requirements for doing so.
- For Reactive Fire, all Squads and the PC must have LOS to the moving target Squad at the point where the fire is applied against that target.
Crossfire Targeting and Fire Procedures
For Proximity Target selection purposes, the enemy Squad closest to the PC is considered the Proximity Target for all Squads. Crossfire Example: 3 American Squads and 1 HMG are firing under the direction of their PC at a German Squad in the open. This constitutes 3 attacks of 3 Dice each, plus one attack of 4 Dice. If at least one of these four attacks produces a Suppression effect or better, the Americans retain/seize the Initiative.
Killed PCs and Crossfire Loss
The Crossfire potential is lost with the death of the PC. It is regained if and when a new PC is created; see sec. 2.3.3.
Crossfires
Diagram example: The 3 Rifle Squads may participate in the Crossfire because their PC has LOS to them, and they all have LOS to the target. The Attached HMG may not participate in the Crossfire because the PC does not have LOS to it (blocked by the woods) — even though the HMG has LOS to the target itself. If the PC moves into the woods, it would then have LOS to the HMG and all Squads, and the HMG would have a Crossfire.
6.4.1a HMG Crossfires and the CC
The CC may form a Crossfire with all unattached HMGs (up to 3 HMGs) integral to his organizational company. This HMG Crossfire potential is lost permanently upon the death of the CC.
6.4 Fire Effects/Results
Each shooting attack produces one of 4 possible results: a Miss (target unaffected), a Pin, a Suppression, a Kill.
6.5.1 Hits and Pins
A Hit is a die roll of "5-6" on one die. A Pin result is achieved by scoring 1 Hit with a single Squad or Weapon. Additional Pin results on the same target have no effect.
- If the firer Pins a moving target (with Reactive Fire), the target is halted at the point in his move where the fire occurs.
- A Pinned Squad may not move until it is Rallied but it may fire.
6.5.1 Suppressions
A Suppression result is achieved by scoring 2 Hits with a single Squad or Weapon.
- A Suppressed Squad may not move or fire until Rallied. If the firer Suppresses (or Kills) a moving target (with Reactive Fire), the target is halted where the fire occurs, and the Initiative shifts.
- Whenever an already Suppressed Squad receives a second Suppression — it is Killed.
Example: An HMG Squad Suppresses a Squad. The HMG immediately fires again and achieves another Suppression. The target is Killed. Note that the firings need not be consecutive; whenever an already Suppressed Squad is Suppressed again it is Killed.
Casualty Figures / Rallying Squads
Use casualty figures (wounded and dead) to indicate Pinned and Suppressed Squads.
- Pins and Suppressions may be removed only by Rallying; see sec. 9.0.
6.5.1 Kills
A Kill result is achieved by scoring 3 Hits with a single Squad or Weapon. Killed Squads are removed.
6.5.2 Direct Fire Terrain Feature Modifier
If the target is in a terrain Feature capable of providing Protective Cover, or the target is Ground Hugging, the firing Squad/Weapon uses one die fewer than its normal allotment.
- Features do not combine to offer greater protection than -1 Die; e.g. Ground Hugging and inside a woods is not cumulative.
Example: A Firegroup of 3 Rifle Squads each of which normally uses 3 Dice per firing, uses only 2 Dice each against a target in a protective terrain Feature. A HMG normally uses 4 Dice per firing but uses only 3 Dice against a target in a terrain Feature. See Submachineguns, sec. 6.9 for exceptions.
6.6 Direct Fire Prohibitions/Blocked Fire
Direct Fire may not be fired through any portion of a friendly Squad or through an intervening terrain Feature to a target beyond it. Streams, Hedges, Walls and Barbed Wire, never block any fire. Enemy Squads never "block" friendly fire.
- Commanders: All Commanders do not Fire.
6.7 Recon by Fire (RBF)
Recon by Fire is Direct Fire applied against a suspected enemy terrain Feature in the hope of detecting its occupants through a nervous return fire or involuntary movement. RBF may be performed only by Rifle Squads, SMG Squads and HMGs.
RBF Procedure
One die is rolled for each participating firing Squad or HMG against the occupants of any terrain Feature. (RBF Firegroups and Crossfires are permitted). For this purpose a HMG counts as a normal Squad. If the die roll from the firer(s) detects the target(s) the fire attack is successful and the firer retains the Initiative.
Detecting Targets with RBF
All occupants are detected on any roll of "6". If a "6" is not rolled no occupants are detected.
- If the terrain Feature is unoccupied, the Phasing player must roll at least one "6" to retain the Initiative, otherwise he loses the Initiative. Dummy markers are revealed as such on the "6" result.
- If a Hidden Squad uses Recon by Fire (or any other fire) it is immediately revealed.
6.8 Submachineguns (SMGs)
These rules reflect the lethality of SMGs at close range and their limitations at longer ranges.
- A SMG Squad rolls only 2 Dice normally.
- If attacked in Close Combat, a SMG Squad rolls 4 Dice normally when firing upon the attacking Squad at "point blank" range; i.e. just short of contact (1-1/4"). But if the SMG wishes to stop the attacking Squad at a distance farther away than point blank range, it fires with only 2 Dice. All other firing rules/modifiers apply. SMG Squads also have advantages in Close Combat, see sec. 8.3.
Protective Cover and SMGs
SMGs never roll fewer than 2 Dice. The -1 die penalty is applied only when rolling more than 2 Dice.
6.9 Snipers
A Sniper must be placed Hidden. He fires once and is removed. When firing as an Action, a failed Sniper shot does not cause an Initiative loss. But Snipers may fire Reactive Fire and seize Initiative.
Sniper Firing Procedure
Roll 3 Dice per Sniper. If the target is a Squad use the normal Direct Fire procedures.
- Snipers may target Commanders, FOs and any particular Squad — even if these are not the closest targets; i.e. Snipers ignore target Proximity.
- If the target is a Commander — a Suppression result is a Kill, a Pin is a Miss.
- As with normal fire, subtract one die if the target is in/on a Protective Cover terrain Feature.
6.10 Ambush Fire
Ambush Fire is a form of Reactive Fire. Hidden Squads/HMGs that occupy a Feature being entered by an enemy Squad are considered lying in Ambush.
-
Ambush Fire is adjudicated like Direct Fire except that each Ambushing Squad is awarded one extra firing die per attack. Example: a Rifle Squad is awarded 4 Dice (vice 3); a HMG is awarded 5 Dice (vice 4); a SMG is awarded 5 Dice (vice 4) at point blank range; or 3 Dice (vice 2) if not. Snipers do not receive the bonus for Ambush Fire.
-
Only those friendly Squads occupying the same Feature are eligible for the Ambush Fire bonus. They may use Firegroups or Crossfires within that Feature. Friendly Squads outside that Feature may contribute to the attack — as with a Crossfire — but only an Ambushing Squad receives the extra die.
-
Ambush Fire may be taken either immediately before (1/4" short), or immediately after a mover enters the Feature; Ambushers are immediately placed on the table at either time. When Ambushers fire from Structures the fire is always taken immediately prior to entry. Because Squads are revealed when they Fire, each Squad may perform Ambush Fire only once per game.
-
Also see Surprise Encounters, sec. 8.5.
7.0 Indirect Fire
Most weapons capable of Indirect Fire are considered off-table unless otherwise specified in a special scenario. When on table, they should be set-up prior to play and emplaced in designated terrain Features (usually near the base-line); they are not normally permitted to move thereafter. Note that certain weapons such as Infantry Guns may fire either Direct Fire or Indirect Fire; see Data Sheets.
- Indirect Fire may be performed any time during a Player's Initiative. An Indirect Fire attack that fails does not cause a loss of the Phasing Player's Initiative; see Timing of Indirect Fire, below.
- All Indirect Fire may be fired over the heads of friendly troops and over any terrain Features. It may not be used as Reactive Fire, or against vehicles.
Forward Observers (FOs)
Every Indirect Fire weapon has one FO assigned to it represented by a single figure. It may attack only a Spotted target Squad to which its FO has LOS.
- An FO may control fire only if he remains stationary the entire Initiative. If a Hidden FO moves he is permanently revealed, otherwise trust your opponent as to LOS from the Hidden FO location.
- FOs do not fight. An FO may not control fire if he is Suppressed. If Killed, FOs may not be replaced.
7.1 Round Types/Fire Missions
A Weapon may fire either Barrage Fire (High Explosive) or Smoke on any given firing. The round type may be switched each Initiative.
- All weapons capable of Indirect fire have a limited number of Fire Missions (FMs) that may be fired. Each attack of HE or Smoke expends one Fire Mission. The number of FMs permitted per battery type is indicated in the Bonus Selections.
Timing of Indirect Fire
To represent the time necessary in reloading and communicating between the FO and his "battery", only one Indirect Fire attack per FO may be performed any time during a player's particular Initiative.
- After the Initiative has been lost, and then regained, a player may apply another Indirect Fire attack from each battery.
7.1.1 Barrage Fire (HE)
A Barrage is an attack using High Explosive (HE) ammunition. Barrage Fire is not subject to Proximity Fire; see sec. 6.3. The target for Barrage Fire must be any Squad, Weapon (limbered or unlimbered), or CC if these are available; a PC and FO may be fired on only when the other Squad types are unavailable.
Indirect Fire Weapons
When it attacks, each Indirect Fire weapon has a number of attack Dice and a Kill potential, both based upon the caliber of the firing weapon:
| Weapon | Dice | Kill Potential |
|---|---|---|
| 50-60mm Mortars, 2" Mortar | 3 | None |
| Mortars & Guns to 82mm / 3" Mortar | 4 | 1 Squad |
| Guns/Howitzers/Mortars to 120mm / 4.2" | 6 | 2 Squads |
| Heavy Artillery (represents 5"+ Mortars) | 8 | 3 Squads* |
*When Heavy Artillery fires at Squads inside Buildings and Hardpoints the Kill Potential is reduced by 1 Squad.
Barrage Fire Procedure
Select a Target Squad, and roll the appropriate number of Firing Dice against it (a "5-6" is a Hit): 1 Hit Pins a Squad; 2 Hits Suppresses a Squad; 3 or more Hits Kills a Squad. A Suppressed target that receives a second Suppression is Killed.
- See Direct Fire, sec. 6.5 to determine Fire Effects, and sec. 6.5.4 for any applicable Protective Cover terrain Feature Modifiers, and for Ground Hugging.
Kill Potential
If the Target Squad has received 3 Hits and been Killed, any other Squads within 1 Stand of the target — up to the weapon's Kill Potential — are Suppressed. If these other Squads are already Suppressed they are Killed instead. These additional Suppressions or Kills are chosen by the defender according to the following priority:
- Squads, HMGs or Company Commanders,
- Platoon Commanders,
- Forward Observers.
7.1.2 Barrage Fire/Structures
When Barrage Hits (Pins, Suppressions or Kills) are achieved against Squads in Structures, the firing player decides which one of his stands receive the Hits, based upon the priority given above for Kill Potential. So, if a HMG and a Rifle Squad occupy a Building that receives Barrage Hits, the owning player chooses either stand as the initial victim.
7.3 Smoke
Smoke may be Called-In on any area to which the FO has LOS including inside or on a terrain Feature. The size of the area affected (the Smoke Screen) is expressed in contiguous stand widths as follows:
- 2 infantry stands long for a 50-60mm battery.
- 3 infantry stands long for an 81/82mm / 3" battery.
- 4 infantry stands long for an 120mm/4.2" battery.
- 6 infantry stands long for larger batteries.
Smoke Screen Procedure
A Smoke Screen may be placed by the firer if he has LOS to a central point. The FO must nominate the center of the Smoke Screen; the Smoke stand-widths then radiate equally in a straight line, to either side of the center point. The Smoke Screen may be placed on any angle desired.
Smoke Screens
Diagrams show Smoke Screen widths for 2-stand, 3-stand, 4-stand, and 6-stand (larger than 120mm) batteries, each centered on an "X". A FO must have LOS to where the center of the Smoke Screen will fall — the "X" marks the center of the Smoke Screen. If the Smoke arrives (on a die roll of "3+"), the smoke stands radiate in a straight line equally to either side of the center point. The Smoke Screen may be placed on any angle on the tabletop as long as the Smoke Screen is straight. We use a cotton ball glued to an infantry Squad-sized stand to represent a smoke stand.
- The firer then rolls a single die: if the result is "3" or higher, the Smoke Screen lands.
- If the roll is "1-2", the Smoke is not placed and is assumed to have misfired or been dispersed — using up a Fire mission.
Smoke Screen Effects
Smoke Blocks Spotting and all Direct Fire attacks which pass through it, except that a Smoked Defending Squad may always fire at its attacker at point blank range if engaged in Close Combat. Squads on Hills (or elevations) cannot see over Smoke. Smoke does not cause "Hits".
Smoke Screen Duration
Smoke lasts until the beginning of the firer's next Initiative, at which time it is removed. At that time, the player may roll again (as per above) to place Smoke at the same position or to anywhere his FO has LOS. Put in other words, Smoke lasts for two consecutive game Initiatives: the balance of the firer's current Initiative and, after the firer loses Initiative, his opponent's next entire Initiative. The Smoke Screen then lifts.
8.0 Close Combat
Close Combat results when a Phasing player's attacking Squads are moved into contact against defending Target Squads, or when attackers contact an enemy occupied Structure.
- Only CCs, Rifle Squads, SMG Squads and Japanese HMGs may initiate a Close Combat. Crew-served weapons may not initiate combat but may defend.
- CCs may initiate Close Combat; PCs may not. Commanders may assist subordinate Squads by adding a Close Combat modifier, see below.
Attacker Vulnerability
Each attacking Squad that is not Pinned, Suppressed or Killed by Reactive Fire, enters Close Combat; see sec. 8.2. A Squad entering Close Combat may be fired upon with Reactive Fire by the Target Squad (if the target is not already in Combat) or by friendly firing Squads other than the target.
- An attacking Squad that is Pinned (or worse) is halted at the point fired upon and does not enter Close Combat.
- Squads involved in Close Combat may not fire again until after all the Close Combat produced during that Move is resolved, see below.
8.1 Pins, Suppressions and Initiative Shifts
An attacking Squad that is Suppressed (or worse) is halted at the point fired upon and does not enter Close Combat. The Initiative would then shift immediately to the defender.
- If an attacking Squad enters Close Combat, and a subsequent attacking Squad is Suppressed, any attacking Squads currently in Close Combat are backed-off 1 stand width; the Initiative shifts — no Close Combat occurs. The same applies if a Close Combat is lost prior to resolving any other existing combats — just back-off the other Squads 1 stand.
8.1.1 Japanese and Russians
When entering Close Combat only, Japanese and Russians ignore Pin results (reflecting their tenacity), but a Suppression result becomes a Kill result (reflecting their vulnerability). Note that although this Pin is ignored for movement purposes, it counts for purposes of maintaining a Squad's ability to continue performing Reactive Fire.
8.2 Close Combat Involvement
Close Combat is resolved any time after at least one attacking Squad is in contact with a defending Squad. The moment for resolution is determined by the Phasing player. He may choose to resolve a combat when only one of his Squads is involved, or he may wait until he has brought in as many Attacking Squads as he can safely get into contact against a defending Squad.
Attacking Squads
All attacking Squads touching a Target Squad are involved. A Commander within 1 stand distance of a subordinate attacking Squad may be included at the attacking player's option.
Defending Squads
The target is involved. A Commander or FO within 1 Stand of a subordinate Target Squad may be included at the defending player's option.
- If the Target is a HMG, or crew-served weapon, any one friendly Squad, plus one Commander or FO within 1 Stand of the weapon may be included.
Commanders/FOs in Combats
A PC may impart his bonus to Squads in his organizational Platoon, and a CC for any Squads in his Company; see Close Combat Modifiers.
- If a CC or PC is in the Target, one subordinate Squad, Weapon (or a CC) within 1 stand distance may be included at the defending player's option. If the target is a FO, any friendly Squad (or CC) within 1 stand may be included.
- A PC or FO is Killed (captured) if contacted separately beyond 1 stand of another friendly Squad.
- The PC or FO is Killed (with any other Squads) if the combat in which they are assisting/involved is lost.
- CCs fight like normal Squads (with bonuses) and, like PCs, they may also assist subordinate Squads.
8.3 Close Combat Procedures
The opposing players each roll one die for each combat produced during that Move. Apply the Close Combat Modifiers listed below. The player with the higher score wins the combat and all his Squad(s) remain; the outscored player loses all Squads in that Combat. A tie is re-rolled.
Initiative
After combat is resolved, the Initiative goes to the surviving side.
Close Combat Modifiers
Apply the following modifiers to each combat as required.
- Target is Crew Served Weapon -2
- Green Troops (at least one Squad in combat) -1
- Surprise Encounter: -1 to mover; -2 vs Jap. defenders
- Target has at least one Suppressed Squad in combat — the Attacker is then +2
- ALL Squads in combat SMG-Armed +1
- ALL Squads in combat are Veteran +1
- ALL Squads in combat are Assault Engineers +1
- Each Squad Larger: +1 for each additional Squad (PCs/FOs do not count)
- PC or CC in combat or within 1 Stand of subordinate Squads +1, or +2*
- Turreted Tank +3**
- Turretless Tank +2**
- APCs and Other Vehicles +1** (Also see sec. 11.3)
*HMGs/Crew Served Weapons: A Weapon that fights by itself or with a PC is -2 (plus any modifier for the PC). If it fights with another non-weapon Squad or a CC it fights normally (i.e. no -2) counting as an additional Squad. Crew-served Weapons apply their Troop Quality modifier.
**When multiple Commanders are involved apply the modifier of the best one.
***All Vehicles are "0" when in combat inside Woods, Fields, and Rough Ground.
Commander Troop Quality
A CC adds its modifier in addition to its Troop Quality; e.g. a +1 Veteran CC is +1 for being Veteran and +1 for his normal bonus. A PC contributes only its "plus" modifier; its Troop Quality is not a factor in Close Combat.
Close Combat
Combat Involvement
The entire HMG, Rifle and PC are involved against the lone Squad. The entire PC and his team CC may be involved player's choices because they are within 1 stand of their involved, subordinate Squads.
Close Combat Example
2 Regular Rifle Squads and a +2 PC attack 1 Regular Rifle Squad and a +1 PC.
This Combat is now resolved as follows:
The attacker adds +2 to his die roll for his PC. The attacker adds +1 for having one additional Squad. The defender adds +1 to his die roll for his PC. The attacker rolls a "2"; the defender rolls a "6". The defender wins 7-5 and all attackers are eliminated. The Initiative shifts to the defender.
8.4 Structures: Buildings and Hardpoints
Combat inside Structures can be bloody. All and only those Squads occupying the Structure are involved in the combat. Each attacking Squad that contacts the Structure is involved. Squads attacking a Structure from the open must contact the Structure directly from any side.
- Victorious attacking Squads may not exceed the Structure Capacity. Some may occupy the Structure; the rest remain behind (outside) A Post-combat occupation in itself does not incur Reactive Fire.
- Attacking Commanders within 1 stand of an involved Squad may assist as per above.
- Remember that defending Squads from different Platoons may not combine their fire at an attacker (i.e. use a Firegroup or Crossfire). Therefore, shoot with as many eligible firers (from the same Platoon) as possible as per sec. 6.4. If any attackers reach the Structure the remaining occupants do not fire.
Building/Hardpoint Combat Resolution
A Close Combat in a Structure may consist of multiple combats. The defender divides his force into one or more combats; the smallest combat consists of one Squad/Weapon.
- The attacker must match each combat with one of his own, i.e. at least one Squad/Weapon. If the attacker cannot match all the defender's combats, the defender then adds any extra Squads to the existing combats as he sees fit.
- If after performing the first "round" of combats there are still Squads remaining on both sides, repeat the defender/attacker pairing off and die roll procedures until only one side remains.
Initiative
After all sub combats are resolved, the Initiative goes to the surviving side regardless of losses.
Example: Close Combat in a Target Structure
2 Regular SMG Squads led by a +2 PC attack 3 defending Regular Rifle Squads and a +1 PC.
The defender divides his force into 3 Squads (one containing the +1 PC).
The attacker matches up 1 Squad against one defending squad; he matches up 1 Squad and his +2 PC against another defending Squad, leaving the third defending Squad (and its +1 leader) alone. The defender now places his third Squad and +1 PC against the attacker's Squad and +2 PC.
These 2 Combats are now resolved as follows:
- 1 Squad against 1 Squad. The attacker adds +1 to his die roll for being SMG armed. The attacker rolls a "2"; the defender rolls a "2". The attacker wins 3-2 and the defending Squad is eliminated.
- 1 attacking Squad and a +2 PC against 2 defending Squads and a +1 PC. The attacker adds +2 to his die roll for his PC; he adds another +1 for having an SMG armed Squad (totaling +3). The defender adds +1 for his PC and +1 for having one extra Squad in the combat (totaling +2). The attacker rolls a "4"; the defender rolls a "6". The defender wins 8-7 and all attackers are eliminated.
- A second round of combat begins immediately, pitting 1 attacking SMG Squad against 2 defending Squads and +1 PC. The attacker adds +1 for having an SMG armed Squad. The defender adds +1 for his PC and +1 for having one extra Squad in the combat (totaling +2). The attacker rolls a "3"; the defender rolls a "3". The defender wins 5-4 and the attacking Squad is eliminated.
- The Initiative shifts to the defender.
8.5 Surprise Encounters
A Surprise Encounter occurs only when a Squad enters an occupied Structure against a Hidden, non-firing enemy who is then revealed.
- A Surprise Encounter results in a Close Combat. The Hidden Squads receive a defensive benefit in a Surprise Encounter; see Modifiers, above. Also see Building Complexes, sec. 4.4.1a.
- Also see Ambush Fire, sec. 6.10.
9.0 Rallying Pinned/Suppressed Squads
A Squad may be Rallied by a successful Rally Action. Squads are Rallied one at a time; Reactive Fire may not be applied against Rallying Squads.
- The chance of a successful Rally is based upon a single die roll which reflects the current condition and Troop Quality of the Rallying Squad, plus applicable modifiers.
- A Squad is Rallied when the modified die roll equals or exceeds the Rally number depending upon the Troop Quality and its condition (Suppressed or Pinned). Automatic results are possible.
| Troop Quality | Suppressed: Rally? | Pinned: Rally? |
|---|---|---|
| Green Troops | 6 | 5-6 |
| Regulars | 5-6 | 4-6 |
| Veterans | 4-6 | 3-6 |
Rally Modifiers
- A PC or CC within 1 Stand of subordinate Squads +1, or +2 as applicable. When multiple Commanders are present use the one with the highest modifier.
- No Enemy Squad in LOS of the Rallying Squad +1. Enemy PCs and FOs do not count.
- When a Commander Rallies he applies his +1 or +2 bonus to himself. Only a CC or BC may assist a PC.
- A PC may assist Squads in, or Attached to, his Platoon only unless these are all Killed, in which case he may assist Squads from another Platoon by being reassigned permanently to that Platoon.
- A CC may assist Squads, PCs, or Heavy Weapons in his Company only unless these are all Killed, in which case he may assist Squads from another Company by being reassigned permanently to that Company.
10.0 Engineers and Obstacles
A scenario may allot a number of obstacle sections to a particular side — usually to the defender. See the Scenario Generator, sec. 13.0, and Bonus Selections for the availability of obstacles and Engineer Squads. Note also that Assault Engineers are more effective in Close Combat than "line" Engineers.
10.1 Minefields
A Minefield section is 4 stands long x 1 stand deep and is indicated secretly as part of terrain set-up.
Minefield Placement
Minefields are placed hidden. A Minefield may be placed either inside a natural terrain Feature or it may link any two Features — within 4 stands distance — across open ground.
- When mining a terrain Feature place a marker beneath it, the entire Feature is assumed to be Mined. A player may occupy a Mined Feature with friendly Squads but these are attacked if they Pivot or move any distance; see below.
- When linking two terrain Features, place one marker at each linking point beneath those Features.
- A player whose Squad (or vehicle) enters a Minefield is immediately notified by his opponent and the Minefield section is then placed on the table. The moving unit is immediately halted (but not Pinned) in the Minefield.
- Minefield "attacks" are made during movement. Each Squad (or vehicle) is attacked each time that it moves into, or through, or exits, a Minefield section. Attack the Squad immediately when it enters. Any Squads that remain stationary in Minefields are not attacked, but if they attempt to leave the minefield they are attacked.
Minefield Attack Procedure
Against Squads the Minefield's owner rolls 4 Dice per attack. Use the Direct Fire procedures in sec. 6.4 and 6.5.1. If the Minefield attack Suppresses (or Kills) the Squad the defender retains the Initiative.
- If the Squad is Pinned by the attack, ignore the Pin result and that Squad may move normally.
- If the Minefield does not at least Suppress the Squad, the moving player retains the Initiative and moves across the minefield. If the Squad is Suppressed, it is immediately halted in that state; if and when it attempts to leave the Minefield it is attacked again.
Minefield Attacks against Vehicles
Roll 1 die per attack. If the die roll is "4" or higher the vehicle is destroyed — its tracks are considered to have been thrown and its crew bailed out.
Clearing Mines
Only Engineers may clear Mines. When an Engineer Squad enters a previously undetected Minefield the player is notified of its location, and the Engineer player rolls one die. On a "3-6" the Engineers detect the Minefield, they are not attacked, and they retain the Initiative. On a "1-2", the Minefield attacks the Engineers (as above) but must at least Suppress them to gain the Initiative.
- Engineers are not attacked by Minefields after a particular Minefield is detected by any Squad type on their side.
- An Engineer Squad may remove a Minefield section when the following conditions are met: The Engineer is adjacent to, or inside, a Minefield, and the Engineer is Stationary, Unsuppressed and does not fire for one entire Phasing Initiative.
- Clearing a Minefield is a successful Action.
11.1 Barbed Wire
A Barbed Wire section is 4 stands long x 1 stand deep, and may be placed anywhere on the field including atop or across a minefield. Wire does not block LOS (or Direct Fire) but does impede movement. Crossing Barbed Wire is a three-step process.
- A Squad is immediately stopped when it contacts the Wire. On its next Move Action, which may occur on the very next Action, it may attempt to cross the Wire but only to the opposite side — just clearing the Wire.
Hung Up on the Wire
A non-Engineer Squad must dice to cross the Wire — and before any Reactive Fire is applied against it. Roll one die: Green "5-6"; Regulars "4-6"; Veterans "3-6". Use applicable Commander modifiers within 1 stand distance. Hung Up Squads may not Fire.
- If the die roll succeeds and if a Squad is not Pinned by fire, it crosses just to the other side. After the Wire is crossed the Squad may move normally.
- A side loses the Initiative if a Squad gets Hung-Up in the Wire. A Squad may be attacked by Fire or by Close Combat while Hung-Up in the Wire. A Squad may try to move next time it possesses the Initiative.
- Engineer Squads cross Wire like normal Squads but do so without rolling to get Hung Up.
Clearing Wire
- An Engineer Squad may remove a Wire section when the following conditions are met:
The Engineer is adjacent to a Wire section, and the Engineer is Stationary, Unsuppressed and does not fire for one entire Phasing Initiative.
- Clearing a Wire section is a successful Action.
Vehicles and Wire
An Armored Vehicle (tank) that contacts a Wire section destroys that section, and may then continue its move. An APC/Halftrack stops and destroys the Wire but may not move beyond the destroyed Wire section during that Initiative; it may move beyond the destroyed Wire section on its next Initiative.
Destroying Wire with Barrage Fire
A Wire section is destroyed when it has received 4 Hits (5-6) from Barrage Fire; subtract 2 Dice if the Wire is in a Protective Cover terrain Feature. The Hits may be cumulative, over a number of Initiatives.
- If an enemy Squad is Hung up in the Wire any Barrage Hits inflicted on the Squad are also inflicted on the Wire.
10.3 Entrenchments, Bunkers & Hardpoints
Entrenchments may be provided as part of a Scenario. Each section of Entrenchment normally provides protection to only one direction, but may be attacked from any side. Entrenchments may be placed anywhere on the tabletop including in the "open". Once Entrenched, Squads that move (or Pivot) lose their protective bonus.
- All Fire against an Entrenchment is done at -1 die to the attack (as when firing at Squads in Features).
- A Hardpoint/Bunker has a capacity of 1 Squad to 4 Squads (Bunkers); the norm is 2 Squads.
Fire against Bunkers
In addition to subtracting one die from an attack, a -1 pip penalty to each die is also applied.
- All Squads in Bunkers may Fire from only one side but may be attacked from any side.
11.0 Vehicles, Guns and Bazookas
CROSSFIRE focuses on infantry. The use of vehicles should be limited to a support role in which there are no more than several vehicles on a side. Trucks are not used in CROSSFIRE as they are assumed to have dropped off their passengers before the battle.
11.1 Vehicular Actions
A Vehicle moves like a Squad except that it may not perform a Retreat Move. A Vehicle may obtain Hidden Placement as per sec. 5.3.
- A Vehicle/Gun may move independently or may use Group Movement with any friendly Squad.
- Any Vehicle/Gun may move only once, or fire only once, during a phasing player's particular Initiative. After the Initiative has been lost — and then regained — a vehicle/gun may move or fire again. Exception: Vehicles armed with only a MG may fire more than once — just like a normal infantry HMG.
- A Vehicle/Gun may perform Reactive Fire only once during an opponent's particular Initiative against any enemy target type that moves (regardless of the fire result). But, if armed with only a MG, the vehicle may fire more than once — like an HMG.
Examples:
A Tank Pivots, or it moves straight; it may not move or fire again that Initiative. A Tank Fires; it may not move or fire again that Initiative.
A Tank performs Reactive Fire and Suppresses or Kills its target; Initiative passes to the side. It may now move or fire once in its own Initiative.
See the Advanced Rules section for special firing characteristics.
11.1.1 Towed Weapons
Anti-tank guns and IG move in "operations". There are three operations: limber, move, unlimber. A Towed weapon must be limbered to move and unlimbered to fire. Each step may be performed only once per Initiative. Alternately, an unlimbered weapon may Pivot in place to face any direction, but may not fire if it does so that Initiative.
11.1.2 APC Passenger Capacity
Up to 4 Squads/or infantry weapons like HMGs / Mortars may be transported by each APC/Halftrack.
Mounting and Dismounting / Passengers
When operating in conjunction with a transport APC/Halftrack, Infantry Squads and Weapons move in "operations".
- There are three operations: Mount/Move/Dismount. Infantry must be mounted to move in their APC, and Dismounted to fire. Only one step may be performed per Initiative. Squads may Mount/Dismount within 1 stand of their vehicle.
11.2 Gun Fire
Gun Fire is Direct Fire and is used by Tanks, Anti-Tank Guns/cannon, Infantry Guns, Bazookas and Anti-Tank Rifles and .50 cal. There are two mutually exclusive Gun Fire procedures used:
-
When firing at vehicles,
-
When firing at infantry "dismounted" targets and Heavy Weapon crews.
-
All information needed to adjudicate Gun Fire is listed in the Data section for each country.
-
The Target Priority rule is waived for Infantry Guns (IG) and also Halftracks armed with .50 cal MGs — these fire at the closest target of any kind.
-
.30 cal MGs, which, like normal HMGs and other small arms cannot fire upon armored vehicles must target the closest non-armored target.
-
Firegroups, Crossfires, and Ambush Fire (extra dice) are not used for Vehicles or Guns.
Gun Arc of Fire and Line of Sight
All Turreted vehicles have an Arc of Fire of ±45° to its facing. Turrets may be rotated once per friendly Initiative 90° maximum. Rotation is considered part of the Fire Action. Rotation without firing is a non-Action but done only once per Initiative.
- Turretless Vehicles, Infantry Guns, Antitank Guns and Bazookas have an Arc of Fire of ±45° to their front. Turretless Vehicles are listed in italics in the vehicle Data section; e.g. the Russian SU-152.
11.2.1 Anti-Vehicle Fire
Only Direct Fire may be used against vehicles. Targeting is from the center of the firing vehicle to the center of the target vehicle. Small arms, which includes HMGs, Rifles and SMGs, may not be fired at any Armored Vehicles. .30 cal. may be fired at Armored Vehicles because they have penetrative capability; see PEN, below.
Anti-Vehicle Fire Procedures
Use the following procedure when firing at Vehicles or Limbered Weapons.
- Roll two six-sided Dice per attack (one light colored, one dark colored). The light die is the Accuracy die used to determine if the shot hits the vehicle; a vehicle must be Hit to be Killed. The dark die is the Penetration die — used to determine if a vehicle is Killed by the attack.
Accuracy (ACC)
A vehicle is hit on a modified die roll of "4-6". There are two types of modifiers that may be applied to the ACC die roll.
- A gun Accuracy modifier (ACC) is listed for each vehicle. The modifier is the number added to, or subtracted from, the die roll and represents the inherent accuracy of the gun based primarily on its muzzle velocity. Examples: A Pz V (Panther tank) adds +2 to the ACC die roll; a M-4 Sherman adds 0.
- Terrain is the other modifier representing the difficulty in targeting a vehicle in Protective Cover or a Hull Down position. This Modifier (-1) is subtracted from the ACC die roll. Also see Hull Down, sec. 13.4.
Penetration (PEN)
Gun Penetration is based on a combination of its muzzle velocity and the weight/size of the shell. Guns that fire large shells at high muzzle velocities have the best chances of destroying armored targets.
-
A gun Penetration (PEN) is listed for each gun/vehicle. The modifier is the number added to, or subtracted from the PEN die roll. Example: A Pz VIB (Tiger II tank) adds +3 to its die roll; an early model T-34A subtracts -1.
-
Compare the modified PEN number against the Front or Flank/Rear of the target's armor ARM (representing a vehicles effective armor thickness). If the modified PEN equals or exceeds the target's ARM the vehicle is disabled (i.e. Killed for game purposes).
-
When firing at vehicles, the Initiative is retained if a Kill results, otherwise it is lost. Similarly, a Phasing player whose vehicle is Killed by Reactive (Gun) fire loses the Initiative.
Examples of Fire
A German Pz IVG (ACC +1, PEN +1) fires at the front of a Russian T-34/85. The German rolls a "5" on the ACC die and a "4" on the PEN die. The Pz IV hits the target (3+1=4). The modified PEN equals the target's Front armor of "5" (4+1=5) and therefore destroys the T-34/85.
Automatic Results: If the die roll is "2" (snakeyes), the target is automatically unaffected. If the die roll is "12" (boxcars), the target is automatically destroyed by a lucky shot regardless of the ACC, or the difference between the PEN and ARM.
Flank/Rear Shots
A Flank Shot is achieved if the firer is entirely behind the target vehicle when the shot is claimed. Extend an imaginary, indefinite, parallel line along the rear hull of the target; if the firer is entirely behind that line, it is a Flank Shot.
APC/Halftrack Passengers
If their vehicle is destroyed, Passengers in APCs or Halftracks (or riding on tanks) receive a number of Kills equal to the EFF of the gun. Example: a PZ V would Kill 2 Squads. Any remaining Passenger Squads in the Squad are Suppressed on the spot. The added vulnerability of passengers reflects their being "packed in" when their transport is Killed.
11.2.2 Anti-Personnel Fire
This procedure is used when firing Guns at dismounted targets. When it attacks, each Gun has a number of attack Dice and a Kill potential, both based primarily upon the high explosive capability of the firing weapon. Consult the HE/EFF rating for the appropriate firing weapon. Example: Sherman tank: 4/2 so the Sherman rolls 4 Dice and may Suppress/Kill up to 2 Squads if it hits, see below.
Anti-Personnel Fire Procedure
Fire is center to center. Select a Target Squad, and roll the appropriate number of Firing Dice against it as with normal Direct Fire for infantry.
1 Hit Pins a Squad; 2 Hits Suppresses a Squad; 3 or more Hits Kills a Squad. A Suppressed target that receives a second Suppression is Killed.
- See Direct Fire, sec. 6.5 to determine Fire Effects and sec. 6.5.4 for any applicable Protective Cover terrain Feature Modifiers.
Kill Potential
If the Target Squad has received 3 Hits and been Killed, any other Squads within 1 Stand of the target — up to the weapon's Kill Potential — are Suppressed. If these other Squads are already Suppressed they are Killed instead. These additional Suppressions or Kills are chosen by the defender according to the following priority:
- Squads, HMGs or Company Commanders,
- Platoon Commanders,
- Forward Observers.
11.3 Bazooka Fire
As indicated by the Scenario a Squad (not Heavy Weapons crews) may be armed with a Bazooka type weapon. These include: Bazookas, PIATs, Panzerfausts, Panzerschrecks and Anti-tank Rifles. These weapons are detailed on the Data Sheets.
- Bazooka fire may be directed against vehicles only. Bazookas have an Arc of Fire of ±45°. Bazookas have unlimited ammo.
- Follow the same ACC/PEN procedures as for Gun Fire, above, but not rolling once per each Squad participating in the attack. Bazooka Firegroups and Crossfires may be used as indicated in sec. 6.4.
- A Squad may perform only one Bazooka attack per Initiative (for Phasing or Reactive Fire), per Squad regardless of the effect. A Failed, Phasing Fire Bazooka attack results in a loss of Initiative. For Reactive Fire, the Squad may still fire small arms, as per the usual Reactive Fire rules.
- Passengers of Killed APCs/Halftracks receive a number of Suppressions/Kills equal to the EFF of the weapon; see Kill Potential above.
- Anti-Tank Rifles have no EFF, but if they destroy a vehicle 1 passenger Squad of the owner's choice is automatically Suppressed on the spot.
11.4 Hull-Down Positions "HD"
HD is protective cover (-2 from the ACC die roll) achieved by only fully turreted vehicles atop hull locations and only to their front facing. Firing Tanks / Guns that are entirely behind the target are not penalized. Vehicles capable of attaining HD are listed on the Data Sheets with a "YES".
11.5 Vehicular Close Combat
Close Combat may be performed by and against vehicles using the procedures and modifiers described in sec. 8.0. APCs/Halftracks count each passenger Squad — in addition to the vehicle — for the "each Squad larger bonus." If the APC is Killed all its Passengers are also Killed. Note that all Vehicles lose their intrinsic "plus" bonus when in combat inside Woods, Fields, and Rough Ground, sec. 8.3.
12.0 Organizations
This section supplies basic Company and basic Battalion-level Infantry organizations for many of the more common formations. Units not found in the Organizations may be found in the Bonus Selections.
Organizational Points Value
Each "line" Company has a points value; e.g. a German Leg Infantry Company of 1939-42 is 37 points based on the Purchase Points in the Bonus Selections. Players may re-dress a points disparity by awarding the inferior force Purchase Points equal to the difference in the basic points value of the opposing forces used. This is called "handicapping"; see Bonus Selections.
Bonus Selections
Bonus Selections (sec. 14.0) are used to play-balance the basic Organizations, and to create larger games by augmenting the basic forces.
Commanders
Commanders (BCs, CCs, PCs) in some Organizations have limited assist abilities in Close Combat or Rallying. This information is given in the Notes.
- BCs and any of their staff Squads move independently. CCs and any of their staff Squads move independently. Other Squads move as per sec. 4.0.
HMGs
Most HMGs are awarded based upon the number of sections actually integral to an organization. Germans are usually awarded an extra HMG at Company level to represent the fact that their Squads were sometimes equipped with 2 light machineguns, each of which had an exceptionally high rate of fire. Other nationalities may be awarded an HMG section at Company level representing an attachment from Battalion or to represent a number of good LMGs at the Squad level.
- In games of one Battalion per side (Large games), all Battalion HMGs must be Attached-out to subordinate Companies/Platoons, as per sec. 2.2.1.
Mortars/Infantry Guns, etc.
Platoon mortars are generally grouped and represented in Company Heavy Weapons. All assets capable of Indirect Fire (Mortars and IGs) are generally used Off-Table (OT), except in special scenarios. One FO is supplied for each Indirect Fire weapon.
Fire Support Weapons
All Mortars and Infantry Guns in the Organizations may fire only a limited number of Fire Missions (FMs); see Bonus Selections for this information. All weapons capable of Indirect Fire are to be used from Off Table in pick-up games.
- Support units above Battalion level are not supplied in the Organizations but are represented in the Bonus Selections.
Germany
Leg Infantry Battalion (1939-'42)
Battalion Headquarters:
- 1-BC (+2)
- 1-SMG Squad
Machinegun Company:
- 3-HMGs
- 1-81mm Mortar
Anti-Tank Company:
- 3-PAK 35 ATG/Truck
3-Infantry Companies*, each with:
- 1-CC (+2)
Company Heavy Weapons:
- 2-HMGs
- 1-50mm Mortar
1-Rifle Platoons, each with:
- 1-PC†
- 3-Rifle Squads
†The 1st Platoon contains a +2 PC; the other 2 Platoons contain +1 PCs.
Notes:
For Armored Infantry: Add 3-251/1s per Company (cost 8 points each), and 1-251 for the Machinegun Company (9) and 1-251 for the Batt. HQ (9). At this level, the PC rides in the same 251 as the rest of the Platoon.
Morale: Regulars.
Leg Infantry Battalion (1943)
Battalion Headquarters:
- 1-BC (+2)
- 1-SMG Squad
3-Infantry Companies*, each with:
- 1-CC (+2)
Company Heavy Weapons:**
- 2- HMGs
- 1-81mm Mortar
1-Rifle Platoons, each with:
- 1-PC‡
- 3-Rifle Squads
‡The 1st Platoon contains a +2 PC; the other 2 Platoons contain +1 PCs.
Leg Infantry Battalion (1944-'45)
**Use the entire 1943 organization but exchange the 1943 Company Heavy Weapons for:
Company Heavy Weapons (add 1 point to cost):
- 1-HMG
- 1-120mm Mortar
- 1-81mm Mortar
Notes:
Morale: Regulars.
Motorized Infantry Battalion (1943-'45)
Battalion Headquarters:
- 1-BC (+2)/Truck
- 1-SMG Squad
- 1-Heavy Company
- 1-120mm Mortar/Truck
- 1-PAK 40 ATG/Tractor
3-Infantry Companies*, each with:
- 1-CC (+2)
Company Heavy Weapons:
- 1-81mm Mortar
- 1-HMG
3-Rifle Platoons, each with:
- 1-PC*
- 3-Rifle Squads
*The 1st Platoon contains a +2 PC; the other 2 Platoons contain +1 PCs.
Notes:
Morale: Regulars.
Motorized Recon Company (1943-'45)
Use the 43-45 Motorized Infantry Company above for these Recon Companies. These would travel by Kubelwagons or Motorcycles to the combat area.
Armored Infantry Battalion (1943)
Panzergrenadier Battalion Headquarters:
- 1-BC (+2) in 251
- 1-SMG Squad
- 1-Heavy Company
- 1-120mm Mortar/Truck
- 1-251/9 (75mm IG) (OT)
- 1-PAK 40 ATG/Tractor
3-Panzergrenadier Companies*, each with:
- 1-CC (+2)
Company Heavy Weapons:
- 1-251/2 (81mm Mortar) (OT)
- 2-HMGs
3-Rifle Platoons, each with:
- 1-PC*
- 3-Rifle Squads
*The 1st Platoon contains a +2 PC; the other 2 Platoons contain +1 PCs.
Notes:
When using APCs with this organization add 3-251/1s per Infantry Company (cost 8 points each), and 1-251 for the CC HQ (9). At this level, the PC rides in the same 251 as the rest of the Platoon.
Morale: Regulars.
Armored Infantry Battalion (1944-'45)
Panzergrenadier Battalion Headquarters:
- 1-BC (+2) in 251
- 1-SMG Squad
- 1-Heavy Weapons Company
- 1-120mm Mortar/Truck
- 1-251/9 (75mm IG) (OT)
3-Panzergrenadier Companies*, each with:
- 1-CC (+2)
Company Heavy Weapons:
- 1-251/2 (81mm Mortar) (OT)
- 1-251/9 (75mm IG) (OT)
- 1-HMG
3-Rifle Platoons, each with:
- 1-PC*
- 3-Rifle Squads
*The 1st Platoon contains a +2 PC; the other 2 Platoons contain +1 PCs.
Notes:
When using APCs with this organization add 3-251/1s per Infantry Company (cost 8 points each), and 1-251 for the CC HQ (9).
At this level, the PC rides in the same 251 as the rest of the Platoon.
A Flak Platoon was sometimes included at the Company Level but is not used here.
Morale: Regulars.
Armored Recon Company (1943-'45)
Use the 44-'45 Armored Infantry Company shown above for these Recon Companies. The CC and each Recon Platoon rides in a 250 Halftracks cost 8. Substitute a 250/7 for the 81mm Mortar and a 250/9 for the (75mm IG) — both (OT).
Engineer Company (1939-'45)
1-Company with:
- 1-CC (+2)
Company Heavy Weapons:
- 1-HMG
- 3-50mm Mortar*
2-Engineer Platoons, each with:
- 1-PC (+1)
- 3-Rifle Squads
Notes:
*81mm from '43, add 2 points to cost.
Morale: Regulars.
Volksgrenadier Battalion (1944-'45)
Battalion Headquarters:
- 1-BC (+1)
- 1-SMG Squad
- 1-Heavy Company
- 1-120mm Mortar/Truck
- 1-81mm Mortar/Truck
- 1-75mm Infantry Gun/Truck
- 1-HMG/Truck
3-Infantry Companies*, each with:
- 1-CC (+1)
Company Heavy Weapons:
- 1-HMG
1- SMG Platoons, each with:
- 1-PC (+1)
- 2- SMG Squads
1-Platoon, with:
- 1-PC (+1)
- 3-Rifle Squads
Notes:
Morale: Green.
Fallschirmjäger Battalion (1943-'45)
Parachute Battalion Headquarters:
- 1-BC (+2)
- 1-SMG Squad
Machinegun Company:
- 2- HMGs/Truck
- 1-81mm Mortar/Truck
- 1-75mm Recoiless Gun/Truck
3- Parachute Companies*, each with:
- 1- CC (+2)
Company Heavy Weapons:
- 2- HMGs
- 1-81mm Mortar
3-Rifle Platoons, each with:
- 1-PC*
- 3-Rifle Squads
*The 1st Platoon contains a +2 PC; the other 2 Platoons contain +1 PCs.
Notes:
Heavy Weapons such as 120mm mortars, IG guns and additional HMGs may also be used in support.
Morale: Veterans.
Airlanding Company (1941-'42)
1-Company with:
- 1-CC (+2)
- 1-Rifle Squad
Company Heavy Weapons:
- 1-HMG
- 1-50mm Mortar
1-Rifle Platoon, with:
- 1-PC (+2)
- 3-Rifle Squads
Notes:
Heavy Weapons such as 120mm mortars, IG guns and additional HMGs may also be used in support.
Morale: Veterans.
Italy
Leg Infantry Battalion (1940-'42)
Battalion Headquarters:
- 1-BC (+0)
- 1-Rifle Squad
3-Infantry Companies*, each with:
- 1-CC (+0)
Company Heavy Weapons:
- 1-HMG
3- Rifle Platoons, each with:
- 1-PC (+0)
- 3- Rifle Squads
Notes:
PCs provide +1 in Rallying but not for Close Combat. CCs and BCs provide no assist benefits for either Close Combat or Rallying.
Morale: Green.
Motorized Infantry Battalion (1941-'43)
Battalion Headquarters:
- 1-BC (+0)
- 1-Rifle Squad
Anti-Tank Company:
- 1- 47mm ATG/Trucks
3- Infantry Companies*, each with:
- 1-CC (+0)
Company Heavy Weapons:
- 1-HMG
3-Rifle Platoons, each with:
- 1-PC (+0)
- 3-Rifle Squads
Notes:
PCs provide +1 in Rallying but not for Close Combat. CCs and BCs provide no assist benefits for either Close Combat or Rallying.
Morale: Regulars.
Bersaglieri Infantry Battalion (1941-'43)
Battalion Headquarters:
- 1-BC (+1)
- 1-SMG Squad
Anti-Tank Company:
- 1- 47mm ATG/Trucks
3- Infantry Companies*, each with:
- 1- CC (+1)
Company Heavy Weapons:
- 1-HMG
3-Rifle Platoons, each with:
- 1- PC (+1)
- 3-Rifle Squads
Notes:
Could be Motorized by adding trucks.
Morale: Regulars.
Bersaglieri Motorcycle Battalion (1941-'43)
Battalion Headquarters:
- 1-BC (+0)
- 1-SMG Squad
Anti-Tank Company:
- 1- 47mm ATG/Trucks
3-Infantry Companies*, each with:
- 1-CC (+1)
Company Heavy Weapons:
- 1-HMG
3- Rifle Platoons, each with:
- 1- PC (+1)
- 3- Rifle Squads
Notes:
Morale: Regulars.
Parachute Company (1942-'43)
1-Company with:
- 1-CC (+1)
Company Heavy Weapons:
- 1-HMG
1- Rifle Platoons, each with:
- 1-PC (+1)
- 2- Rifle Squads
Notes:
Morale: Regulars.
Japan
Leg Infantry Battalion (1939-'42)
Battalion Headquarters:
- 1-BC (+1)
Battalion Machinegun Company:
- 1-HMGs
3-Infantry Companies*, each with:
- 1-CC (+1)
- 1-Rifle Squad
3-Rifle Platoons, each with:
- 1-PC (+1)
- 3-Rifle Squads
- 1-Light (Knee) Mortar**
Notes:
Morale: Regulars.
*All Japanese HMGs in all their organizations count as Crew-Served weapons except that they use only 3 firing Dice; they do not apply the -2 Crew modifier in Close Combat and may initiate Close Combat. They do however, cost the same as HMGs of other nationalities.
**The Knee Mortar uses only 2 Dice with a 1 Squad Kill potential; no ammo limit; no Smoke. It may move separately (i.e. it does not require a PC to move). Otherwise, it fights crew-served (-2). Only the appropriate PC functions as its FO in addition to his other functions.
Leg Infantry Battalion (1943-'45)
Battalion Headquarters:
- 1-BC (+1)
Battalion Machinegun Company:
- 3-HMGs
3-Infantry Companies*, each with:
- 1-CC (+1)
- 1-Rifle Squad
Company Heavy Weapons:
- 1- HMG
- 2- Rifle Squads with ATRs
3-Rifle Platoons, each with:
- 1-PC (+1)
- 3-Rifle Squads
- 1-Light (Knee) Mortar
Notes:
This organization may be used in addition to the one above. See notes from 1939-'42 Infantry Battalion.
Morale: Regulars.
Amphibious Company (1941-'45)
1-Company with:
- 1-CC (+2)
- 1-Rifle Squad
Company Heavy Weapons:
- 1- HMG
- 2- Rifle Squads with ATRs
- 1- 40mm Mortars
2-Rifle Platoons, each with:
- 1-PC (+1)
- 1- Rifle Squads
- 1 Light (Knee) Mortar
Notes:
See notes from 1939-'42 Infantry Battalion.
Morale: Regulars.
Special Amphibious Company ('39-'45)
1-Company with:
- 1-CC (+2)
- 1-Rifle Squad
Company Heavy Weapons:
- 3- HMGs
- 1-Rifle Squads with ATRs
- 1-40mm Mortars
3- Rifle Platoons, each with:
- 1-PC (+1)
- 1-Rifle Squads
- 1 Light (Knee) Mortar
Notes:
From 1943-'45 on there are only 3 Rifle Platoons but use 4 HMGs in the Company Heavy weapons instead of 3. Company cost 90 points.
See notes from 1939-'42 Infantry Battalion.
Morale: Regulars.
Parachute Company (1939-'45)
1-Company with:
- 1-CC (+1)
- 1-Rifle Squad
Company Heavy Weapons:
- 1-HMG
- 1-ATG (37 or 47mm)
1-Rifle Platoons, each with:
- 1-PC (+1)
- 1-Rifle Squad with ATR
Notes:
See notes from 1939-'42 Infantry Battalion.
Morale: Regulars.
France
Leg Infantry Battalion (1940)
Battalion Headquarters:
- 1-BC (+0)
- 1-Rifle Squad
Machinegun Company:
- 2- HMGs
3- Infantry Companies*, each with:
- 1-CC (+0)
Company Heavy Weapons:
- 1-60mm Mortar
4-Rifle Platoons, each with:
- 1-PC (+0)
- 3-Rifle Squads
Notes:
†PCs provide +1 in Rallying but not for Close Combat. CCs and BCs provide no plus benefits for either Close Combat or Rallying.
Morale: Regulars.
Motorized Infantry Battalion (1940)
Battalion Headquarters:
- 1-BC (+0)
- 1-Rifle Squad
3-Infantry Companies*, each with:
- 1-CC (+0)
Company Heavy Weapons:
- 1-PC (+1)†
- 1- HMG
- 2- Rifle Squads
3-Rifle Platoons, each with:
- 1-PC (+0)
- 3-Rifle Squads
Notes:
†PCs provide +1 in Rallying but not for Close Combat. CCs and BCs provide no plus benefits for either Close Combat or Rallying.
†Commander for Heavy Weapons only. Functions as a +1 PC for Rallying but not for Close Combat.
Morale: Regulars.
Dismounted Dragoons (1940)
Battalion Headquarters:
- 1-BC (+0)
- 1-Rifle Squad
Heavy Weapons Company:
- 1-25mm ATG/Halftrack
- 1- 81mm Mortar
- 2- HMGs
Motorcycle Company:
- 1-PC (+0)
- 3- Rifle Squads
Armored Car Company:
- 4-AMR Halftracks
3-Dragoon Companies*, each with:
- 1-CC (+0)
4-Dragoon Platoons, each with:
- 1-PC (+0)
- 3-Rifle Squads
Notes:
†PCs provide +1 in Rallying but not for Close Combat. CCs and BCs provide no plus benefits for either Close Combat or Rallying.
Each Dragoon Platoon is transported in a Lorraine fully-tracked, APC with no MG (cost 6 points each).
Morale: Regulars.
Engineer Company (1940)
1-Company with:
- 1-CC (+0)
2-Engineer Platoons, each with:
- 1-PC (+1)
- 3-Rifle Squads
Notes:
Morale: Regulars.
Belgium
Leg Infantry Company ('40)
Infantry Company with:
- 1-CC (+0)
Company Heavy Weapons:
- 1-60mm Mortar
3- Rifle Platoons, each with:
- 1-PC (+1)
- 4- Rifle Squads
Notes:
Morale: Regulars.
Great Britain
Leg Infantry Battalion (1939-'45)
Battalion Headquarters:
- 1-BC (+1)
- 1-SMG Squad
Battalion Support Company:
- 1-3" Mortar
- 1-2 Pdr ATG/Truck
- 1-Engineer Platoon (1-PC (+1); 3 Rifle Squads)
- 1-Carrier Platoon (carried in 1-Bren Carrier but organized like Rifle Platoons, see below)
3-Infantry Companies*, each with:
- 1-CC (+1)
- 1-HMG (drawn from MG Battalion)
- 1-2" Mortar
3-Rifle Platoons, each with:
- 1-PC (+1)
- 3-Rifle Squads
Notes:
1 ATGs are not integral to the Battalion in 1939-'40 but one may be attached from Brigade.
6 Pdr ATGs become available in 1942.
Morale: Regulars.
Motor Infantry Battalion (1939-'41)
Battalion Headquarters:
- 1-BC (+1)
- 1-SMG Squad
- 1-3" Mortar
- 1-HMG
3-Infantry Companies*, each with:
- 1-CC (+1)
- 1-2" Mortar
3-Rifle Platoons, each with:
- 1-PC (+1)
- 3-Rifle Squads
- 1-Carrier Platoon (carried in 1-Bren Carrier (cost included) but organized like Rifle Platoons, see above).
Notes:
1 Not integral to Battalion in 1939-'40.
Morale: Regulars.
Royal Navy Commando Troop (1942-'45)
Troop Headquarters:
- 1-CC (+2)
Motor Inf. Battalion (1942)
Battalion Headquarters:
- 1-BC (+1)
- 1-SMG Squad
- 1-3" Mortar
1-Anti-Tank Company:
- 3-2 Pdr (or 6 Pdr) ATGs/Trucks
3-Infantry Companies*, each with:
- 1-CC (+1)
- 1-HMG
- 1-2" Mortar
1- Rifle Platoons, each with:
- 1-PC (+1)
- 2- Rifle Squads
- 1-Carrier Platoon (carried in 1-Bren Carrier but organized like Rifle Platoons, see above).
Morale: Regulars.
Motor Inf. Battalion (1943-'45)
Battalion Headquarters:
- 1-BC (+1)
- 1-SMG Squad
1-Support Company:
- 1-3" Mortar
- 1- 6 Pdr/Truck
- 2- HMGs
3- Infantry Companies*, each with:
- 1-CC (+1)
- 1- 2" Mortar
3-Rifle Platoons, each with:
- 1-PC (+1)
- 3-Rifle Squads
- 1-Carrier Platoon (carried in 1-Bren Carrier but organized like Rifle Platoons, see above).
Notes:
1 May be transported by one M-3 Halftrack per Platoon (cost 8 points) or one 3-ton Truck.
Morale: Regulars.
Royal Army Commando Troop (1940-'45)
Troop Headquarters:
- 1-CC (+2)
2- Rifle Platoons, each with:
- 1- PC (+2)
- 2- Rifle Squads
3- Rifle Platoons, each with:
- 1- PC (+2)
- 2- Rifle Squads
Morale: Veterans.
Royal Marine Commando Troop (1942-'45)
Troop Headquarters:
- 1-CC (+2)
- 1-3" Mortar
- 1-Sniper
3-Rifle Platoons, each with:
- 2- PC (+2)
- 2- Rifle Squads
Morale: Veterans.
Airlanding Battalion (1944-'45)
Battalion Headquarters:
- 1-BC (+1)
- 1-SMG Squad
- 1-3" Mortar
- 1-Recon SMG Platoon 1-PC (+1) (3 Squads)
- 1-Engineer Platoon 1-PC (+1) (3 Rifle Squads)
- 1- 6 Pdr/Truck
- 2- HMGs
4- Companies*, each with:
- 1-CC (+1)
- 1-2" Mortar
4-Rifle Platoons, each with:
- 1-PC (+1)
- 1-Rifle Squad
Morale: Veterans.
Parachute Battalion (1944-'45)
Battalion Headquarters:
- 1-BC (+1)
- 1- SMG Squad
- 1- 3" Mortar
- 1-Recon SMG Platoon (1-PC (+1); 3 Squads)
- 1-Engineer Platoon (1-PC (+1); 3 Rifle Squads)
- 1-HMG
3- Parachute Companies*, each with:
- 1-CC (+1)
- 1-2" Mortar
1-Rifle Platoon, each with:
- 1-PC (+1)
- 2-Rifle Squads
Morale: Veterans.
Russia
Leg Infantry Battalion (1939-'45)
Battalion Headquarters:
- 1-BC (+0)
Battalion Heavy Weapons:
- 1-HMGs
- 3-81mm Mortars
- 1-45mm ATGs/Truck
3-Infantry Companies*, each with:
- 1-CC (+0)
Company Heavy Weapons:
- 1-HMG
- 1-50mm Mortar
3- Rifle Platoons, each with:
- 1-PC (+0)
- 4- Rifle Squads
Notes:
†Russian PCs provide +1 in Close Combat but not for Rallying. Russian CCs and BCs are treated normally.
Late War Platoons (1943 on) may contain only 3 Rifle Squads — subtract 9 points for the Company.
Morale: Regulars.
SMG Company (1939-'45)
1-Infantry Company with:
- 1-CC (+0)
3-SMG Platoons, each with:
- 1- PC (+0)
- 3-SMG Squads
Notes:
†Russian PCs provide +1 in Close Combat but not for Rallying. Russian CCs are treated normally.
For special scenario purposes, any of the Heavy Weapons from a normal Infantry Battalion may be grafted on to the SMG Company.
Morale: Regulars.
Parachute Company (1941-'42)
1-Infantry Company with:
- 1-CC (+0)
Company Heavy Weapons:
- 2- 50mm Mortars
3-Rifle Platoons, each with:
- 1-PC (+0)
- 3-Rifle Squads
†Russian PCs provide +1 in Close Combat but not for Morale: Veterans. CCs are treated normally.
Morale: Regulars.
Motorcycle Battalion (1942-'45)
Battalion Headquarters:
- 1-BC (+0)
1-Motorcycle Company*, with:
- 1-CC (+0)
3-SMG Platoons, each with:
- 1-PC (+0)
- 3-SMG Squads
1-Halftrack Company**, each with:
- 1-CC (+0)
3-SMG Platoons, each with:
- 1-PC (+0)
- 3-SMG Squads
Third Company***
Notes:
This was an "non" organization that varied greatly; each Battalion appears to have been unique.
†Russian PCs provide +1 in Close Combat but not for Rallying. Russian CCs, BCs, are treated normally.
*The Motorcycle Company sometimes included an Engineer Squad.
**Each Halftrack Platoon is transported in one lendlease: M-3 Halftrack, Bren Carrier, Scout Car or Track (cost 8 points for a APC).
***A third company (usually included) comprised light tanks, armored cars, flak vehicles, or ATGs. Rifle Squads may be substituted for SMGs.
Morale: Regulars.
Motorized Recon Company (1942-'45)
1-Infantry Company with:
- 1-CC (+0)
- 1-Rifle Squad
2-Rifle Platoons, each with:
- 1-PC (+0)
- 3-Rifle Squads
Notes:
†Russian PCs provide +1 in Close Combat but not for Rallying. Russian CCs are treated normally.
Each Platoon may be transported in one lendlease: M-3 Halftrack, Bren Carrier, Scout Car or Truck; (cost 8 points for a APC).
This organization may include an ATG, Mortar, and/or a Engineer Squad; cost not included.
Morale: Regulars.
United States
Leg Infantry Battalion (1942-'45)
Battalion Headquarters:
- 1-BC (+0)
- 1-SMG Squad
- 3-37mm ATG/Truck*
Battalion Heavy Weapons:
- 2- HMGs
- 1-81mm Mortars
3- Infantry Companies**, each with:
- 1-CC (+0)
Company Heavy Weapons:
- 1-60mm Mortar
- 1-HMG
3-Rifle Platoons, each with:
- 1-PC (+0)
- 3-Rifle Squads
Notes:
†PCs provide +1 in Rallying but not for Close Combat. CCs and BCs provide no plus benefits for either Close Combat or Rallying.
*ATG becomes a 57mm in 1943-'45.
Morale: Green, but...
**A Company of Regulars costs 47 points.
Armored Infantry Battalion (1942)
Battalion Headquarters:
- 1-BC (+0)
- 1-SMG Squad
- 1-T-30 HMC (75mm) (OT)
- 1-37mm ATG/Truck*
- 1-Jeep with .50 cal.
- 1-HMG
- 1-M-4 Halftrack (81mm Mortar) (OT)
3-Infantry Companies**, each with:
- 1-CC (+0)
- 1-37mm ATG*
Company Heavy Weapons:
- 1-60mm Mortar**
- 1-HMG
3-Rifle Platoons, each with:
- 1-PC (+0)
- 3-Rifle Squads
Notes:
†PCs provide +1 in Rallying but not for Close Combat. CCs and BCs provide no plus benefits for either Close Combat or Rallying.
When using APCs with this organization add 3 M5 Halftracks per Infantry Company (cost 8 points each), and 1-M5 for the Batt. HQ (9).
At this level, the PC rides in the same M5 as the rest of the Platoon.
*ATG Drawn by any Halftrack and represents Platoon ATGs.
**Represents Platoon Mortars.
Morale: Green.
Armored Infantry Battalion (1943-'45)
Battalion Headquarters:
- 1-BC (+0)
- 1-SMG Squad
- 1-M-7 Priest (105mm) (OT)
- 1-37mm ATG/Track*
- 1-Jeep with .50 cal.
- 1-M5 Halftrack with .50 cal.
- 1-HMG
- 1-M-4 Halftrack (81mm Mortar) (OT)
3-Infantry Companies*, each with:
- 1-CC (+0)
- 1-37mm ATG*
Company Heavy Weapons:
- 1-M-4 Halftrack (90 mm Mortar**)
- 1-HMG
3-Rifle Platoons, each with:
- 1-PC (+0)
- 3-Rifle Squads
Notes:
†PCs provide +1 in Rallying but not for Close Combat. CCs and BCs provide no plus benefits for either Close Combat or Rallying.
†When using APCs with this organization add 3-M5 Halftracks per Infantry Company (cost 8 points each), and 1-M5 for the Batt. HQ (8).
At this level, the PC rides in the same M5 as the rest of the Platoon.
*ATG Drawn by any Halftrack and represents Platoon ATGs.
**Represents Platoon Mortars.
Morale: Regulars (or may Green at lower cost).
Engineer Company (1942-'45)
1-Company with:
- 1-CC (+1)
3-Engineer Platoons, each with:
- 1-PC (+1)
- 3-Rifle Squads.
Notes:
Morale: Regulars.
Ranger Company (1944-'45)
1-Company with:
- 1-CC (+2)
- 1-60mm Mortar
2-Rifle Platoons, each with:
- 1- PC (+2)
- 2- Rifle Squads
Notes:
Command Control as per Germans, sec. 4.0
Morale: Veterans.
Parachute Battalion (1944-'45)
Parachute Battalion Headquarters:
- 1-BC (+1)
- 1- SMG Squad
- 2- HMGs/Track
- 1-81mm Mortar/Truck
3- Parachute Companies*, each with:
- 1-CC (+1)
- 1-Rifle Squad
- 1-60mm Mortar
2-Rifle Platoons, each with:
- 1-PC (+1)
- 2-Rifle Squads
Notes:
Heavy Weapons such as 81mm Mortars, 75mm, IG guns and additional HMGs may also be used in support.
Morale: Veterans.
Glider Battalion (1944-'45)
Glider Battalion Headquarters:
- 1-BC (+1)
- 1- SMG Squad
- 2- HMGs/Track
- 1-81mm Mortar/Truck
3-Glider Companies*, each with:
- 1-CC (+1)
- 1-Rifle Squad
Company Heavy Weapons:
- 1-60mm Mortar
- 1-HMG
3-Rifle Platoons, each with:
- 1- PC (+1)
- 2- Rifle Squads
Notes:
Heavy Weapons such as 81mm Mortars, 75mm, IG (howitzers) and additional HMGs may also be used in support.
Morale: Veterans.
Marine Battalion 1942-'43
Battalion Headquarters:
- 1-BC (+1)
- 1-SMG Squad
Battalion Mortar Platoon:
- 6-81mm Mortars
Battalion Machinegun Platoon†:
- 4-HMGs
3-Infantry Companies*, each with:
- 1-CC (+1)
- 3- Rifle Squads
- 1-60mm Mortar
3-Rifle Platoons, each with:
- 1-PC (+1)
- 3-Rifle Squads
Notes:
†Each HMG in the Machinegun Platoon may be Attached separately to any of the other Platoons. Also, any and all HMGs may be retained under a CC's exclusive control.
†PCs fight as Squads (like CCs) with PC bonuses.
Morale: Veterans.
Marine Battalion 1943-'45
Battalion Headquarters:
- 1-BC (+1)
- 1-SMG Squad
Battalion Mortar Platoon:
- 6- 81mm Mortars
Battalion Assault Platoon:
- 1-PC (+1)
- 3-Assault Squads (+2)
3-Infantry Companies*, each with:
- 1-CC (+1)
- 1-60mm Mortar
Company Machinegun Platoon*:
- 4-HMGs
3-Rifle Platoons, each with:
- 1-PC (+1)
- 3-Rifle Squads
Notes:
†Assault Squads are +2 in Close Combat, otherwise they are treated as Veterans.
†Each HMG in the Machinegun Platoon may be Attached separately to any of the other Platoons. Also, any and all HMGs may be retained under a CC's exclusive control.
†††PCs fight as Squads (like CCs) with PC bonuses.
Morale: Veterans.
Finland
Leg Infantry Battalion (1943-'45)
Battalion Headquarters:
- 1-BC (+1)
- 1-SMG Squad
- 1-Machinegun Company
- 1-HMGs
3-Infantry Companies*, each with:
- 1-CC (+1)
- 1-SMG Squad
Company Heavy Weapons:
- 1-50mm Mortar
- 1-HMG
3-Rifle Platoons, each with:
- 1-PC (+1)
- 3-Rifle Squads
Notes:
Command Control as per Germans, sec. 4.0
Morale: Regulars.
Hungary
Leg Infantry Company (1941-'45)
1-Infantry Company with:
- 1-CC (+1)
Company Heavy Weapons:
- 1-HMG
2-Rifle Platoons, each with:
- 1-PC (+1)
- 3-Rifle Squads
Notes:
May be supported by HMGs, 50mm Mortars and 81mm Mortars.
Morale: Green outside of Hungary. In Hungary some Regulars and Veterans may be used.
The listed points cost is for Regulars/Green troops.
Poland
Leg Infantry Company (1939)
1-Infantry Company with:
- 1-CC (+0)
Company Heavy Weapons:
- 1-60mm Mortar (use as 50mm)
3-Rifle Platoons, each with:
- 1-PC (+1)
- 3-Rifle Squads
Notes:
Morale: Regulars.
13.0 Scenario Generator
by Rob Wolsky
The Scenario Generator offers two scenario problems each presenting a different tactical problem. With opposing forces, each of at least Company strength, players will be able to fight two different scenario types quickly, and in a variety of terrain venues. The two scenario types are:
- Meeting Engagement
- Bridgehead
Common Rules
These rules apply unless overruled by a specific scenario description. The following guidelines assume Squad bases of approximately 1-1/4" square.
Basic Terrain
At least one third (1/3) of the gaming area should be covered by Terrain Features. A Terrain Feature is defined as an area of terrain (woods, hill, building, etc.) between 4"x6" and 8"x8". As an example, an area of the table 7' x 7' would have approximately 32 pieces of terrain; see diagram. Any combination of differently shaped and sized terrain pieces may be used, as long as the general guidelines are met. Terrain Features are then placed by the players as per the specific scenario requirements.
Terrain Breakdown
If the total number of terrain Features/pieces is about 50 (a 6' x 6' table), a good breakdown of terrain types for the "countryside" would be: 20 Woods; 9 Hills; 9 Fields; 5 Depressions; 2 Rough Ground; 5 Buildings.
- Players must be careful when setting up terrain not to allow a clear fire lane from edge to edge across the table. Double check before play begins, and, if necessary, shift terrain slightly to block LOS from North to South and East to West across the tabletop.
Table Size
For Company sized battles a 6' x 6' table is about right. For battles with 2 Companies on a side, enlarge to about a 6' x 8' table. For Battalion-sized games use an 8' x 8' (or ping-pong table).
Terrain Arrangement/Density
7 x 7 Arrangement
The diagram above shows a 7' x 7' section of tabletop with adequate Terrain density.
About 1/3 of the area is covered with Features: 4 Woods, 2 Hills, 2 Fields, 2 Depressions, 1 Building, 1 Rough Ground.
Notes
If players wish to use the CrossFire terrain Features over their existing pre-made terrain with rolling ground such as Geo-Hex, Terrain Maker, or home-made terrain, they may "overlay" an appropriate number of Features over their existing tabletops.
Whatever terrain method is used, the key is to make your terrain dense enough to permit covered routes of approach yet open enough to permit limited fire lanes.
Specific Feature Arrangement
Several Features that Block LOS such as woods/fields may be placed near or touching each other for a "Dense woods, or separated to represent a Sparse Woods with greater LOS potential."
Game Size
The scenarios are played at a pre-determined game size as per the national Organizations. Players should agree before choosing any Bonus Selections on the basic game size and who is to command which army. The sizes are:
- Small Game: 1-Company per side.
- Mid Size Game: Two-Companies per side.
- Large Game: 1-Battalion per side.
- We recommend playing with only Leg Infantry units at first, see Organizations.
Bonus Selections
Based on mutual player agreement each side has the opportunity to increase his basic force size as described in Bonus Selections; sec. 14.0.
Mortars
All Weapons capable of using Indirect Fire are considered Off-Table (OT).
Meeting Engagement
Mission Objective
Both forces are moving in equal strength to capture a key position.
Scenario Outline
- Players alternate placing Basic Terrain anywhere.
- Players Dice to determine Victory Objective.
- Deploy on tabletop and thereafter begin normal Action/Initiative sequence.
Basic Terrain:
Players alternate placing terrain features (Player A then Player B) until the Basic Terrain is completed.
Objective Determination:
Once the Basic Terrain is on the table, both players roll a die. The player who rolls highest (re-roll ties) nominates the Terrain Feature(s) to be used for scenario Victory Objectives. In a Small game, set one objective, in a Mid-Size or Large game, set two objectives. Bunkers may not be objectives.
- The player who rolled lower now chooses the table edge he will deploy from, places the first Squad and begins the game with the Initiative. The player who rolled higher starts from the opposite table edge.
Deployment:
All forces must first deploy. Use the following movement procedure.
- Each player alternates placing one Squad, Commander or FO at a time into or adjacent (touching) the unoccupied Terrain Feature closest his starting Table Edge until either one player has placed all of his Squads or Reactive Fire has occurred. A Squad may be placed in the next closest Feature to his table edge only after a closer Feature has been occupied by at least one Squad. Squads are not Hidden.
- A side may move only after all its forces have been placed, though it may fire before then.
- Once complete placement or Reactive Fire has occurred, the Squad placement procedure immediately ends and normal movement begins, i.e. the normal Action/Initiative sequence begins.
Recommended Force Levels:
| Size | Force |
|---|---|
| Small Game | 1-Company |
| Mid-Size Game | 2-Companies |
| Large Game | 1-Battalion |
Victory Conditions:
The player occupying the terrain Victory Objective(s) for Five Consecutive Friendly Initiatives without sustaining greater than two-thirds (2/3) casualties in Squads wins the game (PCs and FOs do not count towards casualties). Any other result is a draw.
- Only Squads, HMGs, CCs (or any generated vehicles or guns) count towards occupation of terrain. An objective must be occupied solely by one side; i.e. not shared by opposing forces.
Bridgehead
The Attacker is attempting to breach an enemy line from an established front. The Defender is trying to prevent the Attacker from gaining a bridgehead, and will counter-attack using local reinforcements.
Scenario Outline
- Players choose table side and then alternate placing Basic Terrain anywhere.
- Players Dice for Attacker/Defender determination.
- Defender places Fortifications (see below).
- Defender's Deployment.
- Attacker's Deployment.
Basic Terrain
Players alternate placing terrain Features (Player A then Player B) until the Basic Terrain is completed. Players should be on opposite side of the table before they begin placement; they retain these positions for the battle.
Determine Attacker/Defender
Both players roll one die. The player rolling higher (re-roll ties) determines his role — Attacker or Defender. The Attacker begins with the Initiative.
Fortifications
The defending player may place some, all, or none of the following Fortifications in his half of the table.
| Type | Amount |
|---|---|
| Hardpoint | 1 Two Squad Bunker |
| Wire | 3 Four Stand Sections |
| Mines | 1 Four Stand Section |
Defender's Deployment
The Defender sets up his forces anywhere inside his half of the table — not Hidden. Any terrain Feature that is contacted by the horizontal "half way" line is considered in the Defender's half of the table.
Attacker's Deployment
Once the defender has finished his Deployment, the attacker Deploys anywhere inside his half of the table (not Hidden). He may not Deploy in any of the defender's terrain Features. The Attacker has the Initiative.
Recommended Force Levels:
| Size | Attacker | Defender |
|---|---|---|
| Small Game | 1-Company | 1-Company |
| Mid-Size Game | 2-Companies | 2-Companies |
| Large Game | 1-Battalion | 1-Battalion |
Defender's Reinforcements
When and if the attacker occupies the fourth terrain Feature* inside the Defender's deployment area, in the Defender's next Initiative turn (i.e. once the initiative passes to the defender), the Defender immediately receives a counter attack force of the following strength:
*If playing a Battalion-sized game, capture of the sixth terrain Feature triggers the reinforcements.
Defender Reinforcement:
- Small Game: 12 Bonus Selection Points
- Mid-Size Game: 18 Bonus Selection Points
- Large Game: 24 Bonus Selection Points
The reinforcements must be purchased before play begins. They may enter anywhere along the Defender's rear table edge.
Victory Conditions:
The Attacker wins if he occupies any four (4) terrain Features in the defending players deployment area for Five Consecutive Friendly Initiatives (or any 6 Features in a Large game).
- If a terrain Feature is recaptured by the Defender, the Initiative count (i.e. Five Consecutive Friendly Initiatives) must begin all over again. Only Squads, HMGs, CCs (or any generated vehicles or guns) count towards occupation of terrain. A captured Feature must be occupied solely by one side; i.e. not shared by opposing forces.
Scenario Generator Options
Town Fighting
If players wish to fight in built-up environments many — or all — of the terrain Features in the Meeting Engagement or, especially, the Bridgehead games may be Buildings. At least some of the Buildings should be part of a Building Complex. See our Stalingrad scenario on page 41 for an example of a buildings intensive scenario.
Anything Goes
The Scenario Generator offers the means to play a "pick-up" game scenario with a minimum of game preparation. By using any combination of the basic Organizations and the Bonus Selections, players may customize their own forces and use them with the Scenario Generator. Our goal is that you will create and balance your games as you deem fit.
14.0 Bonus Selections
The use of Bonus Selections is optional, except for the Reinforcements used in the Bridgehead scenario.
- Bonus Selections may be used to re-dress a disparity in Basic Forces (see Organizations, points). This is called Handicapping. For example: A German Leg Company is worth 60 points, an American Leg Company is worth 42.5 points. This means the American receives an extra 18.5 Purchase Points before play begins in addition to any normal Purchase Points allotted to both sides if these are used.
- Therefore, opponents may play with the listed Organizations only, or add the Handicap to them, or add the Handicap plus additional Purchase Points. The choice is made by mutual player agreement.
- Conversely, for pick-up games, players may also build their forces entirely from the Bonus Selections. Here, players agree on a Purchase Points maximum.
Purchase Points
Suggested Bonus Purchase Points for Attackers and Defenders are listed for each country depending upon the size of the game, if used at all; these are additional to the points for handicapping as mentioned above. The Purchase Points vary to reflect the qualitative differences between the nationalities in the game. For example, the Germans, who enjoy significant command/control and leadership advantages in the game are given the fewest points.
Maximum Unit purchases by Period
To reflect unit-type availability (the maximum number of units that may be chosen per type), Bonus units are restricted by period. The periods are set off by slashes, Early-War: to 1942/ Mid-War: 1943/Late-War: 1944-'45. If there are no period slashes listed for a unit type there are no maximums applied.
- Note the Platoon costs are based on 3 Squad Platoons. If a 4th Squad is required add the appropriate number of points.
- Note that all Commanders and weapons cost the same regardless of their Troop Quality rating, except that Veteran Company Commanders cost more. The Troop Quality ratings are based on the organizations you are simulating.
Infantry and Commanders
For every Platoon purchased, one Platoon Commander must be purchased. For every 3 Platoons purchased one Company Commander may be purchased. Commander Bonuses are applied normally except where indicated otherwise in Organizations or in special scenario conditions.
Infantry Support (Indirect Fire)
In pick-up games, all Fire Support is from Off-Table (OT) only. Each Mortar or Gun from the Organizations, or purchased here as Bonus Selections, may fire only the number of Fire Missions (FMs) that appear before it. One FO is supplied free for each Indirect Fire weapon.
Armor
Roll on the Tank/ATG Generation Chart after purchase. See transport rules, sec. 11.1. Tanks/Halftracks may not be purchased by Defenders, unless both players waive this restriction.
Tanks/ATG (Purchase and Type Generation)
After a Tank is purchased immediately make a die roll on the Tank/ATG Generation Chart, for the appropriate nationality/year, to discover which Tank/ATG you have acquired. Note the range of quality for these Tanks/ATGs is large but the cost is constant (9 or 3 points each). Good luck!
Fortification Package
As with most unit types the number of Fortification Packages that may be purchased is limited. Fortifications may not be purchased by Attackers.
Germany
When Attacking:
Large: 15 Points; Mid-Size 12.5 Points; Small: 10 Points
When Defending
Large: 10 Points; Mid-Size 8 Points; Small: 6 Points
| Units/Period | Unit Type | Unit Cost |
|---|---|---|
| Infantry | ||
| 2/2/2 | Veteran Rifle Platoons | 13.5 |
| 3/4/3 | Regular Rifle Platoons | 9 |
| 2/3/4 | Green Rifle Platoons | 7.5 |
| 1/1/1 | Regular SMG Platoons | 7.5 |
| 1/1/2 | Green SMG Platoons | 6 |
| 1/1/1 | Engineer (Rifle) Platoons | 10.5 |
| 1/2/2 | Snipers | 3 |
| 3/3/3 | All HMGs | 6 |
Commanders
| Type | Cost |
|---|---|
| Platoon Commander +1 | 2 |
| Platoon Commander +2 | 4 |
| Company Commander +1 | 4 |
| Company Commander +2 | 6 |
Extra for a Veteran Company Commander — 2 Points
Infantry Fire Support
| FMs | Weapon | Cost |
|---|---|---|
| 12 FMs | 50mm Mortar | 4 |
| 12 FMs | 81mm Mortar | 6 |
| 10 FMs | 120mm Mortar | 7 |
| 12 FMs | 75mm IG | 6 |
| 4/3 FMs | 150mm IG | 10 |
| 3/4/3 FMs | Heavy Artillery | 10 |
Armor
| Units/Period | Type | Cost |
|---|---|---|
| 3/4/2 | Tanks | 9 |
| 1/2/2 | Halftracks | 8 |
Italy
When Attacking:
Large: 23 Points; Mid-Size 21 Points; Small: 17 Points
When Defending
Large: 17 Points; Mid-Size 14.5 Points; Small: 12 Points
| Units/Period | Unit Type | Unit Cost |
|---|---|---|
| Infantry | ||
| 1/1 | Veteran Rifle Platoons | 13.5 |
| 2/2 | Regular Rifle Platoons | 9 |
| 4/4 | Green Rifle Platoons | 7.5 |
| 1/1 | Regular SMG Platoons | 7.5 |
| 1/1 | Engineer (Rifle) Platoons | 10.5 |
| 1/2 | Snipers | 3 |
| 3/2 | All HMGs | 6 |
Commanders
| Type | Cost |
|---|---|
| Platoon Commander +1 | 2 |
| Company Commander +1 | 4 |
Infantry Fire Support
| FMs | Weapon | Cost |
|---|---|---|
| 12 FMs | 81mm Mortar | 6 |
| 12 FMs | 65mm IG | 6 |
| 8 FMs | Heavy Artillery | 10 |
Armor
| Units/Period | Type | Cost |
|---|---|---|
| 1/2 | Tanks | 9 |
| 1/1 | Halftracks | 8 |
Anti-Tank Guns
1/2 ... 3
Fortification Package
1/2 ... 1 Bunker; 3-Wire; 1 Mine ... 6
Japan
When Attacking:
Large: 20 Points; Mid-Size 16.5 Points; Small: 13 Points
When Defending
Large: 13 Points; Mid-Size 11.5 Points; Small: 9 Points
| Units/Period | Unit Type | Unit Cost |
|---|---|---|
| Infantry | ||
| 2/2 | Veteran Rifle Platoons | 13.5 |
| 3/3 | Regular Rifle Platoons | 9 |
| 2/4 | Green Rifle Platoons | 7.5 |
| 1/1/1 | Engineer (Rifle) Platoons | 10.5 |
| 4/4 | Snipers | 3 |
| 1/1 | All HMGs | 6 |
Commanders
| Type | Cost |
|---|---|
| Platoon Commander +1 | 2 |
| Company Commander +1 | 4 |
Infantry Fire Support
| FMs | Weapon | Cost |
|---|---|---|
| Unlimited | Knee Mortar | 2 |
| 12 FMs | 50mm Mortar | 4 |
| 12 FMs | 81mm Mortar | 6 |
| 12 FMs | 65mm IG | 6 |
| 3 FMs | Heavy Artillery | 10 |
Armor
| Units/Period | Type | Cost |
|---|---|---|
| 1/1/1 | Tanks | 9 |
Anti-Tank Guns
2/2/2 ... 3
Fortification Package
3/4/5 ... 2 Bunkers; 2 Wire; 1 Mine ... 6
Note: extra Bunker, fewer Wire.
- Extra to equip each Squad in a Platoon (all or none) with an Anti-Tank Rifle: .5 Point per Squad.
- Extra to equip each Squad in a Platoon (all or none) with an Anti-Tank Rifle: .5 Point per Squad.
France
When Attacking:
Large: 25 Points; Mid-Size 21 Points; Small: 17 Points
When Defending
Large: 17 Points; Mid-Size 14.5 Points; Small: 12 Points
| Units/Period | Unit Type | Unit Cost |
|---|---|---|
| Infantry | ||
| 1/1 | Veteran Rifle Platoons | 13.5 |
| 2 | Regular Rifle Platoons | 9 |
| 6 | Green Rifle Platoons | 7.5 |
| 1 | Regular SMG Platoons | 7.5 |
| 1 | Engineer (Rifle) Platoons | 10.5 |
| 1 | Snipers | 3 |
| 2 | All HMGs | 6 |
Commanders
| Type | Cost |
|---|---|
| Platoon Commander +1 | 2 |
| Company Commander +1 | 4 |
Infantry Fire Support
| FMs | Weapon | Cost |
|---|---|---|
| 12 FMs | 60mm Mortar | 4 |
| 12 FMs | 81mm Mortar | 6 |
| 12 FMs | 65mm IG | 6 |
| 3 FMs | Heavy Artillery | 10 |
Armor
| Units/Period | Type | Cost |
|---|---|---|
| 1 | Tanks | 9 |
| 1 | Halftracks | 8 |
Anti-Tank Guns
1 ... 3
Fortification Package
3 ... 1 Bunker; 3-Wire; 1 Mine ... 6
- Extra to equip a Squad with an Anti-Tank Rifle: .5 Point per Squad.
Great Britain
When Attacking:
Large: 20 Points; Mid-Size 16.5 Points; Small: 13 Points
When Defending
Large: 13 Points; Mid-Size 11.5 Points; Small: 9 Points
| Units/Period | Unit Type | Unit Cost |
|---|---|---|
| Infantry | ||
| 1/1/2 | Veteran Rifle Platoons | 13.5 |
| 3/4/4 | Regular Rifle Platoons | 9 |
| 4/2/5 | Green Rifle Platoons | 7.5 |
| 1/1/1 | Regular SMG Platoons | 7.5 |
| 1/1/1 | Engineer (Rifle) Platoons | 10.5 |
| 1/1/2 | Snipers | 3 |
| 2/2/2 | All HMGs | 6 |
Commanders
| Type | Cost |
|---|---|
| Platoon Commander +1 | 2 |
| (1) Platoon Commander +2* | 4 |
| Company Commander +1 | 4 |
| (1) Company Commander +2* | 6 |
*Only 1 such commander may be purchased.
Extra for a Veteran Company Commander: 2 Points
Infantry Fire Support
| FMs | Weapon | Cost |
|---|---|---|
| 12 FMs | 2" Mortar | 4 |
| 12 FMs | 3" Mortar | 6 |
| 10 FMs | 4.2" Mortar | 7 |
| 3 FMs | Heavy Artillery | 10 |
Armor
| Units/Period | Type | Cost |
|---|---|---|
| 3/4/5 | Tanks | 9 |
| 1/1/2 | Halftracks | 8 |
Anti-Tank Guns
1/2/3 ... 3
Fortification Package
2/3/2 ... 1 Bunker; 3-Mine; 1 Mine ... 6
- Extra to equip a Squad with an Anti-Tank Rifle: .5 Point per Squad.
- Extra to equip a Squad with a PIAT: 2 Points per Squad.
- Extra to make an Engineer Platoon Assault Engineers (all or none): 1 Point per Squad.
Russia
When Attacking:
Large: 25 Points; Mid-Size 21 Points; Small: 17 Points
When Defending
Large: 17 Points; Mid-Size 14.5 Points; Small: 12 Points
| Units/Period | Unit Type | Unit Cost |
|---|---|---|
| Infantry | ||
| 1/2/2 | Veteran Rifle Platoons | 10 |
| 2/3/6 | Regular Rifle Platoons | 7.5 |
| 6/6/6 | Green Rifle Platoons | 6 |
| 2/2/2 | Regular SMG Platoons | 10.5 |
| 1/1/1 | Green SMG Platoons | 4 |
| 1/1/1 | Engineer (Rifle) Platoons | 6 |
| 2/5/3 | Snipers | — |
| 2/2/2 | All HMGs | — |
Commanders
| Type | Cost |
|---|---|
| Platoon Commander +1 | 2 |
| (1) Platoon Commander +2* | 4 |
| Company Commander +1 | 4 |
| (1) Company Commander +2* | 6 |
*Only 1 such commander may be purchased.
Extra for a Veteran Company Commander: 2 Points
Infantry Fire Support
| FMs | Weapon | Cost |
|---|---|---|
| 12 FMs | 50mm Mortar | 4 |
| 12 FMs | 81mm Mortar | 6 |
| 12 FMs | 120mm Mortar | 7 |
| 12 FMs | 76mm IG | 6 |
| 4 FMs | Heavy Artillery | 10 |
Armor
| Units/Period | Type | Cost |
|---|---|---|
| 3/5/6 | Tanks | 9 |
| 1/1/1 | Halftracks | 8 |
Anti-Tank Guns
2/4/5 ... 3
Fortification Package
3/4/3 ... 1 Bunker; 3-Wire; 1 Mine ... 6
All Rifle Platoons are 4 Squads strong; all others are 3 Squads strong.
- Extra to equip a Squad with an Anti-Tank Rifle: .5 Point per Squad.
- Extra to equip a Squad with a Bazooka: 3 Points per Squad (note extra cost due to scarcity).
- Extra to make an Engineer Platoon Assault Engineers (all or none): 1 Point per Squad.
United States
When Attacking:
Large: 20 Points; Mid-Size 16.5 Points; Small: 13 Points
When Defending
Large: 13 Points; Mid-Size 11.5 Points; Small: 9 Points
| Units/Period | Unit Type | Unit Cost |
|---|---|---|
| Infantry | ||
| 1/1/2 | Veteran Rifle Platoons | 13.5 |
| 5/5/5 | Regular Rifle Platoons | 9 |
| 5/6/7 | Green Rifle Platoons | 7.5 |
| 1/1/1 | Regular SMG Platoons | 7.5 |
| 1/1/1 | Engineer (Rifle) Platoons | 10.5 |
| 1/1/1 | Snipers | 3 |
| 2/2/2 | All HMGs | 6 |
Commanders
| Type | Cost |
|---|---|
| (1) Platoon Commander +1* | 2 |
| (1) Platoon Commander +2* | 4 |
| (1) Company Commander +1* | 4 |
*Only 1 such commander may be purchased.
Leg Infantry Commanders with an asset of "0"
Extra for a Veteran Company Commander: 2 Points
Infantry Fire Support
| FMs | Weapon | Cost |
|---|---|---|
| 12 FMs | 60mm Mortar | 4 |
| 12 FMs | 81mm Mortar | 6 |
| 12 FMs | 75mm Howitzer | 6 |
| 3 FMs | Heavy Artillery | 10 |
Armor
| Units/Period | Type | Cost |
|---|---|---|
| 3/4/5 | Tanks | 9 |
| 2/3/4 | Halftracks | 8 |
Anti-Tank Guns
1/2/2 ... 3
Fortification Package
1/1/1 ... 1 Bunker; 3-Wire; 1 Mine ... 6
- Extra to equip a Squad with an Anti-Tank Rifle: .5 Point per Squad.
- Extra to equip a Squad in a Platoon with a Bazooka: 2 Points per Squad.
- Extra to make an Engineer Platoon Assault Engineers (all or none): 1 Point per Squad.
Tank/ATG Generation Tables
The emphasis in these charts is on vehicles and equipment found near/around infantry. They are purposely not meant to be exhaustive, and additional equipment can be represented by comparing them to the equipment represented in the charts.
Germany
| Die | 1939-'42 | 1943 | 1944-'45 |
|---|---|---|---|
| 2 | Pz IIB | Pz IIIG | Pz IIIG/M |
| 3 | Pz IIIE | Pz IIIG | Pz IV/F |
| 4 | Pz IIIG | Pz IV/F | Pz IV/G |
| 5 | Pz IIIG | Pz IIIJ | StuG III/Pz IV |
| 6 | Pz IIIG | Pz IIIJ | Pz IV/H |
| 7 | Pz IIIF | Pz IIIJ | Pz IV/H |
| 8 | Pz IIIF | StuG IIID | Panther |
| 9 | Pz IV/D | StuG IIID | Panther |
| 10 | Pz IV/D | Panther | Hetzer |
| 11 | Pz IV/F* | Panther | Jagdpanther |
| 12 | Tiger I* | Tiger I | Tiger II |
*re-roll again
ATG
- 1939-'42: 1-4 Pak 35; 5-6 Pak 38
- 1943: 1-4 Pak 38; 4-5 Pak 38
- 1944-'45: 1-5 Pak 40; 6 Pak 43 or Flak 88
Italy
| Die | 1940-'41 | 1942-'43 |
|---|---|---|
| 2 | M-11 | Semovente 41 |
| 3 | M-11 | Semovente 41 |
| 4 | M-13/14 | Semovente 40-'42 |
| 5 | M-13/14 | M-13/14 |
| 6 | M-13/14 | M-13/14 |
| 7 | M-13/14 | M-13/14 |
| 8 | Semovente 40-'42 | M-13/14 |
| 9 | Semovente 40-'42 | M-13/14 |
| 10 | Semovente 40-'42 | M-15 |
| 11 | Semovente 41 | M-15 |
| 12 | Semovente 41 | P-26 |
ATG: 1940-'41: 1-3 37mm; 4-6 47mm. 1942-'43: 1-2 37mm; 3-6 47mm.
Japan
| Die | 1940-'41 | 1942-'45 |
|---|---|---|
| 2 | Lt. Tank 95 | Lt. Tank 95 |
| 3 | Lt. Tank 95 | Med. Tank 89 |
| 4 | Lt. Tank 95 | Med. Tank 89 |
| 5 | Lt. Tank 95 | Med. Tank 89 |
| 6 | Med. Tank 89 | Med. Tank 89 |
| 7 | Med. Tank 89 | Med. Tank 89 |
| 8 | Med. Tank 89 | Med. Tank 89 |
| 9 | Med. Tank 89 | Med. Tank 97 |
| 10 | Med. Tank 89 | Med. Tank 97 |
| 11 | Med. Tank 89 | Med. Tank 97 |
| 12 | Med. Tank 89 | Med. Tank 97 |
ATG: 1940-'41: 1-4 37mm; 5-6 47mm. 1942-'45: 1-3 37mm; 4-5 47mm; 5-6 57mm.
France
| Die | 1940-'41 |
|---|---|
| 1 | Light Tank (see French Tank Data charts) |
| 2 | Light Tank (see French Tank Data charts) |
| 3 | Light Tank (see French Tank Data charts) |
| 4 | Light Tank (see French Tank Data charts) |
| 5 | Somua |
| 6 | Somua |
| 7 | Somua |
| 8 | Somua |
| 9 | Char-B |
| 10 | Char-B |
| 11 | Char-B |
ATG: 1-4: 25mm/47mm; 5-6: 47/53
Great Britain
| Die | 1940-'41 | 1942-'43 | 1944-'45 |
|---|---|---|---|
| 2 | M-3 | M-3 | Valentine XI |
| 3 | Cromwell | M-3 | Cromwell VCS |
| 4 | Valentine VII | Valentine VIII | Sherman |
| 5 | Crusader CS | Matilda II | Cromwell IV |
| 6 | Matilda IICS | Matilda II | Cromwell IV |
| 7 | Matilda II | Grant | Sherman |
| 8 | Matilda II | Grant | Sherman |
| 9 | Matilda II | Grant | Firefly |
| 10 | Matilda IICS | Sherman | Churchill VII |
| 11 | Matilda II | Sherman | Cromwell VIICS |
| 12 | A-10/A-13CS | Sherman | Churchill VII |
ATG: 1940-'41: 1-4 2 Pdr; 5-6 6 Pdr. 1942-'43: 1-2 Pdr; 3-6 6 Pdr. 1944-'45: 1-5 6 Pdr; 6-7 Pdr.
Russia
| Die | 1940-'41 | 1942-'43 | 1944-'45 |
|---|---|---|---|
| 2 | KV-1 | KV-1C | SU-152 |
| 3 | T-26 | SU-152 | SU-122 |
| 4 | T-26 | SU-122 | T-34/C |
| 5 | T-26 | T-26 | T-34/C |
| 6 | T-26 | T-26 | T-34/C |
| 7 | T-26 | T-34/C | T-34/85 |
| 8 | T-34A | T-34/C | T-34/85 |
| 9 | T-34A | T-34/C | SU-85 |
| 10 | T-34A | T-34/C | SU-100 |
| 11 | KV-1A | T-34/C | JS-II |
| 12 | KV-II | T-34/85 | JSU-152 |
ATG: 1940-'41: 1-6 45mm. 1942-'43: 1-4 45mm; 5-6 76mm. 1944-'45: 1-3 57mm; 4-5 76mm; 6 85mm.
United States
| Die | 1941 | 1942-'43 | 1944-'45 |
|---|---|---|---|
| 2 | M-3 | M-5 | M-5 |
| 3 | M-3 | M-3 | Sherman E-8 |
| 4 | M-3 | M-5 GMC | Sherman |
| 5 | M-3 | Grant | Sherman |
| 6 | M-3 | Grant | Sherman |
| 7 | M-3 GMC | Sherman | Sherman |
| 8 | M-3 GMC | Sherman | M-10 |
| 9 | M-3 | Sherman | M-10 |
| 10 | Priest | Sherman | M-36 |
| 11 | Priest | M-10 | Sherman IB |
| 12 | Priest | Sherman III | Pershing |
ATG: 1941: 1-4 37mm; 5-6 57mm. 1942-'43: 1-5 57mm; 6 3" Gun. 1944-'45: 1-5 57mm; 6 3" Gun.
Data Sheets
Germany
| Vehicle | ARM | ACC | PEN | Move | HD |
|---|---|---|---|---|---|
| Pz IIIE | 2/1 | 0 | -3 | 5/1 SQ | YES |
| Pz IIIG | 2/1 | 0 | -2 | 5/1 SQ | YES |
| Pz IIIJ-M | 3/1 | 0 | 0 | 5/1 SQ | YES |
| Pz IV D-E | 3/2 | 0 | -2 | 4/2 SQ | YES |
| Pz IV F | 3/2 | 0 | 0 | 4/2 SQ | YES |
| Pz IV/G-H | 4/2 | +1 | +1 | 4/2 SQ | YES |
| Pz V | 6/2 | +2 | +2 | 5/2 SQ | YES |
| Pz VI | 5/5 | +2 | +2 | 5/2 SQ | YES |
| Pz VIB | 6/6 | +2 | +3 | 5/2 SQ | YES |
| StuG III | 3/2 | -2 | 0 | 4/2 SQ | NO |
| StuG IIIG | 4/2 | +1 | +1 | 4/2 SQ | NO |
| StuG IV | 4/2 | +1 | +1 | 4/2 SQ | NO |
| Jagdpanzer IV | 4/2 | -2 | 0 | 5/3 SQ | NO |
| Marder | 4/3 | 0 | +1 | 5/3 SQ | NO |
| Jagdpanther | 4/2 | +5 | +1 | 4/2 SQ | NO |
| Pak 35 ATG | — | 0 | -3 | 0/0 SQ | — |
| Pak 36 ATG | — | 0 | -4 | 2/1 SQ | — |
| Pak 40 ATG | — | 0 | 0 | 4/2 SQ | — |
| Pak 43 ATG | — | +2 | +3 | 5/2 SQ | — |
Italy
| Vehicle | ARM | ACC | PEN | Move | HD |
|---|---|---|---|---|---|
| M-11 | 2/1 | 0 | -3 | 2/1 SQ | YES |
| M-13/14 | 2/1 | 0 | -2 | 2/1 SQ | YES |
| M-15 | 3/1 | 0 | -2 | 2/1 SQ | YES |
| P-26 | 4/2 | 0 | -1 | 4/2 SQ | YES |
| Semovente 40/42 | 3/1 | -2 | -1 | 4/2 SQ | YES |
| Semovente 41 | 3/1 | +2 | +2 | 5/2 SQ | YES |
| 47mm ATG | — | 0 | -3 | 1/1 SQ | — |
| 65mm ATG | — | 0 | -2 | 2/1 SQ | — |
| IG 47/32 | — | -2 | 0 | 4/1 SQ | — |
| Anti-Tank Rifle | — | -2 | -4 | 0 SQ | — |
Japan
| Vehicle | ARM | ACC | PEN | Move | HD |
|---|---|---|---|---|---|
| Lt. Tank 95 | 1/1 | 0 | -3 | 5/1 SQ | YES |
| Med. Tank 89 | 2/1 | 0 | 0 | 2/1 SQ | YES |
| Med. Tank 97 | 2/1 | 0 | -2 | 2/1 SQ | YES |
| 45mm ATG | — | 0 | 0 | 5/1 SQ | — |
| 37mm ATG | — | 0 | -2 | 2/1 SQ | — |
| IG 75mm | — | -2 | 0 | 4/2 SQ | — |
| Anti-Tank Rifle | — | -2 | -4 | 0 SQ | — |
France
| Vehicle | ARM | ACC | PEN | Move | HD |
|---|---|---|---|---|---|
| Somua | 3/2 | 0 | 0 | 2/1 SQ | YES |
| Char-B | 4/3 | 0 | 0 | 4/2 SQ | YES |
| Light* | 2/2 | 0 | -2 | 2/1 SQ | NO |
| 25mm ATG | — | 0 | -3 | 0/0 SQ | — |
| 47mm ATG | — | 0 | 0 | 3/1 SQ | — |
| IG 75mm | — | -2 | 0 | 4/2 SQ | — |
| Anti-Tank Rifle | — | -2 | -4 | 0 SQ | — |
| AMR HT | 2/2 | — | — | MACHINEGUN/4/1 SQ | NO |
*Renault 35/40 or FT with cannon; Hotchkiss 35/39.
Great Britain
| Vehicle | ARM | ACC | PEN | Move | HD |
|---|---|---|---|---|---|
| Cromwell I | 3/2 | 0 | 0 | 5/1 SQ | YES |
| Crom IV | 3/2 | 0 | 0 | 4/2 SQ | YES |
| Crom VII | 4/2 | 0 | 0 | 4/2 SQ | YES |
| Crom VCS | 4/2 | -2 | 0 | 5/2 SQ | YES |
| Crom VIICS | 4/2 | -2 | 0 | 5/2 SQ | YES |
| Matilda II | 4/2 | 0 | -2 | 2/1 SQ | YES |
| Matilda IICS | 4/2 | -2 | -2 | 4/2 SQ | YES |
| Churchill I | 4/2 | 0 | -2 | 4/2 SQ | YES |
| Churchill IV | 4/2 | 0 | 0 | 3/1 SQ | YES |
| Church. V | 4/2 | -2 | 0 | 5/2 SQ | YES |
| Church. VI | 6/4 | 0 | 0 | 4/2 SQ | YES |
| Church. VII | 6/4 | 0 | 0 | 5/2 SQ | YES |
| Valentine | 3/2 | 0 | 0 | 3/1 SQ | YES |
| Valentine XI | 3/2 | 0 | 0 | 4/2 SQ | YES |
| Sherman | 4/2 | 0 | 0 | 4/2 SQ | YES |
| Sherman IB | 4/2 | 0 | 0 | 5/5 SQ | YES |
| Firefly V | 4/2 | +2 | +2 | 4/2 SQ | YES |
| 2 Pdr ATG | — | 0 | -2 | 1/1 SQ | — |
| 6 Pdr ATG | — | 0 | -2 | 2/1 SQ |
Russia
| Vehicle | ARM | ACC | PEN | Move | HD |
|---|---|---|---|---|---|
| T-26/BT-7 | 2/2 | 0 | 0 | 2/1 SQ | NO |
| T-34A | 3/2 | 0 | 0 | 4/2 SQ | NO |
| T-34B/C | 4/3 | 0 | 0 | 4/2 SQ | NO |
| T-34/85 | 5/3 | +1 | +1 | 4/2 SQ | NO |
| KV-1 | 5/3 | 0 | 0 | 4/2 SQ | NO |
| KV-1A | 5/3 | 0 | 0 | 4/2 SQ | NO |
| KV-1C | 6/3 | 0 | 0 | 4/2 SQ | NO |
| KV-II | 5/3 | -2 | +2 | 5/3 SQ | NO |
| JS-II | 6/3 | +2 | +2 | 5/3 SQ | NO |
| SU-85 | 4/3 | +1 | +1 | 5/3 SQ | NO |
| SU-100 | 4/3 | +1 | +1 | 5/3 SQ | NO |
| SU-122 | 4/3 | -2 | +1 | 5/3 SQ | NO |
| SU-152 | 6/4 | -2 | +2 | 5/3 SQ | NO |
| 45mm ATG | — | 0 | -2 | 1/1 SQ | — |
| 57mm ATG | — | 0 | -2 | 1/1 SQ | — |
| 76mm ATG | — | +1 | 0 | 2/1 SQ | — |
| 76mm ATG | — | 0 | 0 | 4/2 SQ | — |
| IG 76mm | — | -2 | -2 | 4/1 SQ | — |
| Anti-Tank Rifle | — | -2 | -4 | 0 SQ | — |
| M-3 HT | 1/1 |
United States
| Vehicle | ARM | ACC | PEN | Move | HD |
|---|---|---|---|---|---|
| Grant | 3/2 | 0 | 0 | 4/2 SQ | YES |
| Sherman | 4/2 | 0 | 0 | 4/2 SQ | YES |
| Sherman E-8 | 4/2 | +1 | 0 | 4/2 SQ | YES |
| Sherman IB 76 | 4/2 | -1 | 0 | 5/2 SQ | YES |
| Sherman Jumbo | 6/2 | 0 | 0 | 5/2 SQ | YES |
| Sherman Jumbo 76 | 6/2 | +1 | 0 | 5/2 SQ | YES |
| Pershing | 5/2 | +1 | 0 | 5/2 SQ | YES |
| T-30 HMC | 3/2 | 0 | -2 | 4/2 SQ | NO |
| M-7 Priest | 2/2 | 0 | 0 | 3/1 SQ | NO |
| M-10 TD | 3/1 | 0 | -2 | 4/2 SQ | YES |
| M-36 TD | 3/1 | 0 | -2 | 5/2 SQ | YES |
| 37mm ATG | — | 0 | -3 | 2/1 SQ | — |
| 57mm ATG | — | +2 | +2 | 4/2 SQ | — |
| Bazooka | — | -2 | +1 | 2 SQ | — |
| M-3 HT | 1/1 | — | — | MACHINEGUN/4/1 SQ | NO |
| .50 cal.* | — | -2 | -4 | 2 SQ | — |
| .50 cal.** | — | — | — | MACHINEGUN/4/1 SQ | NO |
*Use against armored targets.
**Use against dismounted targets.
Stalingrad
Somewhere inside Stalingrad, 1942
German Order of Battle
1-Infantry Company (Morale: All Regulars)
- 1 Company Commander (+2)
- 3 Platoon Commanders (+1)
- 3 Platoons of 3 Rifle Squads
- 1 HMG
1-Infantry Company (Morale: Mixed)
- 1 Company Commander (Veteran) (+2)
- 2 Platoon Commanders (+1)
- 2 Platoons of 3 (Regular) Rifle Squads,
- 1 Platoon Commander (+2)
- 1 Platoon of 3 (Veteran) Rifle Squads
- 1 HMG
- 2 Snipers
German Totals:
2 CCs; 6 PCs; 18 Squads; 2 HMGs; 2 Snipers.
All Germans deploy Hidden inside any buildings with black chimneys.
Russian Order of Battle
1-Infantry Company (All Regulars)
- 1 Company Commander (Veteran) (+1)
- 3 Platoon Commanders (+1)
- 3 Platoons of 4 Rifle Squads
- 1 HMG
1-Infantry SMG Company (All Regulars)
- 1 Company Commander (Veteran) (+1)
- 2 Platoon Commanders (+1)
- 2 Platoons of 3 SMG Squads
- 1 HMG
- 3 Snipers
Russian Totals:
2 CCs; 5 PCs; 20 Squads; 2 HMGs; 3 Snipers.
All Russians deploy Hidden inside any buildings with white chimneys.
Note: For this scenario, Russian PCs provide +1 for Close Combat and Rallying. If this proves too tough, then let their PCs assist only in Close Combat, as per their usual requirements. CCs are unrestricted.
Victory Conditions
Immediate Victory is claimed for either side when any one of the following two conditions are met:
- Capture of all 6 factory buildings (outlined in the pavement pattern). Note that the Factory Buildings are treated like any others.
- Capture of all buildings in a given City Block (as indicated for Blocks A, B, C and D. Only Squads, HMGs or CCs may capture Buildings — PCs may not.
Notes
Building Capacity is 2 Squads (remember that CCs and PCs do not count towards capacity).
Note the use of Building Complexes; see sec. 4.4.1a. The white chimney Buildings touching at the top of Blocks C-D are considered individual Buildings and not a Building Complex.
Building Representation
From cardboard, we cut out 4" squares with a top view look of pavement. Then, we placed a building on each for aesthetic purposes; targeting was from the center of the cardboard base. Copy this procedure, or omit the cardboard and use your own buildings; or if you lack Buildings, just use the cardboard.
This scenario may be played with forces other than those indicated above, providing the game is not substantially larger or smaller.
Action Sequence Example
Position #2
White wants to move into cover and perhaps flank the HMG position. From an FO not shown here, he successfully places a 50mm Smoke Mission with a roll of a "5". Then, using a Group move with the Squad as Group Leader, he moves into the nearby woods.
But Black has a Hidden Squad guarding the HMGs left. This now performs Reactive Fire as White enters the woods. It rolls 3 dice per attack (one die minus 1 die for Protective Cover), beginning with the Black Rifle Squad.
It rolls a "5" and a "4" (1 Hit) and Pins the Rifles.
It now fires at the PC (an exception to the Target Proximity rule, see sec. 6.3) and rolls two "5s" (No Effect). It is now marked for NO FIRE because it failed to achieve a Pin or better on its second attack.
Position #4
White still has the Initiative because no Suppression has been achieved by Black. White rolls to Rally the Squad and does. Feeling lucky, he now attacks the enemy Rifles in Close Combat with his own Rifles; he keeps his PC within 1 stand for assistance. The unstated HMG, with its odd Arc of Fire, can only observe the attack.
White rolls a "5" +1 for the PC is "6". Black rolls a "3" and his Rifle Squad is eliminated. Now White proudly eyes the HMG, knowing he can attack it without being fired upon.
White now attacks the HMG, and has a key advantage in the combat: Black rolls a "6" minus 2 for being a Crew Served Weapon is "4". But White rolls only a "5" +1 for his PC is "6". Black HMG and the White Rifle Squad and PC are eliminated. The Initiative shifts.
White played well by putting himself into position to win. He used the Fire Mission wisely. He did not risk losing the Initiative with the reckless fire of his one squad against targets in Cover. He took a gamble using Close Combat on an HMG advantage — and it almost worked.
Maybe Black was too eager to shoot with his Rifles; perhaps he could have caught White in the open ground (3 dice) or maybe even with Ambush Fire (4 dice) if White moved into the woods.
Advanced Rules
1. Multi-Player Games
CROSSFIRE is designed for two opposing players. Multi-player games are possible with the current method but sometimes a player is left out of the action for a length of time. The following options address this concern.
- One player per side is designated the overall commander. He divides his force among his player-subordinate commanders. Each player must control at least one Platoon. Each player performs one Action or "pass" in an order determined by the overall commander.
- A player may not perform a second action until all commanders have completed their first Action. A commander may opt to "pass" (perform no Action) without his side losing initiative. Only when a commander's action is unsuccessful or when the overall commander declares a "pass" does the Initiative shift to the other side. But the Initiative does not shift until all Commanders have performed one Action or passed. So, in a 3 player game, if the first player loses the Initiative, the other two players are entitled to one Action each before the Initiative passes. As an alternative, the Initiative shifts only after all players on a side have either Failed or passed.
- For every Action performed, Reactive Fire may be taken by eligible Squads of the Non-Phasing Side as per the usual rules.
2. Guns and HMGs on Vehicles
This rule applies specifically to vehicles armed with both a Main Gun and a MG; tanks and tank destroyers are usually so provided, while APCs are not. It increases the lethality of tanks from the basic game.
- The vehicle must remain stationary the entire Initiative to fire either the Gun or MG.
The vehicle may fire both the Main Gun and the MG in a single Action, and may do so as Firegroup. Conversely, the Main Gun may fire at one target and the MG at another. If the Main Gun does not produce a Kill or a Suppression as described in sec. 11.2.1, the Initiative shifts. Firing the MG with the Main Gun does not entail a loss of Initiative if it misses (i.e. the MG is a free shot in this case).
- If only the MG fires in an Action (and not the Main Gun also), Initiative is lost if the MG fails to Suppress the target. If it does Suppress the target, it is entitled to fire again; i.e. normal rules are in effect.
3. Tunnels
These represent either dug tunnels, like in Japanese island warfare, or sewers and connecting basements used in urban combat.
- A Tunnel links any 2 Features within 4 stands of each other, or as specified by a scenario. A number of Tunnels may be awarded to one side to be indicated secretly, or Tunnels may be known to both sides. The uses and limitations of Tunnels may be as diverse as a designer wishes. These are guidelines:
- A Tunnel permits Squads to move from one Feature to another without being exposed to Fire. Hidden Squads may do this and remain Hidden.
- In the case of buildings or small natural Features, Squads may move to an enemy occupied feature and directly into Close Combat.
4. Pre-Planned Bombardment (PPB)
PPB represents Indirect Fire concentrations from numerous off-table Batteries. It is used to "soften-up" enemy defensive positions prior to an attacker-defender scenario. PPB is adjudicated after Deployment but before any Actions are performed.
Procedure
Each scenario awards a number of PPB Fire Missions as determined by the designer. For each FM allotted the firer selects a suspected terrain Feature in which Squads may be Hidden; see sec. 5.3. There is no limit to the number of FMs that may be applied against a single Feature.
- One die is rolled for each FM. A die roll of "5" Suppresses a Squad, a "6" Kills a Squad; anything else is a Miss. Occupants in Buildings and Bunkers may be Suppressed only with a "6". Two consecutive Suppression results Kill a Squad. For simplicity, the same Squad gets attacked until it is Killed, so that there can never be more than one Suppressed unit in a Feature after all PPB is completed. Conversely, players may track Suppressions on different Squads.
- Suppression and Kills are chosen by the owning player as he deems fit on any Squads or Commanders inside that Feature. Obviously, if the Feature is empty, fire effects are not inflicted.
- Just like the concept of Hidden Placement, PPB is based somewhat on the honor system. If and when any surviving occupants of an attacked Hidden Feature are revealed, the owning player reveals the remaining Suppressed unit (if any). If he wishes, he may also inform him if any Squads have been Killed.
Note: PPB Fire Missions can dramatically alter the play balance of a scenario. PPB effectiveness is determined by a combination of FMs allotted, player guesswork, and luck. It takes practice for a designer to know how many FMs to allot in a scenario.
5. Building Floors (experimental)
At present, all buildings are single story structures. For gamers who own detailed models of multi-story buildings, the vertical movement of troops between floors can be represented. Visualize the vertical dimension as a series of contiguous sectors as with Building Complexes. Use all the rules for movement, firing, close combat, and sighting that you would for normal lateral movement situations and apply them vertically. Sighting and firing from the outside of a multi-story building is unaffected by the target being on an upper floor. Building floor capacity may be increased as desired.