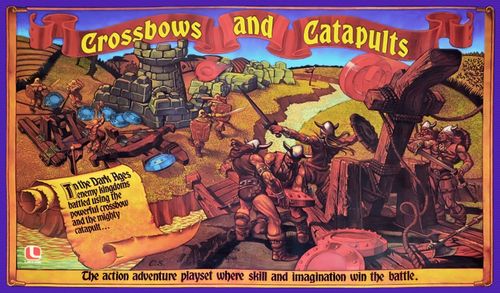
Crossbows and Catapults
Crossbows and Catapults Rulebook
Table of Contents
Table of Contents
Contents
Battle set includes 2 towers, 2 courtyards, 24 blocks, 8 warriors, 10 flags, 20 battle caroms, 2 crossbows and 2 catapults.
Assembly
TOWER: Apply decals provided to castle doors (as shown on package).
FLAGS: Snap flags off the plastic runner and apply decals provided. (Red flags are Vikings and blue flags are Barbarians).
BATTLE CAROMS: Apply decals provided to center of each battle carom. (Red battle caroms are Vikings and blue battle caroms are Barbarians.)
WARRIOR FIGURE: Snap warriors off runners to play.
CATAPULT ASSEMBLY:
- Snap arm and base off runner.
- Insert arm from bottom of base and snap into place.
- Hook rubber band around post in front, wrap around back of catapult arm, and hook to same front post.
CROSSBOW ASSEMBLY:
- Snap shaft and base off runner.
- Insert shaft into base as far as it will go.
- Hook rubber band on left pin on underside of bow, wrap around top of bow and through notch in top of shaft and back to right side of bow and hook to underneath pin.
Before the Battle Begins
BEFORE THE BATTLE: This booklet contains several suggestions of how to play with your CROSSBOWS AND CATAPULTS BATTLE SET. Before each battle, decide whether to follow the suggested tactics or create new ones. You decide.
For example, the booklet explains four ways to win. You decide before play begins which way to win, choose one or combine elements of each or create your own.
- Use your imagination!
- Invent different ways to play!
But remember: ALL RULES MUST BE AGREED UPON BY BOTH COMMANDERS BEFORE THE BATTLE BEGINS.
Set Up to Play
Battle set includes 2 towers, 2 courtyards, 24 blocks, 8 warriors, 10 flags, 20 battle caroms, 2 crossbows and 2 catapults.
Set up the battle arena as shown in the diagram below. This requires an area about 6 feet long and 5 feet wide. This area is adjustable according to the size and skill of the commanders.
The setup diagram identifies these areas and pieces:
- COURTYARD (Battle Carom becomes spy)
- FLAGS
- WALL
- TOWER
- CATAPULT
- CROSSBOW
- WARRIOR
- BATTLE CAROMS
- BATTLEFIELD
- CASTLE GROUNDS (Battle Carom taken prisoner)
- OUT OF BOUNDS (Return Battle Carom to player)
Play Elements
THE COURTYARD: The Courtyard is the rectangular mat upon which you build your castle. Drawn in the middle is the treasure. It is surrounded by a moat next to green cliffs, and is made of cobblestones. The bridge faces your opponent's castle.
- If you land a battle carom on the courtyard, it is a spy.
- If you land a battle carom on the bridge, you can attack from there.
- Battle caroms landing on the moat are either taken prisoner or taken out of the contest (commanders decide).
The courtyard diagram labels the following spots: PRISONER OR DROWNED and MOAT (the surrounding ring), ATTACK FROM HERE / BRIDGE, SPY and COURTYARD (the cobblestone area), and LAND HERE TO WIN / TREASURE (the center).
The Tower / The Moat / The Castle Grounds
THE TOWER: The tower is placed on top of the treasure in the middle of the courtyard to protect it. Inside the tower is the dungeon.
- Captured battle caroms called prisoners are placed inside the tower in the dungeon.
THE MOAT: The Moat surrounds the courtyard.
- Battle caroms that land on the moat are either captured and placed inside the tower or are "killed" (taken out of play).
THE CASTLE GROUNDS: Castle grounds are marked by four of your flags.
- If an opponent's battle carom lands on your castle's grounds, then it is taken prisoner and placed in the tower's dungeon.
The Walls / The Flags
THE WALLS: Build your castle walls any way you like. But be sure to protect your tower and the secret treasure below it.
THE FLAGS: Flags are the spirit of each army. They help to identify and define territory. There are five to each side. One flies proudly from your tower and the others are placed on either side of the Courtyard to define the castle grounds.
- If you knock over your opponent's tower flag, your opponent returns the battle carom that you launched and one prisoner (if he has any). The flag is immediately reset and play continues.
The Crossbow and the Catapult
CATAPULTS: The "ultimate" weapon that hurls battle caroms at your opponent's walls and tower.
CROSSBOWS: Perfect for toppling walls from close range on the battlefield.
- The first time a battle carom is launched by either the catapult or the crossbow, it must be fired from within your castle grounds. From then on, you shoot the battle carom from where it previously landed.
- TAKE TURNS SHOOTING.
- If your battle carom lands out-of-bounds, it is returned without penalty and you can shoot it on your next turn from within your castle grounds.
- If the battle carom stops on your opponent's courtyard, it is called a SPY. Replace it with a warrior figure and return the carom to your arsenal for future play.
- If your battle carom lands on your opponent's castle grounds, it is taken PRISONER. Your opponent places your battle carom in the dungeon.
- If your battle carom lands on the battle field, it remains there until your next turn when you can use either your catapult or crossbow to shoot it from that spot.
- If when using your crossbow or catapult your battle carom hits one of your opponent's battle caroms, then you take his battle carom prisoner.
The carom decals are shown for both armies: BARBARIANS (used with grey castle) and VIKINGS (used with tan castle), each with a WARRIOR decal and a KING decal.
How to Operate the Weapons
HOW TO OPERATE CATAPULT (see diagrams below)
- Position the battle carom securely on the "X" on the catapult lever.
- While holding the base of the catapult with one hand, press down the lever with your other hand. Release the lever.
HOW TO OPERATE CROSSBOW (see diagrams below)
- Pull back the Crossbow shaft with one hand. Position the battle carom to touch the bow (arc) of the crossbow directly in front of the shaft.
- Hold the base of the Crossbow with one hand and release the shaft with the other hand.
CATAPULTS: The "Ultimate Weapon" that hurls battle caroms at your opponent's walls and tower.
CROSSBOWS: Perfect for toppling walls from close range on the battlefield or attacking other warriors.
Battle Caroms / Spies / Kings
THE BATTLE CAROMS: Each army has 9 battle caroms and 1 king. They can attack enemy walls or enemy battle caroms.
- SPIES: When a battle carom lands on an opponent's courtyard inside the moat area, it is called a SPY.
- KINGS: (optional, for greater challenge) The king is the champion warrior of his army. He can only be attacked by another king. If he is hit by a regular warrior, that warrior is captured. If he lands as a spy, then he is released by two of his warriors.
A king on the battlefield always has a figure on top to mark him.
Warrior Figures
THE WARRIOR FIGURES: Warrior figures replace battle caroms who become spies. They are also placed on top of king battle caroms to identify them.
- Warrior figures can be traded for prisoners (commanders decide).
- Spies can be traded for prisoners (commanders decide).
Ways to Win
- Tower Toppler: knock over your enemy's tower before he topples yours.
- Victory by Capturing Prisoners: capture all your opponent's battle caroms and victory is yours.
- Capture the Secret Treasure: topple your enemy's tower or knock it out of the way and land a battle carom (spy) on his secret treasure.
- Spy Assault: get four spies in your enemy's courtyard.
Accessories Available
CROSSBOWS AND CATAPULTS ACCESSORIES: There's an entire line of Crossbows and Catapults reinforcements available separately for hours of imaginative fun. Collect them all and set the stage for even greater battles!
- Castle Outposts
- Battering Ram
- Dragon