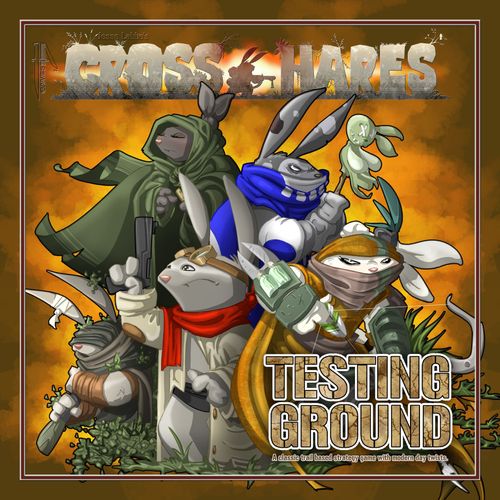
Cross Hares: Testing Ground
Cross Hares: Testing Ground Rulebook
Table of Contents
Table of Contents
Components
1 Rules of Play Book • 1 Illustrated Novel • 6 Illustrated Character Pawns • 6 Plastic Character Pawns • 6 Character Boards • 5 Double Sided Adventure Boards • 10 Event Cards • 49 Strong Hold Cards • 49 Testing Ground Cards • 2 Token Cards • 6 Plastic Stands • 30 Item Markers • 20 Specialty Markers • 1 Movement Die • 1 Research Die • 1 Challenge Die • 2 Curse Tokens • 1 Undead Token • 3 Trap Tokens • 1 Game Board
Set-up
Shuffle and place the three decks of cards on the board in their assigned spots.
- Event deck: Flip over the top card from the EVENT deck (and only this deck). Don't worry about what it says for now, but if you want you can admire the cool artwork on it... I don't mind.
- Strong Hold deck
- Testing Ground deck
Alternative play: At the start of the game, each player picks two Event cards (of his choice), and those are the only cards in the Event pile. So a two-player game would have four cards. Three players would have six cards, and so on.
Place all the Item and Specialty Markers somewhere where everyone can reach them. We always put them in the area under Sazou and it seems to work well there.
Place all the ADVENTURE boards together somewhere. There are a total of 10 adventures... one for each territory.
Objective: Be the first player to reach the mysterious FACTORY and DEFEAT whatever lurks there (see page 9!).
OK, now all the players roll the Challenge die to see who goes first. The player who rolls the highest goes first, and game play goes clockwise from there.
The highest-rolling player chooses his character first, and so on. And because I haven't explained anything about the characters, just choose the one you think looks the best. Place the unused characters back in the box.
The player who picked his character last gets to place his pawn on the STARTING ZONE first. The second to last goes second and so on. Zone 1 is the farthest but has more bonus spaces. There can be only one pawn per Starting Zone.
Set-up is complete!! See, that wasn't so hard.
The Dice
Three different dice come with Testing Ground: the Movement die, the Research die, and the Challenge die.
- Movement die: The only time you use the Movement die is when you are moving your pawn from one zone on the board to another. If you roll a Research symbol, you do not advance but instead roll the Research die and end your turn. You be smart!
- Research die: The Research die is rolled anytime you acquire a Research symbol. This is done by landing on a Research symbol, by rolling one on the Movement die or by a card that directs you to roll the Research die. If you roll an Item or Specialty symbol, you acquire one of the Item or Specialty markers. If you roll the Event, you flip the next Event card. If you roll the Adventure symbol, you go on an Adventure! More on this later.
- Challenge die: This is used for Attacks, during Adventures and for everything else. I hope this is the die you used to see who goes first. (If you didn't use it for that, everything is probably all messed up, and you should put everything back in the box and never open it again.)
OK player 1, roll the Movement die and let the fun begin! Move your character's pawn the number rolled. If you roll the Research symbol, roll the Research die. If you rolled a number and have moved, here are some of the spaces you might have landed on.
Cards and Zones
There is a ZONE KEY on the board to remind you of all the zones.
- Blank zone: A BLANK is a free space where nothing happens. A BLANK zone and an EMPTY zone are two different things. A Blank zone is a space without any symbols on it. An EMPTY zone is ANY space without a Character on it.
- Strong Hold (card): You may draw a Strong Hold card. These cards may be played at different times throughout the game. A player may only hold a maximum of 4 Strong Hold cards in his hand unless he has an item or specialty which allows him to carry more. A player may play several Strong Hold cards at the same time.
- Discard: If a player elects to draw a Strong Hold card and his hand is already full, he may choose to play or discard any cards in his hand in order to make room for the new one. He may NOT look at the new card before playing/discarding from his hand.
- Testing Ground (card): Draw a Testing Ground card. Unlike a Strong Hold card, these are not hidden in a player's hand. This card is flipped into the discard pile, where it becomes active. From there, you just follow the instructions on the card.
- Specialty zone: If you land on a space with this symbol, you acquire a SPECIALTY MARKER. This marker is placed on your character's board or can activate a Specialty (depending on your character).
- Item zone: If you land on a space with this symbol, you acquire an ITEM MARKER. This marker is placed on your character's board. The selected item is now available for your character to use.
- Research zone: Landing on a RESEARCH zone is the same as rolling it on the Movement die. If you land on this space you must roll the Research die.
- Event activation zone: If a player LANDS ON an EVENT zone, he activates the card that is face up in the Discard pile. For the most part these cards affect all the players. It is possible to flip several Event cards (by rolling an Event) during a game but activate only a few, if any. You may also activate the same card several times before covering it with another. Remember, if you LAND on it, it's ACTIVATED. If it is ROLLED, you reveal the next Event card without activating it. It's that simple!!
Going on an Adventure
It's Rare!
If you roll an Adventure symbol on the Research die, it's time to go on an Adventure. Adventures are rare; they occur only in two circumstances: a player rolls the Research symbol on the Movement die and then rolls the Adventure symbol on the Research die, or lands on a Research Zone and then rolls the Adventure symbol. A player basically has to roll a 6-sided die twice and get a 6 on both rolls. Even if a player does go on an Adventure or two during a game, the location of his character will most likely change and therefore change the Adventure. If he rolls an Adventure while he is in the territory of Pipit, he pulls out the Pipit Adventure board and follows the rules of that Adventure. If he is in Sazou, he pulls out the Sazou Adventure board... and so on. You may play the game several times before you come across a specific Adventure. I played many games before I came across the Water Adventure... I still wish I hadn't.
Bargola - Farcut - Harper - Labbé Land - Oax-Itin - Pipit - Saulia - Sazou - Soft Ground - any Water zone
There are 10 locations where it is possible to get an Adventure card. The color of the zone will indicate what territory you are in when you roll the Adventure. For example, Sazou has a purple(ish) tone to the zones to let you know you are now entering or leaving that territory.
Note: If a character has a MAP, it does NOT apply when he is moving a Token during an Adventure. But more about that later.
The example Adventure boards shown in the rulebook are labelled: Background story...just for fun, Location of Adventure, and Instructions for the Adventure. The examples are the Sazou Adventure ("Rise of the Fallen") and the Water Adventure ("Oh, Oh NO!"). The Water Adventure's instructions read: You get 2 rolls of the Challenge die. If you roll a 5, you may fill up your character card with Markers and fill your hand with cards. You may also give an opposing player 1 Marker or CARD for 1 roll. You may do this until you have nothing to give away. If you do not roll a 5, you must go back 10 spaces. "Did I mention they were twins?" You may play the SHALLOW WATER card to avoid this Adventure and end your turn.
And that is EVERYTHING you need to know about the board!!! Well maybe not everything, but MOST of what you need to know.
"Basic Character" Cards
These are examples of Basic character cards. What makes them basic (not to be confused with less powerful) is that these characters gain and use Markers in the standard manner to activate the Items/Specialties their characters possess.
Here is what to look at on your character's card.
- Title: The Title of your character is in RED and may affect you during an encounter. For example, being a Soldier increases the danger of a Guerrilla Bunny attack!
- Advantage: Each Character has a unique ADVANTAGE that can be used throughout the game. Remember your Advantage, because it's likely that your opponents will not remind you of it.
- Inventory: This is the main section that will define your character and separate it from everyone else's. As you gain Markers (both Item and Specialty) you place them on the things you would most like to use. This will be up to you, depending on your style of play.
Items: Once you have placed an Item Marker on an Item, IT'S YOURS! From that point on, you are constantly awarded whatever advantage it gives you. So, if you put your Item Marker on the ROPE, you are no longer going to be affected by any Dead End your character comes across. Whether it is in a card you draw, a space you land on or an Event that has been activated... you are not affected by Dead Ends. Keep your eyes on the things you own and the ones you want, because if you are not paying attention, you might miss out. You CANNOT change an Item Marker from one Item to another. Once it has been placed, it stays there.
Specialties: Unlike Items, once you place a Specialty Marker on your Specialty, it can be activated only by REMOVING the Marker! So, if you put it on the SHELTER (if your Shelter is located in your Specialty section), it will stay there until you need it. You simply remove the Specialty Marker (by placing it back in the Marker pile) and the WEATHER card has NO effect on you. Once you use a Specialty (by removing the Marker), you must acquire and place another Marker on that Specialty to be able to use it again.
You CANNOT stockpile or change ANY Markers from one spot to another. If all of your Items/Specialties are full, you may not acquire another Marker.
IMPORTANT NOTE: If you acquire a Marker through a Research roll (ONLY A ROLL), you may choose to DESTROY an opponent's Marker instead of gaining one. This means if you roll an Item, you may DESTROY an Item Marker on another player's character board. If you roll a Specialty, you may DESTROY a Specialty Marker on another player's board. Remove the Marker of YOUR choice and place it in the Marker pile... NOT ON YOUR CHARACTER CARD! This applies only to basic Item and Specialty Markers on player character cards.
"Deploy Character" Cards
These are examples of Deploy character cards. What makes them different from basic characters is that these characters gain and use Markers in a basic manner, but ALSO can deploy Specialties onto the board.
These cards are set up the same as far as Titles and Advantages, so let's look at what makes them different...
Not all Deploy characters have TOKEN CARDS, but if one does, it will let you know in the top right corner of the character card. Dig through the deck (it's BRIGHT RED), find the Token Card that belongs to your character and place it next to you. This card gives you more details about what your character can do.
On a basic character card, you simply place a Marker on what you want to own. On a deploy character card, you can actually deploy what you want to use. Let's look at Kiryu's card.
Here is where it gets good! His Items are basic (as are some Specialties), but he has a deployable Specialty. Under the word Traps you will see the word "DEPLOY." This means once you acquire a Marker, rather than actually grabbing one and placing it on your card, you can follow the instructions and deploy a trap.
So let's pretend you are using Kiryu. (Maybe you are. I don't know. I'M NOT PSYCHIC!) At the start of the game you place your three Trap Tokens on Kiryu's Token card. They are yours, you just can't deploy them yet.
It's your turn and you roll the Research die and acquire a Specialty Marker. You could take a Marker and put it on your SHELTER or TORCH, but you don't. You instead place your SNARE Trap on an Empty Blank zone on the board. Everyone takes their turn and now it's your turn again. You get another Specialty Marker. But this time you deploy your GRIP Trap. So now you have two Traps on the board. If later in the game all the players have safely passed the zone where you deployed your Snare Trap, then the next time you acquire a Specialty, you may choose to move your Snare rather than deploy your third trap... especially if that is your favorite one (because it's my favorite one and that's what I do).
Things to keep in mind...
You can only place a trap in a zone that does not have any symbols (BLANK) or players (EMPTY) on them. BUT you can think ahead and place it on a zone that could cause double danger to the opposing players. For example, you could place your Snare on a zone that is 6 spaces ahead of a Testing Ground space OR another one of your Traps. Then when someone lands on it, he gets sent back right on top of another negative space! Tah-Dah! You are officially mean!
BE AWARE that if a player is sent to a space where you have a trap, it DOES NOT TRIGGER IT UNLESS IT IS THAT PLAYER'S TURN! So let's say YOU set off an Event that moves ALL the players. If your good friend Bobby (I just made him up to give you more friends) lands on your Trap, he just stays on top of it and the Trap remains on the space.
And what if a player's deploy Token lands on it... like an UNDEAD? Well, your Trap is not triggered and the undead is fine (as much as the undead can be). Traps can only affect playable characters.
"Deploy Character" Cards (continued)
Now that we've covered how a Deploy card works, we can move on to the other Deploy characters.
Specialty Deploy: The Piper comes with an Undead Token Card. Dig through the deck and pull it out. Keep this card next to the Piper's character card. It gives you her Token's stats.
When playing as the Piper and you acquire a Specialty Marker, you may choose to deploy your ZOMBNY Undead Token instead of gaining a Specialty Marker.
You do this by placing the Zombny Undead Token on ANY EMPTY zone within 6 spaces of you (in front or behind). The Zombny may be deployed onto a zone with a symbol on it, just not a zone with a character on it.
Once on the board, AFTER you roll for movement, you may choose to move the Token INSTEAD of your character! You must still move it the exact amount of spaces you roll, BUT you may move it FORWARD OR BACKWARD!!! You can try to land in the same zone as another player by doing this. But be careful! You don't want to leave your character behind because you are too busy moving your Undead Token.
Specialty Movement: If you gain another Specialty Marker while your Undead Token is on the board, you may use that Marker to move the Undead Token up to 6 spaces. If another player is within 6 spaces, you CAN stop IN the same zone as him.
OR, if your Undead Token has been left behind, you may choose to deploy the Undead Token AGAIN to an Empty zone within 6 spaces of your character. This is a good way to keep the Undead Token in play.
Undead Attack: If you move your Undead Token into another player's zone (or if he ends his movement in the Undead Token's zone), that player is ATTACKED and must roll the Challenge die. As with all Attack rolls, he must roll HIGHER than the Undead's DEFENSE (a TIE is considered a LOSS). In this case, he must roll a 4, 5 or 6. If he does, you place your Undead Token back on your character card and must get another Specialty Marker to deploy it again. If he does not roll higher than the Defense, he must GO BACK 5 spaces, and your Undead Token remains. He may choose to use any of his Items or Specialties to enhance his Attack roll. For example, the Mercenary might have a "To the Head Arrow" Marker she can use, giving her +1 to any Attack roll against an Undead opponent.
Finally: If your Zombny is on a zone that lists an action (Strong Hold, Testing Ground, Trap, etc.) and another player lands on that space, he must defeat the Token BEFORE he can activate the action. So if your token is on a "draw a card" zone, he can't draw a card until he defeats the token. After he wins, THEN he can draw. If you put it on a Testing Ground zone he might have two fights to survive before he ends his turn. He can defeat your Undead and then might draw another Attack card... A FUN DAY FOR YOU! You can even place your Token in the Final Factory zone, so the player has to defeat the Token before rolling for the Factory.
Baum!Ya has a couple of fun Specialties! When you gain a Specialty, rather than receiving a Marker, you may deploy BAD JUJU or JAR OF LEECHES.
The only things to really keep in mind are that it is UP TO YOU to keep track of your tokens. If you have Bad JuJu on a player's character, he most likely will not remind you to steal his 4's. And it is not his job to remind you... Keep up with your tokens man!!! You only have two, it's not that hard!
Also, you may want to remember that Baum!Ya does not have a Backpack! So if you have a Jar of Leeches on a player, your hand might fill quickly. So be ready to discard any useless cards you hold for the chance to draw better ones. (See DISCARD in the ZONE section (above) for more.)
Final note... You can put both tokens on 1 player if you choose. You may even change a token from one player to another if you acquire another Specialty. These ARE CURSEs and can be removed with the Curse Breaker card!
Battling for Space
If two players land in the same zone, they can choose to battle for that space.
If on a player's turn his character lands in the same space as another player's character, he decides if he wants to battle for the space. If he does, both players roll the Challenge die. The player with the higher roll takes the space and the losing player is forced BACK 4 SPACES.
When you land on someone or someone lands on you, this is considered an ENEMY ATTACK. You can therefore use any enhancements to help you achieve victory. You may play cards and use Items or Specialties to win.
If the space that is being battled over is NOT a BLANK zone (if it is a Strong Hold, Testing Ground, etc. space), the space will NOT affect the player until he WINS that space, or both players choose to share the space.
For example, it's your turn and you roll the Movement die. You roll a 5, which brings you to a Strong Hold zone. Unfortunately that space has another player's character already in it. You cannot draw a Strong Hold card before that space is actually yours. So you now must roll the Challenge die for space control.
You roll a 4 and then the other player rolls a 5. You now play your RAGE card, giving you +2 and bringing your attack to 6. Your opponent has nothing that will help him. You WIN and the other player is forced BACK 4 SPACES.
Now that you have won the space you were battling over, you can draw a Strong Hold card (because it was a Strong Hold zone). Whatever the zone was (good or bad), it is now yours!
If a player is moved back, the space he lands on will affect his character only IF IT IS HIS TURN. So in this case, it does matter which space your opponent lands on. It WILL NOT affect him.
During Attack rolls, the player who is defending WINS ALL TIES.
Finally, if BOTH players decide that they do NOT want to battle for the space, they are more than welcome to share it. In this case, the landing player gets to activate the space as normal. Just remember, boys and girls, violence is never the answer! Stay in school, and don't do drugs!
If the player whose turn it was decides NOT to attack, the player whose character was landed on can attack instead. Again both players roll the Challenge die, and the losing player (remember, the defender WINS ALL TIES) is forced BACK 4 SPACES.
Testing Ground Cards
For the most part, these cards will not make for a good day. Some of them are good but most are going to sting a little.
There are three types of ATTACK cards: ENEMY ATTACK, ANIMAL ATTACK and UNDEAD ATTACK.
All of these encounters are treated the same way. If you draw one of these cards OR if you have an encounter with an ATTACK through other means, all you have to do is roll HIGHER than the DEFENSE. If you roll HIGHER, you WIN. If you roll LOWER, or TIE, you LOSE.
Some ATTACK cards do not have an obvious DEFENSE. The Sazou Crows, for example, do not have a DEFENSE. However, you must still roll the Challenge die when encountering this card. Therefore, you can still use one of your Markers or cards to help (or avoid) this ANIMAL ATTACK.
Pay close attention to the wording of your cards, Items and Specialties. Some might say, ONLY against ENEMY ATTACKS or NOT for use against the UNDEAD.
Enemy Attack cards
- Scavenger. Defense 3. Defense 4 if in HARPER. Win - draw 2 cards. Lose - lose 1 Marker.
- The Rocks Have Eyes! Defense 3. Win - Draw 1 Card. Lose - Lose 1 Item.
- Military Scout. Defense 3. Win - Draw 1 Card. Lose - Lose 1 Marker or Card.
- Guerrilla Bunnies. Defense 3. Defense 4 if your Title is SOLDIER. Win - ADVANCE 2 spaces. Lose - lose 2 markers.
Animal Attack cards
- (Unnamed card: "You're gonna need a THICKER suit.") Defense 4. Win - ADVANCE 5 spaces. Lose - lose 1 Item marker.
- (Unnamed card: "That's not even possible!!!") Defense 3. Win - ADVANCE 2 spaces. Lose - lose 1 Item marker.
- The Sazou Crows. There are 6 Crows (8 if you are in Sazou!). Roll the die 1 time to see how many Crows you can pick off. GO BACK 1 space for EACH remaining Crow. (No Defense.)
- Brangarian Beast. Defense 4. Win - GO UP 4 spaces and Draw 1 CARD. Lose - Lose 2 Markers and GO BACK 3 spaces.
Undead Attack cards
- ("But he's SOOOO SLOW.") Defense 2. Win - GO UP 1 space. Lose - GO BACK 8 spaces.
- ("Before you knew it, they were everywhere.") Defense 4. Win - GO AGAIN. Lose - GO BACK 3 spaces.
- ("Not a good night to be out.") Defense 3. Win - Acquire 1 Item. Lose - GO BACK 4 spaces OR Lose 1 Item.
- The Zombie Nightmare. Defense 3. Win - Acquire 1 Marker. Lose - GO BACK 4 spaces OR Lose 2 Items.
MOST of the bad cards, spaces and Adventures you come across have a counter card, Item or Specialty. Here are just a few examples...
- A Shelter (Specialty) counters the Weather card "Heavy Downpour" ("At least it's not acid rain." GO BACK 2 spaces PLUS 1 space for each card you have).
- A Rope (Item) counters the Dead End card ("Did anyone bring some ROPE?" GO BACK 3 spaces AND lose NEXT turn.).
- A spear-type Item and a grenade-type Item together counter the Undead Attack card "But he's SOOOO SLOW."
- A Radiation Suit (Protection card: play this card to protect yourself from Radiation or Toxic Elements) counters the Toxic Air card ("This CAN'T be safe." Roll the Challenge die. 1, 2, 3 or 4 = lose NEXT TURN. 5 or 6 = lose NEXT TURN and 2 CARDS.) and the Radiation Blast card.
- A Rope (Protection card: play this card to avoid QUICKSAND, DEAD ENDS, or MUD SLIDES) counters the Dead End, Mud Slide and Quicksand cards.
- A Knowledge card together with a skull marker counters the Scary Path card ("Why does the water smell so ba... oh." GO BACK 6 spaces and lose ANY 1 marker.).
Winning the Game!
If you want to play it straight through then the FIRST player who lands on AND defeats the Factory... WINS!
You do NOT have to roll the exact number to enter the Factory.
The Factory is treated like an ENEMY ATTACK and therefore you CAN modify your ATTACK roll with ANY ENEMY Specialty, Item or Card modifier.
Factory (card): Defense 3. Lose - GO BACK 2.
If you defeat the Factory, you win! Yea! Go get a cookie and celebrate your rookie victory... after all, it was just a factory.
Alternative ending: Not that I am telling you how to play, BUT if you want to discover what is really at the end of your journey (because some of us know that there is something greater under the surface)...
The FIRST player to land on the final space IGNORES the FACTORY stats and rolls the Challenge die! Then using the Outcome card below, you can determine which of the following game endings awaits you.
The FIRST player to enter the Factory zone rolls the Challenge die and looks at the result on the Outcome card. On a roll of 1 or 5, the player wins the game immediately. All other results depend on the player being victorious at one or more Challenge die rolls. If the player succeeds, he WINS!
If the first player does not succeed at their victory roll(s), and the game does not end, then all other players face the same challenge when they arrive at the Factory.
Outcome cards
- #1. Fortune and Glory! You knew you would find something big when you made your way into the lower levels of the concrete confinement... but you had NO IDEA it would be this. You're not sure where all the guards are but what's really on your mind is how to get all the riches home! This will be the beginning of a powerful new life. YOU WIN.
- #2. Expecting Company? (ENEMY ATTACK) There they were, all lined up and ready for your arrival. But you're no fool. You were expecting them to be expecting you but they were not expecting that at all! Let's do this... If your TITLE is SOLDIER you WIN. Defense 3. LOSE - go BACK 3.
- #3. In the Cross Hares! As you walk into the Regime's hidden base, it's obvious you are not the first to discover it. Dozens of soldiers are either dead or tied up - the rumors of the resistance called the Cross Hares are true! You are now one of the Cross Hares. YOU WIN! If your TITLE is SOLDIER, roll for ENEMY ATTACK. Defense 3. LOSE - go BACK 3.
- #4. Friend or Foe??? Ok, you weren't expecting this at all. Powerful and aggressive, but is he with or against you? ROLL THE DIE! 1, 2 or 3 - WITH YOU: YOU WIN. 4, 5 or 6 - AGAINST YOU: Defense 4. Lose - go BACK 1.
- #5. Too... MUCH... POWER!!! There it was, right in front of you. You shattered the power source! However, you weren't around to see if it worked because you were vaporized (sorry) along with everything and everyone in Soft Ground! But on the bright side, you were solely responsible for ending the horrors of the Testing Ground. YOU WIN... sort of.
- #6. But they are so cute. (ANIMAL ATTACK) Dozens of dead soldiers surrounded by hundreds of Sazou crows. You have a good feeling there is no way this can end well. Survive all 3 waves to WIN! Wave 1 - Defense 2. Wave 2 - Defense 3. Wave 3 - Defense 4. Lose - go BACK 1.
Extra Rules and Things to Clarify
Kiryu can reroll his 1's as much as he would like (even during an Adventure).
ANY TIME a player is moved into a zone, THAT zone has NO effect on him unless it is HIS TURN.
So if YOU activate an Event card that forces all characters to move (forward or back) and they land on a Strong Hold zone, they DO NOT draw cards. However, if YOUR character lands on a space, you must follow through with the action because it is YOUR TURN. Remember, if it is NOT YOUR TURN, the space you land on will NOT take effect (unless stated otherwise)! If a character is sent back on top of a TRAP or UNDEAD Token, it does not affect him!! If you move your Undead Token onto that character, though, he is ATTACKED, even though it isn't his turn.
If it is your turn and you land on a space that makes you draw a card. That card might make you move up leading you on another space that makes you do an action... you must continue to follow through until it is no longer your turn.
The MAP Item cannot be used by your Undead Token. It is for use ONLY by your character's pawn.
The Map Item makes you add 1 to your roll ONLY when it is YOUR TURN. It is used only on the actual game board (not an Adventure board) when you roll the Movement die to move FORWARD for your turn.
If an Undead Token lands in a space occupied by two characters, BOTH players roll the Challenge die. The player with the lower roll must fight the Undead. If he loses, he moves back 5 spaces, and the other player takes his turn fighting.
Constance's Advantage can affect only one character per turn. Even if two characters are sharing a space and within range, you can steal a card from only one. This is also the case with the Rifle Item and the High-Tech Rifle Item: each affects only one character per turn.
When attacking another player with one of your Rifle Items/Specialties, IF that player is within range you CAN hit him. EVEN if he is on a forked path next to you (as opposed to being on the same trail as you), you CAN STILL SEND HIM BACK! Just remember, if another player is IN RANGE of your weapon... that weapon CAN affect him.
It is UP TO YOU to remember what Items you have activated. It is also up to you to make sure that another player does the same. If he has a Marker on his Map, he MUST add 1 to his movement rolls. Be sure that he does not conveniently move that extra space ONLY when it benefits him. If you have a Bad Juju Marker (Baum!Ya has this) or any other CURSE on another player's character card, he probably isn't going to (he shouldn't) remind you that you should have stolen his turn. If a player lands on your Trap, he probably won't point that out either. So keep an eye out!
This is NOT CHESS. Just because you move your finger off of your character's pawn does not mean you can't move it back! As long as you do not end your turn, you can decide to change an action. This does NOT mean that you can land on a space, draw a card, not like it... and put it back!
This means you can play a card (BEFORE you follow through with its action), see a better card in your hand AND put the first one back. BUT ONCE you pass the die to the next player... YOU ARE DONE! This might mean that you forgot to draw a card, move your pawn, acquire a Marker or anything else! TOO BAD, your turn is OVER!
Water zones: Even though the WATER ZONES are not labeled in the Zone Key, they are the BLUE zones that are over the water. I am just saying this to make it CLEAR to everyone who is a bit unsure about which ones are WATER. I just counted and I believe there are 14 of them.
Event cards: You can have as many EVENT cards as you would like in the Event deck. However, the more cards you have in the deck, the less likely you will see a specific one. You can have as FEW as 4 Event cards in the deck at the start of the game (for a 2-player game). Before the start of the game, each player may pick out any 2 cards for that deck as he wishes. So if you are playing with 4 players (AND ALL PLAYERS AGREE), there can be as few as 8 cards in the Event deck. Loosely shuffle them together and place them in their spot on the board, THEN turn the top one over. That is the first card that will be activated if someone lands on an Event Zone. This of course is IF the card doesn't get changed before someone ACTIVATES an Event.
Remember: EVENTS are only ACTIVATED if someone LANDS on an EVENT ZONE!!! EVENT cards are only CHANGED if someone ROLLS it on the die.
It doesn't matter if someone defeats or loses or activates an Event card... it remains in play until it is covered.
If you lose a Marker that allows you to hold more than 4 cards (such as a BACKPACK Marker), you must also discard any EXTRA cards that the Marker allowed you to hold. So if another player removes your Backpack and you have 5 cards in your hand, you must choose one of your cards to place in the discard pile.
If an Event is triggered that works in your favor BUT you have an Item that prevents it from happening... you can choose to ignore that Item.
The Coleman Event card. Yes, ALL the players CONTINUE to roll the die until someone rolls a 6! This starts with the player who activated the Event. If a player who has something (Item, card, etc.) which would allow him to avoid this card, he must still take turns rolling the die but if HE gets the 6... he can THEN avoid the character.
Juju Jr. card: This card is played on a player BEFORE he rolls for movement and remains next to that player until he rolls a 5. After his move is used by the player who played that card on him, it is discarded.
Sabotage card: This card may be used to cancel any card PLAYED by another player. Testing Ground cards are NOT played, they are drawn. Event cards are NOT played, they are activated.
If you see a TITLE (e.g. - Tracker) on a card which does not appear in this set, it is NOT an error; it will appear in a future expansion, and we were just thinking ahead.
For the most part, if I didn't cover something, just use YOUR best judgment. The whole point of creating this game was to laugh and have fun. Don't get stuck on something that causes an argument. Work through it and HAVE FUN!