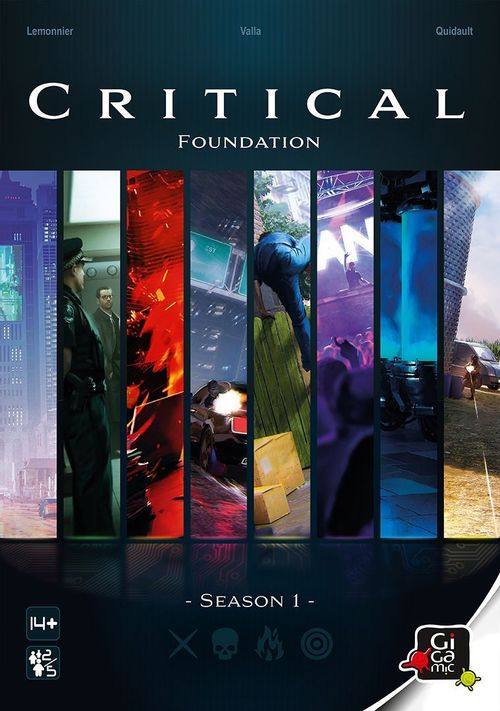
Critical: Foundation – Season 1
Critical: Foundation – Season 1 Rulebook
Table of Contents
Table of Contents
Introduction: Terms Used in Roleplaying Games
- Player Character (PC): The name given to players who embody the story characters.
- Non-Player Character (NPC): The secondary characters in the story. They are enacted by the Gamemaster, and could be either allies or enemies – sometimes both.
- Gamemaster (GM): Their role is to guide the PCs through the story and play the role of the different NPCs that the PCs will encounter.
- D6, D8, D12: The 6-sided, 8-sided and 12-sided dice that you use throughout the game to make checks.
- What do you do?: This is a classic roleplaying game question. It hands the reins to the PCs after the GM has finished describing the scene.
Game Contents
For the Gamemaster: 1 Gamemaster's (GM) screen; What is a Roleplaying Game? booklet; 9 Episodes of approx. 30 minutes each; 1 Synopsis booklet for Season 1; 34 Episode cards; 8 Non-Player Character (NPC) cards; 10 Clue cards; 5 Clue tokens; 32 Narrative tokens; 1 Building plan; 1 x 8-sided die (D8); 2 x 6-sided dice (D6); 1 Dry-erase marker.
For the Player Characters: 4 Character (PC) cards; 4 Name cards; 8 Background cards; 19 Equipment cards; 15 Status cards; 8 Wound cards; 4 Hero tokens; 4 x 12-sided dice (D12).
Part 1: The Player Characters
This section covers the rules that apply to the Player Characters. It is aimed at the PCs, but is also useful for the GM.
Creating Your Character
When you play a roleplaying game, you always begin by creating your character. You will play this character in the game, and they will come alive in the story narrated by the Gamemaster. There are 4 steps involved in creating your character:
- Choose a Character
- Choose a Name
- Choose a Background
- Collect your Starting Equipment
Important: If you play through Season 1, your characters will gradually develop as you progress through the episodes.
Choose a Character. Start by choosing the character you wish to play and take their corresponding Character card. The box contains 4 Character cards, with a character printed on both sides, to give you more choice. Each character has an Occupation, which determines their Main Attribute, their Backgrounds, and their Starting Equipment.
A Character card has: Art, Quote, Occupation, Health, Quality / Flaw, Description, and spaces for the Character's Weapons, Equipment and Background, plus the four Attributes.
Attributes. Dexterity, Mental, Physical and Social. These 4 Attributes summarize the physical and intellectual capacities of your character. The Dexterity and Physical Attributes represent the character's bodily capabilities, and the Mental and Social Attributes represent their intellectual capabilities.
On each Character card, one of the Attributes is highlighted in red – this is the character's Main Attribute. It indicates the character's area of specialization, and the PC will add a Success Bonus of +1 to their dice roll for checks related to this Attribute. The rest of the information on the card will help you bring the character to life by offering advice, ideas and suggestions. You can use them as inspiration, or, if you prefer, you can develop a personality of your own.
Skills. There are 12 Skills in the game, and each relates to one of the 4 Attributes:
| Attribute | Skills |
|---|---|
| Physical | Athletics, Combat, Stealth |
| Dexterity | Know-how, Driving, Survival |
| Mental | Knowledge, Investigation, Perception |
| Social | Negotiation, Manipulation, Empathy |
Your Skills reflect what your character knows, undertakes on a regular basis, or is capable of doing.
Choose a Name. Now come up with a name for your character. Choose wisely, because the other PCs and the GM will address you by this name throughout the game. Take one of the Name cards and write your character's name on it. You might take your inspiration from a book or film that you like, adopt a nickname, or come up with one of your own.
Choose a Background. Each Background is linked to an Occupation and reflects your character's backstory. Choose one of the Background cards that is associated with your Occupation and place it in the designated area by your Character card. The Background cards that relate to your Occupation feature the corresponding Occupation symbol. Your character's Background gives you a better understanding of your character's Occupation and gives you 3 Skills. You will use these Skills during checks. (Example Background, Special Forces: "Add +1 Success bonus to the following checks: Athletics (Physical), Stealth (Physical), Survival (Dexterity).")
Gather your Starting Equipment. Finally, gather the Starting Equipment specified by your Occupation. You will find the symbol for your Occupation on the corresponding Equipment card. (Example: Glass-4 wearable tech – +1 Success bonus when using Knowledge (Mental); you may reroll your Know-how checks (Dexterity).) You have now finished creating your Character and they are ready for duty.
Making a Check
During the game, the Gamemaster might ask you to make a check to find out whether the action you wish to undertake will succeed or fail. Even if you are a climbing pro in real life, your character might not be, so the GM will ask you to make a check to see whether your character succeeds in climbing a mountain. The GM is the only one who can decide if your character needs to make a check.
Each check has a difficulty level, which represents the Success value you must achieve to accomplish your action. The difficulty of an action is set by either the episode or the GM, but never by the PCs. Checks are presented as: Type / Skill / Attribute / Difficulty. Example: "Ask for an individual Athletics check (Physical) 2."
To make a check, you roll the D12 and add any bonuses you might have (see below). Next, compare your result against the difficulty set by the GM.
Difficulty Levels
| Level | Difficulty |
|---|---|
| 1 | Easy |
| 2 | Medium |
| 3 | Hard |
| 4 | Very Hard |
| 5 | Extreme |
| 6+ | Impossible |
Check Success or Failure. If your die roll is more than or equal to the required difficulty, you succeed. If your die roll is less than the required difficulty level, you fail.
Note: The checks in Episode 0 won't be based on character Skills, only on character Attributes. This will give you time to digest the rules.
Types of Checks. There are two types of Checks:
- Individual Checks: each affected PC makes a check and then their individual results are applied to their respective characters. Example: Joanna and Luke are trying to climb a fence so they can enter a private property, and Max is keeping watch over the area. The GM asks Joanna and Luke for an individual Athletics check, and Max for an individual Perception check. Each PC needs to make a check to find out whether they individually succeed or not.
- Group Checks: all PCs make group checks. If at least one of them succeeds, the check is a success for the group as a whole. Example: The group has managed to enter the property and Joanna, Luke and Max are looking for documents in the suspect's office. The GM asks them to make a group Investigation check. If one player succeeds, the group finds the documents.
Adding Bonuses
Once you have rolled your D12, you can apply bonuses to help your action succeed. All bonuses are cumulative.
- Main Attribute: If the check relates to your character's Main Attribute, add a +1 Success Bonus (+1 to the value rolled). Example: Because Luke has a Military Background, he applies a +1 Success Bonus to all his Physical Skill and Attribute Checks.
- Skills: If the required Skill features in your Background, add +1 Success Bonus to the check. Example: Since Luke chose the Mercenary Background, he applies a +1 Success Bonus to all his Athletics, Combat and Driving checks. The Athletics and Combat Skills are associated with the Physical Attribute, so he adds a +2 Success Bonus to these checks.
- Equipment: In addition, your equipment adds extra bonuses to your die result. Example: The Medical Drone Equipment card adds +1 Success Bonus for Perception checks (Mental). The Drone can also heal wounds, but this effect is limited to 2 uses (discard 1 Wound card held by a PC of your choice).
Critical Success and Critical Failure
Critical Success: If you roll at least double the required difficulty level, you get a Critical Success. Your action is a spectacular success and so you double any advantages.
Critical Failure: If you roll the red X result on the D12, you suffer a Critical Failure and cannot use your bonuses. Your action has failed catastrophically. If the failure entails a loss, that loss is doubled. However, as compensation, you receive 1 Hero token.
Critical Failure in group checks: If at least one player has rolled the red X on their D12 when all PCs fail a group check, that check is then a Critical Failure and the group receives one Hero token. Otherwise, the X result is ignored and the group does not receive a Hero token. Example: Joanna, Luke and Max are lost in a dark woods. To find their way, the GM asks them to make a group Perception check (Mental) 3. Joanna rolls a 1, Luke rolls a 2 and unfortunately, Max rolls an X. As they all failed the check and Max rolled an X, they get a Critical Failure. The GM gives them one Hero token but they will be wandering around for several hours!
Hero Tokens
Hero tokens are common to all PCs. When one of you receives a Hero token (usually following a Critical Failure), you win it for the group. Hero tokens are limited to 4 for the entire group.
If the GM asks you to make a check, you may discard a Hero token to add the D8 to your roll. Roll both the D12 and the D8, and add the results together.
Example: Joanna, a hacker, is trying to access the computer system of a state agency and there is no room for error. The GM asks her to make an Individual Know-how check (Dexterity) 5. Joanna decides to use a Hero token and rolls both the D12 and the D8, getting a total of 4 (1 + 3). She adds a +2 Success bonus as Dexterity is her Main Attribute and her Background lists Know-how as one of her Skills. Joanna gets an impressive result of 6! She manages to hack the computer system, bypassing all the firewalls.
Your Character's Health
Your character has 2 Health points: no more, no less. This means they can receive 2 Wound and/or Status cards before being Exhausted.
Wound Cards represent the physical damage suffered by your character. When you receive damage, place that number of Wound cards on your Character card. Note: The description on a Wound card doesn't affect your character: its purpose is simply to immerse you in the narrative of the game.
Status Cards represent effects that incapacitate your character. They use up a health point, and so are placed in the same space as your Wound cards. Status cards not only count as a wound, but have an additional special effect, which is described on the card itself. The consequences of this effect will become apparent as you progress through the episodes in Season 1. Important: Status cards are not healed in the same way as wounds. The text on the Status card explains how your character can remove it.
Being Exhausted. If your Character receives a third Wound or Status card, they become Exhausted. This means that you must sit out the rest of the current scene. Discard all your Wound and/or Status cards and replace them with an Exhausted Status card. You will still be able to play in the next scene and the rest of the story, but will suffer a handicap. The Exhausted Status card reads: "The difficulty of all your checks increases by 1. Discard this card at the end of the next episode."
Example: After being injured, Luke suffers an attack from an enemy mercenary that results in him receiving 2 damage. The GM hands him 2 Wound cards, which brings his total wound count to 3. Luke is now Exhausted, he discards all his Wound cards and receives an Exhausted Status card from the GM. He will have to sit out the rest of this scene, but will return in the next one. Luke will continue to be Exhausted throughout the next episode.
Healing. Each episode will indicate when and how your wounds can be healed, if at all. You may also use your equipment to heal, if applicable.
Equipment
Your equipment comprises the weapons, armor and other items that your character can use to increase their chances of success when performing actions.
Using your Equipment. The Equipment cards explain when and how you can use them. Some cards have a limited amount of uses. We recommend using the Narrative tokens to keep track of the number of times the equipment has been used. If you have spent the number of uses for a piece of equipment, you will need to recharge it before you can use it again. As with healing, the episodes indicate when you can recharge your equipment. The equipment always recharges fully.
Rerolling Dice. Some pieces of equipment allow you to reroll a check. You may reroll some or all of your dice, including an X result.
Weapons. You can only use one weapon at any given time. Place this weapon to the left of your Character card. If you have multiple weapons, the others are placed to the right of your Character card. If you don't have a weapon, you can use your body or an object from your surroundings to attack, but the difficulty level of the check will increase by 1 and you will only inflict 1 damage, even with a critical success.
Saving Your Character
After your game session, put your Character card and all the other cards you have received inside the dedicated sleeve for your character's Occupation. This saves your character's progress for the next game.
Part 2: The Gamemaster
This section should only be read by the Gamemaster (GM).
Introduction to Critical Season 1 – Foundation
Before you start reading through the episodes, we suggest you first read the Synopsis booklet for Season 1. This provides an introduction to the world and the Icarus agency, which you can read to your PCs in Episodes 0 and 1. You will also find an overview of Mars Inc. and OMNI, two entities that the players will come across during their investigations, and a complete synopsis of Season 1, so you can understand the entire story arc.
Once you have read the synopsis booklet, you can start to go into detail by reading the episodes. Each episode includes all the information you need to direct a game for your PCs. The episodes are designed to gradually teach you how to play the role of GM and will demonstrate to the PCs everything that a roleplaying game has to offer. While the episodes are intentionally simple to start with, the narrative is increasingly flexible, offering more room for improvisation as you progress through the adventure.
Remember that the point of playing is to have fun with your friends. If you forget to include an important aspect of the story, just go back to it, and if you don't know how to handle a situation, discuss it with the players. In a roleplaying game, goodwill is important: there are no losers or winners, just players who gather together to play out an adventure and tell a great story.
Setting Up an Episode
When setting up the game, we recommend that you gather together the necessary components beforehand and read through the episode at least once before you begin. To get the best out of your game session, we suggest that you read through the episode once on the day before the game, and then again before you start to play. The more familiar you are with the episode, the more comfortable you will feel directing it, and you will also feel better equipped to manage moments of improvisation.
Reading an Episode
- Setup: This includes all the components you need to play the episode.
- Episode Synopsis: A brief overview that summarizes the main events in the episode.
- Icons: Icons in the margins draw your attention to key moments in the episodes and any required checks (Narrative, Roleplay, Action, Investigation, PC check, GM check).
- Text Bars: Text bars indicate when game components should be used during an episode. Some of the components will be given to the PCs, others will simply be shown to them. Text bar keywords:
- Healing: Indicates how many Wound and/or Status cards a PC may remove from their card.
- Recharge: Indicates whether the PCs may recharge their equipment or not.
- Give: PCs keep these components, saving them at the end of each game session.
- Show/Place: Show these components to the players and allow them to study them. You can also place them in front of your screen or slot them into the central walls of your screen to show them to your players.
- Take back: The PCs cannot keep these components beyond the end of that episode.
- Checks: Ask the players to make a check and then read out the relevant text (successful check / failed check).
The 4 Key Elements of an Episode
Episodes are structured around 4 key elements that allow you to understand the purpose of a scene:
- Narrative: These sections should be read aloud. They build the atmosphere and establish the setting for the upcoming scene. You can use them as inspiration to help you flesh out your description, add more detail and build the atmosphere.
- Roleplay: During the roleplay phase, you will play the part of one (or more) NPCs. These scenes are meant to encourage a verbal exchange with the PCs, usually to allow you to give them some information. The PCs will need to ask the right questions and lead the conversation in the required direction.
- Investigation: During investigation scenes, the PCs will need to find particular pieces of information and come up with suggestions. Make sure you describe the situation accurately and, if necessary, offer a little guidance to help them achieve their task.
- Action: The action scenes are the trickiest to play out, as you will need to divide up the time between the PCs to ensure they each get the opportunity to speak up and perform an action. Go around the table. Ask the first PC which action they wish to perform, describe it, and then ask them to make a check, if one is required. Continue around to the next PC, and then to the next, and so on. The most common type of action scene is combat, but scenes may also revolve around covertly infiltrating a camp, catching a suspect, etc.
Adjusting the Difficulty to the Player Count
At the start of the game, in Episode 1, give the players the number of Hero tokens indicated by the following chart:
| Number of players | 1-2 | 3 | 4 |
|---|---|---|---|
| Hero tokens | 3 | 2 | 1 |
In Season 1, if the PCs are really struggling, you can give them 1 Hero token to help them progress. However, make sure you don't overuse this option, as some of the episodes deliberately put the PCs in danger to increase the dramatic effect of a scene.
The Gamemaster's Toolkit
Episode Cards. When you are playing through a scene, show the PCs the corresponding Episode card. The illustrations on these cards can help them imagine their surroundings in that scene. Each episode will tell you which cards you should show the PCs and when to bring them into play.
NPC Cards. These cards represent the different characters that the PCs will meet during their adventures. They may be allies or enemies.
- Weakness: The NPC's weakness will make it easier for the PCs to defeat them. Players will need to perform the action Find a Weakness to discover the NPC's weakness.
- Special Ability: Some NPCs have a special ability which activates when they attack. The Combat Table on their card shows you which D6 result activates that NPC's special ability.
- Difficulty, Attack and Health: From left to right, these 3 values show the Difficulty of a check against this NPC, the amount of attacks the NPC can make on a PC, and the amount of damage they can withstand before being knocked out.
- Combat Table: During combat, refer to the table at the bottom of the card to see if the NPC's attacks succeed and whether they activate their special ability. The table features the icons on your D6 to help you ascertain the result. A red X result, either on your D6 or as specified in the table, indicates a failure.
Example of an NPC card: Mercenaries – Weakness: None. Special ability: Suppressive Fire – the PC being attacked may perform the Take Cover action during their next turn to avoid the effects of Suppressive Fire. If they fail, they suffer 2 damage. (Suppressive Fire is not allowed in hand to hand combat, where it counts as an X result.) Difficulty 2, Attack 1, Health 3. Combat Table (D6 faces): target icon = 2 Damage; flame icon = Suppressive Fire; skull icon = (no text); X = failure.
The Gamemaster's Dice. In the majority of cases, you will use your D6 during combat to determine whether your NPCs injure the PCs. Your dice rolls are always private.
Clue Cards. The PCs will use the Clue cards during episodes to help them with their investigations. They provide extra information to give the PCs a better understanding of the story. The episodes will indicate when you should give a particular Clue card to the PCs.
Clue Tokens. The Clue tokens have the same purpose as the Clue cards, but are instead handled by the players. If they use them at the right time, Clue tokens can be used to unblock situations or gather new information.
Narrative Tokens. The Narrative tokens represent various aspects of the story, from the passage of time, to the escape of a fugitive, to counting your NPCs' health points. You will also need them to mark the number of uses for some Equipment cards.
The Gamemaster's Screen. The Gamemaster's screen is essential: it allows you to hide information and components from players, which helps you retain the element of surprise during the game. Use one of the two central slots for the Episode cards and the other one for the NPC cards. The screen also provides useful game prompts that will answer your questions as you play the game, to avoid you having to refer to this rulebook.
Combat
Combat scenes are special action scenes that put the lives of the PCs in danger. Combat takes place between the two opposing sides: the PCs and the NPCs. Like with any other action scene, you need to divide up the time into turns within a round, so that each of the PCs and NPCs get their fair share of the action. Combat scenes have the following special game rules:
- Difficulty level for Combat checks
- Critical success and critical failure in combat
- Initiative
- Combat turns and actions
Difficulty level for Combat checks. During combat, the difficulty level of all checks made by the PCs is equal to the difficulty level of the NPC they are confronting.
Critical success and failure during combat. If a PC gets a Critical Success during combat, they receive a bonus as described in the Critical! section for that action. If a PC gets a Critical Failure during combat, the GM can reroll one or more of their D6 during their next attack against this PC.
Initiative. This step determines which side will play first. Ask the PCs for a group Perception check (Mental). If they succeed, then they get to play first. If not, you will play first. Note: If PCs are facing different NPCs, use the highest NPC difficulty level as the difficulty level for the Perception check.
Combat round and actions. In a Combat round, both sides have the opportunity to react and perform actions. Once one side has finished taking their turns, the other side will take theirs. Continue swapping between the sides until one side wins.
The Player Characters' Turn
Going around the table, each PC gets the chance to move, perform one Action of their choice and use one of their Equipment cards. These are the 4 main combat actions:
- Attack: Ask the PC to make a Combat check (Physical). If the PC succeeds, the NPC suffers the weapon's damage. Critical! The weapon damage is doubled.
- Help: Ask the PC to make an Empathy check (Social). If the PC succeeds, another PC of their choice adds a +1 Success bonus and may reroll a check when they next take an action. Critical! Add a +2 Success bonus instead of +1.
- Take cover: Ask the PC to make a Survival check (Dexterity). If the PC succeeds, the damage they suffer decreases by 1. Critical! Any damage is reduced by 2.
- Find a weakness: Ask the PC to make a Perception check (Mental). If the PC succeeds, reveal the NPC's weakness to the PCs. Critical! The NPC's difficulty level decreases by 1.
Note: PCs can undertake any other action they can think up. Use the Skills chart on your screen to determine the appropriate check.
The Gamemaster's Turn
When it is your turn, each of your NPCs can move and undertake one action of your choice. To attack with an NPC, choose one PC target, and roll the same number of D6 as the NPC's attack value. Refer to the table on the bottom of the NPC's card to ascertain the result.
Example: Your Mercenary NPC attacks a PC. His profile indicates an attack strength of 1, so you only roll 1 D6. Referring to the Combat table, you see that your result (the target icon) means that the PC suffers 2 damage. Give that PC 2 Wound cards.
What's Next?
Critical is not simply an introductory game. The box contents provide you with a complete, evolving roleplaying game. Adapt it, make the contents your own and build upon your favorite elements of the game. You could use the game as a basis for your own scenarios, and come up with your own adventures and investigations. The Critical website offers new adventures that are playable within this same world, making use of what you already have.
Writing Your Own Scenarios
Would you like to write your own scenarios? Start writing the adventure that you would like to play. Here are some notes about the method used by the designers.
- Finding Inspiration – from concept to image: If you have an idea for an original scenario or were inspired by the last movie or series that you watched, start by imagining the NPCs and the locations you will need, and find some images that bring them to life.
- From image to concept: If you have an image, setting or general background mood that inspires you, use this as a foundation and imagine what could take place there. Maybe you have a character in mind that you wish to include. As you start to define the adventure's aims and course, the story will begin to flow. With both approaches, you just need to find a way to engage the characters in the story, and to involve them in an investigation that is precipitated by the actions of their opponents.
- Timing: Each episode is designed to last around 30 minutes. This corresponds to 2 or 3 scenes that have a logical progression, with each one tied to a place and time (similar to the scenes in a movie). Investigation or roleplaying scenes might take a bit longer if the players are very invested in their characters, and action scenes may take longer if there is a higher level of adversity.
- Difficulty: The rules set out a difficulty scale for actions, but some situations might require a more complex system, due to the number of checks and obstacles (i.e. surroundings or opponents) involved. You can use the Season 1 scenarios as inspiration for this as well. Keep in mind: increase the tension by gradually ramping up the difficulty as the adventure progresses; good equipment can make up for a lack of Skill within the group, or can strengthen a character's capabilities.