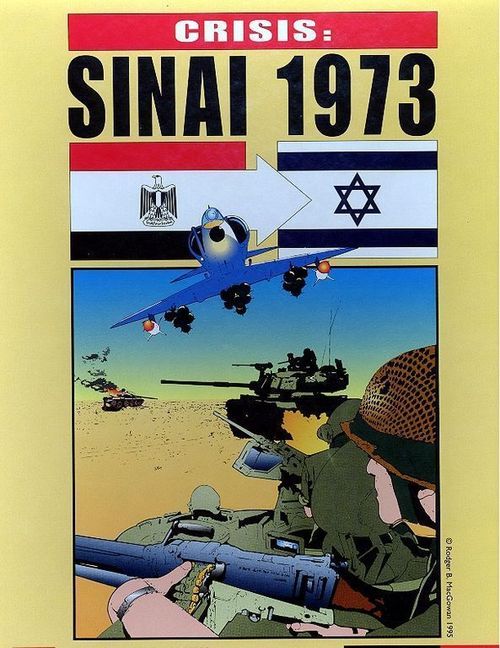
Crisis: Sinai 1973
Crisis: Sinai 1973 Rulebook
Table of Contents
Table of Contents
- 1.0 Introduction
- 2.0 Game Equipment
- 3.0 Sequence of Play
- 4.0 HQs and Command
- 5.0 Commanders
- 6.0 Movement
- 7.0 Supply
- 8.0 Reserves
- 9.0 Ground Combat
- 10.0 Artillery
- 11.0 Breakdown/Recombination
- 12.0 Replacements
- 13.0 Reinforcements
- 14.0 The Suez Canal
- 15.0 Bridges
- 16.0 The Bar-Lev Line
- 17.0 Commandos
- 18.0 Airpower
- 19.0 Victory
- 20.0 Scenarios
- 21.0 Political Rules
- Sequence of Play (summary page)
1.0 Introduction
Crisis: Sinai 1973 is an operational-level historical simulation of the 1973 "October War" between Israel and the United Arab Republic. The game portrays the major military forces and capabilities of both sides and provides scenarios covering all the main combat actions.
Crisis: Sinai 1973 is a two-player game in which the players assume the roles of the opposing sides' senior commanders. The players alternate taking turns and moving playing pieces representing military units across the map. Each turn represents the equivalent of twelve hours of real time, and the scenarios vary in length from five to eleven turns. These rules and the accompanying charts and tables contain all information necessary to play the game; the scenario cards contain all information necessary to set up and play a specific scenario.
1.1 Control
Players will often need to determine whether a given hex on the map is friendly-controlled, enemy-controlled, or disputed between the two sides. To control a hex, a player must:
- Have any friendly unit except a Commander, a Commando unit, or a unit with a Combat Factor of zero (0) present in the hex.
- Have a friendly unit projecting a zone of control (ZOC, see 6.2) into a hex into which no enemy unit projects a ZOC.
- Have been the last player to move a unit through a hex into which no enemy unit currently projects a ZOC.
1.2 Examining Stacks
While playing Crisis: Sinai 1973, both players will often deploy and move their forces in stacks containing several units. They must place whichever unit in a hex has the highest Combat Factor at the top of the stack. The opposing player may never examine the contents of a friendly stack (although he can, of course, look at the top unit).
Exception: A Headquarters (HQ) and/or Commander may be placed at the top of a stack even though this would violate the rule that the strongest unit must be put on top. However, if an HQ and/or Commander are at the top of a stack, the opposing player may remove them temporarily so that he can examine the top combat unit in the stack.
2.0 Game Equipment
Each copy of Crisis: Sinai 1973 contains:
- One 22 x 34" map sheet
- 720 die-cut counters
- One Rulebook and one Play Book
- Five Charts and Tables cards
- One Reinforcement and Replacement Schedule
- One Egyptian GHQ Reserve card
- Five Scenario Set-up cards
- Two 6-sided dice
2.1 The Map
The game's map depicts an area approximately 95 miles wide by 112 miles long centered on the Suez Canal. A hexagonal grid superimposed over the map regulates movement of the playing pieces. Each six-sided hexagon (or "hex") represents an area two-and-a-half miles across. Each hex has its own four-digit identity number, which is used to identify the hex for various game purposes.
2.2 The Playing Pieces
In Crisis: Sinai 1973 the playing pieces (or counters) represent combat units, headquarters, and leaders or function as informational markers used to record important data during the course of play.
Unit Size Symbols: XXX: Corps; XX: Division; X: Brigade; III: Regiment; II: Battalion; I: Company.
2.2.1 Combat Unit, Commander, and Headquarters (HQ) Counters
(The rulebook illustrates the layout of each counter type with labelled diagrams.)
- Ground Combat Unit: Unit Designation, Unit Size, Unit Type, Combat Factor, Antitank Factor, Movement Allowance, Movement Class Indicator (Tracked).
- Artillery Unit: Unit Designation, Unit Size, Unit Type, Combat Factor, Range, Movement Allowance, Movement Class Indicator (Motorized).
- Ground Transport (APC) Unit: Unit Designation, Unit Type, Combat Factor, Ground Transport Capacity, Movement Allowance, Movement Class Indicator (Tracked).
- Headquarters Unit: Unit Designation, Unit Size, Unit Type, Combat Factor, Command Radius, Movement Allowance, Movement Class Indicator (Tracked).
- Commander: Name, Unit Type, Leadership Rating, Movement Allowance, Movement Class Indicator (Tracked).
Unit Type Symbols
Infantry; Mechanized Infantry; Halftrack-Mechanized Infantry; Motorized Infantry; Parachute Infantry; Airmobile Infantry; Commando Infantry; APC; Halftrack; Bus; Truck; Tank; Armored Recon; Amphibious; Antitank; Artillery (motorized); Rocket Artillery (motorized); Self-Propelled Artillery (tracked); Engineer; Bridge Equipment; Commander; Infantry Headquarters; Armor Headquarters; Mechanized Headquarters; Parachute Headquarters; Bar-Lev Garrison.
2.2.2 Glossary of Counter Values
- Unit Designation indicates a unit's historical formation name or number. When a designation contains a slash (/), the numbers and letters to the left of the slash are the unit's own designation; those to the right indicate to which headquarters it is dedicated (see below).
- Combat Factor measures a unit's basic firepower and combat efficiency, whether attacking or defending. If a unit's Combat Factor is printed in parentheses, it cannot attack in Ground Combat (although it may provide Artillery Support or Bombard if it is an artillery unit). If a unit's Combat Factor is "0," it is eliminated if it is alone in a hex (or stacked exclusively with other "0" Combat Factor units) when an enemy unit that has a Combat Factor of greater than "0" enters the hex.
- Antitank Factor quantifies the effectiveness of the unit's organic and attached antitank weaponry, including antitank guided missiles (ATGMs) such as the Russian-built SAGGER and American TOW systems, recoilless rifles, conventional antitank guns, and RPG-7s or other "bazooka" type weapons.
- Movement Allowance is the maximum number of Movement Points (MPs) that the unit may expend each time it has an opportunity to move, assuming that supply and command conditions are perfect.
- Ground Transport Capacity indicates the number of Leg unit steps that a ground transport unit may carry.
- Range is the distance in hexes over which an artillery unit can fire. Do not count the hex occupied by the firing unit, but do count the hex where its target is located.
- Leadership Rating can be used to increase the Movement Allowances of units that are moving stacked with a Commander or to modify combat resolution and Snafu die rolls when a Commander provides Combat Leadership (see 5.3) to friendly units that are involved in combat.
- Command Radius: A combat unit or HQ must be within this number of hexes of a superior headquarters to be In Command (see 4.0). An HQ can dispatch Reserves only if at least one hex containing friendly units that are participating in a Ground Combat is within the HQ's Command Radius.
Exception: If an HQ has an asterisk printed on its counter instead of a number, it can command units and dispatch reserves anywhere within its Command Sector (see 4.2).
2.2.3 Egyptian Unit Colors and Stripes
Note that Egyptian units are printed in several different colors. For example, all units that belong to the 2nd Army are printed in a different color from those belonging to the 3rd Army. Likewise, Egyptian breakdown units and units belonging to the Port Said Force and GHQ Reserve are each printed in a distinctive color. Furthermore, all Egyptian units fall into two distinct categories:
- All Egyptian units that do not have colored stripes on their counters are Independent units.
- All Egyptian units that have a colored stripe printed across the bottom of their counters are Dedicated units. All units that have stripes of the same color printed on them are Dedicated to the same HQ.
Note: The handful of units that are printed in orange are Arab Ally formations. These are treated as Independent GHQ Reserve units for all purposes.
2.2.4 Israeli Unit Colors and Stripes
Israeli breakdown units are printed in a different color than all other Israeli units. All Israeli units that have color stripes across the bottom of their counters are Independent units.
2.2.5 Unit Steps
Most ground units in Crisis: Sinai 1973 consist of several "steps."
- Full-strength Israeli tank battalions and Egyptian (but not Arab League) armor and infantry brigades have four steps.
- Israeli companies and Egyptian battalions, and all HQs (of both sides) have only one step.
- All other units have two steps.
When a unit loses a step for the first time, flip it over onto its back side. Because a one-step unit has nothing printed on its back side, it is eliminated. A two- or four-step unit, on the other hand, remains in play using the reduced Combat and Antitank Factors printed on its reverse side. When a two-step unit suffers a second step loss, it is eliminated; a four-step unit is removed from the map and replaced by a two-step Remnant of the same type.
Note: Each Egyptian brigade has its own Remnant counter. The Israeli tank battalion Remnants are generic (except that a Ti-67 Remnant replaces a reduced Ti-67 tank battalion instead of a "normal" tank Remnant).
Sample 4-Step Unit: Counter front (4 steps); Counter back (3 steps); Remnant front (2 steps); Remnant back (1 step).
When a one- or two-step unit or Remnant is eliminated, place it in the "Eliminated Units" box. If a three- or four-step unit is eliminated outright by Antitank Fire or a Ground Combat result, its Remnant is placed in the "Eliminated Units" box.
2.2.6 Air Units
- Air Combat Unit: Unit Designation, Unit Type Silhouette, Pilot Skill, Combat Factor, CAS Rating, Strike Rating.
- Air Transport Unit: Unit Designation, Unit Type Silhouette, Air Combat Factor, Air Transport Capacity.
2.2.7 Glossary of Air Unit Values
- Unit Designation indicates the type of aircraft with which the unit is equipped.
- The Unit Type Silhouette corresponds to the type of aircraft listed in the unit's Designation.
- Pilot Rating measures the overall proficiency and level of training of the unit's pilots. It is applied as a modifier when resolving air-to-air and air-to-ground combat.
- Air Combat Factor measures the unit's effectiveness when engaging in air-to-air combat. If a unit's Air Combat Factor is parenthesized, it cannot fire in Air Combat.
- CAS Rating measures the unit's effectiveness when flying Close Air Support missions. The combat odds ratio in a ground combat is increased (when attacking) or decreased (when defending) by this value.
- Strike Rating measures the unit's effectiveness when attacking ground units and bridges, and when attacking SAM and Radar Tracks, or enemy units on the Air Display.
- Air Transport Capacity rating indicates the number of ground unit steps that a transport aircraft or helicopter unit may carry when conducting a Transport mission. Only transport and helicopter units possess this rating.
2.2.8 Informational Markers
Attack Hasty Attack; Bridge; Bridge Movement Cost Marker; Bridgehead; Breakthru; Current Turn; Egyptian Army Boundary; Fired; Game Turn; Infantry Replacements Level; Artillery Replacements Level; Tank Replacements Level; Anti-tank Replacements Level; Radar Status; SAM Status; Destroyed SAM Site; Victory Points Level; Out of Supply; Out of Command; Tank Wreck; Air Losses Level; Unit Losses VP Level.
3.0 Sequence of Play
Crisis: Sinai 1973 is played in turns that each represent twelve hours of real time. The number of turns that must be played before the game ends is different in each scenario. The scenario instructions specify which player is the First Player (that is, moves and fights first).
3.1 Political Step (Campaign Scenarios only)
When playing the Variable (i.e., ahistorical) version of the Campaign Scenario, the following activities are conducted in any order desired.
- Both players roll on their respective Ceasefire Tables to determine whether or not the US and USSR impose a UN Ceasefire (which will bring the scenario to an end 2 turns later).
- The Israeli player rolls on the US Intervention Table to determine whether the US Airlift will begin that turn (daylight turns only).
- The Egyptian player rolls on the USSR Intervention Table to determine whether the USSR Airlift will begin that turn (daylight turns only).
3.2 Maintenance Step (daylight turns)
During the Maintenance Step of each daylight turn, both players simultaneously perform the following actions in the order listed:
- Conduct a Maintenance Check for each unit in the "Flown" box by rolling two dice and finding the result on the Maintenance Table printed in the "Flown" box. Units that pass their Maintenance Check are placed in the "Ready 1" box; those that fail remain in the "Flown" box.
- Move all units located in the "Ready 2" box and the Israeli "Golan Front" box into the "Ready 1" box.
- Place all air units that are due to arrive as Reinforcements (see 13.1.2) on the current turn in the "Ready 1" box.
- Receive any Air Replacements (see 12.3) whose codes appear in the current turn's box on the US or USSR Airlift Track. Expend them to bring air units back into play from the "Eliminated" box or to restore damaged units to full strength. An eliminated unit brought back into play is placed in the "Flown" box. If an Air Replacement is not expended on the turn in which it is received, it is permanently lost.
- Attempt to repair (18.2.4) each Radar or SAM Track whose Status marker is not in the Track's maximum value box. Also, receive any SAM Replacement (see 12.3) whose code appears in the current turn's box on the US or USSR Airlift Track, and expend it to increase a SAM Track's value automatically. If a SAM Replacement is not expended on the turn in which it is received, it is permanently lost.
- The Israeli player (only) rolls on the Golan Front Air Commitment Table to determine what fraction of his air units are placed in the "Golan Front" box.
- The Israeli player (only) rolls two dice for each air unit in the "Golan Front" box. If the result is "12," the unit is Damaged (and if the unit is already Damaged, it is Eliminated).
Exception: On October 6 and 7, units in the "Golan Front" box are damaged on rolls of "10" or greater.
3.3 First Player-Turn
3.3.1 Movement Phase
The First Player rotates all his Bridge MC markers so that the lowest MP-cost value points toward the arrow on the Bridge counter. He may then conduct any or all of the following activities in any order he desires:
- Receive any Ground Replacements whose codes appear in the current turn's space on the Reinforcement and Replacement Schedule and on the US or USSR Airlift Track (whichever is appropriate). He may then expend them to strengthen weakened ground units or to bring eliminated ground units back into play (see 12.2).
- Move all, some, or none of his ground units. If any ground Reinforcements are due to arrive on the current turn, he may either move them onto the map at an Entry Hex or place them in the "Air Transport" box. He may fly these, and other units in that box, onto the map by Transport missions (see 18.9).
- Adjust his Command Boundaries (Egyptian player only).
- During his Movement Phase (only), the Egyptian player may attempt to Release all of the units in one box on his GHQ Reserve Display by rolling 2 dice and comparing the result to the GHQ Release Value printed in the current turn's space on the Reinforcement and Replacement Schedule (see 13.2.1). If the attempt is successful, the units in that GHQ Reserve box may either enter play as Reinforcements (see 13.0), or be placed in the Egyptian "Air Transport" box on the Air Display.
3.3.2 Strike Phase (daylight turns only)
The First Player resolves any and all Strike missions that he wishes to conduct with his air units. When he has finished doing so, the Second Player may then conduct any Strike missions that he desires against enemy ground units that are located in the ZOCs (Zones of Control) of friendly units. If a Strike mission is detected by the opposing player, he may launch an Interception mission and/or resolve SAM (surface-to-air missile) fire against it.
3.3.3 Bombardment Phase
The First Player may use his artillery units to conduct Bombardments (see 10.2) against enemy targets that are within range. Artillery units that fire during the Bombardment Phase cannot fire during the Ground Combat Phase.
3.3.4 Ground Combat Phase
The First Player must attack all enemy units whose ZOCs extend into hexes occupied by friendly units, and all friendly units in enemy ZOCs must attack. The First Player resolves Ground combat as a series of individual battles in any order he desires. The Ground Combat procedure is fully described in section 9.0. Both players may fly up to two Close Air Support (CAS) missions in support of each ground combat. If a CAS mission is detected by the opposing player, he may launch an Interception mission and/or resolve SAM (surface-to-air missile) fire against it.
3.3.5 Second Player's Withheld Reserve Movement Phase
All the Second Player's HQs that possess "Breakthru" markers may dispatch Withheld Reserves. Withheld Reserves can move up to the limit of their Movement Allowances. Withheld Reserves can neither enter a hex containing another friendly HQ, nor one into which an enemy unit projects a ZOC. After the Second Player has moved all his Withheld Reserves, both players remove all "Fired" markers from their artillery units and flip all their Commanders onto their front sides.
3.3.6 Exploitation Phase
Players resolve this phase in two distinct segments:
- Exploitation Movement Segment: Any of the First Player's units that possess "Breakthru" markers or that are stacked with HQs that possess "Breakthru" markers can move up to the limit of their Movement Allowances. However, only those units that actually achieved a "Breakthru" during the Ground Combat Phase can enter enemy ZOCs.
- Exploitation Combat Segment: The First Player must attack all enemy units whose ZOCs extend into hexes occupied by friendly units, and all of the First Player's units that are located in enemy ZOCs must attack. All rules applying to the Ground Combat Phase apply in full, including Antitank Fire, CAS missions, and the dispatch of Combat Reserves by the Second Player.
3.3.7 End Phase
The players conduct the following activities in any order:
- The First Player may adjust his Command Boundaries (see 4.2).
- The First Player may begin or complete the construction of bridges (see 15.2).
- Both players remove all their Tank Wrecks from the map and receive any Tank Replacements they are due from Tank Recovery (see 12.2.3).
- Both players remove all "Fired" and "Breakthru" markers from their units and flip all their Commanders onto their front sides.
3.4 Second Player-Turn
Exploitation combat ends the First Player-Turn. The Second Player now conducts his own Player-Turn, playing through the seven phases in the same order as his opponent just did.
3.5 Turn Advancement Step
Advance the Game Turn marker into the next space on the game turn track printed on the Reinforcement and Replacement Schedule. If the US or USSR Airlift is underway, advance its "Current Turn" marker into the next space on the Airlift Track.
3.6 Initiative (Special Rule)
In the standard scenarios (that is, Scenarios 1 through 5), the instructions identify the First Player, who remains the First Player for the entire duration of the scenario. However, during the Campaign Scenario, both players will at times act as First Player. The Egyptian player is always the First Player at the beginning of the Campaign Scenario, but the Israeli player becomes the First Player when he Gains the Initiative.
3.6.1 Gaining the Initiative
The Israeli player gains the Initiative at the beginning of any night turn in which any of the following conditions has been met:
- The Egyptian Unit Loss VP Total is 175 or more.
- It is after October 12, and there are no Egyptian units In Supply outside of an Egyptian SAM zone.
- It is after October 12, and the Israeli player controls an unbroken chain of Road hexes from the eastern map edge to a hex adjacent to the Suez Canal. The path must be free of both Egyptian units and their ZOCs.
3.6.2 The Effects of Gaining the Initiative
The Israeli player becomes the First Player during the night turn in which he Gains the Initiative, and the Egyptian player becomes the Second Player. However, before the First Player-Turn is resolved, the Egyptian player may move all of his ground units up to half (rounded up) of their Movement Allowances (although they cannot enter Israeli ZOCs). This movement in no way restricts the ability of an Egyptian unit to move again (expending its full Movement Allowances) during the Second Player-Turn.
The special movement is not considered a Movement Phase, so the Egyptian player cannot rotate his Bridge MC markers, bring Reinforcements into play, adjust Command Boundaries, or fly Air Transport missions at this time. The Egyptian player may expend Replacements, but any unit that is strengthened or rebuilt cannot move at all.
4.0 HQs and Command
To function at full effectiveness, a unit must be In Command.
- If an Egyptian unit is Out of Command, its Movement Allowance and Combat Factor are reduced to half their printed values (rounded up).
- If an Israeli unit is Out of Command, its Movement Allowance (but not its Combat Factor) is reduced to half its printed value (rounded up).
Exception 1: Bar-Lev garrisons and Commando units never suffer any ill effects from being Out of Command.
Exception 2: If an Egyptian parachute or airmobile brigade is Out of Command, its Combat Factor is not halved (although its Movement Allowance is).
Note: The effects of being Out of Command are cumulative with the effects of being Out of Supply (see 7.0). Therefore, if an Egyptian unit is both Out of Command and Out of Supply, its Movement Allowance and Combat Factor are reduced to one-quarter of their printed values (rounding fractions up).
4.1 Headquarters and Combat
HQ units have only one step (see 2.2.5), so a step loss eliminates the HQ. However, each HQ unit has a Replacement HQ printed on its reverse side. If an HQ is eliminated, its Replacement HQ unit enters play as a reinforcement on the following turn. (To record this, place the HQ unit one turn ahead on the Reinforcement and Replacement Schedule). A Replacement HQ that arrives as a Reinforcement may either move onto the map at any friendly Entry Hex or be placed in any hex that contains a friendly unit that is In Supply. If a Replacement HQ is eliminated, it is replaced using the same process.
Note: HQs cannot be rebuilt with Replacements.
4.2 Egyptian Command Sectors
The Egyptian Port Said and the 2nd and 3rd Army HQs can each only command those independent units and division HQs that are located within its Command Sector. A Command Sector is defined as all hexes lying between a formation's Command Boundaries, from north to south and across the width of the map from east to west. However, the northern boundary of the Port Said HQ's Command Sector is the Mediterranean Sea, and the southern boundary of the 3rd Army HQ's Command Sector is the Gulf of Suez.
Note: The Command Sectors of the Port Said and the 2nd and 3rd Army HQs correspond to the Port Said, Ismailia, and Suez Radar zones (respectively) in most scenarios.
4.2.1 Marking Command Boundaries
During play, record the location of Command Boundaries with Command Boundary markers. The Command Boundary always runs directly between the two hexrows toward whose junction the arrow on the Command Boundary marker points. If the arrow does not clearly point towards the junction of two hexrows, it is improperly placed. A Command Boundary need not be perfectly straight; two or more markers can be used to delineate an irregularly-shaped boundary.
4.2.2 Changing Command Boundaries
The Egyptian player may change his Command Boundaries during his Movement and End Phases by simply moving one or more Command Boundary markers so that the boundaries run down new hexsides.
4.3 The Chain of Command
To be In Command, a unit must be able to trace an unbroken Chain of Command; those that cannot are Out of Command. A unit's command status is judged at the instant that it begins moving or combat is resolved. The presence of enemy units and/or their ZOCs do not block friendly Chains of Command.
4.3.1 Israeli Chain of Command
- An Israeli division or front HQ is always In Command.
- An Israeli brigade HQ is In Command if it is within the Command Radius of a division HQ.
- An Israeli Independent unit is In Command if it is within the Command Radius of the HQ that has the same color stripe.
- Any other Israeli unit is In Command if it is within the Command Radius of a brigade HQ and if that brigade HQ is itself In Command. However, a brigade HQ cannot command more than four battalions at a time (four tank and/or antitank companies are the equivalent of a battalion).
Exception 1: An Israeli division HQ can place In Command one stack of combat units that is within its Command Radius (that is, a stack that is not within the Command Radius of a brigade HQ or does not contain more than four battalions, and in either case, does not include a Commander).
Exception 2: Combat units and HQs stacked with Commanders are automatically In Command.
4.3.2 Egyptian Chain of Command
- An Egyptian army or division HQ is always In Command.
- An Egyptian Independent unit is In Command if it is within the Command Sector of the HQ (Port Said, or 2nd or 3rd Army) that is printed in the same color.
Exception: Independent units of the Egyptian GHQ Reserve (including all Arab ally units) may be placed In Command by the 2nd Army, 3rd Army, or Port Said Force HQs.
- An Egyptian Dedicated unit is In Command if it is within the Command Radius of the division HQ to which it is dedicated.
Exception: The 2nd or 3rd Army HQ each can place In Command one stack of combat units that is within its Command Sector (that is, a stack that contains Dedicated units that are not within the Command Range of their Dedicated HQs).
4.4 Special Israeli HQs
The Israeli 440th Division and Granit Force HQs do not enter play in the same way as normal reinforcements. Instead, the 440th Division HQ (and the Commander "Meron") is stacked with any supplied Israeli unit east of the Suez Canal at the instant that the first Israeli division HQ crosses to the west bank of the Suez Canal. Likewise, the Granit Force HQ (and the Commander "Granit") is stacked with any supplied Israeli unit east of the Suez Canal at the instant that the 252nd Division's HQ crosses over to the west bank of the Suez Canal. Both these HQs may move in the same phase in which they are placed on the map and operate at full effectiveness in all respects.
Special Rule: The Granit Force HQ is, in effect, a duplicate 252nd Division HQ (which has the same color stripe). Thus, in addition to its normal capabilities, the Granit Force HQ may command and provide supply for independent units of the 252nd Division.
5.0 Commanders
Design Note: The contrast between the aggressiveness and flexibility of Israeli commanders and the rigidity of their Egyptian counterparts played a considerable role in determining the outcome of the 1973 October War. To simulate this factor, Crisis: Sinai 1973 includes commander units that portray the officers who historically exerted a major influence on the course of the campaign.
Each Commander has a Unit Designation that indicates the brigade or division he commands. The HQ that has the same Unit Designation as a Commander is referred to hereafter as his "corresponding HQ." Commanders come in two distinct varieties: Brigade Commanders and Higher Commanders (which include division, army, and front commanders).
5.1 Commanders and Movement
A combat unit or HQ that is stacked with a Brigade Commander when it begins moving and that remains stacked with him throughout its entire move has its Movement Allowance increased by an amount equal to his Leadership Rating (after any reduction is made for being Out of Supply).
A Commander cannot willingly move out of his corresponding HQ's Command Sector or Command Radius. A Commander can Retreat outside his corresponding HQ's Command Sector or Command Radius as a result of combat, but he must move back within it at the first opportunity.
5.2 Commanders in Combat
Commanders have no Combat Factors (the parenthesized number in the lower left corner of a Commander counter is his Leadership Rating). If a Commander is not stacked with a friendly unit with a Combat Factor greater than zero, any enemy combat unit can eliminate him simply by entering his hex. A Commander is also eliminated if all of the units with which he is stacked are eliminated.
5.3 Combat Leadership
Commanders can provide Combat Leadership to friendly units that are engaged in ground combat. If a Commander provides Combat Leadership, his Leadership Rating modifies the Snafu Check and Combat Resolution dice rolls (see 9.2.2 and 9.2.6).
Only one Commander can provide Combat Leadership in a particular ground combat; and a given Commander can provide Combat Leadership only once each phase. When a Commander provides Combat Leadership, flip his counter onto its "Committed" side to record that he cannot provide leadership in any further ground combats. All Commanders are flipped onto their front sides during each Withheld Reserve and End Phase.
- A Brigade Commander can provide Combat Leadership only if he is stacked with friendly units that are involved in combat against enemy units in adjacent hex(es).
- If a Higher Commander is stacked with friendly units that are directly involved in ground combat, he can provide Combat Leadership just like a Brigade Commander. However, a Higher Commander can also provide Combat Leadership if he is stacked with his corresponding HQ and if all the friendly units participating in the combat are within its Command Radius or Command Sector (that is, even if they are located in two or more different hexes).
Exception: An Egyptian Division Commander can provide Combat Leadership only if at least one unit Dedicated to his division's HQ is participating in the combat.
5.4 General Kalman Magen
The counter of the Israeli Higher Commander "Magen" has no unit designation printed on it because Magen may command any Israeli division HQ. He may replace an Israeli division commander who has been killed or relieve a division's current Commander. If Magen's counter is stacked in the same hex as an Israeli division HQ at the beginning of a friendly Movement Phase, the Israeli player may relieve its current commander simply by declaring his intent and permanently removing that commander from play.
6.0 Movement
Each unit has a Movement Allowance that is measured in terms of Movement Points (MPs). A unit's Movement Allowance is halved if it is either Out of Supply or Out of Command, and it is quartered if it is both. If a unit is in the same hex as a Commander when it begins moving and remains stacked with him throughout its entire move, its Movement Allowance is increased by an amount equal to the Commander's Leadership Rating. A unit need not expend its full Movement Allowance every turn, but unused MPs cannot be accumulated from turn to turn nor transferred from one unit to another. As a unit moves across the map, it expends one or more MPs for each hex that it enters. The MP cost to enter a hex varies depending upon the Movement Class of the unit. There are three Movement Classes:
- Tracked: All units whose Movement Allowances are printed in a white square (that is, Commander, HQ, Tank, Armored Recon, Mechanized Infantry, Halftrack-Mech Infantry, APC, and Self-Propelled Artillery units)
- Motorized: All units whose Movement Allowances are printed in a white circle (that is, Artillery, Antitank, Motorized Infantry, Bridge Equipment, Gilowa, Truck, and Bus units)
- Leg: All units whose Movement Allowances are not printed in a circle or square
The cost to enter a hex also varies depending upon the type of terrain present in it (see Terrain Effects Chart) and along its sides. If a unit enters a hex through a hexside that is crossed by a Wadi, Canal, Stream, Cliff, Bridge, or the Suez Canal, it must pay the MP cost for the hexside terrain in addition to the MPs needed to enter the terrain in the hex itself. A unit can never enter a hex unless it has sufficient MPs to do so.
6.1 Stacking
There are limits to the number of units that a player can have present in a single hex at any point during play.
- The Egyptian player can stack a maximum of four units in a hex, no more than two of which can be brigades. A reduced-strength brigade or brigade remnant still counts as a brigade for stacking purposes.
- The Israeli player can stack a maximum of six units of any size in a hex.
HQs, Commanders, Bridges, and informational markers do not count for stacking purposes (although Bridge Equipment units do). If a player has an overstacked hex at the end of any phase, he must retreat (see 9.3.1) sufficient units one hex from the overstacked hex to conform to his stacking limit.
Exception: The Israeli Prefabricated Bridge does count against the stacking limit when it is being moved.
6.2 Zones of Control (ZOC)
All units except Commanders and Bar-Lev Garrisons have a ZOC that extends into the six hexes surrounding the hex that it occupies. However, ZOCs do not extend across Lake, Sea, and Suez Canal hexsides (even at bridges) or into Mountain hexes except along roads.
Exception: The ZOCs of tank units do not extend into Swamp and Cultivated hexes except along roads and trails.
6.2.1 ZOC Effects
- A unit that enters an enemy ZOC must immediately stop moving and can move no further that Phase. Also, a unit that begins its movement in an enemy ZOC hex cannot move directly into another enemy ZOC.
- The Israeli Prefabricated Bridge and Gilowa units, and all Bridge Equipment units cannot enter enemy ZOCs.
- Lines of Supply cannot be traced through an enemy ZOC unless the hex is occupied by a friendly unit.
- A unit that is in the ZOC of enemy unit(s) during the friendly Ground Combat Phase or Exploitation Combat Segment must attack some or all of the enemy units that project ZOCs into the hex that it occupies. Furthermore, all enemy units that project ZOCs into hexes occupied by friendly units must be attacked.
Exception: Units occupying Bridgeheads or Bar-Lev Strongpoints do not have to attack. See 14.3 and 16.1.
- A unit that has a parenthesized Combat Factor cannot enter an enemy ZOC unless it is moving in a stack with a unit that has an unparenthesized Combat Factor or unless it joins such a unit that is already present in the enemy ZOC.
Exception: Commando ZOCs have no effect whatsoever upon enemy units except as explained in the Ambush rules (see 17.2). Furthermore, Commando units do not have to stop moving when they enter an enemy ZOC, and they can move directly from one enemy ZOC to another by expending 1 MP in addition to the normal cost of entering the hex.
6.3 Ground Transports
Each Truck, Bus, Halftrack, or APC step can transport one leg step. A unit that is being transported moves using the Movement Allowance of the ground transport unit that is carrying it. A leg unit transported by a Truck or Bus is treated as a Motorized unit for all purposes; and a leg unit transported by an APC unit is treated as a Tracked unit for all purposes; and a leg unit transported by a Halftrack is treated as a Halftrack unit. A ground transport unit and the unit(s) that it is transporting count as one unit for Stacking purposes. A transported unit retains its full Combat Factor.
Exception: Bus units can only move along Roads; they can never move or retreat except from one connected Road hex to another (although they can move across Bridges). If a Bus is forced to retreat off-road, it is eliminated instead, leaving the transported unit "on foot."
6.3.1 Loading and Unloading
A ground transport unit expends three MPs to load or unload a Leg unit. Thus, a ground transport unit can move both before and after it loads or unloads a unit, but a Leg unit cannot move "normally" during the same phase or segment during which it is picked-up or dropped-off by a ground transport unit.
A ground transport unit stacked with Leg units that it is not transporting must be stacked underneath them. When a ground transport unit loads a unit, it is stacked on top of the unit.
6.3.2 Ground Transports and Step Reduction
A ground transport unit that is not transporting other units suffers step losses just like any other combat unit. A ground transport unit that has other units aboard loses one step for each step that is lost by the transported unit(s); otherwise it is immune to step losses.
Note: No step losses may be applied to ground transport units that are not carrying leg units unless all other friendly units that were affected by the Combat, Air Strike, or Artillery Bombardment result have been eliminated (see 9.3).
6.3.3 Israeli Ground Transports and Unit Conversion
If an Israeli Halftrack unit is stacked with an Israeli motorized infantry unit at the beginning of a friendly Movement Phase or Exploitation Movement Segment, each Halftrack step may convert one motorized infantry step into a halftrack-mechanized infantry step. Remove the Halftrack and motorized infantry steps and replace them with a halftrack-mechanized infantry step and a truck step.
Likewise, an Israeli APC step may convert either a motorized infantry or a halftrack-mechanized infantry step into a mechanized infantry step using the same procedure. The only other difference is that, depending upon the type of step converted, either a Truck or a Halftrack step is placed in the hex with the converted mechanized infantry step.
Design Note: During the October War, the Israelis soon realized that the only way to combat enemy antitank weaponry was to have mechanized infantry accompany their assaulting tanks. Unfortunately, the only troop carriers capable of keeping up with the tanks in all kinds of terrain were American M-113 APCs (nicknamed "Zeldas"), which were in very short supply. Frantic efforts were made to forward all available Zeldas to the front; and, as the war progressed, some lucky units were able to replace their obsolete M-3 halftracks.
6.4 Special Movement Rules
6.4.1 Engineers
An engineer unit may cross the Suez Canal by itself by expending its full Movement Allowance.
6.4.2 Commandos
- Commando units can move directly from one enemy ZOC hex into another at a cost of one MP in addition to the cost for the terrain in the hex entered.
- A Commando unit can cross the Suez Canal by itself by expending its full Movement Allowance.
6.4.3 Amphibious Units
Amphibious units function exactly like normal mech infantry and armored recon units in all respects except:
- Amphibious units can enter Sea and Lake hexes at a cost of four MPs each, but cannot end their movement in such a hex.
- An amphibious unit can cross the Suez Canal by itself at a cost of three MPs in addition to the cost of the hex entered on the other side.
Design Note: In October 1973, the Egyptian Order of Battle included the 130th Marine Brigade, which was equipped with Soviet-built amphibious PT-76 light tanks and BTR-50 APCs and which had been specially trained and equipped for amphibious operations. The Israelis fielded a small amphibious armored reconnaissance battalion (the Ha Sinat unit), which was equipped with PT-76s and BTR-50s that had been captured during the Six Day War of 1967.
6.4.4 Egyptian Naval Landings
The Egyptian player may conduct a total of two naval landings during the game. He may make one or both landings during the friendly Movement Phases of any night turns before October 10. A naval landing allows:
- One Egyptian commando unit that is located in Port Said or Port Fuad to move to any partial-Sea hex in the Mediterranean Sea (not the Sabkhet el Bardawil).
- One Egyptian commando unit that is located in Suez, Port Tewfik, or Adabiya to move to any partial-Sea hex in the Gulf of Suez.
The commando unit that conducts a Naval Landing cannot land in a partial-Sea hex that is occupied by an Israeli unit and it cannot move normally during the same Movement Phase.
6.5 Egyptian Movement Restrictions
The following restrictions apply to the movement of all Egyptian ground units.
6.5.1 Suez Canal Proximity Restriction
Starting on October 11, no Egyptian units except bridges, and HQ, Commander, bridge equipment, and engineer units may be located in hexes west and within 5 hexes of the Suez Canal at the end of any Egyptian Movement Phase or Exploitation Movement Segment (counting the hex directly adjacent to the Canal, for example Deversoir [2225], as the first hex). This restriction is temporarily lifted if either of the following circumstances applies:
- There is an Israeli unit west of the Suez Canal at the beginning of an Egyptian Movement Phase or Exploitation Movement Segment.
- The Israeli player controls 3 or more contiguous hexes adjacent to and east of the Suez Canal (recall that Commando units cannot control hexes for any purpose).
In either case, a strictly limited number of Egyptian units may end their movement in hexes west of and within 5 hexes of the Suez Canal:
Exception: If the Israeli player controls a bridge (even a Blocked one) across the Canal, all Egyptian units west of the Canal can end their movement within 5 hexes of it.
- Any Egyptian unit that is within 2 hexes either of one of the 3 contiguous Israeli-controlled hexes on the east bank, or an Israeli unit that is located west of the Canal.
- Any Egyptian unit that is Released from the GHQ Reserve may end its movement in a hex west of and within 5 hexes of the Suez Canal during the Egyptian Movement Phase in which it was Released.
- Any Egyptian unit that is dispatched as a Combat or Withheld Reserve.
- One Egyptian unit that is In Command in each Command Sector where the Israeli player controls 3 or more contiguous east bank hexes, or has a unit west of the Canal (i.e., one unit can move per sector; this applies to more than one Command Sector simultaneously). Furthermore, one additional Egyptian unit per sector can end its movement within 5 hexes of the Canal for each 4 Israeli steps that are located within that Command Sector west of the Canal.
Example: There are Israeli ground units located west of the Suez Canal in both the Egyptian 2nd and 3rd Army Command Sectors; 4 steps in the former and 9 steps in the latter. Thus, 2 units that are In Command in the 2nd Army sector may end their movement within 5 hexes of the Canal; one because the Israelis are west of the Canal, and a second because they have 4 steps across in the sector (4 / 4 = 1). In the 3rd Army sector 3 units may end their movement within 5 hexes of the Canal; one because the Israelis are west of the Canal, and two more because they have 9 steps across (9 / 4 = 2.25).
6.5.2 Suez Canal Crossing
Egyptian units that are located east of the Suez Canal can cross to the west bank only if the Israeli player controls a bridge across the Canal (even if the bridge is currently Blocked). Furthermore, even if there is an Israeli-controlled bridge across the Suez Canal, only one Egyptian brigade or four Egyptian breakdown battalions can move to the west bank each game turn (any number of non-breakdown battalions or companies can move back across).
Design Note: The Egyptian movement restrictions simulate how shock, confusion, and a refusal to accept unpleasant facts fatally undermined Egyptian efforts to seal off the Israeli bridgehead across the Suez Canal. Although sizeable Israeli forces were on the west bank at dawn on October 16, it took the Egyptians over 24 hours to begin moving reinforcements into the area and another 48 hours to recognize the deadly threat that the bridgehead represented to their forces on the east bank.
7.0 Supply
To function at full effectiveness when moving and participating in combat, a unit must be In Supply. Units that are Out of Supply have their Movement Allowance and Combat and Antitank Factors reduced to half their printed values (round fractions up). Also, Artillery units that are Out of Supply cannot provide Artillery Support or conduct Bombardments (see 10.0).
Exception 1: Commando units and Bar-Lev garrisons never suffer any ill effects due to being Out of Supply (or, for that matter, for being Out of Command).
Exception 2: A parachute or airmobile unit is automatically In Supply for the whole duration of a turn in which it enters the map by Air Transport (see 18.9.1).
Note: The effects of being Out of Supply are cumulative with those of being Out of Command (see 4.0). Thus, if an Egyptian unit is both Out of Command and Out of Supply, its Movement Allowance and Combat Factor are reduced to one-quarter their printed values (rounded up). If an Israeli unit is both Out of Command and Out of Supply, its Movement Allowance is quartered, and its Combat Factor reduced by half.
7.1 Determining Supply Status
Determine a unit's supply status at the instant that it moves, fires, or participates in ground combat.
7.1.1 Lines of Supply
To be In Supply, a unit must be able to trace a Line of Supply (LOS), which is an unbroken path of hexes that is free of both enemy units and their ZOCs and that does not pass through any hex that Motorized units cannot enter. An LOS can be traced across the Suez Canal only at operable, friendly-controlled Bridges.
Exception 1: An LOS may be traced through an enemy ZOC hex if the hex is occupied by a friendly unit that has a Combat Factor of greater than zero.
Exception 2: A unit that occupies a Bridgehead may trace an LOS across the Suez Canal or Lake hexside toward which the arrow on the Bridgehead marker (see 14.3) points.
7.1.2 Israeli Supply Lines
An Israeli unit is In Supply if it can trace an LOS no longer than seven hexes to a Road hex and then along an unbroken chain of connected Road hexes to any Road hex on the eastern map edge or on the southern map edge east of the Suez Canal.
Special Rule: When tracing Israeli and Egyptian LOSs, assume that Roads run across the Suez Canal wherever a Bridge exists (even one that is Blocked).
7.1.3 Egyptian Supply Lines
- An Egyptian HQ is In Supply if it is located in a Road hex and can trace an LOS of any length along an unbroken chain of connected Road hexes to any Road hex on the western map edge or on the southern map edge west of the Suez Canal.
- An Egyptian Independent unit is In Supply if it is within the Command Sector of and can trace an LOS (of any length) to the HQ that is printed in the same color and if the HQ is itself In Supply.
Exception: Independent units that belong to the Egyptian GHQ Reserve may be placed In Supply by the 2nd Army, 3rd Army, or Port Said Force HQs.
- An Egyptian Dedicated unit is In Supply if it can trace an LOS to a division HQ that is no longer than the HQ's Command Radius and if the division HQ is itself In Command.
8.0 Reserves
Any non-brigade HQ that is In Supply and not located in an enemy ZOC can dispatch friendly combat units and Commanders that are stacked with it as Reserves. All the combat units and Commanders stacked with an HQ do not have to be (and, indeed, cannot be) dispatched at the same point in a turn. An HQ cannot dispatch another HQ as a Reserve.
Exception: A Dedicated Egyptian unit cannot be dispatched as a Reserve by any HQ except that to which it is Dedicated. Independent Egyptian units may be dispatched by any Egyptian HQ.
Note: Commanders are not HQs and cannot dispatch Reserves.
8.1 Combat Reserves
After the Attacker declares an attack during his Ground Combat Phase or Exploitation Combat Segment, one of the Defender's non-brigade HQs can dispatch one unit and/or one Commander as Combat Reserves. However, an HQ can dispatch Combat Reserves only if at least one of the hexes where friendly units are under attack is within its Command Radius or Command Sector.
A unit or commander dispatched as a Combat Reserve can move up to its full Movement Allowance; but it cannot stop moving in a hex containing a friendly non-brigade HQ, and it can only enter the ZOCs of enemy commando units and those enemy units which are attacking in the ground combat that is being resolved. A Combat Reserve that enters a hex in the ZOC of an attacking enemy unit becomes a full participant in the ground combat; that is, it can apply its Combat and Antitank Factors, or Leadership Rating as usual. A Combat Reserve does not have to enter a hex in the ZOC of an attacking enemy unit.
8.2 Withheld Reserves
Whenever the First Player achieves a "Breakthru" in Ground Combat, place a "Breakthru" marker on the HQ that commanded the Second Player's units that participated in the combat. During the Withheld Reserve Phase, any of the Second Player's units that are stacked with HQs that possess "Breakthru" markers may move up to the limit of their Movement Allowances. Withheld Reserves cannot stop moving in a hex containing a friendly non-brigade HQ nor enter any hex into which an enemy unit projects a ZOC. An HQ can dispatch any number of units and commanders that are stacked with it as Withheld Reserves.
8.3 Breakthru Reserves
Whenever the First Player achieves a "Breakthru" in Ground Combat, place a "Breakthru" marker on the HQ that commanded his units in the combat. Any of the First Player's units that are stacked with HQs that possess "Breakthru" markers may move during his Exploitation Phase. Breakthru Reserves cannot enter a hex containing another friendly HQ nor one into which an enemy unit projects a ZOC. An HQ can dispatch any number of units and commanders that are stacked with it as Breakthru Reserves.
9.0 Ground Combat
During the friendly Ground Combat Phase and Exploitation Combat Segment, all enemy units that project ZOCs into hexes occupied by friendly units must be attacked, and every friendly unit that is in an enemy ZOC must attack.
Exception: Units occupying Bridgeheads or Bar-Lev Strongpoints do not have to attack. See 14.3 and 16.1.
Note: From this point on, the player resolving his Player-Turn is termed the "Attacker" and his opponent the "Defender."
The Attacker may organize battles in any way he desires, as long as every one of his units that is in an enemy ZOC attacks, and every enemy unit that projects a ZOC into a friendly-occupied hex is attacked. All the defending units present in a hex must be attacked as a group, and no unit can attack or be attacked more than once per Phase.
9.1 Special Combat Rules
9.1.1 Hasty Attacks
If a unit that has expended more than one-half (rounded down) of its Movement Allowance (including by absorbing a replacement; see 12.1.1) ends its movement in an enemy ZOC, place a "Hasty Attack" marker on top of it, which causes a disadvantageous combat odds column shift to be applied when the unit attacks in ground combat (see 9.2.5).
Exception 1: A unit that moves only one hex does not receive a "Hasty Attack" marker even if it expended more than half its Movement Allowance. However, a unit that moves only one hex to cross a bridge does receive a "Hasty Attack" marker if it expends more than half its Movement Allowance.
Exception 2: Place a "Hasty Attack" marker on an infantry unit (of any type) that moves more than half (rounded down) its Movement Allowance during a daylight turn, even if it does not end its movement in an enemy ZOC. This simulates the fact that infantry marching in column formation presents a highly concentrated and vulnerable target for enemy airpower and artillery.
9.1.2 Commanding HQs
When a combat is being resolved, both players must identify which of their HQs is commanding their units in the combat. If any friendly unit involved in a ground combat is Out of Command, that side is considered to have no commanding HQ (and uses the Out of Command modifier when making its Snafu Check).
- An Israeli brigade or Egyptian division HQ, or the Port Said HQ can command any number of combats per Ground Combat Phase or Exploitation Combat Segment so long as all of the participating friendly units are within its Command Radius (although an Egyptian division HQ can only command units that are either Independent, or are Dedicated to it).
- An Egyptian army, or Israeli division or front HQ can command 1 combat per Ground Combat Phase or Exploitation Combat Segment so long as all of the participating friendly units are within its Command Radius or Command Sector.
9.2 Ground Combat Procedure
9.2.1 Attack Declaration Step
The Attacker declares which enemy-occupied hex(es) he is attacking, which of his combat units (including non-adjacent artillery units that are providing Artillery Support) are participating in the attack, and whether he has a Commander providing Combat Leadership. He then resolves any Close Air Support missions.
The Defender then declares which of his non-adjacent artillery units will provide Artillery Support; announces whether he has a Commander providing Combat Leadership; and resolves any Close Air Support missions.
Note: A player can allocate only three supporting artillery units and two Close Air Support missions in a single Ground Combat.
9.2.2 Snafu Check Step
Both players simultaneously conduct Snafu Checks by rolling two dice and locating the result on the appropriate column on the Snafu Table. The rolls are modified as follows:
- "-?" Subtract the Leadership Rating of a friendly Commander who is providing Combat Leadership. (The modifier's numeral is printed as a variable symbol; it equals the Leadership Rating.)
- +2 Any participating friendly unit is Out of Command.
- "+?" If units Dedicated to more than one Egyptian division are participating in the same combat, add a value equal to the number of divisions minus one. Thus, if units dedicated to three Egyptian divisions were involved in a single ground combat, the Egyptian player's Snafu roll would be modified by +2.
Possible Snafu effects include adverse column shifts on the Combat Results Table; loss of beneficial column shifts for Artillery and Close Air Support; loss of Combined Arms (see 9.4) or the ability to use Combat Reserves (8.1); and supply failure.
9.2.3 Combat Reserve Step
If a Snafu has not prohibited him from doing so, the Defender may dispatch Combat Reserves (see 8.1).
9.2.4 Antitank Fire Step
The Defender resolves Antitank Fire against enemy tank and/or mechanized infantry units. The procedure for organizing and resolving Antitank Fire is explained in section 9.5 (see below).
9.2.5 Odds Computation Step
After applying all tank losses caused by Antitank Fire, both players tally up their total Combat Factors. Halve the Combat Factor of any unit that is Out of Supply or Out of Command; and quarter it if the unit is both.
Exception: The combat factor of an Israeli unit is not halved if it is Out of Command; see 4.0. Thus, the Combat Factor of an Israeli unit that is both Out of Supply and Out of Command is only halved.
Also, halve the Combat Factors of any units that are attacking across Stream, Canal, Suez Canal, or Cliff hexsides. Finally, double the Combat Factor of an infantry or garrison step that is occupying a Bar-Lev strongpoint (see 16.1).
Note: A unit's Combat Factor cannot be reduced to less than one by any combination of command, supply, and terrain factors.
The Attacker divides his total Combat Factor by the Defender's total Combat Factor and expresses the result (rounding fractions down) as a ratio. He then locates the column on the Ground Combat Results Table that corresponds to this ratio and applies the following shifts (if appropriate):
- Shift to the left a number of columns equal to the value of the Combat Modifier for the terrain in the hex occupied by the defending unit(s) (see the Terrain Effects Chart). If defending units occupy more than one type of terrain, use the highest Combat Modifier.
- Shift one column to the left (1L) if the Ground Combat is taking place at Night.
- Shift one column to the left (1L) if the Israeli player is launching a Hasty Attack, and two columns to the left (2L) if the Egyptian player is launching a Hasty Attack.
- Shift one column to the right (1R) for each of the Attacker's artillery units that is providing Artillery Support.
- Shift to the right a number of columns equal to the total Close Air Support (CAS) Rating of all of the Attacker's air units that flew CAS missions, and survived any resulting SAM Fire and/or Air Combat (rounded down in the case of a fractional total CAS Rating).
- Shift one column to the left (1L) for each of the Defender's artillery units that is providing Artillery Support.
- Shift to the left a number of columns equal to the total CAS Rating of all of the Defender's air units that flew CAS missions and survived any resulting SAM Fire and/or Air Combat (rounded down in the case of a fractional total CAS Rating).
Exception: If the Attacker suffered a "Fire Support Breakdown" Snafu, his total number of shifts for Artillery Support and CAS missions is reduced by an amount equal to the value that appeared to the right of the slash in the Snafu Result (i.e., "/#"). If the Defender suffered this Snafu, his total number of shifts for artillery and close air support is reduced in the same way.
- If the Attacker suffered a "Poor Coordination" Snafu (see 9.2.2), shift to the left a number of columns equal to the value that appeared to the left of the slash in the Snafu Result (i.e., "#/").
- If the Defender suffered a "Poor Coordination" Snafu (see 9.2.2), shift to the right a number of columns equal to the value that appeared to the left of the slash in the Snafu Result (i.e., "#/").
Example: The Israeli player is launching a Hasty Attack against Egyptian units located in a Hill hex. Three Israeli and two Egyptian artillery units are providing Artillery Support, and a full-strength Skyhawk and a damaged Phantom are flying a CAS mission in support of the Israeli ground troops.
Assuming that no Snafus occur, shift the combat odds four columns to the left (one column for the Hasty Attack, another for the Hill terrain, and one each for the two Egyptian artillery units) and five columns to the right (two columns for the Skyhawk's CAS Rating, half a column for the Phantom's CAS Rating, and 1 each for the three Israeli artillery units: 5.5, rounded down). Thus, the net column shifts is one column to the right.
9.2.6 Combat Resolution Step
The Attacker rolls two dice and applies the following modifiers:
- Add the Leadership Rating of an attacking Commander who is providing Combat Leadership to the combat resolution die roll.
- Subtract the Leadership Rating of a defending Commander who is providing Combat Leadership from the combat resolution die roll.
- If all attacking stacks qualify for Combined Arms, add three (+3) to the combat resolution die roll if the Israeli player is attacking, or add one (+1) if the Egyptian player is attacking.
- Subtract the Combat Modifier of the terrain in the hex occupied by defending unit(s) from the combat resolution die roll. (See the Terrain Effects Chart.) If defending units occupy more than one type of terrain, use the highest Combat Modifier.
- If an infantry or garrison step that is occupying a strongpoint is defending by itself, subtract one (-1) from the combat resolution die roll.
Cross-reference the modified die roll result with the column located in the Odds Computation to determine the Combat Result, and then apply effects as explained below.
9.3 Ground Combat Results
- ROUT: All attacking units lose two Steps each, and are Retreated four hexes by the Defender. Defending units may advance into vacated hexes.
- A#R#: The Attacker loses the indicated number of Steps and Retreats his units the indicated number of hexes. If an "R" appears without a number, the attacking units Retreat one hex.
- BLAR: Both sides lose one Step, and attacking units Retreat one hex.
- EX: Exchange: Both sides lose one Step and remain in place.
- EX2: Exchange: Both sides lose two Steps and remain in place.
- BLDR: Both sides lose one Step, and defending units Retreat one hex.
- D#R#: The Defender loses the indicated number of Steps and Retreats his units the indicated number of hexes. If an "R" appears without a number, the defending units Retreat one hex.
- BKTH: Breakthru: All defending units lose two Steps each, and are Retreated four hexes by the Attacker. One stack of attacking units receives a "Breakthru" marker. Place "Breakthru" markers on both sides' controlling HQs (if any).
When a combat result indicates that attacking or defending units must lose a certain number of Steps, the owning player decides which of his units take the Step losses. He may distribute Step losses in any way he chooses.
Exception 1: A step loss cannot be applied to an HQ unit, or to a ground transport unit that is not carrying ground units, unless all other friendly units that are directly participating in the combat have been eliminated.
Exception 2: If the Attacker suffers any step losses while attacking a Cultivated, Swamp, Town, or City hex, the first step lost must be removed from an infantry unit (if one participated in the attack).
Note: Whenever a tank unit loses a step, a Tank Wreck marker is placed in the same hex.
9.3.1 Retreat
A unit that is forced to Retreat is moved the indicated number of hexes. The owning player can Retreat a unit in any direction he desires, as long as all of the priorities listed below are followed (in the order given).
Exception: The Attacker retreats defending units in the event of a "Breakthru" Combat Result; the Defender retreats attacking units in the event of a "Rout."
- Units cannot retreat into a hex occupied by non-commando enemy units. Although units may retreat into hexes occupied solely by enemy commando units, they cannot stop retreating there: if necessary, retreat the units one more hex.
- Units cannot retreat off the map.
- Units may not retreat into Prohibited terrain. No unit can retreat across the Suez Canal except at an unblocked bridge. Amphibious units cannot Retreat into or across Lake/Sea hexes or hexsides.
- Units can retreat into an enemy ZOC only if no other route exists.
- Units cannot retreat into a hex in violation of the stacking limit. However, units that are in a hex into which other friendly units are retreating can Retreat one hex in order to make room.
- Each hex into which a unit retreats must (if possible) be further away from the nearest enemy unit than the hex from which it is retreating.
If, for any reason, a unit cannot Retreat the full distance indicated by the Combat Result, it is eliminated instead. If a unit is forced to Retreat into an enemy ZOC, it immediately loses one Step (in addition to any called for by the Combat Result) and increases the length of its Retreat by one hex.
Exception: A retreating unit does not lose a Step if it retreats into an enemy ZOC hex that is occupied by a friendly combat unit or HQ.
9.3.2 Advance After Combat
Whenever a Combat Result calls for defending units to Retreat, attacking units that participated directly in the combat can Advance (that is, move) into the hex(es) vacated by the retreating units. An advancing unit advances only one hex (observing all restrictions on normal movement); it does not follow a retreating unit the full distance of its Retreat.
Exception: Defending units may Advance when the Combat Result is a "Rout."
Note: A unit can Advance even if all of the enemy units involved in a combat were eliminated by Step losses, and therefore could not carry out the Retreat mandated by the Combat Result.
9.3.3 Breakthroughs
Whenever the combat results in a "BKTH," the Attacker places a Breakthru marker on one stack of friendly units that was directly involved in the combat. Place this marker after Advance After Combat. Both players then place Breakthru markers on their commanding HQs (assuming that they had one).
The effects of a Breakthru marker are as follows:
- Any of the Second Player's units that are stacked with an HQ that possesses a Breakthru marker may be dispatched as Withheld Reserves (see 8.2).
- An attacking unit that received a Breakthrough in Ground Combat may move during the friendly Exploitation Movement Segment and can enter enemy ZOCs at that time.
- Any of the First Player's units that are stacked with an HQ that possesses a Breakthru marker may be dispatched as Breakthrough Reserves (see 8.3) during his Exploitation Movement Segment.
Remove all Breakthru markers from the map during each player's End Phase.
Note: Units that are dispatched as Withheld and Breakthrough Reserves do not themselves possess BKTH markers; they merely begin the Withheld Reserve or Exploitation Phase stacked with an HQ that possesses one.
9.4 Combined Arms
If a stack includes any number of tank units and contains at least one infantry step (including leg, motorized, mechanized, parachute, and commando infantry) for every two tank steps present in it, the stack qualifies for Combined Arms.
Exception 1: A stack that is attacking across the Suez Canal (whether at a bridge or not) may never qualify for Combined Arms.
Exception 2: An Egyptian stack that includes Dedicated tank units qualifies for Combined Arms only if it also contains a sufficient number of infantry steps that belong either to Independent units or to units that are Dedicated to the same HQ.
Note: Stacks that would otherwise qualify may become ineligible for Combined Arms as the result of a Snafu.
9.4.1 Combined Arms in Ground Combat
If all the stacks that are attacking in a Ground Combat qualify for Combined Arms:
- Add three (+3) to the combat resolution die roll if the Israeli player is attacking.
- Add one (+1) to the combat resolution die roll if the Egyptian player is attacking.
9.4.2 Combined Arms and Antitank Fire
When tank, mechanized, or halftrack mechanized infantry units that belong to a stack that qualifies for Combined Arms become the target of enemy Antitank Fire, add two (+2) to the opposing player's die roll on the Antitank Fire Table. A stack that contains mechanized and/or halftrack mechanized infantry steps but no tank steps automatically qualifies for this modifier even though it technically does not qualify for Combined Arms.
Exception: Units that are Ambushed (see 17.2) while moving or retreating cannot qualify for this modifier.
9.5 Antitank Fire
The Defender conducts Antitank Fire against attacking tank and mechanized infantry units during the Antitank Fire Step of the Combat Procedure. Any unit that has an Antitank Factor and is adjacent to an attacking tank or mechanized infantry unit can fire. A unit can use its Antitank Factor only once per Phase or Segment no matter how many adjacent hexes contain attacking enemy tank units.
Note: A commando unit's Antitank Factor may be doubled if it Ambushes enemy units (see 17.2); the Antitank Factor of a unit that is Out of Supply is halved (rounding up).
- Total all the Antitank Factors that are firing at the enemy tank and/or mechanized infantry units in a particular hex, locate the appropriate column on the Antitank Fire Table, and roll one die.
- If any firing unit occupies a hex that has a Combat Modifier (see Terrain Effects Chart), subtract the Combat Modifier from the die roll. If the enemy stack qualifies for Combined Arms, add two to the die roll.
- Cross-reference the row on the Antitank Fire Table that corresponds to the modified die roll with the column that was located in Step #1. If a number appears at the junction of the row and column, the target unit(s) lose that number of steps.
If both tank and mechanized infantry units are present in a stack, step losses inflicted by Antitank Fire are always applied to the tank units first. Step losses can be applied to mechanized infantry units only after all tank units in the stack have been eliminated.
Note: Whenever a tank unit loses a step, a Tank Wreck marker is placed in the same hex.
10.0 Artillery
10.1 Artillery Support
An artillery unit that is both In Supply and In Command and that does not possess a "Fired" marker can give Support to friendly units in any combat in which at least one participating friendly unit occupies a hex that is within the artillery unit's Range.
Exception 1: An Egyptian divisional artillery brigade can only give Support if at least one of the friendly units participating in the combat is Dedicated to the same division HQ.
Exception 2: An Israeli divisional artillery battalion can provide support only if at least one friendly unit participating in the combat is within the Command Radius of the division HQ which has the same color stripe.
Each artillery unit that provides Support shifts the combat odds one column to the right if it is attacking and one column to the left if it is defending. When a player declares that an artillery unit is providing Support, he places a "Fired" marker on top of it. A maximum of three non-adjacent artillery units can give Support to each side in a single Ground Combat.
Note: Artillery Support (and Close Air Support) combat odds shifts may be reduced by a Snafu.
Ignore an artillery unit's Combat Factor when computing the combat odds unless it is directly involved in a combat (that is, it is attacking or being attacked by enemy units located in adjacent hexes). Furthermore, an artillery unit in an enemy ZOC cannot provide Support unless it is attacking or being attacked by the enemy unit(s) that exert the ZOC.
10.2 Artillery Bombardment
Bombardment is a special form of combat in which artillery units attack by themselves (that is, instead of providing Artillery Support to friendly units that are engaged in Ground Combat). Bombarding artillery units never suffer adverse combat effects; only the target of a Bombardment can be affected in any way. Only enemy ground units, SAM Sites, or bridges can be the target of a Bombardment.
Note: A bridge may be bombarded as long as either of the two hexes that it links is within range of the bombarding artillery unit(s).
During the friendly Bombardment Phase, an artillery unit that is both In Supply and In Command, that is not in an enemy ZOC, and that does not possess a "Fired" marker may bombard any hex within range. When an artillery unit declares a Bombardment, place a "Fired" marker on top of it. A maximum of three artillery units may participate in a single Bombardment.
10.2.1 Israeli Divisional Artillery Units
All Israeli divisional artillery units (that is, those with unit ID's other than "SoC") have printed Combat Factors of two. However, if an Israeli divisional artillery unit is conducting a Bombardment (see below) at a range of greater than one hex, reduce its Combat Factor to one.
Design Note: The artillery complement of an Israeli division included significant numbers of 120mm and 160mm mortars, which, although very effective weapons in many respects, had very short ranges.
10.2.2 Bombardment Procedure
- Total the combat factors of all the bombarding artillery units. Because the maximum Bombardment strength is "3," ignore any total of greater value.
- Locate the row on the Bombardment/Strike Table corresponding to the nature of the target (ground unit, SAM site, or bridge) and then find the column on that row corresponding to the value computed in Step #1. Because a +2 DRM is applied on the Bombardment/Strike Table if a Bombardment's priority target(s) are infantry and/or antitank units that do not possess "Hasty Attack" markers, the bombarding player must declare whether or not such units are his priority target(s).
- Roll one die, add any applicable modifiers, and cross-reference the result with the column located in Step #2 to determine the Bombardment result.
10.2.3 Bombardment Results
All results on the Bombardment/Strike Table are quantified in terms of the number of "Hits" inflicted upon the target. Hits from artillery bombardment affect different target types as follows:
- Bridges: Each hit on a bridge causes its MC marker to be rotated 90 degrees counter-clockwise. (Rotating the marker enough times causes the bridge to become Blocked.)
- SAM Sites: A SAM site is destroyed (see 18.2) if any number of hits are inflicted upon it by an Artillery Bombardment.
Note: Artillery Bombardments can attack SAM sites, but cannot target SAM Tracks.
- Ground Units: Tally up the total number of Hits inflicted by a Bombardment. This is the number of steps (see 2.2.5) lost by units in the target stack (that is, the total number of steps lost, not the number lost per unit). Roll one die; if the result is even, the bombarding player chooses which unit is affected by each even-numbered step loss, and the defending player chooses the unit that suffers each odd-numbered step loss; if the die roll result is odd, the procedure is reversed, with the bombarding player allocating all odd-numbered step losses and his opponent all even-numbered step losses. The defending player may allocate a hit to any unit that he pleases, but the attacker must allocate hits as follows:
- If the Attacker declared that the priority target(s) of the Bombardment were infantry and/or antitank units that do not possess "Hasty Attack" markers, he must allocate as many hits as possible to these kinds of units before he may allocate one to any other kind of unit.
- If the attacker did not declare that antitank units and/or infantry units without "Hasty Attack" markers were his priority targets, he may not allocate any hits to such units. Thus, any excess hits that remain after all other types of units in the hex have been eliminated are wasted (that is, they have no effect).
Exception: Hits can never be allocated to HQ, engineer, or bridge equipment units. If these are the only kinds of units present in a hex, they cannot be Bombarded.
Design Note 1: HQ's, engineers, and bridge equipment units cannot be eliminated by Artillery Bombardment (and Strike missions flown by air units) because otherwise each player would concentrate all of his firepower against this relative handful of targets until they were all destroyed, thus crippling his opponent "on the cheap." It would be grossly unfair to have a player lose a scenario because his opponent got lucky hits on a few crucial friendly units. Historically, this kind of strategy and tactic did not occur during the Yom Kippur War; and we've decided that it won't happen in the game either.
Design Note 2: Infantry and/or antitank units that do not possess "Hasty Attack" markers are assumed to be dispersed and dug in. Therefore they are less vulnerable to enemy artillery and airpower and benefit from a +2 DRM on the Bombardment/Strike Table.
11.0 Breakdown/Recombination
11.1 Unit Breakdowns
Certain units have the ability to break down into several smaller units. During the friendly Movement Phase, eligible units that are both In Command and In Supply and that are not in an enemy ZOC can break down. A leg unit expends one MP to break down; any other kind of unit must expend three MPs. Place the unit in the "Breakdown" box and replace it on the map with the appropriate number and type of breakdown units (as listed below). The number of units that can break down is limited by the quantity of breakdown units provided in the counter mix.
Only units of the following kinds can break down, and must do so into precisely the number and types of smaller units listed. Remnants and reduced-strength units cannot break down except as noted.
- Israeli 6-15 tank battalions can break down into one 2-15 and three 1-15 tank companies.
- Israeli 4-15 tank battalions can break down into one 2-15 and two 1-15 tank companies.
- Egyptian tank brigades can break down into one 3-15 and two 2-15 tank battalions and one 2-15 mechanized battalion.
- Egyptian infantry, motorized infantry, and mechanized infantry brigades can break down into one 2-15 tank battalion and three infantry battalions of the appropriate type: 2-6 infantry battalions, 2-15 motorized infantry battalions, or 2-15 halftrack mech infantry battalions.
Exception: Reduced-strength Egyptian brigades may break down. A three-step brigade breaks down into three infantry battalions of the appropriate type (that is, no tank battalion), and a two-step Remnant breaks down into two infantry battalions of the appropriate type.
The infantry battalions into which an Egyptian brigade breaks down cannot have a total Antitank Factor greater than that of the brigade or remnant itself. Egyptian breakdown units function as Independent units for all purposes.
11.2 Recombination
If battalions or companies of the appropriate type and number are stacked together in a hex at the beginning of a friendly Movement Phase or Exploitation Movement Segment, they can be recombined into a full-strength unit.
11.2.1 Procedure
Remove the breakdown units from the map and replace them with a unit of the appropriate type taken from the "Breakdown" box. If the recombined unit is a Leg unit, it expends one MP; a Tracked or Motorized unit expends three MPs.
11.2.2 Israeli Tank Company Absorption
By expending three MPs, a reduced-strength Israeli tank battalion or remnant can absorb one or more breakdown tank companies that are stacked with it at the beginning of a friendly Movement Phase or Exploitation Movement Segment. Remove the companies from the map and add a corresponding number of steps to the tank battalion or remnant. Ti-67 companies cannot be absorbed by "normal" Israeli tank battalions or remnants and vice versa.
Example: At the beginning of the Israeli Movement Phase, a one-step Israeli tank battalion remnant and two tank companies (1-15 or 2-15) are all stacked in the same hex. The Israeli player could either remove one company and flip the remnant to its two-step side, or remove both companies and replace the remnant with a three-step (4-15) tank battalion.
12.0 Replacements
Both sides in Crisis: Sinai 1973 can use Replacements to rebuild units that have lost steps or bring eliminated units back into play.
12.1 Ground Replacements
Ground Replacements come in four distinct types (infantry, tank, antitank, and artillery), each of which can be used to rebuild units of the corresponding type. HQs, commandos, and engineers cannot be rebuilt with Replacements.
Note: Each side may receive one replacement bridge equipment unit if the US and USSR Airlifts are under way.
12.1.1 Strengthening Reduced-Strength Units
An understrength ground unit that is In Supply, In Command, and not located in an enemy ZOC at the beginning of a friendly Movement Phase may absorb one Replacement. When a unit absorbs a Replacement, it gains a step; flip a reduced-strength unit or Remnant onto its front side or replace a full-strength Remnant with a reduced-strength four-step unit. It costs half (rounded down) of the unit's Movement Allowance to absorb a Replacement.
Note: Any unit that absorbs a Replacement and that attacks in the following Ground Combat Phase will necessarily be conducting a Hasty Attack.
12.1.2 Bringing Eliminated Units Back into Play
During a friendly Movement Phase, Ground Replacements can also be used to bring units back into play from the "Eliminated Units" box. A one-step unit returns at full strength; a two-step unit returns on its back (reduced-strength) side; and a four-step unit returns as a reduced-strength Remnant of the appropriate type. A unit may not absorb additional Replacements during the same Movement Phase that it is brought back into play. A unit that is brought back into play immediately expends half of its Movement Allowance.
Note: Only units located in the "Eliminated Units" box may be rebuilt. Replacements cannot be used to bring new units (including Remnants, and battalion and company Breakdown units) into play.
All rebuilt units except tank units move onto the map at any friendly Entry Hex during the same Movement Phase that they are rebuilt. A rebuilt tank unit, on the other hand, is placed on the map in any hex that contains a friendly non-brigade HQ unit that is both In Supply and not located in an enemy ZOC. No more than three rebuilt tank steps can be brought back into play by a single HQ during a particular Movement Phase. An HQ may move normally in the same Movement Phase that it brings tank steps back into play.
12.1.3 Ground Transport Unit Replacements
Both players may expend one Ground Transport Replacement per friendly Movement Phase. These may not be saved up from one turn to the next. Each Ground Transport Replacement expended will either add a step to a reduced-strength Truck, Bus, Halftrack, or APC unit or bring a ground transport unit step back into play from the "Eliminated Units" box as a Reinforcement. A ground transport unit must be In Command, In Supply, and not located in an enemy ZOC to absorb a Ground Transport Replacement, and it expends half its Movement Allowance by doing so.
12.1.4 Israeli Antitank Unit Substitution
Israeli antitank units come in two distinct types, TOW and "normal"; but all Israeli Antitank Replacements are of the TOW type. This difference necessitates several changes to the standard Replacement rules.
- When the Israeli player expends an Antitank Replacement to bring a "normal" antitank unit back into play from the "Eliminated Units" box, he replaces the "normal" version of the antitank company with its corresponding TOW version.
- The Israeli player cannot use an Antitank Replacement to strengthen a one-step "normal" antitank company that is located on the map. He can, however, replace a "normal" antitank company with its corresponding TOW antitank company by expending a number of Antitank Replacements equal to its current strength in steps (one or two). This special substitution is the only case in which a unit may absorb more than one Replacement in a single turn.
Design Note: This rule reflects the re-equipment of Israeli antitank units with TOW (Tube-launched, Optically-sighted, Wire-guided) antitank missiles airlifted from the United States after the start of the war.
12.2 Receiving Ground Replacements
Ground Replacements may be accumulated turn to turn. Keep track of the number of Ground Replacements available to each player by adjusting the position of his "Tank Replacements," "Antitank Replacements," "Artillery Replacements," and "Infantry Replacements" markers on the Records Track. Both players have three sources of Ground Replacements:
Note: SAM Replacements cannot be saved from turn to turn. Thus, if a SAM Replacement cannot be used in the same turn that it is received, it is permanently lost.
12.2.1 Scheduled Replacements
Many spaces on the Reinforcement and Replacement Schedule have Replacement Codes printed in them. Those codes printed at the top of a space indicate Replacements that are received by the Egyptian player; those printed at the bottom are received by the Israeli player. The codes are "T" for Tank Replacements, "AT" for Antitank Replacements, "Art" for Artillery Replacements, "I" for Infantry Replacements, and "SAM" for SAM Replacements.
12.2.2 US and USSR Airlifts
- Once the USSR Airlift has begun (see 21.1), the Egyptian player receives the replacements whose codes are printed in the space on the USSR Airlift track that is occupied by the "Current Turn" marker.
- Likewise, once the US Airlift has begun (see 21.1), the Israeli player receives the replacements whose codes are printed in the space on the US Airlift track that is occupied by the "Current Turn" marker.
12.2.3 Tank Recovery
Whenever a tank Step is eliminated during play, place a Tank Wreck of the appropriate color (blue for Israeli, tan for Egyptian) in the hex where the loss was incurred. If more than one step is lost, place as many Wrecks in the hex as there were steps eliminated. Tank Wrecks do not count against the Stacking Limit.
During each End Phase, both players remove all friendly Tank Wrecks from the map one at a time. When you remove a Tank Wreck from the map, you must ascertain the Control status (see 1.1) of the hex to determine whether you get a Tank Replacement.
- If the hex is either occupied by an enemy unit or is in an uncontested enemy ZOC, no Tank Replacement is received.
- If the hex is not occupied by units of either side but it is in both a friendly and an enemy ZOC, roll a die. If the result is 1 through 3, a Tank Replacement is received. The same procedure is used when a Tank Wreck is removed from a hex that neither player has a unit in, or projects a ZOC into.
- If the hex is either occupied by a friendly unit or is in an uncontested friendly ZOC, roll a die. The Israeli player receives a Tank Replacement on a roll of 1 through 5. The Egyptian player receives a Tank Replacement on a roll of 1 through 4.
Note: Although commando ZOCs have no effect on Tank Recovery, a commando unit would prevent the recovery of an enemy Tank Wreck that was stacked in the same hex.
12.2.4 Ti-67 Tank Wrecks and Replacements
There are several Israeli battalions that have the label "Ti-67" printed on their counters. When a Ti-67 unit loses a step, place a Ti-67 Tank Wreck on the map instead of a "normal" Israeli Tank Wreck. When a Ti-67 Tank Wreck is recovered, increase the value of the Ti-67 Tank Replacements marker instead of the normal Israeli Tank Replacements marker. Furthermore, some scheduled Israeli Tank Replacements are Ti-67 Replacements and can only rebuild tank units of that type.
Design Note: During the Six Day War of 1967, the Israelis captured hundreds of undamaged Egyptian T-54 and T-55 tanks. After the war, a considerable number of these were re-equipped with new engines, electronics, and 105mm guns and taken into the Israeli Army under the designation "Ti-67" (also known as "Tirans").
12.3 Air Replacements
Once the US Airlift has begun, the Israeli player receives any Air Replacements listed in the space occupied by the "Current Turn" marker on the US Airlift Track. Likewise, if the USSR Airlift has begun, the Egyptian player receives any Air Replacements listed in the space occupied by the "Current Turn" marker on the USSR Airlift Track. Each Air Replacement listed can only be used to rebuild the specific type of air unit it identifies (that is, "Skyhawk Replacement").
Air Replacements are used to rebuild air units during the Maintenance Step. Each Air Replacement expended will either restore a damaged air unit to full strength or bring an eliminated air unit back into play.
- A damaged air unit that is restored to full strength remains in whatever box it happens to be in on the Air Display. Thus, if a rebuilt unit was located in the "Ready 1" or "Ready 2" box, it could fly missions during the same turn that it was rebuilt.
- When an Air Replacement is used to bring an air unit back into play from the "Eliminated" box, the unit is placed in the "Flown" box. A second Air Replacement can be spent in the same Maintenance Step in order to bring the unit up to full strength (though it still remains in the "Flown" box).
Air Replacements must be expended on the same turn that they are received; Air Replacements that cannot be used are permanently lost.
13.0 Reinforcements
Both sides may receive additional units during the course of a scenario as described below. Scheduled Reinforcements arrive on a fixed schedule, while the arrival of unscheduled reinforcements varies from game to game.
13.1 Scheduled Reinforcements
13.1.1 When They Arrive
Many of the spaces on the Reinforcement and Replacement Schedule have the pictures of various ground and air units printed next to them. When the Game Turn marker is moved into such a space, the units illustrated become available as Reinforcements. If the picture of an Israeli HQ is shown, its corresponding Leader and all Independent units that have the same color stripe arrive as reinforcements at the same time.
Exception: Some independent units that have the same color stripes as Israeli HQs do not arrive at the same time as the HQ units. Instead, these independent units arrive on the game turn(s) when they themselves are illustrated on the Reinforcement and Replacement Schedule.
13.1.2 How They Enter Play
A Ground Reinforcement may enter the map during a friendly Movement Phase in either of the following ways:
- If it is a parachute, airmobile, or commando unit, it may be placed in the "Air Transport" box; it can then be flown onto the map by a Transport mission in the same Movement Phase (or it can remain in the "Air Transport" box).
- It can move onto the map at any of the entry hexes printed beneath its picture on the Reinforcement and Replacement Schedule. If all of its designated entry hexes are occupied by non-commando enemy units, a reinforcing ground unit is held off-map until the following turn, when it can enter the map at any friendly entry hex.
Note: A ground Reinforcement is automatically In Command and In Supply during the Movement Phase that it moves onto the map.
An Air Reinforcement is placed in the "Ready 1" box during the Maintenance Step of the turn in which its picture appears on the Reinforcement and Replacement Schedule.
13.1.3 The Israeli Composite Brigade HQ
The Israeli Composite Brigade HQ, which arrives as a reinforcement on the daylight turn of October 21, is a special case. Instead of moving onto the map at an Entry Hex or being flown onto the map by an Air Transport mission, it is simply placed in the same hex with the 162nd Division HQ. Make this placement even if the 162nd Division's HQ is Out of Supply and/or in an enemy ZOC.
Design Note: The Composite Brigade was an ad-hoc formation created within the 162nd Division to take command of the infantry forces that were left to mop up the "Greenbelt" while the rest of the division drove south toward Suez. The brigade was placed under the command of the 162nd's executive officer, Brigadier General Dovic Tamari.
13.2 Unscheduled Reinforcements
13.2.1 The Egyptian GHQ Reserve
Units that belong to the Egyptian General Headquarters (GHQ) Reserve are, in effect, unscheduled Reinforcements. Instead of entering play on a predetermined game turn, these units become available only when Released (see below).
Exception: Although they belong to the GHQ Reserve, the Egyptian 4th and 21st Armored Divisions are also scheduled Reinforcements (entering play on the October 8 night and October 9 daylight turns, respectively). These units may be Released before their scheduled turns of arrival, but automatically become available to enter play at that point.
13.2.2 Releasing GHQ Reserve Units
During each friendly Movement Phase, the Egyptian player can attempt to Release the units in one GHQ Reserve box by rolling two dice. If the result is greater than or equal to the GHQ Release Value printed in the current game turn's Space on the Reinforcement and Replacement Schedule, the units in that box may enter the map at Entry Hexes I through P (all of the units in a box do not have to enter at the same entry hex). Add three (+3) to the die roll if there is a supplied Israeli unit west of the Suez Canal.
Exception 1: If an Egyptian Entry Hex on the western map edge is controlled by a supplied Israeli unit, ignore the GHQ Release Value printed on the Reinforcement and Replacement Schedule and use a GHQ Release Value of 10 instead (and do not apply the +3 modifier for a supplied Israeli unit being west of the Suez Canal).
Exception 2: Only one unit per turn may move onto the map at Entry Hex P. Tank units cannot use this entry hex.
The Egyptian player is never forced to bring all of the units in a released GHQ Reserve group onto the map as reinforcements. He may move some onto the map and leave others in their box. Released units that remain in their GHQ box are still considered Released; they may be brought into play as Reinforcements (without having to roll for Release) on any subsequent turn.
Exceptions: Special restrictions apply to the Egyptian units in the D, Optional, and Red Sea GHQ Reserve boxes. See the GHQ Reserve Display for details.
14.0 The Suez Canal
Design Note: In 1973, the Suez Canal was approximately 200 meters wide and 8 meters deep. Its already considerable value as a military water obstacle was enhanced by the steep sand and earth embankments (in places almost 100 feet high) that had been raised on both its banks.
14.1 Moving Across the Canal
The extent to which the Suez Canal presents an obstacle to movement depends upon the nature of the ground unit that is trying to cross it.
- An Amphibious unit (of any kind) can cross the Canal by itself at a cost of three MP in addition to the cost of the hex entered on the other side.
- An Engineer or commando unit that begins a friendly Movement Phase adjacent to the Canal may cross into a hex on the other side by expending its full Movement Allowance. An engineer unit may ferry another unit over the Canal (see below) during the same Movement Phase that it itself moves across.
- Leg, antitank, and brigade HQ units can be ferried across the Canal by an engineer or Gilowa unit (consuming the ferried unit's entire Movement Allowance).
- Israeli tank companies can be ferried across the canal by the Gilowa unit (consuming the company's full Movement Allowance).
- All other units can cross the canal only at a bridge.
Exception: A Commander can cross the Canal if he is stacked with any combat unit that can and does cross the Canal.
14.1.1 Ferrying
An engineer unit that is stacked with a Leg, antitank, or brigade HQ unit in a hex adjacent to the Suez Canal may ferry that unit to the other side. This may be done either during a friendly Movement Phase or when Advancing after a ground combat in the Combat Phase or Exploitation Combat Segment. However, an engineer unit can ferry only one unit across the Canal per turn and cannot ferry a unit on the same turn that it starts or completes the construction of a bridge (see 15.0).
The Israeli Gilowa unit (which was equipped with British-built self-propelled pontoons) can ferry friendly Leg, brigade HQ, and antitank units over the Suez Canal just like an engineer unit, but it also has the ability to ferry Israeli tank companies across the Canal.
14.1.2 Ferrying Egyptian Leg Infantry Brigades
Full-strength (four-step) Egyptian leg infantry brigades cannot be ferried across the Suez Canal (because they include a battalion of tanks). Reduced-strength Egyptian leg infantry brigades (that is, those with three or fewer steps) may be ferried across the Canal as usual by engineers.
14.1.3 Special Rule
At the beginning of Scenario #1 and the Campaign Scenario, all Egyptian Leg infantry brigades set up on their three-step sides with a separate 2-15 breakdown tank battalion to represent their organic tanks. If a reduced-strength Egyptian leg infantry brigade and a 2-15 tank breakdown battalion are stacked in the same hex east of the Suez Canal at the beginning of any Egyptian Movement Phase or Exploitation Movement Segment, remove the tank battalion from the map and add a step to the brigade.
14.2 Advancing and Retreating Across the Canal
Any unit can attack across the Suez Canal, but only engineer, commando, and amphibious units can freely Advance After Combat across it. An attacking Leg or antitank unit can Advance across the Canal only if it is ferried across by a friendly Engineer unit; no other types of units can Advance across the Canal.
Note: An Engineer unit can ferry only 1 unit across the Canal per turn. Thus, if an Engineer unit ferried a unit across during the Movement Phase, it cannot allow another to Advance across the Canal during the following Combat Phase or during the subsequent Exploitation Combat Segment.
Units can Retreat across the Suez Canal only at unblocked friendly bridges, and each friendly unit that retreats over a bridge causes its Bridge MP marker to be rotated just as if it had moved across it during the Movement Phase.
14.3 Bridgeheads
Whenever any unit except an engineer or commando unit crosses a Suez Canal or Lake hexside (including as a result of Advance After Combat), a Bridgehead marker is placed in the hex that the unit crosses into. Bridgeheads can be created in enemy ZOCs. A Bridgehead is removed from the map if all of the units occupying it move out or are forced to Retreat.
- A unit that occupies a Bridgehead does not have to attack enemy units whose ZOCs extend into the hex.
- A unit that occupies a Bridgehead may trace an LOS (7.0) across the Suez Canal or Lake hexside toward which the arrow on the Bridgehead marker points.
Note: Units that do not occupy Bridgeheads can only trace Lines of Supply across a Suez Canal or Lake hexside through operable, friendly-controlled bridges, even if friendly units occupying a Bridgehead in an adjacent hex can trace an LOS across a Suez Canal or Lake hexside.
15.0 Bridges
Non-brigade HQs, and artillery, tank, ground transport, and mechanized and motorized infantry units can cross the Suez Canal only at friendly bridges.
Exception: Israeli tank companies can be ferried across the Suez Canal by the Gilowa unit.
15.1 Bridge Equipment
Each Bridge Equipment unit contains enough pontoons to build a single bridge; when you finish constructing a bridge, remove the Bridge Equipment unit from the map (that is, it cannot be used to construct another bridge elsewhere).
15.1.1 Bridge Equipment Units in Combat
Because it has a Combat Factor of zero, a Bridge Equipment unit is automatically eliminated if any enemy unit with a Combat Factor of greater than zero enters its hex. Furthermore, a Bridge Equipment unit can neither Retreat nor Advance After Combat, and is eliminated if all other friendly units in the hex Retreat as a result of ground combat.
15.1.2 Moving Bridge Equipment Units
All Bridge Equipment units (and the Israeli Prefabricated Bridge) can only move on Roads:
- Egyptian Bridge Equipment units have Movement Allowances of six, and they may move normally by themselves.
- Israeli Bridge Equipment units can move only if towed by an Israeli tank unit. An Israeli tank unit can tow a Bridge Equipment unit that is stacked with it at the beginning of a friendly Movement Phase, but its Movement Allowance is reduced to four.
- Likewise, the Israeli Prefabricated Bridge can move only if it is being towed; the towing tank unit's Movement Allowance is reduced from four to two.
15.2 Bridge Construction
All bridges must be constructed, unless the scenario instructions indicate otherwise. All bridges except the Israeli prefabricated bridge are constructed in a hex adjacent to the Suez Canal. The Prefabricated Bridge may be built in any hex east of the Suez Canal, and is towed to a hex adjacent to the Canal.
15.2.1 Egyptian PMP, TPP, LPP, and Israeli Uniflote Bridges
If an engineer unit which neither moved nor ferried a unit across the Suez Canal during that player-turn is stacked with a Bridge Equipment unit in a hex adjacent to the Suez Canal during the End Phase, it may begin building a Bridge to an adjacent, friendly-controlled hex on the other side. Flip the Bridge Equipment unit onto its "Under Construction" side, with the arrow pointing to the hex on the far bank which the bridge will connect.
- If the hex on the far bank is still friendly-controlled in the next friendly End Phase, replace the Bridge Equipment unit with a Bridge of the same type.
- If the hex on the far bank is no longer friendly-controlled at the end of the next friendly End Phase, you may either leave it "Under Construction" (in hopes of getting rid of the enemy unit(s) that are disputing control) or flip the Bridge Equipment unit onto its front side (so that it can move elsewhere during your next player-turn).
- If the engineer unit that is building a bridge either moves out of the hex or ferries a unit across the Suez Canal during the second turn of construction, the "Under Construction" marker is removed (and the whole process must be started again).
15.2.2 The Israeli Prefabricated Bridge
During any friendly Movement Phase after October 10, the Israeli player may begin constructing the prefabricated bridge in any road hex on or east of the Artillery Road simply by placing the Prefabricated Bridge equipment unit on the map in the desired hex. It takes three full days to construct the bridge, so the Israeli player places the Prefabricated Bridge six turns ahead on the Reinforcement and Replacement Schedule. On the turn during which the Game Turn marker is located in the same space as the Prefabricated Bridge, the Prefabricated Bridge Equipment unit is removed from the map and replaced by the Prefabricated Bridge at the beginning of the Israeli Movement Phase.
The Israeli player can interrupt the construction process at the beginning of any friendly Movement Phase by removing the Prefabricated Bridge equipment unit from the map. However, if he does this, he must start assembling the bridge all over again when he brings it back into play (that is, it will take another six turns to complete the construction process).
Once constructed, the prefabricated bridge becomes operational at the instant that it is located in a hex bordering on the Suez Canal and an adjacent hex on the far bank is friendly-controlled. Thus, it can even become operational during a Combat Phase if ground combat causes the elimination or retreat of Arab units on the far bank.
Example: If the prefabricated bridge is towed adjacent to the Canal during the Israeli Movement Phase and one of the adjacent hexes on the far bank is under exclusive Israeli control, Israeli units may begin crossing over it immediately (that is, during the same Movement Phase).
Design Note: The prefabricated bridge consisted of over a hundred huge cylindrical floats (each 2 meters in diameter) that were linked together to form a 440-ton, 200-meter-long rolling "caterpillar." The bridge was constructed in the Israeli rear and towed to the bank of the Suez Canal. Because it arrived fully-assembled, troops could start crossing it almost immediately.
15.3 Bridge Operation
Each bridge always has a Movement Cost (MC) marker of the same type (that is, a PMP bridge has a PMP MC marker) stacked with it. An MC marker has a series of numbers printed around its four edges.
A unit that is located in one of the hexes linked by a bridge may move across it by expending sufficient MPs to enter the hex on the other side plus the current value of the MC marker. After any unit except a Commander crosses a bridge, rotate the bridge's MC marker counter-clockwise so that the next highest MP cost is facing toward the arrow on the bridge. An APC unit and the Leg unit(s) that it is carrying count as only one unit for bridge-crossing purposes.
Exception: For bridge-crossing purposes, a three- or four-step brigade counts as three units, and a two-step brigade counts as two units. Thus, rotate the bridge MC marker counter-clockwise twice before a three- or four-step brigade crosses a bridge and once before a two-step brigade crosses. If the number on the MC marker would cause the bridge to become Blocked (see below), the brigade cannot cross it. Rotate the marker again (as usual) after the unit has crossed it.
Note: Thus, three- and four-step Egyptian brigades cannot cross LPP bridges.
If rotating an MC marker would cause it to be turned to an edge that has a dot "*" or an MP cost lower than that currently showing printed on it, the bridge is blocked. Flip the MC marker onto its "Blocked" side; no more units can cross it for the remainder of the current player turn.
Example 1: The first battalion or company to cross an Egyptian LPP bridge would have to expend three additional MPs, and the second six MPs. After the second unit crossed, the bridge would become Blocked and would remain until the start of the next friendly Player-Turn.
Example 2: If a four-step Egyptian tank brigade was the first unit to cross a PMP bridge during a Movement Phase, the marker would be rotated from its +3 to its +9 value. After the brigade had crossed, expending an extra nine MPs in the process, the Bridge MC marker would be rotated to its +12 edge.
Example 3: However, if the current value of a PMP bridge's MC marker was +9, a full-strength armored brigade could not cross it, because rotating the marker twice would block the bridge.
If an engineer unit occupies one of the hexes that is linked by a friendly Bridge at the beginning of the friendly Movement Phase, flip its MC marker onto its front side with the edge showing the lowest +MP cost facing toward the arrow on the Bridge.
15.4 Capturing Bridges
If a friendly unit that possesses a Combat Factor (greater than zero) enters one of the two hexes that are linked by an enemy bridge and there is no enemy unit possessing a Combat Factor (greater than zero) occupying the hex on the opposite side, the friendly unit captures the bridge. Immediately turn the MC marker back to its lowest MP cost, no matter how far it has previously been rotated by enemy movement across it (even if it has been Blocked). If there is an enemy unit with a Combat Factor of greater than zero on the opposite side of a bridge when a friendly unit enters one of the hexes that it connects, the bridge remains under enemy control but is automatically Blocked.
15.5 Attacking Across Bridges
Units may attack across intact (that is, fully-constructed) bridges, although their combat factors are still reduced by two-thirds because they are attacking across the Suez Canal. However, if all defending units are either eliminated or retreat from the hex on the other side of the Canal, the bridge is immediately Captured (see 15.4 above), and eligible attacking units may Advance across the bridge. Each unit that does so causes the MC marker to be rotated once, twice, or three times, as usual, so it is possible that not all eligible units will be able to Advance over the bridge before it becomes Blocked.
15.6 Demolishing Bridges
A player may attempt to demolish a bridge in either of the following circumstances:
- Any friendly unit occupies one of the hexes connected by a friendly-controlled bridge at the end of any Combat Phase or Exploitation Combat Segment.
- A friendly unit enters one of the hexes connected by an enemy-controlled bridge (that is, the demolition attempt is resolved immediately).
The procedure for resolving a demolition attempt is the same in both cases. If there is no enemy unit in the hex on the far side of the bridge, it is demolished automatically. If there is an enemy unit at the other end of the bridge, roll two dice. If the result is "8" or less, the bridge is demolished; otherwise it remains intact.
15.7 Moving Bridges
All bridges except the Israeli prefabricated bridge can be moved by reversing the construction procedure. Thus, if both ends of the bridge are friendly-controlled during a friendly End Phase and a friendly engineer unit is located in one of the hexes linked by it, you may replace the Bridge marker with a Bridge Equipment unit on its "Under Construction" side. If both the hexes linked by the bridge are friendly-controlled in the next friendly End Phase, flip the Bridge Equipment unit onto its front side; it can move to another location in the next turn.
If the Israeli prefabricated bridge begins a friendly Movement Phase stacked with an Israeli tank unit, the tank unit can tow the bridge to another location (see 15.1.2, 15.2.2). No units can cross the prefabricated bridge during the same Movement Phase that it is towed to a new location.
16.0 The Bar-Lev Line
Design Note: In the years between their conquest of the Sinai peninsula in 1967 and the Yom Kippur war of 1973, the Israelis constructed a line of fortifications along the Suez Canal. For propaganda reasons, the quality and extent of these defenses (which had been built at the initiative of the one-time Chief-of-Staff of the Israeli Army, General Chaim Bar-Lev) were constantly exaggerated by the Israeli press, but in reality they consisted of nothing more than a chain of fortified observation posts. Gaps of as much as fifteen miles stretched between individual positions, and the entire line was garrisoned by a mere 436 men when the Egyptians attacked.
16.1 Bar-Lev Strongpoints
The Bar-Lev Line consists of thirty strongpoints, each of which can hold either one garrison or one infantry step (including parachute, commando, mechanized and motorized infantry). Each garrison has the following special combat effects:
- The Combat Factor of the infantry or garrison step that is occupying a strongpoint is doubled when attacked.
- The infantry or garrison step that is occupying a strongpoint uses the "Strongpoint" line on the Bombardment/Strike Table when it becomes the target of an Artillery Bombardment or Strike mission.
- If the infantry or garrison step that is occupying a strongpoint is the only unit in the hex and is defending by itself, subtract one (-1) from the combat resolution die roll.
- The infantry step that is occupying a strongpoint does not have to attack enemy units that project ZOCs into the strongpoint hex.
Note: All of the preceding special effects of a Bar-Lev strongpoint apply only to the infantry or garrison step that is actually occupying it. Other infantry units in the same hex gain no benefit whatsoever. Furthermore, a two-, three-, or four-step infantry unit derives no benefit because it cannot fit into the fortification (although a full-strength brigade could break down into several battalions, one of which could then fit).
16.2 Bar-Lev Garrisons
Sixteen Bar-Lev strongpoints have corresponding garrison units. All sixteen are set up on the map in Scenario 1; seven of them in Scenario 2; and one in all other scenarios (the number set up in a Campaign Scenario depends upon the starting point of the Campaign; see the Campaign Setup Instructions in the Play Book). Garrisons function exactly like one-step leg infantry units in all respects except that:
- Garrisons cannot move.
- Garrisons do not project ZOCs.
- If a garrison suffers a Retreat result in combat, it is eliminated instead.
17.0 Commandos
Combat, movement, and ZOCs of commando units differ from other units.
17.1 Commando Special Rules
The following special rules apply to all commando units.
17.1.1 Special Commando Control Rules
- Commando ZOCs have no effect whatsoever except as described in the Ambush rules (see 17.2 below). Thus, they do not impede moving or retreating enemy units, block enemy Lines of Supply, or have any effect upon Tank Recovery.
- A Commando unit cannot Control (see 1.1) a hex for any purpose (including gaining Victory Points). However, the presence of a Commando unit will prevent the enemy player from recovering tank wrecks stacked in the same hex.
- Units may trace LOS through a hex occupied exclusively by enemy commando units just as if they were not there at all.
17.1.2 Special Commando Supply Rule
- Commando units never suffer any ill effects from being Out of Command or Out of Supply.
17.1.3 Special Commando Movement Rules
- A Commando unit does not have to stop moving when it enters an enemy ZOC, and it can move directly from one enemy ZOC to another at a cost of one MP in addition to the cost of the terrain in the hex entered.
- A Commando unit may cross the Suez Canal by itself by expending its full Movement Allowances.
- Units can move and retreat right through, but not stop moving or retreating in, a hex occupied exclusively by enemy commando units.
17.1.4 Special Commando Combat Rules
- Commando units cannot receive Artillery Support in Ground Combat unless at least one friendly non-Commando unit is attacking or defending in the same combat.
- Commando units can ambush enemy units.
17.2 Ambushes
A commando unit that is not stacked with a friendly non-commando unit may choose to attempt to ambush enemy units under the following circumstances:
- An enemy stack moves or retreats into the same hex as a commando unit.
- An enemy stack moves or retreats into a hex in a commando unit's ZOC.
- Enemy units attack a commando unit during a Combat Phase or Exploitation Combat Segment. (The commando unit may or may not be defending in a group with other Egyptian units).
To determine whether an Ambush succeeds, consult the Ambush Table and roll one die. If the modified result is "2" or less, the Ambush succeeds. A single commando unit can attempt to Ambush any number of enemy units per turn, but can actually perform an Ambush only once per phase. Furthermore, only one commando unit may attempt to ambush an enemy stack in a given hex no matter how many are eligible to do so.
17.2.1 Ambush Effects
After a successful ambush, the ambushing commando unit may either:
- Conduct Antitank Fire against the enemy stack and then immediately retreat one hex (thus getting away scot-free). The commando unit may fire antitank fire even if there are no units in the enemy stack that can be affected by antitank fire.
- Resolve Antitank Fire against the enemy stack using double the commando unit's Antitank Factor.
Special Rule: A stack that is ambushed while moving or retreating cannot qualify for Combined Arms.
17.2.2 Ambush-Induced Ground Combat
If an attempt to ambush a moving or retreating stack fails or if a commando unit that conducts a successful ambush chooses to double its Antitank Factor, the units in the ambushed stack may attack the commando unit immediately after Antitank Fire is resolved (a moving stack must expend three MPs).
This combat is resolved as usual, except that there is no Antitank Fire Step and that neither side may use Artillery Support (unless there is an artillery unit in the ambushed stack), fly CAS missions, commit Reserves, or Advance After Combat. No matter what the outcome, any surviving units in the ambushed stack can resume moving after the combat has been resolved.
Note: When resolving this combat, ignore completely any other friendly commando units in the same hex as the ambushing commando unit.
If the ambushed stack is located in the same hex as the ambushing commando unit and if neither side is forced to retreat by the combat result, then all commando units in the hex (that is, including those that did not ambush) must retreat two hexes.
17.3 The Israeli Amphibious Armored Recon Battalion
In addition to its special water-crossing capability, the Israeli amphibious armored reconnaissance battalion shares the following characteristics of a commando unit:
- It does not have to stop moving when it enters an enemy ZOC, and it can move directly from one enemy ZOC to another at a cost of one MP in addition to the cost of the terrain in the hex entered.
- Enemy units can trace LOS and move right through a hex occupied solely by the amphibious recon battalion just as though it was not there at all.
- It has no ZOC.
Note: The Israeli amphibious reconnaissance battalion cannot perform ambushes.
Design Note: The Israeli amphibious recon battalion shares some of the characteristics of a commando unit because its equipment, captured Russian-built PT-76 light tanks and BTR-50 APCs, made it indistinguishable from an Egyptian recon unit.
18.0 Airpower
Both sides in Crisis: Sinai 1973 have air units that can be used to attack enemy ground targets and SAM, Radar, and Air Displays; to transport friendly airmobile, parachute, and commando units; and to fight enemy air units.
18.1 The Air Display
Use the Air Display to record the current status of each side's air units and their availability to fly air missions. Units on the Air Display can be attacked (except for Israeli air units in the "Golan Front" box), and possibly damaged or destroyed, by enemy Strike missions. When an air unit is not conducting a mission, it will always be located in one of the boxes on the Air Display. There is no limit on the number of air units that can be present in a single box on the Air Display.
18.1.1 Maintenance Procedure
During the Maintenance Step of each daylight turn, both players simultaneously conduct the following actions in the exact order listed below.
- Conduct a Maintenance Check for each air unit in the "Flown" box by rolling two dice, applying the modifier (if applicable), and finding the result on the Maintenance Table that is printed in the "Flown" box. Units that pass their Maintenance Check are placed in the "Ready 1" box, those that fail remain in the "Flown" box.
- Move all units located in the "Ready 2" box and the Israeli "Golan Front" box into the "Ready 1" box.
- Place all air units that are due to arrive as Reinforcements (see 13.1) on the current turn in the "Ready 1" box.
- Receive any Air Replacements (see 12.3) whose codes appear in the current turn's box on the US or USSR Airlift Track, and expend them to bring air units back into play from the "Eliminated" box, or to restore damaged units to full strength. An eliminated unit that is brought back into play is placed in the "Flown" box. If an Air Replacement is not expended on the turn in which it is received, it is permanently lost instead.
- Attempt to repair (see 18.2.4) each Radar or SAM Track whose Status marker is not in the Track's maximum value box. Also, receive any SAM Replacement (see 12.2) whose code appears in the current turn's box on the US or USSR Airlift Track, and expend it SAM Replacements to increase a SAM Track's value automatically. If a SAM Replacement is not expended on the turn in which it is received, it is permanently lost instead.
- The Israeli player (only) rolls on the Golan Front Air Commitment Table to determine what fraction of his air units are placed in the "Golan Front" box.
- The Israeli player (only) rolls two dice for each air unit in the "Golan Front" box. If the result is "12," the unit is Damaged (and if the unit is already Damaged, it is Eliminated).
Exception: On October 6 and 7, units in the "Golan Front" box are damaged on rolls of "10" or greater.
18.1.2 Golan Front Air Commitment
During each daylight turn, some Israeli air units will be unavailable because they have been committed to the Golan Front. During the Maintenance Step, the Israeli player rolls two dice on the Golan Front Air Commitment Table, and applies the appropriate modifier. The line on the table that corresponds to the modified die roll result indicates the fraction (rounded down) of the air units in the Israeli "Ready 1" box that are immediately placed in the "Golan Front" box.
Special Rule: The Israeli player may choose to halve (rounding down) the current turn's modifier when rolling on the Golan Front Air Commitment Table, but must double the modifier when rolling on the table during the next daylight turn. Obviously, the Israeli player cannot halve the modifier on a daylight turn during which it must be doubled.
The fraction of air transport and helicopter units that is placed in the "Golan Front" box is computed separately from the fraction of combat air units that are placed there (i.e., the same fraction is applied separately to the two different classes of air units). The following rules must be observed when placing combat air units in the "Golan Front" box:
- At least 1 full-strength Phantom and 1 full-strength Skyhawk must always remain in the "Ready 1" box. In this case, other aircraft types may be substituted for Phantoms and Skyhawks, and damaged units may be substituted for full-strength ones.
- At least two-thirds (rounded up) of the combat units placed in the "Golan Front" box must (if possible) be Phantoms or Skyhawks.
- After setting aside the undamaged Phantoms and Skyhawks for the "Ready 1" box, the priority for placement of units in the "Golan Front" box is: 1. Undamaged units; 2. Damaged units only if all available undamaged units of the same type have been committed to the "Ready 1" or "Golan Front" box.
Example: It is the Maintenance Step of the daylight turn of October 7. There are fourteen air units in the Israeli "Ready 1" box: 4 Phantoms, 5 Skyhawks (one damaged), 2 Mirages, 1 Kfir, and 2 Mysteres. The Israeli player rolls two dice and gets a result of "7," to which he then applies the Golan Front Modifier of "-4." According to the "<=4" row on the Golan Front Air Commitment Table, two-thirds of the aircraft in the "Ready 1" box are diverted to the Golan Front. Two-thirds (rounded down) of fourteen means nine air units will be placed in the "Golan Front" box. Of these, six units (two-thirds, rounded up) must be Skyhawks or Phantoms. The damaged Skyhawk cannot be placed in the "Golan Front" box unless all four of the undamaged Skyhawk units have already been put there.
18.2 Radar and SAM Tracks
Each player has an air defense system consisting of a radar network and an array of surface-to-air missile (SAM) batteries. During play, Radar and SAM Status markers are moved up and down a player's Radar and SAM tracks in order to record the effectiveness of his air detection and antiaircraft networks.
18.2.1 Radar Zones
- The Israeli player has one Radar Zone, which covers the entire map.
- The Egyptian player has three Radar Zones: the Port Said, Ismailia, and Suez, the northern and southern borders of which are printed on the map. Each zone has its own Radar Track, and covers the width of the map between its northern and southern borders.
18.2.2 SAM Zones
- The Israeli player has one SAM Zone, which covers the entire area of the map east of the Suez Canal.
- The Egyptian player has three SAM Zones, each of which is paired with one of the three Radar zones. These zones' northern and southern borders are identical to those of the corresponding Radar Zones, but each also has an eastern border printed on the map. Thus, each SAM zone covers the area between its northern and southern borders, and west of its eastern border.
18.2.3 Damage to Radar and SAM Tracks
The value of a Radar or SAM Track can be reduced in two different ways:
- A SAM or Radar Track's Status marker is moved 1 box down the track for each hit inflicted by an enemy Strike mission.
- A SAM Track's SAM Status marker is moved 1 box down the track for each 2 SAM sites that have been destroyed within its zone. A SAM site is destroyed if any non-commando enemy ground unit enters its hex, or any number of hits are inflicted upon it by an Artillery Bombardment.
Note: Destroyed SAM Site markers are provided so you can record which sites have been eliminated.
18.2.4 Repairing Radar and SAM Tracks
Each SAM or Radar Zone has a maximum value, which corresponds to the value printed in the top box on its corresponding track. A SAM or Radar Zone's value can never be increased to a value greater than that in the highest box on its track. However, if a SAM or Radar track's Status marker is not in its top box during the Maintenance Step, you may attempt to repair it as described below.
Exception: A SAM Track's maximum value is permanently reduced by 1 for each 2 SAM Sites that have been destroyed within its zone. Thus, you may attempt to repair such a SAM Track only if its Status marker occupies a box below the one that corresponds to its new, reduced maximum value.
- Roll one die for each of your Radar Tracks that is at less than maximum value. If the result is "1-2" nothing happens. However, if the result is "3-5," the Status marker is moved 1 box up the track, and if the result is "6", it is moved 2 boxes up the track.
- Roll one die for each of your SAM Tracks that is at less than maximum value. If the result is "6," its Status marker is moved 1 box up the track.
- The US and USSR Airlifts (see 21.1) deliver a small number of SAM Replacements to the Israeli and Egyptian players (respectively). Each SAM Replacement expended automatically causes a SAM Track's Status marker to be moved 1 box up the track. If a SAM Replacement cannot be expended during the same turn that it is received, it is permanently lost instead.
Note: You may attempt to increase the value of a SAM Track by rolling a "6" during the same Maintenance Step in which you expend a SAM Replacement to boost its value automatically.
18.3 Air Mission Eligibility
There are five missions that air units can fly: Strike, Transport, Close Air Support (CAS), Escort, and Interception. An air unit must have a CAS Rating in order to fly a CAS mission; a Strike Rating in order to fly a Strike mission; and a Transport Capacity in order to fly a Transport mission. Furthermore, an air unit that has a parenthesized Air Combat Rating cannot fly an Escort or Interception mission.
18.3.1 Night Air Missions
Transport missions are the only air missions that may be flown during night turns.
18.4 Air Mission Procedure
The following procedure is followed when resolving a Strike, CAS or Transport mission. Different procedures are used when resolving Escort and Interception missions; these are fully described in the appropriate rules sections (see 18.5 and 18.6).
- Remove up to 2 eligible air units from your "Ready 1" or "Ready 2" box (not both), and place them in the spaces in the Strike, CAS, or Transport mission box. If only 1 air unit is participating in a mission, it is always placed in the #1 space in the mission box.
- Declare the air mission's target. A Strike mission's target can be a stack of ground units; a bridge; a Radar or SAM Track; or the enemy Air Display. A CAS mission's target must be one of the stacks of enemy ground units that is participating in a ground combat. A Transport mission's target is the hex(es) where it intends to land the ground unit(s) that it is transporting.
- The opposing player attempts Radar Detection (see 18.4.1) against the air mission.
- If the Radar Detection Result permits it, the opposing player may choose to launch an Interception mission (see 18.6) against the air mission. Should he decide to do so, Air Combat is resolved immediately.
- If allowed by the Radar Detection Result, the opposing player conducts SAM Fire (see 18.4.3) against each unit in the air mission. Apply SAM Fire effects immediately.
- Determine the air mission's outcome as explained in the Strike, CAS, and Transport mission rules (see 18.7, 18.8, and 18.9 respectively).
- Return all surviving units in the air mission to the Air Display. If the participating units were taken from the "Ready 1" box at the beginning of the mission, they are placed in the "Ready 2" box. If they started in the "Ready 2" box, they are placed in the "Flown" box.
Note: Any friendly air units that flew an Escort mission in support of the Strike, CAS, or Transport mission are also returned to the Air Display at this time. The same holds true for any enemy air units that flew an Interception mission.
18.4.1 Radar Detection Procedure
Whenever a Strike, CAS, or Transport mission is flown on the map or Air Display, or against a Radar or SAM Track, the opposing player automatically attempts to detect it using the following procedure.
- Examine the Radar Track whose zone includes the hex that is the air mission's target. The number printed in the box on the track that is occupied by its Radar Status marker is your Radar Value.
Note: A Strike mission that targets a Radar Track is always considered to be within that Radar zone.
Note: If the Israeli player attacks the Egyptian Air Display, the Egyptian player always uses the lowest of his three Radar Values when attempting to detect the mission.
- Roll two dice and apply any appropriate modifiers (from among those listed on the Radar Detection Table).
- Cross-reference the modified dice roll result with the column on the Radar Detection Table that corresponds to your Radar Value to determine the Radar Detection Result.
18.4.2 Radar Detection Results
- IS: The detecting player may conduct an Interception mission against the enemy air mission. After the Interception mission has been resolved, he resolves SAM Fire against the air mission.
Exception: Boldface "I" results apply only if the Israeli player is attempting to detect an air mission. Boldface "S" results apply only if the Egyptian player is attempting to detect an air mission.
- S: The detecting player resolves SAM Fire against the air mission.
- -: The air mission is not detected.
- *: If the Egyptian player rolls a "*" result that includes an "S," he resolves SAM Fire with a -1 die roll modifier. If the result does not include an "S," he resolves SAM Fire on the "1-2" column (with no modifier) even if the Israeli air mission is not located in an Egyptian SAM zone.
If the Israeli player is rolling, he ignores the "*" portion of the result. Thus, he treats an "S*" as an "S", and a "--*" as a "--."
Design Note: This last rule illustrates the effect of Egyptian SA-6 surface-to-air missiles, which were highly effective, but relatively short-ranged. Since SA-6 launchers were mobile, they could accompany Egyptian forces attacking beyond the limits of the main Egyptian SAM belt, which consisted primarily of static SA-2 and SA-3 batteries.
18.4.3 SAM Fire Procedure
If the Radar Detection Result allows you to resolve SAM Fire against an enemy Strike, CAS, or Transport mission, the following procedure is used.
- Examine the SAM Track whose zone includes the hex that is the air mission's target. The number printed in the box on the track that is occupied by its SAM Status marker is your SAM Value.
Note: A Strike mission that targets a Radar or SAM Track is always considered to be within the appropriate SAM zone.
Note: If the Israeli player attacks the Egyptian Air Display, the Egyptian player uses the lowest of his three SAM Values when resolving SAM Fire against the mission.
- Locate the column on the SAM Fire Table that corresponds to the SAM Value determined in Step #1. If the box on the SAM track that is occupied by its SAM marker contains the code "1L," shift 1 column to the left on the SAM Fire Table; if the code "2L" appears there, shift 2 columns to the left.
- Roll two dice and apply any appropriate modifiers (from among those listed on the SAM Fire Table). Then, cross-reference the modified dice roll result with the column located in Step #2 to determine the SAM Fire Result.
Note: Units flying Escort and Interception missions are immune to SAM Fire.
18.4.4 SAM Fire Results
- X: Target is eliminated. If the target is transporting ground units they are also eliminated.
- D: Target is damaged. If the target is at full strength, flip it onto its reduced-strength side; if it is already on its reduced-strength side, or if it is a 1-step air unit, it is eliminated. If the target is a full-strength helicopter or air transport, half of the ground steps that it is transporting are eliminated.
- A: Target is aborted. Immediately place it in the "Flown" box. If the target is transporting ground units, they are returned to the "Air Transport" box.
Exception: If the target is flying a CAS or Strike mission, the owning player may choose to apply this as a "D" result instead. Thus, a full-strength air unit would be flipped onto its damaged side, but could continue flying its mission (there would be no benefit to choosing this option for an air unit that was already on its reduced-strength side).
- DA: Target is both damaged and aborted.
- +1/+2: Place a +1 or +2 marker on a target that is flying a Strike or Transport mission. This will be applied as a modifier when the unit rolls on the Strike or Scatter Table. Units flying CAS missions are unaffected by +1 and +2 results.
18.5 Escort Missions
After designating the target of a Strike, CAS, or Transport mission, you may allocate up to 2 eligible air units to fly an Escort Mission in its defense. Simply declare that you are conducting an Escort Mission, remove the participating units from the "Ready 2" or "Ready 1" box, and place them in the spaces in the "Escort" mission box. If only 1 air unit is participating in a mission, it is always placed in the #1 space in the mission box.
Note: The units flying an Escort mission may be taken from a different "Ready" box than the air units that are flying the Strike, CAS, or Transport mission which is being escorted.
No Radar Detection attempt is made against an Escort Mission, although it may be subject to Interception if the Strike, CAS, or Transport mission that it is defending is detected. However, the units flying an Escort mission are never affected by SAM Fire.
18.6 Interception Missions and Air Combat
Design Note: All air combat in Crisis: Sinai occurs as the result of Interception missions that are sent to attack enemy Strike, CAS, and Transport missions (and the Escort missions that are defending them).
If the Radar Detection Result includes an "I," you may choose to launch an Interception mission against the enemy Strike, CAS, or Transport mission. Simply declare that you are conducting an Interception Mission, and remove up to two eligible units from your "Ready 2" or "Ready 1" box, and place them in the spaces in your "Intercept" mission box. If only 1 air unit is participating in a mission, it is always placed in the #1 space in the mission box.
No Radar Detection attempt is made against an Interception Mission, so the air units participating in it cannot be Intercepted, and will never become the target of SAM Fire.
18.6.1 Air Combat Procedure
Whenever an Interception mission is sent to attack an enemy Strike, CAS, or Transport mission, resolve Air Combat using the following procedure.
- If the enemy mission is accompanied by an Escort mission, the interceptors resolve air combat against the escorts. Each interceptor or escort "fires" at the air unit that occupies the corresponding space in the enemy "Escort" or "Interception" mission box. Thus, the unit in space #1 in the "Intercept" mission box fires at the unit in space #1 on the enemy "Escort" mission box (and vice versa), while the #2 interceptor fires at the #2 escort (and vice versa). However, if 2 interceptors are fighting a solitary escort (or vice versa), they both fire at the single enemy unit (although the unit that is being "ganged up" on can only fire at the unit in the corresponding space on the enemy air mission box).
Exception: In Air Combat between interceptors and escorts, units with higher Air Combat Factors fire before those with lower ratings do. Units that have the same Air Combat Rating fire simultaneously, but because all damage is applied before units with the next highest Air Combat Rating get to fire, it is possible that a unit will be eliminated or aborted before it gets to fire.
- If an interceptor eliminated or aborted the unit in the corresponding space in the enemy "Escort" mission box (or if there was no opposing escort unit), it fires again, this time at the unit in the corresponding space in the enemy "Strike," "CAS," or "Transport" mission box. If 2 Interceptors have no escorts opposing them and there is only 1 unit in the enemy "Strike," "CAS," or "Transport" mission, they both fire at the single enemy unit.
- Any unit that was fired upon by an interceptor in Step #2 and was not aborted or eliminated may fire back at the interceptor that attacked it (if a single unit was "ganged-up" against by 2 interceptors, it only fires back at the one that occupies the corresponding space in the enemy "Intercept" mission). If a unit's Air Combat Rating is parenthesized, it may not fire in Air Combat.
Note: Combat between interceptors and units flying Strike, CAS, and Transport missions differs from combat between interceptors and escorts insofar as air units that possess the same Air Combat Rating do not necessarily fire simultaneously.
Example: Two Israeli Phantoms intercept an Egyptian CAS mission consisting of two MiG-17s that is escorted by two MiG-21s. Since the Phantoms' Air Combat Factor (3) is higher than the MiG-21s' (2), the Israelis fire first. The Phantom in the #1 space of the Israeli "Intercept" box fires at the MiG-21 in the #1 space of the Egyptian "Escort" box, and aborts it. The Phantom in the #2 space fires at the MiG-21 in the #2 space, but misses it entirely. MiG #2 then fires back at Phantom #2, but also fails to inflict any damage.
Because Phantom #1 no longer has a unit opposing it in the #1 space of the Egyptian "Escort" box, it fires again, this time at the MiG-17 in the #1 space of the Egyptian "CAS" box. If the MiG survives, it will get to fire back, although with a +2 modifier because it is flying a CAS mission.
18.6.2 Resolving Air Combat Fires
To resolve each Air Combat fire:
- Subtract the Air Combat Rating of the target unit from the Air Combat Rating of the firing unit (the result may be negative), and locate the corresponding column on the Air Combat Table.
Exception: Air units that have parenthesized Air Combat Ratings cannot fire in Air Combat.
- Roll two dice, and apply the firing unit's Pilot Rating (which may be positive or negative) plus any other applicable modifiers.
- Cross-reference the modified die roll result with the column located in Step 1 to determine the Air Combat Result. Air Combat Results are applied in exactly the same way as SAM Fire Results (see 18.4.4).
18.7 Strike Missions
Strike missions may be flown during any Strike Phase. The target of a Strike mission can be a bridge, a stack of enemy ground units, a Radar or SAM Track, or enemy air units on the Air Display. The procedure for resolving attacks against all kinds of targets is precisely the same.
Exception: You may fly Strike missions during the Strike Phase of your opponent's player-turn. However, the only eligible targets for your Strike missions at that time are enemy ground units that are located in the ZOCs of friendly ground units.
18.7.1 Strike Procedure
Each air unit that is participating in a Strike Mission, and that is neither eliminated nor aborted by an Air Combat or SAM Fire Result attacks separately.
- Find the row on the Bombardment/Strike Table that corresponds to the nature of the target (ground units, bridge, Air Display, or Radar or SAM Track). Since a +2 die roll modifier is applied on the Bombardment/Strike Table if a Strike's priority target(s) are infantry and/or antitank units that do not possess "Hasty Attack" markers, the striking player must declare whether or not such units are his priority target(s).
- Locate the column that corresponds to the attacking air unit's Strike Rating on the row that was located in Step #1.
- Roll one die, add any applicable modifiers, and cross-reference the modified result with the column located in Step #2 to determine the Strike Result.
18.7.2 Strike Results
Each class of target is affected differently by hits inflicted by Strike missions:
- Bridges: Each hit on a bridge causes its MC marker to be rotated 90-degrees counter-clockwise (this may cause the bridge to become Blocked if the marker is rotated enough times).
- Radar and SAM Tracks: Each hit on a Radar or SAM Track reduces its value by one box.
Note: Strike missions cannot target SAM sites, although they can attack SAM Tracks. Artillery Bombardments, on the other hand, cannot target SAM Tracks, but can attack SAM sites.
- Air Units on the Air Display: Each hit inflicted on enemy air units on the Air Display either damages an intact unit (flips it onto its reduced-strength side), or eliminates a damaged unit. Tally up the total number of hits achieved by a Strike mission. The attacking player assigns each even-numbered hit to any enemy air unit of his choice, no matter where it is located on the Air Display; all other hits are allocated by the defending player however he desires.
Exception: Hits can never be assigned to Israeli air units located in the "Golan Front" box.
- Ground Units: Tally up the total number of Hits inflicted by a Strike mission or Bombardment. This is the number of steps (see 2.2.5) lost by units in the target stack (i.e., the total number of steps lost, not the number lost per unit). Roll one die. If the result is even, the attacking player applies all even-numbered step losses, while the defending player allocates all odd-numbered step losses. If the result is odd, the attacking player allocates all odd-numbered step losses.
The defending player may allocate a hit to any unit that he pleases, but the striking player must allocate hits as follows:
- If the striking player declared that antitank and/or infantry units that do not possess "Hasty Attack" markers were his priority targets, he must allocate as many hits as possible to such units before he may allocate one to any other kinds of units.
- If the striking player did not declare that infantry and/or antitank units that do not possess "Hasty Attack" markers were his priority targets, he may not allocate any hits to such units. Thus, any excess hits that remain after all other types of units in the hex have been eliminated are wasted (i.e., have no effect).
Exception: Hits can never be allocated to HQ, engineer, or bridge equipment units. If these are the only kinds of units in a hex, they cannot be targeted by a Strike mission (See Design Notes after 10.2.3).
18.8 CAS Missions
When a Ground Combat is resolved during a daylight turn, both players may fly up to 2 CAS missions. Each air unit that flies a CAS mission to a hex that contains friendly units participating in a Ground Combat, and is neither aborted nor shot down causes the combat odds ratio to be shifted by an amount equal to its CAS Rating (shift to the right when attacking, and to the left when defending).
Exception: Beneficial combat odds ratio shifts may be reduced or lost entirely due to a Snafu (see 9.2.2).
18.9 Transport Missions
During friendly Movement Phases, air transport and helicopter units can move certain types of ground units by air. Each transport or helicopter unit has an Air Transport Capacity printed on it which indicates the number of ground units steps (either 1 or 2) that it can carry. Two air transport or helicopter units may combine to lift a single ground unit whose size in steps exceeds their individual transport capacities, but helicopters and transports cannot be mixed together (i.e., a Transport mission must consist entirely of one or the other). A ground unit cannot move normally during the same Movement Phase in which it is transported by an air unit.
18.9.1 Transport Eligibility
Only the following kinds of ground units can be transported.
- Parachute and commando infantry units can be transported by air transport and helicopter units.
- Airmobile infantry units can be transported by helicopter units.
In order to be transported, a ground unit must begin the Movement Phase in the "Air Transport" box on the Air Display. Any ground unit that is both In Supply and In Command, and is not in an enemy ZOC, can be placed in the "Air Transport" box at the end of any friendly Movement Phase. Furthermore, units that are Released from the Egyptian GHQ Reserve, or arrive as Reinforcements on the current turn, may be placed directly in the "Air Transport" box and be carried by a Transport mission in the same Movement Phase.
A ground unit that is located in the "Air Transport" box at the beginning of a friendly Movement Phase may instead enter play by moving onto the map at any friendly Entry Hex just like a Reinforcement (see 13.1.2).
Note: A parachute or airmobile infantry unit is automatically In Supply for the entire duration of a turn in which it enters the map by Air Transport.
18.9.2 Air Transport Restrictions
Ground units can only be transported to certain kinds of hexes on the map.
- A unit carried by helicopter can land in any type of terrain except City or Mountain.
- A unit carried by air transports can land only in a Clear, Cultivated, or Sand hex.
- No unit can ever land in a hex occupied by an enemy unit of any kind.
Exception: An Egyptian commando or airborne unit that is printed in the same color as the 2nd or 3rd Army, or Port Said Force HQ, may only attempt to land in a hex that is located in the appropriate Command Sector. Thus, the 182nd Airborne Brigade may only be transported to a hex within the 2nd Army's Command Sector (although it could conceivably Scatter outside the Sector).
Two or more ground units that are being lifted by the same air transport mission may land in different hexes. Nonetheless, the air transport mission is still subject to only one Detection attempt, and one SAM fire and/or Interception (if allowed by the Detection result). If an air transport mission is landing Israeli ground units at locations in two or more Egyptian SAM zones, the Egyptian player uses the highest Radar value when attempting to detect the mission, and the highest SAM value when resolving SAM Fire against it (if allowed by the Detection result).
Note: Two 1-step ground units that are being transported by a single air transport or helicopter unit may land at different locations.
18.9.3 Scatter
If an air-transported unit attempts to land in any hex except one containing a friendly-controlled airbase, it may Scatter into another hex. Roll two dice for each ground unit that a Transport mission is carrying, apply any applicable modifiers, and find the result on the Scatter Table. The result will indicate that the unit either landed accurately, or scattered 1 or 2 hexes. If a unit scatters, take the lower of the two individual die rolls and refer to the Scatter Diagram printed on the map to determine in which direction it scatters. If the unit scatters into a hex where it cannot land due to terrain or the presence of an enemy unit, it is eliminated.
19.0 Victory
The number of Victory Points (VPs) that each player has accumulated determines the winner of a Crisis: Sinai 1973 scenario. Players keep track of the current VP Total by adjusting the VP markers on the Records Track as VPs are received during the course of a scenario.
Scenarios 1 through 5 each has its own distinct Victory Conditions, which either award victory to one of the players or end the game in a draw, depending upon what the VP Total is after the scenario has been played through to completion. The procedure for determining the victor in one of the Campaign Scenarios is identical except that either player may automatically win a Campaign Scenario at any time by satisfying his Sudden Death Victory Conditions (see 19.2).
19.1 Victory Point Schedule
VPs are awarded according to the following schedule, but points are awarded for controlling a Bar-Lev strongpoint, town, city, Mountain pass, or Entry Hex only if the controlling player can trace a clear Line of Supply to it. Thus, it is possible that you may control a hex for all other purposes (tracing retreats, blocking supply, and so on), but not receive any VPs for it.
- When the Israeli player receives a VP, it is added to the VP Total.
- When the Egyptian Player receives a VP, it is subtracted from the VP Total. The VP Total may be a negative number.
19.1.1 VPs Awarded to Both Sides
- +/-2: Each enemy step eliminated.
Exception 1: The Egyptian player receives 4 VPs for each Israeli engineer or infantry step (leg, motorized, mechanized, parachute, or commando) he eliminates.
Exception 2: The Egyptian player receives no VPs for eliminating Bar Lev garrisons.
- +/-5: Each enemy Bridge equipment unit eliminated.
- +/-50: Your opponent declares that he is violating a UN Ceasefire (see 21.2).
19.1.2 VPs Awarded to the Egyptian Player
- -5: Each Israeli air step eliminated.
- -5: Each Bar-Lev strongpoint controlled.
- -15: Each town hex controlled east of the Suez Canal or each town hex west of the Suez Canal that is recaptured from Israeli control.
- -25: Each city hex controlled east of the Suez Canal or each city hex west of the Canal that is recaptured from Israeli control.
Exception: The Egyptian player receives no Victory Points for controlling Port Fuad unless it is recaptured from Israeli control.
- -15: Each friendly bridge built across the Suez Canal or each Israeli bridge that is captured, demolished, or voluntarily disassembled (or moved away) by the Israeli player.
Exception: The Egyptian player receives no Victory Points for controlling a bridge that crosses the Suez Canal at Port Fuad.
- -10: Egyptian player recaptures an Israeli-controlled Egyptian entry hex.
- -25: Each Israeli entry hex controlled.
- -25: Egyptian player controls Giddi Pass (any one of the following hexes: 4132, 4530, or 4631).
- -25: Egyptian player controls Mitla Pass (any one of the following hexes: 3936, 4334, 4435, or 4535).
- -5: Each Israeli battalion or remnant Out of Supply at the end of an Egyptian player turn.
19.1.3 VPs Awarded to the Israeli Player
- +3: Each Egyptian air step eliminated.
- +5: Each Bar-Lev strongpoint recaptured from Egyptian control.
- +5: Each of the following units that the Egyptian player brings into play: the Nasir Tank Brigade, the PGRD Mech Infantry Brigade, and any brigade of the 3rd Mechanized Infantry Division.
- +15: Each friendly bridge built across the Suez Canal or each Egyptian bridge that is captured, demolished, or voluntarily disassembled by the Egyptian player.
- +15: Each town hex controlled west of the Suez Canal or each town hex east of the Suez Canal that is recaptured from Egyptian control.
- +25: Each city hex controlled west of the Suez Canal or each city hex east of the Canal that is recaptured from Egyptian control.
- +25: All hexes of Giddi Pass are recaptured from Egyptian control.
- +25: All hexes of Mitla Pass are recaptured from Egyptian control.
- +25: Each Israeli entry hex recaptured from Egyptian control.
- +10: Each Egyptian entry hex controlled.
- +5: Each Egyptian brigade or remnant Out of Supply at the end of an Israeli player turn.
19.1.4 Recording Ground/Air Unit Losses
When playing a Campaign Scenario, the players must keep track of how many VPs they have gained for eliminating enemy ground units, so "Egyptian Unit Loss VP" and "Israeli Unit Loss VP" markers are provided in the countermix. Whenever a ground unit step is eliminated during play, the appropriate "Unit Loss VP" marker(s) are adjusted on the Records Track. Likewise, "Air Step Losses" markers are provided so that the players can keep track of how many enemy air units they have eliminated.
19.2 Sudden Death Victory (Optional Rule)
When playing a Campaign Scenario, the players may agree to utilize Sudden Death Victory Conditions. If they do so, each player chooses any two of his ten Sudden Death Victory Condition chits at the beginning of a Campaign Scenario, and places the rest in an open-topped, opaque container (such as a coffee cup), from which he randomly draws three more. These five chits, which specify that player's Sudden Death Victory Conditions, are placed face-down on the table in front of him. A player may examine his own chits at any time, but can look at his opponent's chits only if the other player declares that he has won a Sudden Death Victory.
At the instant that a player satisfies any four of his five Sudden Death Victory Conditions (as explained below), he wins an automatic Decisive Victory and the Campaign Scenario immediately comes to an end. A player cannot choose to continue playing the Campaign Scenario by not informing his opponent that he has won a Sudden Death Victory.
Note: Obviously, if you satisfy a Sudden Death Victory Condition by gaining control of a territorial objective (city, mountain pass, or entry hex), that condition is no longer satisfied if the opposing player regains control of the territorial objective in question.
19.2.1 Israeli Sudden Death Victory Conditions
- Control any three Egyptian Entry Hexes.
- Have at least thirty steps of Israeli combat units west of the Suez Canal at the end of an Israeli player-turn.
- Eliminate 250 VPs worth of Egyptian ground units.
- Control Port Said (2101).
- Control Qantara (2113 and 2213) or Ismailia (2020 and 2120).
- Control Suez (2838) or Port Tewfik (2938).
- Eliminate twenty-five steps of non-transport, non-helicopter Egyptian air units. (Note that MiG-17 and Su-7 units have only one step at full-strength.)
- Reduce the value of the Egyptian Ismailia or Suez SAM Track to 3 or less.
- Place at least twenty Egyptian steps Out of Supply at the end of any Israeli player-turn.
- Arab Solidarity Attack: If the Israeli player draws this chit, he may present it to the Egyptian player at the end of any turn after October 9 and before the Israelis have gained the Initiative (see 3.6). Within 3 days, the Egyptian player must, in the course of a single player-turn, attack with at least twelve brigades (at least half of which must be tank brigades or remnants). If he does not do so, the Israeli player achieves a Sudden Death Victory Condition.
19.2.2 Egyptian Sudden Death Victory Conditions
A hex may be judged to be controlled only if an unbroken Line of Supply can be traced to it.
- Control any seven Bar-Lev strongpoints that are not adjacent to the Suez Canal.
- Capture or destroy an Israeli bridge or bridge equipment unit.
- Control Baluza (2908).
- Control El Tasa (3121).
- Control any hex of Giddi Pass (4132, 4530, or 4631) or Mitla Pass (3936, 4334, 4435, or 4535).
- Eliminate 75 VPs of Israeli ground units.
- Eliminate 200 VPs of Israeli ground units.
- Eliminate ten steps worth of non-transport, non-helicopter Israeli air units. (Note that Mystere units have only 1 step at full-strength.)
- Eliminate fourteen steps of non-helicopter, non-transport Israeli air units.
- Place at least fifteen Israeli steps Out of Supply at the end of any Egyptian player-turn. (Bar-Lev line garrisons are never counted in this total.)
20.0 Scenarios
Crisis: Sinai 1973 contains five different scenarios, each of which simulates a different phase of the 1973 October War along the Suez Canal. At the beginning of each scenario, both players set up all their units in the appropriate spaces on their Scenario Set-up Cards, then consult the Playbook for detailed set-up instructions.
20.1 Scenario Set-up
20.1.1 The Scenario Set-up Cards
Each scenario has both a set of Scenario Instructions and a Set-up Card. The Scenario Instructions provide all of the information necessary to play the scenario except the deployment of those ground units that are present on the map when it begins; that data is graphically displayed on the Set-up Cards. In those cases where a Set-up Card lists no specific set-up hex(es) for a group of units, the following restrictions must be observed when deploying them.
- All units must set up In Supply and In Command unless the scenario instructions direct that a unit be set up in a hex where it is Out of Command and/or Supply.
- No unit of either side can set up on the El Ballah "island" (hexes 2215 and 2216).
- The Stacking Limit must be obeyed.
- No unit may set up in an enemy ZOC.
Exception: Bar-Lev strongpoint garrisons may (and indeed, sometimes must) be deployed in enemy ZOCs.
Note: Units may break down during set-up.
20.1.2 Scenario Instructions
The scenario instructions state which air units set up on the Air Display at the beginning of a scenario and indicate which boxes on the display they are deployed in. In all cases, the air unit deployments given on the scenario instructions indicate the situation before the Maintenance Step of the first daylight turn of the scenario.
20.1.3 The Front Line
Each scenario has a corresponding front line printed on the map. All Egyptian units must be set up to the west of the front line, and all Israeli units to the east of it. Unless noted otherwise in the scenario instructions or on the scenario set-up card, no Israeli unit can be set up in a hex that is immediately adjacent to the front line. Thus, all Israeli units will be separated from the nearest Egyptian unit by at least one hex.
Exception: Bar-Lev garrisons may set up in hexes adjacent to the front line. Indeed, they may even set up west of the front line.
21.0 Political Rules
Design Note: Although the armed forces of the two superpowers did not intervene directly in the Yom Kippur War, both the US and the USSR exerted a major influence over the conduct of the war by means of their respective airlifts of weaponry and ammunition to Israel and the Arab states. In a similar vein, the United Nations shaped the outcome of the war by imposing a ceasefire on the belligerents. Both these external factors are simulated in Crisis: Sinai 1973.
21.1 US and USSR Airlifts
Both sides may receive air and ground Replacements airlifted in by the superpowers. In the standard scenarios (i.e., Scenarios #1 thru #5) the USSR Airlift automatically begins during the daylight turn of October 10, and the US Airlift on the daylight turn of October 13. However, in the Variable version of the Campaign Scenario, the starting point of the two airlifts is determined as described below.
21.1.1 Determining When the Airlifts Begin
During the Political Step of each daylight Game Turn of the Campaign Scenario:
- The Egyptian player rolls on the USSR Intervention Table to determine if the USSR Airlift begins that turn (only after Oct. 8).
- The Israeli player rolls on the US Intervention Table to determine if the US Airlift begins that turn, assuming that all three conditions for it have been satisfied (i.e., the Israeli Unit Loss VP Total is 250; the Israeli Air Losses Total is 25 steps; and the USSR Airlift has already begun).
When an Airlift begins, place the "Current Turn" marker in the first space on the appropriate Airlift Track. During each Turn Advancement Step a "Current Turn" marker is advanced into the next space on its Airlift Tracks.
21.1.2 US and USSR Airlift Replacements
US and USSR Airlift Replacements are received only on daylight turns:
- Air Replacements whose codes appear in the current day's space on the Airlift Tracks are received during the Maintenance Step.
- Any Ground Replacements whose codes appear in the current day's space on the US or USSR Airlift Track are received during the owning player's Movement Phase.
- A SAM Replacement that is listed on the US or USSR Airlift Track may be used to repair a damaged SAM Track during the Maintenance Step of the same turn in which it arrives (if it cannot be used during that same turn, it is permanently lost).
- The Uniflote bridge listed on the US Airlift Track, and the PMP bridge listed on the USSR Airlift Track are Bridge Equipment unit replacements. They are received only if a bridge or bridge equipment unit of the appropriate type has been captured or demolished. The replacement units may be placed on the map in any friendly-controlled Town or City hex.
21.2 UN Ceasefires
In the Historical versions of the Campaign Scenario, a UN Ceasefire is automatically imposed during the End Phase of the October 22 daylight turn. However, in the Variable versions of the Campaign Scenario, the date on which the UN Ceasefire is imposed is determined as explained below.
21.2.1 Determining When the UN Ceasefire is Imposed
During each Political Phase, both players consult their respective Ceasefire Tables to determine whether the United States and Soviet Union agree to impose a ceasefire. On your Ceasefire Table, cross-reference the column corresponding to the quantity of Sudden Death Victory Conditions you have achieved with the row corresponding to the number of Sudden Death Victory Conditions your opponent has achieved. The number that lies at the intersection of the column and row is your Ceasefire Value.
Special Rule: When determining your Ceasefire Value, do not count only those Sudden Death Victory Conditions that you and your opponent selected at the beginning of the game. Instead, count any Sudden Death Victory Condition listed in 19.2.1 or 19.2.2 whose requirements have been met (that is, even if it is not one of the Sudden Death chits selected in the game currently being played). Count the conditions this way even if the Optional Sudden Death Victory Conditions are not being used in the current game.
Roll two dice. If the result is greater than or equal to your Ceasefire Value, then your superpower votes to impose a ceasefire. If both superpowers vote to impose a ceasefire, place the "UN Ceasefire" marker two turns ahead on the Reinforcement and Replacement Schedule. The game will end during the Turn Advancement Step of that turn unless one of the players chooses to violate the ceasefire.
21.2.2 Violating UN Ceasefires
During the Turn Advancement Step of the turn in which a scenario is supposed to end due to a UN Ceasefire, a player may declare that he is violating the ceasefire. The Israeli player always declares whether he is violating a Ceasefire before the Egyptian player does.
If either player violates a Ceasefire, the end of the scenario is delayed by one turn (that is, it will end during the Turn Advancement Phase of the next turn). A UN Ceasefire may be violated for up to four turns, possibly by different players on different turns. However, each time that a player declares that he is violating a UN Ceasefire, his opponent is immediately awarded fifty VPs.
Sequence of Play (summary page)
The final page of the booklet reprints the Sequence of Play summary given in section 3.0 above (3.1 Political Step through 3.5 Turn Advancement Step) in condensed form, without additional rules.