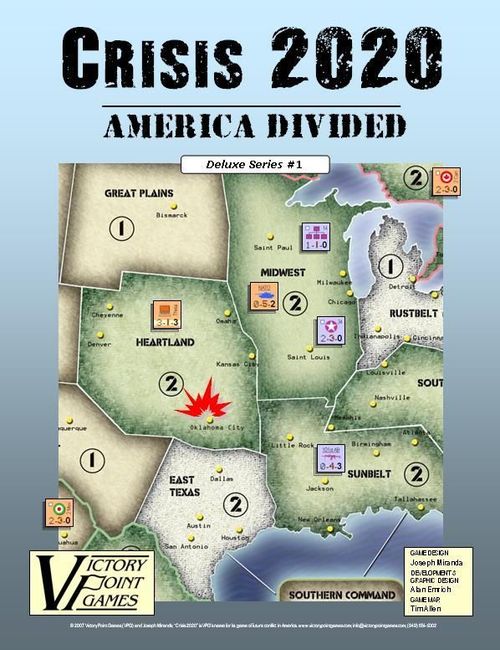
Crisis 2020
Crisis 2020 Rulebook
Table of Contents
Table of Contents
0.0 Using These Rules
New gaming terms, when they are initially defined, appear in dark red lettering for quick referencing.
The instructions for this game are organized into major "Rules" sections as shown in large green SMALL CAPS font, and represented by the number to the left of the decimal point (e.g., rule 4.0 is the fourth rule). These rules generally explain the game's subject matter, its components, the procedures for play, the game's core systems and mechanics, how to set it up, and how to win.
With each Rule, there can be "Cases" that further explain a rule's general concept or basic procedure. Cases might also restrict the application of a rule by denoting exceptions to it. Cases (and Subcases) are an extension of a Rule shown in the way that they are numbered. For example, Rule 4.1 is the first Case of the fourth Rule; and Rule 4.12 is the second Subcase of the first Case of the fourth Rule.
Important information is in red text. References to examples of a Rule or Case are in blue text and this font.
Text in shaded boxes, like this, provides the voice of the game's designer, who is addressing you to explain an idea or concept that is not, itself, a Rule or a Case.
1.0 Introduction
CRISIS 2020 is a two-player simulation of political, social, and military conflict between the United States and various Rebel forces within it. You have the chance to explore different strategies in a dark and difficult American future.
Because the ability to manipulate data through the news media, computer networks, states of awareness, etc. has become a central feature of modern society, success in the game depends as much on conducting "Data Conflict" as it does traditional "Armed Conflict."
The object of the game is to gain effective control of the United States. Control is established by placing a friendly Infrastructure unit in a Region. Each controlled Region's value counts for that side during and at the end of the game. The side with the highest total Regional Value usually wins the game. However, if the score is too close, then both sides lose: anarchy and civil war have broken out!
2.0 Equipment Used
The Map: The map represents the USA and adjoining locations. It is divided into a number of major political Regions through which units move and operate. In addition to Regions in southern Canada and northern Mexico that border the United States, there are also three Overseas Regions: NATO (Europe & Mideast), Southern Command (Latin America), and Pacific Rim (Alaska, Hawaii, and the Far East).
Regions outside of the USA have their names in italic type. They are only used in the Advanced Game.
Regions are also rated for their type – Metroplex (urban/suburban), Developed (mixed metro/rural), or Wilderness – and value (the Region's relative importance politically, economically, and socially).
City names are printed on the map for geographical flavor only. They have no effect on play.
The Crisis Cards: The 80 Crisis Cards come in two general varieties: Conflict Support and Events.
A Conflict Support card has three numbers in its upper-left corner. These values supplement a player's attack when played, depending on the type of Region where the conflict is occurring. Also, depending on the card's border design, it may be restricted to supporting only Data or Armed Conflicts.
Sample Conflict Support card (diagram labels: Title; Strength; Metroplex / Developed / Wilderness; Border: Data / Armed / Both; Flavor Text; Card I.D. #).
An Event card has a special color-coded border and the instructions for its use are printed right on the card itself.
Sample Event card (diagram labels: Title; Special Event; Instructions; Border: Govt. only / Rebel only / Both players; Card I.D. #).
The Playing Pieces: All of the playing pieces (called "units") are printed identically, front and back. The only difference is that one side is the Government's color and the other side is the Rebel's color. Units not currently in play can therefore be added to the map by either side, and are placed with their friendly-side up when recruited.
Unit diagram labels: Type; One per Region; Unit I.D. # / Military Designation (underlined indicates a 'real' military unit); Data; Arms; Movement.
All units have three numbers printed across the bottom. From left to right, the first is the Data Rating, which measures the unit's ability to manipulate the news media, computers, and the like. The second number is the Arms Rating, which shows the unit's ability to dish out physical punishment. The last number is the Movement Rating, which is equal to the maximum number of adjoining Regions the unit can enter each turn.
The types of units in the game:
- Infrastructure: Regional governments and defense forces (e.g., State Troopers) that have joined sides. While representing Regional and national 'legitimacy,' these units represent primarily political leaders and influence, not the masses or the military.
- National Guard Division: Local institutions that have rallied around a Region to promote 'law and order.' These might include local governments, county and city police, unions, political organizations, and the local news media.
- Insurgents: Local guerrillas, terrorist organizations, and other armed or skilled citizenry who militantly or covertly support one side or the other.
- Cybernauts: A select group of agents specializing in the manipulation of modern technology. The stripe across the counter of this color indicates that it is Clandestine (i.e., it is usually immune from adverse Armed Conflict results).
- Strike Force: These are law enforcement and intelligence personnel. The box around their Arms Rating indicates that it can use Armed Conflict against Clandestine units under certain circumstances.
- 'Black' Helicopter: These are very special units formed to deal with just such a crisis as that depicted in this game. Part overt and part clandestine, these organizations are built to move fast and strike effectively.
- Special Operations Groups: Elite military and police forces trained in unconventional warfare.
- High-tech Arms Division: These are military forces equipped with the latest weaponry for intense, sustained ground fighting.
- Rapid Deployment Force: These are highly mobile (airborne) or 'light' forces with weaponry that is more easily transported than in the above 'heavy' divisions.
Although it may seem strange to have FBI agents and such on the Rebel side, these represent rogue officers or even 'moles' inside the Government.
The Combat Results Tables: The Data Conflict and Armed Conflict tables resolve conceptual and physical battles that occur during the course of the game.
The Dice: Whenever a dice roll is required (such as to resolve a conflict), always check to see if a '7' or 'Doubles' has been rolled. When resolving conflict, rolling Doubles triggers a special event (see 6.2 and 8.15). Any time a '7' is rolled, discard the top card in the Crisis Deck by revealing it and placing it in the discard pile. That card has no effect (Exception: 'Extremists,' 4.0).
On-map Displays: The Crisis Card Chart determines how many Crisis Cards you may draw at the beginning of your turn.
The Recruitment Pool Box holds new and eliminated units that can return to play when recruited.
Each side has half of the Neutralized Box where their units that have been removed from the map but not destroyed remain until they recover.
3.0 Sequence of Play
Basic Procedure
CRISIS 2020 has several different scenarios representing distinct visions of the future. Each scenario forms a complete game, and runs for a fixed number of Game Turns, each representing approximately four months of real time.
During each Game Turn, the Rebel side goes first, followed by the Government. During each side's Player Turn (i.e., their respective half of a Game Turn), that player can move friendly units ("friendly" units are those belonging to the side whose Player Turn it currently is) and conducts Armed and Data Conflict with them, often supported by playing Crisis Cards.
Game Turn Sequence
Rebel Player Turn
- Draw Crisis Cards
- Data Conflict
- Movement
- Armed Conflict
- Neutralization Recovery
Government Player Turn
Repeat all five steps in the same order as in the Rebel player turn.
At the conclusion of the Government Player Turn, advance the Turn marker forward to the next space on the Game Turn Track and perform another Game Turn by repeating this entire sequence until the last turn of the game (as indicated in the scenario setup instructions, see 11.0) has been completed.
4.0 Crisis Cards
Crisis Cards are drawn from a shuffled, face-down "draw pile" and, when played or discarded, placed next to the draw pile in a face-up discard pile.
Any time a '7' is rolled, discard the top card in the Crisis Deck by revealing it and placing it in the discard pile. When the "Extremists" card is drawn or discarded by a roll of '7,' immediately reshuffle the discards as per the Setup Rules (see 11.1) and create a new draw pile.
[4.1] The Draw Crisis Cards Phase: During the Draw Crisis Cards phase of a player's turn, count up the total Values of all Regions containing friendly Infrastructure units. Consult the Crisis Card Chart on the map board and draw the indicated number of Crisis Cards into your hand.
[4.2] Retaining Crisis Cards: Unless it is an Event Card bordered in your opponent's color (which you must discard immediately and receive no replacement draw, see 4.3) or purple (which is immediately triggered when added to a player's hand, see 4.4), you may keep a Crisis Card in your hand for as long as you wish.
[4.3] Must-discard Crisis Event Cards: When drawing cards into your hand, if the Government player draws a red-border Crisis card (e.g., Bill of Rights) or the Rebel player draws a blue-border Crisis card (e.g., Mobilization), that player must immediately discard that card face-up into the discard pile. No replacement card is drawn; that card is simply 'lost' to the drawing player.
[4.4] Must-play Crisis Event Cards: The three purple-bordered Event Cards (Economic Collapse, Special Election, and Extremists) are 'must play' cards when drawn into your hand. Interrupt the game, resolve that card, and then continue where you left off.
When discarded due to a die roll of '7,' the Economic Collapse and Special Election events are skipped like every other Crisis Card (see 2.0: Dice, and 5.63).
EXTREMISTS: The Extremists card, however, is an exception and must still be performed whenever that card is drawn or discarded by a die roll of '7.'
[4.5] Conflict Support Cards: Conflict Support Cards are retained and played in support of a player's attacks (see 5.62).
[4.6] Remove From Game Cards: Some Event Cards say to remove them from the game after they have been used. They are not placed in the discard pile; instead, place them back in the bag.
[4.7] Discarding: Whenever a side must discard Crisis Cards, they are selected at random from that player's hand.
[4.8] Crisis Card Momentum (IMPORTANT): When a player is forced to discard more Crisis Cards than he currently has in his hand, the difference becomes Crisis Card draws for his opponent instead.
For example, if I am forced to discard 4 Crisis Cards but I only have 1, I must discard it and then you would get to draw 3 Crisis Cards to 'make up' for those that I failed to discard. Yikes!
[4.9] Placing New Units on the Map: When a Crisis Event Card allows a new unit to enter play, that unit must be available in the Recruitment Pool; otherwise, it is not received. Place them exactly like units obtained from a Recruit result during Data Conflict (see 6.2).
5.0 Attacking
General Rules for Both Data and Armed Conflict
During each of your Conflict Phases (both Data and Armed), you may have some, none, or all of your units make "Attacks" within the Region that they occupy (with some exceptions provided by playing certain Crisis Event cards) by using the appropriate Conflict Table. You are considered the "Attacker" during your Player Turn, and your opponent is the "Defender."
[5.1] Attacking is Voluntary: Units are never forced to attack. Attacking is completely voluntary. Defending against an attack, however, is not voluntary. The Defender unit has no choice as to whether or not it will 'accept' an attack.
[5.2] Which Units May Attack: Each unit may be involved in one Data attack and one Armed attack during the same friendly Player Turn.
That means that if a unit performs a Data attack, it can still move and then participate in an Armed attack during that same Player Turn.
[5.3] Sequencing: You may make multiple attacks during each of your Conflict Phases. Your attacks are made in any order you wish, as long as the results of one attack are applied before going on to the next attack.
[5.4] Attacking with Multiple Units: Any number of attacks may occur in a single Region during the Data Conflict and Armed Conflict Phases of a Player Turn, and more than one unit may take part in a particular attack.
So, for example, if the Attacking side has three units in a Region, it could combine all three into one large value attack, use two units in one attack and the third in another, or make three separate smaller value attacks with one unit each.
Thus, a single defending group of units in a Region may be attacked more than once per Conflict Phase.
A unit could attack the same defender twice during the same Player Turn (once in Data Conflict, and once again in Armed Conflict) as long as the defender was not removed from play during the Data attack and the attacking unit did not move out of the Region.
IMPORTANT: Only the units that actually conduct an attack (or counterattack) are subject to any adverse results from it. Other units in the Region that did not participate are unaffected by any adverse conflict results from that attack.
[5.5] Defending Units: Only defending units in the Region where that attack was conducted are affected by its results.
[5.6] Resolving Conflicts: To resolve a particular attack, conduct the following steps in order:
[5.61] Select the Attacking Units: Within a single Region, indicate those units that have not already attacked this Conflict Phase that will join in that particular attack. Total the appropriate ratings of these units (Data Ratings during Data Conflict; Armed Ratings during Armed Conflict).
[5.62] Attacker May Play Crisis Cards: If desired, the Attacking player (only) may play up to two (maximum) Conflict Support Cards in support of that attack. Add the appropriate number on each card to the total attacking strength before rolling the dice to resolve the conflict. If cancelled by the other player, that card still counts as played.
In addition, any number of appropriate Event Cards can be played in conjunction with that attack.
[5.63] Roll the Dice: Roll two 6-sided dice and add their results together. If a '7' is rolled, discard the top Crisis card; if Doubles are rolled, a special action takes place (see 6.2 and 8.15 for details).
[5.64] Apply the Results: Cross-index the dice roll sum with the Ratings total for that attack on the appropriate Conflict Table and apply the result (as explained in Rules 6.0 and 8.0). All defending units are subject to the results of the attack.
Place eliminated units in the Recruitment Pool and Neutralized units in the Neutralized Box belonging to their side.
Each time Maximum Firepower is announced, Collateral Damage (a) applies to every black result (i.e., Termination or Pacification). If the result already features Collateral Damage, only apply it once.
6.0 Data Conflict
Data Conflict is used to recruit new units, neutralize enemy units, or cause them to convert to your side (i.e., flip over).
[6.1] Data Conflict Specific Cases: The following Cases apply only to Data Conflict (not Armed Conflict):
[6.11] No Targets: Units may launch a Data attack in a Region containing no defending units (to try to gain Crisis Cards and / or new units from the Recruitment Pool).
[6.12] Zero Strength Attacks: Units with a Data Rating of 0 may make Data attacks using the 0 column on the Data Conflict table. Such attacks can receive support from Crisis markers [sic], just like any other Data attack. (This Rule permits nuisance behavior that can add up to something more substantial under certain conditions.)
[6.13] Foreign Regions: The Foreign Region Table is used to conduct Data Attacks in Regions outside the USA (see Advanced Game, 12.0).
[6.2] Data Conflict Results: The various Data Conflict results are explained below:
- Backlash: The Defender receives one Insurgent unit in that Region and draws a number of Crisis Cards equal to the Region's Value.
- Crash: The Attacker must immediately discard one of his Crisis Cards chosen at random from his hand. If he has no Crisis Cards, then his opponent immediately draws a Crisis Card from the deck.
- International Support: The Attacker draws one Crisis Card.
- Neutralization: Draw one Crisis Card from the deck or place one affected enemy unit on its side of the Neutralized Box. It will return to play later during its owner's Recovery Phase (see 9.0).
- Recruit: Perform Neutralization (above) or Recruit one U.S. (or U.N., if in play) unit of any type. To Recruit, the Attacker places one new friendly unit of his choice from the Recruitment Pool, with its friendly side face-up, in the Region where that Data attack was made.
The number and type of units in the counter mix is deliberately limited. If there are no units available for recruiting, then none are received.
- Infrastructure units may be placed only if the Region currently contains no other Infrastructure unit. Only one Infrastructure unit can exist in a single Region.
- Likewise for National Guard units; only one National Guard unit can exist in a single Region. A Region may have one Infrastructure and one National Guard unit in it.
The above two unit types have a lone square icon in their upper-left corner to remind you of this.
-
'Real' military units (i.e., Special Operations, Strike Force, High-Tech Arms, Rapid Deployment, and Stryker units), whose identifications are underlined to remind you of this, may be Recruited only if a friendly Infrastructure unit participated in that Data attack.
-
Defection: Perform Neutralization or Recruit (above), or flip one enemy unit to its reverse side, causing it to change sides. The Attacker chooses which defending unit will defect. The defecting unit immediately comes under the control of the new owner and it can even attack during the current Data Conflict Phase of the Player Turn (see the example).
-
Riot: The Attacker receives one Insurgent unit from the Recruitment Pool, if available. In addition, the Attacker draws a number of Crisis Cards equal to the Region's Value.
-
Protests: The Attacker receives one Insurgent unit for that Foreign Region from the Recruitment Pool, if available. In addition, the Attacker draws one Crisis Card.
-
Intervention: Perform Neutralization (above) or Recruit (as per the above Rules) one unit for that Foreign Region (or the U.N., if in play).
Doubles: When the dice roll results in 'doubles,' perform the following after applying the above Conflict Result.
On the Domestic Region Table, the player with the fewest units in that Region immediately draws a Crisis Card from the deck. If, after applying the Data Conflict Result, the players are tied for the fewest units, then neither draws a Crisis Card.
On the Foreign Region Table, the player(s) without an Infrastructure unit in that Region immediately draw a Crisis Card from the deck.
Data Conflict Example: This is the situation during the Government's Data Conflict Phase. The Government player decides to combine their SEALS (Special Operations) and DHS 4 (Strike Force) units to form one Data Attack with a total Data strength of '3.' The Government then plays the Mass Rally Data Conflict Support card which, in a Metroplex Region, adds '4' to the strength of this attack for a total of '7.'
The Government player rolls the dice for a total of '9.' Looking at the Domestic Region Data Conflict Results Table and cross-indexing the strength '7' attack with a dice roll of '9,' the result is a Defection.
The Government player now has a decision: he could 1) Neutralize one Rebel unit of its choice, 2) Recruit a non-military unit available in the Recruitment Pool (it must be non-military since the Government does not have an Infrastructure unit in Southern California), or 3) cause one Rebel unit of its choice to Defect (i.e., flip over to the Government side).
The Government player decides to flip the Rebel Cybernaut unit, which he immediately uses to launch its own Data Attack on the '3' column of the same Table.
He rolls the dice and this time gets an '11.' That results in a Riot, which causes a Government Insurgent unit to be placed in this Region and allows the Government to draw two Crisis Cards (i.e., a number equal to Southern California's Political Value of '2').
Feeling confident, the Government has his new Insurgent unit also conduct a Data Attack, and adds to its Data Rating of '2' a Detention Camp Conflict Support Card which he plays to add another '1,' raising the Data Attack total to '3.'
The dice roll result is a '12,' which is a Crash result plus a roll of Doubles. Applying the Crash result first, one Government Crisis Card is randomly selected and placed face-up in the Discard Pile (along with the expended Detention Camp card). Next, the Doubles result is applied and the Rebel player, having the fewest units in the Region, draws one Crisis Card from the deck.
The Government decides to end its Data attacks in So. Cal for this Player Turn.
7.0 Movement
Basic Procedure
During your Movement Phase, you may move all, some, or none of your units that have a printed Movement Rating of '1' or more. Each unit is moved individually from Region to connected Region, and no unit may be moved more than once per turn.
[7.1] Moving is Voluntary: Units are never forced to move. Movement is strictly voluntary.
[7.2] Movement Costs: It costs a unit one Movement Point from its Movement Rating to move to a connected land Region along a shared border. Note that Eastern Canada is connected to the USA Rustbelt Region.
[7.3] Moving Restrictions: Units that are moving must conform to these Cases:
[7.31] Continuity: No unit can skip or jump over Regions while moving.
[7.32] Movement Rating Limitation: No unit can enter more Regions during a single Movement Phase than its Movement Rating permits.
[7.33] Opposing Units: Units belonging to the opponent have no effect on movement. A friendly unit may freely move through enemy units without slowing or stopping.
At this scale the Regions are simply too large to permit effective blocking of all transportation routes.
[7.34] Leaving the USA: Units may not enter Canada, Mexico, or any of the three Overseas Regions unless playing the Advanced Game and that specific area is deemed playable.
[7.35] Stacking Restrictions: As when Recruiting (see 6.2), a Region can contain only one Infrastructure unit and one National Guard unit (as indicated by the symbol in their upper-right corners), plus any number of other units from both sides.
The restriction on Infrastructure units is needed because they determine which side currently controls a particular Region for victory purposes. The National Guard represents distinct local forces, and each Region can only yield a maximum of one.
Regular Movement Example: As illustrated here, the Sunbelt Region contains a Government Infrastructure, Cybernaut, Stryker Brigade, and two High-Tech Division units. The Infrastructure unit has a movement allowance of zero, so it cannot move. The Government moves the Cybernaut and Stryker Brigade units their full Movement Ratings of '3' to move to Greater New York. One High-tech Division unit moves one Region to the Southeast, while the other uses its full Movement Rating of '2' to reach the Capitol District.
Note that the Southeast Region contains a Rebel unit, but they have no effect at all on Government units moving into and out of a Region.
8.0 Armed Conflict
Specific Rules
In CRISIS 2020 you can eliminate enemy units "the old fashioned way," with guns, bombs, and lasers.
[8.1] Armed Conflict Specific Cases: The following Cases apply only to Armed Conflict (not Data Conflict):
[8.11] No Targets: Unlike Data Conflict, units may not launch an Armed attack in a Region containing no defending units.
[8.12] Clandestine Units: Small, select, groups of skilled individuals are often difficult to target using conventional means. Cybernaut and Black Helicopter units have a stripe across their counters to indicate they are "Clandestine."
- Clandestine units ignore all Armed Conflict results, unless every attacking unit in that Armed attack is Strike Force (noted by having its Arms Rating printed inside a same-color box as the Clandestine units' stripe to indicate its 'intelligence' cap abilities).
- Clandestine units are also affected if the opponent played a Surveillance Event Card before rolling the dice on the Armed Conflict table.
- Important: Clandestine units are always subject to a Counterattack's results; the above restrictions do not apply when an Armed Counterattack takes place.
[8.13] Maximum Firepower Attacks: Before resolving an Armed attack or counterattack, the side rolling on the Armed Conflict Table may announce "Maximum Firepower" before rolling the dice. Double the Arms Ratings of all friendly units involved.
Today, it seems that access to incredible amounts of firepower is common. The main limitation on its use is political: massacring large numbers of people in a spectacular fashion doesn't look too good during a global news cycle. But there is always the option to use it.
[8.14] Less Than Lethal Attacks: Before resolving an Armed attack or counterattack, the side rolling may announce "Less Than Lethal" before rolling the dice. Resolve that Armed Conflict on the Less Than Lethal table (where there is no possibility for Collateral Damage).
Important: The Government player may announce Less Than Lethal attacks without restriction. The Rebel player, however, may only announce one Less Than Lethal attack (or counterattack) per Game Turn.
[8.15] Armed Conflict Results: The various results of Armed Conflict are explained in detail below:
-
Counterattack: The side that did not just roll the dice on an Armed Conflict Table may immediately perform an Armed attack of its own in that Region.
If this is the Defender (i.e. the side not performing the Player Turn), then any and all units present in the Region may participate in the Counterattack. In addition, he may play Crisis Cards to support this Counterattack as per Rule 5.62.
If this is the original Attacker (i.e. the side performing its Player Turn), only those units that launched the original attack, plus any desired units in that Region that have not yet conducted an Armed attack that Player Turn, may perform the Counterattack.
Counterattacking can alternate any number of times and a unit can perform any number of Counterattacks in a Turn. If a Counterattack produces yet another Counterattack result, then the other side gets to Counterattack. In addition, each Counterattack affords that player the opportunity to once again play Crisis Cards as per Rule 5.62. Any Crisis Cards already played in the original attack or a Counterattack remain in effect and are not discarded until after that Armed Conflict is completely resolved.
Counterattacking is completely voluntary. If no counterattack is actually performed after a Counterattack result is received, that particular Armed Conflict is considered completed and the side performing its Player Turn may proceed with another Armed Conflict using different units.
-
Neutralization: Draw one Crisis Card from the deck or place one affected enemy unit on its side of the Neutralized Box. It will return to play later during its owner's Recovery Phase (see 9.0).
-
Termination*: Eliminate one enemy unit (of your choice) in that Region that participated in that battle (i.e., is subject to its results) and place it in the Recruitment Pool. An Infrastructure unit cannot be chosen. If only an Infrastructure unit is available, treat this result as 'No Effect.'
-
Pacification*: Eliminate all enemy units in the Region that participated in that battle (i.e., are subject to its results), including Infrastructure, and place them in the Recruitment Pool.
* Remember, Clandestine units are unaffected by these results under most circumstances.
-
Collateral Damage: The side rolling on the Armed Conflict Table must immediately discard a number of its Crisis Cards equal to the Region's Value.
Civilian alienation due to the use of 'excessive force' is the most serious side-effect of physical conflict. Note that employing Maximum Firepower greatly increases your chances of causing Collateral Damage, while declaring a Less Than Lethal attack eliminates the possibility of causing it.
-
Doubles: When the dice roll results in 'doubles,' perform the following after applying the above Conflict Result:
On the Regular & Maximum Firepower Table, the player who did not just roll the dice may 'Retreat' one friendly unit by placing it in that player's side of the Neutralized Box. The Retreating unit must be one currently in that Region or one that was just eliminated (i.e., sent to the Recruitment Pool) due to that 'doubles' result. Thus, instead of being eliminated, that unit can be 'Retreated' instead.
This is also a cunning way to 'redeploy' units with a '0' Movement Rating.
On the Less Than Lethal Table, both players draw one Crisis Card.
Armed Conflict Example: The above-illustrated units are in the Midwest Region and it is the Rebel Armed Conflict Phase. The Rebel BATF unit (Bureau of Alcohol, Tobacco, and Firearms – a Strike Force) attacks first by itself with its Armed Conflict Rating of '3.' In so doing, the Government's (Clandestine) Black Helicopter unit can be affected by the Armed Conflict result. The Rebel player then adds a Community Policing Conflict Support Card (which can only affect Armed Conflict), adding its '2' strength in a Developed Region for a total strength of '5.'
The dice roll total is '4' (a '3' plus a '1,' so it's not 'doubles') and the Armed Conflict Results Table is consulted, resulting in a Counterattack (4), which allows any and all Government units in the Midwest Region to counterattack if desired.
All three Government units join the Counterattack, along with the Rallying Cry and Second Amendment Conflict Support Cards for a total strength of '11.' To avoid causing Collateral Damage, the Government player declares that he is conducting a Less Than Lethal attack.
The dice roll total of '7' causes the top card in the Crisis deck to be immediately discarded (4.0) and this result is then referenced under the "11–13" column of the Less Than Lethal Armed Conflict Results Table, resulting in a Termination. This causes the loss of a Rebel unit, which in this case must be the single attacking unit (the BATF Strike Force). This is because, as per Rule 5.4, the other Rebel units in the Midwest Region were not committed to (i.e., they're not a part of) the initial attack, and hence are not subject to any adverse outcome from it.
The Rebel resumes attacking once the counterattack is completed, and has the 10th Mountain Division (a Rapid Deployment unit) attack by itself using the "4-5" column of the Regular Armed Conflict Results Table.
The dice roll is a '5,' which results in a Termination. This causes the loss of the Government's 24th Infantry Division (High-Tech Arms unit); the Clandestine SOAR (Black Helicopter unit) is immune from normal Armed Conflict attack results and Infrastructure is only affected by Pacification results.
Finally, the two Rebel Insurgents units attack together. The Rebel player declares that he is using Maximum Firepower, which doubles their attack strength from '4' to '8.'
The dice roll is '8,' Doubles. Looking at this on the "8-11" column, the result is Pacification with Collateral Damage (a).
First, the Pacification result eliminates the Government Infrastructure unit (but not the Clandestine Black Helicopter unit, see 8.12). Then the Collateral Damage result is applied, which forces the random removal of two Rebel Crisis Cards. A second, automatic Collateral Damage result due to achieving a black result while using Maximum Firepower, is ignored (8.13).
Finally, the Doubles result is applied. The Government player announces that the just-eliminated Government Infrastructure unit managed to 'Retreat' from that battle. Instead of being placed in the Recruitment Pool, it is placed in the Government's side of the Neutralized Box. Note that he could have let the Infrastructure unit remain eliminated and placed his Black Helicopter unit in the Neutralization Box, but that wouldn't make a lot of sense.
9.0 Neutralization Recovery
All units in a side's Neutralized Box are eligible to return to play during the Neutralization Recovery Phase of his Player Turn.
Procedure
First, place each Infrastructure unit in a Region that has no Infrastructure unit and that contains at least one friendly unit.
Second, place each National Guard unit in a Region containing a friendly Infrastructure unit that has no National Guard unit already present there.
Finally, place each unit of all the other types in a Region or Regions containing a friendly Infrastructure unit. Any number of these units can return to play in the same Region.
[9.1] Stuck Units: Any units that cannot thus return to play remain in the Neutralized Box and must try to return to play during the next friendly Neutralization Recovery Phase.
[9.2] Continuity: Even if no Neutralized units can return to play from the box, the game continues until the last turn listed for the scenario.
10.0 How to Win
Procedure
At the end of the last Game Turn of a scenario, each side determines which Regions contain a friendly Infrastructure unit. For each such Region, that side earns the Region's Value in Victory Points.
Determine each side's total Victory Point Value and subtract the smaller number from the larger one. The difference determines the type of victory won by the side with the larger total, as follows:
- Total Victory (31 or more points): Your political system becomes the foundation for another two centuries of American life.
- Strategic Victory (21 - 30 points): Your side is solidly in power, but the seeds of rebellion are planted for future generations.
- Marginal Victory (11 - 20 points): You gain power but face serious ongoing resistance.
- Anarchy (0 - 10 points): Both sides lose because the country collapses into chaos!
11.0 The Scenarios
To play CRISIS 2020, players select one of the scenarios from the Scenario Sheet. It provides a brief description and any special instructions necessary to play that scenario, as well as the setup location of units and starting cards available to each player.
Procedure
Consult the Scenario Sheet. Find the scenario's number in the top row and read down the column to discover how many turns the game will last, which side sets up first, and how many and what type of units each side sets up before the game commences.
[11.1] Setting up the Crisis Deck (Important Procedure): Set up the Crisis Cards by finding card #80 ("Extremists") and setting it aside. Also, find cards #72-77 (the Foreign Intervention cards) and place them back in their bag. They are only used when playing the Advanced Game (see 12.0).
Shuffle the rest of the card together and then cut the deck about 2/3 of the way down. Take the smaller stack (of about 1/3 of the cards) and shuffle the Extremists Card that you set aside into it. Afterward, place that small stack of cards face-down to form the bottom of the Draw Pile, then place the other stack (of about 2/3 of the cards) face-down on top of it to complete the Draw Pile.
The Extremists Event will occur at some point near the Draw Pile's exhaustion.
[11.2] Placing the Initial Units: Select the starting units listed on the Scenario Summary Chart and place them as follows in the player order listed for that scenario:
- An Infrastructure unit cannot be placed in a Region that already contains another Infrastructure unit.
- Likewise, a National Guard unit cannot be placed in a Region that already contains another National Guard unit.
- All other units can be placed in any U.S. Region unless the scenario's special instructions prohibit it.
- USA units not listed in the initial setup are placed in the Recruitment Pool.
Foreign units are set aside unless playing an Advanced Game scenario (see 12.0).
[11.3] Draw Initial Crisis Cards: After all units are placed on the map or in the Recruitment Pool, both sides draw their initial card hand beginning with the player who sets up first.
IMPORTANT: If either of the "Economic Collapse" or "Special Election" (i.e., purple border) Crisis Event Cards are drawn at this time, discard it immediately by placing it face-up in a Discard Pile (next to the Draw Pile) and draw a replacement card for it.
This is the one time where you get a replacement card for drawing a 'clinker.'
[11.4] Scenario Descriptions and Special Rules: See the Scenario Information sheet.
12.0 Advanced Game
In the Advanced Game, new rules and scenarios are introduced that allow for 'Foreign (i.e., non-USA) Power' (e.g., Canada, Mexico, NATO, etc.) Regions and units to enter play.
[12.1] Foreign Activation: Foreign Regions are considered out-of-play and their units are set aside until and unless that Foreign Power is "activated." Once activated, a Foreign Power's associated Region(s) are in play and its units that are not initially placed on the map are added to the Recruitment Pool.
- A Foreign Power can begin the game already activated according to the scenario setup instructions.
- A Foreign Power can also be activated by playing Crisis Event Cards #72-77. Each of these cards activates a Foreign Power for one side and gives its setup instructions. After being played to activate a Foreign Power, do not place that card in the Discard Pile; instead, it is removed from the game.
Each Foreign Activation is a one-time event during a game.
[12.2] Placing Foreign Units on the Map: Foreign units can only be recruited and placed on the map in their Home Region(s) following all of the usual rules and restrictions (see 6.2). They are also usually set up in their Home Region(s), but a scenario's special rules might alter that. Note that U.S. units may freely set up in Foreign Regions that begin the game as active.
Leaving Home: Foreign units may move from these placement locations and enter other Regions according to the Rules of Movement (7.0).
U.N. Units are handled a bit differently. Because they have no associated Foreign Region, they may only be recruited in an Overseas Region or a USA Region that connects to a Transportation Line (see below).
[12.3] Overseas Regions: The NATO, Southern Command, and Pacific Rim areas are treated like other Regions on the map with the following exceptions:
[12.31] Data Conflict: When conducting Data Conflict in a Foreign Region, use the Foreign Region Data Conflict Table. It is a little more 'tame' since events in the USA are of somewhat less concern outside America's borders.
[12.32] Movement: Moving to and from an Overseas Region (Pacific Rim, Southern Command, and NATO – which is primarily Europe) can only be done along its dashed Transportation Line connections as shown on the map. It costs two from its Movement Rating to transit along a Transportation Line. If a unit has fewer than two movement remaining, then it cannot enter or exit an Overseas Region.
Overseas Movement Examples
- A Cybernaut unit begins its Movement Phase in Greater New York and enters the NATO Overseas Region. This expends two of the unit's three Movement Rating. It cannot move any further that Player Turn, because it also costs two movement to exit an Overseas Region.
- An Insurgent unit, with only one Movement Rating, could never move across a dashed line to or from an Overseas Region.
- A Rapid Deployment unit that begins its Movement Phase in the Pacific Rim Overseas Region can use two from its Movement Rating to enter Northern California. It could stop there, or move on to any adjacent Region. But a High-Tech Arms unit in the Pacific Rim could only move to Northern or Southern California or to the SeaTac Region, but no further because its Movement Rating of two would be used up.
[12.4] Advanced Game Scenario Descriptions and Special Rules: See the Scenario Information sheet.
13.0 Designer's Notes
The basic idea behind CRISIS 2020 was to have players operate their forces on two different levels: conventional armed conflict, and the more abstract but equally critical data front.
The combat system provides a tradeoff between force and effectiveness. The more you pile into a combat, the greater the chance of gaining a favorable outcome, but there is also a greater chance of a Collateral Damage result – a very real limitation for forces operating in a politically sensitive environment. The game shows the delicate balancing act between force and subtlety. A Crash result in Data Conflict is similar to Collateral Damage, but not as devastating, representing various excesses, such as warrant-less searches, illegal seizures of property and random killings of members of the populace.
Given the scale, I divided the units into a limited number of types that show their functional distinctions. The Strike Force units, for example, represent a wide range of police and paramilitary forces. Cybernaut units represent everything from the media (local, national, and international) to the internet, to local rabble-rousers and other influential trouble-makers and their followers. The game does not include airpower as distinct units, but it has been 'abstracted in' and forms part of the strength of High-Tech Arms and the increased movement capabilities of Rapid Deployment units.
The Crisis Cards are critical. They represent the mobilized support of various factions. A side's card hand is its political resources. They allow a player who uses them wisely to achieve balance against a materially superior enemy.
Recruiting is very important since each unit type has its own special use. Note that every unit has a Rebel and a Government side, thus both players can recruit any type of unit. This element represents the Rebels winning over military commanders or gaining control of state National Guard units, while the Government for its part can infiltrate radical organizations, cut deals with hackers, and the like.