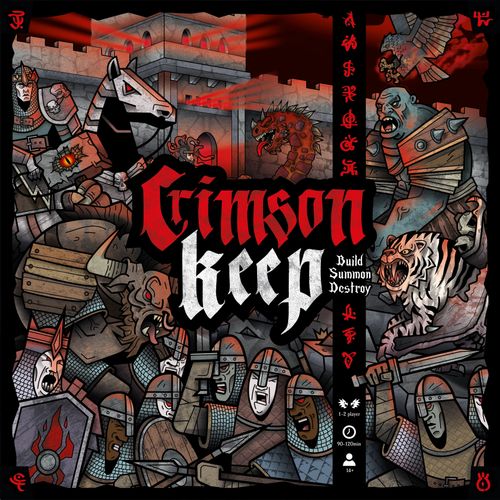
Crimson Keep
Crimson Keep Rulebook
Table of Contents
Table of Contents
- Components
- Setting up
- Card sets
- Reading a card
- Key words
- The Crimson Keep
- The Caverns
- The Barracks
- The Battlefield
- Action Track
- Player actions
- How to start
- Summon Board
- How to Summon a Dragon
- Battle explained
- Battle Tokens
- Runic Alignment
- Protection Token
- Battle Tactics cards
- How to battle
- Battle outcome
- Keep Collapse
- Setting up Final Battle
- Defending a Keep
- Final Battle
- Winning the game
- Adjusting game length / difficulty
- Single Player
- Building cards
- Combat cards
- Cavern cards
- Story continued
- Game Summary
Components
Clan deck cards (x52 per clan)
The cards listed below make up one clan's deck:
Building cards (x22):
- Black Gate x1
- Black Mirror x1
- Clan Leader x1
- Dragon Crystal x1
- Firelancer x3
- Great Hall x1
- Sorceress x1
- Crimson Arches x6
- Obsidian Stairs x6
- Warlock x1
Combat cards (x10):
- Dragon Cannon x1
- Dragon Ram x1
- Dragusa x1
- Fire Falcon x1
- Fire Wraith x1
- Lava Wyrm x1
- Minox x1
- Morgulth Troll x1
- Scorch Knights x1
- Winged Tyvern x1
Cavern cards (x5):
- Blacksmith x1
- Black Armoury x1
- Fire Stallions x1
- Food Cellar x1
- Kragars x1
Dragon cards (x6):
- Elbrith x4
- Obliterate x2
Other cards (x9):
- Battle Tactics x5
- Clan Banner x1
- Keep Defence x3
Other components
- Main Board (x1)
- Left Clan Box (x1) / Right Clan Box (x1)
- Solo Deck (x10)
- Reference Sheet / Player Aid (x2)
- Left Clan Board (x1) / Right Clan Board (x1)
- Left Clan Deck (x1, 52 cards) / Right Clan Deck (x1, 52 cards)
- Turn Marker (x1)
- Left Clan Summon Board (x1) / Right Clan Summon Board (x1)
- Attack Battle Tokens (x28)
- Defence Battle Tokens (x26)
- Left Clan Dice (x2) / Right Clan Dice (x2)
- Rune Value Tiles (x16, x8 for each clan)
- Runes & Token (x26, x13 for each clan)
- Left Clan Trackers (x8): 1x Turn marker, x3 Dragon trackers, x4 Scorch Knight action trackers
- Right Clan Trackers (x8): 1x Turn marker, x3 Dragon trackers, x4 Scorch Knight action trackers
- Drawstring bag (x1), for storing Battle Tokens
If you are colour blind
Each of the clan decks are orientated to look in the correct direction (left clan looks right and right clan looks left). Each deck of cards' set icon also dictates which side to play on. The left clan has their set icons on the top left of the card and vice versa.
Setting up
Game Boards
The Main Board is placed in the middle. The player using the purple clan takes their purple Clan Board and Summon Board and places them on the left of the Main Board. The green clan takes their green Clan Board and Summon Board and places them on the right.
Game Cards
Each clan needs to separate all their cards as follows:
- x37 Clan Deck cards (numbered 1-37)
- x5 Battle Tactics cards
- x4 Dragon cards (illustration of Dragon)
- x3 Keep Defence cards
- x2 Obliterate cards
- x1 Clan Banner card (illustration of Dragon face)
1. Summoning Cards
From your Clan Deck place the following 3 cards on their INACTIVE side (purple / green banner) onto the Summoning Cards space of your Clan Board: Clan Leader (30) / Dragon Crystal (31) / Sorceress (37).
2. Clan Deck
Shuffle all remaining Clan Deck cards ensuring they are all ACTIVE side up (red banner). Then flip the deck over and place INACTIVE side up (purple / green banner) on the Clan Deck space of your Clan Board.
3. Clan Banner
Place the Clan Banner card on top of your Clan Deck. This card is only used to cover the top card of a deck. Do not count this card when drawing cards from a deck.
4. Battle Tokens
Place both Attack and Defence Battle Tokens on the Main Board in between the Clan Action Tracks. Keep around 10 #1 Attack and Defence tokens in the bag to save space.
5. Rune Value Tiles
Each player takes two #1 and two #2 Rune Value tiles of their own colour (4 in total). Place them randomly, white side up in the empty square spaces at the top of each column on your Summon Board. For adjusting the game difficulty or length see the Adjusting game length / difficulty section.
6. Action / Summon Trackers
The Action Track is found on the Main Board. Place the 4 Scorch Knight action trackers on the first space of each track. The Summoning Track is found on your Summon Board. Place the circular summon tracker on space 0 and the 3 Dragon trackers on spaces 9, 15 and 21.
7. Battle Tactics cards
From your 5 Battle Tactics cards only choose 4 to play during this game. Place them face down on the Battle Tactics space of your Clan Board.
8. Turn Marker
The last person to have seen a Dragon takes the Turn Marker and places it on their side of the Main Board.
9. Put remaining items back in Clan Box
These items may be used later on in the game but are not currently required: Dice (x2) / Dragon Cards (x4) / Keep Defence cards (x3) / Obliterate cards (x2) / Summoning Runes (x12) / Protection token (x1) / Unused Rune Value tiles (x4).
Card sets
There are three card sets in the game and each has a unique icon: Building, Combat, and Cavern.
- Building — Use these cards to build your Keep.
- Combat — Use these cards to battle your enemy.
- Cavern — Use these cards for enhanced actions.
You may only place a card from your hand onto a board space if both the card icon and the board space icon match.
Reading a card
- Set icon — This shows which one of the 3 Sets this card belongs to.
- Card name
- Card number — These numbers are used in the solo mode.
- Battle Tokens — These icons indicate if this card has access to either their Defence Battle Tokens or their Attack Battle Tokens. If either of the icons are not shown on the card, then it does not have access to the relevant Battle Token. Battle Tokens are only used during a Battle, this will be explained later.
- Special Ability — When a card is ACTIVE it has access to its Special Ability. Each card's Special Ability is unique. How to use the card is described under the heading.
- Keep column value — During the Final Battle (explained later) each Building card in a defending Keep has a value from 0 to 4. When added together this gives a keep column value.
Key words
There are two key words used in Crimson Keep.
REMOVE – If you REMOVE a card it is placed in the discard pile.
DESTROY – If you DESTROY a card it is taken out of the game entirely.
The Crimson Keep
Building your Keep is essential to success. This mystical tower is built on the Building spaces of the Main Board. To build a Keep you must follow these 2 rules:
- You can only use Building cards.
- You can only place a Building card on a higher level if there is already a card in the same column below.
Your keep can only be three columns wide and up to five cards high. This is marked on the main board by the icons.
The Caverns
The Caverns are found on the Clan Board and are where you place your Cavern cards. When used, these cards offer a multitude of bonus actions including building quicker, moving faster across the battlefield or drawing more cards.
The Barracks
The Barracks are found on the Clan Board. This is where you place your Combat cards before they go onto the Battlefield.
Combat cards can only be flipped ACTIVE when placed on the Battlefield (not in the Barracks). Once a Combat card has left the Barracks it can not return.
The Battlefield
ANY empty space on the main board between Keeps is known as the Battlefield. This is where Combat cards will Battle. Only one Combat card from each clan is allowed on the Battlefield at any one time.
Action Track
Each turn you take 2 actions (doing the same action twice is fine). You can choose from 7 different actions, which are grouped together into 4 sections.
When you perform an action (including the free 'move' action) you will move the relevant action tracker up one space on the track.
If your second action is on the same action track as your first action, you can not move the action tracker a second time.
Free action
When an action tracker is on the final space of its row you can perform one of the two free actions at any point during your turn. You do not have to use this free action immediately and can save it for a future turn. After the free action has been used the action tracker must be returned to the starting space of that row.
Move Weak / Strong / Mighty — These three free actions allow you to move a specific dragon token down 1 space on the Summon Track. This is explained in more detail on the next page.
If you have all action trackers on the free action space, you can move any Dragon token down 2 spaces. You must then reset all action trackers.
Player actions
Place
The first option is to use 1 card from your hand, or use 1 Summoning Card from your Clan Board, and place it INACTIVE on an empty board space with a matching set icon. Cards are always placed INACTIVE (unless otherwise stated). A card with the clan's colour banner at the top is an INACTIVE card. INACTIVE cards are limited in their actions and can not use their Special Ability.
The second option is to place 1 Combat card from your Barracks onto the Battlefield. This card must be placed on level 1 and in the space nearest your Keep. If an enemy card is blocking this action, move the enemy card 1 space away from your Keep to allow your Combat card out. Cards in the Barracks must be INACTIVE. Once on the Battlefield, you will be able to use the 'flip' action to make it ACTIVE.
Replace
Replace 1 card on the board with one card from your hand or Clan Board. The set icons on both cards must match and the new card must be placed INACTIVE. The replaced card is put on your discard pile.
Battlefield: A Combat card on the Battlefield can only be replaced by a card from the Barracks. The new Combat card is placed INACTIVE on level 1 nearest your Keep.
Flip
Flip one card on the board to its opposite side.
Draw
Place all cards in your hand on your discard pile. Draw the top 5 cards from your Clan deck. Keep 3 and place 2 on your discard pile. When the Clan deck runs out shuffle the discard pile to create a new Clan deck.
Draw Bonus: If you end your turn with no cards in your hand, you can automatically draw cards for free before your next turn.
Special Ability
A card with a red banner at the top is ACTIVE and has access to its Special Ability. When a card has used its Special Ability it is always flipped INACTIVE. Once used, a card cannot be flipped ACTIVE again during the same turn.
IMPORTANT: There are certain cards with a Special Ability that start their description with the word 'Store'. This means you can store Battle Tokens on that card as a free action until you are ready to use them in a Battle (explained later). Only when you remove the tokens to use in a Battle is the Special Ability triggered and the card is flipped INACTIVE.
Battle
Use an ACTIVE card to Battle an enemy card (explained later).
Move
This optional free action must be played at the beginning of your turn. Move your ACTIVE Combat card forward 1 space on the Battlefield.
How to start
- Each clan draws the top 5 cards from their Clan Deck (not including their Clan Banner card).
- Keep 3 cards and place 2 on the discard space of your Clan Board. These 3 cards are your starting hand.
- The Clan with the Turn Marker starts the game (this is exchanged each turn).
You and your opponent will take turns completing two actions, exchanging the Turn Marker each turn, until one of you successfully summons the Dragon! Once that happens, you will immediately proceed to the final phase of the game.
Summon Board
To summon a Dragon you will need runes. The Summon Board shows you which runes you have found and also shows you how close to summoning a Dragon you are.
Runes
Runes are found by completing objectives within the game. Objectives are split into four categories that are found on your Summon Board.
- Building Runes — Found by building your Keep. Building cards do not need to be ACTIVE when completing this objective.
- Combat Runes — Found by defeating other cards in combat.
- Runic Alignment — Found by making a Runic Alignment (explained below).
- Clan Runes — Found by placing cards on, or using cards from your Clan board.
When a rune has been found, place it on the Summon Board space with the matching rune icon. Runes can be found in any order and not necessarily from the top down.
Rune values
At the top of each column there is a rune value tile (completed in set up). The number on the tile is the value of each rune found in that column for the duration of the game. When the first rune is found in each column, flip the tile over to its colour side. The reason for this is explained in the 'How to Summon a Dragon' section below.
Summon Track
At the bottom of the board is the summon track. When you find a rune you move the summon tracker up the track equivalent to the value of the rune you have just found.
Combat Runes
If a combat objective is completed a second time, flip the rune over to reveal the bonus value. You can then move the marker along the summon track equal to the runes bonus value.
Dragons
There are 3 Dragon trackers on the summon track. These represent the 3 strengths of Dragon you can summon:
- Weak (lowest number) — This Dragon has no Obliterate cards in the Final Battle.
- Strong (middle number) — This Dragon uses 1 Obliterate card in the Final Battle.
- Mighty (highest number) — This Dragon uses 2 Obliterate cards in the Final Battle.
Obliterate cards are explained in the Final Battle section.
You are able to move each Dragon tracker down the track, closer to your summon tracker by using the free actions available at the end of certain action tracks found on the main board (see the Action Track section).
How to Summon a Dragon
Before you can summon a Dragon, you will need to complete ALL 3 TASKS as described below:
Have 3 Runic Value Tiles flipped
When you find the first rune in any column you will also flip the Rune Value Tile over. You can only summon a Dragon if 3 of the 4 tiles have been flipped.
Have 3 Summoning cards Active
On your Clan Board you have 3 Summoning Cards. These can be placed in your Keep using the place action during any turn. You can only summon a Dragon if all 3 of these cards are ACTIVE in your Keep.
Dragon Crystal — The Dragon Crystal transfers its power from the Crimson Keep into the Sorceress. The opposition can not DESTROY your Dragon Crystal, only REMOVE it.
Sorceress — With the power gained from the Dragon Crystal the Sorceress summons a Dragon using the discovered runes. The opposition can not DESTROY your Sorceress, only REMOVE it.
Clan Leader — When the Dragon is summoned the Clan Leader controls the Dragon with the Morgulth amulet. The opposition can not DESTROY your Clan Leader, only REMOVE it.
Land on / Pass a Dragon Marker
ONLY DURING THE TURN when your summon marker lands on or passes a Dragon marker, AND the above 2 tasks have been completed you can choose to either Summon a Dragon or Pass:
Summon – If you decide to summon a Dragon this triggers the FINAL BATTLE! We will go over the rules for that a little later.
Pass – You may not wish to summon this Dragon and try to summon a stronger one. In this case remove the Dragon marker and move your summon tracker up 1 space.
Miss – If you land on, or pass a Dragon marker but can not summon, you must still remove the Dragon marker, but you do not move your marker up 1 space.
Battle explained
Throughout the first phase of the game, you will sometimes choose to battle your enemy using the Battle action. There are several different things that will affect the Battle like Battle Tokens, Protection Tokens, and Battle Tactics cards. We will go over those first before explaining how to complete a Battle.
Battle Tokens
Battle Tokens are found and stored on certain cards when flipped ACTIVE in the game. These tokens are mainly used to boost your attack or defence when in a battle.
A Battle Token is removed if the card is flipped INACTIVE.
Battle Tokens also help you defend against a Dragon in the Final Battle.
Runic Alignment
When 2 ACTIVE Building cards are orthogonally adjacent and have matching runes, this is known as a Runic Alignment. You can now store a single Battle Token on each card. Each token must be a value of 1 but can be any mix of attack or defence.
If the pair of runes match a specific rune shown on your Summon board you have also discovered that rune!
Having Runic Alignments in your Keep also helps you defend against a Dragon in the Final Battle.
Protection Token
When the Black Armoury card uses its Special Ability, a Protection Token is placed on your ACTIVE Combat card on the Battlefield. If your Combat card wins a battle, remove the token and ignore the 'REMOVE' rule and keep your Combat card on the Battlefield ACTIVE (more details on this shortly). If at any point before a battle your Combat card is flipped INACTIVE, the Protection Token is removed.
Battle Tactics cards
Each clan starts with 4 Battle Tactics cards to choose from when they battle. Each card has a unique ability to improve the attack or defence total.
A Battle Tactics card can not be used a second time until all other of that clan's Battle Tactics cards have been played.
How to battle
To use the Battle action the following is required:
- Two cards must be adjacent (unless otherwise stated on card).
- The attacking card must be ACTIVE.
- No Special Abilities can be used during a Battle.
Defending is automatic and does not require an action.
To battle you must follow the below 5 steps in order:
1. Select Battle Tactics cards: Each clan secretly chooses 1 Battle Tactics card and places it face down in front of them.
2. Defender chooses Battle Tokens: If the defender has a shield under its banner, it has access to its Defence Battle Tokens that have been stored on cards during the game. The defender chooses which Defence Battle Tokens it wants to use (if any) and places them on its defending card. Any Defence Battle Tokens already on the card are automatically used. Any card that a Defence Battle Token was removed from must be flipped INACTIVE.
3. Attacker chooses Battle Tokens: If the attacker has a dot under its banner, it has access to its Attack Battle Tokens that have been stored on cards during the game. The attacker chooses which Attack Battle Tokens it wants to use (if any) and places them on its attacking card. Any Attack Battle Tokens already on the card are automatically used. Any card that an Attack Battle Token was removed from must be flipped INACTIVE.
4. Roll attack / defence dice: Each clan rolls 1 die (unless otherwise stated on their card). Both add their dice total to the value of their respective Attack / Defence Battle Tokens on their card.
5. Reveal Battle Tactics cards: Both attack and defence reveal their Battle Tactics cards and resolve their effects.
Battle example: Morgulth Troll Battles Lava Wyrm
Step 1: Select Battle Tactics cards. The Morgulth Troll chooses to use the 'Battle' action to attack the Lava Wyrm. It also has the 'Protection' token which means if it wins the battle it can stay on the Battlefield.
Steps 2 & 3: Select Battle Tokens. Both Attack and Defence choose a Battle Tactics card from their Clan Board and place it face down in front of them. The Lava Wyrm can't select any Defence Battle Tokens so step 2 is skipped (this is because the Lava Wyrm does not have a shield icon under its banner). The Morgulth Troll has access to its Attack Battle Tokens and puts two of them on its card (4 and 1). The cards that the Attack Battle Tokens were taken from are flipped INACTIVE.
Step 4: Roll attack / defence dice. Each player (even if their card is INACTIVE) rolls 1 die. Attacker has 2 cards in their Barracks and 2 cards in their Caverns, so adds 4 to their attack total. Defender rolls an extra dice, but is only able to roll a 1.
Step 5: Reveal Battle Tactics cards. Attacker reveals 'Reserve Troops' — for every card placed in your Barracks and Caverns, add +1 to your total. Defender reveals 'Hidden Weapon' — roll an additional dice and add it to your total.
Who Won? Add up dice, Battle Tokens, and effects from the Battle Tactics cards. Attacker = 14. Defender = 7. Attacker wins! This is the second Combat card they have destroyed and so flips the rune over and moves their summon marker up another 2 spaces. Normally the victor would have to REMOVE their Combat card, but the Protection Token allows the victorious Morgulth Troll to stay on the Battlefield ACTIVE after winning the Battle.
Note: The Morgulth Troll could have used its Special Ability 'Club Crush' to immediately REMOVE the Lava Wyrm, but instead decided to engage in a battle, to try and flip their existing Combat Rune and make it more powerful. Using a card's Special Ability to defeat another card is not the same as engaging in a Battle.
Battle outcome
Victory
The highest total is the victor! In the event of a tie, another die is rolled by both players and added to the total. This continues until there is a victor.
To resolve a battle outcome use the following rules:
- The Combat card that WINS = REMOVE that card.
- The Combat card that LOSES = DESTROY that card.
- The Building card that WINS = FLIP INACTIVE (if not already).
- The Building card that LOSES = DESTROY that card.
You CAN NOT DESTROY (only REMOVE) the 3 Summoning Cards.
After the battle, return all used Battle Tokens to the general supply.
Keep Collapse
If you REMOVE or DESTROY a Building card with at least one card above it, a Keep Collapse occurs. You must then do the following:
- REMOVE or DESTROY the affected card. Then REMOVE all cards above the affected card in the same column.
- REMOVE ALL Combat cards on the battlefield (including Combat cards which have the Protection token).
Attackers bonus
For each enemy card removed / destroyed, the attacker draws a new card from the top of their clan deck into their hand.
Keep collapse example
The attacking clan uses their Dragon Rams Special Ability 'Rage' against the defenders Black Gate. This means the defender must REMOVE the Black Gate without a battle. Because the Black gate had cards placed above it in the same column, the defender must also REMOVE all these cards. The attacker must also REMOVE their Dragon Ram from the battlefield. The attacking clan gains a Rune for creating a Keep Collapse. Attacking clan also gains 3 new cards from their clan deck into their hand.
Setting up Final Battle
During the same turn a Dragon is successfully summoned, the end game scenario immediately triggers and the below steps are done in order. The clan who summoned the Dragon will now be referenced as the Dragon Clan.
1. Dragon Clan updates their board
- Remove all Battle Tokens from their Keep and Clan Board.
- All cards in their hand are placed in the discard pile. The Dragon Clan can only use the Dragon from now on.
- The Dragon Clan's Keep is now indestructible, flip all Building cards to their ACTIVE side.
2. Dragon Clan summons the Dragon
Place the 4 Dragon cards 'aura' side up on the 4 spaces covering the Monolith on the main board.
Obliterate Cards are also taken into their hand based on the strength of the Dragon summoned:
- Weak = 0 Obliterate cards
- Strong = 1 Obliterate card
- Mighty = 2 Obliterate cards
This is the end of the summoning phase for the Dragon Clan.
3. Defending Clan takes one final full turn
The defending clan takes one final full turn of 2 actions. This is best spent trying to strengthen their Keep (see below).
4. Defending Clan buys Keep Defence cards
Immediately after the defending clan finishes their final full turn, they can buy Keep Defence cards. Without flipping any cards the defending clan removes all Battle Tokens (attack and defence) from their board/s. The total value of these Battle Tokens are used to buy Keep Defence cards. These cards are used against the Dragon in the Final Battle.
- Total value 4-7 = 1 Keep Defence card
- Total value 8-11 = 2 Keep Defence cards
- Total value 12 or more = 3 Keep Defence cards
Defenders can select what Keep Defence cards they want. Each card has two options, so when using them make sure to place them face-down with the chosen effect at the top of the card.
5. Defending Clan gives the Dragon Clan their 2 dice
6. One Action per turn
Play returns to the Dragon Clan, but now both clans only have 1 ACTION per turn.
Defending a Keep
Each column in the defending Keep has a defence total. To find this total you must add the value of each card in the column. This value is written as small number under the set icon of each card.
- INACTIVE Building card = 0
- ACTIVE Building card = 2
- INACTIVE Summoning card = 3
- ACTIVE Summoning card = 4
Also every ACTIVE Runic Alignment found in the defenders Keep adds +1 to their Keep Column defence total.
Final Battle
In the Final Battle the Dragon Clan will attack the defending clan's Keep using either its Dragon's Obliterate Card or its Fire Attack.
Obliterate Card
Reveal and play an Obliterate card. The Obliterate card completely destroys the Keep column it targets. When a column is destroyed the defenders can not build their Keep in this column anymore. To help illustrate this, the Obliterate card can be placed on level 1 of the destroyed column. If the Keep is not fully destroyed, then the defending clan has another turn (only 1 action).
or
Fire Attack
A Dragon must Fire Attack the Keep column it is closest to.
Resolve a Fire Attack in the following order:
- Defending clan works out its columns defence total. Defender can choose to play a Keep Defence card (if available). The card must be placed correct way up and face down in front of them.
- Dragon rolls 4 dice and adds up their total.
- Defender resolves Keep Defence Card (if played). After a Keep Defence card has been used you must DESTROY it.
Successful Fire Attack
If the total attack value is equal or greater than the defence value (Defence total of the column with any added effects from the Keep Defence card), the defender must DESTROY all their cards in that column of the Keep. The defending clan can no longer build in this column (Attacker can use an Obliterate card to mark this if they wish).
Unsuccessful Fire Attack
If the total attack value is less than the defence value, the Keep is not affected. The Dragon must flip 1 of its cards to the 'injured' side. The defending clan then has another turn (only 1 action).
Hard Mode
Before the game, decide if you want to increase the difficulty of the Dragon in the Final battle by changing the 'Unsuccessful Fire Attack' rule as below:
If the total attack value is less than the defence value, the Keep is not affected. The Dragon must flip 1 of its cards to the 'injured' side AND REMOVE ONE OF ITS ATTACKING DICE. The defending clan then has another turn (only 1 action).
Winning the game
If the Dragon Clan destroys all 3 columns of the defenders Keep they have won the game and are now the rulers of Kalwrath Immure!
If the Dragon has been injured 4 times!
The Dragon in its final death throws twists and turns in the air...
Dragon Clan clan must roll 1 die:
- 1-5 – In a dying fit of rage the Dragon turns on its own and flies straight into its own Keep. Destroying everything in a cacophony of fire, wings and teeth, the attacking clan is completely destroyed and the defending clan win the game!
- 6 – You manage to control the dying beast for one last fatal attack. The Dragon flies straight into the defending keep and destroys 1 column. If this is the last column the attacking clan wins, If it is not then the defending clan wins!
Adjusting game length / difficulty
During set up if both players select the same rune value tiles the game length can be adjusted. The higher the values the quicker the game.
During set up if both players select different rune value tiles an individual's game difficulty can be adjusted. The higher the values the easier the game. This is useful if one player is more experienced than the other.
Pick any combination of the tiles to suit your game preference and set up as per normal rules.
| Game Length | Rune Value Tiles | Difficulty |
|---|---|---|
| Quickest game | 2, 2, 2, 2 | Novice player |
| Short game | 1, 2, 2, 2 | Intermediate player |
| Regular game | 1, 1, 2, 2 | Regular player |
| Long game | 1, 1, 1, 2 | Experienced player |
| Epic game | 1, 1, 1, 1 | Veteran player |
Single Player
In this mode your opponent is Kai.
You must still follow the same rules as the multi-player game to win the game. Kai is different and does not require runes to summon a Dragon, instead she must build the ultimate Keep to summon a Dragon and win the game!
The return of Kai
Kai is the ghost of the young sorceress who defeated the Morgulth Raa and the Dragon Elbrith a thousand years ago. The Dragon's awakening has enraged her spirit and she has risen again to stop the return of power to the Morgulth Raa.
Even though her physical body has long perished, her spirit is still powerful. She has now taken control of a Morgulth Raa clan leader to do her bidding. If Kai succeeds, she will use Elbrith to destroy the Morgulth Raa once and for all.
Kai already knows the secret runes to summon the Dragon, but she will need a very powerful Keep in order to summon Elbrith due to the lack of her physical form.
The race is on, who will summon Elbrith first...
Setting up
You
Set up the same way as the 2 player game.
Kai
- Remove the following items before setting Kai up:
- 1x Summon Board / 1x Summon tracker / 3x Dragon trackers
- 1x set of Rune Value Tiles
- 1x set of Summoning Runes
- 1x Clan Banner card
- 1x set of 5 Cavern cards: Fire Stallions / Kragars / Black Armoury / Blacksmith / Food Cellar
- Shuffle & place 4 Battle Tactics cards on Battle Tactics space.
- Place the 4 Scorch Knight action trackers on the first space of each action track on the main board.
- Set aside the following cards as per main game: Obliterate (x2) / Keep Defence (x3) / Dragon (x4).
- Shuffle ALL of Kai's remaining Clan Deck cards (the numbered cards) including Clan Leader, Dragon Crystal and Sorceress and place them on the Clan Deck space of the Clan board.
- Place a 1 Attack Battle Token and a 1 Defence Battle Token on the final space of each action track.
- Shuffle the 10 specific Solo Deck cards for Kai and place them face-down next to Kai's side of the board.
How to play Kai
- Kai will always start the game. Draw the top 5 cards from Kai's Clan Deck and select the 3 highest numbered cards and discard the remaining 2.
- Kai will always perform at least 2 actions each turn.
Free Action (check every turn)
If Kai has an ACTIVE Combat Card on the Battlefield ALWAYS move that card forward 1 space as a free 'MOVE' action as shown on the main board action track.
Action 1 – Place a card
At the beginning of each turn Kai must first toss the Turn Marker. This will determine if she uses her highest or lowest numbered cards this turn. Once determined, Kai places either her highest or lowest numbered cards on the relevant board space. Remember to move Kai's Action Track token forward when the 'Place' action is used.
Rule for placing Building cards:
- Kai builds her Keep using normal building rules. A Building card must always be placed on the lowest available level starting at column A, then B, then C. If necessary always move a Combat card away from Kai's Keep 1 space to allow a Building card to be placed.
- Black Gate card – When Kai can place this card it is always placed on space 1C. If there is already a card on 1C the Black Gate card always replaces it.
Full Barracks / Caverns: If the Barracks are full on Kai's 'Place' action, she will always replace either the highest or lowest numbered card in the Barracks with highest or lowest numbered card from her hand, based on the Turn Marker.
No cards:
- If Kai has no cards in her hand, she will automatically draw 5 more, keeping 3 and discarding 2 (based on what is shown on the Turn Marker) as a FREE action.
- Kai will shuffle her discard pile if her Draw Deck is empty.
Action 2 – Use Solo Deck
The Solo Deck is used to perform Kai's second action.
Always start by flipping the top card of the Solo Deck and place it next to the Solo Deck face-up. If Kai can perform the action then do it, if not then keep flipping cards until Kai can perform an action.
If there are multiple actions available, only 1 action can be performed. Start at number 1 and work down until an action is possible. When this second action has been completed, Kai will end her turn.
When Kai reaches the end of the Solo Deck shuffle all the cards and form a new Solo Deck.
Remember to move Kai's Action Track token forward (if it is not a 'Place' action).
Kai's Summoning Tasks
Although your summoning tasks are the same as the multi player game, Kai must achieve the following before she can summon a Dragon:
- Build a full height Keep (15 cards)
- Have all cards ACTIVE in her Keep
Activating the Keep
Once Kai has built a full height Keep (15 cards) she will concentrate on making it fully ACTIVE.
On her next turn Kai will do the following:
- Ignore her normal 2 actions and flip her 2 highest numbered INACTIVE Building cards. Kai will keep doing this every turn until she has a fully ACTIVE Keep.
- If at any point you REMOVE / DESTROY a Building card, Kai will revert back to her usual 2 actions.
On the same turn Kai flips the final card in her Keep ACTIVE she will summon a Dragon.
How to Battle as Kai
Battles with Kai are played the same as the 2 player game. Kai with do the following on her turn:
- Select Battle Tactics cards – shuffle all of Kai's Battle Tactics cards and place the top card face down.
- & 3. Select Battle Tokens – Kai will always use ALL available Battle Tokens.
- Roll attack / defence dice – (same as 2 player game)
- Reveal Battle Tactics cards – (same as 2 player game)
Kai does not lose the use of a played Battle Tactics card at the end of the battle.
Keep Collapse
Kai gains no benefit from a keep collapse.
Battle Tokens for Kai
Kai has 3 ways in which she can earn Battle Tokens:
- ACTIVE Clan leader (same as 2 player game)
- ACTIVE Dragon Crystal (same as 2 player game)
- Action Track: When Kai reaches the end of any action track she will not perform the free action. Instead she will collect the 2 Battle Tokens (1 Attack + 1 Defence) and place these on the Caverns space of her Clan board.
Kai will then refill the empty Action Track space with two more Battle Tokens (1 Attack + 1 Defence) and return her marker to the first space of the Action Track. Kai will repeat this every time she reaches the end of an Action Track.
Final Battle
The final battle is played and won in the same way as the 2 player game (see the Final Battle section). There are some small adjustments for Kai as explained below.
KAI Attacking
Obliterate cards for Kai
If Kai summons the Dragon, she will earn Obliterate cards based on the number of Summoning cards placed in her Keep.
- 0-1 Summoning cards = 0 Obliterate cards
- 2 Summoning cards = 1 Obliterate card
- 3 Summoning cards = 2 Obliterate cards
Using Obliterate Cards
Kai will always use an Obliterate card if she has one. She will always destroy the most powerful column. If there is a tie choose the closest to Kai.
KAI Defending
For KAI's final turn of 2 actions (after the Dragon is summoned) she will only do the following 2 actions:
A. Flip highest # INACTIVE Building card ACTIVE. B. Place a Building card in an empty column.
Action A is always done if possible. Action B is only done if action A is not possible. If Kai can not do either action she will end her turn.
Choosing Keep Defence Cards for Kai
Same rules as main game. Randomly choose earned Keep Defence Cards and keep them hidden.
Using Kai's Keep Defence Cards
Kai will always use a Keep Defence Card if she has one. Choose a card and rotate randomly to play.
Defending a Keep
When Kai has a single action between Dragon attacks, she will always flip her highest numbered ACTIVE Building card. If there are no cards to flip ACTIVE Kai will end her turn.
Winning
If KAI wins, she destroys both clans and her revenge is complete.
Building cards
These are the cards you will use to build your Keep and offer unique special abilities. Some cards can battle your enemy, others can improve the defence of your Keep, whilst others can allow you to perform even more actions per turn.
Dragon Crystal
Following the light into the depths of the mountains you found the Dragon Crystal in a cavern bathed in crimson light. The surrounding rock glowed with the crystal's power. In this 'activated' state the rock was virtually indestructible and became known as Crimsidian. This was the key to building the mysterious Crimson Keep depicted in your scrolls!
Special Ability: Mystic Shield
When ACTIVE, store a Defence Battle token on the card equal to the level it is placed in the Keep:
Level 1 = 1 Defence Battle token · Level 2 = 2 Defence Battle token · Level 3 = 3 Defence Battle token · Level 4 = 4 Defence Battle token · Level 5 = 5 Defence Battle token
The Dragon Crystal uses 2 dice when defending.
This card can be placed into your Keep from the Clan Board using the 'Place' action.
Clan Leader
Your Clan Leader is both cunning and experienced in the ways of war. Their strategic knowledge will improve the chances of any planned attack against your enemy. They also have their eye on a much bigger prize. The scrolls showed someone controlling a Dragon using an amulet similar to the one you have. Surely they are the one destined to take control of this mighty beast...
Special Ability: Battle Veteran
When ACTIVE, store an Attack Battle token on the card equal to the level it is in the Keep:
Level 1 = 1 Attack Battle token · Level 2 = 2 Attack Battle token · Level 3 = 3 Attack Battle token · Level 4 = 4 Attack Battle token · Level 5 = 5 Attack Battle token
The Clan Leader uses 2 dice when defending.
This card can be placed into your Keep from the Clan Board using the 'Place' action.
Sorceress
For decades the Sorceress has studied the ancient Dragon texts. Now on Kalwrath Immure she can finish her studies and discover the missing runes that hold the key to summoning the mighty Dragon! Through these learnings she can also use her power to activate vast amounts of crimsidian at the same time.
Special Ability: Crimson Keep
The Sorceress can flip a number of Building cards equal to the level she is placed in your Keep:
Level 1 = flip 1 card · Level 2 = flip 2 cards · Level 3 = flip 3 cards · Level 4 = flip 4 cards · Level 5 = flip 5 cards
The Sorceress uses 2 dice when defending.
This card can be placed into your Keep from the Clan Board using the 'Place' action.
Warlock
On discovery of the Dragon Crystal, the Warlock took great interest in the effect it had on the surrounding rock and wondered how far its power would reach. After much practice and meditation, he has now learned how to channel this new power and use it over great distances.
Special Ability: Cunning
The Warlock can directly attack an INACTIVE enemy Sorceress or Warlock (this is not a Battle). Announce which card you want to attack (there may be two options) and Roll 1 clan die. If the roll is higher than the level of the enemy card, REMOVE the enemy card from the Keep.
Example: Enemy's INACTIVE Sorceress is on level 4. You roll 1 die and get a 5. Because this is higher than the level of the enemy Sorceress, you REMOVE her from the Keep.
Firelancer
Positioned on the Keep wall, a Firelancer is always watching. Their specially adapted lances can project flames over huge distances!
Special Ability:
Burn: Move an enemy Combat card that is in range* back 1 space.
Scorch: Flip an enemy Building card that is in range* INACTIVE.
Singe: Flip an enemy Combat card that is in range* INACTIVE.
*Range — Starting from the Firelancer card, its range is the first card it reaches in either a diagonal OR horizontal line (depending on Special Ability).
Great Hall
With its smooth black walls and high ceilings threaded with veins of crimson, the Great Hall is a sight to behold. It is here that members of the high council discuss key strategies. Whether it's to build the Keep, improve defence or engage with the enemy, extra resource will always be found.
Special Ability: War Council
Move up 1 space on ANY Action Track. The Action Track rule still applies. OR perform 2 more actions after flipping this card INACTIVE, but do not move the action tracker up the Special Ability Action Track.
Black Mirror
Whilst exploring the Black Forest, a small dark clearing was found. In the centre, jutting out of the ground stood a shard of perfectly smooth obsidian rock. When brought back to the Keep, the Warlock discovered that this strange monolith had unique properties that could be harnessed...
Special Ability: Altered Space
This card allows you to swap two Building cards that are orthogonally adjacent to each other.
Black Gate
This immense gate is made from black iron and has been reinforced with Crimsidian. When activated this mighty defence is almost impossible to destroy!
This card can only be placed on a level 1 space.
Special Ability: Iron Will
Place a Combat card from your Barracks ACTIVE on the Battlefield nearest your Keep. Remember only 1 Combat card from each Clan is allowed on the Battlefield at any time.
The Black Gate uses 2 dice when defending.
Crimson Arch and Obsidian Stair
Although only basic building blocks for your Keep, each Crimson Arch and Obsidian Stair has a unique rune associated with it. When paired with another matching rune it can make your Keep even stronger.
Special Ability: Runic Alignment
When a Crimson Arch and an Obsidian Stair are placed orthogonally adjacent to each other in a Keep where:
- Both cards are ACTIVE
- Both cards have runes that make a pair
You can store a single Battle Token with a value of 1 on each card (Attack / Defence). The tokens can be any mix of attack or defence.
When a Battle Token is removed from a card to be used in a Battle, flip the relevant card INACTIVE. If a card is flipped INACTIVE for any other reason, the Battle Token is removed and put in the general supply.
To regain a Battle Token after it has been used / removed, repeat the above Runic Alignment rules. You can not have more than 1 Battle Token on any card.
For every ACTIVE Runic Aligment in the Final Battle you add +1 to your Keep Column defence total.
Combat cards
Your Combat cards are a mix of your clan's best warriors and an array of deadly monsters you have captured. Chosen for their hand-to-hand combat, they also have an array of special talents that can be used if the need arises.
Dragusa
Found deep in the mountains, this ancient and cunning creature is extremely dangerous. Many of your soldiers were slain before she was finally captured and brought back to your Caverns. A devastating force on the battlefield, Dragusa could be your biggest asset. But beware, she could just as easily turn on her captors as easily as she destroys your enemies...
Special Ability: Fury
Flip 1 enemy Summoning card INACTIVE and REMOVE one Combat card from the Battlefield.
You must then roll 1 die:
Roll 1-3: Dragusa turns on you and you must DESTROY her.
Roll 4-6: Dragusa remains on the Battlefield and is flipped to her INACTIVE side.
Fire Falcon
These rare and highly intelligent birds have been trained from a chick. Lighting fast and with unnatural strength, they can catch anything from a mouse to a small horse! However with these abilities your clan leader does not want to catch a mouse but has a more valuable prize in mind...
Special Ability: Air Assault
Fly your Fire Falcon up to the same level as the enemy Dragon Crystal and roll 1 die. If you roll the same number as the level both cards are on, REMOVE the enemy Dragon Crystal.
After this action, the Fire Falcon returns to level 1 nearest your Keep and is flipped INACTIVE. If a Keep Collapse occurs you must REMOVE this card.
Example: Enemy's Dragon Crystal is on level 4. Your Fire Falcon flies to Level 4 and rolls 1 die. You roll a 4 so you REMOVE the enemies Dragon Crystal. Your Fire Falcon is returned to level 1 and flipped INACTIVE on the Battlefield nearest your Keep.
Fire Wraith
Created from dark magic, this extremely dangerous and tortured soul is eternally searching for a land known as Tanelorn. Born from fire, she is a temperamental ally but can be convinced to aid your cause if the time is right. A glorious death awaits her, she believes being engulfed in flames will send her into the netherworld where she will finally find peace.
Special Ability: Sacrifice
During Final Battle the Fire Wraith ignores any Keep Collapse created by the Dragon.
During the Final Battle flip 1 Dragon card to its injured side, then your Fire Wraith then dies from Dragon fire and you must DESTROY her.
Winged Tyvern
This magnificent beast was bred specifically by your clan. Raised from a cub it is fiercely loyal and highly territorial. If it sees a powerful threat, its natural instinct is to attack in a fury of teeth, wings and talons.
Special Ability: Territorial Attack
Fly your Winged Tyvern up to the same level as the enemy Clan Leader and roll 1 die. If you roll the same number as the level both cards are on then REMOVE the enemy Clan Leader.
After this action, the Winged Tyvern returns to level 1 nearest your Keep and is flipped INACTIVE.
Example: Enemy's Clan Leader is on level 4. Your Winged Tyvern flies to Level 4 and rolls 1 die. You roll a 5 and miss. Your Winged Tyvern is returned to level 1 and flipped INACTIVE on the Battlefield nearest your Keep.
Scorch Knights
These are your most fierce and loyal clan members and have faced many perils in your service. Convinced the prophecy has finally come to pass, they have willingly travelled hundreds of miles over the Boiling Sea to see it fulfilled. They will fight to reclaim their ancestral power at any cost.
Special Ability: Strength in Numbers
From the general supply find and store a 3 Attack Battle Token on the Scorch Knights card. This token is used to modify the Scorch Knights attack if they battle another card.
The Attack Battle Token can not be swapped for a Defence Battle Token.
Lava Wyrm
These deadly monsters are found in the underground caverns left behind by the volcanic lava flows. Over a thousand years they have evolved to have an unnaturally high resilience to heat. It is said they can travel across a lava flow unscathed.
Special Ability: Unscathed
When ACTIVE the Lava Wyrm is immune to any attack from a Firelancer.
If a Firelancer attacks the Lava Wyrm you do not need to flip this card INACTIVE.
Morgulth Troll
These lumbering giants never descended from the labyrinth of caves found deep within the Kalwrath mountains. Naturally aggressive, they are always looking for conflict. This combined with their immense strength can make them quite the destructive force. Their mighty clubs have been modified with shards of crimsidian, which when wielded, can cause utter devastation!
Special Ability: Club Crush
REMOVE an enemy Combat card that is adjacent to this card.
Dragon Cannon
This devastating weapon has been built for only one purpose, to destroy the opposition's Keep and turn it into rubble! Loaded with Crimsidian shot covered in a thick tar-like substance, it's then set-alight and launched. This is one of your most destructive weapons!
Special Ability: Blitz
Battle the nearest Building card using 2 dice. If victorious DESTROY the targeted card.
Additionally, the card placed behind the destroyed card is also flipped INACTIVE. If this second card was already INACTIVE, REMOVE the second card.
Dragon Ram
This giant ram was built for a single purpose, to destroy the enemy's gate! Built from wood and iron, its huge Dragon's head is reinforced with crimsidian. When activated, it is capable of destroying any wall or gate in one mighty strike.
Special Ability: Rage
REMOVE 1 enemy Building card that is adjacent.
When moving, if 2 Firelancers are ACTIVE in your Keep you can move this card 1 extra space.
Example: You use the 'free' action to move your ACTIVE Dragon Ram forward 1 space, but because you have 2 ACTIVE Firelancers on your Keep you can now move a total of 2 spaces.
Minox
Once a docile beast, the Minox has slowly been warped by the Dragon Crystal's power into a semi-intelligent monster with a vicious temper. One of the first to descend from the mountains, they are found throughout the Black Forest and if confronted will charge at anything it sees as an immediate threat.
Special Ability: Horn Dash
Move the Minox next to an enemy Combat card on the Battlefield (ignore distance) and Battle. If victorious after the battle, the Minox will remain on the Battlefield but is flipped INACTIVE.
Cavern cards
In the re-purposed caverns formed by ancient lava flows, you can find all manner of activity. Blacksmiths forging armour, huge cellars of food, stables with horses wreathed in flame and even strange native stone-masons.
Fire Stallions
Fire Stallions are amongst the fastest animals in the known world over land. Used by scouts to go out and look for resources across Kalwrath Immure, they are your best chance of finding what you need as fast as possible.
Special Ability: Recruitment Run
Discard current hand, Draw 8 cards and keep 4. Place the remaining 4 on your discard pile.
This card CAN NOT be used at the same time you are performing a Draw Bonus.
Kragars
Deep within the Lava Caverns, if you are lucky you can find the Kragar. These small but extremely strong creatures are exceptional stone-masons. With a natural talent for carving rock, they can help build your Keep quicker.
Special Ability: Master of Stone
Place 1 ACTIVE Building card in your Keep. The Building card can be from your hand or one of the Summoning cards on your Clan Board.
Blacksmith
Your skilled bladesmiths have learned how to forge Crimsidian into weapons. When fused, each weapon glows with an unnatural light and an eerie whisper can be heard as if it were alive...
Special Ability: Sharper Edge
Store either a 2 Attack Battle Token or a 2 Defence Battle Token on this card.
When the Battle token is removed from this card to be used in a battle, flip it INACTIVE.
Black Armoury
The skilled armourers have learned how to forge Crimsidian into armour. When activated, the armour's strength is improved ten fold.
Special Ability: Protection
You can store the Protection Token on this card when ACTIVE.
To use the Protection Token place it on an ACTIVE Combat card on the Battlefield and flip the Black Armoury card INACTIVE.
If the Combat card with the Protection Token is victorious in Battle, remove the token and keep your Combat card on the Battlefield ACTIVE.
Food Cellar
Every great leader understands that an army can't fight on an empty stomach. Your huge stores of food kept in the caverns ensure that your troops are never left feeling hungry and have plenty of energy to charge at the enemy!
Special Ability: Battle Charge!
Move an ACTIVE Combat card 1 space on the Battlefield.
Story continued
A Dragons curse
From birth, a Dragon's crystal is bound to them and continually grows within them. It is this which gives them their immense power, however, it is also their curse. For those who know how, a Dragon can be controlled by its own crystal and bend its will to do their bidding. In the rare instance a Dragon dies, it can be resurrected using its own crystal, but to do this the crystal must be placed in a special tower to amplify the power needed to bring them back from the dead. The Morgulth Raa discovered these secrets and used them to control the mighty Dragon Elbrith.
A Broken Empire
The Morgulth Raa had long forgotten their dark past. The only relic they retained from their history were the two amulets that have now led them home.
A thousand years ago they had ruled over the Young Realms from the impenetrable isle known as Kalwrath Immure. With powerful sorcery and their dreaded Dragon they were all but invincible.
However, a ray of hope had grown in the Young Realms in the shape of a child born with an unnatural gift for sorcery. It was believed she could one day match the mightiest of the Morgulth Raa and defeat their Dragon. For fear of her being found, the Young Realms hid the young sorceress for many years and bided their time. When the eclipse of the fire moons aligned on the young sorceress naming day it was seen as good omen, and they prepared their champion to usurp the Morgulth Raa and free the world from their tyrannical rule.
The battle was fierce, but the young sorceress proved too powerful even for the mightiest of the Morgulth Raa. Just before she defeated the Dragon, Elbrith released her crystal in the hope of someday being resurrected. The crystal dropped to the rocks below and shattered into four pieces. Suddenly the ground erupted and the two larger shards were engulfed by the rising land.
Elbrith's body had been destroyed, but her spirit had survived. Knowing this was her only chance, the Young Sorceress quickly enslaved the Dragons spirit within a giant black monolith. But the powerful spell drained what little energy the Young Sorceress had left and her final act took her life.
Knowing they were defeated, the Morgulth Raa fled Kalwrath Immure, but not before picking up the two smaller shards of Elbrith's crystal. Homeless and weakened, they were hunted down by the Young Realms, and the few that survived settled in a remote land where they hid in fear and exile.
With only two small parts of the Dragons Crystal, the Morgulth Raa knew it was impossible to resurrect their Dragon. Instead, two amulets were made, each holding a shard of the Dragon Crystal. They vowed to return to Kalwrath Immure, find the lost crystals, resurrect Elbrith and take vengeance on the Young Realms.
The spell that ensnared Elbrith's spirit has held fast and brought balance to the world for an age. But now the Fire Moons eclipse signifies a waning of the young sorceress spell and Elbrith's spirit is awakening. Crimson light flickers over her black sorceress cage, and her spirit becomes restless. Knowing that she cannot resurrect herself, she waits until the Fire Moon eclipse and uses what power she has and emits a shaft of crimson light out over the Boiling Sea...
Game Summary
Setup
Cards with a set icon top left play on the left, cards with a set icon top right play on the right.
- Place Summoning Cards (Clan Leader, Dragon Crystal and Sorceress) on the Summoning Cards spaces of the Clan Board.
- Shuffle Clan Deck cards ACTIVE side up, then flip to INACTIVE side up and place on Clan Deck Space.
- Place Clan Banner card on top of Clan Deck.
- Place Battle Tokens in between action tracks on main board.
- Shuffle and place 1 Rune Value tile at the top of each column of Summon Board (white side up).
- Place all trackers on action track (main board), place all trackers on Summon Track.
- Choose 4 Battle Tactics cards and place on the Battle Tactics Clan board space.
- The last person to see a Dragon takes the Turn Marker and starts the game.
- Place all remaining cards and items back in clan box.
Player Actions
The first time an action is used per turn, move the Action tracker forward 1 space.
- Draw / Draw bonus – Draw 5 cards, keep 3.
- Place – Place a card from hand / Clan Board (icons must match).
- Flip – Flip one card on the board to its opposite side.
- Special Ability – When a card is ACTIVE it has access to its Special Ability.
- Move – Move an ACTIVE Combat card forward 1 space on the Battlefield (start of turn).
- Battle – Use an ACTIVE card to battle an adjacent card.
- Replace – Replace a card on the board (icons must match and card is placed INACTIVE).
Building a Keep
- You can only use Building cards to build your Keep.
- You can only build higher if there is already a card beneath it.
Barracks / Battlefield
- Combat cards are placed INACTIVE in Barracks. They can only be flipped ACTIVE on the Battlefield.
- The Battlefield is any empty space between 2 Keeps.
- Only 1 Combat card from each clan is allowed on Battlefield at any one time.
Battle Tokens
- Used during a battle to boost attack / defence totals.
- Only cards showing an Attack or Defence icon under their banner have access to their Battle tokens.
- Cards that have Battle Tokens removed must be flipped INACTIVE.
How to battle
- Both choose one Battle Tactics card.
- Defenders select Battle Tokens and place on card.
- Attackers select Battle Tokens and place on card.
- Both roll dice for attack / defence.
- Reveal and resolve Battle Tactics cards.
Combat card WINS = REMOVE that card
Combat card LOSES = DESTROY that card
Building card WINS = FLIP INACTIVE (if not already)
Building card LOSES = DESTROY that card
- You CAN NOT DESTROY (only REMOVE) the 3 Summoning Cards.
- All tokens used must be returned to the general supply.
Keep collapse
Triggered when you REMOVE or DESTROY a Building card with at least one card above it.
- REMOVE or DESTROY affected card. Then REMOVE all cards above in the same column.
- You must also REMOVE every Combat card on the Battlefield.
- For each Building card removed or destroyed, the attacker can draw a new card into their hand from their Clan Deck.
Summoning Tasks
- Flip at least 3 Runic Value tiles – do this when you find the FIRST rune in each column.
- All 3 summoning cards must be ACTIVE in your Keep.
- Land on or pass a Dragon Tracker on the summon track during your turn.
Summon a Dragon
During a turn when your Summon Tracker reaches a Dragon Tracker you have 3 options:
Summon: All summoning tasks are completed, you can choose to summon that Dragon (See Final Battle!).
Pass: All summoning tasks are completed but you do not want to summon that Dragon. Remove the Dragon Tracker and move your Summon Tracker forward 1 space.
Miss: Summoning tasks are not completed. Remove Dragon Tracker but do not move your Summon Tracker forward 1 space.
Final Battle!
Setup
- Dragon Clan discards all tokens and cards in their hand. They then flip all their Keep cards ACTIVE. Only the Dragon can now be used to attack.
- Dragon Clan places Dragon on main board and claims any Obliterate cards: Weak = 0 Obliterate cards. Strong = 1 Obliterate card. Mighty = 2 Obliterate cards.
- Defending Clan takes one final full turn (2 actions).
- Defending Clan buys Keep Defence cards with Battle Tokens: Value of 4-7 = 1 Keep Defence card. Value of 8-11 = 2 Keep Defence cards. Value of 12 or more = 3 Keep Defence cards.
- Both clans now only have 1 action per turn.
Defending a Keep
Each card in a defending Keep has a defence value: INACTIVE Building card = 0 · ACTIVE Building card = 2 · INACTIVE Summoning card = 3 · ACTIVE Summoning card = 4 · Also +1 for every ACTIVE Runic Alignment found in the defenders Keep.
Dragon Attacks
- Obliterate card – single use attack card.
- Fire Attack – Dragon always attacks closest Keep column with 4 dice.
How to Fire Attack:
- Dragon must attack closest Keep Column.
- Defender chooses if they want to use a Keep Defence card.
- Attacker rolls 4 dice.
- Defender resolves Keep Defence Card (if used) then must DESTROY it.
- Highest total wins battle (Dragon wins ties).
- Dragon wins = DESTROY defender's Keep column.
- Keep wins = 1 Dragon card flipped to injured side (also remove 1 attack die from Dragon in hard mode).
After a battle, defenders have another turn if their Keep is not fully destroyed (1 action).
All Keep columns destroyed – Dragon wins game
Dragon is Injured 4 times – Attacking Dragon rolls 1 dice:
- 1-5 = Attacking Clan Loses
- 6 = Dragon destroys 1x Defending Keep Column. If this is the last defending Keep Column the Dragon wins the game. If not defenders have won!