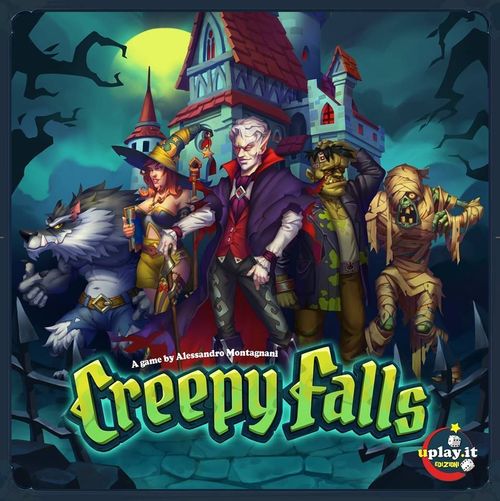
Creepy Falls
Creepy Falls Rulebook
Table of Contents
Table of Contents
Contents
- 1 City Board
- 1 Aid for the players (Aid/First Player tile)
- 7 Form tiles
- 1 Three-outcomes dice
- 3 Rat markers
- Spell tokens (12 for each colour)
- 5 different types of tokens: Corpse, Grimoire, Blood, Amulet, Soul
- 1 Van Helsing/Round counter dice
- For each of 5 colours: 9 Ghouls (23 white Ghouls), 3 Mummies, 3 Frankenstein's Monsters, 4 Werewolves, 2 Witches
Setup
Determine the first player in the way you prefer and give to him the Aid/First Player tile.
Take off the box the tokens trays and put them near the board as a supply.
Each player receives 2 Blood tokens and 1 Soul token, he chooses a colour and then decides his starting army (the difference between starting armys will be clear soon):
- 5 Ghouls, 1 Corpse token, 1 Amulet token,
- 3 Ghouls, 1 Frankenstein's Monster, 1 Corpse token,
- 4 Ghouls, 1 Mummy.
(For the first game we recommend chosing different configurations. In this way you will get used with different pieces)
Then take 5 Corpse tokens, 3 Amulet tokens, 2 Grimoire tokens, and put them randomly as follows: place 4 of them in the designated round spaces of the Bloody Gen Castle and the other 6 in the Rotten Swamp. You must perform this action at the end of each round.
Place the Van Helsing dice on the Pumpkin Field zone of the City Board, with the Round 1 face up.
2-players game: In a 2 players game the basic rules are the same, but you need some additional rules. First of all, both players choose a colour (except white), take all white Ghouls as well as your pieces, and put the others back in the box. We will refer to those Ghouls as "neutral Ghouls". Place 1 neutral Ghoul in the following areas: Cemetery, Shadow Forest, Bloody Gen Castle, The Dark Library and Rotten Swamp.
3-players game: Each player starts the game with 1 more Ghoul, no matter which starting army he chose. Moreover, you must put 6 tokens on the City Board, instead of 10: 3 Corpse, 2 Amulet, 1 Grimoire, randomly put 3 of these tokens in the Bloody Gen Castle and 3 in the Rotten Swamp.
Game Play
At the end of the game, you get 1 Power Point for each of your Blood token and 2 Power Points for each Soul token. The player who gets more Power Points wins the game.
Note: In some (rare) cases, developments of the game could change the way Power Points are assigned, like spells.
The game consists of 6 rounds. Each round consists of the following phases:
- Form Choice
- Placement
- Resolution
- Store
Form Choice
In this phase each player, starting from the first one and proceeding clockwise, chooses a Form tile and puts it in front of him. The Form tiles give special advantages to the player, and it lasts for the current round. At the end of the round, each Form becomes available again for a new Form Choice.
A player can only choose a form that wasn't already chosen during this round.
Form tiles advantages refer to different phases of the round, in particular:
- Flying Fox, Swarm of Rats and Cloud of Bats give advantages during the Placement phase;
- Human Form and Dark Hunter give advantages during the Resolution phase;
- Wild Animal gives advantages during the Store phase;
- Acid Fog is the only Form that does not directly refer to a round phase, and it could be very strategic and relevant for the development of the game.
You will find a detailed description of Form tiles at the end of this rulebook (page. 10).
Note: There is a spell that lets the player get more than one Form tile. In this case, if there are no more Form tiles, you can't use this benefit for this round: this could happen if more than one player has this kind of spells.
2-players game: In a game with exactly 2 players, repeat this twice: each player alternatively chooses two forms, starting from the first player. Moreover, the Swarm of Rats Form is not available.
Placement
The Placement phase is the core of the game. In this phase each player places his army on the City Board to get benefits from the zones.
Starting from the first player and proceeding clockwise, each player takes a placement turn: choose a zone of the City Board and put units from your army in that zone. Once you have finished your placement turn, the next player starts his placement turn. After the last player's placement turn, the first player takes his next placement turn, and so on. You must take a placement turn if you can: if you still have units in your army (as long as you respect the general placement rules) you necessarily have to place them.
It's important for the next Resolution phase to remember which units have been placed first: to keep track of the placement order follow the guidelines printed on the City Board.
General placement rules
- During each placement turn, you can only place in one zone.
- You can place as many units of as many types you like as long as rules are respected.
- You can't place units in a zone where you already placed during this round.
- You can't choose a zone with the Van Helsing dice.
Exceptions: description of the units
General placement rules are always valid for all the units, except for the Mummy and the Frankenstein's Monster, who can break the third rule, described below. Moreover, Werewolves and Witches have additional rules.
Ghoul: It is the basic unit, it follows the general rules without any exception.
Frankenstein's Monster: In a zone where you have already placed a Frankenstein's Monster, you can place one more time as if it there were no units of your army in that zone. You can use the option of replacing in that zone only once. Remember to remark this option by flipping the Frankenstein's Monsters units on the back side once used. If you use the Frankenstein's power, flip the others Frankenstein's Monsters belonging to you in the same zone (if any).
Mummy: You can place Mummies in a zone where you have already placed. If you place one or more Mummies in a zone where you placed a Frankenstein's Monsters, flip the Frankenstein's Monsters on the back side (this means that the advantages from Frankenstein's Monsters are lost). Remember that you can't simultaneously put Mummies and different units in a zone in which you have already placed, unless this move involves flipping a Frankenstein's Monster.
Werewolf and Witch: You can't place them in a zone where other of your units are present, and you can't place more than one unit of this two types at the same time. You can't place Witches and Werewolves in a zone where there is a Frankenstein's Monster belonging to your army. You can't place Mummies in a zone where there is a Werewolf or a Witch of your army.
Note: If you place a unit in a zone where you have already placed, for example using Frankenstein's Monster's or Mummy's advantages, put the new units together with the already placed ones. This means that adding units to a zone in which you had already placed doesn't change the order of placement.
Resolution
Once each player has finished his units (or if there are no more allowed placements), the Resolution phase begins: each player receives the advantages from the placed units.
Each unit has a size:
| Unit | Size |
|---|---|
| Ghoul, Mummy | 1 |
| Werewolf, Frankenstein's Monster | 2 |
| Witch | 0 |
For each zone, add the size points of all your units: the player who has the most size points in the zone takes the first advantage, the player who scored the second size points takes the second advantage, and so on. In case two or more players have the same size points, the most powerful advantage goes to the one who placed first. Remember that this is not simultaneous, and you must follow the increasing order of the zones (Cemetery first) and the size order within the zone (the players with higher size points takes their advantages before the players with lower size).
Note: If a player has size 0 in a zone (for example placing a Witch), he takes no advantages for that zone.
Special units: Werewolves and Witches
Werewolves and Witches are special units since they get Souls from the other players in the same zone, as well as the advantages from the City Board (if any). After a zone has been resolved, if there is a Werewolf, each player that had placed in that zone must give 1 Soul token to the owner of the Werewolf; if there is a Witch, each player that had placed in that zone must give 2 Soul tokens to the owner of the Witch.
If there is more than one special unit in a zone, the player who has the most size points (in case of a tie, the one who placed first) takes the Soul tokens first.
If a player doesn't have Soul tokens, or he has less tokens than the requested, he must destroy a unit of his choice from his army for every spacial unit he can't completely pay.
Note: If a player has less tokens than the requested, he must give all the tokens he can, and then destroy a unit.
2-players game: In a game with exactly 2 players, there are also neutral Ghouls in some zones. Those Ghouls count as they belong to a third player who doesn't have Souls and who doesn't collect advantages.
If you place in a zone in which there are 1 or 2 neutral Ghouls and your size is equal or less than 1 or 2, respectively, you get a lower advantage. If you have a Werewolf or a Witch in that zone you don't get any Soul token, but when you get your advantage from the zone 1 neutral Ghoul is destroyed.
If you place in a zone in which there are 3 neutral Ghouls, they count as 1 neutral Werewolf. This means that if your size in that zone is equal to 2 or less, you get a lower advantage and you have to discard 1 Soul token; if you have no Soul tokens, destroy one unit of your army as usual. If you have a Werewolf or a Witch in that zone, you don't get any Soul token, but when you get your advantage from the zone, 1 neutral Ghoul is destroyed.
Note: Neutral Ghouls are always considered as if they have been placed first, even if a player has a Rat marker in that zone.
3-players game: In a 3-players game the Resolution phase works as usual. However, in the zones that provide exactly 3 advantages, the last one is not distributed. Moreover the advantages from the Rotten Swamp are slightly different: the player who scored the most size points chooses 2 tokens, the second one takes the last token. Changes for 3 are indicated on the City Board with a symbol, as a reminder.
After resolving a zone, each player takes back his units. After resolving all the zones, discard remaining tokens from Castle and Swamp zones and remove all Rat markers from the City Board (if any).
Zones Overview
Each zone on the City Board is marked by a parchment, that shows the name, the Resolution order and the advantages that the zone gives during the Resolution (for example: 1st advantage: 1 Soul, 2 Blood; 2nd advantage: 2 Blood; 3rd advantage: 1 Blood. In a 3-players game the 3rd advantage is not distributed).
Most zones only show symbols of the tokens you can gain on them during the Resolution phase.
In the Bloody Gen Castle and the Rotten Swamp zones there is a symbol of the four token types (Corpse, Amulet, Grimoire, Blood tokens placed near the zone). This means that the player who scored the most size points chooses the tokens of the first advantage between the ones near the zone, the player who scored the second size points chooses between the remaining ones, and so on.
The zone Karloff -113 and Pumpkins Field work differently from the others:
Karloff -113: Advantages in this zone are actions instead tokens. The first advantage lets the player choose one of the 4 possible actions, the second lets the playes choose one of the remaining actions and so on.
A player doesn't have to do the action he chose in this zone: this means that you can choose an action only to avoid that another player chooses that action this round.
Possible actions are:
- Destroy 1 Ghoul to get 1 Mummy,
- Destroy 2 Ghoul to get 1 Frankenstein's Monster,
- Destroy 1 Ghoul to army the other players to destroy 1 unit of their choice from their army,
- Destroy 1 Ghoul to get 2 tokens (not necessarily the same) of your choice between Corpse, Amulet and Grimoire.
Note: The third action could sound unattractive at first. Actually, it could be really favourable for a player with a big army advantage, since it increases the gap with other players (a small army suffers more a one unit shortage than a bigger one).
Pumpkins Field: No advantages for this zone.
Example of Placement and Resolution
We will show a simplified example with only one zone, however during each turn you can play in any of the City Board zones.
Placement: Francesco places 1 Ghoul in the zone. Scilla places 1 Frankenstein's Monster. Giovanni goes for the first advantage, so he places 3 Ghouls. Then comes Federico's turn, who places 1 Werewolf. After it's Francesco's turn again, who has only one Mummy left and he places it so Federico's Werewolf doesn't exceed his size points score. Scilla uses Frankenstein's skill to add 1 Ghoul in the zone. Giovanni doesn't have Mummies, so he can't play once more in this zone. Federico can't place anything more in this zone, since he placed the Werewolf.
Resolution: Scilla wins the 1st advantage, since, like Giovanni, she has 3 size points, and she placed first, so Giovanni takes the second one. Francesco wins the 3rd advantage and Federico the 4th advantage (they are in a size tie too). Hence, Scilla gets 2 Soul, 3 Blood and she chooses the Grimoire token. Giovanni gets 1 Soul, 2 Blood and he chooses a Corpse token. Francesco gets 1 Soul and chooses the Amulet token. Federico gets 1 Blood and takes the remaining Corpse, moreover he takes 1 Soul from all the other players.
Store
In this phase you can use Corpse, Soul and Grimoire tokens to buy new units for your army or to cast spells, and you can exchange those tokens for Blood tokens.
Starting from the first player of the round, each player can buy stuff in the order he likes. Once the buying stage is over, the selling phase begins, proceeding clockwise as always. The selling rules are explained in the next page.
Unit costs are as follows:
| Unit | Cost |
|---|---|
| Ghoul | 3 Corpse |
| Mummy | It can't be bought in this phase. The only way to get a new Mummy is to play in Karloff -113. |
| Frankenstein's Monster | 7 Corpse |
| Werewolf | 6 Amulet |
| Witch | 7 Amulet |
Spells
Spells are special rules that affect only the player who cast them, from the moment he buys it until the end of the game. Each Spell costs Grimoire tokens, shown on the left-hand side of the Spell on the Spell Book, and has a power level (1, 2 or 3). To cast a Spell of level 2 you need to have cast at least one spell of level 1, no matter which one. To cast a Spell of level 3 you need to have cast at least one Spell of level 2 (even in the same store phase). To cast a Spell you have to pay the Grimoire tokens and to put a Spell token on the Spell Book in one of the corresponding round areas.
A spell can be cast by more than one player, but it can't be cast twice by the same player.
Selling in the Store phase
Once each player finished the buying stage, you can sell some of your tokens in exchange for Blood tokens, proceeding clockwise from the first player, as usual. To do so, you have to choose one between Corpse, Amulet or Grimoire, discard from 1 to 5 tokens of the same type and take 1 Blood token for any token discarded in this way.
During the Store phase of rounds 1 to 5, you can perform this action only once (hence you can sell only 1 type of tokens and up to 5 tokens of this type). During the Store phase of round 6 you can take this action twice (hence you can sell up to 10 tokens of 1 type or up to 5 tokens of a type and 5 tokens of a different one).
Note: In round 6th, if you have the Wild Animal Form, you can only apply the bonus for your first sale. Remember that you can skip the selling stage, but in order to get the bonus of this Form you have to sell at least 1 token.
End of a Round
Toll of Blood
At the end of each round, you have to pay a toll of 2 Blood tokens. If you have less than 2 Blood tokens, discard the Blood tokens you have (if you have 1) and destroy 1 unit of your choice from your army.
Beginning of a new Round
Before the beginning of the new round, take 5 Corpse, 3 Amulet and 2 Grimoire tokens and randomly place them as follows: place 4 of them in the designated round areas of the Bloody Gen Castle, and the other 6 in the areas of the Rotten Swamp. Turn the Van Helsing dice on the face corresponding to the new round.
Each player puts the Form tile back in the centre of the table, so it is available again for the next Form Choice phase.
The second player is now the first and he takes the Aid/First Player tile.
2-players game: At the end of rounds 2 and 4, place 1 neutral Ghoul in each zone of the City Board.
3-players game: At the end of each round (except the last one), take 3 Corpse, 2 Amulet e 1 Grimoire, and place them randomly: 3 in the Bloody Gen Castle and 3 in the Rotten Swamp.
At the end of round 6, the game ends and the player with the most Power Points will be declared the winner. In case of a tie, the win is shared.
Forms Overview
Flying Fox: During the Placement phase, on your placement turn, you can pass up to two times in the phase, but not consecutively. This means that you can decide to skip your placement turn up to two times (not consecutively). By doing so, you can see the other players' play before.
Cloud of Bats: At the end of the Placement phase, but before the Resolution phase, you can take back one of your already placed Ghouls and replace him as if it were a Mummy. This means that you can move a Ghoul that is placed in a zone to another one, as long as you respect the placement rules of the Mummy (for example, you cannot place it in a zone in which there is a Werewolf).
Wild Animal: In the Store phase you get the bonus:
- 4 Blood if you sell at least one of Corpse or Amulet
- 5 Blood if you sell at least one of Grimoire
If during the Store phase you sell at least one token, you get the bonus, no matter how many tokens do you sell.
Acid Fog: Before the beginning of the Placement phase, you can move the Van Helsing dice in any zone of the City Board. This is the only way to move the Van Helsing dice. It will remain in this zone until someone takes this Form tile and decides to move it again. Resolve this form before the Swarm of Rats Form, if present.
Human Form: During the Resolution phase, each time you have the first advantage in:
- Cemetery, you get 2 Corpse more
- Shadow Forest, you get 2 Amulet more
- Dark Library, you get 2 Grimoire more
You get these tokens in addition to the ones you normally get with the first advantage.
Dark Hunter: During the Resolution phase, each time you have the first advantage in:
- Vladovich Village
- Bloody Gen Castle
- Hell Dock
you get the bonus: 1 Blood and 1 Soul more. You get these tokens in addition to the ones you normally get with the first advantage.
Swarm of Rats: Before the Placement phase, put the 3 Rat markers on 3 zones of the City Board. For any tie in a zone with a Rat marker, your army is considered as placed before the others. Resolve this form after the Acid Fog Form, if present.
Spells description
I (Level 1, Cost 3): During the Resolution phase, every time you have the first or second advantage in Cemetery, you get 1 more Corpse token.
II (Level 1, Cost 5): Reduce by 1 Grimoire the cost of all your next Spells.
III (Level 1, Cost 4): After the Store phase, roll the 3-outcomes dice and take the corresponding token.
IV (Level 1, Cost 3): During the Resolution phase, every time you have the first or second advantage in the Forest, you get 1 more Amulet token.
V (Level 2, Cost 4): During the Form Choice phase, after each player has chosen his Form, you select an additional one (if available).
VI (Level 2, Cost 4): The size of your Werewolves is now 3. The size of your Witches is now 1.
VII (Level 2, Cost 6): At the end of the game, you get 2 Soul tokens for each Spell you cast (including this).
VIII (Level 2, Cost 3): You don't have to pay the Toll of Blood anymore.
IX (Level 3, Cost 4): When you sell in the Store phase, you get 2 Blood instead of 1 for each token sold. If you have the Wild Animal Form, you also double the bonus.
X (Level 3, Cost 8): At the end of the game, each of your Blood token is worth 2 Power Points, and each of your Soul token 1 Power Points.
XI (Level 3, Cost 3): Your Werewolves and your Witches may now be placed with the same rules of a Ghoul, so now you can place them with other units.
XII (Level 3, Cost 3): You can play in the zone where there is the Van Helsing dice.