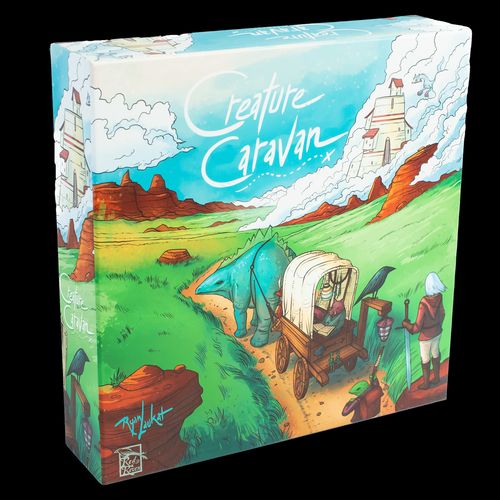
Creature Caravan
Creature Caravan Rulebook
Table of Contents
Table of Contents
Game Info
Designed and Illustrated by Ryan Laukat
- 1-4 players
- Ages 13+
- 60-90 minutes
Components
- 135 cards
- 4 player caravan tokens (1 for each player)
- 1 ember zombie board
- 1 market board
- 1 Eastrey Tile
- 4 map tiles (double-sided)
- 4 sets of player cubes (15 in each color)
- 4 sets of player tents (12 in each color)
- 4 player boards (double-sided with solo bot rules)
- 25 dice
- 48 food tokens (1 value)
- 8 food tokens (3 value)
- 8 food tokens (5 value)
- 16 bag tokens (1 value)
- 8 bag tokens (3 value)
- 30 treasure chest tokens
- 16 coin tokens (1 value)
- 8 coin tokens (3 value)
- 17 fruit tokens
- 21 ember zombie tokens
- 1 scoring pad (not pictured)
Note: Tents and treasures are the only components in this game meant to be limited. If you run out of any component other than tents or treasures, use a suitable substitute.
Setup
-
Set up the map by placing the "Start" tile first (either side up). Then place all map tiles randomly in a horizontal row to the right so that the spaces line up. Place the Eastrey tile at the end of the row; Eastrey is adjacent to all 6 spaces it touches.
-
Place the market board and ember zombie board near the map tiles, easily accessible to all players.
-
Place the food, bag, coin, fruit, and ember zombie tokens in piles nearby.
-
Mix the treasure chest tokens in a pile nearby with the rewards face down.
-
Shuffle the cards and place them in a deck that all players can reach. If needed, you may split this deck roughly in half to make two draw piles for convenience. Discard piles are face down next to the deck(s).
-
Each player takes a player board, 5 dice, and 1 coin token, then chooses a color and takes all 15 cubes, 12 tents, and 1 caravan token in that color.
-
Each player then draws 8 cards, keeping them secret from the other players.
-
The youngest player places their caravan token first. They may choose any space in the first column on the "Start" tile. Other players do the same in clockwise order, but each player must start on a different space.
Gameplay Overview
Creature Caravan is played in turns. Each turn, all players take actions simultaneously until all players have finished taking actions. At the end of each turn, each player places a camp token on their current space on the map (which may trigger an effect). When all players have placed their 12th camp, the game ends and players count victory points. The player with the most victory points is the winner.
Turn
At the start of each turn, each player takes all their dice and rolls them all at once. Players may roll once more before taking any actions if they don't want to keep the first result, but they must re-roll all their dice all at once.
Each turn, all players simultaneously place their dice on actions either on their player boards or on creature cards in their own tableau (their caravan). They must complete each action before moving on to the next action. Once a player places a die, they may not "take back" their action or move the die until the next turn. Each action can only be taken once per turn.
Each action shows the symbol of a die face with the minimum die value required to take the action. To the right of the die symbol are any effects which activate immediately after you place a die there. To take any action, you must first place 1 die with a value that meets or exceeds the minimum required die value.
Exception: The player board action allowing travel to any land type requires 2 dice.
After placing the die, you may then perform any or all of the listed effects for that action, in any order, but you must resolve that action before taking another.
Example: The Lizard Rider card is in your caravan. The action on the card shows a die face with 3 pips. You place a 5-value die there. You may then travel to an adjacent plains space, travel to an adjacent canyon space, and collect a card. Or you may instead collect a card, travel to a canyon space, then travel to a plains space. Or you may instead travel to a canyon space, collect a card, then end your turn without traveling to a plains space.
Some cards have more than one action. You may take either action without taking the other, but if you want to take both actions, you must place dice separately and resolve the actions separately.
Action Cost: Sometimes, an action has a food, bag, or coin icon on the bottom left corner of the die symbol. To take the action, in addition to placing a die, you must also pay the indicated resource. Example: The Cursed Vagrant is in your caravan. You place a 1-value die on the action symbol, then you pay 1 food to the supply before collecting 1 coin.
Players do not need to use all their dice to end their turn and may also take any number of free actions at any point during their turn. Free actions require no dice and can be taken at any time and any number of times on your turn (except "Once per turn" actions). Free actions are described below.
You may have up to a total of 12 cards in your caravan, unless a card effect says otherwise. You may not discard a card once it is in your caravan unless a card effect says otherwise. There is no hand limit.
Take a "Once per turn" action: If a card says "Once per turn" followed by an effect, this is a free action you may take without placing a die. You are not required to take this action every turn. "Each Turn" and "Turn Start" effects also only apply once per turn, and they are optional.
Optional Rule: Trading
Use this rule if you would like more player interaction in the game. At any time, players may exchange food and cards in hand with other players, but may not trade anything else. Players may not show a card before trading, but they can state the name and types of a card. For example, "Aged Engineer," or "Magic," etc. Players may not reveal any other information about their cards in hand when trading.
Free Actions
Discard cards in hand to gain food or coins: Discard 1 card from your hand to gain 1 food. Discard 3 cards from your hand to gain 1 coin.
Add a creature to your caravan: Choose a creature card from your hand. Pay the cost, listed in the upper left corner of the card, then play the card face up next to your player board. Any actions on the card are immediately available and any effects on the card are immediately active, including "Each Turn" effects. However, any "Turn Start" effects apply beginning at the start of the next turn, and any effects based on other cards played do not apply when playing this card. Example: You pay 3 food and 1 bag to add the Glogo Sage to your caravan. This card states "Magic cards cost 1 fewer food," but this does not apply to adding the Glogo Sage to your caravan. This card also says, "Each time you play a magic card, gain 1 card," but you do not collect a card when you place the Glogo Sage, even though it is a magic card.
Any effects on the card that say "when you play this card" activate only once, when you play the card.
Action Types
Travel: Move your caravan token to an adjacent map square with the indicated land type. You may move in any direction except diagonally (unless a card effect allows it), but you must move to the land type indicated on the travel action. Plains include any squares without a canyon, mountain, or lake. All clouds spaces, all of Eastrey, and all white towers are plains spaces (unless the white tower is in another land type). Icons with two different land types can be used to move to either land type (not both). Icons with all four land types can be used to move to any adjacent square. If a travel action includes the word "vertical" it may not be used to travel toward or away from Eastrey, only up or down in the same column.
The four land types on travel icons are: Plains, Canyon, Lake, Mountain.
Any space with a threat symbol represents an ember zombie. If a player moves into or through a threat space, they take 1 ember zombie token and place it on their player board. Each ember zombie token is -1 vp at the end of the game. Players may discard 1 zombie token when they attack an ember zombie. (See Attack.)
Gain Resources: Gain the resource in the quantities pictured. (Remember to pay a resource if there is an icon in the bottom left corner of the action symbol.)
Draw: Draw the number of cards indicated. If there is a hand icon, draw the number of cards indicated, but keep only the number indicated on the hand icon. Decide which cards you want to keep and discard the rest. (For example, the draw-2-keep-1 symbol means to draw 2 and keep 1 of them.)
Trade at Market: Make 1 available trade at the market. Each trade icon on the market board has a number of bags or coins and a number of victory points. To make an available trade, return the indicated number of bags or coins to the supply and take food equal to that number plus 2, then place one of your cubes in the top space of that trade column. At the end of each turn, all cubes on the market board move down one space toward the trade icon. Once any player cube moves onto the trade icon, all other cubes on that column move to the trade icon and that trade is no longer available. If other player cubes are on spaces above a trade icon, but no cubes have reached the trade icon, the trade is still available, but each player may only make one trade per column.
Example: You have 2 coins to trade, but you already have a cube in the 2-coin trade column. The 1-coin column has a red cube on the first space, but the trade icon is still empty. You return 1 coin to the supply, take 3 food, then place one of your blue player cubes on the top square of the 1-coin trade column. At the end of this turn, the red and blue cubes in the first column move down 1 space, and the blue cube in the second column moves down to the trade icon and the 2-coin trade is no longer available to any player.
Attack: If your caravan token is on a space with a threat symbol, but you have not yet placed a camp on that space, you may attack 1 zombie on the ember zombie board.
Each attack icon on the ember zombie board represents one zombie and has an attack power (indicated by a sword and a number) and a number of victory points.
To attack a specific zombie, place dice on any number of attack actions on your player board and/or cards in your caravan until the value of the dice and any bonus attacks reaches or exceeds the attack power of that zombie. If you cannot reach or exceed the attack power of any available zombie, you may not attack that turn.
After attacking one ember zombie, place one of your cubes in the top space of that column on the ember zombie board then discard 1 ember zombie token from your player board. Hint: Attacking a zombie as soon as you move to a threat space on the map will keep you from having any ember zombie negative victory points at the end of the game.
At the end of each turn, cubes on the ember zombie board move down one space toward the attack icon. Once any player cube moves onto the attack icon, all other cubes on that column move to the icon and that zombie is defeated. No other players may attack it. If other player cubes are on spaces above an attack icon, but no cubes have reached the icon, that zombie is still a threat and other players may attack it, but each player may only attack each zombie once.
Example: You decide to attack a zombie. You place a 5 on your Giant Bat card and a 4 on your player board, adding them together for a total of 9. The Giant Bat also gives you +1 per 2 flying (counting itself). Because you also have the Kite Barge in your caravan (another flying card), you gain +1 attack. Your total attack power is 10. You place a cube on the top space of the 10 column on the zombie board and discard a zombie token.
End of Turn
Once each player has finished taking all their actions, prepare for a new turn by following these steps:
Market and Ember Zombie Boards: Any player cubes on any spaces above a trade icon or an attack icon slide down 1 space. If any cube reaches the icon, all cubes in that column slide down to the icon and the bag trade, coin trade, or zombie is no longer available to any player.
Camps: Each player places a camp on the space with their caravan token. Players may have more than one camp on a space and they may camp on a space with another player's camp or caravan token.
Creature Card Map Effects: Each player receives any rewards indicated on creature cards in their caravan as a result of camping on specific spaces, if applicable.
Map Effects: If a player camps on a space with a white tower, a fruit symbol, or a treasure symbol, and they don't already have a camp there (ignore other players' camps), they take the following bonus:
- White tower: draw 3 cards.
- Fruit symbol: take 1 fruit token. Fruit tokens may be placed at any time on a creature card to reduce the required die value of all actions on the card to 1 for the rest of the game. Players may store fruit until they are ready to place it, but once placed, a fruit token cannot be moved. Fruit tokens may not be placed on player board actions.
- Treasure symbol: draw 1 random treasure token. If a bag, fruit, or coin is pictured, take the matching token immediately and only once. Keep the treasure token face down next to your player board and count its victory point value during scoring.
At the start of the next turn, each player again rolls all their dice to start the new round. Also, any players who have creature cards in their caravan with "Turn start" effects collect those rewards before starting the new turn.
Map Tiles
Opponent Players' Camps and Caravan: On the map tiles, ignore other players' camps when moving, camping, collecting treasure, fruit, and cards from white towers, and taking ember zombie tokens.
Your Camps and Caravan: If you have a camp on a white tower, fruit symbol, or treasure symbol, you may no longer collect rewards on these spaces, even if you place another camp. If you have a camp on a threat space, you may not attack a zombie on that space.
Threat Spaces: Any time you move to or through a space with a threat symbol, you must take an ember zombie token. Each ember zombie token is -1 victory point at the end of the game. You may discard 1 ember zombie token each time you attack a zombie. You do not take additional zombie tokens when camping.
Land Types: The four land types are plains (which is anything that does not have mountains, lake, or canyons), mountains, lakes, and canyons.
Clouds: Cloud spaces count as plains. They do not have any special rules, but they interact with some cards in the deck.
Moving to Eastrey: The Eastrey tile counts as one large space and is considered adjacent to the 6 spaces in the adjacent column to the left. Once you move to Eastrey, you cannot move again. At the end of each turn while in Eastrey, place a camp as normal.
End of the Game
After 12 turns, the game ends. After the final camp has been placed and players gain their rewards from camp placement, players can perform any number of free actions. Then, players count their victory points. (Players may use the scoring pad to facilitate scoring.) The player with the most VP is the winner. If tied, the player with the most combined cubes placed on the market and ember zombie boards wins.
Scoring
Reach Eastrey: You must have at least one camp in Eastrey. (5VP)
Total Distance: Including the starting space and the space your caravan token ended, count the spaces your caravan traveled forward. Do not count tents in this step, only how many columns forward you moved between the starting space and Eastrey. (1VP per distance, max 25VP if you camp on Eastrey.)
Spaces with your Camps: Count each space that has one or more of your camps in it. Do not count each camp. (1VP per space) Example: You have 4 camps on 1 space, so that space is worth 1 VP.
Ember Zombie Board: Each cube on the zombie board gives a specific number of victory points.
Trades at the Market: Each cube on the market board gives a specific number of victory points.
Card VP: Count all points on teal banners on all cards in your caravan (see "Card Victory Points" below). Do not count cards in your hand.
Treasures: Count all points on teal banners on your treasure tokens.
Ember Zombie Tokens: -1 victory point per ember zombie token you still have. (Remember that you discard 1 ember zombie token each time you attack a zombie on the zombie board.)
Card Victory Points
Some cards give basic victory points, and some have requirements for the victory points to apply. For example, if you have the Ancient Skeleton in your caravan, it says, "8 if 4+ Deadly." That means that you gain 8 victory points at the end of the game if you have at least 4 deadly cards in your caravan. When calculating victory point bonuses, count every card in your caravan. In this example, count the Ancient Skeleton as one of the deadly cards in your caravan.
Some cards give basic victory points and bonus victory points if certain conditions are met. For example, if you have the Crystal Furnace Robot in your caravan, you gain 1 victory point. You gain 4 additional victory points if you have any cards with the word "Toadfolk" in the name.
Most of these victory point requirements are based on card types, which include: folk, deadly, machine, shy, magic, delver, giant, tiny, nocturnal, and flying. Some requirements are based on specific card names or words in card names, such as "Toadfolk," "Glogo," "Aged Engineer," etc.
Card Anatomy and Details
- Card Cost: The cost is listed in the upper left corner of the card.
- Card Types: Each card has several types listed above the name. These types interact with various abilities and victory point banners. When counting types, only count them on cards in your caravan, not cards in your hand.
- VP Banner: Teal banners on the card show victory points.
- Victory Point Condition: For example, a card that awards you 3 victory points may give you 2 additional victory points if the card "Aged Mystic" is also in your caravan.
- Extra Die: This card gives you an extra die as soon as you play it. You may roll it and place it on the same turn. You have this die for the rest of the game.
- Extra Travel: When you perform this action, you can move into an adjacent lake or plains space. If you have 2 or more flying cards (including this card), you may move 1 extra plains or lake space when you take this action.
- Cost Discounts: Some cards list a discount or a "0" cost if you have a required number of types already in your caravan. This cost discount only applies to food, not coins or bags.
Player Board Actions
Actions on your player board can each only be used once per turn (except the free actions). Fruit tokens may not be placed on player board actions.
- You start with 5 dice.
- At the start of the game, you only have 1 attack action. This means you can only defeat zombies that have a strength of 5 or 6 without playing cards that have additional attack actions. Remember, you can combine attack actions to defeat one zombie. If you want to attack more than one zombie on your turn, you must use separate attack actions for each zombie.
- One player board action requires two dice to use, but it lets you move 1 space (any terrain).
Solo Mode Rules
By Malorie Laukat and Ryan Laukat
Solo mode in Creature Caravan incorporates a bot opponent which can also be used as an additional opponent in any game to add more challenge. To play with the bot, each player sets up as normal. For the bot, only some components and rules will be used, as follows:
Give the bot 1 player board (bot side up), 5 dice, and a set of tents, cubes, and caravan marker. Place the bot caravan marker on a starting space using a die roll. (Map spaces in the starting column correspond to numbers 1-6 from top to bottom.) Instead of drawing a starting hand of cards for the bot, sort through the deck to find one set of the following starting cards and place them next to the bot player board:
- Aged Engineer and Trinket Wagon (We recommend starting with this combination.)
- Nizra the Witch and Plains Wagon
- Lizardfolk Herbalist and Scaled Stallion
- Glogo Traveler and Noble Commander
Player actions follow normal rules. Each turn, after player actions are complete, run bot actions as follows:
1. Roll 5 Dice
2. Assign Dice in Order
Place the dice on the bot player board in order from top to bottom according to the numbers and combinations rolled. There will be multiple possibilities for placing dice. BE SURE TO FOLLOW THE ORDER FROM TOP TO BOTTOM. You will only place one die or set of dice on each bot action.
Dice placement order from top to bottom:
- First, place any one set of double 4s, 5s, or 6s. If there are multiple, place the highest value set first (6s first).
- Next, place any one set of double 1s (if there is a single 1-value, do not place it here).
- Place any remaining dice with values 2-6 on the corresponding spaces.
- If there are any remaining dice, place them in the "Combat Dice" section of the board.
3. Take Dice Actions
Take all actions whose die requirements have been met that turn, in order from top to bottom as listed on the bot player board.
Bot actions in order from top to bottom:
- Double 4s, 5s, or 6s: Place 1 of the bot's cubes on the market board in the lowest available trade space. If tied, choose coins. The bot follows normal player rules: it may only have one cube per trade and cannot place on unavailable trades.
- Double 1 (one set): Move the bot's caravan marker forward 2 spaces then up 2 spaces, if possible. If you reach the edge of the map, ignore further movement this action. Do not take zombie tokens.
- Die value 2: Move the bot's caravan marker forward 1 space then down 1 space, if possible. If you reach the edge of the map, ignore further movement this action. Do not take zombie tokens.
- Die value 3: Draw cards one at a time (up to 6) until you find 1 card that matches an incomplete VP set on a card in the bot's caravan. Play that card next to the bot's player board. If the bot has no incomplete VP sets on played cards, do nothing. If you draw 6 cards and none matches an incomplete VP set, stop drawing. (The bot has no card limit.) Example of an incomplete VP Set: The bot has "Nizra the Witch" with a VP condition of "10 VP if 4+ nocturnal." The bot has 2 played "nocturnal" cards. The bot needs 2 additional "nocturnal" cards for this to be a complete VP set.
- Die value 4: If there are any dice in the "combat dice" section of the board, roll them now and add the results together. Add 1 to this number for every combat action on the bot's played cards. If the total is 6 or greater, place a cube on the lowest available Ember Zombie space on the combat board. If the total is 5 or less, or if the bot had no extra combat dice to roll, place a zombie token on the bot's board. Example: The bot has two combat dice and the "Noble Commander." Roll these two dice for a total of 5, then add 1 for the combat action on the "Noble Commander" card. The total is 6, so the bot defeats the lowest available Ember Zombie. Note: It is common to have combat dice but no 4-value die to activate combat. When this happens, simply ignore the combat dice this turn.
- Die value 5: Place a fruit token on the bot's player board. (Each fruit token is worth 1VP at the end of the game for the bot only.)
4. Camp
After you complete all bot actions, place a tent on the space with the bot's caravan marker. Bots collect only fruit and treasures from the board. If the bot camps on a space with a fruit or treasure token, draw one from the supply and place it on the bot player board. Disregard all other camping bonuses. If a treasure gives the bot a fruit, the bot gains a fruit. If the treasure gives a coin or a bag, the bot gains nothing.
Counting Victory Points for the Bot
- Market and Ember Zombie VP as normal.
- Map VP as normal: 1 VP per space with bot camps and 1 VP per space the bot moved forward. Give 5 VPs if the bot reached Eastrey.
- 1 VP per camp the bot has on a white tower space.
- 1 VP per fruit token the bot has.
- VP from treasure tokens the bot has collected.
- VP from all cards the bot played. Count all bonuses that apply such as +VP for sets of card tags, enemies defeated, etc. If the bot completes a VP bonus involving camps on the map, the bot collects these VPs as well. The bot receives no points for incomplete VP sets.
- Apply negative VPs from cards and subtract points for zombie tokens.
Bot Rule Reminders
- The bot does not use any card actions (except when calculating attack), only bot player board actions. The bot ignores card abilities and combat bonuses.
- The bot has no hand. The bot's caravan has no card limit.
- Do not discard any bot zombie tokens after combat.
- Note: When running the bot, we recommend ignoring/discarding the Young Manticore if drawn.
Bot Challenge+
To make the bot more challenging, choose one of these:
- Bot Level 2: When the bot has 5 or more fruit tokens, it rolls 1 more die per turn (it never rolls more dice than 6).
- Bot Level 3: For every 4 fruit tokens the bot has, it rolls 1 more die per turn.