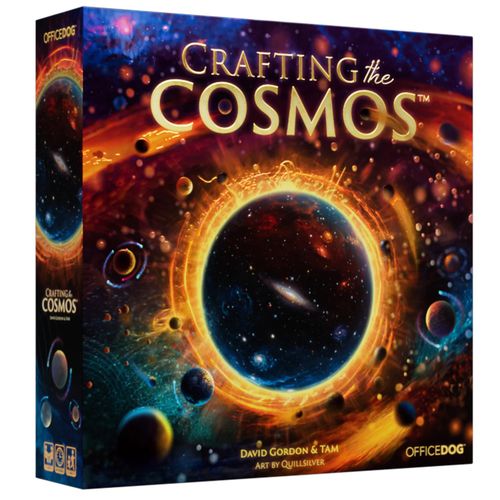
Crafting the Cosmos
Crafting the Cosmos Rulebook
Table of Contents
Table of Contents
Components
- 1 Main Board (Console)
- 4 Player Boards
- 12 Resource Slider Tokens (3 per player)
- 4 Start and End-of-Turn Markers (1 per player)
- Goal Card Riser and Energy Card Riser — 2 Card Risers (optional risers for display of the Goal Card and Energy Card rows, to enhance visibility)
- 16 Power Tokens (4 per player)
- 50 Double-Sided Life Tokens (stable life / proto life)
- 16 Universal Goal Cards
- 60 Energy Cards (15 each of Light, Time, Gravity, and Chemistry)
- 8 Energy Tokens (opaque marbles: 1 per player color and 4 dark)
- 32 Power Cards (8 each of Light, Time, Gravity, and Chemistry)
- 4 Score Markers (1 per player color)
- 18 Time Crystal Tokens
- 4 +50/+100 Double-Sided Point Tokens
- 78 Star Tokens: 26 hydrogen-rich, 20 helium-rich, 16 oxygen-rich, 16 carbon-rich (all with a supernova on the reverse side; front shows the element side, back shows the completed/supernova side)
- 1 1st Player Token
- 48 Nebula Tiles (16 each of Size 1, Size 2, and Size 3)
- 24 Advanced Life Tokens:
- Group 1 (bright green border): four 8-point tokens, three 7-point tokens, one 6-point token
- Group 2 (no border): two 7-point tokens, five 6-point tokens, five 5-point tokens, four 4-point tokens
Main Board Setup
-
Place the main board in the center of the table. Optionally, assemble the card risers and place them along the sides of the main board. In steps 3 and 5 of setup, display the goal and energy cards on the risers.
-
Place the time crystals into the supply based on the number of players:
- 2 players: 6 time crystals
- 3 players: 9 time crystals
- 4 players: 11 time crystals
Set aside 1 additional time crystal per player for their player boards. Return any extra to the game box.
-
Shuffle the universal goal cards, draw 6, and place them facedown in a deck to the right of the main board, near the gravity control. Reveal the first goal and place it on the top space of the goal track. Return the remaining universal goal cards to the game box.
-
Separate the power cards by type into decks. Shuffle each deck and then place it facedown near its respective matching control of the main board.
-
Shuffle the energy cards and deal 4 faceup in a display next to the main board, near the light control. Place the remaining energy cards nearby as the energy card deck.
-
Separate the nebula tiles into 3 stacks by size (1, 2, or 3). Shuffle each stack and then place them near the main board, element side down.
-
Shuffle the advanced life tokens into 2 facedown stacks:
- Group 1 (bright green border): 8 points x 4, 7 points x 3, 6 points x 1
- Group 2 (no border, all of the remaining advanced life): 7 points x 2, 6 points x 5, 5 points x 5, 4 points x 4
Place the Group 2 advanced life tokens in a stack near the main board. Place 2 random Group 1 advanced life tokens per player on top of the Group 2 advanced life tokens. Return the rest to the game box.
The main board is divided into three sectors — Delta, Psi, and Phi — separated by sector boundaries, used for scoring certain universal goals. Each control space on the main board has a slot for a power token, a spot for the active reward, and a spot for the passive reward.
Player Board Setup
Each player chooses a color and takes the pieces matching that color:
- 1 Player Board
- 1 Score Marker
- 4 Power Tokens
- 3 Resource Slider Tokens
- 1 Energy Token
- 1 End-of-Turn Marker
- 1 Time Crystal (from those set aside during main board setup, not from the main supply)
Next, each player:
A. Draws 1 nebula tile of each size and places it element side up on the indicated spots of their player board. B. Places the score marker on the 0 spot of their personal score track. C. Places 1 proto life (purple side up) on the starting life spot (indicated by the white space). D. Places 4 power tokens on the left side of their player board. E. Places the 3 resource slider tokens on the 0 space of their 3 resource tracks (Supernova, DNA, and Graviton). F. Places 1 time crystal (from those set aside during main board setup, not from the main supply) on the 0 space of their time chamber. G. Places 1 end-of-turn marker on their start turn spot. H. Places 1 carbon-rich star token on the center space of their player board. I. Draws 4 energy cards from the energy card deck to their hand.
Take the energy tokens of each player plus the following number of dark energy tokens based on the number of players:
- 2 players: 4 dark energy tokens
- 3 players: 3 dark energy tokens
- 4 players: 3 dark energy tokens
Next, starting with the light control on the main board, randomly place an energy token in each control 1 at a time in clockwise order until you have placed all of them.
The player whose energy token is drawn last is the first player. That player receives the 1st player token and will take the first turn.
Overview
The goal of Crafting the Cosmos is to have the most victory points at the end of the game.
The game is played in a series of rounds. Each round consists of each player taking a turn, which is then followed by a shared end phase. A player's turn consists of 2 phases: energy and craft. Each player will take turns in sequence.
- The first player takes their turn by moving energy on the main board and gaining resources.
- They then spend their resources to craft their galaxy.
- Gameplay proceeds with the next player in clockwise turn order, repeating steps 1 and 2.
Once all players have taken a turn, there is an end phase where all players will score universal goals and prepare for the next round.
Energy Phase
During the energy phase, perform the following 2 steps: shift energy and collect resources.
1. Shift Energy
Move energy tokens around the controls on the main board to gain resources for crafting your cosmos. Each control is a single space that can hold a maximum of 3 energy tokens.
- You must move your energy token at least 1 space. (It does not have to be the first token you move.)
- You may move only your energy token and dark energy tokens.
- You may move energy tokens a combined total of 3 spaces.
- Energy tokens must move clockwise.
- Skip any control that is full (i.e., has 3 energy tokens).
It is possible to end the turn with your energy token in the control where it started the turn by moving 3 times and skipping over a full control.
Example: It is magenta's turn to shift energy. They first move the dark energy token in the chemistry control to the light control. They then move their own energy token 2 spaces, once to the chemistry control, then once to the time control after skipping over the full light control.
2. Collect Resources
Gain the resources from the 1 active control space with your energy token and then from all 4 of the passive control spaces.
Active Reward: Indicated on the left side of the control. Receive all of the resources for the control where your energy token is (matching your player color).
Passive Rewards: Indicated on the right side of the control. Gain resources equal to the total number of energy tokens in each control, regardless of whose energy tokens are there (your energy token, your opponent's energy token, or dark energy tokens). If there are no energy tokens in a control, you do not get any of those resources.
When collecting resources, start with your active rewards, then collect the passive rewards from the control with your energy token. Finally, move clockwise around the control spaces, collecting the rest of your passive rewards.
Important: Finish taking all of your resources during the energy phase before beginning the craft phase and placing resources or taking actions.
Resources Overview
Nebulae — Surround a nebula with specific types of stars to complete it and score points. Gain: draw 1 from the size 1, size 2, or size 3 stack and keep it near your player board.
Stars — Required to complete a nebula. Gain: take the appropriate stars from the reserve and keep them near your player board.
Supernovae — Convert regular stars into powerful wild stars. Gain: increase your supernova slider once per resource gained.
Time Crystals — Accumulate time crystals to gain extra stars and score points. Gain: slide a time crystal up your time chamber track.
When you reach the sixth space of your time chamber track, take a new time crystal token from the supply, place it on the 0 space of the track, and then continue gaining crystals, if applicable. Take a new time crystal token only when you reach the sixth space of the track. (See the Discharge Time Chamber action below.)
Energy Cards — Spend energy cards to gain power cards, activate power cards, and score points. Gain: draw cards from the faceup energy card display or facedown energy card deck.
New faceup cards are revealed at the end of each player's energy phase until there are 4 faceup cards again. (They are not refilled after each card is taken.) There is an energy card hand limit of 10 that is checked during the end phase. If the deck becomes depleted, shuffle the energy card discard pile to form a new deck.
Proto Life — Surround a completed nebula with proto life to gain valuable advanced life. Gain: take life tokens from the supply with the proto life (purple) side faceup and keep them near your player board.
DNA — Convert fragile proto life into robust stable life. Gain: increase your DNA slider once per resource gained.
Graviton — Spend gravitons to perform move actions with stars or life. Gain: increase your graviton slider once per resource gained.
Running out of resources: If there is not enough of a given resource, the player may not take it. The exception is time crystals. When the supply of time crystals runs out, players can take an extra token from the game box to track additional time crystals on their time chamber track for the current round.
The Four Controls
Light Control
- Active: 3 hydrogen-rich star tokens.
- Passive: 1 energy card per energy token.
Time Control
- Active: 1 helium-rich star token and 2 DNA resources.
- Passive: advance a time crystal 1 space up the time chamber track per energy token.
Gravity Control
- Active: 2 oxygen-rich star tokens and 1 supernova resource.
- Passive: 1 graviton resource per energy token.
Chemistry Control
- Active: 1 carbon-rich star token and 1 nebula tile (from the top of the size 1, size 2, or size 3 stack).
- Passive: 1 proto life token per energy token.
Each control has a spot for power markers (see Gaining Power Cards, below).
Example: Continued from the shift-energy example. The magenta player takes 1 helium-rich star token and 2 DNA resources. They then take 3 time crystal advancements, 1 graviton resource, 0 proto life tokens, and 3 energy cards.
Optional — Speeding Up Gameplay: Once you have collected all your resources, the next player can begin their energy phase while you spend your resources during your craft phase.
Craft Phase
Once a player has collected all of their resources (during the energy phase), they spend them during the craft phase in any order to craft their galaxy. They may take placement actions, scoring actions, energy card actions, and resource slider actions in any order.
Placement Actions
Players must place all of their nebulae, stars, and proto life before the end of their turn or they are lost.
Nebulae — You may place a nebula into any empty nebula space on your player board, element side up. You may look at the element side before choosing where to place it. The larger the nebula the more stars you will need to complete it and the more points it will be worth. (See Complete a Nebula, below, for rules on completing nebulae.)
Stars — You may place a star on any empty star space of your player board. There are 4 standard types of stars: hydrogen, helium, carbon, and oxygen.
Proto Life — You must place proto life adjacent to existing life on an empty life space of your player board, purple side up. In the rare case that you have no life on your board, place any new life on the starting life space. (See Create Advanced Life, below, for rules on creating advanced life.)
Points — When you gain points, move your score marker on your personal score track. When you reach 50 or more points on the track, take a 50-point token, move your score marker to the beginning of the track, and continue from there. If you reach 100 or more points, flip the 50-point token to the 100-point side, place your score marker at the beginning of the track once again, and continue as before. A player can have more than 150 points.
Scoring Actions
You may perform any of the following 3 actions at any time and in any order during your craft phase if you meet the requirement.
Complete a Nebula
Requirement: The nebula is next to a matching quantity of stars that are rich in the elements the nebula requires.
Reminder: Supernovae are wild. A supernova may count as any single type of star when completing a nebula.
- Gain the points indicated on the nebula tile.
- Discard 1 star touching the nebula to the supply. (You choose the star, and you may choose a supernova.)
- Flip over the nebula tile to its completed side. You may complete each nebula once.
Note: You do not need any life present to complete a nebula. (See Create Advanced Life, below, for scoring advanced life.)
Example: A size 3 nebula needs to be surrounded by stars rich in 6 specific elements. It awards 10 points, and the player must discard 1 star. The player then flips the nebula tile over to show the completed side.
Discharge Time Chamber
Requirement: Have a time crystal token on the 6 spot of your time chamber track.
- Gain 1 star token (any type) and place it on any open star space.
- Move the time crystal token to the rightmost scoring space.
- Gain victory points based on the number on the scoring space (1: 3 points; 2: 6 points; 3: 10 points; 4: 15 points; 5: 21 points). After you have filled your time chamber 5 times, future discharge time chamber actions will earn you a star but not score additional points.
Example: At the start of the round, the cyan player has 4 time crystals. This turn, they gain 3 more time crystals. They slide their time crystal token up 2 spaces to the top of the time chamber track and then grab a new crystal from the supply and place it on the 0 space of the time chamber. They then slide it up 1 more space to gain their third crystal. At any point during their craft phase, they can slide the crystal at the top of their time chamber over to the 6-point space to gain 6 points on their score track and gain a star.
Create Advanced Life
Requirement: Have 6 life tokens (any combination of proto and stable) surrounding a completed nebula tile without an advanced life token already on it.
- Discard all of the proto life tokens surrounding this nebula. (The stable life tokens all stay.)
- Draw 1 advanced life token from the top of the advanced life stack and place it facedown on the nebula.
Example: The player has 6 life tokens surrounding a completed nebula tile and decides to form advanced life. They discard all of the proto life tokens (3) around the nebula. Finally, they draw 1 advanced life token and place it facedown on the nebula.
Points from advanced life score at the end of the game, and their values are kept secret. (See Universal Goals and End of Game, below.) You may look at your own advanced life tokens at any time.
Energy Card Actions
Players can spend energy cards in 3 ways during the craft phase. After you spend energy cards, place them in a central discard pile near the draw deck. You do not need to use all of your energy cards each round. You may keep up to 10 energy cards. (See End Phase, below, regarding hand limit.)
- Players can discard matching sets of energy cards to add power cards to their galaxy. (See Gaining Power Cards, below.)
- Players can also discard energy cards to activate many power cards based on their costs. (Some power cards have costs in addition to energy cards.) You can activate power cards during the craft phase only. You may use a power card as often as you can afford to.
- Players can discard 5 matching energy cards to gain 6 points. You can perform this action multiple times if you have enough matching energy cards.
Gaining Power Cards
The cost to gain a power card is indicated by the slots on your player board. The first power card costs 2 matching energy cards. The second costs 3, the third also costs 3, and the fourth costs 4 matching energy cards.
To gain a power card, you will draw a number of power cards equal to the number of matching energy cards you spent. Always draw from the power card deck matching the type of energy cards used. Next, keep 1 power card and place the others in any order on the bottom of the matching power card deck.
When you gain a power card, place the power token from that power card slot on the main board as a reminder for future energy phases (i.e., if you gain a time power card, place the marker in the time control of the main board as a reminder to gain an additional resource each energy phase). You still gain resources if no energy tokens are in the control.
You can fill your power card slots in any order.
You can gain multiple power cards in a single turn if you have enough energy cards. If you have no open slots, you cannot gain a new power card with this action. (See Power Card Reference, below, for a complete reference of power cards.)
Example: "Nuclear Fusion" (a Time power card) — Cost: Discard any 1 star to gain any 1 star. Effect: Bonus Resource in Each Energy Phase.
Example: The magenta player decides to fill their second power card slot. They discard 3 matching energy cards (3 light energy cards). They draw 3 cards from the matching power card deck (light) and choose 1. They choose "Relativity Δ." They place it in their second power card slot. Next, they take their power token from the slot and place it in the light control on the main board.
Resource Slider Actions
Players must spend all of the resources on their resource sliders before the end of their turn or they are lost.
Convert a Star into a Supernova — Spend 1 supernova resource (decrease your supernova resource slider by 1) to take a convert star action. Flip any star token over from its element side to the supernova side. (Reminder: a supernova counts as any type of star when performing the complete nebula action but cannot be moved by the movement action.)
Stabilization — Spend 1 DNA resource (decrease your DNA resource slider by 1) to take a stabilization action. Flip 1 proto life token to the stable life (green) side. (Reminder: stable life tokens are not discarded during the create advanced life action.)
Movement — Spend 1 graviton resource (decrease your graviton resource slider by 1) to take a movement action. When you take a movement action, move a single life token or star token to 1 adjacent space. If an adjacent space is occupied, you can skip over the occupied space and move the token to a space adjacent to that one. You can hop over any number of adjacent occupied spaces this way. Only star tokens can occupy star spaces, and only life tokens can occupy life spaces. You cannot use a movement action to move a star token onto a life space, for example. You may not move supernovae.
Movement example: The player wants to move a star token. They can move it to either of two empty adjacent spaces. They can also hop over filled star spaces to a third space. However, these are not the only spaces they can move the star token to.
End of Craft Phase Actions
The last action of your craft phase is to move your end-of-turn marker from the alpha spot to either the "gain a size 1, 2, or 3 nebula" or the "stabilize 1 proto life to stable life" omega spot. After placing the nebula tile or performing the stabilization action, move all of your resource sliders to 0. (All unspent gravitons, supernovae, and DNA are lost.)
Your craft phase is over, and the next player can begin their turn, unless they have the 1st player token, in which case proceed to the end phase.
End Phase
Once everyone has completed their craft phase, perform the following steps in the end phase:
- Move all of the universal goal cards 1 space down the goal track.
- If a universal goal card reaches the bottom of the track (the fourth space), score it. (See Universal Goals, below.)
- Draw a new universal goal card and add it to the top space of the goal track (if any are left in the deck).
- Check to see if the game has ended. (See End of Game, below.)
- Check energy card hand sizes. If any player has more than 10 energy cards in their hand, they must discard until they have 10 energy cards.
- Each player returns their end-of-turn marker to the alpha spot on their player board. The 1st player token is passed to the left, and a new round begins.
In a 2-player game, do not pass the 1st player token.
Universal Goals
Points are awarded to the players who have the most of the resources specified by the universal goal card: 1st place scores 6 points, and 2nd place scores 3 points. If players are tied for 1st place, they each score 6 points, and no player scores 2nd place points. If players are tied for 2nd place, they each score 3 points. Then discard the universal goal card.
In a 2-player game, do not score 2nd place points.
You must have at least 1 of the contested resource to be able to score from a universal goal. If no players are able to score the goal, the goal is still discarded.
For the purposes of universal goals, supernovae count as stars but count only as their own type. They cannot be counted as any other type of star (i.e., they could count for your continuous stream of stars but not as a carbon star). (See Universal Goal Reference, below, for a complete reference of universal goal cards.)
Example: It is the end phase and time to award points for the universal goal, which is for the most proto life. The magenta player and the cyan player each have 7 proto life tokens. The violet player has 3 proto life tokens. Magenta and cyan each score 6 points, and violet scores 0.
End of Game
The game ends after the end phase if the time crystal tokens in the supply are depleted or if the last universal goal card is scored. Each player flips over their advanced life tokens and adds those victory points to their score track. Whoever has the most points wins.
In the case of a tie, whoever has the most energy cards left in hand is the winner. If there is still a tie, the tied players share the victory.
Universal Goal Reference
- Most Stable Life — The player with the most stable life anywhere in their galaxy.
- Total Size of Nebulae in Psi — Count the size of each completed nebula in Psi Sector (1, 2, or 3). The largest total wins.
- Most Supernovae — The player with the most supernovae anywhere in their galaxy.
- Total Size of Nebulae in Phi — Count the size of each completed nebula in Phi Sector (1, 2, or 3). The largest total wins.
- Largest Group of Stars — The player with the most stars (including supernovae) in 1 continuous group in adjacent star spaces, without gaps.
- Most Life in Delta — The player with the most life in Delta Sector. Proto and stable life both count. Life on the border touching Delta Sector counts. Advanced life does not count.
- Total Size of Nebulae in Delta — Count the size of each completed nebula in Delta Sector (1, 2, or 3). The largest total wins.
- Most Life in Psi — The player with the most life in Psi Sector. Proto and stable life both count. Life on the border touching Psi Sector counts. Advanced life does not count.
- Most Life in Phi — The player with the most life in Phi Sector. Proto and stable life both count. Life on the border touching Phi Sector counts. Advanced life does not count.
- Most Time Chamber Slots Filled — The player with the most time crystal tokens along the top of their player board.
Power Card Reference
Time Power Cards
- Generations — Cost: instead of gaining any star from filling a time chamber slot. Effect: gain 3 stable life anywhere. (You do not stabilize any proto life with this effect.)
- Expanding Universe — Cost: instead of gaining any star from filling a time chamber slot. Effect: gain 2 helium-rich stars.
- Black Hole — Cost: instead of gaining any star from filling a time chamber slot. Effect: convert any 2 stars into supernovae.
- Event Horizon — Cost: 1 energy card (any type) and 1 supernova. Effect: gain 2 time crystals or 2 proto life. (Cannot gain 1 of each.)
- 4th Dimension — Cost: 1 time energy card. Effect: gain 1 time crystal.
- Special Relativity — Cost: 2 matching energy cards. Effect: gain 2 time crystals.
- Quasar — Cost: 1 energy card (any type) and 1 graviton. Effect: gain 1 time crystal.
- Nuclear Fusion — Cost: 1 time energy card. Effect: discard 1 star and then gain 1 star. The new star can go anywhere (as usual).
Chemistry Power Cards
- Genetic Drift — Cost: 1 energy card (any type). Effect: move 1 proto life and then stabilize that life. If you do not have any proto life, you cannot use this effect.
- Ionizing Radiation — Cost: 1 energy card (any type). Effect: stabilize all proto life next to 1 supernova. If you do not have a supernova with proto life next to it, you cannot use this effect.
- Evolution — Cost: 3 stable life and 1 energy card (any type). Effect: gain an advanced life on any nebula with exactly 1 advanced life already on it. If you do not have a nebula with exactly 1 advanced life on it, you cannot use this effect. The stable life spent can come from any part of your galaxy.
- Abiogenesis — Cost: 1 chemistry energy card. Effect: gain 1 stable life anywhere. You do not stabilize a proto life with this effect.
- Survival of the Fittest — Cost: 1 proto life and 1 energy card (any type). Effect: stabilize 2 proto life. If you have only 1 proto life, you may stabilize it, but the extra effect will be lost.
- Speciation — Cost: 1 energy card (any type). Effect: gain 1 proto life in a life space adjacent to any 1 stable life you control. If you do not have a stable life, you cannot use this effect.
- Photosynthesis — Cost: 1 energy card (any type). Effect: stabilize all proto life next to all helium-rich stars you control. If you do not have any helium-rich stars or any proto life next to a helium-rich star, you cannot use this effect.
- Water-Rich Comets — Cost: 1 energy card (any type). Effect: stabilize all proto life next to all oxygen-rich stars you control. If you do not have any oxygen-rich stars or any proto life next to an oxygen-rich star, you cannot use this effect.
Light Power Cards
- Molecular Cloud — Cost: 2 light energy cards. Effect: gain a hydrogen-rich star.
- Amino Acids — Cost: 1 chemistry energy card. Effect: gain 1 stable life anywhere. You do not stabilize a proto life with this effect.
- Speed of Light — Cost: 5 matching energy cards (cards of the same type). Effect: gain 6 victory points and any standard star (hydrogen, helium, carbon, or oxygen).
- Time Dilation — Cost: 1 light energy card. Effect: gain 1 time crystal.
- Relativity Δ — Cost: 2 time energy cards. Effect: gain a standard star (hydrogen, helium, carbon, or oxygen) in the Delta Sector of your galaxy (on the border is allowed).
- Relativity Ψ — Cost: 2 gravity energy cards. Effect: gain a standard star (hydrogen, helium, carbon, or oxygen) in the Psi Sector of your galaxy (on the border is allowed).
- Relativity Φ — Cost: 2 chemistry energy cards. Effect: gain a standard star (hydrogen, helium, carbon, or oxygen) in the Phi Sector of your galaxy (on the border is allowed).
- Nuclear Fission — Cost: 2 time energy cards. Effect: discard a star and gain a standard star (hydrogen, helium, carbon, or oxygen) and a time crystal.
Gravity Power Cards
- Binary Star — Cost: 1 energy card (any type) and 1 graviton. Effect: convert 1 supernova back into its previous type (flip the token), then move it once (following the usual movement rules).
- Core Collapse — Cost: 1 energy card (any type) and 1 graviton. Effect: convert 1 of any star into a supernova.
- Star Stuff — Cost: 1 energy card (any type). Effect: gain a size 1 nebula or replace an incomplete size 1 nebula in your galaxy with a size 2 nebula.
- Shooting Star — Cost: 1 gravity energy card. Effect: move 1 star, supernova, or incomplete nebula in your galaxy anywhere.
- Solar Wind — Cost: 2 chemistry energy cards. Effect: convert 1 star into a supernova, then convert all proto life adjacent to that supernova into stable life. You can convert the star even if it does not have any proto life next to it.
- Pulsar — Cost: 1 gravity energy card and 1 graviton. Effect: gain 2 time crystals.
- White Dwarf — Cost: 2 time energy cards. Effect: convert 1 star into a supernova and then gain a time crystal.
- Wormhole — Cost: 1 energy card (any type) and 1 stable life. Effect: move up to 3 proto life anywhere or move up to 3 stable life anywhere. If you have fewer than 3 proto or stable life, you can still move the life you do have.
Icon Reference
- Hydrogen Star, Helium Star, Oxygen Star, Carbon Star — the four standard star types; a token's reverse side shows its Supernova form.
- Light, Chemistry, Time, Gravity — the four control types, matching the four energy card and power card types.
- Light Energy Card, Chemistry Energy Card, Time Energy Card, Gravity Energy Card — energy cards matching each control type.
- Graviton, Time Crystal, Energy Card, Proto Life, Stable Life, Nebula — resources and components tracked on the player board.
- Victory Points, Matching Energy Cards, Universal Goal Cards, Power Token, Discard, Discharge Time Chamber Action, Size 1 Nebula, Size 2 Nebula, Size 3 Nebula, Advanced Life, 1st and 2nd Place for Goals — action and scoring icons.
- Delta Sector, Psi Sector, Phi Sector, Sector Boundary — the three galaxy sectors used for universal goal scoring.
- Alpha (start of turn marker position) = Start Turn; Omega (end of turn marker position) = End Turn.
- Discard Star icon (including supernova).