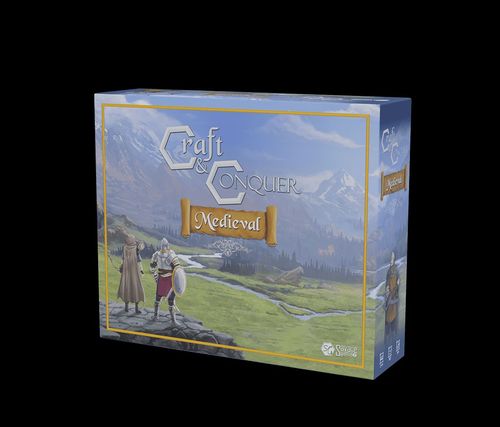
Craft & Conquer: Medieval
Craft & Conquer: Medieval Rulebook
Table of Contents
Table of Contents
Game Components
- 32 Bases
- 32 Miniatures
- 32 Peasants
- 200 Resource Tokens
- 60 Coins
- 40 Settlement Tokens
- 80 Action Cards
- 75 Objective Cards
- 8 Faction Cards
- 13 Dice
- 24 Arrows
- 4 Player Tiles
- 14 Game Tiles (double sided)
- 4 Cheat Sheets
Introduction & Setup
Craft and Conquer: Medieval is a competitive game of conquest where players collect, craft & deploy to conquer other players in classic turn-based strategy gameplay. The game is played in approximately 60 to 120 minutes depending on the number of players and objectives in play.
To begin the game, all players are given a number of Objective Cards to complete. (See Number of Objectives, p.13) The first player to complete the chosen number of objectives first, activates the last round. However, that player may not be the actual winner. The player with the most points scored by the total value of their Objective Cards will become the "Lord/Lady of the Land".
This game uses a modular board design, providing a unique experience with every game. The board is made up of 14 unique terrain tiles and 4 player tiles. The number of tiles used to generate the board is dependent on the number of players and player preference.
Each tile consists of a combination of grass, mountains, lakes, rivers or forest spaces. Some are "large river tiles" that can optionally be placed across the board, for a more unique gameplay. (See Large River Tiles, p.5)
Bridges
Some tiles also contain bridges, which span across small rivers. Soldiers cannot cross rivers except where a bridge joins two different spaces. All bridges follow normal Movement rules. (See Movement, p.23)
Table Arrangement
Before playing the game, the board tiles and game pieces should be separated and sorted. All tokens, miniatures, cards and dice should be placed in a designated area near the board - the Stockpile. This is where each player will collect or return Resources, coins, cards, Settlements and soldiers.
Game Tile Layouts
When setting up the board, there are several methods to laying out the game tiles. For beginners, it is recommended to use one of the following standard layouts.
Standard layouts are shown for 2 Players, 3 Players and 4 Players. (The layout diagrams are not reproduced in this text.)
Deciding Tile Placement
Game tiles are placed by each player, in clockwise order turn, beginning with the highest die roll. The resulting layout should be in the same format as one of the layouts listed below, based on the number of players.
The first tile placed should be in the center of the play area, with each additional tile connected to a previously placed tile.
Recommendation: If players are placing tiles one at a time, players can place them strategically to aid their gameplay. It is also recommended to start by placing one tile in the center of the play area and add additional tiles around it.
Large River Tiles (Optional)
There are four game tiles with river segments on them. Players may choose to ignore the river tile connections or align them together for a more challenging game. These tiles are recommended for advanced players using the alternative layouts.
River Tiles also have a large bridge structure. These bridges are considered normal spaces for all soldier Movements, but Settlements cannot be placed upon them.
Note - Connecting River Tiles: River tiles can be rotated and connected in any direction, as long as at least one arrow is pointing directly at another arrow on the adjacent river tile.
Alternative Layouts
Here are some fun alternative layouts that can be used when setting up the game tiles. These are recommended for more advanced players who are already familiar with the game. The printed alternative layouts are:
- Close Quarters (3 Players)
- Double Teamed (3 Players)
- Choke Point (3 Players)
- Narrow Pass (2 Players)
- Side-by-Side (2 Players)
- Arena (4 Players)
- Mega Choke Point (4 Players)
- Alleyway (4 Players)
Note - Creating Additional Layouts: For variety, anyone can make a custom layout. However, all Player Tiles & Kingdom rules must be followed. (See Player Tiles & Kingdoms, p.7)
Player Tiles & Kingdoms
In addition to the game tiles, each player will have one Player Tile. This tile must be placed adjacent to two game tiles, at the edge of the board. (See the standard or alternative layouts for examples.)
Important: A Player Tile must be placed adjacent to exactly two game tiles; no more and no fewer. This ensures every player has equal space on which to start.
These three tiles (the Player Tile and two adjacent game tiles) make up a player's starting area where they can build Settlements and deploy soldiers, during the game. This is considered the player's Kingdom.
Important - No Overlapping Kingdoms: A player's Kingdom area cannot overlap with any other player's Kingdom. Each player must have two game tiles, of their own, which are not shared with other players. However, if playing a team game, this rule can be ignored within each team.
Player Setup
The following are all the steps needed to start a Craft and Conquer game, regardless of the number of active players.
Step 1: Choose a Faction Card. Each player can choose a Faction card. Each faction card indicates the number and type of Resources, Settlements and soldiers the player will have at the beginning of the game. These cards can be dealt out randomly or chosen by the individual players. (See Faction Cards, p.11)
Step 2: Collect Starting Pieces. All players will gather whatever pieces, tokens and soldiers their Faction Card indicates and place it in their play area.
Step 3: Deal Three Objective Cards. Each player will be dealt 3 Objective Cards. More Objective Cards are drawn throughout the game. (See Objective Cards, p.12)
Step 4: Deal Two Action Cards. Each player will be dealt 2 Action Cards. More action cards are drawn throughout the game. (See Action Cards, p.28)
Step 5: Place Settlements. Before a game begins, all players place the collected Settlements (from step 2), in their Kingdom. When placing, there must be at least two spaces between each Settlement. (See Settlements, p.15)
Good vs Bad Settlement Placement: These Settlements are only separated by one space. This is an illegal placement.
Remember: Each player should keep his Objective and Action cards hidden from the other players until they are claimed or used during the course of the game.
Step 6: Place Peasants on Settlements. Each player is given a number of Peasants according to their Faction card. Peasants are placed on a player's own Settlements to help collect Resources during each turn. Only one Peasant can be placed per Settlement. (See Peasants, p.14)
Step 7: Deploy Starting Soldiers. Each player's Faction Card includes one or more soldiers to place on the board. These soldiers are deployed adjacent to a Settlement. When deploying soldiers, there can only be one soldier per Settlement. If there are more soldiers than Settlements, the player must wait until their next turn to deploy additional soldiers. (See Deploying Soldiers, p.20)
Step 8: Roll The Dice. Each player rolls two attack dice and the player with the highest value will go first. Alternatively, the oldest player can go first. Each player takes turns in a clockwise direction around the play area.
Step 9: Begin the Game!
General Gameplay
Craft and Conquer: Medieval is a turn based game. Each player takes turns to gather Resources, craft & deploy soldiers and complete objectives using strategic combat tactics, to fight for victory and rule the land.
Objectives are won in a variety of ways; deploying soldiers, gathering Resources, conquering enemy soldiers, establishing Settlements, and more. Your choices are influenced by what actions you take and what objectives you draw throughout the game.
"They gather for war, as the sound of horns and battle cries echo throughout the land."
Gameplay Turns
Step 1: Draw a single Objective Card and a single Action Card. Skip this step on your first turn. You may have a maximum of 3 Objective Cards and 2 Action Cards in your hand at one time. You may exchange any drawn cards for any cards currently in your hand. All exchanged cards must be discarded. No cards may be played until this step is complete.
Remember: All Objective Cards and Action Cards are kept hidden in your hand until they are completed or used. Action Cards with the "Continuous" rule must stay visible to all players, once played for the first time.
Step 2: Remove Peasants and Collect Resources. Resources can only be gathered if a Peasant is on a Settlement at the beginning of your turn. You can also collect Resources from enemy Settlements that are occupied at the beginning of your turn. (See Occupation, p.27). Remove one Peasant at a time and collect the Resources indicated on that Settlement. (See Peasants or Settlements, p.14-15)
Step 3: Collect Coins from each Settlement you own or occupy. You may always collect Coins even if there are no Peasants on your Settlement. The number of taxes is represented on each Settlement as a small coin. (See Settlements, p.15)
Step 4a (Optional): Craft something. You may or may not choose to build Settlements, soldiers and/or purchase Resources or Peasants. Resources can only be sold for 1 coin each. It is recommended you craft during every turn, or it may hinder your ability to achieve your objectives. (See Crafting, p.18)
Step 4b (Optional): Deploy a soldier. If you have purchased soldiers during a turn, you may deploy them to your Settlements. You can only deploy soldiers, one per Settlement, per turn. (See Deploying Soldiers, p.20)
Step 4c (Optional): Move or Attack an Enemy. You may choose to move and/or attack with one or more of your deployed soldiers. To move a single soldier, you must first call out which soldier you will move then roll the orange Movement die. Additionally, Champions get 1 extra Movement range added to the Movement die. Example: You want to move a Champion and you roll a three. You will add one and move a total of four spaces.
Remember: If a soldier has already attacked it cannot move until next turn, unless otherwise stated on an Action Card. (See Movement, p.23)
Step 4d (Optional): Claim an Objective. You may claim any Objective Cards you have completed during your turn. However, you cannot claim objectives for something done on a previous turn.
Step 5: Place Peasants. After completing all other steps, place your Peasants on your Settlements according to these rules:
- Fewer Peasants than Settlements: Choose which Settlements to place them on, or buy more Peasants for 2 coins each.
- More Peasants than Settlements: Keep or sell the excess Peasants for 1 coin each.
Note - Withholding Peasants: You cannot withhold Peasants from any of your empty Settlements.
Ending Your Turn: Once your Peasants are placed on your Settlements, your turn has ended and you may do no more actions. The next player to your left can begin their turn.
Each in step 4 are optional. You can perform them in any order at any time during your turn.
Faction Cards
Faction cards are dealt to each player or randomly drawn at the beginning of the game. Each card is unique, with its own perks and abilities, and it provides a brief history of the Faction's past.
Once drawn, each player gathers all the Resources indicated on the card face. The card is kept until the end of the game, where it is used for reference and scoring.
The card face shows the Faction Title and Faction colors (See How to Win, p.30), the Resources and items collected before the game begins, and the unique perks and abilities of the Faction, which also show the Faction colors as text.
Faction Colors
Each Faction card has two Faction colors, represented by the multi-colored icon to the right of the title. This will be referenced when counting objective points at the end of the game. (See How to Win, p.30)
How it works: If a player has one or more completed objectives with a ribbon color that matches the Faction color, the player can add one point to their final score, for each of the cards that match.
Objective Cards
At the beginning of the game, players will be dealt three Objective Cards. Each player will then draw a single Objective Card at the beginning of each turn, excluding the first turn.
Important: Players are not allowed to complete any Objective Cards during the drawing phase of their turn.
Each player may hold a maximum of three Objective Cards in their hand at one time. Each completed Objective Card must be placed face up on the table and is no longer considered a part of the player's hand.
Ending the Game: The game will end when one of the players completes 5 objectives and has placed them face up on the table.
When drawing Objective Cards, the player can choose to discard or exchange it for one of the cards already in their hand. The replaced card must be discarded if the player has exceeded the number of cards allowed in their hand.
Strategy: Pay close attention to the cards your opponent discards. It could give you some insight into their plans for future turns.
The card layout shows: the Objective (the condition or action the player must meet or perform to complete it); the ribbons, which match the different Faction colors (some cards have multiple colors which can be used in scoring points; only one of the colors can be used for each scoring method); and the instructional icons area, including the number of points the objective is worth.
Completing Objective Cards
Objectives are achieved by accomplishing specific goals represented by the titles found on each Objective Card, such as "Defeated a Knight," "Captured a Settlement," or "Crafted an Archer." Once the objective on a card has been fulfilled, the player should declare it as 'completed' and place it face up on the table for all players to see.
Scoring & Ribbon Colors
All Objective Cards have a colored ribbon along the left side of the face. This corresponds with the various Faction colors and can help players increase their scores at the end of the game.
Note - Ribbon Scoring: At the end of the game, if a player has a set of three Objective Cards, which has at least one matching ribbon color, the player will get three additional points when scoring.
Also, any completed objectives with a ribbon color that matches the player's Faction color, will get one additional point for each card. (See How to Win, p.30)
Number of Objectives
The number of completed Objective Cards can be adjusted to make the game shorter or longer. Here are the recommended number of objectives based on length and player count:
| Players | 30' | 60' | 90' | 120' |
|---|---|---|---|---|
| 2 Players | 2 Objs | 3 Objs | 4 Objs | 5+ Objs |
| 3 Players | 1-2 Objs | 2 Objs | 3 Objs | 4+ Objs |
| 4 Players | (blank) | 1-2 Objs | 2-3 Objs | 3+ Objs |
Objective Definitions
Each Objective Card is defined by a single past-tense term that the active player must have completed, before they can claim it. Below are the definitions for each:
- Craft = The indicated item must be crafted.
- Defeat = The indicated soldier of an enemy player must be defeated in combat.
- Upgrade = The specific item must be upgraded to the indicated Tier/level.
- Discard = The indicated number of items must be gathered from your hand and returned to the stockpile area.
- Retire = The indicated soldier must be permanently removed from the play area. A player can only retire a soldier if they have a "Retired" Objective Card in their hand, that can be completed.
- Capture Settlement = An enemy player's Settlement must be occupied by the active player's soldier.
- Capture Peasant = An enemy player's Peasant must be captured and in the active player's hand.
- Occupy Settlement = An enemy player's Settlement must be occupied for the indicated number of turns.
Objective Points icons display the number of points you receive when completing an objective. Different Objective Cards have different values. These points are added together at the end of the game to see who has won.
Either/or forces you to make a choice. If you hold more than one of these cards in your hand, you can only choose from one of them to complete in one turn. You must wait until your next turn to complete any other objectives that contain this icon.
Example: you have the "Capture a Peasant" and "Capture a Settlement" card in your hand. You choose to complete the "Capture a Settlement" objective. You can NOT also complete the "Capture a Peasant" during that same capture action. To achieve it, you must capture another Peasant on a following turn.
In X Turns icons require you to achieve the objective in a certain number of turns, indicated by the number in the center.
Example 1: The "Defeat Two Archers" objective requires you to defeat both Archers in one turn.
Example 2: The "Occupy a Settlement" objective requires you to occupy an enemy Settlement for three turns before you can complete the objective. On the third turn - not counting the turn you declared the objective on - you may claim this Objective.
Declare requires you to tell every player your intent to complete this objective. You must also place it face up on the table and it must be visible to all players. Normally, this is also associated with an "In x turns" icon. This means you would declare your intent to complete the card during the first turn but are unable to complete it until you have finished the indicated number of turns.
Note: If the intended action for the declared card is not achieved, the Objective becomes forfeit and must be discarded. An example would be when your Soldier is defeated during the "Occupy a Settlement" Objective.
"Standing at the front lines, everyone feared what would come next. The calm before the storm..."
Peasants
Peasants have multiple functions throughout the game. Players use them to collect Resources and craft soldiers. A player cannot do either of these without Peasants.
When a player wants to gather Resources, they must have a Peasant already inhabiting (placed on top of) their Settlements at the beginning of their turn.
How it works: With a peasant inhabiting a settlement, at the start of a turn a player can pick up the Peasant and temporarily place the Peasant in their inventory, collecting all resources the inhabited settlement provides. They can do this for each of their own inhabited Settlements.
Additionally, players can also collect Resources for any enemy Settlements that they currently Occupy with one of their soldiers. (See Occupation, p.27)
End of Turn
To declare the end of a player's turn, the active player must place all the Peasants they have in their inventory back on their Settlements. This signifies the end of a player's turn. This is required, without exception.
Note - Additional Peasants: If a player has more Peasants than Settlements, they can keep the additional Peasants in their inventory for later use - such as crafting soldiers. However, a player can never withhold any Peasants from their Settlements if they are in the player's hand.
Note - Enemy Settlement Resource Gathering: When gathering Resources from an occupied enemy Settlement, the occupying soldier is not removed from the Settlement.
Peasants for Crafting Soldiers
Peasants are additionally used and traded in when crafting first level soldiers. However, they are not required when upgrading soldiers. (See Crafting, p.18)
Purchasing Peasants
A player may purchase Peasants, anytime during their turn, for two coins per Peasant. There are no limits to the amount of Peasants a player can own. However, in practical terms, a player will only need as many Peasants for the same number of Settlements they have on the board.
Note - Number of Peasants Per Settlement: There can be no more than 1 Peasant on a single Settlement.
"A simple farmer was trained today, taking up arms in the fight for his family, his country and his king."
Resources & Settlements
Resources
There are 5 Resources used in this game: Wood, Iron, Craftpoint, Horse and Stone. Each player gathers these Resources via Settlements at the beginning of each of their turns (See Settlements below). Additionally, the Resources can be purchased for 2 coins each, at any time throughout a player's turn.
Resources are used for buying more Settlements, crafting an army, or stocking up on ammo. Resources can also be sold back to the stockpile for 1 coin each, at anytime during that player's turn.
How it works: Resources can be purchased for 2 coins from the stockpile, but can only be sold for 1 coin, except Craftpoints. Craftpoints cost 10 coins when purchased and can only be sold for 1 coin each. It's a really bad investment.
Settlements
Settlements provide Resources and allow soldier deployment. Placing and defending a Settlement requires thoughtful strategy and a fair bit of upfront cost.
A player may buy a Settlement at any point during their turn, if the player has the Resources and coins to do so.
Remember: Each player can only have a maximum of five Settlements in their Kingdom. This limitation does not include any Enemy Settlements a player may occupy with a soldier.
Placing Settlements
When placing a Settlement, the player must not place the Settlements too close together. The minimum distance between each is 2 spaces. (See Player Setup, p.8)
Collecting Coins
Settlements produce coins each turn. Tier 1 Settlements produce two coins each turn. Tier 2 Settlements produce three coins each turn. The icons - located in the center of the Settlement Token indicate how many coins are collected each turn.
Gathering Resources
At the beginning of a player's turn, they must remove all of their Peasants from their Settlements and gather all the Resources that the Settlement produces. (See Peasants, p.14)
Each Settlement Token indicates the type and the quantity of the Resources which can be gathered during a single turn. While Tier 1 Settlements produce two Resources, Tier 2 Settlements produce more.
Settlement tokens as printed (p.15-16):
- Farm Token (Tier 1): 1 Wood Resource, 2 Coins/Taxes, 1 Iron Resource
- Quarry Token (Tier 2): 2 Iron Resources, 3 Coins/Taxes, 1 Craftpoint, 1 Stone Resource
- Village Token (Tier 2): 2 Wood Resources, 3 Coins/Taxes, 1 Craftpoint, 1 Horse
Purchasing Additional Settlements
A player can purchase and place additional Settlements during their turn, up to the maximum of five within their Kingdom.
Note - Settlement Upgrades and Placement: Settlements cannot be upgraded on the same turn it was purchased, and once placed on the board, Settlements cannot be moved.
Tier 1 Settlements are directly purchased. On the other hand, Tier 2 Settlements are upgrades and replace Tier 1 Settlements on the board. A player must have a Tier 1 Settlement on the board before they can purchase an upgrade.
Tier 1 "Farm": purchase cost 10 coins and 1 Craftpoint.
Tier 2 "Quarry" and Tier 2 "Village" are upgrades from the Tier 1 Farm. The printed upgrade costs are given in two places that do not agree (see the source note below):
- Printed on page 16: Tier 2 "Quarry" = 10 coins, 3 Craftpoints, 5 Iron. Tier 2 "Village" = 10 coins, 3 Craftpoints, 5 Wood.
- Printed on page 18 (Tier 2 Settlement Upgrades chart): Tier 2 "Village" = 5 coins, 5 Wood, 3 Craftpoints. Tier 2 "Quarry" = 5 coins, 5 Iron, 3 Craftpoints.
Source note: the printed rulebook gives two different cost sets for the Tier 2 upgrades (page 16 and page 18). Both are transcribed here as printed; the publisher's text does not say which governs.
Craftpoints
Craftpoints are a unique resource within the game. They do not work the same as the other Resources. They are primarily used for upgrading soldiers and building/upgrading Settlements.
There are three ways for a player to gather additional Craftpoints:
- Gathering Resources from Tier 2 Settlements.
- Purchasing Craftpoints for ten coins each.
- Defeating enemy units (see details below).
At the beginning of the game, all players start with a limited number of Craftpoints. Players are able to gather additional Craftpoints in a variety of ways.
Craftpoints to Gather
- For each defeated Tier 1 Soldier, the winner collects two Craftpoints.
- For each defeated Tier 2 Soldier, the winner collects four Craftpoints.
- For each defeated Tier 3 Soldier, the winner collects six Craftpoints.
Crafting
Crafting is an essential part of gameplay, with the ability to trade in Resources and coins to purchase various items during a player's turn.
There are three primary items that a player can craft: Soldiers, Settlements and Ammo.
Remember: Players are only allowed to craft on their own turn.
Crafting involves spending coins and Resources, and sometimes selling Resources to buy what a player needs.
Before a player can craft anything they must have sufficient amounts of Resources in their hand. Resources are collected during the first step of a player's turn (See General Gameplay, p.10). Afterward, the player may choose what they wish to spend and what to craft. The following visual charts detail all the prices for all soldiers and purchasable components within the game.
"A blacksmith's hammer slams down on molten steel, as sparks spray into the night air."
Crafting Prices
- Peasant: 2 coins.
Tier 1 Settlements
- Farm (Tier 1): 10 coins and 1 Craftpoint.
Tier 2 Settlement Upgrades
Upgrade items are marked with an asterisk. See the conflicting printed costs under "Purchasing Additional Settlements" (Settlements, p.16) above.
- Village (Tier 2, upgrade from Farm), printed on page 18: 5 coins, 5 Wood, 3 Craftpoints.
- Quarry (Tier 2, upgrade from Farm), printed on page 18: 5 coins, 5 Iron, 3 Craftpoints.
Arrows
During a game, players may buy normal arrows or flaming arrows. Players can choose which one they want to buy. If a player has purchased a normal arrow but he wants to purchase a flaming arrow, instead, he may trade in the normal arrow at full value of 1 coin and 1 wood, then pay the remaining balance.
Unique: Normal Arrows are the only item that can be traded at full value in the game. All other Resources, including Craftpoints, are traded in at 1 coin each. (See Resources & Settlements, p.15)
- Normal Arrow: 1 coin and 1 Wood.
- Flaming Arrow: 3 coins and 2 Wood.
Note - Upgrade Only: This symbol identifies an item is an upgrade. The item cannot be purchased directly and can only be upgraded from the Tier 1 item.
Tier 1 Soldier Purchases
- Archer: 1 Peasant, 4 coins, 2 Wood.
- Warrior: 1 Peasant, 5 coins, 1 Wood, 1 Iron.
Tier 2 Soldier Upgrades
- Warrior to Knight*: 4 coins, 2 Iron, 1 Craftpoint.
- Archer to Bolteer*: 5 coins, 1 Iron, 1 Wood, 1 Craftpoint.
Tier 3 Soldier Upgrades
- Knight to Champion*: 4 coins, 2 Iron, 3 Craftpoints, 1 Horse.
- Bolteer to Catapult*: 4 coins, 6 Wood, 3 Craftpoints.
Deploying & Upgrading Soldiers
Deploying Soldiers
Soldiers are crafted throughout the game and can be deployed on the board during a player's turn. Players can craft and deploy soldiers only on their turn.
Each soldier crafted must be placed on a board space next to an adjacent Settlement owned by that player and cannot be placed in the following locations:
- Outside of the player's Kingdom, (See Player Tile, p.7)
Example: if your Settlement is placed on the border of your game tile and an adjacent game tile, you must deploy your soldier inside your Kingdom's borders.
Note - Adjacent Deployment: The term 'adjacent' means at least one edge touching the side of a Settlement. Multiple edges can be touching but only one is required.
- Adjacent to a Settlement which is under Siege, or
- Adjacent to an enemy settlement currently occupied.
(Printed diagrams show one deployment that is not legal because the soldier is placed outside of the player's Kingdom, and deployments that are good because the soldier is placed next to the Settlement with at least one side touching. The red marking shows a player's Kingdom area.)
Siege Deployment
When a player has a Settlement with an enemy Soldier adjacent, that Settlement is considered under Siege. Besieged Settlements must adhere to the following Siege Rule.
Siege Rule: At the beginning of a player's turn, before all other steps - including drawing new cards, the player may choose to spend the Resources left in their hand to purchase and deploy a Soldier on a Settlement under Siege. This applies to each turn the settlement is under Siege and the player must take this action as the first step of the turn. Additionally, the player must have the exact number of resources in their hand required to make the unit purchase during this Rule step.
No coins or Resources may be traded for, nor gathered, during this Rule step. Any new Soldiers purchased during this Rule step may be placed on any space adjacent to any of the player's Settlements following the standard deployment rules.
Remember: No Soldiers obtained later - during the player's turn - may be deployed to a Settlement under Siege.
Upgrading Soldiers
During the course of a player's turn, they may choose to upgrade their soldiers. This can be done at any time during their turn as long as the upgradeable soldier has not been Spent (See Spent Soldiers, p.24). This may be to increase their odds in combat or to achieve objectives. Each Tier 1 soldier can be upgraded to a higher Tier of the same type (See Crafting, p.18). See the chart below for a summary of the upgrade rules.
Upgrade Rules:
- Soldiers cannot be upgraded more than once per turn.
- Soldiers cannot be upgraded in the same turn that they were deployed.
- Soldiers cannot be upgraded after they have moved or attacked.
- The upgraded soldier takes the original position of the old soldier. The old soldier is removed from the board.
Please note, these rules may be altered with action cards.
"Weapon racks were emptied with the sound of foot steps. The garrison was ready for what came next."
Deploying near Rivers
Soldiers cannot be deployed across rivers even if they are adjacent to a Settlement. The only exception is when a Settlement is adjacent to a bridge. In this instance, soldier deployment would be allowed.
Simultaneous Deployment
At times, it is possible to purchase multiple soldiers during a single turn. However, only one soldier may be deployed per Settlement, per turn. Players that wish to deploy multiple soldiers, must have multiple Settlements to deploy from.
Example: if you currently own 2 Settlements, then you can only deploy 2 soldiers that turn.
On the other hand, if a player has deployed soldiers from a previous turn and they are still adjacent to a Settlement, that player can still deploy more soldiers on the current turn.
Combat
The combat system for this game utilizes six Attack dice and six Defense dice. Both sets have unique faces which determine the tide of the specific battles.
Engaging in Combat
When the active player decides to engage in combat - the player must first declare which of their soldiers will attack which enemy soldier. This is considered the declaration of a battle engagement. Once declared, each player chooses the appropriate amount of dice and rolls simultaneously.
Attack Dice
The yellow attack dice have three different faces to represent the attacking power that will be dealt to a defending player. A blank, a single attack and a double attack. They equal 0, 1 and 2 points of attack power when rolled.
Defense Dice
The light blue defense dice have 4 different faces to represent the defending power against an attacking player. A blank, single defense, double defense, and a counter-attack. They equal 0, 1 and 2 points of defense power when rolled. The counter-attack also equals 1 defense.
Rolling The Dice
When a player attacks an enemy soldier, both attacking and defending player must only use the number of dice that are allowed for the specific soldier. (See Attacking & Defending, p.24)
Note - Simultaneously Rolling: The attacker and defender both roll dice simultaneously on the play area. Each player counts all defending dice and all attacking dice separately.
Note - Dice & Action Cards: Dice totals can be altered by action cards that are played during the battle engagement. (See Action Cards, p.28)
Winning as the Attacker
If the attacker's total attack power is higher than the defender's total defense power, the attacker wins and the defender's soldier is removed from the game board. The attacker collects any earned Craftpoints. (See Craftpoints, p.17)
Winning as the Defender
If the defender's score is equal to or higher than the attacker's score, the defender wins and both soldiers survive. If a counter-attack face was rolled among the defender's winning score, he may choose to perform a counter-attack. (See Counter-Attacks, p.23)
Note - Winning Ties: all ties are won by the defender, unless otherwise stated in an Action Card.
Counter-Attacks
When rolled, the defense dice counter-attack face is equal to 1 defense. However, it also gives the defender the opportunity to switch roles and become the attacker, possibly changing the tide of the battle. This is a choice and the defender may choose not to counter-attack.
The counter-attacking soldier must be in range of the attacking soldier to perform a counter-attack. For melee soldiers, the attacking soldier must be adjacent. For ranged soldiers, the attacking soldier must be within attacking range of the defending soldier.
How it works: The defending player will become the attacker and roll the attack dice. The attacking player will roll the defense dice. It is also possible that the battle will go on for several rounds before there is a winner.
The number of attack dice and defense dice that the players will use is determined by the type of soldiers in the current engagement.
Note - Counter Attack: counter-attacks cannot be used when performing a "Double Attack" or "Double Defense" action.
Example: The defender has a Warrior and the attacker has a Knight. The defender rolls 3 defense dice, gaining 2 Double Defense faces and 1 Counter-Attack face. He scores a total of 5 defense with a counter-attack ability. The attacker rolls 5 attack dice and gets 2 Double Attack faces, 1 Single Attack face and 2 Blank faces. He also scored a total of 5 attack, so the defender wins the engagement, because the defender always wins a tie. Then the defender chooses to play his counter-attack. The defender rolls 3 attack dice, gaining 1 Double Attack face, 1 Single Attack face and 1 Blank face. He scores 3 attack. The attacker rolls 5 defense dice with terrible results, gaining only 2 Single Defense faces and 3 Blank faces. He scored 2 defense. The Knight is defeated and the Warrior will live to fight another day. The Knight is removed from play.
Ranged Soldier Counter-Attacks
Ranged soldiers may perform a counter-attack. However, ammo must be spent to perform it. Once ammo has been spent, the soldier may continue to perform counter-attacks for the duration of the engagement. No additional ammo needs to be spent.
Remember - Spent Ammo: just like normal engagements, all spent ammo must be returned to the Resources pile when used. (See Attacking & Defending, p.24)
Movement
Each Soldier on the board may perform a Movement once per turn, unless otherwise stated on an Action Card. When moving a Soldier, the player must first declare which Soldier will be moved. All Soldier Movements are determined by rolling the orange Movement die. A Soldier may move the number of spaces equal to the number displayed on the die. For instance, if a 5 is rolled on the Movement die, the Soldier can travel up to 5 spaces across the game board.
Forest Movement
When moving through a forest, each forest space is considered two Movements. If a Soldier's next move exits a forest onto a grass space, it is considered one Movement.
Important: if the Soldier only has one Movement left, the Soldier cannot move to another forest space.
Note: Players have the choice to move only a partial number of spaces or not move at all. It is not required to move the maximum number of spaces shown on the die.
Soldiers may only move on grass or forest spaces. Mountains and water are considered obstacles and cannot be traversed, unless otherwise stated on an Action Card. Mountains also block line of sight for all ground Soldiers. Forest spaces also block line of sight but conditions apply.
Example - Forest Movement: In this example, a player has a Knight Soldier wanting to cross through the Forest. To achieve this, the player would have to roll a minimum of a four on the Movement die.
Tier 3 Movements
Both Tier 3 soldiers have unique Movements.
Champion: The Champion can move one additional space when rolling the Movement die.
Catapult: When moving the Catapult, the Movement die is not used as the Catapult has a static movement speed of three.
Declaring a Movement
Before rolling a Movement die, the player must declare they're moving a Soldier and identify which specific Soldier is to be moved, to all players.
Spent Soldiers
During a single turn, each of the player's soldiers can both move and attack. The term "spent" indicates a soldier that has already been used in an attack. Once a soldier is spent it can no longer be used that turn, unless otherwise stated in an Action Card.
Note - Moving Before Attacking: If a player wants to move and attack with a soldier, he must move the soldier first.
Moving around Settlements
During a game there may be moments when a player wants to move through a Settlement.
Moving through Friendly Settlements: A soldier can move through a friendly Settlement but cannot stop on the Settlement. When a soldier moves, it counts each space it will use under the Settlement (normally this will be 2 spaces). If there are not enough Movements - as indicated from the Movement die roll - to completed move through the Settlement, then the Soldier cannot enter the Settlement.
Moving through Enemy Settlements: A Soldier cannot move onto an enemy Settlement without first defeating all enemy Soldier adjacent to that Settlement. A Soldier entering an enemy Settlement must stop inside the Settlement for one turn. Moving onto an enemy Settlement is considered an Occupation. (See Occupation, p.27)
Important: Entering an enemy Settlement is considered only 1 space, and when moving onto an undefended enemy Settlement, the soldier must have enough Movement spaces to successfully enter.
"He sits next to her, both exhausted from the fight. No more can be done."
Attacking & Defending
Combat comes and goes throughout the game. Players will choose when and how to attack, as well as the Soldiers with which to attack. In the base game, there are 2 types of soldiers. Ranged and Melee. Each Soldier has unique advantages and challenges. Successful players will learn how to coordinate attacks in order to use their Soldier effectively.
During a turn, players may perform a single attack with each soldier they own on the board. When attacking or defending, all soldiers have a predefined number of dice they may use to attack and/or defend with. (See Combat, p.22)
The following chart shows how many dice a player rolls for each soldier type, when attacking or defending:
- Warriors: 3 dice.
- Knights: 5 dice.
- Champions: 6 dice.
- Archers: 2 dice, plus 1 die per flaming arrow used (attacking only).
- Bolteer: 4 dice, plus 1 die per flaming arrow used (attacking only).
- Catapult: 2 defense dice (see Catapults and Stone Ammo below for attacking).
Note - Flaming Arrows: A player can increase the number of dice that Archers and Bolteers use when attacking, by using a flaming arrow instead of a normal arrow. This adds 1 extra dice. This is only for attacking and does not apply when defending.
Ranged Attacks & Ammo
All ranged soldiers require a player to collect or craft ammo to attack and counter-attack. When an attack or counter-attack is made the ammo is spent and must be returned to the resource pile.
Both Archers and Bolteers use arrows which must be crafted with Resources before an attack can begin. There are three types of ammo in the base game: normal arrows, flaming arrows and stone.
Important: The Catapult has a defense of 2. For attacks, the Catapult uses stone as ammo. Each stone allows it to attack with 2 attack dice. The Catapult can use up to 3 stone for a maximum of 6 dice.
Note - Line-of-Sight: Catapults lose one die on their dice roll when they do not have a clear line-of-sight.
Normal Arrows
Normal arrows are the basic ammo used by all Archers and Bolteers. Arrows must be spent to attack or counter-attack with these soldiers, using the predefined number of dice for that soldier.
Flaming Arrows
These arrows give one extra dice to an Archer's or Bolteer's predefined dice roll for that attack.
Catapults and Stone Ammo
When attacking with a Catapult it must use stones as its ammo. A Catapult has a base attack of 2 dice per stone. A maximum of 3 stones may be used to attack with, increasing the total number of dice to 6. Once the attack has been made and the chosen number of stones have been used, the stones must be returned to the resource pile.
Note - Catapult Attack: The Catapult is the only soldier that has a minimum limit to its range. It cannot target any enemy closer than 5 spaces.
Attacking Distance
Every soldier has an attacking distance. All melee soldiers must be adjacent to another soldier to perform an attack. However, all ranged soldiers can attack at different distances.
See the following chart for the maximum number of spaces each ranged soldier can use when attacking:
- Archer: 4 Distance.
- Bolteer: 5 Distance.
- Catapult: 5-8 Distance.
Line-of-Sight
When performing an attack, most ranged soldiers require direct line-of-sight.
To determine line-of-sight a player must count the least number of spaces between an attacking and defending soldier. If there are forest or mountain spaces between the soldiers, then there is NOT a clear line-of-sight and the player cannot perform an attack. However, if there are two equal paths of closest distance and one has a clear line-of-sight, then the player can choose the clear path and perform an attack.
Soldiers standing on a forest space are still considered to have a clear line-of-sight if there are no forest or mountains spaces between the attacking and defending soldier.
Note - Range & Catapults: Catapults do not need line-of-sight to attack, which means they can attack soldiers on the other side of forest spaces, however they cannot attack over mountain spaces. Catapults also lose one die on their dice roll when they do not have a clear line-of-sight.
Note - Over Settlements: All ranged soldiers can shoot over Settlements. Each space that passes over a part of the Settlement must be counted for the range of the soldier.
(Printed diagrams show one path through 2 forest spaces that is not a clear line-of-sight, so the Archer cannot attack, and an equal-distance path through a forest space that the player may choose to use if it is clear.)
After Winning an Attack
Whether attacking or counter-attacking, the soldier that loses is defeated and is removed from the game board. The victorious player of that engagement collects any earned Craftpoints. (See Craftpoints, p.17)
Occupation
Players may choose to take control of an enemy Settlement. This is called an Occupation. To occupy an enemy Settlement, a player must move onto it with a soldier.
The player that occupies a Settlement, will also capture the Peasant that is on that Settlement.
Note - Captured Peasants: All Peasants that are captured stay in the player's hand for the duration of the game. Captured Peasants count toward a player's score at the end of the game. They cannot be sold or used for crafting.
Attacking and Defending
During an Occupation, the soldier is unable to attack. However, soldiers can defend themselves when occupying a Settlement but will be unable to counter-attack.
Note - Defending Settlements From Occupation: Players cannot begin an occupation of another player's Settlement if the defending player has friendly soldiers adjacent to that Settlement. All adjacent, defending soldiers must be defeated, first. A good strategy is to bring more than one soldier to the fight. (See Siege Deployment, p.21)
Note - Occupation & Objectives: If there are any objectives that can be achieved by capturing a Settlement or a Peasant, players can claim or declare it, depending on the objective, at the moment the occupation starts.
When occupying an enemy Settlement, players will be able to collect all the Resources from that Settlement at the beginning of their next turn and all following turns, until the soldier is defeated or it leaves the Settlement. This includes both Resources and coins.
If a player chooses to move their soldier off of an occupied Settlement, it will stop the occupation and no more Resources will be collected. The Settlement will revert to the original owner.
Action Cards
Craft and Conquer: Medieval comes with a set of Action Cards that can change the outcome of combat, give free upgrades or give special abilities to the player.
All players start with two Action Cards, and are able to draw additional cards at the beginning of each turn. (See General Gameplay, p.10) A player may choose to exchange any newly drawn cards with a card from their hand.
Note - Playing an Action Card: During the drawing phase of a player's turn, the player is not allowed to play any cards. They must first choose which cards to keep and discard. After this step of their turn is complete, they can resume using their action cards as they wish.
Note - Discarding After Use: Unless a card contains the Continuous icon, Action Cards are discarded after a single use.
Each Action Card has one or more icons that help give instruction on when and how the card can be used. Each icon is explained in the following chart.
Action Card Instructional Icons
- Your Turn: The solid hand means the card can only be played during your turn. It cannot be played on another player's turn.
- Other Player's Turn: This empty hand means the card cannot be played on your turn. It can only be played during another player's turn.
- Any Turn: These double hands mean the card can be played at anytime, either on your turn or during another player's turn.
- Flipped on Use: This means the card must be flipped face down after use and cannot be used until your next turn. It can be flipped face up at the beginning of your next turn.
- Continuous: This infinity loop allows the card to be used continually. It is not placed in the discard pile after use.
Action Cards Explained
The following is a list of all the Action Cards with detailed explanations of their functions and how they work.
- Added Defense: Gives you the ability to add 1 additional die to your dice roll, when defending. When playing this card, you will have one extra die for the entire engagement, including Counter-Attacks, until there is a draw or a victory. This card can be played before or after the dice roll. This can only be played on another player's turn.
- Archer Volley: Allows you to perform a "Double Attack" (See Double Attack, p.29). This card can be kept in your hand for the duration of the game, if you desire. It can be used only once per turn, then it must be flipped face down until your next turn begins. At the beginning of your next turn you can flip it face up, indicating it is ready to use. This can only be played on your turn. Once played, this card must be visible for all players to see. This card follows the "Flipped on Use" rule.
- Attrition: Gives you the ability to declare to another single enemy player, of your choice, that they cannot perform any attacks during their next turn. The effect ends after the chosen player finishes their next turn. This can only be played on your turn.
- Craftpoints: Allows you to collect 3 Craftpoints at anytime during your turn.
- Double Speed: Gives you the ability to double a single soldiers speed. You may choose to play this card before or after rolling the Movement die for a single soldier. This card is only used once, for one soldier. This can only be played on your turn.
- Flaming Arrows: Allows you to collect 3 flaming arrows at anytime during your turn. This can only be played on your turn.
- Hindered Path: Gives you the ability to reduce the number of Movement spaces that another player has just rolled on the Movement die, for a single soldier. The number is rounded down. This can only be played on another player's turn.
- Kidnapped: Allows you to choose a Peasant on an enemy Settlement, to capture. The Peasant stays in your inventory for the duration of the game. If you also have the "Capture a Peasant" Objective Card in your hand, you may claim it at the same time. This can only be played on your turn.
- Misdirection: Allows you to roll the Movement die and move an enemy soldier that number of spaces in any direction. This can only be played on another player's turn.
- Mountain Crossing: Allows you to move a single soldier across 1 or more mountain spaces and land on the other side. Before this card can be used you must roll the Movement die. If the number is insufficient to reach the other side, then you cannot play this card. When moving to the other side, it must be a grass or forest space, following all Forest Movement rules (See Forest Movement, p.23). This can only be played on your turn.
Double Attack
Double Attack gives a player the ability to use two Archers to attack a single target. The player will use the accumulation of dice from both Archers, and roll the dice together for a single attack value. Both Archers must be adjacent to each other and can only target a single enemy to attack. The player must also have two ammo in their possession before they can declare the attack. Both ammos will be used and discarded when the engagement begins.
Example: The player will discard two ammo and roll the dice for both Archers, together. The player will then add the totals together for a single attack value.
The Double Attack ability only works with Archers and no other soldiers.
Also, when using ammo, the player may mix the type of ammo they use. This means they could roll with 4, 5 or 6 dice, depending on the types of arrows they use.
Example: A player has 1 arrow and 1 flaming arrow. He spends both to declare a Double Attack and rolls with a total of 5 dice; 2 dice for the first Archer's arrow and 3 dice for the second Archer's flaming arrow.
"They stand, man to man, holding their ground against oncoming foes."
Double Defend
Double Defend gives a player the ability to use two Warriors to defend against an attacker. This could be a single attacking soldier or a Double Attack. The defender will use the accumulation of dice from both Warriors and shake them together for a single defense value. Both warriors must be adjacent to each other to perform a Double Defend.
Note - Counter-Attack Faces: When rolling defense dice during a Double Defend, counter-attack rolls are not valid. However, the counter-attack dice face will be considered a single (1) standard defense point.
The Double Defend ability only works with Warrior and no other soldiers.
Note - Losing a Double Defend: if a player loses a Double Defense, the attacking player may choose which of the two Warriors to remove from gameplay.
How to Win
After all other players have completed their final turn, everyone counts all the objectives points they have earned. The player with the most objective points is the winner. In the case of a tie, the player with the most soldiers and Settlements on the board wins.
The game ends with one last round when an individual player has completed their final Objective and has placed it face up on the table. This immediately ends that player's turn. All other players will have one last turn to claim more objectives.
Note - Last Round: The player who completed their final objective cannot play during the final round, but can participate in rolling dice when defending. Neither can they use any Action Cards or claim any additional Objectives. Counter-attacks are allowed.
Remember: The maximum number of Objective Cards that must be completed during a single game is chosen before the game begins and agreed upon by all players. (See Number of Objectives, p.13)
Warning: Just because a player has claimed the maximum number of objectives, it doesn't mean they have the most points. The player with the most points wins.
Scoring
Objective Cards have a point value. Each player counts this value on each of their completed Objective Cards and adds them to their overall score.
The point value is different for each Objective Card.
Faction Colors
Each Faction Card has associated Faction colors. For each completed Objective Card with a ribbon color that matches the Faction color, 1 point is added to that player's overall score.
Example: There is a player who has a partially blue colored ribbon on 3 of his completed objectives. His Faction colors are blue and purple. This means he would get 3 points added to his overall score.
Note - Uncompleted Objective Cards: Any cards in a player's hand that have not been completed cannot be counted toward the player's total.
Objective Card Ribbons
Objective Cards have ribbons consisting of one or two colors. If a player has a set of 3 cards with at least one matching color each, that player gets 3 additional points for the set and adds it to their overall score. Only one set may be claimed by each player.
The Faction color icon is the ribbon color that Objective Card ribbons must match at least one of.
Peasants
Finally, if a player has captured any enemy Peasants throughout the game, they can add 1 additional point for each captured Peasant to their overall score.
Turn Steps
Step 1: Draw a single Objective Card and a single Action Card. Skip this step on your first turn. You may have a maximum of 3 Objective Cards and 2 Action Cards in your hand at one time. You may exchange any drawn cards for any cards currently in your hand. All exchanged cards must be discarded. No cards may be played until this step is complete.
Remember: All Objective Cards and Action Cards are kept hidden in your hand until they are completed or used. Action Cards with the "Continuous" rule must stay visible to all players, once played for the first time.
Step 2: Remove Peasants and Collect Resources. Resources can only be gathered if a Peasant is on a Settlement at the beginning of your turn. You can also collect Resources from enemy Settlements that are occupied at the beginning of your turn. (See Occupation, p.27). Remove one Peasant at a time and collect the Resources indicated on that Settlement. (See Peasants or Settlements, p.14-15)
Step 3: Collect Coins from each Settlement you own or occupy. You may always collect Coins even if there are no Peasants on your Settlement. The number of taxes is represented on each Settlement as a small coin. (See Settlements, p.15)
Step 4a (Optional): Craft something. You may or may not choose to build Settlements, soldiers and/or purchase Resources or Peasants. Resources can only be sold for 1 coin each. It is recommended you craft during every turn, or it may hinder your ability to achieve your objectives. (See Crafting, p.18)
Step 4b (Optional): Deploy a soldier. If you have purchased soldiers during a turn, you may deploy them to your Settlements. You can only deploy soldiers, one per Settlement, per turn. (See Deploying Soldiers, p.20)
Step 4c (Optional): Move or Attack an Enemy. You may choose to move and/or attack with one or more of your deployed soldiers. To move a single soldier, you must first call out which soldier you will move then roll the orange Movement die. Additionally, Champions get 1 extra Movement range added to the Movement die. Example: You want to move a Champion and you roll a three. You will add one and move a total of four spaces.
Remember: If a soldier has already attacked it cannot move until next turn, unless otherwise stated on an Action Card. (See Movement, p.23)
Step 4d (Optional): Claim an Objective. You may claim any Objective Cards you have completed during your turn. However, you cannot claim objectives for something done on a previous turn.
Step 5: Place Peasants. After completing all other steps, place your Peasants on your Settlements according to these rules:
- Fewer Peasants than Settlements: Choose which Settlements to place them on, or buy more Peasants for 2 coins each.
- More Peasants than Settlements: Keep or sell the excess Peasants for 1 coin each.
Note - Withholding Peasants: You cannot withhold Peasants from any of your empty Settlements.
Ending Your Turn: Once your Peasants are placed on your Settlements, your turn has ended and you may do no more actions. The next player to your left can begin their turn.
Each in step 4 are optional. You can perform them in any order at any time during your turn.
Kickstarter Exclusive
Thank you for supporting our Kickstarter! Included in this game is the Exclusive set of 4 "City of Avalon" Tier 3 Settlements.
Upgrading: The "City of Avalon" can only be upgraded from a Tier 2 settlement.
Placement: The "City of Avalon" must at least cover the same three spaces as the Tier 2 settlement it is replacing. The fourth space can be in any location as long as it is not within 2 spaces of a nearby settlement.
Crafting Cost: 4 coins, 3 Iron, 3 Wood, 3 Stone, 4 Craftpoints.
Remember: Each player can only have 1 "City of Avalon" on the board, per game.