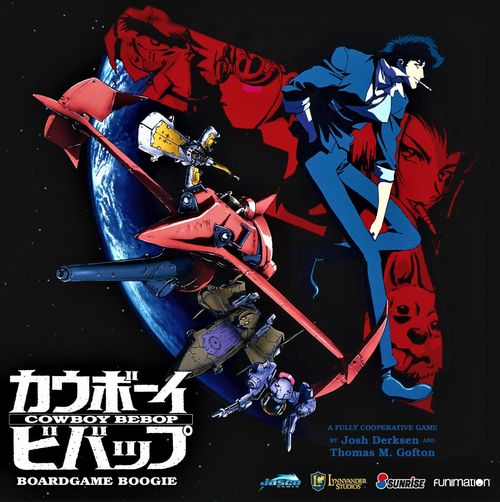
Cowboy Bebop: Boardgame Boogie
Cowboy Bebop: Boardgame Boogie Rulebook
Table of Contents
Table of Contents
Components
Punchboard components (40):
- Bebop Token: 1
- Character Board: 4
- Character Standee: 4
- Zip Craft Standee: 3
- Sector Board: 5
- Used Token: 20 (5 of each type: Bar, Contact, Shop, Spaceport)
- Food Token: 1
- Fuel Token: 1
- Woolongs Token: 1
- Standee Base: 7
Other: Bebop Board (folding game board) 1.
Cards (165):
- Bounty: 18
- Contact: 20
- Event: 48 (40 normal, 8 Vicious)
- Sector Lead: 10
- Location Lead: 10
- Terrain Lead: 10
- Sessions: 12 (3 per Character)
- Actions: 32 (8 per Character)
- Reference: 4
- Ein: 1
Components Overview
Bebop Board
The large folding game board represents the command center of the Bebop and is divided into four main areas:
The Bounty Track (1) is where Bounty cards are placed, and lets you know how close each is to escaping.
The Resource Track (2) marks the total amount of Food, Fuel, and Woolongs (money) the players have remaining. All players share the Resources on this track, regardless of where they are in the solar system. Life is difficult without Woolongs or Fuel, but impossible without Food; Only the Food Token can reach the Starve space, but if it does, all players lose the game.
Each Character (except Ed!) has a personal Zip Craft. These are stored in the Hangar (3) when they are onboard the Bebop and not in use. They begin the game here.
The Leads area (4) is where players store the Leads they've gained in hopes of creating a combination to locate a Bounty; it only has space for 2 of each type of Lead, but also has labels for the Lead decks and their discard piles.
Resource Tokens
As you gain and spend Resources, these Tokens are moved along the track. If you ever have 11-20 of a Resource, flip its Token to its +10 side and continue counting with the track. Any Resources gained beyond 20 are ignored.
Sector Boards
The solar system is divided into five main Sectors, each with its own circular board (5): Venus, Earth, Mars, The Belt, and the Jovian System (the moons of Jupiter). Each board has a set of four Locations (6) with varying combinations of colored rings, representing types of Terrain (7). Moving around the solar system and Interacting with these Locations is the primary way players gain Leads and Resources, and advance the game.
The Bebop
Players can move between Sector boards by flying the Bebop. The Bebop Token is always "docked" (placed against a Sector board) and counts as part of the Sector it's docked at. When flying the Bebop, take the Token and all Characters onboard it, and dock it at a different planet.
Used Tokens
As players travel the solar system, the Locations they Interact with become Used and are marked with a Used Token that has the corresponding icon. Locations can't be Interacted with while they have a Used Token on them. The most common way to remove Used Tokens is to visit the same type of Location on all 5 planets: when all Used Tokens of one type have been placed, return those Tokens to the supply.
Contacts
These cards represent supporting Characters that the crew of the Bebop rely upon for information, and are the primary source of new Leads. Draw a Contact when a Character Interacts with a Contact Location. Choose one of its two options to resolve, then discard it.
Example Contact ("Doc"): Draw a Lead. OR Spend 1000W to draw 2 Leads from any deck(s).
Leads
Leads are information on the whereabouts of Bounties, and are divided into three decks by type: Sector Leads, Location Leads, and Terrain Leads.
Throughout the game, players accumulate Leads and try to make combinations. A combination of Sector + Location + Terrain Lead can be used to pinpoint one specific place in the solar system, though not every combination exists. For example, the combination Earth + Spaceport + Mountain identifies the Spaceport on Earth, because that Spaceport is Green/Blue.
When a player goes to a Location, they can discard the matching combination of Leads to locate and Chase a Bounty there.
Bounties
Bounties are wanted criminals (1) in the solar system with an outstanding Reward (2). Players must capture these people for money to sustain the Bebop. Each Bounty card lists its starting position on the Bounty Track (3), Required Lead ("Last seen") (4), and Skill Requirements, including any Jams you must draw (5).
By using the Chase Action, a Character turns in a set of Leads that include the Bounty's Required Lead and that match their current Location to attempt to capture the Bounty. If successful, they gain the money and/or Resources listed in the Payout (After Expenses) (6).
Payout (After Expenses): The "after expenses" part is a joke, because although Bounties are worth millions of Woolongs, the crew never sees most of that Reward-it always seems to get consumed by various expenses. These "expenses" aren't something players incur; this text has no bearing on gameplay.
Events
These represent the everyday troubles of life as a Bounty hunter. At the start of each turn, the current player must draw and resolve an Event. Each Event has two main parts: The top line (7) of an Event marks the passage of time, and either costs the players Food (the crew has to eat!) or moves Bounties down the Bounty Track, possibly causing them to escape. Then, the current player is presented with a problem to solve (8) and must choose one of the two options. If they can only do one of the options presented, they must choose that one. If they can do neither, they must spend 1 Food.
Example Event ("Overheard Conversation"): Spend 1 Food. Discard 1 Investigation to draw a Lead. OR Discard 1 Lead and draw a replacement from the same deck.
Jams (Events)
During Sessions and Chases, things never go as planned and Characters often find themselves in a Jam. The Jam Icon (9) is only used when players must draw Jams. The Rest of the Event card isn't used in this case; but the Jam Icon is added to the requirements of the Session or Chase.
Vicious!
Every so often, the crew has an encounter with Vicious, and the results are never desirable. Six of the eight Vicious Event cards are shuffled into the Event deck each game. Unlike normal Events, Vicious cards don't have Jam icons, but are always fully resolved regardless of whether they are drawn at the start of a player turn, or during a Session or Chase. There's no escaping from Vicious!
Character Components
Sessions: These are stories from the show that belong to each Character. At the start of each game, each Character randomly selects one of their Session cards and must visit specific places and spend specific Resources to complete it. Players win when all Characters have completed their Sessions.
Board & Standees: The Character board has a reference for the Skill Icons that appear on a Character's hand of Skill Cards, as well as 3 Character Abilities that are powered by Skill Icons. A Character's position in the solar system is marked using a Character or Zip Craft standee.
Skill Cards: Each Character has a hand of 8 Skill Cards, which represent their abilities and stamina. Skill Cards are discarded to do most things in the game. Some Skill Cards have two icons, separated by OR: these cards count as either Skill when discarded, while cards with AND are always two Skill Icons. Managing which Skills you have access to at any given time is a key element of the game.
Skill Icons: These icons appear on many types of cards, and are referred to by name on others. Players discard Skill Cards from their hand with specific icons as required to use their Character Abilities, resolve Events and Contacts, Chase Bounties, and complete Sessions. The Skill Icons are Combat, Hacking, Investigation and Piloting.
Jams: These appear on Sessions and Bounties: For each Jam, you'll have to draw an Event and discard a Skill Card that matches the Event's icon.
Ein: The beloved companion of the crew, Ein functions as a unique and powerful Skill Card that any player can borrow and discard when they need a little help. Ein's Skill Icons can be used for anything that requires a Skill Icon. When not in use, Ein should be placed in the middle of the table so that everybody knows he's available. When discarding cards, place Ein on your Tableau to use his Skills. When Ein would be drawn from your Tableau to your hand, return him to the Bebop.
Setup
1. Place the Game Boards. Arrange the Sector Boards and Bebop Board in the middle of the table. Feel free to arrange the Sector Boards however you wish to best use your available table space, but make sure you leave room above and below the Bebop Board for Bounties and Lead decks.
Used Tokens: Sort these by icon into 4 piles, and place them near the Sector Boards.
2. Starting Resources. Place the Food, Fuel, and Woolongs Tokens on the fifth (5th) space of the Resource Track (the side of the Token with the +10 should be face down).
3. Prepare Decks.
- Leads: Separate the Leads into three decks: Sectors, Locations, and Terrain. Shuffle each deck individually, and place it beside the labelled space on Bebop Board.
- Contacts: Shuffle the Contact deck and place it in the middle of the play area as shown.
- Events: Find and separate the 8 Vicious cards. Shuffle them, then add 6 Vicious cards to the Rest of the Events without looking at them. Return the two unused Vicious Events to the box, they will not be used this game. Shuffle the deck of 46 Event cards (40 Events + 6 Vicious cards) and place it in the middle of the play area as shown. As each player must draw an Event at the start of their turn, make sure this deck is within reach of all players.
4. Starting Bounties. Shuffle the Bounties and deal 9 cards face down to form the Bounty deck. Return the other Bounty cards to the box; they will not be used this game.
Draw 3 Bounties and check their starting positions on the Bounty Track; place each of them where indicated. If you have several Bounties in the same space, lay them out vertically, as shown in the diagram.
5. Choose Characters. Each player chooses a Character to play as and takes the matching:
- Character & Zip Craft standees, with plastic bases.
- Character Board
- Hand of 8 Skill Cards
- 3 Session Cards
Solo Play: if playing with only 1 player, see page 18 (Solo Play, below).
6. Draw Sessions. Each player randomly selects one of their Sessions and tucks it underneath their Character board, face up, so that the Part I section is showing. Return the other Sessions to the box; they will not be used this game.
7. Place Bebop & Characters. Place the Bebop Token docked at Mars, as shown. All players insert their standees into plastic bases and place them on the Bebop Token.
Zip Craft: When playing with Spike, Jet, or Faye, those players also place their Zip Craft standees on the Hangar section of the Bebop Board.
Ein: Place the Ein card in middle of the play area.
8. Choose Starting Player. Choose a player to go first. Players are strongly encouraged to share information about their Sessions with each other, to best coordinate who should go first. If players can't decide, they should randomly determine a player to start.
YOU ARE NOW READY TO BOOGIE!
These instructions are for the standard difficulty of Cowboy Bebop: Boardgame Boogie. Once you are familiar with the game, you may want to use the Difficulty Adjustments (below).
Playing the Game
The game is played over a series of turns, until all players have completed their Sessions, or until players run out of Food (Starve).
Each player turn consists of two steps in sequence:
- Event Phase: Draw and resolve an Event card
- Action Phase: Perform 3 Actions
After performing 3 Actions, play proceeds clockwise with the next player taking a turn.
Objective
Cowboy Bebop: Boardgame Boogie is a fully co-operative game: players win or lose together.
Winning the Game: Each player must complete Part I of their Session. Once everyone has completed Part I, each player must complete Part II of their Session. All players win immediately when the second part of all Sessions are complete.
Losing the Game: All players lose immediately if, at any time, the Food Token moves to the Starve space of the Resource Track.
Event Phase
The turn player draws and resolves an Event card. If the Event Deck is empty, shuffle the Event discard pile to form a new Event Deck and then draw. Resolving most Events consists of reading and resolving two steps.
If you drew Vicious, skip to the section "Vicious Events" below.
First, do whatever the effect in the line at the top of the card says. These effects are either "Spend 1 Food", "Bounties Move", or nothing.
Spend 1 Food: Move the Food 1 space toward "Starve". If the Food Token reaches the Starve space, the game is lost.
Bounties Move: All Bounty cards on the track are moved 1 space to the left (toward the 1 space). If any Bounties are at the 1 space and are moved by this effect, they escape! See the example below.
Escaping Bounties: For each Bounty that escapes, discard it and draw a new Bounty from the Bounty deck, if possible. There should always be 3 Bounties on the track unless the Bounty deck is empty. If there are no Bounties left in the Bounty deck, that's it for the game; you don't get more. You do not reshuffle the Bounty deck.
Example (diagram): Asimov Solensan is at the 1 space and escapes; Chessmaster Hex moves to the 1 space; Twinkle Maria Murdock moves to the 3 space.
Second, read the main section of the card aloud. Most Events have two options separated by the word OR. If you are presented with multiple options, pick one and do what it says. Only you can discard the required Skills for an Event, but your fellow crew members might have some input on your decision.
If you don't have the requirements for one of the options presented, you must choose the other option. If you don't have the requirements for any of the options on the card, you must spend 1 Food instead. This can cause you to spend 2 Food in total - one for the top line of the Event and one instead of the main section's effect.
After you have resolved your Event, place it in a discard pile beside the Event Deck, and proceed to the Action Phase.
Event Example: Jet draws "The Bebop Breaks Down" (Spend 1 Food. Discard 1 Piloting and 1 Hacking. You manage to find and replace the broken part without losing too much time. OR Spend 2000W. Calling upon Doohan's expertise saves the day but at great cost.). First, he spends 1 Food, then reads the options aloud. He doesn't currently have a Piloting icon in hand, so he can't do the first option. He spends 2000 Woolongs for the second option and discards the Event.
Vicious Events
When a Vicious Event is drawn, it is resolved the same way as other Events, with a couple exceptions: The effects on Vicious Events are always bad, and you don't get multiple options to choose between.
Example Vicious Event: Spend 1 Food. For the rest of your turn, you cannot interact with Locations.
Discarding Cards
Many game effects require players to discard specific Skills or random cards. These cards are always placed at the end of a horizontal row to the right of your Character board called the Tableau; they can be overlapped to save space.
Discard 2 Hacking: Requirements like this mean discard Skill Card(s) from your hand that have a total of at least two Hacking icons and place them on the rightmost end of your Tableau in any order.
Discard a Random Card: You must have at least 1 Skill Card in hand to meet this requirement. Shuffle your hand and deal one card to the rightmost end of your Tableau.
Once discarded and placed in your Tableau, your Skill Cards can't be used for anything. Interact with a Bar, or Rest (see below) to get them back into your hand!
Action Phase
Perform 3 Actions from the following list. Each Action is explained in detail below. You can perform the same Action multiple times, if desired.
- Move between Locations or to/from the Bebop.
- Fly Bebop to another Sector.
- Enter or Exit your Zip Craft in your Location.
- Interact with a Location.
- Rest to draw Skill Cards from your Tableau.
- Session: discard cards and Resources to complete it.
- Chase: discard Leads and attempt to catch a Bounty.
- Use a Character Ability Action on your Character Board.
Move
Move your Character standee between two Locations on the same Sector Board; this represents travelling on foot or by ground vehicle. If the Bebop is docked at your Sector Board, you can move between a Location and the Bebop. You cannot perform this Action while in a Zip Craft (see below). Example: Spike can move from the Bar to the Contact, or from the Bar to the Bebop.
Fly Bebop
Spend 1 Fuel to move the Bebop Token, and all Character standees onboard it, to a different Sector. If you cannot afford the Fuel cost, you cannot perform this Action. You cannot perform this Action while in a Zip Craft (see below). Example: Jet flies the Bebop while Ed is onboard, so Ed remains onboard and comes along for the ride.
Enter / Exit Zip Craft
Enter Zip Craft: To enter your Zip Craft, place your Zip Craft standee where your Character standee is, then place your Character standee on your Character Board. This Action can only be performed if you are in the same Location as your Zip Craft (they begin the game onboard the Bebop in the Hangar space).
Players can only Enter and use their own Zip Craft.
When you are in your Zip Craft, you cannot use the Move or Fly Bebop Actions. Instead, you spend Fuel to Fly your Zip Craft (this is not an Action). This is the only effect of being in your Zip Craft; it has no bearing on any other Actions such as Interacting with Locations, completing Sessions, or Chasing Bounties.
Exit Zip Craft: Once you are in your Zip Craft, you can use an Action to Exit. Return your Character standee to the Location of your Zip Craft. If you are onboard the Bebop, return your Zip Craft to the Bebop's Hangar. Otherwise, lay the Zip Craft standee on its side in your current Location, leaving it there.
Flying Zip Craft
The crew's Zip Craft afford them great independence and freedom of movement-at a cost. By spending 1 Fuel, you can fly to any Location on any Sector Board, including to/from the Bebop. Flying your Zip Craft is not an Action, and can be done as many times as you can afford to spend Fuel on your turn. If you are in a Zip Craft and have no Fuel, you'll have to exit it if you want to move at all.
Example: Faye flies her Zip Craft between the Contact on the Jovian System and the Contact on The Belt by spending 1 Fuel. Then, she Interacts with the Contact and spends another 1 Fuel to fly back to the Spaceport on Jovian. Using your Zip Craft is a great (albeit expensive) way to get more done on your turn!
Interact
When your Character is on a Location, use the Interact Action to gain the Location's benefit. You may only Interact with Locations that don't have Used Tokens.
Contact (Gain Leads): Draw and resolve a Contact card. If there are no Contacts left, shuffle the Contact discard pile to form a new deck, then draw. Each Contact card has two options, separated by the word OR. Choose one of the options, spending Resources and/or discarding Skill Cards to your Tableau as required. Only you can discard the required Skills for a Contact. If you don't have any of the requirements, discard the Contact without effect. When finished, place the Contact in a discard pile beside the Contact Deck.
If the Lead deck you want to gain a Lead from is empty, shuffle its discard pile to form a new deck, then draw. When you gain Leads, they must be placed in open spaces of the correct Lead type on the Bebop Board. If there isn't an open space for the type of Lead you gain, you must discard a Lead to make room.
Contact Example: After Drawing the Tech Expert (Discard 1 Hacking to draw a Lead. OR Discard 2 Hacking to draw 2 Leads from any deck(s).), Spike has no Skill Cards in hand with Hacking icons, and must discard the Tech Expert without gaining Leads.
Shop (Buy Food): Spend any number of Woolongs to gain an equal amount of Food (Move the Woolongs Resource Token left, and the Food Resource Token right). Example: Spending 3000 Woolongs to gain 3 Food.
Spaceport (Buy Fuel): Spaceports work just like Shops, except you are spending Woolongs to gain Fuel.
Bar (Draw Skill Cards): Draw all Skill Cards from your Tableau, putting them back in your hand. Bars are a better version of the Rest Action.
Used Tokens: After you Interact with a Location and resolve its effect, take a Used Token with the matching icon from the pile and cover the Location icon. If you place the 5th and final Used Token on the same type of Location, return all Tokens of that type back to the pile. Those Locations are once again made available for use.
Rest
Draw the leftmost (earliest discarded) two Skill Cards from your Tableau, putting them back in your hand.
Tip: When discarding a lot of Skill Cards all at once, it's worth paying attention to the order they are discarded and placed in your Tableau!
Session
Both Parts of a Session card require several things from the Character making the attempt to complete it. Follow the steps below to attempt to complete Part of a Session:
- Part I before Part II: Players cannot attempt to complete Part II of their Sessions until every player has completed Part I of their Session.
- Location: Your Character must be in the Location listed on the Part of the Session card you are completing.
- Discard Required Skills & Spend Resources: Most Sessions have Skill Requirements that Characters can't complete by themselves; see Helping Out, below.
- Resolve Jams: Determine Jam Requirements by drawing an Event card for each Jam icon on that Part of your Session card: Session Part I always draws 1 Jam, and Part II always draws 2 Jams. Refer to the icons on the bottom right of these Events and Discard the matching Skills. Ignore the Rest of the Event text, unless it's Vicious-see below. Other Characters can also help you with your Jams; see Helping Out, below.
- Advance Session: If you successfully discard for the Jam Requirements, that Part of the Session is complete. Slide your Session card up to reveal the next Part. When you complete Part II, flip the Session face down. When all players have completed Part II of their Sessions, all players win the game!
Failing a Jam: If you cannot discard the Skill Icons needed to meet the Jam requirements, the Session attempt fails. All of your Resources remain spent, and your Skill Cards remain discarded.
Vicious Jams: Vicious cards do not have Jam icons, but unlike other Event cards you must resolve the text on Vicious cards when they are drawn for Jams. Several Vicious cards force you to discard cards, and this could cause you to fail the Session or Chase attempt.
Session Example: Faye is playing the Session "Honky Tonky Women" this game. Part I of this Session requires Faye to be at the Bar on Mars, and discard 2 Hacking, 4 Investigation, and spend 2000 Woolongs.
Faye spends the Woolongs but isn't able to discard both 4 Investigation AND 2 Hacking using only her Skill Cards. Luckily Spike and Jet are in the same Sector and get pulled into helping. They discard the remaining Skill Requirements.
Then, Faye must also resolve a Jam to complete Part I of her Session. She draws an Event card and checks the Jam icon. The Jam is Piloting, which Faye discards 1 Piloting for. With Part I of her Session complete, Faye slides the Session card up to reveal Part II.
Chase
Chases are how the crew attempts to catch a Bounty and collect its Payout (After Expenses). They are similar to Sessions in that they often require a coordinated effort from the team. Follow the steps below to resolve a Chase:
- Locate the Bounty: Discard a set of 3 Leads (Sector + Location + Terrain). The Leads must match both your current Sector, Location, and Terrain, and the "Last Seen" requirement text of a Bounty on the track. Place each of the Leads in the discard pile for its type.
- Discard Required Skills: Discard cards with the Bounty's Skill Requirements. Other Characters can help; see Helping Out, below.
- Resolve Jams: Determine Jam Requirements by drawing an Event card for each of the Bounty's Jam icons. Refer to the icons on the bottom right of these Events and Discard the matching Skills. Ignore the Rest of the Event text, unless it's Vicious-see Vicious Jams above.
- Collect Payout: If you successfully discard for the Jam Requirements, you catch the Bounty! Discard the Bounty and gain its Payout, then draw another Bounty. There should always be 3 Bounties on the track unless the Bounty deck is empty. If there are no Bounties left in the Bounty deck, that's it for the game. You do not reshuffle the Bounty deck.
Failing a Jam: If you cannot discard the Skill Icons needed to meet the Jam requirements, the Chase fails. All of your Leads and Skill Cards remain discarded and the Bounty remains on the track where it is.
Chase Example: Jet has assembled some Leads and is attempting to Chase Decker. Spike's also in the same Sector to help out.
Decker was last seen on The Belt, so that must be one of the Leads used in the set. Jet discards Belt + Contact + Mountain while at the Location described by his Leads. Decker (36,000,000 W; starts at 5 on the Bounty Track; last seen on the Belt; Payout: Gain 9000W and 2 Fuel) requires 2 Combat, 3 Piloting, and 1 Hacking. Jet and Spike work together to meet the Skill Requirements.
With Decker's Skill Requirements met, Jet draws 3 Jams: 2 Hacking and Vicious! Jet spends the 1 Food for Vicious but Spike only has 1 Hacking, so they also use Ein. Decker is caught, earning them a Payout of 9000 Woolongs and 2 Fuel.
Helping Out
When you perform a Session or Chase Action, other Characters in your Sector can help. This includes those in Zip Craft in your Sector, as well as those on the Bebop when it's docked at your Sector Board.
To help, other Characters may discard Skill Cards from their hands to their own Tableaus to help with the Skill or Jam Requirements of your Session or Chase.
Character Abilities
Each Character's board has 3 special abilities, which can be described as two main types.
Abilities with the Action: heading cost an Action on your turn. Discard a card from your hand to your Tableau with the Skill Icon shown to perform this unique Action. You can use these abilities as many times as you have Actions and the appropriate Skill Cards to discard.
Abilities with "Before", "After" or "When" can be used when you are doing another Action or resolving some other effect; the ability will say when it applies. Discard a card from your hand to your Tableau with the Skill Icon shown to apply the ability's effect. Regardless of how many Skill Cards you have in hand, each of these abilities can only be used once per opportunity it describes.
Spike Spiegel
Determined (discard Combat): After drawing Jams during a Chase, ignore all Jam Requirements of one type. Example: Spike is chasing a Bounty and draws 2 Jams; both are Hacking icons. Instead of discarding 2 Hacking (that Spike doesn't have!), Spike discards 1 Combat to use this ability and ignores all Hacking Jams. Notes: This ability has no effect on Vicious Jams. You cannot discard multiple Combat icons to ignore multiple types of Jams during one Chase Action.
Keen Eye: Action: Discard one Lead. Gain a Lead of your choice from any discard pile. Example: The crew desperately needs a Mars Lead to complete a set, and there's one in the Sector discard pile from earlier in the game. Spike spends an Action, discards 1 Hacking, and discards a Contact Lead to take the Mars Lead from the discard pile and return it to the Leads area. If there isn't room for the type of Lead you gain, discard another Lead to make room.
One with the Swordfish: When you Fly your Zip Craft, spend no Fuel. Example: Spike uses an Action to Enter his Zip Craft, and discards 1 Piloting (instead of spending 1 Fuel) to Fly his Zip Craft. Spike can do this as many times as he has cards with Piloting icons in hand to discard.
Jet Black
Lean Times: Action: Spend 1 Food, 1 Fuel, or 1000W to gain 1 Food, 1 Fuel, or 1000W. Example: The crew has a lot of Fuel, but almost no Food. Jet spends an Action and discards 1 Combat to spend 1 Fuel and gain 1 Food. Since he still has Combat icons in hand, he uses another Action to do it again.
Well-Connected: After drawing a Contact, draw a second Contact card and choose which to use. Example: With few cards in hand, Jet needs to draw a Contact with requirements he can meet. He Interacts with a Contact Location, draws a Contact card and doesn't like what he sees. He discards 1 Investigation to draw another Contact and chooses the best option of the two cards.
Efficient Pilot: Action: Fly the Bebop without spending Fuel. Before you Fly, 1 other Character in your Sector may move on or off the Bebop. Example: Ed plays the next turn after Jet and both of them want to travel to Earth so that Jet can help Ed with a Session. Jet discards 1 Piloting to perform this Action to Fly the Bebop, moving Ed onto the Bebop before it flies to Earth and avoiding the Fuel cost. Moving 1 other Character is optional when using this ability.
Ein
When discarding cards, place Ein on your Tableau to use his Skills. When Ein would be drawn from your Tableau to your hand, return him to the Bebop instead.
Ein is extremely valuable for getting out of trouble. When he is available (in the middle of the play area), any player can use him; it doesn't matter where you are in the solar system. He can be discarded for anything that requires a Skill Icon to be discarded. This means he can be used for Events, Contacts, Sessions, Chases (both for Skill Requirements and Jams), and even to activate Character Abilities.
Faye Valentine
Persuasive: After drawing a Contact, reduce its requirements by 1000W. Example: Faye Interacts with a Contact Location to draw a Contact, and draws the Store Clerk: both of this Contact's options cost Woolongs (1000W and 2000W). Faye chooses the first option and discards 1 Combat to resolve it without spending Woolongs. Notes: You cannot discard multiple Combat icons for multiple discounts on one Contact card. The max discount is 1000W.
Big Spender: After Interacting with a Bar, spend 1000W instead of placing a Used Token. Example: Faye Interacts with a Bar, drawing all of the cards in her Tableau into her hand. Now that she's got a Skill Card with Hacking in her hand again, she discards it and spends 1000W instead of placing the Used Token on the Bar, keeping it available for someone else to use.
Charming: After Interacting with a Shop or Spaceport, gain 1 Food or 1 Fuel. Example: Faye Interacts with a Shop, spends 2000W to gain 2 Food, and discards 1 Investigation to gain 1 Fuel. Notes: You can gain a Resource not normally available at your Location. You cannot discard multiple Investigation icons to gain multiple Resources with this ability; only once per Spaceport or Shop you Interact with.
Ed (Edward Wong Hau Pepelu Tivrusky IV)
Net Dive: Action: Discard one Lead. Draw 2 Leads from any one deck, Gain one of those Leads and discard the other. Example: The crew has a lot of Leads that don't match the current Bounties. Ed uses an Action and discards 1 Hacking to discard a "Ruins" Lead, then draws 2 Sector Leads: Mars and Venus. Ed chooses to keep Mars and discards Venus.
Feral Child: After drawing an Event, do not spend 1 Food. Example: Ed draws the Event "What's in the Fridge", and chooses to discard 1 Investigation instead of spending 1 Food for the top line. If Ed chooses to resolve the Event's second option, 1 Food will still be spent since Ed can only use this ability once per Event. Notes: You can use this ability on any part of an Event card. You can even use it for Vicious Events that spend Food, but never for Jams (even if a Vicious Jam spends 1 Food).
Remote Control: Action: From anywhere, Fly the Bebop or 1 Zip Craft without spending Fuel. Example: Ed spends an Action and discards 1 Piloting to move Faye (in her Zip Craft) to any Location. Notes: You can move a Zip Craft standee no one is currently using. You do not have to be onboard the Bebop to Fly it using this Action.
Solo Play
It is possible to play Cowboy Bebop: Boardgame Boogie by yourself. There are no rule changes, except that you must control 2 Characters. Each Character has their own Session, hand of Skill Cards and Tableau as if you had two players. As usual, you win if both Characters complete their Sessions.
Difficulty Adjustments
Once you are familiar with Cowboy Bebop: Boardgame Boogie, you may wish to use the following rules to adjust the difficulty for more casual play or a greater challenge:
Waltz (Easier): Use this adjustment to make the game a little longer with a more casual pace. Use 11 Bounty cards to form the Bounty Deck. Only shuffle 4 Vicious cards into the Event Deck.
Boogie (Normal): The standard difficulty level of the game. Use 9 Bounty cards to form the Bounty Deck. Shuffle 6 Vicious cards into the Event Deck.
Blues (Hard): A greater challenge for experienced Space Cowboys. Use 9 Bounty cards to form the Bounty Deck. Shuffle all 8 Vicious cards into the Event Deck.
The Real Folk Blues (Very Hard): A supreme challenge, not for the faint of heart! Use only 7 Bounty cards to form the Bounty Deck. Shuffle all 8 Vicious cards into the Event Deck.
Important Terms
- Action - Players take 3 Actions each turn.
- Bebop - A converted interplanetary fishing trawler, that Characters use to fly between Sectors.
- Bounty - A person of interest, upon which a sizable Reward for capture has been placed.
- Bounty Track - The top third of the Bebop Board, marks how long before a Bounty escapes.
- Character - The four crew members of the Bebop: Ed, Faye, Jet and Spike. Each is represented by a Character Board, standee, hand of Skill Cards, and a Session.
- Character Ability - Each Character has 3 of these on their Character Board, and you must discard a specific Skill Icon to use each of them.
- Chase - The Action used when attempting to capture a Bounty to gain its Payout.
- Combat - Red (Gun) Skill Icon.
- Contact - A Location where players can draw Contact Cards, to gain Leads.
- Ein - A "data dog" rescued by the crew, Ein is a Skill Card that can be used by any player.
- Event - Random happenings. Each player must draw and resolve one at the start of their Turn.
- Food - You gotta eat! Most Events cost Food, and if you run out, all players lose the game.
Player Turn Sequence (Reference Card)
1. Draw an Event a) Resolve the effect on the top of the card. b) Resolve one of the Event's options you can fulfill. If you can't fulfill either, spend 1 Food.
2. Perform 3 Actions. Each time you perform an Action, you may use a relevant Character Ability by discarding a card with the matching Skill Icon.
Action Reference
- Move: Within the same Sector, move between the Bebop and a Location, or between two Locations.
- Fly Bebop: While onboard the Bebop, spend 1 Fuel to move it to another Sector.
- Interact: Mark your Location as used to... Bar: Draw all the cards in your Tableau. Shop: Buy any amount of Food, 1000W each. Spaceport: Buy any amount of Fuel, 1000W each. Contact: Draw and resolve a Contact card.
- Enter/Exit your Zip Craft if it's in your Location. While in your Zip Craft, you cannot use the Move or Fly Bebop Actions, but you can Fly your Zip Craft.
- Fly Zip Craft: While in a Zip Craft, spend 1 Fuel to move to any Location. This is not an Action.
- Rest: Draw 2 cards from the left side of your Tableau.
- Session: 1. In the Location of your Session, spend Resources and discard Skill Requirements.* 2. Draw Jams (Event cards) shown and discard those Jam Requirements.* 3. If successful, advance your Session. Otherwise, nothing happens.
- Chase: 1. Discard a set of Leads that match your current Sector + Location + Terrain, and choose a Bounty with a matching Lead (Last seen). 2. Discard cards for Bounty's Skill Requirements.* 3. Draw Jams (Event cards) shown and discard those Jam Requirements.* 4. If successful, discard the Bounty and gain its Payout. Draw another Bounty if possible. Otherwise, nothing happens.
* Other Characters in the same Sector can also discard cards with required Skills to help you.
Icon Reference
Skill icons: Combat, Hacking, Piloting, Investigation. Resources: Food, Fuel, Woolongs (x1000). Locations: Bar, Shop, Contact, Spaceport.
Jam: Draw an Event, use only its Jam icon. If you draw a Vicious Event for a Jam, resolve its full text.