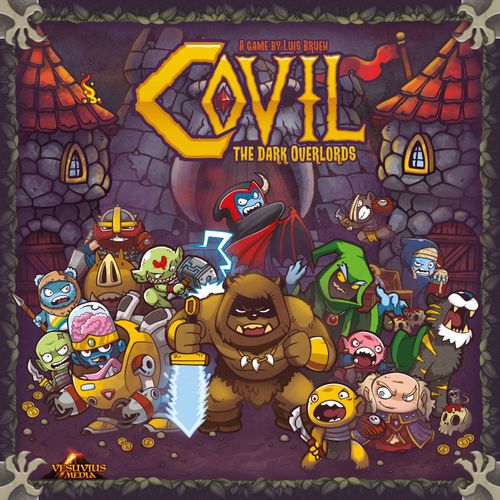
Covil: The Dark Overlords
Covil: The Dark Overlords Rulebook
Table of Contents
Table of Contents
Components
- 2 game boards: A fits up to 4 players, B is best for 2-3 players.
- 20 troop meeples: 5 of each color.
- 5 rebel meeples.
- 24 Power Relics: Mini Euro cards (45x68 mm).
- 24 exhaustion tokens: Side A: Exhausted / Side B: Tired.
- 4 Fortress tokens: 1 cardboard token of each color.
- 4 Champions hall: 1 player board of each color.
- 4 hp tokens.
- 4 gold tokens.
- 1 Evil Scepter: 1st player token.
- 6 Dark Overlords.
- 20 Henchmen (5 of each color).
- 40 Mercenaries.
All Minions (Dark Overlords, Henchmen, Mercenaries) use standard Euro cards (59x92 mm).
Game Setup
- A. Game board. Choose the right board for you (A fits up to 4 players, B fits up to 3 players) and place it in the center of the play area, within easy reach of all players.
- B. Give each player 1 Champions hall, 5 Troop meeples, 5 Henchmen cards and 1 Fortress of their color. Also give 1 hp token and 1 gold token. Place the hp token on the fortress health track starting on 5 and the gold token also starting on 5 on the Treasury track. Place the henchmen in the empty Minion slots on their Champions hall.
- C. Rebels. Place 1 Rebel meeple in town. Place the remainder in a pile next to the board.
- D. Deal Dark Overlord cards. Shuffle all Dark Overlord cards and give one to each player. Players place their Dark Overlord at the Evil throne slot at the Champions hall. Put the remaining Dark Overlords back in the box.
- E. Place the Exhaustion tokens. Exhaust all Dark Overlords in play, by placing one exhaustion token on each one of them.
- F. Mercenaries. Shuffle all Mercenary cards. Set aside 24 of them to be played in this game and put the rest back in the box. Reveal 6 cards (this is the Mercenary pool). If there are cards costing 10 gold, shuffle them back into the deck and reveal new ones in their place.
- G. Power Relics. Shuffle all Power Relics and give 2 to each player. Players keep them in their hands.
- H. Evil Scepter first player token. Give it to the youngest player to start the game. Patience is a virtue acquired within the centuries.
- I. Choose starting zones. At the first Morning phase, the starting player chooses and places their fortress with 2 starter troops of their color in one of the spirals marked on the game board, and then the other players choose clockwise.
Gameplay Overview
In Covil: The Dark Overlords you will struggle for the supremacy of the regions surrounding an isolated town. Each player controls a Dark Overlord with unique powers and countless troops of minions to "defend the world from enemy hordes", bring "peace and security to the territories" - at a cost, of course!
The game consists of 4 days, each of them divided in 3 phases:
- Phase 1: Morning (Summoning troops)
- Phase 2: Afternoon (Performing Actions)
- Phase 3: Night (Dominance and Clean-up)
At the end of the 4th night phase, the game ends. The player with the most Victory Points wins.
Phase 1: Morning
Proceeding clockwise each player stands up all their troop meeples that were lying down on the board. Then, players check if they need to summon one or more new troops at their fortress. All players must start the morning phase with the same amount of troop meeples as described on the chart. If you have fewer than the number shown, summon new troops on your fortress until you reach it. Summoned troops always enter the game standing up. Once everyone has completed this phase, the starting player then begins phase 2.
- Day 1: 2 troops.
- Day 2: 3 troops.
- Day 3: 4 troops.
- Day 4: 5 troops.
Phase 2: Afternoon
Afternoon lasts a series of rounds until all troops are lying down on the board. During a player's afternoon turn you may execute these following actions once, in any order:
- 2.1) Acquire a Minion
- 2.2) Perform any amount of free actions
- 2.3) Lie down a troop to perform one troop action
2.1 Acquire a Minion
You may purchase a Minion from the Mercenary pool by paying its cost with any combination of: gold from your Treasury; discarding Power Relics from your hand; placing one or more unexhausted Minions from your player mat back to the pool.
If the Minion that you replaced at the pool in order to buy a new one is worth more gold than the one that you are acquiring, you may get the difference as gold back in your Treasury. Every acquired Minion comes into your Champions Hall tired.
Example: If you want to acquire a Minion that is worth 8 gold, you may spend 3 gold from your Treasury, discard one Power Relic from your hand that is worth 1 gold, and also place back in the Mercenary pool 2 of your Minions that are worth 2 gold each. Place the newly acquired Minion on your Champions Hall with one exhaustion token with the "tired side" face up.
When acquiring Minions there are a few things that you need to know beforehand in order to make the best choices.
Minion card
- Name of the Minion.
- Class of the Minion: Melee, Ranged or Defense.
- Base Stat.
- Minion Cost: gold shown can also be used to acquire new Minions (by replacing it back to the Mercenary pool) and also as score at the end of the game.
- Ability: see below. Ability effect as described on each card.
Champions Hall
Within your countless troops of nameless Minions there are just a few that stand out and make some difference. There are you the Dark Overlord, your Henchmen and Mercenaries like Assassins, Warriors, Guardians, Saboteurs and Sorcerers with unique powers and abilities. You may never have more than 5 Minions at your Champions Hall, with the Dark Overlord a special Minion that can never be removed from his evil throne.
Passive Abilities
Passive abilities are active at all times, even if their Minion is exhausted.
Reinforcements. This Minion has its own elite squad. By just having it in your army you will improve all your troops. If the bonus applies only to some terrain, the zone that matters is the one where your troop resides. Example: +1 to all troops' defense on the Town zone or Water zones. This bonus will be +2 if applied to a town zone that is also a water zone.
Influence. This Minion has some underground contacts in town. It grants you a passive non combat related advantage. Influence effects always apply before the resolution of hiring a Minion. Example: you need two gold less than the regular price to acquire Warriors from the Mercenary pool. If it costs 0 you will get +2 gold.
Instant Abilities
Your Minion must be unexhausted in order to use its ability and perform its effect as described.
Aftershock. This Minion is mighty! Every time that you exhaust it to perform one attack, its special ability will activate. Example: when you exhaust this Minion to attack, you will get its base stat + any reinforcements bonus + its own aftershock.
Command. In your turn, as a free action, you may exhaust it to perform its special ability. Example: In your turn, as a free action, you may exhaust this Minion to move a troop (standing or lying down) once.
2.2 Perform Any Amount of Free Actions
On every turn, in the Afternoon phase, a player may activate any amount of Power Relics, and exhaust any amount of Minions to activate their Command ability. You don't need to lie down troops of yours to perform these actions. But you may need to exhaust one Minion as a cost or a result of the action.
Example: If the Instant Ability of a Power Relic grants you a free attack, you can attack once with any of your troops (standing up or lying down), but you still need to exhaust one of your Minions to perform the attack as usual.
Power Relics
These magical artifacts, when active, grant you decisive special abilities and also strategic advantage in combat.
Card parts:
- Gold value: applies only if the Power Relic is inactive and also in your hand.
- Target zone: applies only to solo mode.
- Instant Ability: when you activate one Power Relic you may perform its special ability once right away.
- Troop Bonus: applies when the Power Relic is active. Lasts until it is discarded at night.
In your turn, as a free action, you may activate as many Power Relics from your hand as you like. You may also activate Power Relics in another player's turn as a response to an attack declaration. When you activate one, you may perform its Instant Ability right away, and you also get a Troop Bonus stat that will last until the night phase is started.
You may get Power Relics by buying them; by raiding the town or by Looting an enemy fortress.
An inactive Power Relic that remains in your hand may be used as gold to acquire new Minions or as victory points at the end of the game.
If the Power Relics run out during the game, shuffle back their discard pile.
Buy Power Relics. At any point of the game, in any phase, you may spend 3 gold from your Treasury to draw one Power Relic from the deck.
Raid the town. At the night phase, each player draws one Power Relic from the deck for every troop that they have in town. Place one Rebel in town for every Power Relic acquired this way.
Loot a fortress. When you deal the last hitpoint to an enemy fortress, you also draw one Power Relic from the deck.
2.3 Lie down one troop to perform one troop action
If you still have troops standing up on the board at your turn, you must lie down one of them to perform its action. You may not lie down more than one troop each turn.
Troop actions: Move this troop; or Rest one of your Minions; or Repair your fortress; or Gain 1 gold; or Attack.
When all troops, from all players, are lying down on the board, proceed to the night phase.
Example: first lie down your troop when declaring your action, then perform it. An already lying down troop may only perform free actions.
Move this troop
Lie down one troop in order to move the same troop into one adjacent zone. If you have move-based abilities, you may move a troop up to 2 zones away when departing from the described type of terrain.
Example: with this Reinforcement your troops may move +1 zone from Desert or Water zones.
Rest one of your Minions
By lying down one of your troops to rest one of your Minions once, you may: flip the exhaustion token on top of a Minion to its tired side, or if the token was already at the tired side remove the exhaustion token from the Minion.
A Minion being exhausted or tired means that you cannot exhaust it to attack or to perform command abilities and you cannot use it as gold or even discard it.
Every time that something states that you must exhaust one of your Minions, place one exhaustion token on top of it, with the exhausted side facing up. (States: exhausted, tired, ready.)
Repair your fortress
Lie down one troop to repair 1 hitpoint at your fortress health track. A destroyed fortress can never be repaired.
Gain 1 gold
Lie down one troop to gain one gold into your Treasury right away. You may never have more than 5 gold in your Treasury, so it is highly recommended to acquire new Minions or buy Power Relics.
Attack
To perform an attack you need to lie down one troop and also exhaust one of your Minions (you need to exhaust one of your Minions even for free attacks). This attack may be melee or ranged. When you are declaring an attack you also need to declare which one enemy troop you are attacking. The outcome of an attack will be decided after the defender's response. You may target an unguarded fortress directly; in that case, there is no response.
- Melee attacks may only target troops within the same zone as your attacking troop. Every troop has Melee attack 1.
- Ranged attacks may only target troops within the same zone as well as troops in adjacent zones to your attacking troop.
To perform one ranged attack: lie down the attacking troop and exhaust one of your Minions, add its base stat if applicable, add all Reinforcements, add all active Power Relics.
The Attacking strength is the Base stat of the Minion exhausted to perform the attack (if applicable to the chosen attack) plus all applicable Reinforcements abilities (from both exhausted and ready Minions) plus all active Power Relics applicable.
Example declaration: "I'm attacking your troop with strength 6" (2 from the exhausted Minion Base Stat, 3 from Reinforcements, 1 from active Power Relics).
The Defender's Response
When someone declares an attack that targets one of your troops, you will have to calculate your troop's passive defense and you may decide to exhaust one of your defensive Minions to add its base stat and activate as many Power Relics from your hand as you like. If you activate Power Relics as a response you still get their instant ability right away, but you may never avoid the combat itself this way (by moving the defender troop away, for example).
The defender strength: all troops have defense 1, plus exhaust one Minion base stat (optional), plus defense Reinforcements applicable, plus active Power Relics.
Raise the stakes: the attacking player may respond to a defender's response by activating one or more Power Relics. Continue raising the stakes until both players pass.
Example declaration: "My defense is 6!" (1 from troop stats, 1 from Reinforcements, 2 from exhausting the Guardian, 2 from active Power Relics.)
The Outcome
Compare the strength of the attacking troop with the defender. In case of a tie, the defender wins. Every combat has these possible outcomes:
- A) The defender wins. Nothing happens.
- B) The defender loses (defender troop was standing up). The attacker gains 1 gold. The defender lies down their troop and also retreats the troop by moving it into any adjacent zone. Move-based Reinforcements may also be applied.
- C) The defender loses (defender troop was lying down). The attacker gains +1 gold. The defender removes their troop from the board.
Also check if the target troop was in the same zone as its player's fortress. In that case, first resolve the outcome and then proceed to the "Fortress gets damaged" section.
The fortress gets damaged
If the defender's troop was within the same zone as their fortress when it loses a combat, deal the remaining damage to the fortress itself. It does not matter if the defender has more than one troop within their fortress zone. Also, if there is no defending troop present, the fortress may be targeted directly and takes every attacking strength as damage.
Hidden treasures: If you deal damage to an enemy fortress (no matter how much damage you dealt), gain +1 gold.
Loot the Fortress: when you deal the last hitpoint to an enemy fortress you also draw one Power Relic from the deck.
Example: Attack 4 vs defense 2; the lying down defender removes their troop from the board. Deal 2 damage to the defender's fortress. The attacker gains 2 gold (1 from winning the combat, 1 from damaging the fortress).
The fortress gets destroyed
When a fortress loses its last hitpoint it gets destroyed. Flip that fortress token to the boom side. During the morning phase, you may summon new troops at your destroyed fortress as usual. A destroyed fortress does not grant you Victory Points at the end of the game and can no longer be repaired.
Phase 3: Night
All players together check the board following these instructions:
- Discard all active Power Relics;
- Renew the Mercenary Pool;
- Collect protection fee;
- Raid the town (Rebels may Retaliate!);
- Rest all Minions once.
Once the night phase is completed, the player immediately to the left of the starting player takes the Evil Scepter and becomes the new starting player. Proceed to Phase 1.
3.1 Discard all active Power Relics
No Power Relic stays in play to the next day. Your minions are too reckless to keep them active. All players discard their own active Power Relics.
3.2 Renew the Mercenary Pool
Discard remaining cards at the Mercenary pool and then reveal 6 new ones.
3.3 Collect Protection Fee
All players check the board for dominance over Water, Desert, Mountain and Forest zones. To collect protection fee you must have dominance over a given type of terrain (which is a clear majority of the majorities in that terrain type's zones). Only troops count towards majority (do not count any fortress nor Rebels). Also, a tied zone does not count as one majority for any of those players with troops inside it.
For each dominance over a kind of terrain, you gain +2 gold. In case of a tie over the dominance of a kind of terrain, no one gets gold. Proceed to the next type of terrain until all four terrain types were checked.
Example:
- Dominance over water: Yellow has majority on zone A, Yellow and Green are tied on zone D (a tie does not count as one majority), Green has majority on zone E (Rebels do not count towards majority) and Red has majority over zone F. As Yellow, Red and Green are tied with 1 majority each, no one gets gold for dominance over water.
- Dominance over desert: Yellow has majority on zone C, zone D is tied. Yellow player gains +2 gold for having the dominance over desert.
- Dominance over mountain: Yellow has majority on zone A, Yellow player gains +2 gold for having the dominance over mountain.
- Dominance over forest: Green has majority on zone B and zone G, Red has majority on zone F only. Green player gains +2 gold for having the dominance over forest.
3.4 Raid the town
Players draw 1 Power Relic from the deck for each troop that they have on the town zone. Place 1 new Rebel for each Power Relic drawn this way. If there are 5 Rebel meeples at the town the Rebels will Retaliate!
Example: Green has 2 troops on zone E (Green player draws 2 Power Relics) and Red has one troop on zone E (Red player draws 1 Power Relic). Add 3 more Rebels at the town.
Rebels Retaliate
Having minion hordes causing chaos at the town may lead into townsfolk riots. If there are 5 Rebel meeples at the town the Rebels will Retaliate!
Proceeding clockwise each troop on the town zone will receive an attack with strength 3 (players may defend themselves as usual, one troop at a time). All non destroyed fortresses will receive an attack with strength 3 (players can defend themselves if they have at least 1 troop at their fortress).
When all Rebels' attacks are resolved, remove all rebels from town.
3.5 Rest all Minions Once
All players may rest each of their Minions once for free. If the Minion was exhausted, flip the token and it becomes tired. If the Minion was tired remove the token and it becomes ready.
Final Scoring
At the end of the 4th night phase, the game ends. The player with the most Victory Points (VP) wins. You score Victory Points from all the following:
- Your Living Fortress is worth 5 VP. If it is destroyed, you get 0 VP from it.
- Treasury. Every gold in your Treasury is worth 1 VP.
- Minions Cost. The amount of gold shown on every Minion that you own is worth the same amount in VP.
- Power Relics. Score one VP for each gold shown on Power Relics that are still in your hand.
- Influence abilities may still apply their effect for the final scoring.
Tie Breakers: In case of a tie, the player with the most troops still on the board is the winner. If it is still a tie, the player with more HP left at their fortress wins, then the player with more gold coins left at their Treasury wins, then the player that has the most expensive Minion on their Champions hall wins. If it is still a tie, you share victory.
Example: The green player still has his fortress alive (+5 VP); has 5 gold in his Treasury (+5 VP); his Minions score 27 VP (he received +1 for the private because of his dark overlord); his Power Relics score 10 VP (it was 6, but then his Donnish Druid added +1 to each). Final Score: 47 VP (5+5+27+10).
Evil Prevails: An Epic Solo Showdown
Setup
Set up the game as a game for 2 players on the Desert town map with some minor changes.
Before shuffling the Mercenary deck, divide it in 3 different piles:
- Mercenaries costing 2 gold
- Mercenaries costing 4 and 6 gold
- Mercenaries costing 8 and 10 gold
Shuffle each of those piles.
Place on the dummy player mat (instead of the henchmen):
- 2 Mercenaries from the first pile (2 gold)
- 2 Mercenaries from the second pile (4 or 6 gold)
- 1 Mercenary from the third pile (8 or 10 gold)
The dummy player will not acquire new mercenaries through the course of the entire game.
Shuffle the remaining Mercenary cards: set aside 24 of them to be played in this game and put the rest back in the box. Reveal 6 cards. If there are cards costing 10 gold, shuffle them back to the deck and reveal new ones in their place.
Do not deal starter Power Relics to the dummy player. The dummy player will not activate any Power Relics through the game. Keep any Power Relics that it acquires through the game next to its player mat facedown for its final scoring.
Finish the setup and play the game as usual. Take the Evil Scepter first player token and start the game! The goal of the solo game is to achieve more VPs than the Dummy player.
The Dummy Player A.I.
The dummy player is enemy to you only (so if you decide to face more than one A.I. they will never attack each other); its actions follow some rules. Check its action priority below.
Morning phase: Buy Relics. On each morning phase, if possible, the dummy player will spend 3 gold to buy one Power Relic. Keep it facedown next to its dummy player mat for final scoring.
Afternoon phase:
- Perform a Melee Attack! Exhaust its strongest Melee Minion available and add all applicable Reinforcement bonus. If there is a tie, exhaust the top left available Minion. If there is no Melee Minion to exhaust proceed to 2. Target zone tie breakers: Enemy fortress zone; then the zone with enemy lying down troops; if there is still a tie flip Power Relics from deck until an applicable zone appears.
- Perform a Ranged Attack! Exhaust its strongest Ranged Minion available and add all applicable Reinforcement bonus. If there is a tie, exhaust the top left available Minion. If there is no Ranged Minion to exhaust proceed to 3. Target zone tie breakers: Enemy fortress zone; then the zone with enemy lying down troops; if there is still a tie flip Power Relics from deck until an applicable zone appears.
- Move! (also applicable to Retreat) Flip a Power Relic from the deck and then move the dummy troop to the target zone. Target zone breakers: Nearest to the enemy fortress zone.
Dummy Players will never activate Command abilities and will always exhaust their best defensive Minion to try to defend themselves.
Night phase: Perform night phase as usual.
Once you are used to the solo rules, try to place the dummy fortress next to yours, then if you still want more challenge add another dummy player!
Example A
The Yellow player starts the game at zone A, and the Red dummy player at Zone B.
Afternoon Phase:
- 1st troop: Yellow player moves his 1st troop to zone C, then the dummy player flips a Power Relic, and the zone shown is mountain, so it moves into D zone.
- 2nd troop: Yellow player decides to perform the "Squire" command to be able to move to zone F (the town). Dummy player flips a Power Relic, and the zone shown is forest so it moves into zone E.
Example B
A jump into the action.
Afternoon Phase:
- 1st troop: Dummy player melee attacks on zone C. Yellow loses and retreats to zone F. Yellow player ranged attacks zone B from zone F and destroys Dummy player's fortress.
- 2nd troop: Dummy player will always favor melee attack, so it will attack on zone F. Yellow attacks from zone H to zone F.
- 3rd troop: Dummy player could perform ranged attacks from zone I and zone E but it will attack from zone I into zone A because it has enemy Fortress. Yellow player decides to attack red on zone I.
- 4th troop: Dummy player ranged attacks zone G from zone E. Yellow has no more available actions.
Gameplay Summary
Each day has 3 phases: Morning, Afternoon, Night. In the Morning, proceeding clockwise each player completes their phase 1 by standing up all lying down troops and summoning troops in the same zone as their fortress. Once everyone has completed this phase, the starting player begins the next phase.
In Phase 2 is where the action happens. In this phase each player may hire one Mercenary from the pool, and lie down one troop meeple to perform its troop action.
- Troop actions: Move; or Rest; or Repair; or Gain 1 gold; or Attack.
- Free Actions: activate Power Relics, perform Command abilities.
Proceed clockwise until all troops on the board are lying down, then proceed to the next phase.
In phase 3 all players together follow these instructions: 1) Discard all active Power Relics; 2) Renew the Mercenary Pool; 3) Collect protection fee; 4) Raid the town (Rebels may Retaliate!); 5) Rest all Minions once. Once the night phase is completed, the player immediately to the left of the starting player takes the Evil Scepter and becomes the new starting player. Proceed to Phase 1.
Scoring basics: Score 5 VP if your fortress is not destroyed. Score one VP for each gold left in your Treasury, shown in your acquired Minions' costs and shown in Power Relics that are still in your hand.