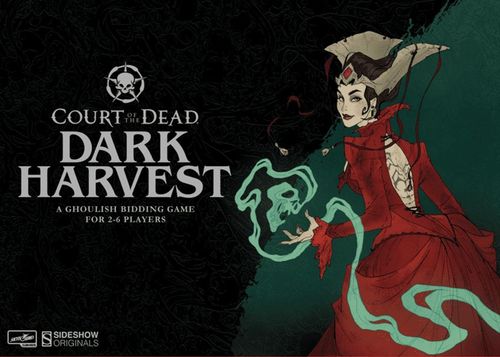
Court of the Dead: Dark Harvest
Court of the Dead: Dark Harvest Rulebook
Table of Contents
Table of Contents
Components
- 6 Privacy Screens
- 18 Faction Tokens
- 30 Influence Tokens
- 24 Court Cards
- 9 Harvest Cards
- 3 Final Harvest Cards
- 3 Faction Favors
- 3 Court Deck Markers
- 60 Soul Tokens
- 3 Failure Tokens
Setup
To begin setup, each player should take a privacy screen, one of each faction token, and 5 influence tokens of a single color.
The Court Decks
Take all 24 Court cards and separate them into four piles based on the color of the card face. You should be left with four piles:
- Flesh (Red), 7 cards
- Spirit (Blue), 7 cards
- Bone (Yellow), 7 cards
- United (Gray), 3 cards
Randomly deal one United card (gray card) into each of the other three stacks. Then shuffle each deck and place them perpendicularly onto the matching faction marker card, as shown. Place all three decks in a line in the center of the play area.
The setup page also shows a Queen of the Dead card ("Gain up to four Influence. (max five)") beside the Court piles. The rulebook does not name the deck it belongs to, so it is reproduced here only as printed.
The Harvest Deck
Randomly select one of the Final Harvest cards and place it facedown on the table. Place 5 randomly selected Harvest cards facedown on top of the Final Harvest.
Finally, place the three Faction Favor cards near their corresponding Court deck (e.g., Flesh near Flesh).
The game is ready to begin.
Game Round
Each game round in Court of the Dead: Dark Harvest has an Income Phase and two main phases of gameplay: the Court Phase and the Harvest Phase. Skip the Court Phase on the first round of the game.
Income Phase
In the Income Phase players receive souls and Influence to spend.
Each player starts the game with 5 Influence and then regains 1 of their spent Influence at the start of each income phase (max 5).
At the start of every round, each player gains soul tokens depending on the number of players currently in the game:
| Players | Souls |
|---|---|
| 2 Players | 8 Souls |
| 3 Players | 7 Souls |
| 4 Players | 6 Souls |
| 5 Players | 5 Souls |
| 6 Players | 4 Souls |
Example: 4 Players, 6 Souls.
Court Phase
In the Court Phase players will attempt to win the favor of powerful members of the Court to aid their cause.
Reveal the top card of each of the three Court decks. Players should read the revealed cards and decide privately which one they want to bid on. Each player secretly places a number of Influence tokens, and the faction token of the Court deck they'd like to bid on, in a closed fist.
When all players are ready, everyone opens their fist and reveals how many Influence tokens they are spending, and which faction they are attempting to influence.
The Court
The player who bid the most Influence on each faction wins the revealed card from that deck and resolves its effects. All Influence tokens that were bid on a card are lost, even if the player making the bid did not win the card.
If there is a tie, then all tied players lose, and no one gets the card.
After resolving the effects of a card, that player takes the Faction Favor of the corresponding faction. E.g., if a player wins the favor of Gethsemoni (a Flesh card), that player resolves their ability and takes the Flesh Faction Favor.
That player keeps this Faction Favor until someone else takes it from them by winning a card from that faction in the future.
United cards allow players to choose any Faction Favor they want that wasn't claimed that round.
If multiple cards must be resolved at the same time, the order is always the following:
- Flesh
- Spirit
- Bone
Some Court cards allow characters to delay taking their action until a specific time later in the round. But unless specifically stated, the action occurs immediately.
The Court page also shows a Queen of the Dead card ("Gain up to four Influence. (max five)") as an illustration. As on the setup page, the rulebook does not name its deck, so it is reproduced only as printed.
Harvest Phase
The Harvest
Reveal the top card of the Harvest Deck. The number on the card represents the number of souls that must be collectively offered in order to placate the Celestials for this round.
Each player should collect a number of souls in secret from behind their screen and place them in a closed fist when they are ready to make their Offering.
When every player is ready, the group reveals their Offerings simultaneously.
If the group has collectively met or exceeded the threshold on the Harvest card, then the Harvest is a success.
If the group has not met or exceeded the threshold on the Harvest card, then this Harvest is a failure.
Example: the Harvest threshold is 17 souls, but the group reveals a total of 8 souls, so the Harvest is a failure and now must follow the failure rules.
Success
When a Harvest succeeds, the player who contributed the most souls to the Harvest may gain a bonus influence cube.
Failure
When a Harvest fails, the group receives a collective Failure token.
If this was the group's first or second Failure token, then the player who contributed the fewest souls must resolve the Fail effect listed on the Harvest Card.
If multiple players are tied for fewest, then the oldest player resolves the Fail effect first.
If this is the group's third Failure token, or if the group already has three Failure tokens, then the player or players who contributed the fewest souls to the Harvest are eliminated. Any souls that an eliminated player has collected are lost and returned to the supply. Eliminated players no longer count toward the number of players during the income phase, and are skipped over if they would be targeted by cards that affect players sitting next to a specific player.
Editor's note: the printed text reads "the Harvest art eliminated"; "Harvest are eliminated" is read as the intended wording.
End of the Game
After the final Harvest has been resolved, the player with the most souls left behind their screen is the winner. If eliminating a player means that there is only one player left, the remaining player wins the game immediately.
If players are tied for the most souls, then the player with the Bone Faction Favor breaks the tie. If the Bone Favor is not in play, or the player with the Favor refuses to break the tie, then the player with the most influence tokens wins the tie. If there is still a tie, then victory is shared and the Underworld is united... for now.
Faction Favors
Each Faction Favor card allows players to break the rules of the game in some small way.
- Flesh: You may add or subtract one Influence cube from your bid after all bids have been revealed. This occurs before any Court cards are resolved.
- Spirit: You may add or subtract one soul from your Offering after all Offerings have been revealed. This occurs immediately after the Offerings are revealed.
- Bone: Once per round you may break a tie in any way you see fit. You do not need to be involved in the tie to use this ability.
FAQ
Q: What happens if a player would lose more souls than they can pay?
A: Players may never have a negative number of souls or Influence. If a card effect such as Odium or Oglaveil would force a player to lose more souls than they have, they lose all the souls they have, and must reveal that they have nothing left behind their screen.
Q: How do the favor cards factor into the timing rule?
A: When multiple cards would take place at the same time, resolve them in this specific faction order: Flesh, Spirit, Bone.
This rule remains true when Faction Favors and Court cards would take place at the same time. For example, if Exraile and the Spirit Faction Favors are both in play, Exraile would activate first, because Flesh is first in the order.
If a Faction Favor and a Court card of the same faction would ever activate at the same time, the Court card will activate before the favor.
Detailed Game Phases
Income
a. Gain Influence: i. Each player gains one Influence. b. Gain souls: i. Players gain souls according to the number of players currently in the game.
Court Phase
a. Reveal the top card of each Court deck. b. Choose an amount of Influence to bid. c. Reveal bids. d. Adjust Influence: i. If a card or favor allows you to adjust Influence, do so here. e. Resolve Court cards: Flesh, Spirit, Bone. f. Award Favor cards.
Harvest Phase
a. Reveal the top card of the Harvest deck. b. Prepare Offerings: i. If a card allows you to manipulate the Offerings before revealing them, do so here. c. Reveal Offerings. d. Adjust Offerings: i. If any Court or Favor cards allow you to adjust your Offering, do so here. e. Pay Celestials: i. All souls given to the Celestials are put back into the bank. f. End of Harvest Phase: Cleopsis and Demithyle may declare the Harvest a failure or success at this point.
Resolution
a. If success: Determine which player offered the most souls, and they receive +1 Influence. b. If failure: Take a Failure token from the box and place it near the Harvest deck. i. If this is the first or second Failure token, the player or players who contributed the fewest souls must resolve the Fail effect. If there is a tie for fewest, then the oldest player resolves the effect first. ii. If this is the group's third Failure, or if the group already has three Failures, ignore the Fail effect and instead eliminate the player or players who contributed the least.
Editor's note: the printed text reads "then then the oldest player"; it is read here as "then the oldest player".
Court Card Notes
Editor's note: the printed text reads "seperately" in the Poxxil note and "prot�g�" (a dropped glyph) in the Mortighull note; these are corrected to "separately" and "protégé" here. No other wording has been changed.
Flesh
Cleopsis: Remember that the Cleopsis' power to sabotage the Harvest is optional. The player with this ability need not make a decision until the very end of the round, after all other steps have been taken and effects have been resolved. If Demithyle is in play, however, his ability will counter Cleopsis because as a member of the Bone faction, he activates after Cleopsis. Also, if there are multiple effects like Cleopsis in play that force a failure, the Harvest can still only fail once.
Poxxil: Poxxil's plagues are incredibly potent. If an effect like Socopherie copies Poxxil, the second Poxxil will activate separately and will not count Influence put on a different "Poxxil."
Gallevarbe: As a skilled hunter of souls, Gallavarbe will always acquire her quarry. Even if the Harvest fails, any souls beyond the required amount will be claimed by Gallevarbe. However, in the rare event that Socopherie copies Gallevarbe, the two hunters will split the bounty as evenly as possible and dispose of any they cannot divide evenly between themselves.
Spirit
Ellianastis: When a player is made to play without a screen by Ellianastis, they must make all of their Offerings in public and do so before anyone else makes their secret Offerings.
Ghetis: Even if there are multiple effects like Ghetis in play that force a failure, each Harvest can still only fail once.
Socopherie: When Socopherie copies another Court card, she remains a member of the Spirit faction with Influence placed on her. The copied effect will resolve at the speed of a Spirit and Influence placed on Socopherie will count towards her new effect.
Bone
Demithyle: As the legendary protector of Death's Realm, Demithyle's victory is always guaranteed. Should Demithyle choose, he can cause the Harvest to succeed even if the likes of Cleopsis and Ghetis would choose otherwise. He need not make a decision, though, until after all other effects have resolved.
Mortighull: Demithyle's protégé is an incredible overachiever. When counting souls for effects like Gallevarbe, the extra souls will still go to Gallevarbe player. They can pull soul tokens straight from the bank.
Council of Osteomancey: Ever bound to the rules they set: the Council of Osteomancy will not break ties. If two players are tied for the most souls, and the tie is not broken by the player holding the Favor of Bone, neither player will lose souls.
Shieve: Shieve does not conjure souls on her own. Thus, if you wish to add souls to the Offering, they must be available from the pool behind your screen.
United
Mortis Knighthood: You must have souls behind your screen in order to put any on Mortis Knighthood. You can choose 0 but you cannot put more souls onto Mortis Knighthood than are available to you.
Death: If players tie for either Most Souls or Least Souls and the tie is not broken by the Favor of Bone, Death's ability will not cause players to give up souls.
Malavestros: Do not take Malavestros' games lightly. Once Malavestros has switched your Offering, your new Offering is yours and your original is now theirs. Even if you originally offered 4 souls under the guidance of Exraile, you will be limited to the new amount given to you by Malavestros.