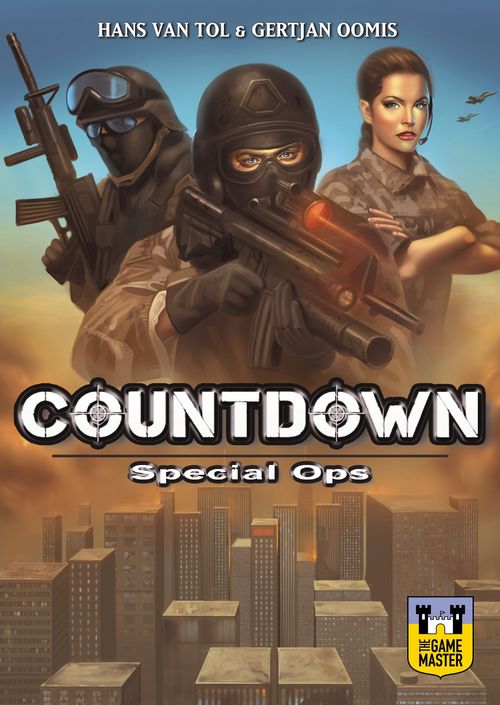
Countdown: Special Ops
Countdown: Special Ops Rulebook
Table of Contents
Table of Contents
Game Materials
9 Markers
- 1 Time marker
- 1 Mission score marker
- 7 Special Ops markers
1 Sticker sheet
48 Cubes
- 18 Health units (red)
- 18 Energy units (yellow)
- 6 Aiming skill units (blue)
- 6 Specialty skill units (white)
6 Dice
8 Game boards
- 1 Track board
- 7 Special Ops boards
220 Playing cards
- 6 overview cards (two-sided)
- 20 assignment cards
- 15 location cards
- 45 target cards (bombs, hostages and terrorist leaders)
- 90 threat cards (35x level 1, 30x level 2, 25x level 3)
- 12 support cards
- 16 secured area cards
- 6 deployment and exit cards
- 3 bullet control cards
- 7 personal agenda cards (including 2 traitor cards)
Before Your First Game
Put the stickers on the markers. Take the sticker sheet and put the 9 round stickers from the sheet on the 9 round markers: one sticker on top of each black marker.
Game Set Up
This part of the rules explains how the game materials look like and how they must be prepared before a mission can start.
-
Prepare Track board. Place the Track Board on one side of the table, so there is enough space in the centre of the table to set up the mission later. Now place the markers:
- Place the time marker on the time track on position "0";
- Place the scoring marker on the mission scoring track on position "0".
-
Special Ops cards. Place the 7 Special Ops boards on both sides of the table and place their corresponding marker on them.
-
Distribute two-sided game overview cards. Give each player an overview card. This card shows a game overview on one side and a short overview of the Special Ops abilities on the other side.
Game overview side (summary):
- 1. Intel phase: Intel agent may reveal threat and target cards.
- 2. Positioning: Move Ops to adjacent area or stay in position. Scout may use his special skill.
- 3. Action: Special Ops may use their Special skill. In Close Combat the Ops attempt to eliminate terrorists to protect civilians, bring hostages into safety and secure the areas.
- 4. Countdown: Move time marker to the right.
- 5. Recovery: Each Special Op gets +1 energy.
Special Ops abilities side:
The Briefing
This part of the rules explains the goal of the game, the assignments and about training on the job. It also reveals the main target and location of your mission.
Purpose of the Game
The players play together as a team. The team wins if the players have succeeded in ending the mission with a positive mission score (+1 or higher) and at least one Special Op has reached an exit area safely.
If the game is played in the traitor mode, the patriots attempt to end the mission with a positive score and the traitors' goal is to end the mission with a score of 0 or less.
Training on the Job
Playing a mission in real time mode takes about 30 minutes. Setting up a new mission requires less than 5 minutes of preparation. If you decide to play the game without time pressure, a mission may take longer but would not exceed 60 minutes. The fastest way to get better at the game is by training on the job in real time. This way you will experience all kinds of situations and improve your tactics and skills. Our advice: learn to play effective missions with "on the job" training.
Reveal Assignment Card
Take the top card from the pile of green Assignment cards (take green for your first mission) and place it face-up on the table.
This is an example of an Assignment card showing the target, level, time and the mission location with a complete mission set up. After revealing the card, continue with Mission Set Up.
- Target of the mission (example: save the hostages). The symbol on the card refers to the target of the mission. This target can be to eliminate terrorist leaders, dismantle bombs or save hostages (shown in the example). Take the deck of target cards with the corresponding symbol and place it in front of you. Put the other target cards back in the box.
- Level of the mission (example: level 1). The green assignment card is a single mission on level 1. The highest level you can find for a single mission assignment is level 3, which are the red assignment cards.
- Location of the mission (example: Cruise Ship).
- Time indicator (example: 7, 6, or 5 rounds for 1-4, 5 or 6 players). The time indicator on the bottom of the assignment card shows three spaces with different numbers. The left number (in the green space) refers to the number of rounds available when the game is played with 1-4 players. The next number (orange space) refers to the number of rounds for 5 players and the last number is for playing with 6 players. Place the time marker on the time track on the position with this number on it (to the left side of the time track). In this example a mission with 1-4 players would start at 7, with 5 players at 6 and with 6 players the time marker would be placed on position 5.
Single Mission Briefing
This briefing gives all details on the mission to be played. To learn the game, the best way is to start with a single mission and randomly take an assignment card from the green beginner set.
Increase the Level
If you and your team of players have succeeded in finishing one or more missions from the green assignment deck, you may try out an orange assignment. More experienced players may even attempt the red assignments.
Location
The name of the location is connected to the blueprint which shows the way in which the mission will be set up. Take the corresponding location card from the face-up pile to set up the mission.
Note for First Mission
When playing your first single mission you may ignore the section explaining the level 2 and 3 assignments. You may proceed with Mission Set Up. If you have succeeded in completing missions on level 1, read the explanation of the level 2 assignments and try out a mission on a higher level.
For rookies, we keep the rules for a single mission simple. But if you are more experienced and dare to play a single mission on level 2 or 3, you can also start registrating the development of your specialty skills. This way you will enjoy the fun of this game element and since you are an experienced player you can also learn this element before you start your first campaign or a pre-set scenario game. Furthermore the development of your specialty skills will also give you more chance to be succesfull on level 2 and 3 missions. Check out the section Specialty Skills, on page 14.
Advanced Players Options
- Advanced players may choose the target deck (bombs, leaders or hostages), the location of the mission (15 different locations available) themselves.
- Advanced players may increase the difficulty of a mission by decreasing the time for a mission: set the time marker one position lower (further to the right).
- Advanced players may also choose to play a campaign of three missions of increasing game levels: threat cards will increase in level while going through the threat deck. For an explanation of campaigns, read the section Campaign Mode.
- Advanced players may also increase the threat level of the threat deck before the start of a campaign: remove the top 5-15 threat cards of the threat deck; the level 2 threat cards will be encountered earlier in the campaign and in this way will make a campaign more difficult.
Having Difficulties to Be Successful?
You can always try a different location or mission type. You can also add 1 or 2 rounds to the mission.
Level 2 and 3 Assignments
Take the top card of the pile with the orange Assignment cards (level 2) or the red Assignment cards (level 3) and place it face-up on the table. The card reveals the type of target, mission level, location name and the available time. Note that there is an alternative mission location on the level 2 assignments. If you play a mission on level 2, you get to choose which of these two locations you want to play. In the example, you may choose between the locations Underground and Terrorist Camp. Take the location card of your choice and proceed with the Mission Set Up.
- Target of the mission (example: eliminate leaders). The symbol in the center refers to the target of the mission. Take the deck of target cards with the corresponding symbol and place it in front of you. Put the other target cards back in the box.
- Level of the mission (example: level 2).
- Location of the mission (example: Underground). The location names refer to one of the 15 locations in COUNTDOWN. Take the location cards from the face-up pile of location cards with the corresponding names and choose which mission location you would like to play.
- Time indicator (example: 6, 5 or 4 rounds for 1-4, 5 or 6 players).
Having Difficulties to Be Successful on Level 2 or 3?
Hint for advanced play: start using specialty skills development.
Mission Set Up
This part of the rules explains how to use the location card to set up a new mission.
This part of the rules explains the final preparations of a mission: to select and deploy their Special Ops.
Preparation
Each mission starts with:
- Planning. The players study the setup card of the mission location and the mission targets (leaders, hostages or bombs). They can then formulate a plan for how to complete the mission.
The setup card shows: (1) the time indicator, (2) the threat areas, (3) the target areas, (4) the deploy area, (5) the exit area, (6) the total number of threat cards, and (7) the bonus mission points. The location name is printed on the card. This image is an example of the set up for a mission on the Cruise Ship location.
-
Time indicator. The time indicator shows the same time as on the assignment card. Place the time marker on the position as indicated depending on the number of players. In this example, if you play with 1-4 players place the time marker on 7.
-
Prepare threat areas. First place one secured area card on each grey marked threat area; secondly place the number of threat cards indicated on the setup card in each threat area, stacking them on top of the secured area card. In this example place 2 threat cards on the grey area with the white circle around it.
-
Prepare target areas. First place one secured area card on each red marked target area; secondly place the number of target cards indicated on the setup card in each target area, stacking them on top of the secured area card. In this example place 2 target cards on the red area with the red circle around it.
-
Place deployment cards. Place deployment cards on the indicated yellow deployment areas; place one card per area with the arrow pointing in the indicated direction.
-
Place exit cards. Place exit cards on the indicated green exit areas; place one card per area with the arrow pointing in the indicated direction.
-
Total threat cards. This number indicates how many Threat cards are used in a mission. You need to know this when playing a campaign.
-
Bonus mission points. The first number indicates the number of areas (target + threat areas) which have to be secured to get 2 mission points.
Select Special Ops
-
Select Special Ops. Players must select the Special Ops for the mission. The number of Special Ops selected depends on the number of players.
- 4-6 players: each player places one Special Op in front of him, so the number of Special Ops is 4-6, depending on the number of players.
- 1-3 players: 1 player: the player controls 4 Special Ops; 2 players: each player controls 2 Special Ops; 3 players: each player controls 1 Special Op and all players control 1 "dummy" Special Op together.
Remove the unused Special Ops cards and markers and put them back into the box.
-
Place cubes on Special Ops cards. Now prepare the selected Special Ops cards:
- Place 2 health units (red cubes) on the first two red squares next to the heart;
- Place 2 energy units (yellow cubes) on the first two yellow squares next to the lightning;
- Place 1 aiming skill unit (blue cube) on the development track of aiming skill with the gun symbol on top, on position "0";
- The specialty skill track is not used during your first single mission or a mission on level 1; it will only be used for advanced play: single missions on level 2 or 3 and for campaigns/scenarios. For details check out section Specialty Skills on page 14.
Each player now places his Special Op card or cards (with one or two players) in front of him. When playing with 3 players, place the fourth "dummy" Special Op next to the Track board within reach.
Select & Deploy
- Deploy Special Ops. The players decide which deployment areas they will position their Special Ops in. Place the Special Ops markers on the deployment cards.
Mission Overview
End of Round
After phase 5, recovery, the next round starts phase 1 (Intelligence) again.
Defensive Strategy
Trigger time. As soon as the time marker reaches the level 0, all targets are triggered: bombs which have not been dismantled yet will explode, terrorist leaders who are still alive will escape and hostages which are not in the safe hands of Special Ops or outside the mission area, will be executed. Each triggered target will cost valuable mission points. Even if all Special Ops are outside the mission location on exit areas before trigger time, all target areas will be triggered before the game ends. It is allowed to go beyond trigger time, costing valuable mission points, but it is possible to be successful in the mission.
Split Strategy
Hint: splitting up the team is permitted. This may save time, but is riskier for the Special Ops.
End of Mission
Continue the game until all surviving Special Ops are in the exit areas unless the team gives up because they decide they are unable to complete the mission successfully (mission score of +1 or more). The mission also ends immediately if the time marker moves on to the Game Over space, if all of the Special Ops are eliminated or if the mission score reaches -8 or below.
The mission is successful if the mission ends with a positive mission score and there is at least one Special Op who has reached an exit area alive. The scoring is explained in detail in the section Mission Scoring.
Set Timer
If the game is played in real time mode, set the timer to 35 minutes before the game set up starts.
Goal of the Mission
End the mission with a positive mission score and at least one Special Op alive and safe on one of the exit areas.
The game is played in a cooperative way, with all players having the same goal (exception: traitor mode). Each player has the final say for "his" Special Op. Each mission consists of a number of rounds, each represented by one time unit. In each round 5 phases will be completed in sequence:
- Intelligence. You may use Jill's intel skill to reveal threat and/or target cards; Jill, the intel agent, comes into action in this phase.
- Positioning. The Special Ops may move one area. If entering a secured area, the Special Op(s) may move one extra area, only once in a round. Vince, the scout, may use his special skill to move secretly with other Special Op(s) and even move further; this will cost Vince one additional energy (yellow cube) for each additional area.
- Action.
- A. If entering unsecured area(s) the Special Ops could be risking their lives in a gunfight with the enemy or can get injured by a hidden booby trap; in a gunfight higher aiming skills will make the Special Ops become more effective.
- B. If Special Ops are in an area without enemies and no (active) booby traps, they may use their special skills; the bomb expert may dismantle bombs and booby traps if revealed before entrance, the sniper and buster may attack adjacent areas with a sniper rifle and hand grenades and the intel agent may collect more valuable information; the medic helps in critical situations with healing and giving extra energy.
- Countdown. Shift the time marker one position to the right.
- Recovery. Give each Special Op one energy unit.
Game Play
This part of the rules explains in detail how the five phases of the game proceed.
Development of specialty skill: only in a campaign or a single mission of level 2 or 3, Vince may increase his specialty skill to take more Special Ops with him. Check for details in the Special Ops section. In a single mission on level 1 (green assignments) the Special Ops will only be able to operate on specialty skill level 1.
Phase 1: Intelligence
In this phase Jill, the intelligence agent, may use her intelligence skill to reveal threat or target cards in adjacent areas. This information helps the Special Ops to plan their next action. By expending 1 energy Jill may reveal the top face-down card of a pile in an area adjacent to her position. Remove one yellow energy cube from her character card for each card revealed and return it to the general stock.
Special situation: secured areas. All Special Ops may move through one secured area to another area once per game round. If all threat and target cards are taken from an area, the area is secured.
Development of specialty skill: in a mission on level 2 or 3 or in a campaign Jill may increase her specialty skill in order to reveal more face-down cards at once. Check for details in the Special Ops section. In a single mission on level 1 (green assignments) the Special Ops will only be able to operate on specialty skill level 1.
Special situation: sniper terrorist. If Jill reveals a terrorist with a sniper symbol, this terrorist takes a shot at her. Roll the dice for the attack by the terrorist and if the roll of the die is equal or lower than the attack value of the terrorist, Jill loses one health point. Remove one red cube. If the terrorist rolls a higher value, he misses. The terrorist stays in position, face-up. In this example, if the roll of the die is equal to or less than "4", the Intel Agent is hit and she loses one red health cube. Rolling a "5" or "6" has no effect.
Note: this sniper terrorist comes from the level 2 threat deck and is quite dangerous. But there are also snipers who can surprise the Special Ops in the level 1 threat deck.
Phase 2: Positioning
After the Intelligence phase, all Special Ops must decide if they will move from one area to another or stay in their current position. All Special Ops can move freely one space horizontally or vertically to an adjacent area. They do not have to give up any energy for moving. Shift the markers for that Special Op to the area they have moved to.
Vince, the scout, is the only Special Op who may move extra. He may make additional moves at the cost of one energy (yellow cube) for each extra area moved into. When moving he may take one other Op with him. Vince may move even further in this phase. This will cost Vince one additional energy (yellow cube) for each additional area.
Phase 3: Action
Using aiming skill. During the action phase the Special Ops need to eliminate the terrorist threat. Each Special Op may attack an enemy (terrorists or terrorist leader) by taking a shot at them. All Special Ops have the ability to shoot at an enemy, but some Special Ops have a higher learning curve and can increase their aiming skill (+1 to die roll) faster and/or reach a higher aiming skill level.
At the start of a single mission each Special Op will have no additional aiming skill. Their attack value is determined solely by the roll of the die. During a mission all Special Ops improve their aiming skill by fighting in close combat. The sniper may also improve his aiming skill by effective use of his specialty skill. By playing COUNTDOWN Special Ops well, you will increase your aiming skills during the mission by reaching certain levels of aiming experience. This allows you to add this aiming skill level to the die rolls, improving your chances of completing the mission successfully. Some Special Ops can improve their skills faster, for example the Shooter. However the Shooter is the only Special Op without a specialty skill.
Using the Special Ops. Each Special Op has his or her own specialty, except for the Shooter who instead develops his aiming skill faster than other Special Ops due to his improved learning curve. It is important to use the combination of skills in the best possible way. A full explanation of the specialty skills of each Special Op and in how they can develop them, is explained in the Specialty Skills section.
Threats and Targets
Possible actions available depend on the kind of threats encountered. The different kind of threats require different actions. Threat cards can only be found in the grey marked areas. The target cards can only be found in the red marked areas. The way in which threat and target cards work and how they are dealt with is explained here, in the order in which they are resolved when Special Ops enter an unsecured area.
Threats
Here are three examples of booby traps. The first one is from a level 2 threat deck, the second one from a level 3 threat deck and the third booby trap comes from a target deck for a leader mission.
How to dismantle booby traps?
- Steve "Wires" Andersen, alias The Bomb Expert, may dismantle a booby trap, but only if he knows the booby trap is there. Therefore the booby trap must have been revealed before entering the area. By expending 1 energy cube, The Bomb Expert may immediately dismantle the revealed booby trap on entering the room, avoiding detonation.
- Bob "Hellfire" Jones, alias The Buster, may also take out a booby trap when throwing in a hand grenade. If a hand grenade causes a booby trap to be revealed, it explodes. There is therefore a risk of hurting civilians and hostages. The number of hearts on the booby trap indicate the number of cards which have to be revealed after the booby trap has been revealed by a grenade, any civilians or hostages are eliminated. Terrorists are never hurt by the booby traps they have placed.
Targets
Booby traps. Immediately after one or more Special Ops enter an unsecured area, all threat or target cards are revealed simultaneously. Place them next to the mission set up. If a booby trap is present and it was not revealed before the Special Ops entered the area, the booby trap is triggered, exploding. The number of hearts on the card indicates amount of damage. Hostages and Civilians take damage first and are eliminated. Once all Hostages and Civilians have been killed any remaining damage is shared out among the Special Ops in the room. The Special Ops will take damage, starting with the Special Op with the lowest Special Op number, shown in the top left corner of their character card. Each Special Op takes one damage by removing one red health cube from their character cards and returning it to the general stock. There are booby traps that damage the first two humans (hostages, civilians or Special Ops) or the first three humans in an area.
Example: Two Special Ops, the Shooter (1) and the Medic (7) enter an area and find a booby trap and a civilian in the same area. Now the civilian gets killed first (costing 2 valuable mission points) and the Shooter (lowest number: first in line) loses one health point, remove one red cube from the Shooter's character card. The Medic remains unharmed. If the civilian card had been a terrorist card, the Shooter and the Medic would both lose one health point. If the Shooter had entered the area alone and no civilians or hostages would have been present in the area, he would have surely died.
Terrorists and Terrorist Leaders
Terrorists and terrorist leaders are also referred to as "the enemy" within the rules. If the Special Ops enter an area with one or more enemies, this usually results in a gun fight. The Special Ops have the advantage of first strike, there is no sense in waiting to get shot at by the enemy. Only in the rare cases of all the Special Ops entering an area being killed instantly by a booby trap, time bomb or a bazooka from the enemy, or the Special Ops who enter the area having no chance of hitting the enemy (due to lack of energy or low aiming skill) is it possible that there will be no gun fight.
Special Skills of the Enemy
Some enemies have special skills which trigger when they are turned face-up, before the gun fight and before the enemy returns fire.
- If new terrorists are added to an area as a result of the symbol T+1 or +1T, this results in drawing a terrorist card from the threat deck. If other type of cards are drawn, discard them and continue till a terrorist card is drawn from the deck. Add the new terrorist to the area, but neglect any special skills of this extra terrorist (no bazooka, no +1T or other effects).
- The effect of the special skill of a terrorist is only valid once per game round; for instance a terrorist with a bazooka may only use his bazooka when the Special Ops enter an area; this also has the effect that in case of re-entering an area an enemy with the +1T symbol immediately gets new support if you re-enter the area.
Choose Your Opponent
The Special Ops must first choose which enemy they want to aim at. When in a gun fight, the Special Ops cannot use their specialty skills. Their only weapon is their gun and the only skill that counts in a close combat situation is their aiming skill. At the start of the mission each Special Op has no aiming experience and a skill level 0. However Special Ops will still be able to shoot at the enemy with their aiming skill of 0. To hit the enemy they have to roll one die and must equal or exceed the defense value of the terrorist to eliminate him. The Special Ops must choose their target before they roll the dice. It is permitted for two Special Ops to aim at one enemy at the same time, increasing the chances that their first strike will be successful.
Note: Each attack is handled individually. The values will NOT be counted up.
Place the Special Ops marker on the enemies present in the area. It is possible that there will be more enemies than Special Ops in an area. In this case the players choose which of the enemies they attack first.
First Strike
Each Special Op that takes a shot at an enemy expends one energy unit. Roll the die and add the value of the aiming skill (which may be 0) to the die roll to determine the attack power of the shot. This value must equal or exceed the defense value of the terrorist to succeed.
Example: These pictures show two terrorists from level 1, which can be encountered in a single mission. The terrorist on the left can be eliminated by a Special Op with no aiming skill by rolling the die and reaching a value of "3" or more. The terrorist on the right is more dangerous. If this terrorist is not eliminated immediately, he receives back up from the arrival of an additional terrorist (T+1). His defense value is 5. A Special Op without experience to increase his aiming skills has little chance of taking out this terrorist. A Special Op with no aiming skill (level 0) would have a chance of only 17% to hit the terrorist on the right, while a Special Op with aiming skill level 2 would have a 50% chance (3/6).
Rewards: for each attempt to eliminate an enemy in a gun fight, successful or unsuccessful, a Special Op gets +1 aiming experience. If a Special Op succeeds in eliminating an enemy his or her gained experience may be greater if the enemy is stronger or more dangerous, and therefore has an added experience reward on the card. As shown in the example above, the terrorist on the right brings extra aiming experience of +1. When a terrorist is eliminated the card is discarded and removed from the game.
Use of Bullet Control
If the dice roll is not high enough to eliminate a terrorist, the players may choose to play a bullet control card to add the indicated value to his dice roll. This card gives the Special Op extra control over his gun. The use of a bullet control card costs -2 mission point, but it may help the Special Ops in difficult situations. If one of these 3 cards has been used, it is out of the game. Only in campaigns is it possible to use the same card again, since they will be replenished at the beginning of each new mission.
Returned Fire
If no terrorists have survived the first strike, this step is omitted. If terrorists survived the first strike, they will fire back at their attackers. For instance, if the surviving terrorist has been attacked by Bob who missed, he will take a shot at Bob first. Roll the die for the terrorist. If the attack value of the terrorist is less than or equal to the die roll, he wounds the Special Op who immediately loses one health point (remove one red cube). All surviving terrorists will shoot at a Special Op once, starting with the enemy with the lowest number and then going up until all terrorists have had their turn. Some terrorists have no attacker, because nobody targeted them. These terrorists will aim at the Special Op with the lowest number (top left corner of the Special Ops card). If a Special Op has no health points left, he will die and must be removed from the mission. In this case immediately move the mission marker down 2 steps.
Example: In case these two terrorists have been shot at and only the terrorist on the right survived since the Special Ops did not succeed in taking him out in the first strike, this terrorist may shoot back at the Special Ops who took a shot at him. Roll the die for terrorist number 70. He must roll 1, 2 or 3 to hit the Special Op, since his attack value is 3. In this case the Special Op will lose one health. The terrorist misses if he rolls 4 or more.
Casualties
When a terrorist survives the first strike from the Special Ops, he will aim at Special Ops, civilians and hostages in the following order:
- Hostages
- Civilians
- The Special Op who has attacked him
- The Special Op with the lowest number
If there are several civilians or hostages in the area, the civilian or hostage with the highest impact on the mission score will be attacked first. In case several Special Ops have attacked him, he will shoot back first at the Special Op with the lowest number on the upper left corner. A terrorist may only aim at one hostage, civilian or Special Op. Attacks on civilians and hostages will always be successful; only if the terrorist shoots at a Special Op is the die roll used to determine success.
Further Tactics in Missions: Retreat or Push Forward
After the terrorists have had their chance to shoot back, the Special Ops may decide to shoot again, retreat () or push forward ():
- Next strike: follow the instructions for "first strike".
- Retreat (): the Special Ops may move back to an adjacent secured area.
- Push forward (): only in case Special Ops are in the same area with the enemy and they cannot attack one or more enemies due to lack of aiming skill or energy, they may push forward to an adjacent area of their choice once; if the Special Ops enter the area and are confronted with new enemies, they must finish the gun fight first; they do not regain energy till the end of the round; if the Special Ops push forward to an area where other Special Ops are participating in a gun fight, they may only participate in the fight after the other Special Ops have finished their attack and the surviving enemies have returned fire; push forward may be done only once per game round.
Important: it is permitted to retreat some of the Special Ops who were in close combat and keep others in the unsecured area.
Note: the push forward strategy may be effective if the players need to pass through an area with terrorists with high defense. They cannot prevent a gunfight, but they may save energy and try to push forward in an attempt to save their skin and valuable mission time.
Other Threats or Target Cards
Hostages: one of the goals of a mission can be saving hostages which can be found in target areas; hostages must be guided to safety by Special Ops; first all terrorists in the area must be eliminated; each Special Op may lead only 1 hostage; hostages are safe when they are in one of the exit areas; Special Ops are allowed to escort hostages to safety and then return in the field to finish the mission; hostages may bring important mission points. The example hostage card shown here shows that this hostage is part of a terrorist leader mission deck (officer hat), that saving the hostage earns 0 mission points and if the hostage does not survive the mission, this will cost 1 mission point.
Civilians: the Special Ops must do their best to prevent civilian casualties (and avoid minus points) by dismantling booby traps in time, eliminating enemies before they can strike back, dismantling time bombs before they explode and minimizing friendly fire such as from hand grenades. Civilians in a secured area are being removed from the game; they return to their homes. Civilians do not engage in gunfights, but they can become a victim of enemy fire; civilians do not bring any rewards or experience, and do not have to be brought into exit areas. In this example of a civilian from the level 2 threat deck, the civilian will cost 2 mission points if she died.
Time bombs: bombs can only be dismantled by Steve the Bomb Expert; some bombs are more complex and take more energy and (possibly) more time (rounds) to dismantle, slow down the mission and increase the risk of failure. Time bombs explode when the indicated time has expired: when the mission Trigger Time is reached; all civilians, hostages and Special Ops in this area will not survive. In this example the time bomb has a complexity of 1 if encountered during a single mission (green/orange/red). If the bomb has been diffused the team earns 2 mission points and the Bomb Expert earns 3 experience (specialty). If it explodes the penalty is -1 mission point. Only when playing a campaign the complexity on level 2 and 3 (second and third mission) is relevant.
Gaining Aiming Experience
For each attempted attack on an enemy in close combat the Special Op gets +1 aiming experience, even if the attempt is unsuccessful. Shift the blue unit on the aiming skill track one position further. Some (thouger) enemies may bring additional experience or health if they are eliminated by a Special Op during close combat. If several Special Ops succeed in attacking the same enemy, they may decide who gets the bonus reward (experience or health). One option may be to distribute the experience among the Special Ops who successfully attacked the same enemy.
Increase Aiming Skill
Keep track of the aiming experience of a Special Op by moving the blue unit further on the track with the gun symbol on top. After each attack the gained experience is processed. Each Special Op starts on aiming skill level 0, which is indicated by the number on the left of the block. If the aiming experience reaches a level where the number on the left is 1, their skill level has increased to 1.
Example: The Bomb Expert's aiming skill level 1 is reached with 4 experience points. From this point on, the Bomb Expert may add 1 to his die roll to determine his attack value. If he reaches experience level 11, he may add 2 to his die roll.
Note: the maximum aiming skill is 3 for this Special Op.
Area Secured
Only when there are no hostile threats (enemies, booby traps or bombs) in an area, is the area secured and the "secured area" card is being revealed. Saved civilians will be placed on the discard pile and have no effect on the mission score. Hostages must still be taken by the Special Ops to secure the area.
Phase 4: Countdown
Shift the time marker one step to the right and on to the next time level.
Trigger Time
As soon as the time marker reaches level zero, all target cards which are face-down will be turned face-up to show where the bombs, terrorist leaders or hostages are located. Now all targets which are still in the mission and not under the protection of the Special Ops will have a negative effect on the mission outcome:
- Bombs explode, causing minus points and possible casualties affecting civilians, hostages and Special Ops present in the same area;
- Terrorist leaders escape, costing minus points;
- Hostages are executed, costing minus points.
Exception: hostages who are with a Special Op, will not be executed at the trigger time, even if they are still not at one of the exit areas. The Special Ops still have time to bring them into safety. Of course there is always the risk that they do not survive the escape route due to enemies or booby traps in unsecured areas, blocking their way out.
Phase 5: Recovery
Each Special Op regains energy: add one energy block on the position farthest to the right on the open spaces on the character card of the Special Ops. If a Special Op already has 3 energy blocks, no further energy is added.
End of Mission
Continue the game until one of the conditions for the end of a mission below has been met.
A mission may end in several ways:
Unsuccessful missions:
- The time marker has passed -3 and the team has not finished the mission;
- All of the Special Ops have been eliminated;
- The mission score reaches or exceeds -8;
- The players give up, due to lack of time or an agreed low chance of success;
- All surviving Special Ops are in the exit areas, but the mission score is negative or zero.
Successful missions:
- The mission score is positive and at least one Special Op is in an exit area. The end score of the mission also depends on the time used, the number of Special Ops who have reached safety and the number of secured areas. The scoring is explained in detail in the section Mission Scoring.
Mission Scoring
Purpose of the game: The players must succeed in a mission by achieving a positive mission score and having at least one Special Op survive the mission.
Target Cards
The Special Ops may score mission points primarily by reaching the goals of the mission: dismantling bombs, bringing the hostages to safety and taking out terrorist leaders. The mission points for achieving these goals are on the target cards, the minus points for not achieving these goals are also indicated on these cards. If no target cards are scored, a mission is bound to fail.
Survive the Mission: Special Ops
COUNTDOWN Special Ops is a cooperative game in which team work is essential to survive and to succeed in the mission. The price of losing Special Ops during the mission is high: 2 mission points for each Special Op who does not survive the mission or is not in one of the exit areas.
Time
- If the mission ends before the deadline, each step above zero gives +1 mission point;
- If the mission ends on zero, no effect;
- If the mission ends below zero, this results in -1 mission point for each step below.
Civilians
- Civilians only cost mission points if they have died during the mission.
Bonus Points: Secure the Areas
- On each mission card, the target for the number of secured areas is stated; if the team succeeds in securing this number of areas or more, it will receive a bonus of 2 mission points.
Specialty Skills
Each Special Op has the ability to shoot at the enemy. Each Special Op starts at an experience level 0 in aiming by placing the blue block on "0". Depending on their individual development path, they can increase their aiming skill. Also when playing a single mission. The specialty skill of the Special Ops provides them with special abilities.
Each Special Op (exception: the Shooter) starts on experience level 1 for their specialty skill and a white cube is placed on position "1" at the start of a mission. Only when playing a mission on level 2 and 3 or playing in campaign mode, the Special Ops may increase their special skills. In this section we explain how to use the specialty skills and how the Special Ops may develop their special skills.
1. Gustav "the Butcher" Schneider, alias Shooter
Gustav has no specialty skills. His strength is his improved learning curve when gaining aiming skills. Also Gustav is the only Special Op with the potential of an aiming skill of 6 (die roll + 6) when his experience reaches 40.
2. Bob "Hellfire" Jones, alias Buster
Special ability: Bob's specialty is to throw hand grenades into adjacent areas by expending 1 energy per throw. Bob may throw a hand grenade in an adjacent area of his choice.
Important: Throwing a hand grenade is not permitted when one or more Special Ops are present in the target area. To determine the attack value of the grenade the player who controls the Buster, rolls one die and adds +1 to the dice value. The attack value of the grenade is reduced by 1 point for each successive threat/target card (top down) that is attacked. If the attack value equals or exceeds the defense value of an enemy, this enemy is eliminated. Civilians or Hostages who get "in the line of fire" die instantly, the attack value is irrelevant. The team may lose valuable mission points if they use grenades carelessly.
Go through the pile from the top-down until a hit is not effective or the pile is depleted. Do not reveal any further cards once the effect of the grenade has worn out. With a grenade Bob may also trigger a booby trap. As soon as a booby trap card is revealed, discard the booby trap and reveal the next 1, 2 or 3 cards (depending on the number of hearts on the booby trap card). If a Civilian or Hostage is revealed, discard this card and adjust the mission score according to the minus points on the card. Any other card (enemies and bombs) will remain in the area face up. A booby trap has no effect on enemies and bombs.
How to gain experience: Bob is rewarded +1 specialty skill experience for each enemy he eliminates with his specialty. Move the white cube on the specialty skill track accordingly.
Development: If on a higher specialty skill level the Buster gets more effective since he may roll 2 or 3 dice and still adding +1 to his first hit to determine the attack value. He must reach an experience level of 8 to reach skill level 2 and experience level 20 to use skill level 3.
3. Vince "Speedy" Armstrong, alias Scout
Special ability: Vince's specialty is that he may move swiftly and secretly taking other Special Ops with him if he wishes. During game phase 2, Positioning, the Scout may cross additional borders and may optionally take another Special Op with him. Vince expends 1 energy for a secret move - with or without taking a Special Op. He expends 1 energy extra for each additional border he crosses. He may only move once per round, but may decide how far he moves - or until he runs out of energy. Take the yellow unit(s) from his character card and return them to the general stock.
How to gain experience: For each time Vince uses his specialty to take a Special Op with him on a secret move he receives +1 experience. He does not gain extra experience if he moves further than 1 border. Move the white cube on the specialty skill track accordingly.
Development: With higher skill levels Vince may take 2 or 3 Special Ops with him. He must acquire an experience level of 8 to reach skill level 2 and experience level 20 to reach specialty skill level 3.
4. Matt "Dead Eye" Nakamura, alias Sniper
Special ability: Matt's specialty is to attack the enemy from adjacent areas without the risk of getting shot at, unless he attacks a terrorist with a sniper ability. Matt must see the target to be able to attack it. Each attack costs 1 energy. If Matt has targeted a visible enemy to attack, the player controlling Matt rolls one die to determine his attack value: the die roll + his aiming skill level is the attack power. If the attack power of the sniper is equal or higher than the defense power of the enemy, the enemy is eliminated. Matt will receive +1 aiming experience for each attempt to eliminate an enemy. His aiming skill increases at a higher rate in close combat though, due to the possible experience bonus for tougher enemies.
Note: The sniper is the only Special Op who has the possibility to increase his aiming skill by using his specialty. All other Special Ops must gain aiming experience in close combat.
How to gain experience: Matt will be rewarded for using his specialty with: +1 aiming experience if he aims at a terrorist (even if he misses). If he hits the enemy, he gains an additional +1 experience for his sniping skill. Move the white cube on the specialty experience track +1 for each enemy he eliminated.
Development: With higher specialty skill levels the sniper may shoot at 2 or 3 targets at once, expending only 1 energy for each time he takes a shot at his enemies. He must acquire an experience level of 8 to reach skill level 2 and experience level 20 to reach specialty skill level 3.
5. Jill "Brains" Bradly, alias Intel
Special ability: Jill's specialty is to reveal cards in adjacent area(s); each time she uses her ability it will cost 1 energy. She may reveal face-down from the top of the pile in multiple different areas in a single round. Jill may use her specialty during the intel phase (phase 1) or during the action phase (phase 3). She may also reveal the second or third card in a pile if the cards above have already been revealed. If Jill reveals a sniper terrorist, he shoots once. One of the players rolls a die to determine if Jill is hit. If the value of the die is equal or less than the attack value of the sniper terrorist, she loses one health.
How to gain experience: For each time Jill reveals a terrorist or main target she receives +1 experience. Move the white cube on the specialty skill track accordingly.
Development: On skill level 2 Jill may reveal 2 cards by giving up 1 energy. Jill may choose to reveal cards of one pile or different piles to a total of 2 cards. On level 3 she may reveal a total of 3 face-down cards.
6. Steve "Wires" Andersen, alias Bomb Expert
Special ability: Steve's specialty is to dismantle time bombs and booby traps that have been revealed earlier. Steve may dismantle a time bomb of complexity 1 in one round by expending 1 energy. More complex bombs will take him more time and energy. Steve may also dismantle a booby trap, but only if the booby trap has been revealed before he enters the area. Diffusing a booby trap costs 1 energy.
Important: Steve cannot work on bombs when there is a gun fight, so he can only use his specialty when there are no enemies in the same area.
How to gain experience: Each bomb card shows the experience which is gained by dismantling the bomb. Dismantling a booby trap is rewarded with 1 experience for Steve. Move the white cube on the specialty skill track accordingly.
Development: On higher specialty skill level Steve may diffuse bombs using less energy. On level 2 he only needs 1 energy for a bomb with complexity level 2. For example he may diffuse a bomb with complexity 4 using only 2 energy if he has reached skill level 2.
7. Rita "Heartbeat" Garcia, alias Medic
Special ability: Rita's specialty is to heal other Special Ops when they are hurt or to provide them with extra energy:
- Rita may only heal one of her team mates if there are no enemies in the area in which she and the injured Special Op are positioned. By expending 2 energy, the injured Special Op gains one health point. Add a red cube to its character card. She cannot add a third red cube to a colleague.
- Rita may expend energy to a team mate in the same area if he or she wants it; she can help a Special Op in a gunfight by providing him or her with an energy; she expends 1 energy and the other Special Op gets 1 energy.
How to gain experience: Experience in her specialty skill increases by +2 for healing a Special Op and by +1 for providing energy to a Special Op. Move the white cube on the specialty skill track accordingly.
Development: On the next specialty skill level (level 2) Rita may help two Special Ops at once, expending only 2 energy in total to heal them both. Alternatively she may expend 1 energy to provide energy to two other Special Ops, the additional energy is taken from the supply. At level 3, she may help three other Special Ops, at a total cost of 2 energy to heal them or 1 energy to boost their energy levels. She must acquire an experience level of 8 to reach skill level 2 and experience level 20 to reach specialty skill level 3.
Traitor Mode
COUNTDOWN Special Ops may also be played with one or two traitors in the team. This way the game will be a cooperative game with an extra layer in it. The traitor mode may only be played with 3-6 players. There will always be at least one traitor in the game and with 5-6 players there may also be a second traitor.
There are 7 personal agenda cards: 5 patriot cards and 2 traitor cards.
- 3-4 players with 1 traitor: take the 7 personal agenda cards, remove 1 traitor card and put it back in the box; take the other traitor card and place it face-down on the table, now add the other (patriot) cards face-down to the pile until the total number of cards is the same as the number of players; return the extra cards to the box; shuffle the 3-4 cards and give each player a card face-down; the players may look at their card.
- 5-6 players with 1 or 2 traitors: take the 7 personal agenda cards, remove 1 traitor card and place it face-down on the table. Shuffle the rest of the cards and add cards to the traitor card until the total number of cards is exactly the same as the number of players; return the extra cards to the box; shuffle the deck of 5-6 cards and give each player a card face-down; the players may look at their card.
Aim of the Game
The aim of the game is different for those players who have received a traitor card. Their aim is to make the mission fail. At the end of a mission, there will be a "showdown" in which all players have the chance to vote on the other players if they think they are a traitor. Therefore the traitors must be careful when they operate during the game and when they attempt to sabotage the mission.
Showdown
When the mission has ended, all players have a chance to vote on the other players. The aim of the voting is to reveal the traitor(s). First reveal the undistributed personal agenda cards from the box to calculate how many traitors are in the game. This can be 1 or 2 traitors if the game is played with 5-6 players. Now all players vote on a player they believe is a traitor.
The players may discuss their choice. If the majority of players have agreed on a player, the personal agenda card of this player is revealed. If the player was a traitor, the mission score is increased by 3 points. If the player was actually a patriot, the mission score is reduced by 2 points. Resume voting until all the traitors have been revealed. If the mission score is positive the patriots win but if the mission score is zero or negative then the traitors win.
No Attacking of Special Ops
There is one important rule: it is not permitted to hurt other Special Ops directly by shooting them or by using your Specialty skill. The traitor(s) must achieve their goal by influencing the discussion and choices made by the team.
Campaign
Introduction
It is possible to play a series of missions to create a campaign. In this way the Special Ops may develop their skills and may be able to complete missions with a threat level of 2 or 3. The Special Ops will have to "fight" their way through the deck of threat cards with terrorists of increasing levels. Targets will also get more dangerous and difficult to cope with on higher levels.
Introduction of the Support Cards
The only difference between the first mission of a campaign and a single mission is that the Special Ops team gets 4 random support cards at the start of a campaign. They may use these support cards at a specific moment of their choice, but no support cards will be added during the campaign.
The players may use a support card only once, at any moment in a mission. The card is discarded directly after use.
Use of Bullet Control
The bullet control cards are used just as in a single mission and they are returned face-up at the start of each mission.
Suggested Campaigns
- Bomb missions in crowded areas: Shopping mall, Train station and the Stadium.
- Killing terrorist leaders: Warehouse, Harbor and Energy plant.
- Freedom mission: free the hostages at Cruise Ship, Metropolis and Government office.
Make Your Campaign More Challenging
Take out the top 10 or 20 threat cards from the threat pile. Now you will reach level 2 and 3 threat cards much faster and succeeding in a campaign will become much more challenging.
Advanced Play
Set up your own campaign in the following steps:
- Choose the type of mission goal for all the missions: bombs, hostages or leaders;
- Sort the locations into the three levels and shuffle the cards for each level separately; now take one location card each from level 1, level 2 and level 3; put them in a pile and show the top location card (level 1);
Game Overview
The players choose a type of mission: leaders, bombs or hostages and set up the missions as above. The level 1 location is prepared as in the basic game and the players choose their Special Ops team. In a campaign, the Special Ops receive some back up with 4 support cards at the start of the first mission. If the first mission is successful, they will proceed to the selected level 2 mission with the same goal. Prepare the threat deck as explained at Threat deck preparation. If this mission is also successful, the third and last level 3 mission is played. Each support card may be used only once, to help the team at difficult moments.
Note: succeeding in a campaign is not easy and we advise you not to start with a campaign until you have more experience with the game.
Preparing the Team for a Campaign
- Use the set up for the basic game;
- Decide which Special Ops you want to take on the campaign. IMPORTANT: the team cannot be changed during a campaign;
- Place a white unit on the first position of the specialty skill development track: "1" of each Special Op;
- Add the support cards to the game: shuffle the deck of support cards and place the deck face-down; now draw 4 support cards and place them face-up next to the mission deck.
After Your First Campaign Mission
If your first campaign mission is successful, take your Special Ops with you to the next mission. Before you start your next mission:
- Recovery: After a mission the Special Ops regain health and energy. If a Special Op has less than 2 health, his health is refilled to 2 health points. This works the same for energy blocks;
- Threat deck preparation: Retrieve all the threat cards from the previous mission that have not been encountered (face-down) and any terrorists that have not been overcome. Then add new cards from the threat deck so the number total of threat cards is the same as indicated by the number in the left corner of the location card. Now shuffle these cards and distribute them to prepare the mission in accordance with the location card.
Important: Play the right level. When you play the first mission of a campaign (or a scenario), level 1 on the target cards is valid. For the second mission of a campaign the level 2 values of the targets are valid and for the third mission use the level 3 values. The threat cards encountered come from the threat deck, of which the level of difficulty increases "automatically". If your first mission of a campaign (or scenario) is successful, you may play your second mission. Now you move up to level 2 on the target cards. The threat deck will have level 1 and 2 threat cards now. The third and last mission of a campaign (or scenario) will be played on target level 3 and the threat cards encountered is a mixture of level 1, 2 and 3.
Scenario's
Scenario Play
If you would like to play specific pre-made scenario's, we suggest three specific campaigns. After you have finished the set up as below, choose your team and deploy the Special Ops to start your scenario.
1. Operation Ace
This operation's main goal is to eliminate terrorist cells in a warehouse, take out terrorist leaders in a foreign terrorist camp and wipe out a hidden laboratory in an abandoned energy plant. Locate the terrorist leaders and take them out.
Locations: Select the location cards below and put the level 1 location on top, face-up and set up the first mission location:
- Level 1: Warehouse
- Level 2: Terrorist camp
- Level 3: Energy plant
Threat level: Operation Ace is played in difficult circumstances. Prepare the threat deck as in a campaign but remove the top 5 cards from the deck and place them inside the box.
2. Operation Bomberjack
This operation's main goal is to locate and dismantle the bombs hidden in different locations with the potential for many civilian casualties. You start your mission in a shopping mall, before moving on to find the bombs at a train station and then getting to the packed stadium in time to defuse the hidden bombs and save the huge crowd of sports fans who have gathered for the games.
Locations: Select the location cards below and put the level 1 location on top, face-up and set up the first mission location:
- Level 1: Shopping Mall
- Level 2: Train station
- Level 3: Stadium
Threat level: Operation Bomberjack is played under very difficult circumstances. Prepare the threat deck as in a campaign but remove the top 10 cards from the deck and place them inside the box.
3. Operation Civilization
This operation's main goal is to free hostages from several locations packed with innocent citizens. Make sure that you act fast and take out the terrorists first, to prevent heavy casualties and mission failure. Help the hostages on a medium sized cruise ship, and then penetrate the metropolis to save the civilians and hostages. Finally save the President from assassination by terrorists. If you succeeded in this campaign you are a real hero.
Locations: Select the location cards below and put the level 1 location on top, face-up and set up the first mission location:
- Level 1: Cruise ship
- Level 2: Metropolis
- Level 3: Government building
Threat level: Operation Civilization is played in extreme circumstances. The terrorists have become very strong and you have to prevent total chaos by saving the President from the deadly attack. Prepare the threat deck as in a campaign but remove the top 15 cards from the deck and place them inside the box. Now the number of level 1 threat cards is only 20!
Support Cards
Support card description:
- Adrenaline Rush: All Special Ops gain 1 Energy unit. If a Special Op already has 3 units he or she doesn't gain an extra unit.
- Big Gun: 1 Special Op has +3 attack in close combat for 1 attack, activate this card before you roll the die.
- Blow Out: Remove 1 face-up terrorist card on an area of your choice.
- Bulletproof Vest: All terrorists and/or terrorist leaders in 1 single area have -1 attack until the end of this round.
- Energy Burst: 1 Special Op can attack 2 terrorists and/or terrorist leaders at the same time, using only 1 energy. He or she rolls 1 die for both terrorists and/or terrorist leaders.
- First Aid Kit: Heal 1 Special Op. Take 1 Health unit from the supply. This card may only be used on a Special Op who was hit and he or she must retreat to gain the unit.
- Grenade: 1 Special Op may throw a grenade in an adjacent area. Roll a die and add the aiming skill of the Special Op to determine the damage that will be dealt. No EXP is gained from this action.
- Helicopter Dropping: Start the mission on an area of your choice, this card may only be used at the start of a mission.
- Infrared Vision: Each Special Op has +1 attack until the end of this round.
- Shield: Block an attack of 1 terrorist or terrorist leader. Choose the terrorist or terrorist leader before the die roll.
- Sniper Rifle: 1 Special Op can shoot from an adjacent area until the end of this round, only 1 aiming EXP is gained for each eliminated terrorist.
Appendix: Symbols
The symbols table on the final page of the printed rules.
- Special Op: Indicates that this card is a Special Op. This symbol is also on 5 of the Agenda cards.
- Intel: This symbol is printed on the Intel Agent. The Intel Agent reveals cards in 1 or more adjacent area(s), each reveal action costs 1 Energy.
- Bomb: This symbol refers to time bombs, but also refers to the skill of the Bomb Expert to diffuse bombs. The target deck "bombs" also holds this symbol.
- Grenade: This symbol is printed on the Buster. The Buster can throw a grenade into an adjacent area. Roll the die (or dice) to determine the attack value +1 of the grenade.
- Heal: This symbol is printed on the Medic. The Medic heals Special Ops who get injured or gives energy to Special Ops.
- Snipe: This symbol is printed on the Sniper and Terrorists. The Sniper can attack from adjacent areas. Terrorists with Snipe can attack the Sniper from adjacent areas and they attack the Intel Agent if revealed by her.
- Camouflage: This symbol is printed on the Scout. The Scout may move secretly and take one other Special Op with him. He may also cross additional area borders.
- Health: This indicates how much Health the Special Op has. Some Terrorists also have this symbol. It also refers to the impact of a booby trap.
- Energy: This indicates the amount of Energy the Special Op has. This symbol is also printed on Bombs, the number on top of it indicates how much Energy it takes to dismantle the Bomb.
- Attack: This is the attack value of the Terrorist or Leader. It also indicates the Aiming skill value of the Special Ops.