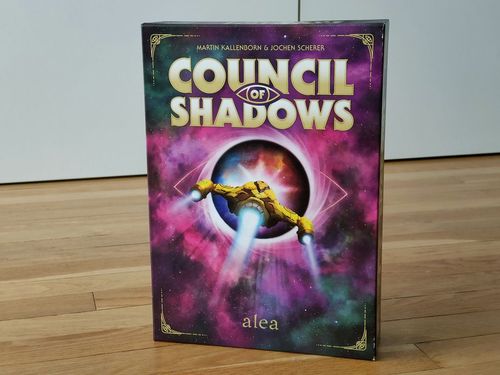
Council of Shadows
Council of Shadows Rulebook
Table of Contents
Table of Contents
Gameplay Overview
Over a number of rounds, players will travel to new galaxies to collect enough Energy that not only covers their own costs, but goes far beyond them. Choose carefully whether you will perform powerful actions that cost large amounts of Energy, or if you will use more subtle and strategic tactics to win.
If players collect more Energy than they need, they advance in Dark Tech levels and get closer to earning a seat on the Council. Once a player reaches the third and final Dark Tech level, the game ends and whoever has the highest Dark Tech level wins.
Game Materials
The Game board is printed on both sides. The front side is for three or four players (indicated by 3/4), and the back side is for two players or solo play.
- 1 Game board, printed on both sides
- 1 Council of Shadows placard
- 31 Solar System tiles (10 x Parsec 1, 11 x Parsec 2, 10 x Parsec 3)
- 4 Order tiles
- 2 Panels for additional action spaces
- 25 Artificial Intelligence (AI) cards
- 16 Dark Tech skill cards (8 x Level I, 8 x Level II)
- 27 Bonus cards (18 x light, 9 x dark)
- 18 Automa cards (for the single-player game)
- 55 Gemstones (20 x coal, 20 x gold, 15 x crystal)
- 2 Covering screens (for a three-person game)
- 1 Throne (assembled from two pieces)
- 6 Leaders (Module 2)
- 1 Screen (assembled from three parts)
- 3 Space Station tiles (Module 1)
- 6 Action cards for each civilization
The board shows three Distance Ranges — Parsec 1, Parsec 2, and Parsec 3 — an Energy Bar (0-100), a playing field for the Solar System tiles, 10 Galaxies (each with two to five fields for Solar Systems), a Galaxy Energy Yield indicator, 31 fields for the Solar Systems, and a starting spot for the Energy Bar. The Council of Shadows placard has a Fuel gauge (20-100).
Each Player Receives:
- 1 Panel
- 1 deck of 6 Action cards
- 1 Consumption marker
- 1 Energy marker
- 1 Player marker
- 30 Cubes
- 1 Screen
- 2 Gemstones (1 Coal and 1 Gold)
Note: Should game materials run out, find a suitable substitute.
Game Preparation (for 3 Players)
Put the game board together and place the side with 3/4 facing up.
Sort the Gemstones by color in 3 separate piles as a general supply.
Sort the 31 Solar System tiles into 3 stacks according to their location (Parsec 1, 2, or 3). Shuffle each stack separately and place each face down on the appropriate space.
Take the top 2 tiles from the Parsec 1 stack and place them face up on the two gray spaces labeled Parvus Corta Galaxy.
Shuffle the 25 AI cards and place 2 rows of 4 cards face up next to the game board. Place the rest of the AI cards face down next to them for a draw pile.
Place the Council of Shadows placard above the Game board. Shuffle the 8 Level I Dark Tech cards and the 8 Level II Dark Tech cards as 2 separate piles and place them face down on the appropriate spaces on the board. Remove the top 2 cards from each pile and put them back in the box without looking at them. There should now be 6 face-down cards on each pile.
Shuffle the 18 Light Bonus cards and place them in a face-down pile next to the game board.
Prepare the Dark Bonus cards: In a three-player game, put the 2 cards with the 4 symbol back into the box. If playing without Module 1, put the card with the symbol back in the box. Shuffle the remaining Dark Bonus cards and deal 1 Dark Bonus card to each player. Players may look at their own bonus card secretly at any time. Return the remaining Dark Bonus cards to the box without looking at them.
Each player chooses a civilization and receives the following items in that civilization's designated color:
- 1 Panel
- 1 deck of 6 Action cards
- 1 Consumption marker
- 1 Energy marker
- 30 Cubes
- 1 Player marker
- 1 Screen
- 2 Gemstones (1 Coal and 1 Gold)
Players place their Consumption marker on space 20 of the corresponding track. These markers can never fall below 20 (even through special effects) and never rise above 100.
Take the Turn Order tiles equal to the number of players (2 players: 1 and 2; 3 players 1, 2, and 3; 4 players all 4). Any Turn Order Tiles not used are placed back in the box. Pass the tiles out randomly face down. All players flip them at the same time. The player with the number 1 tile places their Energy marker on the 0 spot and turns the marker so the image of the Council of Shadows faces up. Each player follows, playing their Energy marker on the next higher spot. The player with the number 2 tile places their Energy marker on the 1 spot, and so on.
Only in a three-player game: Take the 2 Cover plates and use them to cover the turquoise-colored galaxy labeled Tennant Strand (9/4) and the yellow galaxy labeled Heaven's Fence (11/6); these two galaxies are not used in a three-player game.
Leave the following items in the box: Automa cards, the Space Stations, the additional Action spaces, and the Leaders. Players will only need these items when using the special rules (see below).
Types of Planets
- Blue (earth-like planets)
- Brown (desert planets)
- Red (volcanic planets)
A player's ability to adapt to different planetary environments will determine which planets they can colonize. At first, players can only colonize earth-like planets (blue). However, with upgrades, players can establish colonies on desert planets (brown) or volcano planets (red). You may choose which upgrades you will buy first.
Stacking cubes is now permitted — either on a player's own cubes or those of their opponents.
With the colony expansion, you may immediately place your colony cubes on top of your own cubes or on a different player's cubes, but only to a maximum height of three cubes. Without this expansion, you may only settle on empty planets. (See "Settlement")
Gameplay
The game is played in several rounds. Each round consists of three phases:
- Buying
- Planning/Ordering
- Actions (and scoring)
The player with the Turn Order tile 1 begins phase 1. When finished, the player with the turn order tile 2 completes phase 1, etc., until all players have completed phase 1. (See also the player markers below the "Council of Shadows" placard).
Phase 1: Buy
In each buying phase, the player may carry out up to three purchase actions. With each purchase action, the player can either collect 1 AI card from the "Buy" display or make one upgrade to their board. For example, the player can buy two AI cards and make one upgrade for your board on a single turn during Phase I.
Players can spend three types of Gemstones with ascending value: coal, gold, and crystal. Higher value Gemstones can always be used as a substitute for lower value Gemstones, but in these cases, players do not receive any change. The player can pay with the exact cost to buy this card, but you could also buy the card with a higher-value Gemstone… When players overpay, they do not receive any change.
Buying AI Cards: Choose an AI card from the designated area and pay the cost indicated at the bottom left corner. Place the Gemstones in their general piles and take the card – it is now available for the player to use like any of their action cards. Immediately draw a new AI card from the deck to replace the AI card that was just purchased. Players pay the purchase price, then add the card to their hand. Players may purchase multiple AI cards per turn.
Each AI card shows a Consumption value, an Action illustration, a Cost to purchase, and (for some AI cards) a Special ability.
Buying Upgrades for the Board: On your board, the players will find a total of 13 upgrades. Four give one-time bonuses and the other nine give ongoing bonuses. To buy an upgrade, pay the cost indicated (shown above or sometimes to the side of the card). Players then put one of their cubes in the corresponding field on their board, where it stays until the end of the game. Players can only buy each upgrade once per game. Players pay the purchase price shown, then place a cube in the corresponding field. Players can purchase multiple upgrades per turn.
Extra Energy: These special projects give you the specified amount of Energy once and immediately. Advance your Energy marker around the board accordingly.
Expanded reach: Upgrades allow players to increase the range of their action spaces. Initially, players can only perform their actions on Galaxies within Parsec 1. With upgrades, players can advance into Galaxies within Parsec 2 and Parsec 3. You must upgrade to Parsec 2 in order to upgrade to Parsec 3. If players buy this upgrade, they choose one of their Action spaces. Place a cube on the next space in the direction of the arrow, pay the costs above it, and receive one Energy. With an action field that is expanded to Parsec 3, players can carry out actions in all three ranges.
If a player cannot or does not want to carry out any further buying actions, the next player takes their turn. When everyone has completed "Phase 1: Buying", "Phase 2: Planning" begins.
Phase 2: Planning and Ordering (simultaneously)
Players should place their screens in front of their boards and plan their Actions. The screens should prevent players from seeing the plans of other players. However, players can agree at the beginning of the game to play without screens.
In the first round of the game, the Action spaces on each player's board are free. Each player chooses 3 Action cards from their hand and places one of them on one of their three action spaces (placing on top of other cards is also allowed).
In later rounds, some cards will cover a player's Action spaces. Players can also place cards from their hand on Action cards that are already on display, but only the top card counts. The cards already on display can neither be moved nor returned to the player's hand. When all players have finished planning, remove the screens.
Phase 3: Actions and Scoring
In the new turn order, the players carry out the actions on their cards, always all three actions, and always from left to right (take actions from left to right).
Each action is fundamentally connected to the range of the action field on which it lies (Parsec 1, 2, or 3), and on the applicable adaptability of the planet (blue, brown, red).
At the beginning of the game – when they have not yet bought any upgrades – a player may only carry out actions on earth-like planets (blue) and in the Parsec 1 range.
Symbols for Start Cards: Earth-like planet (blue), Desert planet (brown), Volcano planet (red), Distance, Energy Yield.
Discover: Choose one pile in the range of the Action field (Parsec 1-3) and draw the top 2 Solar System tiles. Choose 1 of the two tiles and place it on an empty space of your choice in the chosen range. Place the remaining tile face-down underneath the pile. Now players may either place a Colony directly on the recently-placed tile (as the player's adaptability allows), or players may collect the resources from this solar system once by paying the appropriate Gemstones or by spending the required Energy. If players chose to collect resources, they do not need to consider their adaptability. Bringing new Solar Systems into the game, then either settling or collecting resources. (Pay attention to the range!)
Collecting Gemstones: Collect the three pictured Gemstones from the general supply area.
Upgrading Gemstones: Players may upgrade one coal Gemstone to a gold Gemstone or one gold Gemstone to a crystal Gemstone.
Settling/Founding Colonies: Players place one or two cubes (stacked) to form a "colony" on an empty planet of a Solar System (unless you have the Colony Expansion). Pay attention to the range of the Action field and adaptability. No more than three cubes are allowed to be stacked on each other on a single planet.
Collecting Resources: A player may collect up to two resources. To collect a planet's resources, players must own at least one colony there. For every colony (represented by a cube in this Solar System), players may collect one resource from this Solar System. The range of the action field (Parsec 1-3) is crucial. Players may collect resources with their cubes only once per Action card.
Note: When you collect resources, you do not remove any cubes!
After players have completed their Actions, they must slide all of the Action cards they used one space to the right. Any cards that are slid out may be returned to the player's hand and they can immediately be used again. After players have slid the cards to the right, the left Action field is empty. Finally, players slide all cards one space to the right and take the last card into their hand.
Consumption points are now recorded, and a new playing order determined. Each player pays the costs on the upper left of all the Action cards they played and records them by moving their marker forward that number of spaces. Whoever in the current planning phase has the highest Consumption (not necessarily their overall total!) receives the Turn Order tile with the 1. The player with the second highest Consumption receives the tile with the 2, and so on. In case of a tie, the person who is farthest along on the scorecard receives the tile. If the players are still tied, the player who arrived at the spot first (the player whose marker is on the bottom) receives the tile.
At the very beginning of the game, when all of the players' Energy markers are lined up next to each other on the starting spot (numbered 0), the player whose marker is beneath the largest number gets the Turn Order tile with the 1.
When your Consumption marker passes 100, further steps are not counted. For determining the turn order, use only the consumption numbers for that turn.
Example: Cecelia (red) through playing her action cards has a Consumption number of 12 (6+3+3) and accordingly advances her marker 12 spaces. With this, she has the highest consumption in this round (+12 to 45). She receives the Turn Order tile 1. Dario (violet) has the second most (+6 to 47) and accordingly receives the 2.
Assessment
Every galaxy in which there is at least one colony can be assessed a maximum of once. Players now have the ability to assess their Galaxies. Players assess each Galaxy in which they have at least one Colony exactly once. If they have more colonies (cubes) than anyone else in that galaxy (a simple majority), they receive the higher payout. If players have the same number or fewer, players receive the lower payout.
Majority (>): higher number. Minority (≤): lower number.
To assess a Galaxy, players remove 1 cube of their choice from the Galaxy. They then receive the corresponding Energy and 1 Light Bonus card from the deck if one is available, which they may look at and place face down in front of them.
Note: Each player may own a maximum of 4 Bonus cards (Light and Dark). If players receive a fifth card, they may look at it to see if they would like to keep it. The player may then place it or another one of their cards at the bottom of the deck.
Example: Dario (violet) owns a majority in the blue Galaxy. He removes 1 of his two cubes of choice and receives Eight Energy and a Light Bonus card. He can assess other galaxies, but not the blue one in this round anymore. In the green Galaxy, Dario has the same number of cubes as Cecelia (red) and fewer than Anna (blue). Dario can, however, remove his cube to receive 4 Energy and a Light Bonus card.
Tip: Cubes are only removed during assessments, and at no other time.
After each player has ended the third phase, the current round ends. The new round starts immediately with the next buying phase. The current turn order remains intact.
Dark Tech
Whoever reaches or overtakes their Consumption marker with their Energy marker rises one Dark Tech level and resets their Energy marker to 0 (+ any extra Energy).
If a player manages to collect enough Energy that they reach their Consumption marker with their Energy marker, then they achieve the next Dark Tech level. The player finishes the current phase in which they reached the Consumption marker and then they set their Energy marker back at zero and turn the marker to indicate their new Dark Tech level (so that is face up for Level I, etc.).
For example, if a player has more Energy than was required when they reset their Energy marker, they would put their marker back at zero and then move it forward the remaining spaces. If the player reaches their Consumption marker again, then they rise another level.
Example: The player had their Consumption marker (on 56) and reached it with their Energy marker (now on 63). They set their Energy marker on seven (63-56 = 7) and begin on the next Dark Tech level.
As a reward for this Energy donation to the Council of Shadows, the player receives a one-time Dark Tech ability from the Council when they level up to Level I or Level II. At the end of the current phase in which the player reaches the new Dark Tech level (and only then), the player takes one of the Dark Tech cards from the correct deck, carries out its effect(s), and places it face up in front of them. The first time, they should choose from Deck I, the second time from Deck II. When they reach the 3rd Dark Tech level, this marks the end of the game and they do not receive any more Dark Tech cards, but rather the Throne, which they place in front of them.
Players advance from Dark Tech Level 0 to Level I, then to Level II, and finally to Level III. (The end of the game)
Any other players that have a lower Dark Tech level than the player who just leveled up receive Gemstones. Once a player has reached Dark Tech Level I, all players who have not yet reached Dark Tech Level I receive 1 Gemstone. If the player reached Dark Tech Level II, then everyone at Dark Tech Level I receives 1 Gemstone and all those without any level receive 1 Gemstone and 1 Gemstone (of higher value). Players draw 1 Dark Tech Level I card or 1 Dark Tech Level II card accordingly; those players who are behind them receive Gemstones.
Example: Anna is at Dark Tech Level 0. She receives 5 Energy through an assessment in the red galaxy (She had fewer cubes there than the other player). She reaches 41 and overtakes her Consumption marker at 40. She could conduct further assessments, but decides to stop. She places her Energy marker back on space 1 on the board, turns it to Level I and so receives a Dark Tech card from Deck I.
If a player achieves a new Dark Tech level twice during Phase 2 (their Energy overtakes their Consumption twice), at the end of the phase, both actions will be carried out chronologically, one after the other. You cannot reach a new Dark Tech level through negative Consumption in the planning phase (AI cards). At no time may the Consumption marker reach the Energy marker by being reduced. It always remains at least one field above the Energy marker.
The End of the Game
As soon as someone reaches Dark Tech Level III, play the current round to the end. If one of the players reaches Dark Tech Level III, they receive the Throne, and the current round is still played out to the end. At this point the game comes to an end. This makes it possible for the other players to raise their Dark Tech to Level III.
After the current round has ended for everyone, the final scoring occurs in which more Energy can be gained. The player with the Throne begins.
Final Scoring Round
Each player receives Energy for:
- The remaining Gemstones (1-3): coal = 1, gold = 2, crystal = 3.
- Their remaining AI cards: 2 Energy each (starting cards do not count).
- Their remaining Bonus cards: see the listed Energy (page 22).
If a player manages to achieve a new Dark Tech level during the final scoring round, they should adjust their Energy marker to reflect their new level. They do not receive Dark Tech cards, and Gemstones are not given out to the other players who are behind.
Whoever has the highest Dark Tech level wins and receives the Throne. If more than one player achieves the same level, the player wins who has the most Energy between the two of them. If there is still a tie, the majority of cubes on the board acts as a tie breaker. If there is still a tie, then there is more than one winner.
Expansions
Module 1: Space Stations
At the beginning of the game, each player receives three Space Stations in their color and sets them next to their board. Shuffle the Dark Bonus cards shown below into the corresponding deck at the beginning of the game.
Like AI cards and board upgrades, Space Stations can be bought during the Buying phase (a part of the Buying phase; the costs are printed on the left). Their costs are listed on the left side of the card. Each Space Station has a different effect on the Galaxy in which it is built (see below).
Place the Space Station on an empty Space Station field in the desired Galaxy. It stays there until the end of the game. It cannot be removed or switched out. Each Galaxy can only contain one space station. Whoever wants to build a Space Station in a Galaxy must have at least one Colony in that Galaxy at the time.
Collecting Resources with Stations: During the Assessment phase, whether or not the player assesses other places, the player may collect a resource from one of the Solar Systems of their choosing in which they have at least one Colony.
Harvesting with Stations: Players may harvest this Galaxy without having to remove one of their cubes. They still must have at least one Colony there.
Colonizing Station: Players place 3 of their cubes directly on the Space Station. They will add these cubes to their other Colony cubes when determining majorities.
Module 2: Leaders
Whether or not the players use Module 1, the players should take the six Leaders at the start of the game. After players determine the game's initial play order, whoever has the highest Turn Order token should take all six Leaders and choose one of them. The remainder should go to the next person in line and so forth until the last person (with the turn order token 1) has selected a Leader. Place any remaining Leaders back in the box. At the beginning of the game, select them in reverse turn order.
- Buteo — At the beginning, raise the player's Consumption by 10 (=30). Every round during a player's harvest phase, they may collect one resource in a range of their choice. As with a regular harvesting action, players must own a colony in the solar system in which they wish to harvest.
- Zoe — At the beginning, raise the player's Consumption by 14 (=34). In each Buying phase, players may establish one Colony according to their allowed moves (blue, brown, red) in the range of their choice. This is not a buying action.
- Ava — At the beginning, raise the player's Consumption by 8 (=28). Take the extra Action field and place it to the right of the player's board. Action cards now move from the 3rd space to the 4th space before they come back to the player's hand. Place a cube on Parsec 1. Players can also expand their range from this extra Action field.
- Casares — At the beginning, raise the player's Consumption by 6 (=26). If players have 3 or more colonies in a galaxy, they do not have to remove a cube when they harvest there. With Casares as a Leader, players may not buy the AI cards that allow them to settle with a 3-cube tower.
- S3E3 — At the beginning, raise the player's Consumption by 7 (=27). Before each harvest, count all of the player's Colonies on the board and move their Energy marker forward by that number. Players are allowed to harvest.
- Breish — At the beginning, raise the player's consumption by 5 (=25). The player starts with 8 Energy. When harvesting, if there is a tie in the galaxy, this player still receives the higher yield.
The Game for Four or Two Players
With four players, the players should use the front side of the game board (3/4). The players should use all of the Dark Bonus cards that show (3/4) on them and all four turn order tokens.
With two players, the players should use the back side of the board (2). At the beginning of the game, place the four Bonus cards with the yellow, turquoise, brown, and beige Galaxies back in the box, as well as turn order tokens 3 and 4.
Example for a Turn (two players)
Bernd is chosen as player one. First, he buys an AI card (a new AI card is then drawn) and builds out his board. Now it is Cecilia's turn. She also buys an AI card. She collects a Gold Gemstone for the next round.
Both of them then play their action cards behind their screens. Afterwards, players show their actions and record the Consumption. Bernd moves his Consumption marker 12 spaces ahead and Cecilia only 4. Bernd gets the 1st position tile, because he consumed more than Cecilia (who gets the 2nd position tile.)
Bernd begins Phase 3. He conducts his three actions from left to right.
First, he reveals his cards. While he has already upgraded the 1st action field to Parsec 2, he may reveal up to the Parsec 2 area. He draws two Solar System tokens from the Parsec 2 deck, selects one he wants, and puts the other one back under the deck. He places his selected token face up on a field of his choice in the Parsec 2 range (and only there). Afterwards, he may decide whether he wants to place one cube on a blue planet or if he wants to harvest the resources of the Solar System (then he does not place a cube). He chooses to place a cube on the token he just laid down.
As his second action, he may place a tower of two cubes on an open blue planet of his choice in the Parsec 1 range.
As his third action, he may harvest resources in the Parsec 1 range. While he has only placed the two cubes from his second action in Parsec 1, he harvests the resources of the solar system twice (no cubes are removed). Afterwards, all of his actions have ended, and he slides all three Action cards one space to the right. He takes the harvesting card back in his hand.
At the end of the third phase, he may still decide, whether or not he wants to assess. He decides to assess both galaxies in which he has Colonies. He must remove a cube from each. Both times, he is the only one with a colony in the Galaxy and so he has the majority: he gets the higher payout. He moves his Energy marker forward accordingly. Afterwards, his turn is over.
Then it is Cecelia's turn to carry out her actions from left to right.
First, she reveals her actions in the Parsec 1 range: She takes two Solar System tiles from the Parsec 1 deck, puts one back and places the other one face up on an open space in Parsec 1. She also decides to place a cube on it.
As her second action, she places her newly-bought AI card. This card does not actually allow an action, but it does limit her Consumption for this round to 2.
As her third action, she is allowed to place one cube in range 1. While she has not yet upgraded anything, she is only allowed to place this on an open blue planet and not on top of other cubes. She decides to settle again in the same Galaxy in which she discovered a planet with her first action.
After she has completed her actions, she slides all of her cards one field to the right and takes the card that was slid off the board back into her hand. While she only has Colonies in one Galaxy, she can only assess this Galaxy. She takes one cube from this Galaxy back and moves her Energy marker ahead accordingly.
A new round begins, once again with the buying phase. Bernd begins…
The Automa Mode
Play against the AI. Play the corresponding AI cards; otherwise it is similar to a two-person game.
In the Automa game, the player should use the two-person gameboard (2). You are playing against the AI and those who have made themselves subject to them. This means that you may only choose from among the following peoples: Tretans, Shengar, or Humans. Prepare the blue cubes for the AI and place the Energy markers and Consumption markers on the starting positions. Also prepare the 1st and 2nd turn order tokens. Take all of the 16 Automa-cards (with the golden background), sort them by the Dark Tech levels on their backs into three piles, shuffle them separately, and place them face down.
Note: The two cards shown with the silver backgrounds are Automa cards and should only be used when you are already a bit more experienced with the Automa version. In this case, the players should simply shuffle these in with their corresponding decks.
The game is played out according to the base rules. Follow the rules of the base game. After a player has bought and planned their turn, reveal the top card of the Automa deck (which, at the beginning of the game, will be a card from Dark Tech Level I). The order of turns is determined as usual by the current highest Consumption value. When it is the AI's turn, carry out the actions for the AI one after another from top to bottom. Always carry out the left action. When an action on the left is not possible to carry out, use the alternative on the right instead. (If this is also not possible, take no action.) If that also does not work, skip this action. When the AI is creating settlements and more than one Planet is available, you may choose a place, even if it benefits you.
As soon as the AI reaches a new Dark Tech level, draw from the next highest deck for them. You do not receive anything when the AI obtains a new level.
The AI also ends the game if they reach Dark Tech Level III. They also participate in the final scoring round, but since they do not have extra Gemstones or AI cards that they have bought, they only gain points from all of their Light Bonus cards (they do not need to keep to the limit of four!). For the final scoring round, only count up all of the Light Bonus cards the AI has gathered.
Example for Automa Cards
Consumption Value (here 11).
Action 1 and Alternative — The AI settles a desert planet with a 2-cube tower in the Parsec 2 range of the blue Galaxy. If there is no brown planet available, they instead explore (in the blue Galaxy) and then settle on an available volcano planet on the new board with a 2-cube tower.
Action 2 and Alternative — The AI settles on a desert planet in the orange galaxy. If no brown planet is available there, they instead explore in the orange galaxy and settle there with a 2-cube tower on a free desert planet on the new board.
Action 3, here: no alternative — The AI receives 6 Energy.
Assessment — The AI assesses all galaxies in which they are represented. The player may decide which cube should be removed if there is more than one.
Reading the Automa card icons:
- The AI settles one Colony or a 2-block tower on an earth-like planet in Parsec 2.
- This is the Consumption value of the AI. Move their Consumption marker forward accordingly. These values lie between -5 and 15.
- Remove the 4 fulfilled AI cards and replace them with new ones from the deck.
- The AI explores first and then settles with one colony on an earth-like planet in Parsec 2.
- The AI explores first and then settles with three colonies on a volcano planet in Parsec 3.
- The AI receives X Energy. (here 6)
- The AI settles with a 2-block tower on a desert planet in Parsec 2.
- The AI assesses all of their Galaxies, in which they have the majority.
- The AI explores first in Parsec 2 and then settles with a 2-block tower on a desert planet on this board.
- The AI assesses all of their Galaxies, in which she have at least one Colony.
Glossary of the Cards
Dark Tech Level I
New Stargate — Take the extra Action field. This Action field is immediately upgraded to Parsec 3. Place it to the right of the player's board. The Action cards are slid now from the 3rd to the new 4th field, and only then from the 4th field into the player's hand. Immediately collect one Gold Gemstone. Note: If a player also has the Leader Ava, they now have five Action fields.
Gemstone Upgrade — Whenever a player receives Gemstones while collecting resources, they collect a Gemstone that is one level higher than they would otherwise collect (instead of a Coal, take a Gold, and instead of the Gold, take a Crystal. Crystal Gemstones cannot be upgraded.) Immediately collect one Crystal Gemstone.
The Explorer Folk — Whenever a player discovers a Solar System and establishes a Colony on it, a player may place an additional cube there beyond what the Action card allows. (For example: instead of one cube, place a tower of two cubes). The player still cannot build a tower higher than three cubes.
Scientific Settlements — A player may immediately establish one Colony (regardless of the planet or distance). The player may build there regardless of your upgrades. Additionally, the player receives one resource from this Solar System.
Empire — Before deciding to Assess, the player receives 3 Energy for each Galaxy in which they have the simple majority. They may then decide to assess as normal.
Flexible Civilization Planning — Immediately upgrade (for free) all of the ranges of the player's Action fields to Parsec 2 or Parsec 3 if they are already at Parsec 2. For each upgrade, move your Energy marker forward by one.
Energy Saver — Limit the player's Consumption immediately to 7 for one time only.
World Traveler — From now on, whenever the player harvests, they also harvest from the Colonies of other players within their range. Immediately collect one Crystal Gemstone.
Dark Tech Level II
Resourceful Folk — A player may immediately harvest twice (regardless of which range they are in). This ability is only usable once per game.
Perpetual Motion — A player's Consumption value in every following round is 0. (Regardless of which action cards they play) This is also valid for determining turn order, which means the player will likely always be the last to play.
Feudalism — Whether or not a player assesses, they receive 3 Energy beforehand for each Solar System in which they have the simple majority.
Journey of Discovery — A player may immediately carry out one discovery Action in a Solar System they discover and then either: 1) place a 2 cube tower (regardless on which planet and in which range; as long as they can build on top of it. The player does not worry about their upgrades.) or 2) harvest that Solar System twice.
Information Breakthrough — Collect (for free) an AI card of your choice and put a new one in its place. Then collect the top card from the Light Bonus card deck. Additionally, the player may collect one Crystal Gemstone.
Dominate Folk — A player may immediately assess two different Galaxies (exactly like a normal assessment), including the majority payout and removing one cube apiece.
Energy Boost — A player receives a one-time Energy boost of 10 Energy.
Secondary Settlement — A player may immediately establish two colonies, regardless of which range they are in; as long as they can build on top of it. They do not worry about their upgrades.
Bonus Cards
- A player receives 3 Energy plus 1 Energy for each pictured Gemstone (example shows Gold) that the player still has at the end.
- A player receives 3 Energy plus 1 Energy for each of their cubes that match the pictured type of planet (example shows blue).
- Divide a player's total consumption value by 10 and round down. They receive this amount of Energy.
- A player receives 1 Energy plus 1 Energy for each cube on their board, including the secondary boards.
- A player receives 4 Energy plus 1 Energy for each of their cubes in the pictured area. (example shows Parsec 1).
- A player receives 1 Energy plus 2 extra Energy for each of their AI cards – not including their starting cards (four cards instead of the usual two).
- A player receives 1 Energy plus 2 Energy for each Light Bonus card, including this one.
- A player receives 2 Energy plus 4 Energy for each of their built Space Stations. Only when playing with Module 1.
- A player receives 3 Energy plus 6 Energy when they have the majority in this galaxy (example shows gray). On the other hand, a player receives 3 Energy if they have at least one Colony in the pictured Galaxy.
- A player receives 5 Energy.
The Action Cards (Selection)
- Place 1 cube (if the player is able) and harvest once where you have a cube. This must be within the correct range.
- Place a tower of two cubes on an available planet of the player's choice in a range of their choice. If they have the Colony expansion, they may place single cubes.
- Place a tower of three cubes on an available planet according to the player's adaptability and the range of the action slot. No more than three cubes are allowed to stand on a planet at once.
- A player may either place a cube on a planet (paying attention to the adaptability, Colony expansion, and range) or the player may discover a Solar System and set a cube on it, or the player may harvest the resources of the newly-played Solar System.
- A player discovers a solar system and places either two cubes on a planet (pay attention to the adaptability, Colony expansion, and range) or they may harvest its resources twice.
- Discover a solar system (regardless of action range) and place a cube there (regardless of adaptability). Or the player may immediately harvest the resources once for the newly discovered Solar System.
- Discover a Solar System (within the action range) and place a cube (if the player is able). Then the player may immediately harvest the resources once in the newly-discovered solar system.
- The player's Energy consumption is reduced by 1. A player may, according to the range of the action slot, discover a Solar System and either place one cube there or harvest its resources once.
- A player's Energy consumption drops by 4. They do not carry out any other actions.
Symbol Overview of Selected Symbols
- A player receives 3 Energy.
- Immediately and one-time.
- Always when a player explores.
- Always in the assessment phase.
- Purchasing phase.
- Action planning phase.
- Determine Energy consumption.
- Determine turn order.
- Symbol for Consumption.
- AI card.
- The action can be carried out in the Parsec and Planet of the player's choice.
- Once for each cube pictured, collect the resource from a Colony of a Planet. Pay attention to the range. A cube can only be used once per action card.
- Shows the maximum Parsec of the card or action slot.
- Place a cube on a Planet. Pay attention to the range and adaptability.
- Symbol for the Space Station.
- Having the majority in a Galaxy.
- Having the majority in a Solar System (hex).
- Dark Tech Level (I, II, III).
- Light bonus card: A player collects these by assessing certain galaxies. They are scored at the end of the game.
- Dark bonus card: A player receives these at the beginning of the game. They are scored at the end of the game.