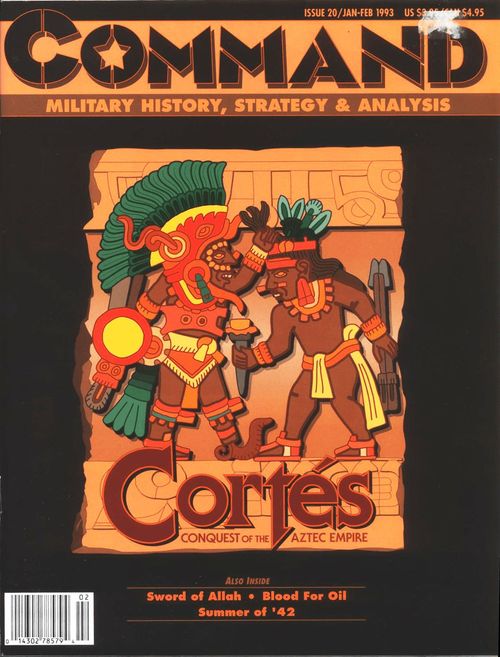
Cortes: Conquest of the Aztec Empire
Cortes: Conquest of the Aztec Empire Rulebook
Table of Contents
Table of Contents
- 1.0 Introduction
- 2.0 Components
- 3.0 Setup
- 4.0 Turn Sequence
- 5.0 How to Win
- 6.0 Stacking
- 7.0 Movement
- 8.0 Combat
- 9.0 Leaders
- 10.0 Redeployment and Recovery (R&R) Interphases
- 11.0 Optional Rules
- 12.0 Designer's Notes
- 13.0 D-Elim
1.0 Introduction
1.1 Historical Background
Cortes: Conquest of the Aztecs is a two-player simulation that covers the epic three-month siege of Tenochtitlan, the climactic battle for control of Mexico fought in 1521. One player steps into the role of the conquistador Hernando Cortes, commanding the attacking Spanish forces and their Indian allies. The other player takes the place of the young Aztec emperor, Cuauhtemoc, and commands a native army of 160,000 fierce warriors in the defense of their capital city.
1.2 Game Scale
A. Each hex on the map represents 328 yards (300 meters) from side to side.
B. Each Spanish combat unit represents a gunboat and its crew, a ground force of between 50-70 infantry, or about 20 horsemen. Aztec and Spanish Indian Ally units represent groups of about 200 elite "Knights," or less well trained masses of up to 4,000 regular warriors.
C. Each turn represents activities lasting anywhere from 30 minutes to several hours, to several days, depending on the pace of events at any given point in the siege.
1.3 Abbreviations
| Abbr | Meaning |
|---|---|
| CF | Combat Factor |
| DRM | Die Roll Modifier |
| LP | Loss Point |
| MA | Movement Allowance |
| MP | Movement Point |
| TEC | Terrain Effects Chart |
1.4 Basic Game
The Basic Game does not use any optional rules (11.0), Spanish Ally Stacking Limits (6.2), Fog of War (8.8), Cannon (8.20), or Causeway Combat Restrictions (8.21).
2.0 Components
2.1 Inventory
The components to a complete game of Cortes include these rules, the map, and the 128 die-cut counters (also referred to as units). Players must provide two standard (six-sided) dice to resolve combat.
2.2 The Map
A. The map represents the militarily significant terrain found in and around the city of Tenochtitlan in 1521. A hexagonal (hex) grid is printed over the land areas of the map to regulate the placement and movement of units. The lake has been divided into larger areas to govern waterborne movement across it.
B. A unit is considered to be in only one hex (or lake area) at any one time. Each hex contains natural and/or artificial terrain features that may affect the movement of units and combat between units.
C. The terrain and artificial structures on the map have been altered slightly from their real-world configurations to make them fit within the hex and area grids, but the relationships between the terrain from hex to hex and area to area are accurate to the degree necessary for presenting players with the same space/time dilemmas faced by their historic counterparts in the actual campaign.
D. Every land hex on the map has a unique, four-digit, identification number. (Similarly, all lake areas have one or two-digit numbers.) These are provided to help you find places more quickly and to allow you to record unit positions if you have to put the game away before a match is finished.
Example: Chapultepec is in hex 1322.
2.3 Counters
A. There are 128 counters included in the game, most of which represent combat units or special weapons; two others are provided as informational markers and memory aids. After reading through these rules at least one time, carefully punch out the counters.
B. Each combat unit counter displays several pieces of information: nationality (its side), historical identification, step strength, combat factor (CF), movement allowance (MA), lake movement capability, substitute status, and type.
2.4 Sample Units
[Diagram: Unit ID, Unit Type, Combat Factor, Steps, Tribe, and Movement Allowance are labeled on the sample counter; a second diagram shows a Substitute Unit, marked by an asterisk next to its Unit ID.]
This unit is an elite Texcocoan Spanish Indian Ally unit. When at full strength it contains four steps (2.10).It has a full strength CF of 6, and a regular (land) MA of five hexes. The unit is also able to use lake movement.
2.5 Nationality
A unit's nationality (side) is indicated by its background color.
A. Spanish and Spanish Indian Allies have a light brown background.
B. The Aztecs have a light green background.
2.6 Historical Identification
All the units in the game are identified either by the name of their commander and/or by their tribe. The numbers shown on the counters correspond with the following list of names and tribes. (E: Elite, K: Knights, R: Regulars)
2.6.1 Spanish Infantry
| ID | Unit | ID | Unit |
|---|---|---|---|
| 1 | Jorge de Alvarado | 5 | Verdugo |
| 2 | Badajoz | 6 | de Lugo |
| 3 | Monjaraz | 7 | Marin |
| 4 | de Tapia | 8 | de Ircio |
2.6.2 Spanish Cavalry
| ID | Unit |
|---|---|
| 9 | Pedro de Alvarado |
| 10 | de Olid |
| 11 | Sandoval |
2.6.3 Spanish Gunboats and Cannon
| ID | Unit | ID | Unit |
|---|---|---|---|
| 12 | Holguin | 19 | Portillo |
| 13 | Barba | 20 | Lerna |
| 14 | Linpias | 21 | Nortes |
| 15 | Carvajal | 22 | Briones |
| 16 | Jaramillo | 23 | de Auz |
| 17 | Ruiz | 24 | Desconocido |
| 18 | Caravajal |
2.6.4 Spanish Allies
| ID | Units | ID | Units |
|---|---|---|---|
| 29 | Ixtilochitl's E Texcocoans | 41-42 | Arnecarneca R |
| 30-33 | Texcocoan R | 43-44 | Chalcoan R |
| 34-35 | Xochimilcoan R | 45-46 | Huexotzingoan R |
| 36 | Chichimeca's E Tlaxcalans | 47 | Cernpoalan R |
| 37-40 | Tlaxcalan R | 48 | Cholulan R |
2.6.5 Aztec Knights
| ID | Units | ID | Units |
|---|---|---|---|
| 1 | Tzilacatzin's K | 2 | Atlixcatzin's K |
| 3 | Quetzalaztatzin's K | 4 | Tzayectzin's K |
| 5 | Ternoctzin's K | 6 | Mayeuatzin's K |
| 7 | Tlapanecatl's K | 8 | Ternilotzin's K |
| 9 | Coyoueuetzin's K | 10 | Tetlepanquetzatzin's K |
2.6.6 Aztec Others
| ID | Units | ID | Unit |
|---|---|---|---|
| 11-53 | Aztec regular conscript warriors | Ctmc | Aztec Emperor Cuauhternoc |
2.7 Spanish Indian Ally Tribes
The abbreviations indicate the tribe/nation to which the units belong.
| Abbr | Name | Abbr | Name |
|---|---|---|---|
| Am | Arnecarnecan | Hu | Huetzotzingoan |
| Ce | Cernpoalan | Te | Texcocoan |
| Ch | Chalcoan | Tl | Tlaxcalan |
| Co | Cholulan |
Tribal affiliations are important for Spanish stacking (6.2).
2.8 Unit Types
2.8.1 Combat Units
[Counter illustrations: Spanish Infantry, Spanish Cavalry, Spanish Gunboat, Spanish Cannon, Elite Indian Ally, Regular Indian Ally, Aztec Knight, and Aztec Regular Warrior.]
2.8.2 Leaders
[Counter illustrations: Cortes and Cuahtemoc.]
2.9 Combat Factor
This is a measure of a unit's ability to conduct defensive and offensive combat operations (8.0).
2.10 Steps
A. All combat units in the game contain two or four steps, an expression of a unit's ability to absorb losses before being eliminated.
B. Combat losses are absorbed as steps; if a two-step unit takes a step loss, it is flipped over to display its reduced side. If a one-step unit (or a multi-step unit that had already been reduced to just one step) takes a step loss, it eliminated and placed in the dead pile.
C. Most units in the game have one or two steps. The rest have four steps. On the Aztec side, all Knights (units 1-10) have four-step. On the Spanish side, the European infantry and cavalry, and the elite units of the Indian Allies, have four steps (units 1-11, 29, and 36).
D. All four-step units have two counters. Only one of each of those units' counters may be in play on the map at any one time. The lower valued ones are substituted for the higher as the units take step losses. A counter's status as a substitute unit is shown by the presence of an asterisk next to the unit ID.
E. A unit's step strength may go up (10.0) and down during play, but no unit may be increased to a step value higher than what it had at the start of the game.
F. All units start the game at full strength.
2.11 Movement Allowance
This number is a measure of a unit's ability to move across the hex grid printed across the land and causeway portions of the map. Units pay different movement costs to enter different hexes, depending on their terrain (7.0).
2.12 Lake Movement Capability
A. On the Spanish side, only the gunboats and Indian Ally units with their MA in blue boxes may use lake movement (7.10).
B. Gunboats may use only lake movement.
C. All Aztec units are lake-movement capable. Aztec units may never enter lake areas 7, 11, 15, 21, or 29 (those along the map's eastern edge).
D. Gunboats may not be used as any kind of naval transport (beyond moving Cortes around) in this game. Historically, they were not designed or used for that purpose.
Historical/Design Note: The Aztecs had hundreds, perhaps thousands, of canoes of all sizes available throughout the city and this portion of the lake. They were trained to use them in combat. On the Spanish side, most of the Europeans were complete landlubbers, and only their Indian Allies who came from elsewhere around this lake (or other lakes) had water-war capabilities.
2.13 Human Sacrifice/Temple Desecration Markers
These are used with optional rule 11.5. Beginners should set aside these two counters; they will not be used in the Basic Game.
2.14 Definitions
A. Throughout these rules, when the term Aztec is used, it applies to all the units on the that side unless otherwise noted.
B. When the term Spanish is used it applies only to the European units of that side (Cortes plus units 1-28), unless otherwise noted.
C. The term Indian Ally refers to units 29-48 on the Spanish side.
D. Tenochtitlan refers to the entire island centered around the temple complex in hex 3016.
E. Tlatelolco refers only to the temple complex in hex 2810.
F. The lake refers to all areas of the large water body surrounding Tenochtitlan.
G. The quagmire is a unique, no-entry, not-land, not-water hex in 3023 (7.7.1.2).
H. The mainland refers to all non-Tenochtitlan land hexes on the map. The causeway hexes running between Tenochtitlan and the mainland will be referred to separately and specifically throughout the rules.
3.0 Setup
3.1 Choose Sides and Setup
Players should first decide which side each will command. The Spanish side commands all Spanish and Indian Ally units in the counter mix.
The Aztec player commands all Aztec units.
Both sides should sort their units and place them on or near the map according to the following information. Both players will move units across the map, so there is no seating side of preference for either.
Place all substitute units off to the side for later use. Also set the Human Sacrifice/Desecration markers off to the side.
3.2 Spanish Deployment
A. The Spanish side always deploys first. Units may begin play stacked within normal limits (6.0).
B. w/i # means in or within that many hexes of that hex.
| Location | Units |
|---|---|
| w/i 2 1004 | 1-3, 9, 25, 36-40 |
| w/i 2 1539 | 4-6, 10, 26, 29-33 |
| w/i 2 4244 | 7, 8, 11, 27, 28, 34, 35, 41-48* |
| Lake Area 11 | Cortes, 12-24 |
* These units may overstack for set up only - keep the overstacking to a minimum.
Design Note: The Spanish deployment is shown on the map.
3.3 Aztec Deployment
A. All Aztec units may be deployed in any land hexes at least four hexes away from the nearest Spanish-side unit.
B. They may also be deployed on the lake in any areas other than the five prohibited easternmost areas.
Design Note: There are no ZOCs, hex control, or supply rules in this game. (Supply is dealt with through the R&R procedures, 10.0.)
4.0 Turn Sequence
4.1 In General
A. Every match of Cortes is divided into an indefinite number of turns. Each complete turn is divided into two or more player-turns, one for the Spanish, and one for the Aztecs. The player-turns are divided into a sequence of steps (or phases).
B. After the completion of any number of complete of Spanish and Aztec player-turns, the Spanish may call for a break in the action, in the form of a Mutual Redeployment and Recovery (R&R) Interphase.
C. Every action taken must be carried out in the appropriate phase of that side's own player turn. Exception: Both players perform various activities during the mutual R&R Interphases.
D. Once a side finishes a given phase of its player-turn and has gone one to another, it may not go back to perform some forgotten action or redo a poorly executed one unless the opponent graciously permits it.
4.2 The Turn Sequence
The rest of the rules are organized, as much as possible, to explain things in the order they are encountered when progressing through each turn. The Spanish are the first player in every game turn.
A. Spanish Player-Turn
- Movement Phase a. Lake Movement b. Land Movement
- Combat Phase a. Lake Combat and Shore Bombardment b. Ground Combat
B. Aztec Player-Turn
- Movement Phase a. Lake Movement b. Ground Movement
- Combat Phase a. Lake Combat and Shore Bombardment b. Ground Combat
4.3 Break Off or Continue
A. After the Aztecs complete their player turn, the Spanish declare whether to initiate another pair of player-turns or break off and have a mutual R&R Interphase. The Spanish may make the declaration only at the end of two complete player turns, never just part way through. The Aztecs never make the declaration.
B. If the Spanish declare for another couplet of player-turns, repeat the sequence in 4.2.
C. If the Spanish declare for an R&R Interphase and the Aztecs agree, run through the mutual R&R Interphase sequence given in 10.1.
4.4 Aztec Objection
A. When the Spanish make an R&R declaration, the situation on the map may be such that the Aztecs do not want a break in the action at that point.
B. If any of these conditions exists when the Spanish make an R&R declaration, the Aztecs may attempt to abort that declaration and thus cause another player-turn couplet to be run through instead.
- The Aztecs took Spanish captives during the Combat Phase of the player-turn that just ended (11.7). [Transcriber's note: the captives rule is 11.5 (Prisoners and Human Sacrifice); the 11.7 reference is a cross-reference error in the source.]
- There are one or more Spanish-side units on causeway and/or Tenochtitlan hexes at that instant.
- There are one or more Aztec units on non-causeway land hexes completely outside of Tenochtitlan. (This does not include units in lake areas.)
Historical Note: The Spanish units tended to lose cohesion (and hence the ability to retreat smoothly before the enemy) just after they lost men as prisoners to the Aztecs.
4.5 Forcing a Continuation
To force the battle to continue, the Aztecs roll a single die, adding that result to the number of full-strength Aztec Knight units on the map at that instant.
A. If the sum is 12 or more, the Spanish are denied the request for a mutual R&R Interphase and another couplet of player-turns must be run through before another such declaration may be made.
B. If the total is 11 or less, go to the R&R procedures (10.0).
Play Note: No matter how many of the conditions given in 4.4 pertain at the instant the Aztecs object to a mutual R&R Interphase, only one die roll check is made. The Aztecs are never required to object just because one or more conditions of 4.4 pertain; it is their option to do so.
5.0 How to Win
5.1 Loss Points
Unless the Aztecs wins a sudden death victory (5.2), victory is judged on the basis of Loss Points (LPs). Only the Spanish accumulate LPs. The more LPs they accumulate, the more likely they are to lose the game.
5.2 Sudden Death Aztec Victory
Play stops immediately and the Aztecs are declared the winner the instant Cortes is killed or captured by Aztec units (9.0). There is no sudden death victory available for the Spanish.
Design Note: Cuauhtemoc, though certainly an important, able and charismatic war leader for the Aztecs, would have been more or less replaceable by one of the many other brave Aztec nobles in the city. Cortes, however, was the critical personality in the whole Spanish effort. With him dead, the many sub-commanders and factions among the Europeans would have undoubtedly fallen into squabbling, and perhaps even fighting, among themselves, and Tenochtitlan would have thus been given an indefinite reprieve.
5.3 Ending the Game
Failing the loss of Cortes, the game is over at the end of the Spanish player-turn in which Tenochtitlan is conquered. This occurs when are no longer any Aztec units (including Cuauhtemoc) on Tenochtitlan at the end of a Spanish player-turn.
5.4 Spanish Loss Points
To determine the level of Spanish victory or defeat at the end of a game, total the number of LPs for these events/conditions:
| LPs | Event/Condition |
|---|---|
| 5 | per mutual R&R Interphase occurring* |
| 1 | per complete Spanish unit, including boats and cannon, in the dead pile** |
| 5 | if Cuauhtemoc was not captured or killed (9.0) |
* This is not the number called for by the Spanish, but the number actually executed.
** Do not include Indian Ally units.
Play Note: Record the number of R&R phases on paper or by electronic means.
5.5 Victory Levels
Compare the total LP to the chart below to determine the winner of the game and his performance relative to history.
| LPs | Victory Level |
|---|---|
| 1-8 | A holy and blessed Spanish victory over the infidel. The Spanish side performed substantially better than its historic counterpart Hernando Cortes. The conquest of Mexico and the rest of Central America has been accelerated. |
| 9-16 | A Spanish victory broadly comparable to their historical performance. The battle was hard and competently fought by both sides; history proceeds unchanged. |
| 17-24 | An Aztec moral victory. Due to excess Spanish losses and/or too much time spent taking Tenochtitlan, the Europeans' conquest is somehow incomplete. The outlying areas of the Aztec Empire and the powerful native states yet to fall, such as the Michoacan and Mayan warlords, will be difficult foes indeed. |
| 25+ | An Aztec cosmologic victory. After Tenochtitlan falls, there is so little respect for the remnants of the Spanish forces that the surrounding states fall upon the invaders and take over the ruins of the Aztec world. |
Historical Note: The two Aztec victories described above are victories for play purposes only, and would in reality have only been temporary. Eventually, the Spaniards would have returned with more men and guns, and the smallpox would have come back, guaranteeing the final subjugation of the Indians.
6.0 Stacking
Placing more than one unit into the same hex is called stacking.
6.1 Spanish Stacking Limit
A. The Spanish may stack up to five cavalry and/or infantry units in the same hex. The cannon and Cortes units do not count against the stacking limit, (but see 7.4 and 11.6).
B. Spanish units may never stack or move with Indian Ally units of any kind. They may pass freely through each others' hexes, but may not end their moves stacked with one another.
6.2 Spanish Indian Ally Stacking Limits
A. Units from different tribal nations may not stack or move together. They may pass freely through each others' hexes, but may not end their moves stacked with one another.
B. Within tribal limits, the Spanish may stack one elite unit (29 and 36) with one regular warrior unit from the same tribe.
C. Regular warrior units may not stack with each other even if they are from the same tribe.
6.3 Aztec Stacking Limits
A. The Aztecs may stack up to three Knight units in the same hex, or one Knight unit and one regular warrior unit.
B. Regular warrior units may not stack with each other.
6.4 Lake Area Stacking
A. Within the limits of lake movement eligibility rules (7.10), there are no stacking limits in the lake. It is possible for the entire Aztec army to occupy the same lake area.
B. On the Spanish side, any number of gunboats and any number of lake-movement-eligible Indian Ally units may occupy the same lake area at the same time.
6.5 Stacking and Movement
Stacking rules are in effect at the end of each unit's or stack's movement. There is no limit to the number of units that may pass through any given hex over the course of a Movement Phase, as long as the limits are met at the end.
6.6 Overstacking
A. If any hex is found to be overstacked at the end of any unit's or stack's movement, the opponent may immediately select and remove the minimum number of units necessary to bring the stack back into limits.
B. The Human Sacrifice/Desecration markers have no stacking value.
7.0 Movement
7.1 In General
A. Every unit in the game has an MA printed in its bottom-left corner. That factor is the number of movement points (MPs) available to the unit to move across the hex/area grid of the map during its movement.
B. Units move from hex to adjacent hex (or area); no skipping of hexes or areas is allowed. They expend MPs to enter each hex, depending on the terrain in the hex being entered (7.7).
C. Movement of each side's units takes place only during the friendly Movement Phase. No enemy movement takes place during a friendly Movement Phase.
7.2 Limits
A. MPs may not be accumulated from turn to turn, nor may they be loaned from one unit to another.
B. The phasing side may move all, some, or none of its units in each friendly Movement Phase. Units that move are not required to expend all their MPs before stopping.
C. The movement of each individual movement or stack must be completed before that of another starts. A player may only change the position of an already moved unit or stack if her/his opponent allows it.
7.3 Minimum Movement Ability
A. A unit is guaranteed the ability to move at least one hex during its Movement Phase by expending all its available MPs.
B. This guarantee does not allow units to enter hexes (or areas) or cross hex/area boundaries that are otherwise impassable to them.
7.4 Cannon
These units may move only with Spanish infantry (11.6).
7.5 Enemy-Occupied Hexes and Areas
A. Units may never enter hexes containing enemy units.
B. It is permitted for units of both sides to exist simultaneously in the same lake area(s).
7.6 Splitting Stacks
A. When moving a stack, it may halt it temporarily to allow a unit or sub-stack to split off and move away on a separate course. The unit(s) left behind in the original (or parent) stack may then resume their own movement, even splitting off another unit if so desired. Once an entirely different parent stack (or individual unit that was not part of that parent stack), the original parent stack may not continue moving without the opponent's permission.
B. If units with different MAs are traveling together in a stack, each uses up its own MA as if it were moving alone. As the slower units exhaust their MA, they may drop off as the parent stack continues moving with the faster units.
7.7 Terrain and Movement
A. All terrain features on the map can be classified into one of two broad categories: natural, and artificial. Each category is divided into several different types.
B. There is never more than one type of natural terrain and/or one type of artificial terrain in any one hex.
7.7.1 Natural Terrain
There are only two types of natural terrain on the map: clear, and quagmire. The movement effects of these terrain types are described below, and are summarized on the Terrain Effects Chart (TEC).
7.7.1.1 Clear
A. Clear is the base terrain of the game. It is just that: clear. Hexes with only clear terrain in them represent areas devoid of any natural features that would enhance defense or slow movement.
B. Each clear hex costs all ground units 1 MP to enter.
C. Strictly speaking, the clear hexes on Tenochtitlan are actually market place hexes, but their status and effects are the same as normal clear terrain.
7.7.1.2 Quagmire
There is only one quagmire hex on the map (3023). It represents an area of incomplete Chinampaization (7.7.2.2), and as such is completely impassable to all units. It is still too wet and marshy to allow ground units to march through, but is also too shallow and plant-infested to allow boats and canoes passage.
7.7.2 Artificial Terrain
Artificial terrain has six types: Dry Land Cities, Chinampa Cities, Temple Complexes, Fortresses, Major Fortresses, and Causeways.
7.7.2.1 Dry Land Cities
A. These hexes represent urban areas erected on natural clear terrain.
B. All units expend 1 MP to enter a dry land city hex.
7.7.2.2 Chinampa City
A. These hexes represent urban areas that have actually been built as artificial islands on what was previously lake area. Being so close to the water table, these hexes are riddled with canals, wells, drainage and aqueduct pipes, etc. It is virtually impossible for any unit to travel in a straight line for any length of time in such terrain.
B. All units expend 2 MPs to enter a Chinampa City hex.
C. Cavalry may enter Chinampa City hexes only when traveling along a causeway (7.7.2.5).
7.7.2.3 Temple Complex
A. These hexes (2810 and 3016) represent the Aztecs' chief religious centers. The large and easily defensible step-pyramids are located there.
B. All units expend 2 MPs to enter a temple complex hex.
7.7.2.4 Fortresses and Major Fortresses
All units expend 2 MPs to enter.
7.7.2.5 Causeways
A. These are elevated highways cutting across much of Tenochtitlan and the lake.
- Aztec units can travel along causeway hexes at a rate of 1 MP per hex.
- Spanish and Indian Ally units expend 2 MPs per causeway hex entered.
B. To use causeway movement, units must travel from causeway hex to causeway hex across hexsides traversed by the causeway.
Example: An Aztec unit in hex 2910 could not move to 3010 using causeway movement, even though both those hexes contain causeways, because the hexside crossed in such a direct move is not itself traversed by the causeway. Such a move could be made (barring the blocking presence of an enemy unit) by moving to 3011 and then to 3010.
C. When using causeway movement, units pay only their side's causeway MP cost. Do not add the causeway cost to that of the terrain being entered, only pay the causeway cost itself.
D. Cavalry may enter Chinampa City hexes only when moving on a causeway.
Design Note: During the fighting, points in the causeway were often blocked or purposefully ripped up. The Aztecs, fully supplied with causeway repair equipment, ready-made portable bridges, and skilled causeway engineers, etc., were better and faster at the repairs than the Spanish and their Allies. Hence the movement differential.
7.8 Tepeyac
A. During the Movement Phases of the regular turn sequence, the units of both sides may only enter Tepeyac (the land hexes around 3400) by causeway and/or lake movement.
B. Spanish-side units may redeploy to Tepeyac as part of the redeployment process of the Mutual R&R Interphases (10.0).
C. Spanish-side units that begin their regular Movement Phase in Tepeyac may move off the map, but they are out of play until the next R&R redeployment.
D. Aztec units may not redeploy to Tepeyac.
Design Note: The Spanish and their allies are in control of the area surrounding the edge of the map sheet.
7.9 Moving Off the Map
Other than as part of the situations described in 7.8, 9.5, and optional rule 11.1, no unit may move off the mapsheet.
7.10 Lake Movement
A. All Aztec units, the Spanish gunboats, and the water-capable Indian Allies can use lake (water borne) movement.
B. Spanish gun boats may only move on the lake; they never enter any land hexes. During each Spanish Movement Phase, each gunboat may move from the lake area in which it begins the phase into an adjacent lake area.
C. Aztec and eligible Indian Ally units that begin their Movement Phase on a coastal hex or a causeway hex over the lake, can enter any lake area adjacent to that hex (but no farther that turn).
D. Aztec and eligible Indian Allies starting their Movement Phase already in a lake area can move from there to any non-prohibited land hex bordering that area. Alternatively, they could move from the lake area where they started into any one adjacent lake area. Just like gunboats, Aztecs and eligible Indian Allies can stay out on the lake from turn to turn.)
E. No unit may combine land and lake movement during the same Movement Phase.
F. Always move units into/on/off the lake before making regular land moves.
G. Cortes can embark from a coastal hex onto a Spanish gunboat in an adjacent lake zone. He can disembark from a boat onto any coastal hex. He may not combine land and lake movement in the same phase.
7.11 Crossing Causeways by Lake Movement
A. This is permitted as if the causeways were not there.
Example: A lake-moving unit in Lake Area 5 could move directly from there to Lake Areas 3 or 9.
B. To determine lake area adjacency across causeways, imagine the causeways were not there and in your mind's eye move the bordering areas together.
Example: A unit in Lake Area 4 can move to areas 6 or 9. A unit in Area 5, though, could only move from there to Area 9.
C. Except when using lake movement as described above, ground units may not move into lake areas or attack into lake areas.
D. Unlike land movement, where enemy units may never occupy the same hex at the same time, in lake movement the presence of enemy units does not block the movement of friendly units into that same area. Indeed, it is possible for enemy units to coexist in the same lake area from turn to turn (8.21).
8.0 Combat
8.1 In General
A. Combat takes place between opposing adjacent units during the combat phase in both player turns. Attacking is always voluntary; the mere fact of opposing units' adjacency does not necessitate combat. Exception: Lake combat is mandatory (8.22).
B. Defending units may not refuse combat.
C. During any given combat phase, the phasing side is considered the attacker, and the non-phasing side is the defender, no matter what the overall situation on the map.
8.2 Procedure
For each combat, follow these steps:
A. Determine which units will attack and which will be attacked (8.3-8.8).
B. Determine the odds (8.9).
C. Modify the odds for concentric attack (8.10) and terrain (8.11-8.15).
D. Roll the dice, then determine and apply the combat results (8.16-8.21).
E. See 8.22-8.24 for lake combat and shore bombardment.
8.3 Multiple Defenders
If there is more than one enemy unit in a hex being attacked by friendly units, that stack defends as if it were one large, combined, defending unit.
8.4 Multi-Hex Attacks
An enemy occupied hex may be attacked in one battle by as many of friendly units as can be brought to bear from any of the surrounding hexes. No more than one hex may be the object of a single attack.
Example: An attacking unit or stack in 2924 may not attack defenders in 3024 and 3025 in a single battle in the same Combat Phase.
8.5 Indivisibility of Units
A. No single attacking unit may have its CF divided and applied to more than one battle during a single Combat Phase.
B. No defending unit may have part of its CF attacked by one or a few attackers, while another part is attacked by others.
C. No attacking unit may attack more than once per Combat Phase, and no defending unit may be attacked more than once per Combat Phase. It is possible for a defending unit to be bombarded (8.24) and then attacked.
8.6 Attack Sequencing
A. There is no artificial limit on the number of attacks the phasing side may conduct during its Combat Phase.
B. The attacker is not required to declare all attacks beforehand, and may resolve them in any order as long as the resolution of one is completed before moving onto the next.
8.7 Stacks on the Attack
It is not necessary for all the units stacked in a given hex to participate in the same attack. Some units might attack into one defender hex, while others attacked into some other(s), or did not attack at all.
8.8 Fog of War
A. The Spanish may not look beneath the top unit of an Aztec stack until the time comes in the combat resolution process for odds computation. Once an examination has been made, the Spanish may not call off that attack.
B. The Aztecs may examine Spanish and Indian Ally stacks at any time.
Play Note: See 11.9 for an optional fog of war rule. [Transcriber's note: the optional fog of war rule is printed as 11.7 in this document; the 11.9 reference is a cross-reference error in the source.]
8.9 Combat Odds
A. Sum the CFs of all attacking units involved in a battle; then sum the CFs of the defending units.
B. Divide the attacker's CFs by the defender's CFs, then round any remainder in the defender's favor to get a ratio.
Commentary: The attacker should strive to have more attack factors involved in a given battle than the defender has defense factors.
High Odds Example: 26 attack factors against 7 defense factors yields an odds ratio of 3:1. 26 ÷ 7 = 3.71, which rounds down to 3, making the odds ratio 3:1, corresponding to a column heading on the Combat Results Table (CRT).
Poor Odds Example: 5 attack factors against 11 defense factors yields a ratio of 1:3. 11 ÷ 5 = 2.2; round this up (2.2 becomes 3), yielding odds of 1:3.
8.10 Concentric Assault
A. The attacker receives a rightward column shift when:
- The defending hex is attacked by units in opposite hexes (Figure A),
- Attacking units in three hexes with one hex between each surround the defender (Figure B), or
- Units in more than three hexes attack (Figure C).
B. The concentric assault bonus is available regardless of the terrain the defender is occupying.
[Figures A, B and C show the defending hex with attackers in the opposite, three-hex and more-than-three-hex arrangements.]
8.11 Dry Land City
If the defending units in a battle are located in a Dry Land City hex, shift the combat odds one CRT column leftward.
Example: A 4:1 attack would become 3:1.
8.12 Chinampa City
If Aztec units are defending in a Chinampa City hex, shift the combat odds one CRT column leftward.
Design Note: The water obstacles in Chinampa areas make a defender's haven, but only for those with the detailed knowledge necessary to exploit the terrain. The Aztecs had that knowledge; the Spanish and their allies did not.
8.13 Major Fortresses
Defenders receive a three-column leftward CRT odds shift.
Example: A 3:1 attack against Chapultepec would be resolved using the 1:2 column.
8.14 Fortresses and Temples
These give defenders a two-column leftward CRT odds shift.
8.15 Cumulative Combat Effects
All terrain and other combat effects that apply in any given battle are cumulative.
8.16 Odds Limits
A. The column headings on the CRT range from 1:4 to 8:1.
B. Odds greater than 8:1 are resolved at 8:1; odds less than 1:4 are resolved at 1:4.
C. Do not round to the 8:1 or 1:4 columns until all column shifts have been applied.
8.17 Final Combat Resolution
After the final combat odds have been calculated for a given battle, find that column heading on the CRT. The attacker rolls two six-sided dice. Cross-reference the roll with the column on the CRT to get the combat result.
Example: A roll of 5 at odds of 3:1 yields a result of 1/2.
8.18 Combat Results
The number to the left of the slash applies to the attackers; the number to the right applies to the defenders. The result must be satisfied by step losses among the involved units.
8.18.1 Step Loss
For both sides involved in a given battle, every step of unit strength given up satisfies one increment of the combat result.
Example: Flipping a two-step unit to its reverse side satisfies one increment of combat result. Eliminating it entirely would satisfy two increments.
8.18.2 Step Loss Apportionment
In general, step losses may be apportioned by each side among its involved units in each battle as desired; however, no involved unit may be entirely eliminated before all involved units have been reduced to a single strength step.
Example: If the Spanish had three units (two of them with step strengths of 2, and the other with 1) involved in an attack and suffered a combat result of 2, they would first have to reduce the two-step unit down to one step, then they could then eliminate any involved unit (all now at one-step) to satisfy the second step loss.
8.18.3 Zero Combat Results
A combat result of 0 (zero) means No Effect. No step losses are taken.
8.19 Mandatory Advance After Combat
A. If the defender's hex in a battle is left vacant after applying the combat result, at least one surviving attacking unit (if any do survive) must moved into that hex. The attacker may move more than one surviving unit into the hex (normal stacking limits apply).
B. Victorious defenders never advance after combat; they merely hold their positions.
C. Advances require no MP expenditure, and must occur immediately after a battle is resolved and before the next begins.
8.20 Cannon
In any battle (attack or defense) in which the Spanish have one or more cannon involved, increase the Aztec combat result by one. The increase is never greater than one, regardless of how many cannon are present.
8.21 Causeway Combat Restrictions
The causeways of Tenochtitlan were 50 feet wide, which is only enough room for 15 men fighting abreast with sword and shield or from horseback.
A. Only one Spanish unit may attack through a hexside spanned only by water and a causeway.
B. This limit applies only to Spanish units and their Indian Allies incapable of lake movement.
C. Aztecs and Indian Allies capable of lake movement are not affected; they are assumed to be using their canoes to broaden their frontage.
D. This limit does not affect Spanish or Indian Ally stacking in such hexes, nor does it affect their defense. That is, all units stacked in a causeway hex still participate in its defense according to normal combat rules.
E. A Spanish infantry unit attacking through such a hexside may still take along a cannon.
8.22 Lake Combat
A. Combat occur between opposing units occupying the same lake area at the start of either side's Combat Phase. Odds determination procedures are the same, except there are never any terrain effects, and an attacker with more units (not steps) involved than the defender may withhold some or all of the surplus units for shore bombardment. A defender's surplus units may not be withheld; this is only an attacker option.
B. After a lake area battle has been resolved, if there are still units of both sides in that same lake area, that situation is allowed to continue. That is, opposing units in the same lake area do not interfere with each others' movement and ability to be there. However, unlike the situation on land, where combat is always voluntary, lake combat is mandatory between opposing units occupying the same lake area in any Combat Phase.
8.23 Spanish Gunboats
The gunboats carried most of the cannon and muskets available to Cortes. The mobility of the boats and the terrain-less lake surface greatly enhanced those weapons' combat effectiveness.
In all lake area battles (attack and defense) in which one or more gunboats are involved, the Aztec combat result for that battle is doubled. A zero becomes a 1 in this case.
8.24 Shore Bombardment
A. If the attacker has waterborne forces available in a lake area (either in an uncontested area or withheld surplus units from a lake battle in the area), it may use those units to attack enemy units located on land or causeway hexes bordering the lake area. Resolve shore bombardments after any lake battles.
B. A maximum of four units may bombard a hex from a single lake area. If enemy units exist in more than one neighboring land hex, all those units may potentially be bombarded, but no single hex may receive fire from more than four bombarding units.
C. No unit may bombard more than once per Combat Phase.
D. Roll one die for each bombarding unit. Aztec and Indian Ally units score hits on rolls of 1; gun boats hit on a 1-3.
E. Each hit inflicts one step loss on the units in the target hex.
F. Units in non-coastal land hexes cannot be bombarded. Spanish and Indian Ally units occupying coastal fortress hexes cannot be bombarded by Aztecs.
G. Spanish gun boats (but not Indian Ally units) can bombard Aztecs in coastal fortresses, but they must add apply a +1 die roll modifier (DRM) to their bombardment die roll when doing so.
Design Note: Except as explained in 8.21, Aztec and Indian Ally units capable of lake movement who occupy causeway or coastal hexes are considered to be fully within the non-water portions of those hexes for all purposes. The amphibious capabilities of those two categories of units does not give their owners the ability to flip them back and forth between the two environments at will – players must use the movement rules to position them either on the lake or on land/causeway hexes every Movement Phase.
9.0 Leaders
Cortes and Cuauhtemoc are the two leader units in the game. Each provides combat bonuses to his units by participating personally in combat, but neither has any step or combat strengths of his own.
9.1 Cuauhtemoc
A. Cuauhtemoc may never leave the island of Tenochtitlan until an Aztec Movement Phase begins where both temple hexes had been desecrated at least once in an earlier phase and there are five or fewer Aztec units left on the island.
B. If Cuauhtemoc is stacked with a force of attacking Aztec units, that attack receives a two column rightward odds shift. He provides no defensive benefits.
9.2 Cortes
If Cortes is stacked with any Spanish unit involved in combat (attack or defense) that defense receives a one column shift in the Spanish favor.
9.3 Leader Capture/Death
A. If a leader is stacked with units that are eliminated in combat, the opponent immediately roles two dice.
- On a 7, the leader is considered captured/killed (permanently removed from play).
- On any other roll, the leader is considered to have made a last-minute getaway, and is placed atop the nearest friendly unit or stack. If more than one such hex exists at the same distance, the placement is up to the owner.
B. If either leader is stacked with units that take any step losses in combat (leaving some friendly combat units surviving in the hex), the opponent immediately rolls two dice. On a 12, the involved leader is captured/killed.
C. If a leader contributes his ability to an attack (not defense), roll two dice. If the attackers suffer no casualties, he is captured/killed on a 2; if the attackers suffer casualties, he is captured/killed on a 2 or 12.
D. If either leader is alone in a hex (or Cortes is alone except for a cannon unit), any opposing non-leader unit may capture/kill him by simply moving into his hex (an exception to 7.5).
Design Note: Cortes' capture/death results in an immediate Aztec sudden death victory.
E. If Cuauhtemoc makes it through an entire game without being killed or captured, the Spanish must add 5 LPs to his total at game's end (5.0).
Design Note: Unlike other recent XTR games with leader units, there is no provision here for wounding a leader. That was done to reflect the nature of combat in this campaign: if a leader takes a wound, it is either light enough for him to recuperate quickly and continue, or it is bad enough that he soon succumbs: he either lives or he dies.
9.4 Leader Lake Movement
A. Both leaders are eligible to use lake movement according to the rules governing it for their side. Cortes may be carried on a gunboat (7.11). Cuauhtemoc may be carried by any Aztec unit on the lake. In both cases, the leaders should be clearly stacked with the particular unit doing the carrying, and they share the fate of that carrying unit in combat.
B. While on the water, both may switch carriers at the start of a friendly Movement Phase.
9.5 Cuauhtemoc's Escape
Once Cuauhtemoc is free to leave Tenochtitlan, the Aztecs may attempt to move him off the map and thus stage his escape. Cuauhtemoc may only move off the map via a land hex on the map's western or southern edges, and he must expend 1 MP to do so. Once off map, Cuauhtemoc never returns.
Design Note: It is not really necessary to get Cuauhtemoc off the map in order to stick the Spanish player with those 5 LPs at the end of the game; his mere survival/non-capture to that point is good enough for that. Escaping is just a way to ensure the Spaniard cannot kill or capture him.
10.0 Redeployment and Recovery (R&R) Interphases
10.1 Mutual R&R Interphases
The R&R Interphase has a strict sequence:
A. Spanish Indian Ally Desertion Check
B. Mutual Force Redeployment
C. Mutual Force Replenishment
D. Mutual Deadpile Retrievals
E. Disease Check (optional)
10.2 Spanish Indian Ally Desertion Checks
A. The Spanish roll one die, applying any and all relevant DRMs.
| DRM | Event/Condition |
|---|---|
| -1 | per Human Sacrifice marker on the map at that instant |
| -1 | The Aztecs exited a one-unit raid (per 11.1) since the last R&R Interphase. |
| -1 | The Aztecs attempted to abort the declaration of this R&R Interphase. |
| -3 | There is at least one Aztec unit in Chapultepec (1322) at this instant. |
B. If the modified result is less than 1, all non-elite Spanish Indian Ally units immediately desert the siege and go home. (Remove them from the map, but do not put them in the dead pile; put them off to the side in a separate group.)
C. Elite units (29 and 36) never desert.
D. The deserting units return to play at full strength during the Mutual Redeployment Step of the next R&R interphase.
E. Allies may desert once per game.
10.3 Mutual Force Redeployment
This step has several sub-steps, which must be executed in the exact order given below.
10.3.1 Spanish Unit Removal
A. First the Spanish remove all gunboats from the map and all ground units that are not completely surrounded by Aztec units at that instant.
B. For each isolated unit (those remaining on the map), roll one die.
- On a 1-4, the unit loses one step, but any remnant is then removed with the other Spanish and Indian Ally units.
- On a 5, the unit loses two steps and is removed.
- On a 6, the unit loses three steps and is removed.
C. If a given surrounded unit is called on to lose its entire step strength (or more), it is eliminated and put into the dead pile – its breakout attempt failed.
D. When removing Spanish-side units, be careful to maintain their proper step strength.
10.3.2 Fortress Occupation
A. If Spanish units occupy any, some, or all of the four coastal fortresses on Tenochtitlan and/or Acachinango (2543) they may keep some or all of those occupying units on the map during redeployment. The decision is made on a unit-by-unit and fort-by-fort basis.
B. If the Spanish maintain occupation of one or more fortresses, they may later (10.3.4) redeploy units there and along the causeway leading from the mainland to such forts.
C. This rule is never applied to any inland fortresses.
10.3.3 Aztec Unit Removal and Fortress Occupation
A. After the Spanish complete the steps in 10.3.1 and 10.3.2, the Aztecs similarly remove their units from the map (also taking care to maintain their step strengths).
B. If Aztec units occupy Chapultepec and/or Acachinango, they may leave some or all of them there.
10.3.4 Spanish-Side Redeployment
When the Aztecs complete 10.3.3, the Spanish redeploy available units onto the map in any non-Tenochtitlan land hexes (plus any forts/causeways as described in 10.3.2). They also redeploy gunboats to any of the lake areas along the map's eastern edge.
10.3.5 Aztec Redeployment
A. After the Spanish deploy, the Aztecs redeploy available units onto the map in any Tenochtitlan hexes (except for the coastal fortresses if they are Spanish-occupied). They may deploy in Chapultepec and Acachinango if Aztec-occupied.
B. They may deploy units into any lake areas except those along the map's far eastern edge.
C. Cuauhtemoc must always be placed in a Tenochtitlan hex.
D. Aztec units may not redeploy with four hexes of Tepeyac.
10.3.6 Stacking
Both players must observe all normal stacking rules when redeploying during an R&R Interphase.
10.4 Mutual Force Replenishment
A. After both sides have redeployed, both sides roll one die for each unit in play at less than full step strength.
- An Aztec or Indian Ally regular warrior unit recovers a strength step on a 1-2 (3-6 means no change).
- A Spanish or Allied elite unit recovers up to two steps on a 1, one step on 2-4, and remains unchanged on a 5-6. (If such a unit is reduced only one step, it can recover only one step.)
- An Aztec Knight recovers one step on a 1-3, none on a roll of 4-6.
B. Spanish gunboats are automatically replenished to full two-step strength.
10.5 Mutual Deadpile Retrievals
A. Next, each side rolls one die per unit in the dead pile to see if any of those units reform and reenter play.
- An Aztec or Indian Ally regular unit reenters play at full strength on a 1, reduced strength on a 2-3, and is permanently eliminated on a roll of 6. A 4-5 means no change in status; keep the unit in the dead pile until the next R&R interphase.
- A Spanish or Allied elite unit will reenter play with one step of strength on a roll of 1, and will be permanently eliminated on a roll of 6 (2-5 means no change in status).
B. Aztec Knights and Spanish gunboats never re-enter play once eliminated.
C. After the first R&R, players should keep their eliminated units sorted into two distinct dead piles, one for those units eligible for more recovery checks, and another for those permanently eliminated. When adding up Spanish LPs at game's end, count the units in both piles.
10.6 Deadpile Redeployments
A. After both sides determine which of their eliminated units (if any) are to be retrieved from the dead pile in a given R&R Interphase, they deploy them onto the map.
B. If at all possible, all such units must be stacked in hexes and/or lake areas already occupied by previously redeployed units.
C. In cases where stacking limits prevent that, place such units in any hexes that would have been allowable for them had they been redeployed per 10.3.4 and 10.3.5.
10.7 Disease Check
If using optional rule 11.10, make the disease check called for in that rule at this point. [Transcriber's note: the disease rule is printed as 11.8 in this document; the 11.10 reference is a cross-reference error in the source.]
10.8 Successive R&R Interphases
A. At this point, the Spanish should survey the situation. If they are satisfied with the results of the R&R Interphase, immediately begin a new couplet of player turns. If not satisfied, they may call for a new R&R Interphase. In that case, repeat the sequence in 10.1.
B. The Aztecs may not attempt to abort the R&R Interphase in such situations.
C. There is no limit to the number of successive R&R Interphases the Spanish may call for, but there is a 5 LP penalty for each one.
11.0 Optional Rules
11.1 Aztec Off-Map Raids
A. After the first R&R interphase, the Aztecs the Aztec player may move one full strength regular unit off the map through any clear terrain hex on the south or west edge. The unit pays 1 MP to exit the map and may never reenter play after leaving.
B. This occurs during the friendly Movement Phase and only one unit may exit the map in a given Movement Phase.
C. The effect of a raid is to increase the probability the Spanish Indian Allies desert during the next R&R interphase (10.2).
D. The desertion modifier does not accumulate throughout the game as more raids are sent; it remains at -1, and is only used if a raid was sent since the last R&R interphase.
11.2 Aztec Trapping Tactics
11.2.1 Procedure
A. Prior to resolving an attack in which any Knight units are involved, the Aztecs may attempt to spring a trap on Spanish or Indian Ally defenders. The Aztecs specify the defending unit (or stack) they are attempting to trap and roll one die per Knight unit involved in the attacking force.
- On a 1-5, the result is no effect.
- On a 6, the defending unit has been sucked into the trap.
B. In situations with more than one Knight unit, the Aztecs roll one die per Knight until all have had one roll and failed or until one has succeeded. Once a 6 is rolled, stop rolling; the trap has been sprung.
C. The Aztecs can increase the chance a Knight unit will succeed in its trap ploy by first reducing it one step, then rolling the die. In that case, the defender will fall into the trap on a 4-6. A Knight unit cannot be reduced a step to improve a trap roll if it has only one step (and would thus be eliminated).
D. Other than the number of engaged Knight units available, there is no limit to the number of trapping attempts the Aztecs may make during the Combat Phase. If a trapping attempt fails, the Aztecs are not required to go on with that specific attack. That is, if the Aztecs maneuvered their frontline and back up forces so as to attack in an anticipated successful trap, and the trap fails, they may scrub the whole effort and move on to another battle. Alternatively, they may go ahead and launch the battle as if nothing had happened (and may include in the attack any Knights that just failed at trapping).
Clarification: A trapping Knight may single out one Spanish unit from a stack – it does not have try to trap the whole stack, but may do so, if desired.
11.2.2 Effects of Trapping
A. If a defending Spanish-side unit or stack falls for a trap, the Aztecs immediately moves the successful Knight unit (along with all other friendly units then stacked with it), three hexes in any desired direction. This movement does not require the expenditure of MPs, but it may only go through land hexes that would normally be enterable by the trapping units during movement.
B. After the trapping unit or stack has moved, the Aztecs move the duped Spanish-side defenders along the hex path just moved by the trappers. The Spanish-side units pay no MPs, but cannot be made to enter hexes that would normally be prohibited to them.
Example: Cavalry cannot be trapped into Chinampa hexes.
C. Once the trapper/trapped move is completed, immediately launch and resolve the attack against the just-trapped units before resolving any other traps/battles.
Clarification: The trapping Knight and the following Spanish unit may move up to three hexes; that is, the Knight may move 1-3 hexes, with the Spanish unit following.
Design Note: Trapping may seem a pretty trivial rule, but if the Aztecs can use it to isolate and swamp key Spanish units.
11.3 Cavalry Charges
11.3.1 Procedure
A. Prior to resolving an attack in which they have one or more cavalry units involved, the Spanish may attempt to improve his combat situation by charging the Aztec defenders. The Spanish specify the defending unit (or stack) being charged and roll one die per cavalry unit involved in the attacking force.
B. The charge succeeds on a 5-6 against a defending Aztec stack containing any Knight units, and one a 3-6 against a stack containing only regular warriors.
C. If the charge fails, there is no effect to either side, and the battle is resolved normally.
11.3.2 Effects of Successful Charging
A. If a charge succeeds, immediately reduce the affected Aztec unit or stack by one step (total). The Spanish may move it one hex in any direction (normal terrain prohibitions do apply).
B. The charging Spanish cavalry unit(s) must occupy the just vacated hex (any other Spanish units stacked with the cavalry may also occupy, but they are not required to do so).
C. Then proceed with the Spanish Combat Phase.
D. The just-advanced units may still attack, alone or in conjunction with non-advanced units, any Aztec-defended hex now adjacent.
E. A cavalry unit can make only one charge attempt per Spanish Combat Phase.
F. In cases where more than one cavalry unit charges the same hex, each gets a die roll (and may thus each inflict a step loss), but the Aztecs never retreat more than one hex.
G. Roll for all cavalry charging a single hex before executing the Aztec retreat.
H. Cavalry can charge fortress and temple hexes. They can also attack them normally.
11.4 Cannon
A. Cannon can only move if transported by a Spanish infantry unit. Place the cannon beneath the infantry unit moving it; there are no extra movement costs.
B. A given cannon unit may only be switched from one transporting unit to another at the start of a Spanish Movement Phase.
C. Cannon have no combat or step strengths. If a cannon unit is caught alone in a hex by a moving Aztec unit, the Aztec unit enters its hex (an exception to 7.5) and instantly and permanently destroys the cannon.
D. Cannon may not be used to satisfy Spanish combat losses.
E. The presence of a cannon in any combat (attack or defense) increases the Aztec combat result by one.
F. In combat, a cannon unit always shares the fate of the last step of the infantry unit transporting it.
11.5 Prisoners and Human Sacrifice
A. Any time a Spanish (only) defender (only) loses one or more steps in a battle in which one or more Aztec Knights participated, roll one die. On a 1-2, the Knights (no matter what their fate in that battle) have taken prisoners and sent them off to be sacrificed at the main temple complexes.
B. Instantly place a Human Sacrifice marker on one of the temple complex hexes. If a second prisoner is taken, place the second Human Sacrifice counter on the other temple complex hex. For each human sacrifice counter on the map, Aztec attack (not defense) odds are increased by one column rightward.
Example: 3:1 odds becomes a 5:1 if both counters are on the map.
C. Once deployed, a sacrifice counter remains on the map until the start of the next R&R interphase, or until the temple it is on is desecrated by the Spanish (11.6).
D. If still more prisoners are taken after both human sacrifice counters are deployed on the map, there is no further effect on play.
E. Taking prisoners (even if no sacrifice results due to temple desecration) affects the desertion of Spanish Indian Allies and Aztec attempts to abort a Spanish declaration for an R&R Interphase.
11.6 Temple Desecration
A. If a Spanish infantry unit stacked with Cortes, or any cavalry unit (with or without Cortes) enters a temple complex, that hex becomes desecrated (from the Aztecs' viewpoint); place a desecration marker (on the reverse of the human sacrifice markers) atop it.
B. A desecrated temple remains that way until the start of the next R&R Interphase.
C. Desecrated temples cannot perform human sacrifice, so there is no combat advantage to the Aztec for taking prisoners while both temples are desecrated.
Design Note: The processes of prisoner-taking and temple desecrating start over after every R&R interphase.
Historical Note: Virtually all aspects of Aztec religion involved human sacrifice. One such aspect was the use of mass sacrifice of captured enemies to boost the offensive morale of the Aztec army. Historically, whenever Spaniards were taken at Tenochtitlan, they were disfigured, dismembered and devoured by the Aztecs with particular zeal.
11.7 Optional Fog of War
During the actual campaign, the Spaniards discovered the Aztecs used their huge temple pyramids as observation towers. From atop them, using a system of signals and runners, they were warned of many Spanish maneuvers and directed their own ripostes more effectively.
Whenever both temples are desecrated, all Aztec units lose 1 MP from their MA, and the Aztecs may no longer examine Spanish and Indian Ally stacks before declaring attacks.
11.8 Disease
An earlier outbreak of smallpox is factored into the game with lower Aztec replacement capacities than would have been the case before the epidemic. However, both sides in the siege were sometimes affected by other illnesses that normally accompanied pre-modern warfare.
A. As a last step in every R&R Interphase, the Aztecs roll two dice.
B. On a 2 or a 12, some disease has broken out in both armies.
C. If disease breaks out, the Spanish roll one die, and reduce their on map forces by that number of steps (total, Spanish choice of units).
D. The Aztecs rolls two dice and reduce their on-map forces by that number of steps (total, Aztec choice of units).
12.0 Designer's Notes
A. The siege of Tenochtitlan took some 80 days to run to completion (depending on what you count as its exact start date). Most of the fighting took place in spurts, with long periods of relative inactivity in between. That's why, instead of an objective, day-by-day system of time keeping, I decided instead to mark the passage of time by counting the number of discrete assaults launched by the Spanish player.
B. That also worked well with the victory conditions I had in mind: the locals were impressed more by fights-to-the-finish than by a series of strikes. Each time an assault was broken off by the Spanish, it appeared to the Indians (on both sides) the Spanish were weakening rather than regrouping. Thus, the outcome of the game is largely determined by how well the Spanish manage their forces over time.
C. The way units take step losses and recover is the best and simplest way I could come up with to accurately simulate 16th century casualty rates. Neither side received a great deal of reinforcements or replacements during the siege (excepting, maybe, the category of conscripts, depending on how you define a great deal), and therefore had to depend largely on their elite soldiers to sustain their fighting strength.
D. Elite units had greater cohesion in combat, and that is reflected in their four-step status. The elites of both sides can, however, be overcome by sheer force of numbers if they are used recklessly.
E. The rules for Spanish cavalry charges and Aztec trap movement are neat bits of chrome unique to both sides. The Spanish, of course, could run down any light infantry formation they caught on solid ground that was not otherwise protected. The Aztecs were masters of psychological warfare: they would taunt their enemy, rush forward in feigned attack, fall back in feigned retreat, and turn around to crush the hapless attackers who had just been drawn into the middle of a large, prepared ambush.
F. The Aztecs also got a lot of mileage out of sacrificing Spanish soldiers. Whenever they did so in quantity, it weakened the Spanish-led coalition by encouraging the desertion of their Indian allies. Even if the departing demoralized warriors were unable to do more than hold down some inactive flank, they were important in that they freed the Europeans for the more serious fighting.
13.0 D-Elim
Transcriber's note: the strategy article below is printed as section 13.0 "D-Elim" in the source. Its sub-section numbers are reproduced as printed, including the duplicated "13.3" heading and the Spanish tactics items numbered 13.3.3 to 13.3.7.
13.1 Spanish Strategy
A. The Spanish player's decisions revolve around time and timing. Time is not really an issue – you have as many turns between R&R Interphases as you want, and you can call for them you need them. Don't be in a hurry!
B. If the Aztec tries to fight on the mainland, take the time to surround him and destroy the units- especially the Knights. If he fights on the causeways or the forts along the causeways don't attack – bring up your gunboats and chip away at him until he gives it up.
C. Timing is the key to calling for R&R. On the one hand, you want to maximize the damage to the Aztec army, and will be tempted to push your units to their last extremities. On the other hand, the Aztec has considerable offensive power, especially in the early game, and he can knock off a stack made up of one- and two-step units. If the Aztec pulls an out-of-the-blue trapping move, and you've got two or three Spanish units in the dead pile, you are in trouble.
D. A good rule of thumb is to call for R&R when your last four-stepper takes a casualty – and even then you should have some three step units left.
13.2 Spanish Tactics
13.2.1 Aztec Knights
The rule of Spanish tactics is: kill the Knights; kill the Knights; kill the Knights. Once the back of those ten (SS panzer division-like) units has aggregately broken, the game is yours – the only question will be your losses in reaching that point.
13.2.2 Multiple Columns
A. Historically, the Aztecs were infinitely brave warriors, but were largely ignorant of the art of warfare. Cortes was able to get away with using a multi-pronged advance into the city from the very start. The idea of merely blocking or delaying two of the drives while concentrating on the defeat the third does not seem to have occurred to Cuauhtemoc or his commanders. Be assured, such thinking will occur to most or all of your experienced gaming opponents.
B. At the beginning of the game, the full-strength Aztec Knights require you to keep your Spaniards in three or four stacks. You cannot run two drives and protect the flanks of both.
C. Later, when Aztec strength has diminished, you may be able to launch two columns. Timing is important here as well – make sure both columns can develop their strength at about the same time. If the Aztec can concentrate on one, you'll have to waste another R&R phase to recover.
D. Once the Knights have been broken, and the game enters its final, ''bug hunt" phase, you can safely unstack your infantry. Prior to that time, you do so at your peril.
E. We've found the best place to launch a single drive is from the northwest corner of the island (hex 2307). This area has the most clear terrain, is close to a temple, and has easily defensible flanks. When a second column is launched, bring it in at 3107. If you start the second column at 2313, you'll hit clear terrain, but the drives will not be mutually supporting and it takes time to develop strength there.
F. The southern approach, while possessing easily defensible flanks, also runs into the fort at 3019. Even with cavalry, it will take some work to break into it.
13.3.3 Terrain
A. With two exceptions, there is no crucial terrain in the game – you win by destroying the Aztec army. Gamers conditioned to maintaining front lines, defending or attacking victory point hexes can often be drawn into self-destructive drives to nowhere, or meaningless perimeter battles.
B. For example, say it's sometime around the mid-game and you've got a wedge-shaped drive going toward one of the temples. The Aztec maneuvers some Knights to your far flanks and begins to knock off the Indian allies deployed there. Don't hesitate to pull the Spanish units back from the apex of your front, and redeploy them to the flanks in order to rescue your allies and -most importantly take a shot at eliminating those Aztec Knights. Don't worry if the Aztec meanwhile retakes the hexes you abandoned; it means nothing; you have the time to go back.
C. Any offensive has significance only in so far as it takes you to where you can eliminate the most Aztecs the fastest. Don't be afraid to pull back or change directions – your targets are the Indians themselves; where they die is only detail.
D. The two exceptions are the temples when dual-sacrificing is going on. It is good to do away with a two-column Aztec shift benefit, but don't forget the easiest way to do that is to simply call an R&R - if the rest of the situation allows for it.
13.3.4 Cavalry
Your cavalry, though strong, hobbles your army. You cannot afford to fight without them, but, being road-bound, they define your potential routes of advance. There's nothing to do about that; keep them together in one stack, along with at least one infantry/ cannon unit combo, and drive on.
13.3.5 Cannon
There is no excuse for not having one infantry-cannon combo in every Spanish stack. Enough said.
13.3.6 Gunboats
Once the action moves onto the island, spread them around the island. Keep at least one in every lake zone adjacent to the island – this will discourage any escape/raid attempts. In lake areas nearest the fighting, keep groups of four boats together to provide support against any Aztec flanking sweeps that (mistakenly) come down to the water's edge.
13.3.7 Cortes
Land him as soon as possible; move him forward with the main phalanx, but commit him to lead battles only when you really need that one column shift. Remember, one snake eyes and it's all over except for the shouting (and chortling, etc., from your opponent).
13.3 Aztec Strategy
A. The Spanish player will choose the time and location of the main fighting. Your only choice in the matter is whether to fight first on the mainland and the shore of Tenochtitlan. In a word, don't.
B. The first rule of Aztec warfare in this game is: stay away from the water. Because he faces no time pressure between R&R Interphases, the Spanish can sit back and let the gunboats chip away at any Aztecs in range – they can't run out of ammo. In the long run, all you get for such fighting is lost steps.
C. We don't mean to say that any operation you run off the island or on the mainland will automatically turn sour on you, but that proposition is a good bet against a savvy Spaniard opponent. Nor should you simply ignore those areas. Far from it; keep a constant watch on the overall situation. If the Spaniard becomes careless in placement or maneuver, you never know what can become suddenly and uniquely possible: raiding parties, expeditions to Chapultepec, Cuauhtemoc's escape, etc.
D. The second rule of Aztec warfare in this game is: you must attack. You win by forcing the Spanish to call for R&R interphases before they would really like to do so. Given this odds chart, the only sure way to do that is to attack. (We were both surprised and delighted when we discovered this during playtesting. It at once reflects the historical situation, while also keeping the defending player fully engaged in the game.) If you try to defend Tenochtitlan simply by defending hexes, the Spanish will blow you out, one position at a time.
13.4 Aztec Tactics
13.4.1 Stacking
A. Try to avoid stacking two or three Knights together, because a stack of those elites will instantly bring maximal Spanish counterattacks, and your resultant losses must then necessarily all be Knights.
B. Stack three Knights only in forts or temples, and only if the Spanish cannot bring a full strength stack to bear. The Knight/2-4-4 combo is best.
13.4.2 Flank Attacks
A. Go after the Indian allies guarding the Spanish flanks every chance you get, though watch the mandatory advance-after-combat rule does not draw you into situations where you end up losing more steps than what you have destroyed. However, do this with your regulars and save the Knights for use against the Spanish themselves.
B. If you keep stretching the Spanish flanks, it minimizes their ability to concentrate their units (which also maximizes your attack options).
13.4.3 Timing
A. Make only one high-odds attack each turn in the early going of any set of player couplets. Once you have two human sacrifice markers, the power of your attacks increases dramatically.
B. Attack too much early on and you'll weaken your Knights before they have a chance to do real damage.
13.4.4 Other
Always go for the concentric assault, and use Cuauhtemoc ruthlessly and constantly (though never thoughtlessly or carelessly).