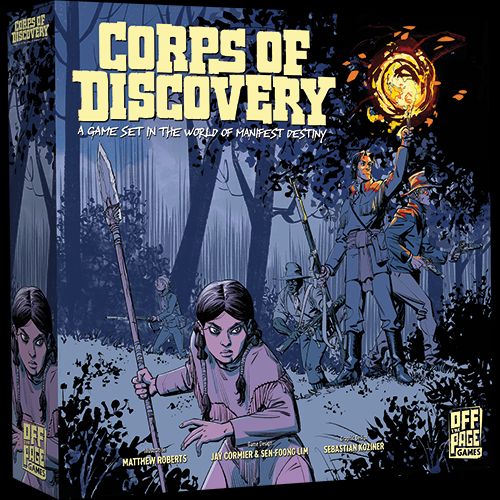
Corps of Discovery: A Game Set in the World of Manifest Destiny
Corps of Discovery Rulebook
Table of Contents
Table of Contents
Components
- 1 Map Board
- 16 Maps*
- 2 Map Folders
- 2 Double Sided Reference Boards
- 1 Concealer Page
- 1 Supply Board
- 24 Challenge Cards
- 6 Threat Cards
- 5 Character Cards
- 8 Gear Cards
- 7 Search Cards
- 4 Kill Minotaur Cards
- 13 Destiny Cards
- 50 Path Tokens
- 48 Resource Tokens
- 4 Sample Tokens
- 14 Water Tokens
- 4 Minotaur Tokens
- 3 Tipi Tokens
- 3 Fort Tokens
- 3 Fire Tokens
- 1 Shelter Token
- 8 Flora Terrain Tokens
- 5 Crew Tokens
- 1 Greek Fire Token
* This is not a game map, it's used just as an illustration. None of the actual game maps are shown throughout the rules.
Component Anatomy
MAP BOARD: Chapter Icon, Chapter Name, Map Number, Mission Briefing.
REFERENCE BOARD: Chapter Icon, Chapter Name, Extra Rules, True Both Ways Terrain Rules, True One Way Terrain Rules, Compass, Path Tokens, Reward Description.
SUPPLY BOARD: Path Tokens Placement Area, End of Day, Challenge Row, Night Phase, Consequence, Backpack, How to Build a Shelter, Fatigued Area of Backpack, How to Build a Fire, Fire Token Placement Location, Starting Water Supply, Extra Water Supply.
CHARACTER CARDS: Character Name, Chapter Icon, Non-Compatible Chapter, Name of Ability, Effect of Ability.
CHALLENGE CARDS: Time Limit, Name of Challenge, Challenge Description, Fail Effect, Pass Effect, Requirements Needed to Pass.
GEAR CARDS: Compatible Chapter Icon, Name of Ability, Effect of Ability.
THREAT CARDS: Threat Category, Threat Name, Threat Effect, How to Remove Monster, Where to Place Monster.
EXHAUST: When a rule or card indicates to Exhaust something, that means to turn the indicated card or component face down.
REFRESH: When a rule or card indicates to Refresh something that means to turn it face up.
Core Game Setup
- Select the Chapter you wish to play and gather the specific game components for that Chapter. The Chapter specific components are indicated in the Chapter's rules and also have the Chapter's Icon on them.
- Set up the Map Board:
- A. Place a Path Token into each of the holes on the Map Board, sun side face down.
- B. Choose a Map from the selected Chapter folder - but don't look at it!
- C. Cover the Map with the Concealer Page and insert both into the Map Board, then gently remove the Concealer Page.
- D. Place a Rock Resource Token on top of the Path Token that is indicated as the Rock Peak. The Path designated as the Rock Peak is listed on the Map Board in the Mission Briefing, as row and column coordinates.
- Players choose their Character and Gear Cards:
- E. Each player chooses an eligible Character Card. Some characters are restricted based on the Chapter being played or the player count (i.e. Collins can't be used in a solo game).
- F. Each player selects a number of Gear Cards based on the total number of players:
- I. 1 player: 3 Gear Cards
- II. 2 players: 2 Gear Cards each
- III. 3 players: 1 Gear Card each
- IV. 4 players: 1 Gear Card each
- G. Training Gear: If you want an easier game, one player can add the Training Gear called Medicine, and it does not count towards your Gear limit.
- H. Return any unused Character and Gear Cards to the game box.
- Set up the Reference Board:
- I. Place the Reference Board of the chosen Chapter near the Map Board, where all players can easily see it. The Reference Board contains important information that will be used often during the game.
- Set up the Supply Board:
- J. Place the Supply Board within reach of the players.
- K. Shuffle the core Destiny Cards with the Chapter specific ones to form the Destiny Deck and then draw 2 cards and place them face up to the right of the Supply Board. Place the remaining deck face down near the board with space for a discard pile.
- L. Find the "Approach the Arch" Challenge Card and place it in the leftmost space on the Challenge Row. This is always the first Challenge for the first day of each game.
- M. Take the core game Challenge Cards (with no Chapter icons on them) and the Chapter specific Challenge Cards (with the icon of the Chapter chosen to play) and shuffle them together forming the Challenge Deck.
- N. Place 1 Challenge Card from the deck face up in each of the remaining two empty spaces in the Challenge Row. There should now be a total of 3 face up Challenge Cards, including "Approach the Arch". Each day will have 3 new challenges and you will play multiple days during a game. Place the Challenge Deck face down nearby and leave space for a discard pile.
Track your plays. Write the player names along with their character and gear on the folder, along with which map you're using. This will help you keep track of which maps which players have played, as well as compare scores if you have different groups playing the same maps.
Gameplay
Each Chapter has a unique objective to be completed. While trying to achieve those objectives you will also be trying to Pass a set of 3 daily Challenge Cards. Each set of 3 Challenge Cards represents 1 day of Exploring. Each Challenge Card requires different sets of Resources to be acquired or spent in order to successfully Pass them within a limited amount of time. This means you'll need to Explore the map in order to find the various Resources you need before your water or food runs out.
On each turn, a player will:
- Explore a Path, and
- Perform Free Actions, there are 8 standard Free Actions, all are optional and can be performed before or after you Explore a Path on a turn. Some Chapters may have unique Free Actions that will be described in the Chapter's specific rules.
Explore a Path
Every turn you will Explore a Path by removing a Path Token from a space and revealing the Terrain underneath. You then gather or use Resources from the revealed Terrain and place it into your Backpack.
A Path Token covers each of the circular spaces on the Map Board. These circular spaces are called Paths. If a Path has a Path Token on it, it is an Unexplored Path and if the Path Token has been removed it is referred to as an Explored Path.
Before understanding the rules to Exploring, you first need to know how to deduce where the Terrain you need is located.
How to Find Terrain: The Reference Board
The Reference Board provides rules for how each of the Terrain types can be found and is slightly different for each Chapter. Use the Reference Board to deduce where a Terrain you need could be located. This will gain you the required Terrain effect or Resource Tokens to successfully complete the daily Challenge Cards.
The Reference Board is divided into 2 sections.
- The top section shows any Terrain rule that is true for both Terrain types. For example, Water is always adjacent to Wood and Wood is always adjacent to Water.
- The bottom section is only true for the first Terrain. For example, every Field is adjacent to a Wood and a Food, but every Food and Wood will not necessarily be adjacent to a Field.
The Rules
- Water / Wood: Water is always orthogonally adjacent to at least 1 Wood, and Wood is always orthogonally adjacent to at least 1 Water.
- Food / Tipi: Food is always diagonally adjacent to at least 1 Tipi, and a Tipi is always diagonally adjacent to at least 1 Food.
- Tipi / Skull: A Tipi is always orthogonally or diagonally adjacent to at least 1 Skull, and a Skull is always orthogonally or diagonally adjacent to at least 1 Tipi.
- Wood: There is exactly 1 Wood in every row and every column.
- Mud: Mud always has at least 1 Water and at least 1 Rock orthogonally adjacent to it.
- Rock: All Rocks are connected orthogonally. They will also never be on the outside row and column edges of the Map Board. (All are connected. Not on the edge. Unpassable. Rock will never be in any of these Paths.)
- Skull: A Skull will have different Terrain types on each of its 4 sides. If a Skull is on the edge of the Map, then it may only have Terrain on 2 or 3 of its sides, but they must all still be different.
- Hill: Hills don't have rules on how they're found, so they can be anywhere. When found you will get information and gain another turn though. See Terrain Activation on page 11. (Take another turn.)
- Field: A Field is the Terrain that a Shelter can be built on (see Free Action - Build a Shelter pg.14). A Field always has at least 1 Food and at least 1 Wood orthogonally adjacent to it. (Can place Shelter.)
How to Use the Reference Board to Find Terrain
In the example below, see if you can determine what any of the lettered Paths are by using the logic rules found on the Reference Board. Flip the page to verify if you are correct.
- A Because we know that Wood must always be adjacent to Water, then we 100% know that A is a Wood, as that's the only spot adjacent that isn't explored yet.
- B Based on the mini map in the Mission Briefing, there's a good chance that B is a Fort. It might not be, but also looking at the Hill to the right that says there are 2 Forts in that row and column, the chances are pretty high.
- C Diagonal to every Tipi is a Food, so C has to be Food since the other diagonal isn't one.
- D All Rocks are connected and since we know the Peak is at E3 and we've revealed 1 other Rock, those 2 Rocks must be connected (and Rocks cannot exist on the edge) so D must be a Rock.
- E We know that Mud is found adjacent to a Water and a Rock, and since all Rocks are connected, we know that a Rock could not be in the Path above, so E must be a Rock.
- F Looking at the mini map in the Mission Briefing, there's a good chance that this is a Fort, but we're not 100% sure.
- F + G + H One of these has to be a Wood since a Wood is always adjacent to a Water. It can't be H because that column already has a Wood in A and only 1 Wood exists in every row and column. If F isn't a Fort it could be a Wood, but column 7 currently has no Wood and it will need exactly 1 Wood in that column, so there's a high chance that G is a Wood.
Rules for Exploring
The Explored Paths represent the trail of the expedition, there are no player pawns to track positions on the Map Board.
-
Every Path that you Explore after the first must be orthogonally adjacent (north, east, west, or south) to a Path that has already been Explored.
-
However, you cannot explore a Path adjacent to:
- a Rock Path or
- a Path with a Monster Token on it.
They both block progress unless you can access that Path from another direction or remove the Monster. They are circled in red to remind you of this.
MONSTER EXPLORE EFFECT: If you Explore a Path that is affected by a Monster's Explore Effect, then you must discard any 1 Resource before you can Explore that Path.
Strategy: Through deduction, you may have a strong indication as to which Terrain is located on an Unexplored Path. Place a Resource Token matching the suspected Terrain on top of the face down Path Token as a reminder of your assumption. The full color side can be used when you are 100% certain a Terrain is on a Path, and use the gray side with the ? on it when you're not 100% sure.
To Explore a Path
- REMOVE THE PATH TOKEN
- A. Select a valid Path that you can access using the Rules to Exploring.
- B. Remove the Path Token from the selected Path and place it on the leftmost Challenge Card. This Path is now considered an Explored Path.
- ACTIVATE THE TERRAIN OF THE EXPLORED PATH
- A. You can only Activate the Terrain of the Path that was just Explored.
- B. You MAY collect the Resource Token, and resolve any extra rules as indicated on the Terrain Activation table.
- C. You may collect more Resource Tokens than you have space for in your backpack, but you will need to discard down to 6 Resources and 10 Water by the end of your turn.
You cannot take any other action between steps 1 and 2 when you Explore a Path.
THE FIRST EXPLORE OF THE GAME: The Mission Briefing of a Chapter will indicate where the first Explore of the game can be done. The expedition will begin from that Path. If it says Column 7, that means your boat is in the river and you can stop anywhere along the river to start Exploring.
Terrain Activation Table
| Terrain Type | Resource Token Collected | Extra Rules |
|---|---|---|
| Food | Food | --- |
| Rock | Rock | --- |
| Wood | Wood | --- |
| Mud | Mud | --- |
| Water | Water | --- |
| Skull | Skull | Draw a Threat Card. See Skull Terrain Found for further rules on page 12 |
| Field | None | A Field has no effect when explored but the Free Action, Build a Shelter is performed on these Paths once found (see page 14) |
| Hill | None | When revealed, the Path Token from this Explored Path is discarded rather than added to a Challenge Card. Hills also provide information as indicated on a Chapter's Reference Board. The player who Explored and found a Hill gets to take another turn. |
| Tipi | None | When revealed the player can immediately trade 1 Resource Token for any other Resource Token. |
Skull Terrain Found
When you find a Skull, you get that Resource, but you've also uncovered a Monster Lair!
- Place a Skull Token in the leftmost empty space in your Backpack.
- Draw and resolve a Threat Card.
- A. If the revealed Threat Card is a Monster, place the matching Monster Token on the Skull you just Explored. Then place the Monster Threat Card beside the Map Board as a reminder of that Monster's effect.
- B. If the Chased Threat Card is revealed, place any gained Destiny Cards in your Supply under the Chased card and place the pile of cards on top of the face up Destiny Cards that are beside the Supply Board. You cannot earn or use any Destiny Cards while Chased is in play. You can reclaim Destiny Cards and use them again after you Kill a Monster (varies by chapter) and discard Chased.
- C. If the Injured Threat Card is revealed, place it over the End of Day and Night area on the Supply Board. During the next Night phase, move this Injured Card to the first space in the Challenge Row. It is now active. While the Injured Card is active, you will only reveal 2 new Challenge Cards instead of 3 at the beginning of each new day. As a Free Action on your turn, you can pay 1 Mud to discard the Injured Card from the Supply Board. This can be done even if it hasn't been moved to the first space yet.
Backpack
Collected Resource Tokens are placed in an empty space in your Backpack. You have 6 spaces to carry Resources, but you could get Fatigued and lose 1 Water if you are carrying Resources in the Fatigue spaces whenever you resolve a Challenge Card. More on this on page 16.
Resources can be moved around in your Backpack at any time.
Sample Tokens: Some Challenge Cards will tell you to gain 1 Sample Token. This Token is placed in your Backpack and takes up 1 space. As a Free Action you can discard 1 Resource to also discard the Sample Token. If you gain a Sample Token when your Backpack is full, you must discard a resource to accept the Sample Token!
Exploration Reward
COMPLETE COLUMN: DESTINY CARDS. When you Explore the last Unexplored Path in a column of the Map Board, you choose one of the face up Destiny Cards from beside the Supply Board. You can also draw the top card of the Destiny Deck instead, if you do not want one of the face up cards. Keep collected Destiny Cards near the Supply Board.
COMPLETE ROW: CHAPTER SPECIFIC REWARD. If you Explore the last Unexplored Path in a row, you gain the benefit indicated by the Chapter's Specific Rules as indicated on the Reference Board.
Free Actions
These Free Actions are optional and can be done at any time during a turn, before or after you Explore and Activate a Path, but must be done before Resolving a Challenge Card.
Use Character Abilities
You can use your character's ability on your turn. Some abilities require you to EXHAUST when used. Generally these abilities can only be used once a day until Refreshed. Character abilities may also specify a time when it can be used, such as before or after Exploring a Path.
Check Appendix on Page 27 to review Character Abilities.
Use a Gear Card
You can use 1 or more of your face up Gear Cards on your turn. The card will indicate whether you need to Exhaust it to activate its ability, or if you need to Remove it from Play entirely. The Gear may also specify a time when it can be used, such as before or after Exploring a Path. You cannot use another player's Gear Card or trade Gear Cards to other players. The Appendix on Page 27 includes a description of all available Gear Cards.
Kill a Monster
Each chapter has a specific way to kill Monsters. Refer to the Chapter's specific rules for details.
Use Destiny Cards
Destiny Cards are shared by all players. A player can use any number of acquired Destiny Cards on their turn as a free action. Discard the Destiny Card and perform the action described on the card.
Build a Shelter
On your turn you can build a Shelter on an Explored Field Terrain.
- Determine the location. A Shelter must be built on an Explored Field Terrain. If there are no available vacant Field Terrains then a Shelter cannot be built.
- To build a Shelter you must discard 2 different resources of either Wood, Mud or Skull (eg. 1 Wood and 1 Skull, or 1 Mud and 1 Wood, but not 2 Wood or 2 Skull). Place the Shelter on an available Field Terrain on the Map Board.
- Building a Shelter prevents the penalty of being Fatigued when your Backpack is full.
- Only one Shelter can be on the Map Board at a time, though if you do build a second Shelter, you can relocate it to a new Field Terrain.
Build a Fire
To build a fire, discard exactly either 2 Wood or 2 Stone and place a Fire Token on the Supply Board. You can only have 3 Fires at any one time. Fires can help with some Challenge Cards and can be used to Backtrack (see below).
Backtrack
After you Explore a Path, you can choose to discard 2 Fire Tokens from the Supply Board to Backtrack. This means that you do not Activate that Terrain. You do not collect any Resource Tokens or trigger any special rules of that Terrain. Simply replace the Path Token on top of that Path. You MAY Refresh any Gear or Characters that you used, and reverse any effects those cards had. You then must Explore a different Path.
You used your torches to look into that Path and you didn't like what you saw, so you decided there must be a better way.
Discarding Resource Tokens
You may discard any number of Resource Tokens from your Backpack at any time. This would primarily be done to avoid Fatigue in the Backpack.
Ending Your Turn
CHECK RESOURCE LIMITS: Discard down to 6 Resources and 10 Water in your Backpack.
Resolve Challenge Card
Check to see if the leftmost Challenge Card has reached its time limit. If the time limit has been reached, resolve the Challenge Card to determine if it was a Pass or Fail. Otherwise, pass the turn to the player on your left.
TIME LIMITS: Each Challenge Card has a time limit in the top right corner. When the number of Path Tokens on a Challenge Card matches the time limit, resolve the card.
How You Pass a Challenge
- In order to Pass a Challenge, you need to meet every requirement on the Challenge Card which generally involves having and/or discarding specific Resources.
- If you have met all the requirements and choose to discard all required Resources you then Pass the Challenge. Follow any instructions on the Pass side of the Challenge Card. You can choose to NOT pass a challenge even if you can meet the requirements. This is usually done to keep the Resources for something else. If you choose not to Pass a challenge it is considered a Fail.
- You may also receive additional rewards if other criteria are met. Each Challenge Card will specify any additional rewards. In the "School of Fish" card to the right, if you PASS and if you also have at least 1 Fire Token, then you gain 1 Food Token.
Challenge Card requirement symbols:
- A plain resource icon means you MUST discard this resource.
- A resource icon in brackets means you must discard this resource if you have it. If you do not have it, then there is no effect.
- A Fire icon means you need to have at least 1 Fire to satisfy this requirement, but you don't need to discard it.
- A Shelter icon means you need to have a Shelter on a field to satisfy this requirement, but you don't need to discard it.
When You Fail a Challenge
If you do not possess the required items on your Supply Board or cannot (or choose not to) discard the required Resource Tokens you Fail the Challenge. Follow any instructions on the Fail side of the Challenge Card.
- You must always try to meet a Fail consequence. If you are told to lose a specific amount of Resource Tokens but do not have that many, you must discard as many as you can back to the Reserve. If you have none, there is no additional penalty for having insufficient resources (or Destiny Cards, etc.) with the exception of Water.
- If you are ever asked to discard Water Tokens and you cannot, all players die of thirst and the players lose the game. Food is NOT the same - the only time Food must be consumed is at the End of the Day. If you have no Food remaining at the End of the Day, all players die of hunger and the players lose the game.
Consequence: After Resolving the Challenge Card
Regardless of whether you Passed or Failed, discard the resolved Challenge Card from its space on the Supply Board and all of the Path Tokens that were on it. Then you must resolve the Consequence indicated on the space revealed from the discarded Challenge Card. Each Consequence will check if you are Fatigued and resolve any active Consequence Effects (Extra Consequence effects are not introduced until later Chapters).
FATIGUED
- After you finish resolving a Challenge Card, you must check to see if you are Fatigued.
- If you are carrying 5 or 6 Resource Tokens you are considered Fatigued. You must either discard down to 4 Resource Tokens to not be Fatigued OR lose 1 Water Token as penalty for carrying too much.
- If you have built a Shelter then you will not have to discard a Water if you are Fatigued.
- Note that Consequences are only triggered after normal Challenge Cards are discarded, not End of Day or Injured Threat Cards.
If all 3 Challenge Cards have been resolved, proceed with the End of Day. Otherwise, end your turn and pass play to the left.
Note: Play order cannot be changed during the game as it is important to plan who acts when.
EXAMPLE
- A. Everson has placed a third Path Token on this Challenge Card. It is now the end of his turn so he will now resolve this Challenge Card.
- B. The players have the right Resources and discard: 1 Rock, 1 Mud, and 2 Water.
- C. They look under the Pass column and they gain 1 Wood.
- D. They discard the Challenge Card and check for consequences and see that they are Fatigued because there is at least 1 Resource in the red Fatigue spaces on the Backpack.
- E. The Players decide to discard 1 Food to bring them down to 4 Resources so that they are now not Fatigued and don't lose any of that precious Water!
- F. It is now the next player's turn.
If they didn't have the right Resources, or chose not to discard the right Resources, then they'd Fail and be forced to discard 3 Water, 2 Wood and a Shelter.
End of Day
- Once all 3 Challenge Cards for the day have been resolved, you must then resolve the End of Day Challenge. Feed your crew by discarding 1 Food Token to the Reserve to Pass this Challenge. If you do not have a Food Token to discard you Fail the Challenge and the players starve and lose the game!
- Remember: This is NOT a Challenge Card so you do not check to see if you are Fatigued after this Challenge is completed.
Night
- If there are no Monsters currently in play, draw a Threat Card and resolve it (see Skull Terrain Found page 12).
- If it's a Monster, then it will tell you where to place it. For example, in Fauna it could tell you to place it on the northernmost Explored Path (using Resource Priority Order).
- Resource Priority can be found on the back of the Rulebook and is only required if there are multiple valid locations to place a Monster. If one of the northernmost Explored Paths is a Food (because Food is first in Resource Priority order), then place the Monster there. Otherwise continue down the Resources on the back of the rules until you have one that matches one of the northernmost Explored Paths.
- Deal out 3 new Challenge Cards for the next day. (reminder - if the Threat Card "Injured" is in play, it takes the space of one of the Challenge Cards, reducing your time for the next day by only drawing 2 Challenge Cards to resolve).
- Refresh all Character and Gear Cards. A new day begins.
End of Game
- If you are ever required to discard Water Tokens (due to Monsters, Challenge Cards or being Fatigued) and you do not have enough in the Water Supply on the Supply Board to meet the requirement, all players die of thirst and lose the game.
- If you Fail the End of Day Challenge because you did not have a Food Token to discard, all players starve and lose the game.
- If you cannot refill the Challenge Row with 3 new Challenge Cards then you lose the game.
- The Chapter Rules will contain the objectives that need to be completed to win the game.
Scoring the Game for the Level of Success
Add up the Time Limit number of every unresolved Challenge Card still on the Supply Board and each Challenge Card remaining in the Challenge Deck. This is your final score!
| SCORE | |
|---|---|
| 28+ | Master Explorer |
| 22-27 | Fearless Trailblazer |
| 16-21 | Veteran Pathfinder |
| 10-15 | Skilled Tracker |
| 4-9 | Novice Guide |
| 1-3 | Greenhorn Scout |
Chapter 0: Training Mission
To ensure you're ready for the greater mission ahead, the President has tasked you to scout out the land to determine its viability for the upcoming expedition. This training mission will introduce you to the rules and deduction concepts used in Corps of Discovery during a brief introductory scenario.
Chapter Goal
Survive two days! To survive you need water. If you are ever told to discard water and you cannot - you die of thirst and lose the game. These unexplored lands are unforgiving but the search for water is far from the greatest challenge you will face.
Setup for Training Mission
Set up the Map Board as described in the Core Game Set up with these exceptions:
- The map will only be a 5x5 grid of Terrain rather than the standard 7x7 grid. Place Path Tokens face down in Rows B-F of Columns 3-7.
- From the Fauna folder, choose 1 of the 2 Training Maps - but don't look at it! Cover the Training Map with the Concealer Page and insert both into the Map Board, then remove the Concealer Page.
- Choose Lewis as your Character Card (this is the only Character used for the Training Mission regardless of player count).
- Choose Compass as your Gear Card (this is the only Gear used for the Training Mission regardless of player count).
- Start with 3 Water Tokens instead of the core game's usual 8.
- Instead of a Reference Board there is a Reference Card for the Training Mission. It contains 5 of the total Resources that normally appear in the full game.
- Reveal any Threat Card with a Minotaur and place its matching Token on D4. Find the Kill Minotaur Card that requires you to Make Ammo and place it face up above the Map Board.
All the standard game rules apply with the following exceptions:
- There is no Explore Bonus. You will not gain a reward when you Explore the last unexplored Path in a Column or Row, so you will not use Destiny Cards in the Training Mission.
- There is no Field Terrain so you cannot use the Build a Shelter Free Action.
- You only need one Food Token to Feed the Crew after the first day. You don't need to Feed the Crew after the second day.
- During the Night if there is no Monster in play you will not draw a new Threat Card. Only one Monster will be in the Training Mission.
Ending the Training Mission
You LOSE the Training Mission if you are required to discard any Water Tokens and have none on the Supply Board.
The land proved to be unforgiving and water is scarce, you leave rundown and thirsty. So thirsty. Perhaps an expedition here is not sustainable.
You WIN the Training Mission if you resolve all 6 Challenge Cards.
The land is beautiful and bountiful and worth exploring further. Of course there was a Minotaur roaming about, but the wilderness is a dangerous place and it can't get worse than that, right?
Chapter 1: Fauna
As part of the President's Corps of Discovery, sent out to clear the land of monsters, you must find and kill 3 Minotaurs. To do so, you'll need to locate 3 of the settler's Forts so you can learn how to slay these dangerous beasts!
Chapter Specific Components
- 1 Folder with 8 Maps
- 4 Threat Cards
- 4 Challenge Cards
- 2 Fauna Reference Boards
- 3 Fort Tokens
- 4 Minotaur Tokens
- 6 Vine Tokens
- 1 Destiny Card
- 4 Kill Minotaur Cards
Extra Setup
Shuffle the Kill Minotaur Cards deck face down near the board. Leave space for a discard pile.
The First Exploration
Start exploring on any Path in Column 7 on the Map.
- This represents the starting point of the expedition as they launch from their boat.
Chapter Specific Changes to Gameplay
There are 2 new Terrain types to find in Fauna Maps: Vine and Forts.
VINE: At least 1 Vine exists in the same column where there's at least 1 Rock. And the opposite is true too: At least 1 Rock exists in the same column where there's at least 1 Vine.
- When you Activate the Vine you gain 1 Vine Token.
FORTS: You were provided with a mini map for where 3 Forts exist! Check the Mission Briefing for your mini-map! The location of a Fort is dictated by the pattern of adjacent Terrain types shown on the minimap in the Mission Briefing. This pattern can be rotated in 90 degree increments but not flipped or mirrored.
- When you Activate a Fort Terrain, you reveal a new Kill Minotaur Card. Finding a Fort will give you information on HOW you can kill these invasive monsters.
HILLS: In the Fauna Chapter, the number on a Hill indicates how many Forts there are in the row and column that the Hill is on. The 2 on this Hill means that there are 2 total Forts in this row AND column. In the example on the right, there's a Hill with 0 beside the Hill with a 2. That means there are no Forts in that row or column, which means the 2 Forts must be in the column with the Hill that has a 2 and not its row.
Exploration Bonus for Completing a Row
When you Explore the final Unexplored Path in a Row, you MAY discard any 1 revealed Threat Card in play. If you do discard a Threat Card you then must draw a new Threat Card. If you discard a Minotaur, then remove that Minotaur from the map as well. Place the discarded Threat Card at the bottom of the Threat deck. If it was a Minotaur, it is not considered killed yet.
Monster - Minotaur
THREAT CARD EFFECTS: The Minotaurs make you discard a resource to explore in its row and column on the Map Board. If you Explore a Path in this row or column, you must first discard any 1 Resource.
Each Minotaur Threat Card reads:
MONSTER: Minotaur
Place Minotaur Token on: If DAY: Explored Monster Lair; If NIGHT/ROW REWARD: Northernmost (or Southernmost, Easternmost, Westernmost, depending on the card) Explored Path (Token Tray order).
EFFECT: Discard any 1 Resource to Explore a Path in its row or column.
HOW TO REMOVE: Resolve a Kill Minotaur Card.
Free Action: Kill Monster - Kill a Minotaur
- You can kill a revealed Minotaur by discarding all of the Resources listed on any revealed Kill Minotaur Card.
- If you have multiple revealed Minotaurs and/or multiple revealed Kill Minotaur Cards, you may kill any revealed Minotaur with any revealed Kill Minotaur Card.
- Once killed, place the Minotaur Card face down below the reference board. It no longer causes any negative effects. Discard the Kill Minotaur Card as it can only be used to kill a single Minotaur. Place the Minotaur Token in the Mission Briefing area as a trophy of your kill!
Fauna Victory Condition
When you kill 3 Minotaurs, the game ends immediately and no further actions or cards will resolve. The players are victorious! Tally the Chapter Score to see how well you did.
Important Reminder: While surviving in the wilds of the New World by Passing Challenge Cards is important, you only win the Fauna Chapter when you kill 3 Minotaurs - never forget the mission the President tasked you with!
Chapter 2: Flora
You've managed to find the settlers and survive the rampaging Minotaurs but, in this dangerous new world, deadly threats are lurking around every corner. Now, the Corps of Discovery must defend those settlers from an invasive plant species - one that takes over the minds and bodies of anything it touches, turning them into mindless creatures that want to bring all animals under the sway of the Giant Plant!
Kill it with fire!
You must locate the Giant Plant that is controlling all of the Flora and bring the highly volatile Greek Fire to its location in order to burn it to cinders.
Chapter Specific Components
- 1 Folder with 8 Maps
- 2 Flora Reference Boards
- 1 New Destiny Card
- 5 Crew Tokens (1, 2, 3, 4, & S)
- 4 Petrified Fossil Tokens
- 8 Flora Terrain Tokens
- 7 Search Cards
- 4 New Challenge Cards
- 1 New Character Card (Mme. Boniface)
- 1 Greek Fire Token
Extra Setup
Complete the core game setup with the addition of the following steps:
- Place the Flora Terrain Tokens over the matching Terrain icons on the Flora Reference Board.
- Place the Search Card with the Giant Plant face up.
- Shuffle and deal 3 face up Search Cards in a row below the Map Board to the left of the Giant Plant Card. The 3 Search Cards and the Giant Plant Card form the Expedition Trail. Remove the remaining Search Cards from the game.
- Place the Crew Token labelled "S" on the left side of the Expedition Trail, before the first Terrain. This token marks your progress on the Expedition to kill the Giant Plant. The 'S' Crew Token is always used to track progress. If you ever have to lose this token you lose the game. You will be moving the 'S' Crew Token to the right along the Expedition Trail.
- Place the rest of the Crew Tokens nearby.
- Place the Greek Fire Token on top of the Path indicated in the Mission Briefing.
- Place 1 Fire Token on your Supply Board, as indicated in the Mission Briefing.
The First Exploration
Players start at the Fort location as indicated in the Mission Briefing. Remove the Path Token on that Path from play.
Chapter Specific Changes to Gameplay
There are 2 new Terrain types to find in Flora Maps: Petrified Forest and Sacagawea.
PETRIFIED FOSSIL: Can be found on Paths that are 1 Path away from the edge of the map. When you Activate this Terrain you gain 1 Petrified Fossil Token into your Backpack.
SACAGAWEA: Can be found orthogonally or diagonally adjacent to 3 Wood. When you Activate this Terrain you immediately remove all Minotaurs in play. Also, if more Minotaurs enter play, they are immediately killed and removed from play.
Exploration is as normal with the following exceptions:
HILLS: In the Flora Chapter, the number on a Hill indicates how many Flora creatures there are in the row and column that the Hill is on. A 2 on a Hill would mean that there are 2 total Flora creatures in this row AND column.
Search Cards and the Expedition Trail
- If you Explore a Path and the revealed Terrain is next on the Expedition Trail (to the right of the Crew Token) move the Crew Token onto that Terrain icon on the current Search Card. Flora Terrain unique to this Chapter have extra requirements (see below).
- If you Explore a Path and reveal a Flora Terrain, you MAY discard a Fire Token to kill it:
- If you discard a Fire Token: Remove the matching Flora Token from the Reference Board and place it off to the side.
- A. That Flora is now considered dead!
- B. If the Flora Terrain you just Explored matches the next Terrain on the Expedition Trail, advance the Crew Token onto the matching Flora Terrain icon.
- C. If the Flora Terrain you just Explored doesn't match the next Terrain on the Expedition Trail then you discard that Flora Terrain Token and don't advance.
- If you DO NOT discard a Fire Token: If you don't have a Fire Token to discard, or you choose to not discard a Fire Token, then you will lose 1 of your available Crew Tokens.
- A. You do NOT activate the Terrain at all! You do NOT collect any Resource from this Terrain.
- B. Choose 1 of your Crew Tokens, which can be any of the Crew Tokens you have available on your Reference Board, and remove from the game. That Crew Token has been eaten and the Crew Member has died.
- C. Place the Flora Terrain Token matching the Terrain you just explored ONTO that Path. It has a red circle around it, which means that you cannot Explore FROM this Path to an adjacent Path.
- D. At any time in the future when you have built Fire, you can discard it to kill any Flora Terrain Token that's on the Map Board. Discard that Flora Terrain Token.
- If you discard a Fire Token: Remove the matching Flora Token from the Reference Board and place it off to the side.
Explore Bonus for Completing a Row
When you Explore the final Unexplored Path in a Row, you can move your Crew Token 1 space to the right on the Expedition Trail, as long as it is not a Flora Terrain.
Search Cards and Greek Fire
- When you move off of a Search Card flip it over to reveal Resources and items you will need to fight the Giant Plant!
- When you move off the 3rd Search Card, you need to have acquired Greek Fire. To acquire Greek Fire, simply Explore the Path that has the Greek Fire Token on it. Once you do, add this Token to your backpack. It takes up a spot in your backpack until the end of the game.
Fight the Giant Plant
If the S Crew Token has moved off of the 3rd Search Card AND you have the Greek Fire Token in your possession, then it's time to fight the Giant Plant!
Keep the Crew Token that's on the Greek Fire icon on the final Search Card where it is, and then place each of your remaining Crew Tokens such that they cover up the Resources and Items on the backs of the Search Cards. Whatever remains visible is what you will need in order to defeat the Giant Plant. Continue playing until you have all the Resources and Items that are still visible on the backs of the Search Cards. If you lose a Crew Token, then you will now need to acquire the Resource or Item that was under it as well.
End of game
The game ends IMMEDIATELY when the players have:
- the Greek Fire,
- moved the Crew Token off of the 3rd Search Card,
- and obtained the Resources and items indicated by the areas on the back of the Search Card not covered by a Crew Token.
No further actions or cards are resolved. The players are victorious!
The Greek Fire was heavy and difficult to move through the wilds, but it was the only way to kill this monstrous Giant Plant. Once the Greek Fire was in position and ignited we could feel the settler's tensions burn away as the Giant Plant turned to ashes. They were free of this menace.
Both regular loss conditions apply to Flora - you can still starve or die of thirst. In Flora you can also lose the game if all your Crew Tokens (including 'S' who is on your Expedition Trail) are removed from the game.
Appendix
Gear
BOX OF GOODS — DISCARD: Gain any 1 Resource. If you still have this when you win the mission, add 4 to your score. CAN ONLY BE SELECTED AT THE START OF A GAME.
This Gear makes the game a bit harder. It has a tiny bit of a bonus if you use it, but if you can hold onto it and not use it, then you'll grab an extra 4 points!
COMPASS — EXHAUST BEFORE EXPLORE: If you correctly guess the next Terrain you're about to Explore, discard that Path Token.
Effectively saving you an hour each time you're correct. Use this when you need more time to find the Terrain you're looking for.
FLINT — EXHAUST: You only need 1 Wood or 1 Rock to build a Fire.
Cheap fire! You only have to pay 1 Wood or 1 Stone to build a Fire!
JAR — EXHAUST: Place 1 Resource that's not Water from the Supply Board onto this card. At Night, return that Resource plus one more of the same type to the Supply Board.
The Resource chosen is placed on this card and cannot be used by another player. You can choose to move it back to the Supply Board prior to the End of the Day, but you won't get the extra Resource unless it stays there until Night.
MORTAR AND PESTLE — EXHAUST: Discard any 2 Resources to gain any 1 Resource.
The 2 Resources chosen do not need to be the same Resource. Remember, Water is a Resource!
SATCHEL — EXHAUST AFTER EXPLORE: Discard the Resource you just gained from Exploring to take a Destiny Card instead.
You can take either of the face up Destiny cards above the Reference Board or take the top card from the Destiny deck.
TRACKING GUIDE — EXHAUST BEFORE EXPLORE: If you correctly guess the Terrain you're about to Explore, discard that Path Token and that Resource, and Explore again.
This lets you hunt for a specific Terrain by predicting a Terrain you don't want! If it is the Terrain you want, then you found it! If it isn't the Terrain you want - but it is the Terrain you guessed, then you can discard that Path Token and Explore a new Path!
TRAINING GEAR: MEDICINE — EXHAUST: Refresh 1 Character or Gear. END OF GAME: -5 points in a 2, 3, or 4 player game.
Make your game easier with Medicine. Exhaust this to Refresh 1 Character or Gear belonging to any player. In a 2, 3, or 4 player game, you will lose 5 points at the end of the game.
Characters
CLARK — Lead Crew: EXHAUST: Swap 1 Gear from Reserve and add to your play area.
You can swap out an Exhausted Gear and bring in a Refreshed Gear. Note: You cannot bring in any of the Gear that indicates that it can only be selected at the start of a game.
COLLINS — Obedient: EXHAUST: You don't pay the Resource to Explore Paths protected by Monsters. EXHAUST: Guess the next Terrain correctly and you can immediately build a Shelter there.
You cannot use Collins in a solo game or in the Fog expansion. When you guess the Terrain correctly, you still have to pay the required Resources to build the Shelter.
LEWIS — Research: EXHAUST BEFORE EXPLORE: Gain a second Resource matching what you just found.
You don't gain anything more if you found a Terrain that doesn't produce a Resource. For example, if you find a Tipi, this ability has no effect. If the Terrain provides your choice of Resource, then this ability will give you 2 of the one you choose. In the expansion, Insecta, if the Ranidae is Exhausted, you can keep 1 of the 2 Resources you collected and shuttle the other one to the boat if it's still needed.
MME. BONIFACE — Mixture: When you collect Wood or Skull from Exploring, you can instead take Water.
If you gain multiple Wood or Skulls in a turn (from a Destiny Card), you can only take Water for the first Resource, not the second.
YORK — Resourceful: When you find a Resource that's needed for any of today's challenges, place it on the Challenge Card instead of in your Backpack.
Helps keep your Backpack free and reduces the risk of Fatigue. Once a Resource is placed on a Challenge Card it cannot be moved off it until that card is resolved. If you Fail that Challenge, you can put that Resource in your Backpack.
Reference
Chapters
| Chapter | Goal |
|---|---|
| FAUNA | Find and kill 3 Minotaurs |
| FLORA | Find the Giant Flora and kill it with Greek fire |
| EXPANSION 1: INSECTA | Make Insecticide and kill 4 giant insects |
| EXPANSION 2: VAMETER | Track the flying Vameter and shoot it 5 times |
| EXPANSION 3: MALDONADO | Save or kill 3 Crew, depending on whether or not you're the traitor! |
| EXPANSION 4: FOG | The Terrain rules are mixed up. Determine the new rules to win |
Terrains & Resources
This list is also the Resource Priority Order, read from top to bottom.
| Terrain | Resource / Effect |
|---|---|
| Food | FOOD |
| Wood | WOOD |
| Mud | MUD |
| Rock | ROCK |
| Skull | SKULL + draw a Threat Card |
| Vine | VINE |
| Field | NO RESOURCE, CAN PLACE SHELTER |
| Mushroom Field | MUSHROOM*, CAN PLACE SHELTER |
| Flower | FLOWER* |
| Petrified Forest | PETRIFIED FOSSIL* |
| Water | WATER |
| Tipi | TRADE 1 RESOURCE |
| Hill | NO RESOURCE, DISCARD PATH TOKEN, TAKE ANOTHER TURN |
*FROM EXPANSIONS
Cards Per Player Count
- 1 PLAYER: 3 Gear Cards
- 2 PLAYERS: 2 Gear Cards each
- 3 PLAYERS: 1 Gear Card each
- 4 PLAYERS: 1 Gear Card each
What You Do in a Turn
Explore and Activate a Path, and any number of Free Actions (pages 13-14):
- USE CHARACTER ABILITIES
- USE A GEAR CARD
- KILL A MONSTER
- USE DESTINY CARDS
- BUILD A SHELTER
- BUILD A FIRE
- BACKTRACK
- DISCARD RESOURCE TOKENS
Why Shelter?
Build a Shelter: Pick 2 of Wood, Mud or Skull — NO FATIGUE PENALTY. Having a Shelter means you won't lose Water when you are Fatigued by carrying too much in your backpack.
What is Backtrack?
Build a Fire: 2 Wood or 2 Rock. Discard 2 Fire to cancel the turn you just had (put Path Token back, discard gained Resource, retract any Character or Gear abilities).
How You Lose
- If you are told to lose Water and you don't have any, you lose the game!
- If you can't eat food at the end of a day, you lose the game!
Scoring the Game
| SCORE | |
|---|---|
| 28+ | Master Explorer |
| 22-27 | Fearless Trailblazer |
| 16-21 | Veteran Pathfinder |
| 10-15 | Skilled Tracker |
| 4-9 | Novice Guide |
| 1-3 | Greenhorn Scout |