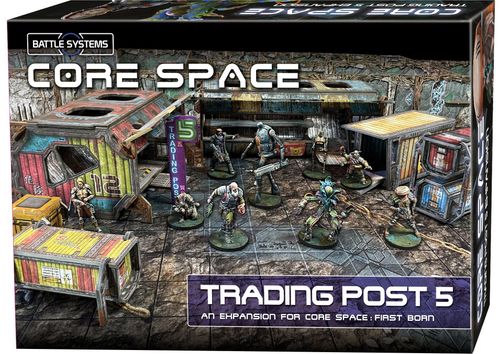
Core Space: First Born – Trading Post 5
Core Space: First Born – Trading Post 5 Rulebook
Table of Contents
Table of Contents
Overview
Trading Post 5 is a hastily built waystation in a crater of an abandoned asteroid in First Born space. In the game you will get to know the Trading Post, the place to buy, sell and recruit between missions.
This expansion presents the Trading Post as a playable location when your Traders visit it hoping to make a large profit from their recently acquired alien loot. However, the aliens that so abruptly woke have followed them. Can they defend the settlement from the attackers who are trying to reclaim their home on the asteroid?
All of the different components can be used in this book's custom narrative campaign, but they remain fully modular, so they can also be integrated into other Core Space games whenever you wish.
The campaign in this set is for 1 or 2 crews. If you use two crews, we recommend having at least one additional crew beyond this set to make sure there are enough spare NPCs to represent the inhabitants of Trading Post 5.
Miniatures
This set introduces a large number of new characters to the game, each with a double-sided board that allows them to be used as criminal Gangers, casual Civilians, and even as the sole agent of the Galactic Corps, Zara.
Event Cards
The Event Cards in this expansion introduce new NPCs and game rules. Add them to any other cards in your collection with matching icons, and use them when the mission specifies or when you want to add a special touch to custom games.
Equipment
This expansion includes a selection of new equipment tokens representing some of the powerful weapons found at the Trading Post. They should be mixed in with the others of their type as usual.
The white tokens should be kept separate for use as supply drops; see page 12.
Some characters and tokens include icons you may not have seen before. Their rules are on page 12.
Terrain
The terrain in this set is made up of prefabricated containers housing shops, workshops, bars and supplies, expanding First Born Space. These are represented in missions using the map icons below.
- Large Commercial Container – a large prefabricated container (drawn with a grey-blue body and three windows).
- Small Commercial Container – a smaller prefabricated container (drawn with a red-and-grey body and one window).
- Container – a long, flat container with a striped top.
- Delivery Crates – three tall crates, drawn side by side.
- Small Crates – small square crates.
- Table – a triangular table.
- Chair – a single chair.
- Ganger, Civilian and Galactic Corps – the NPC markers for each type.
Detailed assembly tutorials can be found at www.battlesystems.co.uk.
Note that when filling the various crates in this set, you must use only items that are not First Born, choosing them at random from those in your collection of the appropriate size, and omitting any item marked with the icon shown on the printed page.
Gangers
Core Space is full of criminal gangs, often former traders turned violent thieves in desperate times.
Gangers will be used when the mission briefing specifies, or they can be used in any game by adding their cards to the Event deck.
Gangers choose targets in the same way as the First Born, and choose their actions by following the AI table in the core rulebook.
Target Priority List
- First Born.
- Galactic Corps.
- Security.
- Traders.
- Rival Gangers.
- Civilians.
Gangers will not attack each other.
Auxiliaries
Auxiliaries are a new type of character representing animal companions and robotic assistants. They do not replace a fully functioning Trader, but they are small, cheap and loyal!
Auxiliaries are classified as either Creatures or Machines on their boards. Creatures have no additional rules, but Machines follow all the usual rules for Trader Machines (such as being immune to poison).
Using Auxiliaries
Auxiliaries have a point cost and can be hired in the same way as Traders. They are always hired from the standard side of the board (at the blank point cost). They do not count towards the crew limit, nor towards the ship, nor when going on a mission.
They activate as if they were Traders, but unless stated otherwise they are limited to the following actions:
- Move.
- Attack.
- Search.
- Knock Back.
Auxiliaries can pick up and carry equipment if their boards have removable slots with room to do so. Removing these sections to carry items can remove character abilities, just as with a Trader's armour slot. The different types of Auxiliary have different amounts of inventory space.
Auxiliaries cannot use equipment. They have simplified statistics, like NPCs, and use them when attacking. As with NPCs, an Auxiliary can take only one point of damage before being destroyed.
Creatures cannot be revived, but Machines can be repaired after the game if they are recovered and dragged back to the ship (even if they were not originally yours). The repair cost is equivalent to the mission hire cost.
Advancement
Auxiliaries have a limited career track in the corner of their boards. They earn career points for surviving missions, just like Traders. Once their career track is full, you may flip their board and use the Trained/Enhanced side (at the cost of red points) as an advanced option.
Auxiliaries can be sold in the Trade Phase for their hire cost (using the increased value in points if they are Trained/Enhanced).
NPC Auxiliaries
In some missions Auxiliaries will be used as NPCs, and the mission will specify an NPC as their owner. They arrive with that NPC and activate using the same rules.
If their owner is a Civilian, do not roll for the Auxiliary's actions: they remain adjacent to the Civilian, moving with it and attacking the same targets. If the Civilian is defeated, the Auxiliary is removed with it.
Auxiliaries without a Persuade value cannot be Persuaded, but if their owner is Persuaded to join a crew, they will also join automatically. If they survive the game, they can be permanently hired as usual, provided their owner is hired at the same time.
Civilians
People can carve out a living in the most abandoned places in the galaxy. Sometimes these civilians get caught in the crossfire. They can be a nuisance, they can be human shields, or they can be vital allies.
Civilians will be used when the mission briefing specifies, or they can be used in any game by adding their cards to the Event deck.
Civilians do not use their actions normally when used as NPCs. Instead, each time you activate a Civilian, roll the Knowledge Die. The result determines its actions for that activation, as shown below. If there is no target for the result rolled, treat the roll as a Move result.
- Move (1): The Civilian performs a Move action in the direction indicated on the die, moving across terrain where necessary.
- Attack (2): The Civilian performs an Attack action against the nearest target (a Close Combat attack if it is engaged, a Ranged attack otherwise). Then it panics and performs two Move actions in the direction indicated on the die, moving across terrain where necessary.
- Hide (3): The Civilian performs a Move action, moving the shortest distance that would put it in cover from the nearest visible enemy, moving across terrain where necessary.
- Join (4): If there are Traders at short range with line of sight, the Civilian will join the crew of the nearest of them. Unlike other NPCs, Civilians who have joined a crew continue to roll the die each time they activate. On another Join result they leave the crew and return to their NPC rules.
- Trade (5): The Civilian performs a Move action towards the nearest Trader it has line of sight to that is not engaged.
- If it makes contact with the Trader, the Trader is offered a trade. The player must draw a small equipment token at random. They may keep it, swap it for an item they already have, or refuse it. Any item swapped or refused is placed in the Civilian's item slot, or back into the supply if that slot is full.
- If the Civilian does not reach the Trader, it stops.
- Reality Distortion (6): The Civilian switches off its reality distortion field. It was a Live One all along! Replace the Civilian with a Live One. If no Live Ones are available, there is no effect.
- If you have the original starter set, you may use the Chance Die as normal, replacing the Live One result with the Reality Distortion result when playing in First Born Space.
The First Born
When a Civilian is driven to attack, it will drop all caution and will even attack a First Born.
However, in normal circumstances they will avoid enemies as powerful as this if possible. Unless a Civilian rolls an Attack result, it will not move within 4 squares of a First Born.
If a Civilian starts its activation within 4 squares of a First Born, any first move it makes (if applicable) must be used to move away from that First Born. Once it is out of range, it continues with its selected actions as normal.
Civilians that leave base contact with First Born provoke Opportunity Attacks as normal.
Priority Target List
- First Born.
- Gangers or Traders, whichever is closer.
Civilians will not attack any other type of NPC, nor each other, and never consider these to be enemies except for the First Born.
Leaving base contact with Civilians never triggers an Opportunity Attack.
Workers
You will notice that Stilts has a grey Worker side on its character board. This can be used with the Worker rules in the Shift Change, MegaCorp or Black Star Rising expansions.
Galactic Corps
The Galactic Corps is a combined militia and police force: not particularly well equipped, but disciplined.
The GCC has commissioned Special Agent Zara to be its eyes and ears on events in the First Born system. She has set herself up in Trading Post 5 and spends her days pretending to drink at the bar, but she watches everything.
Noticed Performance
For players using the upgraded navigation panels only: if Zara is in play and survives a mission, any crew that achieved the primary objective and has no tagged items left gains +1 reputation after the game.
Detaining Traders
When used together with the rest of the Galactic Corps, Zara will detain Traders as normal. When used alone, she has higher priorities, and the arrest rules are not used.
Elite Corps
Some situations call for the very best, and you will notice that Zara has alternative "Elite" statistics on the reverse of her board, for use if you want a greater challenge!
The Galactic Corps will be used when the mission briefing specifies, or it can be used in any game by adding its cards to the Event deck.
The Galactic Corps chooses targets in the same way as the First Born, and chooses its actions by following the AI table in the core rulebook.
Priority Target List
- First Born.
- Gangers or Traders, whichever is closer.
The Galactic Corps will not attack Security Guards, Civilians, or each other, and does not consider these groups to be enemies.
Lone Agent
Unlike the other Galactic Corps NPCs, Zara is not interested in minor offences; instead she is on an information-gathering mission.
At the start of a game, Zara will only consider the First Born to be enemies. She will only target (or arrest) Traders and other NPCs if a member of their crew or NPC type has attacked her in the current mission.
Analysis Required
If Zara has no target in line of sight when she activates, she will spend her actions Moving towards the nearest searchable terrain piece. Once she reaches it, her next action is to digitally tag its contents as GCC property. Use the dry-wipe pen to mark the back of each counter as shown.
Place a Reminder Counter on the terrain piece to remind you that Zara will not tag it again.
These objects are now tagged as Goods: they can only be sold for half their usual price (rounded down), and you run the risk of the Corps raiding you! See Tagged Goods on page 12.
This also applies to target tokens: any mission reward for them will be halved if they are tagged.
Mission Briefing 1 – Hold the Fort
You head to Trading Post 5, a small but prosperous outfit hidden at the bottom of an asteroid crater. The locals are a tough bunch, and the owner, Daric, simply winks and slaps his mismatched legs when you ask what happened to the first four trading posts.
Just as you split up to explore the settlement, you hear a rumble. The First Born have followed you here after your last foray and are attacking the trading post. You'll need to secure the perimeter if you want to live another day! "There goes our R & R…" complains Wade.
Primary Objective
Reward: Your safety.
Your mission is to secure the perimeter and contain the First Born assault on the trading post by blocking the entry points around the board.
To block an entry point, a Trader must interact with it and roll dice equal to its Skill statistic. You may add an automatic hit to the roll for each previous blocking attempt made before the current round. A Trader carrying an item may also add an automatic hit to their roll.
If at least three hits are scored, the point is secured and its counter is flipped.
With nowhere to escape, the mission ends when Hostility reaches Wake Protocols. If all entry points are blocked before this happens, the game ends when all First Born in play have been defeated.
Note the final Hostility and the number of blocked entry points at the end of the game, as they will affect the next mission.
Secondary Objective
Reward: Variable.
The residents of Trading Post 5 were not prepared for this attack, and you can use it to your advantage by saving lives and saving the day.
For each Civilian or Ganger NPC still alive at the end of the game, you may:
- Hire that character at its mission fee, even if it did not join your crew during the game.
- Take a free small item with a purchase cost of up to 5 UA: mix all the small equipment tokens that are not First Born of that value, and draw one at random.
- If you have an upgraded ship from the Ships of Disrepute expansion, you may adjust your reputation by +1 or –1 for each surviving NPC.
Special Instructions
Setup: Your crew is taking some downtime at the Trading Post and has split up. Place one Trader from each crew inside each room. The fourth Trader may be placed in a room of the player's choice.
Also, remember to use standard equipment (not First Born) to fill the various crates in the Trading Post.
First Born Arrival: All First Born arrive from the Entry Points in this game. The Drones and True Born are placed adjacent to the chosen point. All references to Patrol Points instead use Entry Points.
If an Entry Point is rolled that is blocked to arrival, use the next available point clockwise around the board, if any. If all Entry Points are blocked, no First Born will arrive.
NPCs: This mission uses 10 NPCs: two Game Hunters from the starter set, Zara, and seven NPCs of your choice (the rest of this set, unless you have used them as Traders).
Mixer enters play and is owned by Daric (or a random NPC if Daric is in use). Set them aside at the start of the game. Once these characters have been defeated, they will not be reused in this mission, and any rule that puts them into play will have no effect.
All NPCs arrive from Patrol Points instead of Entry Points in this mission.
During the Inspection Hostility phase, a random Civilian or Ganger will arrive at a random Patrol Point each round, if one is available.
No NPC considers Traders to be enemies unless they are attacked first.
Preparation
- Maximum starting crew: 4 (icon shown as a hand with four fingers).
- Event cards:
- Figure icon: all cards.
- Hand icon: 2 cards.
- Cap-wearing figure icon: all cards.
- Creature icon: all cards.
- Helmet icon (Zara): only "Lone Agent".
- Hostility Tracker: starting Hostility level 3. The track reads, from top to bottom: Cleanse, Threat Defence, Wake Protocols, Aware, Inspection, Patrol.
- Search Assignment:
- Tall container with white ends: 1 (on the top row); 3 and 1 (on the row below).
- Red square crate: 2 and 1.
- Yellow square crate: 2 and 1.
Mission Briefing 2 – Stem the Tide
The First Born are still a threat to the Trading Post, so you venture into the nearby catacombs to find out where they come from. It seems they have re-established their abandoned settlement, but you have no intention of giving them time to unpack their household furniture!
The First Born's power source is a Dyson reactor; blowing it to pieces should stop the attacks. While you are busy fighting for your lives, the First Born have launched a second attack on Trading Post 5 and are systematically trying to destroy its structures. Daric yells over the comms that he will pay well if you can save his livelihood!
Primary Objective
Reward: Trading Post 5 secured.
A deep hum comes from the nearby catacombs and a strange energy fills the air. Their scans reveal that the nearby Dyson Reactor is providing power to this sector of First Born territory, allowing them to enter the area and attack. Destroying it will delay the First Born long enough for you to secure the Trading Post.
Your task is to destroy this reactor, but don't let it accumulate too much energy before you do: it could be a cataclysm!
Secondary Objective
Reward: 0–30 UA.
Meanwhile, the First Born have renewed their attack on Trading Post 5, and after your earlier heroics, Daric has asked you to protect his livelihood.
Each First Born character of rank 2 or higher carries a Molecular Disassembler; mark it with a Reminder Counter. Planting these in the structures will let the asteroid's living rock break them down at a molecular level and reclaim the territory.
If any First Born with a device does not have line of sight to an enemy when it activates, it will spend its actions moving towards the nearest structure. If it makes contact with the structure, it automatically places its device: take its counter and place it on the building.
If any structure accumulates 3 counters, it is destroyed and removed from the board. Any character inside it suffers an attack of 2 dice and is Knocked Down where the structure stood.
At the end of the game, you will be rewarded 10 UA for each building still standing. Note this result, as it will affect the next mission.
Special Instructions
Blocked Entry Points: The Entry Points blocked in Mission 1 will help you avoid being surrounded in this mission. If you blocked 2 or fewer Entry Points, there is no effect. For each Entry Point blocked, provided that 3 or more were blocked, you may flip a single Entry Point token of your choice from Entry Points 1–4.
If flipped Entry Points are used for First Born arrival, place the newcomers at the nearest available Entry Point.
Once Hostility reaches Wake Protocols, flip the Entry Points back over: the blocks have been overcome, and this rule no longer applies.
Patrol Points are used normally.
Also, if you completed Mission 1 early, with unused pegs before Hostility reached Wake Protocols, reduce this game's starting Hostility by the number of unused pegs (those that were missing to reach Wake Protocols).
NPCs: This mission uses the same NPCs as Mission 1.
Any NPC that enters play in this mission arrives from the left-hand edge of the board, near the structures, at a position chosen by the players, instead of from an Entry Point or any other position.
During the Inspection and Aware Hostility levels, a random Civilian or Ganger will arrive from this edge each round, if one is available.
No NPC considers Traders to be enemies unless they are attacked first.
Preparation
- Maximum starting crew: 4 (icon shown as a hand with four fingers).
- Event cards:
- Figure icon: all cards.
- Round icon: ×6 (except "Gold Rush").
- Hand icon: ×2.
- Cap-wearing figure icon: all cards.
- Creature icon: all cards.
- Helmet icon (Zara): only "Lone Alone". The printed page reads "Lone Alone" here, while Mission 1 and the Zara card read "Lone Agent"; it is transcribed as printed.
- Creature icon (optional): optional cards.
- Hostility Tracker: starting Hostility level 10.
- Search Assignment:
- Green tall container: 2 and 1, plus a small 1 at the far right.
- Yellow square crate: 2 and 1.
- White-ended tall container: 1 (wide); then 1 and 1 on the row below.
- Red square crate: 1 and 1.
Mission Briefing 3 – Bring in Team B
You have decided to take the fight directly to the First Born instead of waiting for them to counterattack. As the locals are spoiling for a fight, you agree to join forces. They are a tough bunch of rugged individualists, and they look to you for leadership.
If you can collect enough raw mineral deposits from First Born territory, you should be able to set up an early-warning system against future attacks. You brought the First Born here, so it is only fair that you do everything you can to help. Of course, any surplus mineral is yours, so make room in your pockets.
Primary Objective
Reward: Priceless minerals.
The scientists of Trading Post 5 have discovered a way to use the newly found First Born minerals to detect nearby Dyson energy. Equipment with this technology could be used to create an alert and defence system for the Trading Post, but they need these minerals in much larger quantities.
To achieve the objective, you must leave the board with at least 7 minerals of any type. Any you started the game with do not count: they must have been recently extracted to keep their detection properties.
If you succeed, you will be rewarded with the surplus minerals after the warning system is built: 1 Dialena Crystal, 2 Herrilium Crystals and 3 Kalamita Crystals.
Secondary Objective
Reward: Everything you can find.
Given what you are doing for the Trading Post, nobody will begrudge you looting the temple on your way out. Your new friends may even help you! Grab everything you can and get out, quickly!
Special Instructions
Team B: This will be a tough mission, so you have brought reinforcements. This mission uses the same NPCs as Missions 1 and 2.
For each structure that survived Mission 2, take two random Civilian or Ganger NPCs and deploy them in a structure at the start of this mission. These characters will be controlled by the players during the game as if they had joined your crew. If you are playing with two crews, divide them equally between the players.
As before, Mixer comes with Daric (or a random NPC if Daric is in use). Mixer will be very useful for going to fetch things.
If all three structures survived and Zara was not defeated in Mission 2, she too is deployed at the start of the game and controlled by the players.
If you have the In the Line of Fire expansion, each player may also escort a Tracker. Any minerals they collect will count towards the objective.
Supplies: Drones have been used to remove and restock the two delivery crates next to their starting position. When Hostility enters a new level, discard the crates' contents and refill them as usual. Any mineral deposited inside a crate when it is restocked is transported back to Trading Post 5 and counts towards your objective.
Preparation
- Maximum starting crew: 4 (icon shown as a hand with four fingers).
- Event cards:
- Figure icon: all cards.
- Round icon: ×6 (except "Gold Rush").
- Hand icon: ×2.
- Cap-wearing figure icon: all cards.
- Creature icon: all cards.
- Bottom row, three icons: optional cards.
- Hostility Tracker: starting Hostility level 14.
- Search Assignment:
- Green tall container: 2 and 1, plus a small 1 at the far right.
- Yellow square crate: 2 and 1.
- White-ended tall container: 2 (wide); then 3 and 2 on the row below.
- Red square crate: 2 and 1.
Reference
The following icons appear on the cards, tokens and characters in this expansion.
- Re-roll icon: The character may re-roll a single die from any Close Combat attack.
- Supply drop icon: This character can be Persuaded to request a supply drop, even if they have joined your crew or another player's crew.
- Poison icon: After resolving an attack with this weapon, place poison tokens equal to the number of hits scored (regardless of the damage caused) beside the target or on its board. At each Assessment Phase, the target removes one poison token and loses one health. A character cannot have more than 3 poison tokens. Purge, Rogue Purge and Machine characters cannot have poison tokens. Any item that restores health can be used to remove poison tokens.
- Data storage icon: This item can store data tokens up to the limit shown. Missions will specify how and where they can be collected. Unless stated otherwise, data tokens may be sold for 2 UA each.
- Timed device icon: Items with this icon can be dropped on the floor and armed by spending an action. Place this number of Reminder Counters on the token. Remove one counter at each Assessment Phase. When the last counter is removed, the token explodes with the statistics shown. These tokens may have a wider blast radius than normal, with the fourth number shown being the number of dice that hit targets within three squares. (The printed text says "la cuarta", the fourth, and the icon shows three numbers; it is transcribed as printed.) While Reminder Counters remain on the token, the Trader who armed it may detonate it with an effortless action, or by spending a Skill peg outside their own turn.
- Armour icon: This armour can be put on or taken off with an effortless action. If it is removed in order to make an attack (for example, when the custom backlash helmet is thrown at an enemy), the token can be returned directly to the armour slot without needing a separate action to put it on.
- Unjam icon: This Trader can unjam a weapon as an effortless action.
- MECH icon: The "MECH" on these items means they can only be used by Machine class characters.
Please note that some of the characters and classes in this book have abilities that may not be found in the core rulebooks. If you do not have the relevant expansions, you can download a complete list of abilities from the Battle Systems website.
New Terrain Rules
Delivery Crates
Delivery Crates can be searched in the same way as Arks or Stasis Pods, and any starting contents will be shown normally on the setup diagram. Note that they use non-First Born items, as described on page 2.
These crates can also be requested as supply drops. They can be put into play by Event cards, or by Persuading NPCs with the supply drop icon.
Supply drops can only be requested once per Hostility level, and only when Hostility is at Wake Protocols or higher.
Only the white tokens included in this and other sets are used for supply drops. When a supply drop is requested, randomly select 2 standard tokens and 4 nano tokens and add them to a Delivery Crate.
The player who requested the supply drop chooses a point on the board to request it at. Roll to Scatter from that point to determine where the drop actually lands, and place the Delivery Crate as close to that point as possible without touching terrain. Any character occupying the squares it covers is pushed aside to the nearest empty square and Knocked Down.
Once on the board, the crate can be searched normally.
Tagged Goods
The white tokens represent official supplies tagged by the CCG, intended for survival in a war zone, not for Traders to profit from!
These items can be picked up normally, but if you want to keep them after the game, you will have to get rid of them quickly! The offer prices for these items are half the normal values: the best you can get for a quick sale.
Furthermore, any attempt to sell or keep these items may trigger an alert. At the start of any Trade Phase in which you possess tagged goods, roll the Knowledge Die. On a 1, your sale has been raided by the Corps: all tagged items are confiscated, and the Corps immediately detains a random Trader from your crew for handling stolen goods. You will need to roll immediately for their release, as detailed in the Extraction Phase.
On a result of 2 to 6, you may keep or sell the items normally.