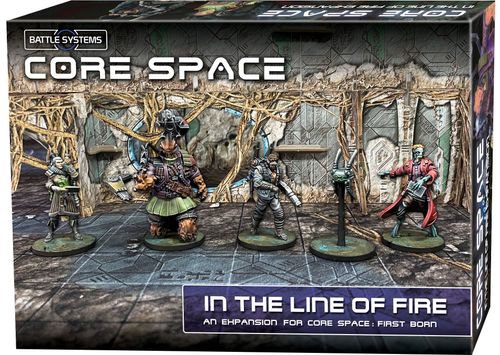
Core Space: First Born – In The Line of Fire
Core Space: First Born – In The Line of Fire Rulebook
Table of Contents
Table of Contents
Overview
Miniatures
This set introduces four new NPCs to the game, each with a double-sided character board. The Civilian Media Team brings its Drone with an Auxiliary Autocam, while Prospector NPCs can also be hired as Merchants.
The rules for each type can be found in this book and can be combined with similar characters from other Core Space sets.
Event Cards
The Event Cards in this expansion introduce new rules and NPCs to the game. Add them to any other Event Cards in your collection with matching icons, and use them when a mission specifies or when you want to add a special touch to custom games.
Equipment
The white equipment tokens in this set represent CCG supply deliveries. They must be kept separate from the rest of your equipment; see page 12.
Some characters and tokens include icons you may not have seen before. Their rules are on page 36.
New NPCs
Media Team
The best news reporters tend to put themselves actively in the line of fire for the sake of a good story. They can be a bit of a nuisance to your team, but keep them safe and you may become the star of their film!
Media Teams will move around the board with their cameras, filming anything that might be of interest to viewers at the centre. Media NPCs will be used when the mission report specifies, or they can be used in any game by adding the cards to the Event Deck. Unless the mission report says otherwise, they will arrive on the board when a card tells them to.
The Media Team always enters play as a group of three: a reporter, a technician and an Auxiliary Autocam (see Auxiliaries on page 5).
Activation
Media Teams activate in the NPC Phase after the Prospectors. The technician and the reporter activate first.
The Media Team always moves together, staying in contact with the base where possible. As detailed on page 5, the Autocam moves with the reporter for free.
At the end of Movement, it must be placed freely on an adjacent square in LoS with another type of character, if possible.
If they begin their activation within short range and LoS of an enemy, each will use its first action to attack the nearest enemy. If there are still enemies at short range, they will use their second action to Move away.
If the technician is not adjacent to the reporter, it will use its actions to Move next to the reporter before doing anything else.
If there are no enemies at short range and LoS, but there are friendly Merchants, the reporter will spend one action per turn interviewing them (mark the nearest Merchant with a Reminder Counter) and will lose one action on its next turn.
Otherwise, they will spend their actions Moving toward the other nearest character, but stopping once they are within LoS and medium range. If they are already at medium range and LoS, they do not move.
Once the technician and reporter have activated, whenever the Autocam has LoS to another character within medium range, it will use its Film action (see page 5). If the Autocam is not within medium range and LoS of another character, its action is wasted.
Once the Autocam has its maximum number of data tokens, the Media Team will spend its actions and leave the board by the nearest entry point.
If both members of the Media Team have been defeated, the Autocam will use its actions to leave the board regardless of how many data it has collected.
Target Priority
- Beasts.
- First Born.
- Gangers.
- Merchants (only if provoked).
The Media Team only considers Merchants to be enemies if one of its team members has attacked a Media NPC in the current mission.
Character Boards
The set's two named Media characters are Mi'Soon (e-Mi'Soon), a Goo'el, and Zain Nair, a human. Their printed profiles are flavour text and are not transcribed.
Reputation
If you have the Ships of Disrepute expansion, starring in a documentary can do wonders for your Reputation. The following can be added to the Reputable Actions (des) list:
- +/- 2 if any Merchant on your team was interviewed and/or filmed (once per team per game).
- +/- 1 if any Merchant in your crew defeats a First Born or Purge of rank 2+ within LoS and medium range of the Autocam (once per crew per game).
- -1 if any Merchant in your crew defeats a Civilian, Guardian or Galactic Corps NPC while in LoS and medium range of the Autocam.
During the game, place Reminder Counters on your Reputation Record when these actions occur. The adjustments apply at the end of the game, and only if the Autocam and at least one member of the Media Team left the board alive, allowing them to upload their footage to their editor!
The Media Team itself is considered Civilians for the purposes of reputation adjustments for defeating or rescuing civilians.
Merchant Trend
If your reputation rank is Scum, Mercenary, Renowned or Elite, you must always include the cards marked with the Media icon in your games: the media will follow you everywhere!
Joining Teams
Media NPCs can be persuaded to join teams during a game, but they cannot be hired permanently as they do not have a Merchant side on their board.
However, if you capture the Autocam you can sell its data tokens. In later games in which you have captured or bought an Autocam, you can still benefit from its shield and still use its action to film and collect data tokens.
When owned by a Merchant, the Autocam can only collect data tokens by filming First Born or Purge, not other Merchants or NPCs. Reputation adjustments do not apply.
Prospectors
The mineral veins found in the First Born asteroids are like nothing seen before in the galactic core, and the more scientifically minded pioneers were quick to find a way to turn these new elements into weapons. Whether for weapon-making or some healthier purpose, experts in the field have begun arriving in First Born Space to extract these minerals for themselves.
Prospectors are NPCs who will head straight for the most valuable mineral veins on the board and extract their value before you can. This may cause trouble for your Merchants, but keep them safe and they can be very useful allies.
Prospectors will be used when the mission report specifies, or they can be used in any game by adding the cards to the Event Deck. Unless the mission report says otherwise, they will arrive on the board when a card tells them to. Alternatively, they can hire your crew before the game. See Armed Escort below.
When playing games in the Galactic Core, Prospectors can be used as civilians.
Activation
Prospectors activate in the NPC Phase after Game Hunters.
If they begin their activation within short range and LoS of an enemy, they will use their first action to attack the nearest enemy. If there are still enemies at short range, they will use their second action to retreat.
Otherwise, they will spend their actions Moving toward the room closest to the centre of the board that has not yet been mined and does not contain any enemies. While moving, they will not move within short range of an enemy.
Once in contact, they will Mine the wall. When mining, Prospectors draw two tokens and choose the higher-value one. They are skilled enough to ignore the effects of Rock Worm Larvae: put these back in the bag and draw a replacement.
Each Prospector can hold two nano-mineral tokens in its item slot. Once full, the Prospector will spend its actions leaving the board by the nearest Entry Point.
If there are no unmined walls on the map, they will conduct general searches in each room, starting from the centre of the board. They will drop anything that is not a mineral.
If there are no walls to mine or rooms to search, the Prospectors will leave the board.
Target Priority
- Beasts.
- First Born.
- Gangers.
- Merchants (only if provoked).
Prospectors only consider Merchants to be enemies if a member of that Merchant's crew has attacked a Prospector in the current mission.
Armed Escort
Prospectors often hire Merchants as security when they enter dangerous environments. You may choose to escort a single Prospector at the start of any mission in First Born Space. They deploy with your crew and do not count towards the mission's Merchant limit.
They follow their normal NPC rules for the duration of the game, except that their exit point will be your ship's airlock. Additionally, any Mine action performed by your team in the same room as the Prospector may draw two tokens and choose the better one.
If they manage to leave in your ship, you may take a mineral of your choice from their item space as a reward.
If they are defeated, you will be temporarily blacklisted: you will not be able to craft (create) items after that game.
Auxiliaries
Auxiliaries are a new type of character that represents animal companions and robotic assistants. They do not replace a fully functioning Merchant, but they are small, cheap and loyal!
Auxiliaries are classified as Creatures or Machines on their boards. Creatures have no additional rules, but Machines follow all the usual rules for Merchant Machines (such as being immune to poison).
Using Auxiliaries
Auxiliaries have a point cost and can be hired like Merchants. They are always hired from the standard side of their boards (with the white cost).
They do not count towards the crew limit, nor aboard the ship, nor when going on a mission.
They activate as though they were Merchants, but unless stated otherwise they are limited to the following actions:
- Move.
- Attack.
- Search.
- Push.
Auxiliaries can pick up and carry equipment if they have removable slots on their boards with room to do so. Removing these sections to carry items can remove character abilities, just as with a Merchant's armour slot. The different types of Auxiliary have different amounts of inventory space.
Auxiliaries cannot use equipment. They have simplified NPC stats, and these are what they use when attacking.
Like NPCs, Auxiliaries can take a single point of damage before being destroyed. Creatures cannot be revived, but Machines can be repaired after the game if they are recovered and dragged back to the ship (even if they were not originally yours). The repair cost is equal to the mission rental cost.
Special Actions
The Autocam in this expansion has some additional rules:
- Movement: While the Autocam is in contact with its owner, it may move with them and does not need to use its own action to move. It will still use its action to move if it is not in contact.
- New Film Action: If there is another character (of any type if used by the Media; only First Born and Purge if used by Merchants) within medium range and LoS, add a data token to the character's board.
Advancement
Auxiliaries have a limited career track in the corner of their boards. They earn career points for surviving missions, just like Merchants. Once their career track is full, you may flip their board and use the Trained/Enhanced side (with the red point cost) in the future.
Auxiliaries can be sold in the Trading Phase for their rental cost (using the value increased by points if they are Trained/Enhanced).
NPC Auxiliaries
In some missions, Auxiliaries will be used as NPCs and the mission will specify an NPC as their owner. They arrive with that NPC and activate using the same rules.
If their owner is a Civilian, do not roll for the Auxiliary's Actions: they will remain adjacent to the Civilian, moving with it and attacking the same targets. If the Civilian is defeated, the Auxiliary is removed along with it.
Auxiliaries without a Persuasion value cannot be Persuaded, but if you persuade their owner to join a crew, they will also join automatically. If they survive the game, they can be hired permanently as usual, provided their owner is hired at the same time.
Mission Briefing 1 – Fame and Glory
First Born are big news, so the media megacorporation Hikari has hired you to escort a camera crew to the heart of First Born territory. "Good images of First Born are rare, so you are facing a potential gold mine."
The media team has worked as war correspondents, so they believe they have seen it all, but you cannot help thinking they are in for a surprise. Your job is to keep the team alive; if they die, you will not get paid! But more importantly, generate interesting news. Use your knowledge to guide the cameras toward the juiciest action. Everyone might come out of this unscathed, provided they are not killed before you collect your fee!
Primary Objective
Reward: Up to 24UA
Your job is to keep the Media Team alive long enough for them to get their footage.
Once the Autocam has collected its maximum data allowance, the Media Team will leave the board through your airlock instead of an Entry Point. You can also persuade them to join your crew if you want them to leave sooner.
When the game ends, provided at least one member of the Media Team survives, you will earn 2UA per data token collected by the Autocam, plus a 5UA bonus for each Media Team member who escapes in your ship.
If you want a greater challenge, rotate the Autocam's board at the start of the game: the enhanced version may hold more data, so you will have to keep them alive for longer!
If you have an upgraded ship and finish the game with all data and both Media Team members alive, you gain +/- 2 reputation.
Secondary Objective
Reward: Whatever you can find.
This temple seems to be as generously stocked with valuables as any other, so make the most of it!
Special Instructions
Media Team
They deploy on the board alongside your crew at the start of the game.
The naive news crew is not yet aware of how dangerous the First Born can be, and they may get too close! They will only stop moving when they are at short range of other characters in this mission, instead of the usual medium range.
The Autocam will only film First Born in this mission.
Setup
- Maximum starting crew: 3.
- Event cards (by icon): all cards; all cards; 2 cards; all cards.
- Hostility tracker: starting level 4. Bands as printed, top to bottom: Cleanse, Threat Defence, Wake Protocols, Aware, Inspection, Patrol.
- Search allocation: as printed on the mission page.
The printed board map for this mission is not transcribed.
Mission Briefing 2 – Good Prospects
The exciting images captured by Hikari's team have everyone enthusiastic. Behind all this, a prospector, Laurinda Vincent, has hired you to escort her through a particularly dangerous place, rich in mineral riches but also rich in First Born. It will be dangerous, but Laurinda has tempting purchasing power... This could be very profitable.
The Media Team, still excited by the success of its previous adventure, wants to take part in the action, but you refuse: looking after too many civilians in an environment like that could lead to all of them dying. However, since they are the media, they carry on regardless. If you can keep them alive, it could be advantageous to you in terms of assets.
Primary Objective
Reward: Valuable minerals.
This time it's a Prospector you must keep alive! This game follows the Armed Escort rules on page 4. If two crews are used, each can escort one Prospector.
Their benefactor has given the Prospector a wish list, but they cannot carry it all themselves, so you will have to help. Each Prospector requires 1 Dialena crystal, 2 Herrilium crystals and 3 Kalamita crystals, divided between them and your Merchants.
They will not leave the board until you have all these tokens. In the meantime, even once their space is full, they will continue mining walls, swapping the tokens they have for higher-value ones or otherwise dropping the tokens they mine.
At the end of the game, you will receive the usual mineral reward for the Prospector plus one additional Dialena crystal.
Secondary Objective
Reward: Up to 7UA.
Although you are not officially escorting the Media Team, it is worth keeping them alive! At the end of the game, you will receive 1UA for each data token they collect.
Special Instructions
Media Team
The First Born are yesterday's news! The Autocam will only film Rock Worms and True Born in this mission.
They will also film Prospectors, but only once those carry at least one mineral token.
Also, at the start of the game, place two data tokens on each of the Dyson Reactors, the True Born Stasis Capsule and the Command Console. While they have tokens, these terrain pieces can also be filmed, removing one token each time.
Setup
- Maximum starting crew: 3.
- Event cards (by icon): 6 cards; 6 cards; 2 cards; all cards; all cards; all cards; all cards.
- Hostility tracker: starting level 6. Bands as printed, top to bottom: Cleanse, Threat Defence, Wake Protocols, Aware, Inspection, Patrol.
- Search allocation: as printed on the mission page.
The printed board map for this mission is not transcribed.
Mission Briefing 3 – Making the News
You cannot help noticing that the Media Team is accumulating assets as well as congratulations. That is a little annoying, since you are the ones who take all the risks! You decide to cut out the middlemen and get a second-hand Autocam. How hard can it be?
The general public is already tired of seven-foot psychic aliens, so you will have to find something truly impressive (and dangerous!) to capture on film. Venture into the deepest catacombs and find the most terrifying creatures you can to make popcorn!
This mission is for crews who have recovered or bought an Auxiliary Autocam.
Primary Objective
Reward: Fame and Fortune.
You head for a First Born temple that you know is heavily defended, and you are determined to capture some valuable footage.
Data tokens collected by the Autocam in this mission can be sold normally. Additionally, a Merchant adjacent to the Autocam can interact with its airlock door to load the footage onto your ship's server, removing the Autocam's tokens and allowing it to collect more.
Only First Born of rank 3+ can be filmed for data tokens in this mission. However, First Born of any level can be filmed for one additional data token if they are Engaged (Trabado) with a Merchant. For example, one data token for filming an Engaged Liege, or a total of two for an Engaged Talos.
Secondary Objective
Reward: Whatever you can find.
You are no expert with a camera, but even if you end up with hours of footage of your own thumb, you have your Merchant instincts to fall back on and salvage what you can from the expedition. Choose the clean spot!
Special Instructions
Industry Contacts
Your previous work protecting the local Media Team has given you inside access. For each of the two previous missions in this book in which at least one member of the Media Team survived, add 1UA to the value of your data tokens in this mission.
If at least one Media Team member survived both missions, you will also receive the reputation adjustments on page 3.
Setup
- Maximum starting crew: 3.
- Event cards (by icon): 6 cards; 6 cards; 2 cards; all cards; all cards; all cards; recommended cards.
- Hostility tracker: starting level 12. Bands as printed, top to bottom: Cleanse, Threat Defence, Wake Protocols, Aware, Inspection, Patrol.
- Search allocation: as printed on the mission page.
The printed board map for this mission is not transcribed.
Reference
Icons in this section are described by their appearance on the printed page.
- Flying (X): This character can float above the ground with the following benefits (X = the number on the icon):
- Ignore the first Hit of any Opportunity Attack against them.
- They cannot be knocked Prone. They are still subject to other parts of a rule that would normally make them Prone.
- Persuasion supply request: This character can be Persuaded to request a supply drop, even if it has joined your crew or another player's.
- Armour value: The black number is the character's physical armour value as normal, but the green numbers also extend this protection to friendly characters within 1 and 2 squares respectively, unless their own armour value is better.
- Data token storage: This item can store data tokens up to the limit shown. Missions will specify how and where they can be collected. Unless stated otherwise, data tokens can be sold for 2UA each.
- Explosive (X): Objects with this icon can be dropped on the ground and armed by spending an action. Place this number of Reminder Counters on the token. Remove one Counter in each Evaluation Phase. When the last Counter is removed, the token explodes with the stats shown. These tokens may have a larger blast radius than normal, and the fourth dice number reaches targets within three squares. While Reminder Counters remain on the token, the Merchant who armed it can detonate it using a free action or by spending a Skill peg outside their own turn.
Note: some characters and classes in this book have abilities that may not be found in the core rulebooks. If you do not have the relevant expansions, you can download a complete list of abilities from the Battle Systems website.
The item pictured on this page is printed as "Reapair Kit" in the source; it is transcribed here as "Repair Kit" (Kit de Reparación in the source).
Supply Drops
The white tokens represent official supplies tagged by the CCG, intended for survival in a war zone, not for Merchants to make a profit!
These can be requested as supplies run down. They can be put into play through Event Cards or by Persuading NPCs with the supply icon. Supply drops can only be requested once per Hostility band, and only once Hostility is at Wake Protocols or higher.
Only the white tokens included in this and other sets are used for Supply Deliveries. When a supply delivery is requested, randomly select 2 standard tokens and 4 nano tokens. If you have a delivery crate from other Core Space expansions, the supplies can be placed inside it.
The player who requested the Supply Delivery chooses a point on the board to request the delivery. Roll to scatter from that point to determine where it actually lands, and place the tokens as close as possible to that point without touching terrain. Any character on the target square is pushed aside to the nearest empty square and knocked Prone.
Tagged Goods
These items can be picked up normally, but if you want to keep them after the game, you will have to appraise them quickly! The offer prices for these items are half their normal values: the best you can get for a quick sale.
In addition, any attempt to sell or keep these items may raise an alert. At the start of any Trading Phase in which you possess Tagged Goods, roll the Knowledge die. On a 1, your sale has been raided by the Galactic Corps. All Tagged Goods are confiscated, and the Corps immediately detains a random Merchant from your crew for handling stolen goods. You will have to roll immediately for their release as detailed in the Extraction Phase.
On a result of 2 to 6, you may keep or sell the items normally.
Utility Equipment
Summary
This expansion pack improves your Merchants with new and powerful items. As your crew gains experience, you will start equipping them with the best items and weapons money can buy (and some that money can't!). However, there will come a time when your pockets and bags are overflowing and two hands are no longer enough to carry everything.
The new equipment in this pack is here to do the heavy lifting for you (and the punching and shooting too!). This pack introduces "portable" items, from bandoliers to backpacks, and from automated weaponry to exoskeletons. This is represented by two new mini boards that clip to the side of the standard Crew Board.
Storage Boards
These boards provide additional storage space for your Merchants during games. Their tokens are yellow item tokens. Run into a war zone with a bandolier full of ammunition, grenades or a backpack to fill with loot!
Combat Boards
Combat Boards represent armour and mounted weaponry that will give your fighting a boost. Most of this equipment, designated by dark blue tokens, gives your Merchant additional ammunition or even a protective shield (using the new blue pegs), granting an additional benefit to the standards shown by the usual icons.
Connectors
These plastic connectors keep each Merchant's equipment attached to their board during the game.
In addition to the tokens in this set, there will be other items for Board Extensions available in future sets.
Combat Boards in Detail
Combat Boards hold items ranging from shoulder-mounted cannons to bulky armour and full exoskeletons. The board can hold up to two medium-sized tokens or one full-sized token.
New Abilities
Each token of any size gives the user one additional action each round. This action can only be used to perform Attack Actions using the token's own stats, if any.
Ammunition
Each side of the board has an ammunition track. Each track may only be used by a weapon in the space above it, and that weapon may only use this ammunition.
Full-sized equipment may have weapon stats on one or both sides of the token. Each side is separate. If a token only has stats on one side, the ammunition on the other side is not used.
If weapons are equipped on a Combat Board at the start of a game, fill their respective ammunition tracks as usual.
Each ammunition row is reloaded separately in the same way as a normal Merchant board, and as usual any ammunition that does not fit is lost. Ammunition reloads cannot be split between boards or between different weapons.
If the weapon's stats are joined by a line, as with the Heavy Fusion Cannon, both ammunition tracks are considered a single row of 10 ammunition.
Shields
The central track of the Combat Board uses blue pegs to represent energy shields that absorb the power of enemy attacks.
If you have shield pegs, the first point of damage from any attack made against you removes one blue shield peg instead of a health peg. The remaining damage is treated as normal.
Shield pegs granted by different items do not stack; you will use the highest value available. Any other icons on separate tokens may still be used if applicable. Shield pegs count as Shield Armour for any rule that refers to them.
Maintenance
This equipment must be maintained. At the end of each Trading Phase you must pay a maintenance cost of 1UA for each Combat token you own, plus another 1UA if the item was used in the most recent mission. If you cannot pay, the token is discarded.
Storage Items
These items represent backpacks, bandoliers and other gear that lets you carry more loot while keeping your hands full! Their boards simply provide additional space for carrying equipment tokens.
Backpacks
Storage items with the ALL icon can hold any item that would normally be carried in the equipment tray. These items cannot be used while inside; they must first be taken out. Other effects will still apply, for example Purge Spiders exploding while you are inside your backpack!
Your Merchant may begin each mission with their equipment split between their tray and their storage space however they wish.
Merchants must spend an Action to carry up to one item from Storage to their tray (or to the ship's hold, if using the optional rules for returning to the ship). Any number of items can be moved to Storage as part of the same Action.
During a Search Action, any item found can be added directly to Storage as part of the Action, but no item can be taken out or swapped.
Bandoliers
Storage items with the NANO icon are designed for easy access to items such as ammunition, grenades and stimulants. They can be used alongside other utility items, but only small "Nano" items can be placed inside them.
These items can be used by the Merchant as if carried in their tray as usual. Merchants can spend an Action to add, remove or swap any number of items between their equipment tray and the Storage space.
When searching, items can be freely added or removed from the Storage space as part of the same Action.
Items that enhance other equipment, such as a laser sight, cannot be used while in Storage; they must be stored with their weapon in the main tray.
Weapon Mounts
Storage items with the following icon allow quick access to heavy weapons. They can contain a single equipment token of any size.
Tokens move to and from the storage space in the same way as a backpack, and cannot be used while there. However, Merchants with a Weapon Mount can spend a free action to bring the item into position, allowing them to use it as if it were in their equipment tray for all other actions taken that turn.
Obtaining Utility Equipment
Utility Equipment can be bought in the Trading Phase as usual. Unless stated otherwise, it cannot be found on missions.
Whenever you buy a Utility Equipment, take the corresponding plastic board.
Limits
Each Merchant can only have one of each type of board. Small storage equipment, such as a bandolier, will have the NANO icon, meaning it does not count towards this limit and can be used together with other Utility Equipment.
Tokens and boards are kept with their Merchants. They can be exchanged between Merchants between games as you wish, but if for some reason you have more utility equipment than your Merchants can carry, the items must be sold or discarded. They cannot be placed in the ship's hold.
Carrying Utility Equipment
Generally, Merchants will start and end each game with their Utility boards already installed. However, if for some reason this equipment is loose on a mission, handle it as follows.
If a Utility Equipment token is dropped, leave the token on the ground as usual and place the associated plastic board alongside the board.
Storage tokens and medium-sized Combat tokens can be picked up using an Action (not a free action; these items are bulky). Take the associated plastic board and attach it to your Merchant board, but do not place the corresponding token on top. Instead, the token must be carried on its side in the Merchant's equipment tray and cannot be used while in this position.
Storage Equipment can be equipped using the "Equip Armour" action. Place the token on its board; it can now be used normally. Combat items cannot be equipped during a game.
Full-sized Combat tokens are too large to carry in a Merchant's equipment tray. Instead, they must be dragged back to their ship in the same way as a defeated Merchant (see the main rulebook).
Stealing and Breaking
When equipped, Utility Equipment is not considered to be in your equipment tray, so it and its contents cannot be targeted by any rule that could steal, break or otherwise affect equipment in your tray.
Equipped Combat items cannot be removed by any means from a Merchant by another Merchant in the game.
Equipped Storage items can only be obtained when the Merchant is defeated. As detailed above, they cannot be captured using the usual Search action to rob a defeated Merchant. They must first be removed from their carrier with a separate action before they can be picked up.
If they are carried in the tray, Utility Equipment can be affected normally.
Item Reference
Icons in this section are described by their appearance on the printed page.
- Shield: Add this many blue shield pegs to the Combat Board at the start of each mission.
- Shield (with upgrade arrow): Add this many blue shield pegs to the Combat Board at the start of each mission. In any round in which you spend shield pegs, place the corresponding token on your Merchant board with the crossed-out Shield side facing up. The shield cannot be restored while this is in place. In any round in which the shield is not used, the counter may be flipped. In any Evaluation Phase in which the uncrossed Shield is not facing up, restore one blue shield peg on the board, up to its maximum.
- Reroll (weapon): The character can reroll a single die of each Attack made with this weapon.
- Reroll (ranged): The character can reroll a single die of any Ranged Attack.
- Interrupt (ranged): Once per round, a Merchant with this item can interrupt an enemy's turn, before or after an Action, or in the middle of an Action in the case of a Move, to make a Ranged Attack with this weapon against that enemy. When this is a Utility item, it uses the free action granted by the item, which must not already have been used this round.
- Piercing: This weapon penetrates enemies and is resolved against all targets (friend or foe) along a straight line chosen by the shooter, using the value for the appropriate range. Terrain blocks the attack as normal.
- Fire: After an attack with this weapon is resolved, place Fire tokens equal to the number of Hits scored (regardless of damage caused) next to the target or on its board. In each Evaluation Phase, the target removes one Fire token and loses one health peg. A character cannot have more than 3 Fire tokens. A burning character can spend an Action while Prone to remove a Fire token. Purge, Rogue Purge and Machine characters automatically remove one Fire token each time they perform any Action.
- Limited uses (X): This item has limited uses equal to the number on the icon. Track this using black pegs on the ammunition track beneath the icon. A peg must be removed each time the item is used. When no pegs remain, the item cannot be used for the rest of the mission.
- Jam: This Merchant can clear a Jam (Encasquillado) using a free action.
- Data token storage: This item can store data tokens up to the limit shown. Missions will specify how and where they can be collected. Unless stated otherwise, data tokens can be sold for 2UA each.
Item Notes
- +2 Repair: The item pictured with a "+2 REPAIR" tag allows a character to add two dice to a Repair roll.
- Jump Pack (Mochila de Salto): The Jump Pack can be used as a free action. It allows the character to perform Move actions using the Scatter (Desbandada) icon shown on the token.