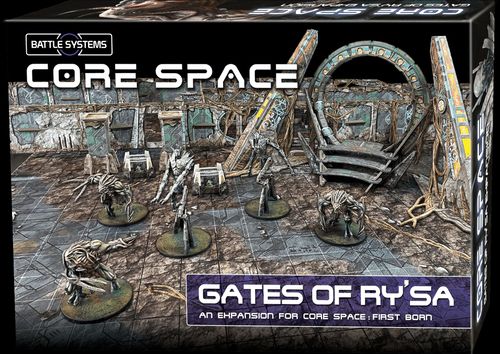
Core Space: First Born – The Gates of Ry'sa
Core Space: First Born – The Gates of Ry'sa Rulebook
Table of Contents
Table of Contents
Components
Some characters and tokens include icons that you may not have seen before. Their rules are on page 24 (see Reference below).
- Miniatures – This set includes two new types of First Born NPC, the Talos and the Cerberosa. These new and powerful enemies can be integrated seamlessly into your games simply by turning the Hostility Tracker, and each comes with a custom die to add new effects to their attacks. The rules for each type can be found in this book and can be combined with similar characters from other Core Space sets.
- Event Cards – The Event Cards in this expansion represent the transformative nature of the nearby gate and help add the new First Born creatures to the game. Add them to any other cards in your collection with matching icons, and use them when the mission specifies or when you want to add a special touch to custom games.
- Equipment – This expansion includes a selection of new item tokens. Most of these expand your selection of First Born weaponry that can be found on the board, but there are also some new Trader weapons you can craft. These should be mixed with the others of their type as usual.
- Terrain – The terrain in this expansion contains two imposing energy fragments, as well as an enormous dimensional portal, one of the legendary Gates of Ry'sa. These are represented in missions using the map icons shown below.
Terrain
The Ry'sa Gate
Mainly, the Gate will be used as an entry or exit point for a mission, and activating or deactivating it will often be part of the mission objective. As a portal to another location, Entry Point markers will often be placed at the base of the portal instead of around the edges of the board. If one of these Entry Points is rolled while the portal is inactive, roll again.
Components: Ry'sa Gate; Energy Fragments (two); Pedestals (four); Target Markers for the Portal (numbered 1 to 6).
Assembly tutorials for the terrain can be found at www.battlesystems.co.uk.
Short-Range Travel
In other missions, the Gate can be used for short-range jumps across the board. Once the Gate is active, characters can pass through it directly and continue their action from their new location.
Portal Target Markers are used to determine the destination:
- Roll the Knowledge die and place the character as close as possible to the marker bearing the number rolled before continuing their activation.
- The destination can be manipulated by activating the Pedestals.
Characters can also use the Target Markers to return to the gate. To do so, the character must interact while standing on a Target Marker and must be carrying a Seeker Stone. Place the character in contact with the vortex at the top of the steps.
There are two Seeker Stones included in this set, and they must be placed at random in stasis capsules at the start of each game.
Energy Fragments
The Energy Fragments concentrate Dyson energy to power the Gate. Each Energy Fragment works in exactly the same way as a Dyson Reactor (see the First Born rulebook).
Additionally, whenever an energy counter is removed, it must be removed from the Fragment with the most counters (the first player chooses if tied) each time a character passes through the Gate (in either direction; this includes characters arriving at Entry Points).
Activating the Gate
The Gate will be activated automatically once the Energy Fragments have accumulated enough energy counters. If the mission does not specify otherwise, this total is 5 and is cumulative across all Energy Fragments in play that have not yet been destroyed.
When activated, place the vortex in the centre of the Gate. It can now be used as described above.
If the number of counters falls below this threshold for any reason, the Gate is deactivated immediately.
Pedestals
Pedestals can be searched in the same way as Arks, and any initial contents will be shown as normal in the set-up diagram. However, a Pedestal can only be searched once an activation rune has been placed on it.
At the start of a game that includes the Pedestals, the four runes are each placed in a different stasis capsule around the board, in addition to any other equipment. They can be obtained through a Search Action as normal. Note that some missions may specify alternative locations for the runes.
While in contact with a Pedestal, a Trader can insert or remove a rune with a no-effort action.
In addition to providing access to the contents of the Pedestal, these runes calibrate the destination of the local Gate. Some missions may specify certain effects that apply once several runes have been placed on their Pedestals.
Otherwise, when passing through the Gate, Traders may add to or subtract from their Target Marker roll a number equal to the number of activation runes inserted.
New First Born NPCs
Cerberosa
Cerberosa are genetically modified attack beasts used as a blunt instrument, designed to purge a room of unwanted intruders. They will attack ferociously with teeth, claws and venomous spines that will cause grave wounds if they do not kill their victims outright.
The Cerberosa are used when specified by the mission briefing, or can be used in any game by adding the Cerberosa Event Cards to the Event deck. When you use the Cerberosa, you must use the reverse of the Hostility Tracker, which will bring them into play at the Aware level.
The Cerberosa choose targets in the same way as most other First Born and choose their actions following the AI table in the rulebook. They turn their boards over once Hostility reaches the Cleanse level as usual. With three actions these creatures are quick and deadly. Don't let them get close!
Beasts – The Cerberosa are classed as Beasts and will therefore be the target of Game Hunter NPCs. If a Cerberosa is defeated while one or more Game Hunters are in play, drop a Trophy token where it fell as usual. See the Game Hunter rules in the First Born rulebook for full details.
Additionally, Cerberosa Trophy tokens also have the Cerberosa icon. This allows them to be used to craft, instead of selling the trophy. The new Toxic Lash in this set can only be crafted using a Cerberosa trophy in addition to the Dialena crystal.
Carrying Items – Cerberosa cannot carry items. The slots where Trophy tokens are punched are not used unless a mission states otherwise.
Cerberosa Dice
Cerberosa do not use the Knowledge die when attacking. Instead, as shown by the icon on their boards, they roll their own brown die, made to represent their fierce cuts and deadly venom. This applies to their first attack each round. The results are detailed on the last page of this book.
Note that, as with other First Born, when the Cleanse side of the First Born board is used, the die is used the first two times the character attacks each round.
Talos
Talos are 3.6-metre humanoid machines made of a crystalline rock structure similar to the walls of their habitats in the asteroids. They are armoured and can regenerate damage received. Their weapons are built into their bodies and include plasma and heat, as well as neurological attacks. Known as "sentinels" by intruders, their sole purpose is to attack as soon as they see them.
The Talos are used when specified by the mission briefing, or can be used in any game by adding the Talos Event Cards to the Event deck. When you use the Talos, you must use the reverse of the Hostility Tracker, which will bring them into play at the Wake Protocols level.
The Talos choose targets in the same way as most other First Born and choose their actions following the AI table in the rulebook. They turn their boards over once Hostility reaches the Cleanse level as usual.
Talos are very hard to kill. They begin the game in Sentry mode, using their Stat Insert No. 1. When a Talos receives its first point of damage, like the True Born, it is not defeated instantly and instead replaces the stat insert with the more powerful Assault version (No. 2). This one can continue to act normally.
Even penetrating its rocky armour will only make them stumble. Damaging a Talos with Insert No. 2 will not cause damage or defeat it, only knock it down. You will have to strike them again before they recover to defeat them permanently. This is represented by the icon on their boards (see page 12).
Otherwise, a Talos lying face down will use its next action to get up, and you will have to knock it down again.
Beasts – Talos are classed as Beasts and will therefore be the target of Game Hunter NPCs. If a Talos is defeated while one or more Game Hunters are in play, drop a Trophy token where it fell as usual. See the Game Hunter rules in the First Born rulebook for full details.
Additionally, Talos Trophy tokens also have the Talos icon. This allows them to be used to craft, instead of selling the trophy. The new Dysonfire Shard in this set can only be crafted using a Talos trophy in addition to the Herrilium crystal.
Carrying Items – Some missions may specify that a Talos can carry items using the empty slot for tokens on its board. A Talos can also carry a second item by punching through the Target Lock section of its board, thereby losing this ability.
Talos Dice
Talos do not use the Knowledge die when attacking. Instead, as shown by the icon on their boards, they roll their own grey die, made to represent the effects of their neurological attacks and powerful energy explosions. This applies to their first attack each round. The results are detailed on the last page of this book.
Note that, as with other First Born, when the Cleanse side of the First Born board is used, the die is used the first two times the character attacks each round.
Attacking the Talos
Notice that there are two Talos boards, one for each miniature. This allows you to track any damage and stat changes separately.
The two boards are colour-coded: one has blue energy and the other orange. At the start of the game, remove the Trophy tokens from the boards and place them on the miniature bases so you can track which board matches each miniature. Alternatively, if you choose to paint your miniatures, you can colour-code the paint schemes!
Mission 1 – The Keys of Ry'sa
The Ry'sa Gates are a network of interconnected portals that the First Born mainly use to travel between the asteroids within their own star system. The Gates can be used for interstellar travel, but there are greater chances of mishaps: the longer the journey, the greater the chances that the traveller will be lost in the Void, a non-empty space.
You imagine that the Gates may also lead you to hidden catacombs that cannot be accessed by other means. You don't know what is in those hidden catacombs, but surely that is where the good things are! You have located the energy trail of a Gate and want to secure it to travel safely to other First Born locations.
However, you will need the activation runes to act as keys. Without them, the gates cannot be calibrated and would tear you apart if you tried to pass. And then there is the small matter of defeating the guardians of the Gates, the Talos and the Cerberosa, ferocious beasts determined to bring about your dreadful destruction!
Primary Objective
Reward: Activation runes.
If the rumours are true, the colossal power of the Gate can be calibrated with special relics. You have located these relics in a nearby temple and are heading to collect them.
The activation runes are found in the stasis capsules of this mission. Note how many you find and return to your ship; they will be used in Mission 2.
Secondary Objective
Reward: A trial by fire.
Although you have not yet discovered how to defeat the new First Born threats in this temple, it is in a way a learning experience!
Place a Target Marker on each of the three Talos and Cerberosa boards.
The first time any Cerberosa or any one of the Talos attacks a Trader and inflicts at least two damage, that Trader must take its Target token and add it to its tray (discarding other items if there is no room). This token cannot be discarded or lost in any way. It is worth nothing, but the reduced carrying capacity represents a war wound that gives the Trader one additional Advancement point after the game.
If any Cerberosa or each of the Talos suffers an attack that would defeat them (see Special Instructions) while they still have a Target token, the Trader that attacked them may choose to take the token. If not, it is discarded.
Special Instructions
Preparation – Make sure that for this mission and the rest of the campaign, the Hostility Tracker that will bring the Talos and Cerberosa into play is on the correct side.
Standard command runes are not used in this mission, but each stasis capsule will contain one of this expansion's Ry'sa activation runes; that is your objective.
Translator's note: the Spanish source reads "Ry'san" in this sentence; it is rendered as Ry'sa, the name used everywhere else.
Why Won't You Die!? – You have never encountered beasts as formidable before, and you do not yet know their weaknesses.
When a Cerberosa is defeated in this game, it immediately moves three times towards the nearest Entry Point, avoiding enemies if possible and ignoring Opportunity Attacks. If it reaches an Entry Point, it is removed. If it is still on the board, mark it with a reminder counter. The next time this character activates, remove the counter. It takes no action on this turn, but acts normally in future turns.
The Talos cannot suffer damage while lying face down in this mission. When a Talos is damaged with its second insert in place, place it face down as usual and then mark it with a reminder counter. The next time this character activates, remove the counter and restore the Talos's first stat insert. It takes no action on this turn, but acts normally in future turns.
Setup Sheet – Mission 1
- Maximum starting crew: 4
- Event cards: 6 cards (first icon); 6 cards (globe icon); 2 cards (hand icon); 2 cards (beast icon); "Recommended" cards (rock icon). All cards with the Talos icon; all cards with the Cerberosa icon.
- Hostility Tracker: Starting level 3.
- Search Assignment: Two rows of tokens, each showing values 2 and 1.
- Key items: Three Target Markers (green cards with the target icon) and four brown bar tokens.
Mission 2 – Into the Unknown
The Portal lies between two Energy Fragments, its uncalibrated vortex dark and menacing, like rotating oceans of broken glass. The smell of ozone is everywhere and there is a tangible electricity in the air. Daric warned you how dangerous the Gates are, but weak traders never win. There are good things to be had, and you could well be the one who grabs them! You will need to set up the activation runes to calibrate the Gates before you can pass through; attempting it now would be like walking into a black hole.
The hunters Caaligorn and Keats don't want to miss out on the action: Cerberosa and Talos are too great a challenge to pass up. The danger of the Gates seems to make Caaligorn grin like a maniac, and even Keats is suppressing a smile. You wonder whether you should think carefully about keeping certain company.
Primary Objective
Reward: Pass through the Gate.
Your goal is to pass through the Gate, but others at the Trading Post have told you that getting out the other side is not so easy. You must install the activation runes you found in Mission 1 on the Pedestals around the board to help calibrate the destination of the portal.
Your Traders must pass through the Gate and reach Target Point 6. Traders who arrive here have left this asteroid and no longer take part in the game. Once all Traders have reached this target point or have been defeated, the mission is over.
Secondary Objective
Reward: Expert Assistance.
You are not the only one who wants to see what lies beyond the Gate. Once the Gate is activated, the Non-Trapped Hunters no longer follow their normal rules. Instead, they will use their actions to move towards the gate and attempt to pass through it, arriving at a random target point as usual.
You can use any rune you have installed to alter their rolls. Any Game Hunter that successfully reaches Target Point 6 before the end of the game will help you in the next mission.
Special Instructions
Organic Machines – Even the simplest technology of the First Born is bound to biomechanics. These are organic components designed in laboratories that are integral to the operation of any First Born technology. Advanced machines such as the Talos have living nervous systems and endocrine organs that blur the line between biological and mechanical; alive and inert. Even machines that appear purely mechanical, such as the Drones, have organic neural networks.
Energy Absorbed – Energy from the nearby Energy Fragments has transmuted the rocky bodies of the Talos. Each Talos in this mission carries an ore token in its item slot (discard it and replace it if you reveal a Worm Larva). These can be acquired when the Talos is defeated. In addition, the first two Talos to arrive on the board will also carry a Seeker Stone.
One Way – Activation stones can also be used to calibrate links to other First Born temples and to block incoming attackers. Once at least two activation stones are installed on the Pedestals, a Trader may interact with the command console to remove one of the Entry Points located at the Gate. If a removed Entry Point is later rolled for an arrival in the game, roll again.
Linked Missions – There are no Extraction, Trade or Maintenance Phases after this mission. The Development Phase is carried out as normal. Your Traders may reload and heal exactly as if they were attempting a rescue mission. Then continue to Mission 3, using only the Traders and hunters who escaped the board through the gate. Traders defeated in this mission must be extracted after Mission 3.
Setup Sheet – Mission 2
- Maximum starting crew: 4
- Event cards: 6 cards (first icon); 6 cards (globe icon); 2 cards (hand icon); 2 cards (beast icon); 3 cards (hand icon, including Ry'sa Affinity). All cards with the Talos icon; all cards with the Cerberosa icon.
- Hostility Tracker: Starting level 2.
- Search Assignment: Two entries, each showing a value of 2 and 1 or 1 and 1.
- Key items: Brown bar tokens; the number depends on the previous mission (as printed).
Mission 3 – The Hidden Vaults
The journey lasts less than a fraction of a second, but it feels like years to you. You are floating in a void, unable to move, unable to see, able to do nothing but think. Broken fragments of your life replay over and over in your mind like a feverish dream. After an eternity, you become aware of the stars surrounding you, the whole galaxy laid out before you. You can discern each star, each planet, billions of points of light, all within reach of your outstretched arm.
And suddenly you are on the other side of the gate and remember nothing of the journey. For years you will be haunted by a map of the galaxy imprinted on your mind. But here and now you are in trouble up to your neck. You need to locate your crew and steal everything that isn't bolted down!
Primary Objective
Reward: Trophies and a trip home!
You have come this far, so there is no turning back. Your objective is to collect as much loot as possible before returning through the gate.
This time, your Traders must pass through the gate and reach Target Points 3 or 4. Traders who arrive here will no longer take part in the game. Once all Traders have reached these Target Points or have been defeated, the mission is over.
Additionally:
- If you have any Dyson items, the energy counters collected from the Energy Fragments in this mission must be placed blue side up. Blue Energy Counters still only count as one for the item's limit, but they contribute two dice when discarded during attacks made with the item, and are worth a bonus of 1UA each when the item is traded. Energy added to the token from any other source must be placed orange side up as usual.
- All trophies collected in this mission that are not used for crafting are worth double their usual value if sold in the Trade Phase after the game.
- At the start of the game, place one large True Born item at random and one random standard True Born item inside the True Born stasis capsule. Once opened, the Capsule can be searched to obtain them, in addition to any that can be recovered from the True Born itself.
Secondary Objective
Reward: Up to 20UA.
As a token of gratitude, any hunter who successfully leaves through the gate with your team will reward you with 10UA each. Alternatively, they can be hired permanently at the cost of their temporary hire.
Special Instructions
Preparation – When your Traders emerged from the gate, you were apparently expelled on the other side at random. For each Trader and Hunter that passed through the Gate, roll the Knowledge die and place them at or next to the corresponding Patrol Point.
Standard command runes are not used in this mission, but each stasis capsule will contain one of this expansion's Ry'sa activation runes, and two capsules will also contain Seeker Stones.
Hunters – Any Game Hunter that passed through the Gate in the previous mission can be controlled in this mission as if it were your Trader, using the Trader side of its boards. They still have their hunter knowledge and will be able to extract trophies.
Shut Down – The First Born defenders will do everything in their power to prevent you from leaving with their valuables. If a non-Trapped Liege begins its turn within short range of an Energy Fragment with accumulated Energy Counters, it will ignore its AI activation box. Instead, it will use its actions to: move into contact with the Fragment, then interact with it to shut it down. When a Liege interacts, remove an energy counter from the Fragment and add a reminder counter.
Remove the reminder counter from each Fragment in each evaluation phase instead of adding an energy counter.
Translator's note: the Spanish source reads "Fragmento de Poder" (Power Fragment) in this paragraph; it is rendered here as Energy Fragment, the component named everywhere else in the set.
One Way – Activation stones can also be used to calibrate links to other First Born temples and to block incoming attackers. Once at least two activation stones are installed on the Pedestals, a Trader may interact with the command console to remove one of the Entry Points located at the Gate. If a removed Entry Point is later rolled for an arrival in the game, roll again.
Translator's note: this paragraph repeats the One Way rule from Mission 2 as printed in the source.
Setup Sheet – Mission 3
- Maximum starting crew: X (as printed; the crew size is variable).
- Event cards: 6 cards (first icon); 6 cards (globe icon); 2 cards (hand icon); all cards (rock-creature icon); all cards (Talos icon); optional (figure icon); optional (beast icon).
- Hostility Tracker: The starting level is shown by a stylised numeral that the page image reads as 7. The tracker bars at the Patrol level are shaded green. Translator's note: this numeral was read from the page image and is not confirmed against the printed bar count; check the printed sheet before relying on it.
- Search Assignment: Three rows of tokens, each showing values 2 and 1.
- Key items: Two green cards with face icons; six brown bar tokens.
Reference
This section explains the status and combat icons used in this expansion and the results of the Talos and Cerberosa dice. The results are printed in the original on the last page of the book.
Knocked Down
This character can only be defeated while lying face down. If it loses its final Health/Stat point while standing, no damage is caused and the character becomes Knocked Down. It must be at its final Health/Stat point while standing and then receive damage while Knocked Down to be defeated.
Fire
After an attack with this weapon is resolved, place fire tokens equal to the number of hits made (regardless of damage caused) next to the target or on its board. In each evaluation phase, the target removes a fire token and loses one point of Health. A character cannot have more than 3 fire tokens.
A burning character may spend an Action while Knocked Down to remove a fire token.
Purge, Rogue Purge and Machine characters automatically remove one fire token each time they perform any Action.
Poison
After an attack with this weapon is resolved, place poison tokens equal to the number of hits made (regardless of damage caused) next to the target or on its board. In each evaluation phase, the target removes a poison token and loses one point of Health. A character cannot have more than 3 poison tokens.
Purge, Rogue Purge and Machine characters never receive poison tokens.
Any item that restores Health can be used to remove poison tokens.
Melee Weapon
This weapon can be used to make Melee Attacks against characters on diagonally adjacent squares, or within 1 inch if measured.
Illustration: Toxic Lash.
Cerberosa Dice
- Envenomed Attack: Adds one hit to the total for the attack.
- Poisoned Attack: This attack follows the Poison rules.
- Paralysing Cut: If this attack causes damage, the target also loses one skill peg, if possible.
- Blood Frenzy: If this attack defeats a Trader, Cerberosa stops to devour the corpse; the Trader is permanently dead and removed from the campaign. They cannot be resurrected and their equipment is placed on the ground where they fell.
- Otherwise, Cerberosa makes another Melee Attack Action, using the Cerberosa die (this does not count towards the number of uses in the round).
- If they are no longer in contact with their target, they will perform a Move Action towards the nearest character (friend or foe, excluding First Born of a higher rank) and will attack them instead if possible.
- Pack Instinct: The Cerberosa emits pheromones calling its pack. All other non-Trapped Cerberosa in play immediately perform a Move Action towards this attack's target. If there is no other Cerberosa in play, one immediately arrives at the nearest Entry Point and will activate this round.
Talos Dice
- Piercing Attack: Add two hits to the attack total.
- Flaming Attack: This attack follows the Fire rules.
- Extra Action: The character gains an additional action this turn.
- Terrify: The target character is marked with a fear counter.
- Panic Shots: All Traders with a ranged weapon, at short range and line of sight, lose one ammo peg if possible (adding it to the Hostility Tracker if none has been added this round).
- Paralysing Explosion: All characters that are not First Born and are at short range are knocked down.