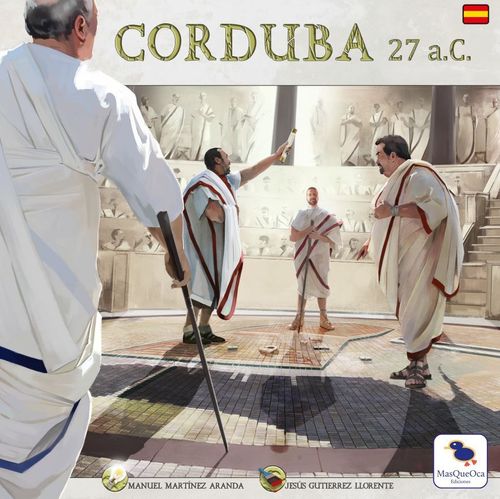
Corduba 27 a.C.
Corduba 27 a.C. Rulebook
Table of Contents
Table of Contents
- Game Components
- Summary and Object of the Game
- Description of the Game Components
- Resources and Denarii
- Workers and Specialists
- Production Spaces and Buildings
- Player Components
- Offerings
- Troops
- Riots
- Milestones (Res Gestae)
- Monuments and Monument Bonus Tokens
- Inheritance Cards (Hereditas)
- Family Cards
- Rome Demands Cards (Romae Postulationem)
- Building (Aedificium) and Caepio Cards
- Player Board
- Game Board
- Additional Boards
- Using the Macellum
- Set Up
- Sequence of Play • Decades
- Gameplay • Rounds of Play
- End of the Game
- Easily Missed
- Solo Play
Game Components
- 1 Omnibus Board
- 1 Macellum Board
- 3 Pars Boards
- 4 Player Boards
- 1 Game Board
- 4 Player Aids
- 1 Rulebook, 1 Glossary, 1 Historical Booklet
- 18 Building Cards
- 30 Caepio Cards (for solo play)
- 7 Event Cards (Romae Postulationem)
- 8 Inheritance Cards
- 8 Family Cards
- 6 glass beads (price markers)
- 1 six-sided die (for solo play)
- 12 Stone (resource)
- 12 Food (resource)
- 12 Marble (resource)
- 12 Tools (resource)
- 12 Amphorae (resource)
- 15 Riot counters
- 12 Wood (resource)
Note from the editor: We have included some extra wooden pieces. All game components are limited to the quantities listed here. The extra pieces provided are meant to replace damaged or lost components.
- 15 cubes (Senators) of each color
- 18 Insulae of each color
- 3 Prestige Markers of each color
- 1 Well-being Marker of each color
- 1 Round Marker
- 1 Happiness Marker of each color
- 1 Merchant of each color
- 1 Riot Marker of each color
- 1 Turn Order Marker of each color
- 4 Specialists of each color
- 2 Special Workers
- 1 Worker Marker of each color
- 42 Workers
Cardboard components:
- 52 Building tiles
- 36 coins with a value of 1 Denarius
- 15 coins with a value of 5 Denarii
- 10 coins with a value of 10 Denarii
- 6 Monument tiles
- 26 Offering tokens (value 1)
- 12 Offering tokens (value 2)
- 1 End-of-Game tile
- 14 Velites Troop tokens (value 2)
- 12 Legionaries Troop tokens (value 3)
- 6 Monument Bonus tokens
- 10 Equites Troop tokens (value 4)
- 5 Senators
- 16 neutral Insulae
- 9 Macellum tiles
- 8 Res Gestae tokens
- 8 "Blocked" tokens (for 1-2 player games)
Summary and Object of the Game
Corduba 27 BC is played out across three 'decades.' Decades I and II are divided into 3 Rounds of Play, while Decade III only has two rounds. Each Decade is further broken down into 5 segments:
I. ROMAE POSTULATIONEM: at the beginning of each Decade, draw one Romae Postulationem card. Rome will demand Troops, Offerings, and resources that players will be required to provide at the end of each Decade when the rounds have finished.
II. RESTOCK THE MACELLVM: the Macellum is restocked to its maximum storage limit depending on the number of players.
III. PECULIUM: players receive the benefits their unlocked Specialists provide.
IV. ROUNDS OF PLAY
Each of the 8 Rounds of Play are subdivided into several phases:
-
Riot Phase: active Riots spread and then players place new Riot counters on the board.
-
Macellum Phase: prices in the Macellum are adjusted according to the Macellum tile drawn.
-
Action Phases: in turn order, players take actions one by one until all have passed. Players may:
- a) Build
- b) Activate a building or Production Space
- c) Claim a Milestone
- d) Pass
- Take certain free actions
Rome Demands Interphase (only at the end of rounds 3, 6, and 8, which correspond to the last round in each Decade): Rome demands Troops, Offerings, and resources.
-
Check Happiness: players must pay their Workers and Specialists in order to keep them happy.
End of round: Players recover their Workers and Specialists from the board.
At the heart of the game is the Action Phase, during which players will take turns according to their position on the Turn Order Track. On your turn, you will activate and construct buildings in the different Districts of Corduba, train troops to send to the Roman cohorts and celebrate festivals in honor of the gods. The point of doing all this is to win the favor of as many Senators as possible. In order to win Senators over to your side, you will have to obtain resources from nearby production areas by sending your Workers or trading in the Macellum. Constructing buildings will increase your Prestige with the different social classes in the city, which is a crucial part of gaining favor with the Senators. Each building constructed adds new actions to the game, so knowing which building to construct where and when is essential.
As the game progresses, you will notice that the number of available actions increases. This means that your strategy will change from one round to the next. At the end of each Decade, players need to meet the various demands of Rome and so must prepare themselves or riots will break out and shatter their hopes for a peaceful reconstruction. Sending troops to the Roman cohorts, celebrating festivals in honor of Augustus and the gods, and gaining the confidence of the different districts will give each player the opportunity to win the favor of the Senators.
V. WAREHOUSE MAINTENANCE: players discard resources in excess of the limit.
VI. POLITICS: players obtain new Senators if they have more Prestige than their opponents in the city Districts.
When the third Decade ends, players must sell all their remaining resources at the price indicated in the Macellum. A player loses a Senator if they caused more riots than their opponents did and gain extra Senators if they claimed Milestones during the game. In addition, the richest player gains a Senator.
At the end of the game, the player with the most Senators present in the Senate wins the game.
Well met! I am Caepio. Throughout the rulebook, you will see there are boxes like this one. Make sure you read them, as I will be giving you some important advice you will need on your quest for fame and glory. Once you feel comfortable with the game, test your skills against mine in solo play. What do you say? Are you up for the challenge?
Description of the Game Components
Below is a detailed description of the most important game components. Read this section carefully as many basic concepts are explained. Consulting the Glossary is also highly recommended before playing your first game.
Resources and Denarii
Basic resources: Wood, Stone, Food, and Tools are all considered basic resources which can be obtained at the different Production Spaces located in the center of the game board (except Tools), at the Macellum, and also at certain buildings. Tools are a difficult resource to get a hold of, so players are advised to take some from their starting Inheritance Card. During the game, Tools can only be taken from the general reserve by activating the CUDENDUM building.
Amphorae (singular, Amphora): this resource represents the containers that held olive oil. They are considered a 'wild' resource, which means that at any point during the game, players can substitute them for any other basic resource, except when interacting with the Macellum where they have their own price. For the purposes of resolving Rome Demands cards, Amphorae are equivalent to two of the required resource. Players can get Amphorae mainly from its Production Space and by advancing on the Pars Servorum Prestige Track. Unless some other ability expressly permits it, Amphorae cannot be used as Marble.
Marble: this resource is never considered 'basic' and can be obtained at the corresponding Production Space on the game board, at certain buildings, at the Marcellum, and by advancing on the Pars Patricius Prestige Track.
Denarii: the game's currency. Denarii (singular: Denarius) can be obtained in many ways, but are always in short supply. Important: Denarii are not considered resources by general rule.
Workers and Specialists
Workers: these pieces represent the players' workforce. At the beginning of the game and of each round, players receive the number of Workers indicated by their Worker Register. This register can be increased by placing Insulae in the different Districts, by advancing on the Pars Servorum Prestige Track, and by activating the LUDUS building.
Specialists: these pieces represent skilled Workers in particular fields and count as two Workers when used to build or activate buildings matching their color. However, they may not be used to build or activate buildings of a different color. They do not increase the Worker Register. Specialists can be sent to the Production Spaces in the center of the board just like any other Worker. Every player has their own Specialists that can be unlocked by advancing on the Pars Servorum Prestige Track and by activating the LIBRARIUM building.
Production Spaces and Buildings
The spaces on the game board marked with a scroll are called Production Spaces. The CASTRA building can also be found in the upper right corner of the board, which represents the city barracks. Buildings in the game include, apart from the CASTRA, Monuments and the rest of the building tiles. Important: Production Spaces and buildings are equivalent terms in all respects. However, when 'building tile' is specifically referenced, Production Spaces are not considered valid options.
Building tiles: the action 'a) Build' allows players to place new buildings in the different city Districts. Buildings have different shapes and sizes and always have a particular color that matches a specific Specialist. There may only ever be one of each type of building in any given District. When constructing buildings, new actions become available to all players. Some buildings have two or more possible actions. In this case, players must choose which space to activate when sending one or more Workers there to activate the building.
There are many ways to get resources, but the best one is to send Workers to Production Spaces. Do not underestimate the importance of these spaces for getting whatever you need. Your Merchant is also a very useful, albeit limited, tool for stocking up on resources. However, do not take more than what you need since at the end of each Decade you may have to discard resources during Warehouse Maintenance. You should also try to keep a steady supply of Denarii, as they are very limited yet absolutely necessary for performing many tasks.
Getting Workers and Specialists is of the utmost importance. The quickest way to do this is by placing Insulae on the board and advancing on the Pars Sevorum Prestige Track. Try to use your Specialists to build or activate buildings of their color, but it would not be the end of the world if you find it necessary to send them to the Production Spaces to get those much-needed resources. Keep in mind that the more Workers and Specialists you have, the higher your Happiness needs to be each round in order to avoid upkeep costs. Bread and games, as they say…
Constructing buildings is the quickest way to get more Prestige in the different Districts as well as increase your workforce. Do not ignore the Prestige benefits that each District provides, and neither should you pass up the opportunity to place a building tile in a District if you can then place several Insulae. Even if it is a District you have not been paying much attention to, it will still be worth it. Also remember that each District gives certain construction bonuses, and make sure you use these to your advantage. If you are short on Workers, Pars Servorum is the place to build. If, on the other hand, what you lack are money or resources, the other Districts can accommodate you.
Player Components
Turn Order Marker: this is used to indicate a player's position in turn order each round.
Riot Marker: this is used to indicate the total number of Riots that players have caused throughout the game.
Well-being and Happiness Markers: the heart-shaped marker represents Well-being, which essentially represents how sympathetic the people are to your cause. The marker in the shape of a harp measures Happiness, which indicates how content your workforce is with you. Any time the Well-being Marker moves forward or backward a number of spaces, so does the Happiness Marker. However, the opposite case is not true: an increase or decrease in Happiness does not affect the Well-being Marker.
Insulae: Players have a set of 18 Insulae that begin the game on their Player Board. As Insulae are placed on the game board, players immediately receive new Workers and bonuses. If a player has run out of Insulae for a particular District and needs to place more, they must use the neutral Insulae provided with the game. Insulae on the game board count towards building adjacency (see the Build action, below, for more details).
Prestige Markers: these are used to measure each player's Prestige in each of the city Districts.
Merchant: this token can be sent to buy and / or sell at the Macellum. This can be done during a player's turn as a free action once per Decade.
Cubes: these pieces are used to represent Senators. They also have a few other specific uses in the game.
Offerings
At the end of each Decade, players will have to provide Offerings to the gods. The player who gives the most Offerings gains a Senator. Offerings can be obtained by advancing on the Pars Plebeius Prestige Track or by activating the SANTUARIUM and TEMPLUM buildings. The purple Specialist (representing a priest) can also help in receiving more Offerings.
Troops
Rome will demand Troops from the city at the end of each Decade. The player who sends the most Troops gains a Senator. Troops are usually obtained by activating the CASTRA. The red Specialist (representing a Legionary) can provide more Troops.
Riots
Riots represent the overall dissatisfaction and anger of the Roman people. Riots can occur in several ways. A building with a riot may not be activated and a District with at least one Riot will not provide its corresponding construction bonus. Riots can be eliminated (suppressed) by activating the PRAEFECTURAE building.
Milestones (Res Gestae)
These counters represent important achievements and are different in each game. They can be claimed by any player that meets the requirements. Once claimed, a Milestone is no longer available to other players. At the end of the game, each Res Gestae a player has in their possession provides them with a Senator. Consult the Glossary for detailed descriptions of the Milestones.
Monuments and Monument Bonus Tokens
Monuments are extremely expensive to build. They can be constructed by any player and have specific locations on the game board. When a player builds a Monument, they receive a special bonus token that will aid them throughout the rest of the game. The token they receive depends on the Monument built. Consult the Player Aid for a detailed description.
Riots! You can't please everyone, right? It is never good to create them yourself, but if other players do make sure you learn to use this to your advantage. Suppress them to get more Prestige in the District and when you have to place a Riot, do so on a building that another player needs to use. Are Tools in short supply? Stock up on them and then block the action so it is difficult for the other players to get more. Use Riots to slow down your opponents.
Also remember that at the end of the Decade, Rome will demand Troops and the people will need Offerings. Make sure you have the minimum required amount at the very least, because otherwise, Riots will spread and your family will quickly lose fame and fortune. It is always a good idea to have a Priest and Legionary Specialist in reserve, although it is true that these are less useful than other Specialists when constructing or activating buildings of their color.
Monuments may be expensive but if you can build them, they will give you bonuses for the rest of the game. Citizens love them, too, so your Prestige will get a significant boost in the Districts.
Inheritance Cards (Hereditas)
At the beginning of the game, each player receives two Inheritance Cards, which represent their family's ancestral legacy. Players choose one of these Inheritance Cards and receive the bonuses indicated on the card.
Family Cards
Along with Inheritance Cards, players also receive a Family Card. These cards show the two most prominent members of each player's house, but only one can be chosen as their representative for the game. Each character on the Family Cards has special abilities, explained on the card itself. In addition, each card provides one starting Prestige in the indicated District.
Rome Demands Cards (Romae Postulationem)
At the end of each decade, Rome demands Troops for the army and the city demands Offerings to the gods, in addition to a specific type of resource. Players can gain Senators and other benefits by meeting the demands listed on the Romae Postulationem card.
Building (Aedificium) and Caepio Cards
These cards represent the buildings in the city and Caepio's actions. They are only used for solo play.
Player Board
Short Summary of Each Round
The PECULIUM is received at the beginning of each Decade and when a Specialist is first unlocked. Place the Merchant here. Place any MONUMENT BONUS TOKENS achieved during the game. This is the WORKER REGISTER. At the beginning of each round, players receive the number of Workers indicated by their Worker Marker's position on this track.
SPECIALISTS begin the game on these spaces, unavailable to players. They can be unlocked over the course of a game and some players may even begin the game with one (this depends on the Inheritance Card chosen). Players receive the specified bonus when unlocking a Specialist. Players may only have one of each type of Specialist at any given time.
At the end of each Decade, players must pay an upkeep cost known as Warehouse Maintenance. The maximum amount of resources that can be stored is indicated here, which depends on the number of players. Any resources beyond this limit are returned to the general reserve.
Rome demands a certain number of Troops and Offerings at the end of each Decade. A summary of these demands can be found here.
INSULAE begin the game on these rows. Each row corresponds to the District matching that same color (bronze, silver, or gold). When Insulae are placed, players remove them from their Player Board and put them on the game board, immediately receiving any bonuses that are revealed. When placing in a District, players must use the Insulae corresponding to that same District. If at any time players must place Insulae from a row that no longer has any, they must use neutral Insulae instead.
Game Board
TURN ORDER TRACK: indicates the turn order for each round. When a player passes, they must place their Turn Order Marker in the available space farthest to the left on the free (unused) row.
WELL-BEING AND HAPPINESS TRACKS: Well-being measures players' popularity in the city and is essential for maintaining a sustainable increase in Happiness. Happiness is volatile and every round players must compare their Happiness to their total number of Workers and Specialists. The difference between these two values is the amount of Food and/or Denarii players have to pay in order to avoid causing Riots. If this occurs, a player's Well-being will decrease while their upkeep costs will only get larger. There are several ways to increase Well-being and Happiness levels.
CASTRA: at the CASTRA, players can obtain Velites, Legionaries, or Equites. The CASTRA is considered a red building.
DISTRICTS: the city is divided into three Districts: Pars Servorum (bronze), Pars Plebeius (silver) and Pars Patricius (gold). Each District corresponds to a different social class (slaves, plebeians, and patricians, respectively) and provides certain construction bonuses. In addition, the inhabitants of each District also provide different bonuses as players increase their Prestige there. Each District has a unique distribution of roadways (lines) that delineate construction zones. When constructing buildings, neither the lines located inside nor those marking the limits of the Districts can be intersected by the building tile being placed.
CONSTRUCTION BONUSES: each District provides a specific construction bonus.
RIOT TRACK
PRESTIGE TRACKS: each District has a Prestige Track where players advance their markers to indicate the level of Prestige they currently have there. If a marker advances to a space where a Prestige bonus is depicted, the player that marker belongs to immediately receives that bonus. On the other hand, if a Prestige Marker moves down the track onto a space with an indicated bonus, it is ignored (the owning player does not receive that bonus). Each Prestige Track only has 12 spaces (maximum level of Prestige). If a player reaches the last space on a Prestige Track, they take the Senator located there (which gives them a Senator at the end of the game).
MONUMENT CONSTRUCTION SPACES: each Monument has its own matching location on the game board.
PORTUM: Players can use the PORTUM action an unlimited number of times.
PRODUCTION SPACES: these spaces are printed on the game board and can be identified by the scrolls with their names. Players may send Workers and Specialists to these spaces to obtain resources and train Troops. Except for the Castra, which has three slots, Production Spaces have two available action slots. If a slot is occupied, no more Workers may be sent there for the rest of the round. Next to each Production Space, create a pool of the corresponding resource. Resources must be taken from or returned to these pools, or general reserves (except for Tools, which have their own space on an additional board).
Additional Boards
The following boards can be used to maintain an organized playing area. They have different sections to keep track of Senator count, where Monuments are placed, or for interaction with the Macellum.
The District Boards (Pars), with building tiles on their corresponding spaces, are placed next to their respective Districts on the game board. This will help players keep track of which buildings are still available for construction in any particular District.
The fourth board, called the Omnibus Pars, holds the Basilica (a unique building that can be built in any District). There are also spaces for Riot counters, Offerings, Tools, neutral Insulae, and Troops.
Macellum Board
MONUMENT TILES: the 6 Monuments in the game are placed in this area. When a Monument is constructed, it provides the increase in Prestige indicated on its space along with a Monument Bonus token that rewards the player with a unique ability for the rest of the game. During setup, place each bonus token on its respective Monument. Each Monument provides a bonus for the rest of the game. Do not overlook them!
ROMAE POSTULATIONEM: At the beginning of each Decade, a Rome Demands card is revealed that tells players which type of resource they will have to turn in at the end of that Decade. Players will have to compete to contribute what they can, but the one who delivers the least amount of resources will normally be penalized. There is a required minimum of resources that players must contribute as a group. If this demand is not met, everyone receives the penalty indicated on the card and also causes a Riot. Additionally, the number of Troops and Offerings that players must provide individually at the end of the Decade is indicated on the space where the card is placed. Not providing this amount incurs an additional penalty. Each decade, Rome's demands will increase. A Decade is divided into three rounds. At the end of the third round, players will have to deal with the Romae Postulationem.
The available Res Gestae depend on the number of players. Res Gestae are Milestones that any player can claim if they meet the requirements. Just send a Worker or Specialist and take the tile. At the end of the game, each one provides a Senator.
The amount of resources available in the Macellum depends on the number of players. Restock it at the beginning of each round (2 players / 3 players / 4 players). Spaces are also provided for used Merchants.
MACELLVM: the Macellum is the city market. Players can send their Merchant here or interact with it by performing actions provided by different buildings. Depending on the number of players, there will be a set number of resources of each type (indicated below their symbol). Resources in the Macellum are only available to players when they perform actions there. Activating Production Spaces never adds or removes resources from the Macellum (although certain Family Card abilities can interact with the market in different ways).
Using the Macellum
Buying and Selling
Buying: when a player buys resources from the market, they must take them from those available there and pay that resource's current price. If a particular resource has run out, then it cannot be purchased. When the last resource of a type is purchased, the price marker corresponding to that resource increases by one and only one (regardless of how many were bought). This price increase occurs only after buying all desired resources of that type. Denarii used to buy resources are returned to the general reserve.
Selling: when a player sells resources at the market, they are placed on their corresponding space in the market until the maximum limit is reached (which depends on the number of players). Any resources over this limit are returned to the general reserves of their respective Production Spaces on the game board. The player then takes the indicated amount of Denarii, depending on the current price, from the general reserve. In addition, the price marker corresponding to that resource decreases by one and only one (regardless of how many were sold). This price decrease occurs only after selling all desired resources of that type. Important: buying and selling the same type of resource is not allowed during the same action, whether it be by activating a building or the sending the Merchant to trade.
Price fluctuation: market prices always fluctuate when buying or selling unless otherwise specified by some effect.
Macellum tiles: prices fluctuate at the beginning of each Decade according to the Macellum tile drawn (explained later).
Example 1: Sam decides to use his Merchant to sell one unit of Marble at the Macellum. The sold resource is placed in its corresponding space and he receives 5 Denarii. He also decides to purchase three Amphorae and pays 6 Denarii which matches the current price for this resource times three (base price = 2, number of resources purchased = 3). For this purchase, he was able to use the Denarii he received from the previous sale, and so proceeds to take three Amphorae from their space on the Macellum board. Since he has bought all remaining Amphorae, the space is now empty for the rest of the players. Finally, the prices for both resources fluctuate: Marble decreases in cost by 1, resting at a value of 4, while the price of Amphorae increases to a cost of 3.
Example 2: although she could have used her resources to construct a building, Daniela has just seen a great opportunity at the market. In the general reserve, there is very little Stone and so she has decided to buy up as much as she can to keep her opponents from having access to this resource. She sends her Merchant and buys the 4 remaining Stone at a price of 2 per unit. She pays 8 Denarii and takes the Stone from the Macellum. She also buys the last unit of Food for 3 Denarii. Then, she sells 2 Marble, placing one on the Macellum and the other in the general reserve (since there is no more room for Marble in the market). She receives 8 Denarii for this sale, and then the prices are adjusted.
Set Up
Setting Up the Game Board
- Place the game board depicting a map of the city in the center of the playing area.
- Place the Pars boards next to their respective Districts and the Omnibus Pars in the extra space next to the Pars Servorum. Then, place the buildings in their corresponding spaces on these boards.
- Place the Round Marker (hourglass) in the first space on the Macellum board.
- Shuffle the 8 Res Gestae tokens and randomly choose an amount equal to the number of players plus two. Place them face-up on the Res Gestae spaces on the Macellum board.
- Place the six Monument Tiles and their Bonus tokens in the matching spaces on the Macellum board.
- Create the general reserve for resources. To do this, multiply the number of players by 3 and place the resulting number of Wood, Stone, Tools, Food, Amphorae, and Marble resources near their respective Production Spaces. Example: in a two-player game, there will be 6 of each type of resource while in a 4-player game there will be 12. Any remaining resources are placed back in the box.
- Create the stocks of resources in the Macellum depending on the number of players by taking them from the general reserve (example: for 4 players, there will be 4 units each of Food, Wood, Stone, and Tools, and 3 units each of Marble and Amphorae). Place a glass bead (price marker) on the white numbers to set the starting price for each resource.
- Place the Riot counters, value 1 and 2 Offering tokens, Troops, neutral Insulae tiles, and Basilica tile in the reserved spaces on the Omnibus Pars board.
- Create a pool of Workers and Denarii and place them within reach of all players. The number of Workers and Denarii are not limited. Use a substitute component if they run out.
- Lastly, shuffle the 7 Romae Postulationem and place them in the reserved space on the Macellum board.
Setting Up the Player Boards and Markers
- Each player chooses a color and takes all the components of that color: 1 Player Board, 18 Insulae (placed in the three rows on their Player Board), 15 Senators (placed in their area of play near their Player Board), 1 set of Specialists (one of each color, placed in the reserved spaces on their Player Board), 1 Merchant (placed on top of the image of a coin purse on their Player Board), 1 Well-being Marker, 1 Happiness Marker, 3 Prestige Markers, 1 Riot Marker, 1 Worker Marker, 1 Turn Order Marker.
- Each player places a Prestige Marker in each District on the starting space (marked by a laurel wreath).
- Each player places their Riot Marker next to the Riot Track on the game board.
- The starting player is determined randomly. Beginning with the starting player and in clockwise fashion, each player places their Turn Order Marker in the appropriate space on the Turn Order Track located in the upper left corner of the game board.
Starting Resources
After set-up, each player receives two Inheritance Cards and one Family Card. Players must choose one of the two Inheritance Cards. The card they choose will determine what resources, Workers, and Specialists they start the game with. They must also choose one of the two characters depicted on the Family Card.
Family Cards: when a player has chosen their character, they read their ability aloud to the rest of the players and increase their Prestige in the District indicated on the card. If any characters have a starting ability (written in smaller type on the card), they are resolved now in turn order.
Inheritance Card: starting with the last player in turn order and in counterclockwise fashion, each player takes the Denarii, starting resources (which could be any combination of Food, Wood, Stone, or Tools up to the total indicated on the card) and other elements listed on their card. Players may only take Marble and Amphorae if their card allows them to. By the time a player takes their turn choosing starting resources, one or more types may have already run out, in which case they must choose other resources to take. Then, they place their Worker Marker on the Worker Register in the space indicated on their Inheritance Card and receive the corresponding amount of Workers from the general reserve. If an Inheritance Card provides Prestige, it is increased in the corresponding District (and if by doing so a player reaches a space with a bonus, it is received immediately). If the card shows a Specialist or allows a player to choose one, it is unlocked and the player receives the bonus during the first Peculium. Lastly, the player places their Well-being and Happiness Markers on their respective tracks on the spaces indicated.
Extra starting Denarii: the player to the left of the starting player receives 1 additional Denarius, the next player receives 2, etc.
First Game • Quick Start
If this is your first game, we do not recommend using Inheritance or Family Cards. Instead, each player receives 5 Denarii and one Marble and places their Worker Marker on space 4 of their Worker Register (taking that amount of Workers from the reserve). In addition, each player chooses a starting Specialist to unlock and receives the bonus during the first Peculium. Players then place their Well-being and Happiness Markers on space 3 of each track respectively, and their Prestige Markers on space 1 of each District's Prestige Track. Finally, starting with the last player in turn order and in counterclockwise fashion, each player chooses 4 basic resources and takes them from the general reserve.
Sequence of Play • Decades
The game is played out over three Decades, each one consisting of 5 segments. Segments, except for Rounds of Play, do not take long to resolve. Important: do not forget to implement the small modifications to the rules for 2-and-3-player games listed under Easily Missed.
I. Rome Demands
Draw the top card of the Romae Postulationem deck. From now on, players will be aware of what resource they will need to provide at the end of the Decade, along with the number of Troops and Offerings required depending on the current Decade:
- a) Decade I: Rome demands that every player provide a minimum value of 2 Troops and 1 Offering, in combination with the resource indicated on the card.
- b) Decade II: Rome demands that every player provide a minimum value of 3 Troops and 2 Offerings, in combination with the resource indicated on the card.
- c) Decade III: Rome demands that every player provide a minimum value of 4 Troops and 3 Offerings, in combination with the resource indicated on the card.
Demands from Rome must be satisfied during a special interphase called 'Rome Demands.' This interphase occurs at the end of the 3rd, 6th, and 8th Rounds of Play Decade segment (explained later).
II. Restock the Macellvm
The Macellum is restocked to the limit for each type of resource, taking said resources from the general reserve. If there are not enough resources, take as many as possible.
III. Peculium
Players receive the bonuses associated with their unlocked Specialists.
IV. Rounds of Play
The first and second Decades are divided into 3 Rounds of Play while the third Decade only has 2. At the end of the 3rd, 6th, and 8th Rounds of Play, players must meet the demands of Rome. The phases of each Round of Play and all available actions in the game are detailed in Gameplay • Rounds of Play, below.
V. Warehouse Maintenance
At the end of each Decade, players may only keep a specified amount of resources (Wood, Stone, Tools, Food, Amphorae and/or Marble). The maximum amount of resources players may store depends on the number of players:
- 2 players: 6 resources in total
- 3 players: 9 resources in total
- 4 players: 12 resources in total
Any discarded resources are returned to their general reserves on the game board. Denarii and Workers are not considered resources. A reminder of this can be found on the Player Board.
VI. Politics
At the end of this segment, players recover their Merchant and refresh their Family Cards (if used during the previous Decade). The player with most Prestige in each District places one of their Senators in the Senate located on the Macellum board. In case of a tie, no player receives a Senator. After the Politics segment of the last Decade, the game ends.
Gameplay • Rounds of Play
This is the main segment of the game. Each Round of Play, players take their turns following turn order. Each turn, players may perform an action plus any number of free actions, such as using their Merchant or activating the ability on their Family Card. Decades I and II are composed of three Rounds of Play while Decade III only has two. Each one of the eight Rounds of Play are divided into five phases. One phase must be resolved completely before moving on to the next one. Each of these phases is described in detail below.
Phase 1. Riots (skipped on the first turn)
1.1) Riots spread: if at the beginning of a round a District is in Revolt (there is one or more Riot counters present there), then the Riots spread. The last player in turn order takes a Riot counter from the reserve and places it on a building tile that does not already have one (never on a Production Space) in a District that has at least one Riot. If there are Riots in another District, the next player in reverse turn order from the last player to place a Riot does the same. This can occur in up to two different Districts (as explained below, three rioting Districts ends the game since this represents a citywide rebellion). Players are not penalized for placing new Riot counters when they spread. If there are no available buildings, this step is ignored.
1.2) Causing Riots: starting with the first player in turn order, each player decreases their Well-being for each Riot counter in their possession. They then distribute these Riot counters (corresponding to Riots caused in the previous round) to the other players as equally as possible (this means that players do not place Riots that they themselves caused). Then, starting with the first player in turn order and following the same rules mentioned above, players place on the game board all Riot counters they have received from other players.
Riot counters: On any given building tile, there can be at most one Riot counter at a time. During the game, when a District has at least one rioting building, the construction bonus for building in that District is no longer active. As a reminder, place a Riot counter on top of the circular space depicting the construction bonus. This District is now considered a 'District in Revolt.' When a District loses its last Riot counter, the one covering its construction bonus is removed, reactivating the bonus for all players. A building with a Riot counter is blocked and cannot be used while still rioting.
Suppressing Riots: players can activate the PRAEFECTURAE (prefecture) building to suppress Riots. This building can never receive a Riot counter. Monuments are also immune to Riots. At any given time, if a player's action causes a District to no longer be in Revolt (they have removed the last Riot counter), then that player increases their Prestige in that District by one.
Rebellion: if at the beginning of a Round of Play all three Districts are in Revolt, the game ends immediately and all players are eliminated (there is no winner). The city is said to have risen up against your rule and Rome withdraws her support. None of you was up to the task.
Causing Riots results in the people losing confidence in your abilities, and this will decrease your Well-being. Just as bad, if not worse, is the fact that you will be giving your opponents Riot counters that they can use against you. Have you instead received Riot counters from the other players, while you also happen to notice that their coffers are empty? Well, now would be the time to start Riots at buildings that generate Denarii. You can also be the one to put a District in Revolt, negating the construction bonus, if you see that the other players have a vested interested in increasing their Prestige there through construction. With time and experience, you will find the best ways to take advantage of Riots. In addition, it is never a bad strategy to suppress Riots with the Praefecturae in order to get a bit of extra Prestige.
Example: first, Riots spread in Pars Patricius, the only District in Revolt (1). This District has two buildings with riots (2)(3). Laura, last in turn order, takes a Riot counter from the reserve and decides to place it on the Santuarium, which immediately blocks it from being used (4). Daniela caused 3 Riots last round because she could not meet any of Rome's demands. Sam caused 1 Riot when he could not provide the required number of Troops. Both Leo and Laura were able to avoid causing any Riots. Firstly, Daniela and Sam adjust their positions on the Well-being and Happiness Tracks. Daniel moves three spaces to the left and Sam moves one (a). Then, Daniela advances three spaces to the right on the Riot Track while Sam advances one (b). Daniela distributes her Riot counters equally among the other players, giving one to each of them. Sam decides to give his Riot counter to Leo (c). Now, starting with the first player in turn order and continuing clockwise, players place the Riot counters in their possession in a District of their choice. Daniela is the first player but has no Riot counter to place. Sam received one Riot counter from Daniela which he places on the Herbarium in the plebeian District (5), nullifying its construction bonus (6) because now it is a District in Revolt. Leo is the next player in turn order and has two Riot counters, having received one from both Daniela and Sam. He decides to place both in the patrician District, blocking the Cudendum (7) and the Ludus (8). Lastly, Laura places her Riot counter she received from Daniela in the plebeian district on the Librarium (9).
Phase 2. Macellum
The first player in turn order reveals a Macellum tile and adjusts the prices in the market accordingly. Then, the tile is returned to the game box.
Example: the current market prices are the ones shown in the picture. Daniela draws a Macellum tile and adjusts the prices according to what is indicated on the tile: the price of Food increases by 2 and the price of Amphorae increases by 1. The price of both Wood and Stone decreases by 1.
Phase 3. Actions
During this phase, players take actions in turn order until everyone passes. On their turn, players must perform one of the actions listed below, plus any number of free actions.
Build
Constructing a building
The costs to build each building can be seen on the Player Aid. When a player decides to perform this action, follow the steps outlined below in order. By constructing buildings, players are also 'constructing' actions that then become available to all players.
-
Choose a District in which to construct the building.
-
Choose a building still available in that District and pay the construction costs, applying that District's construction bonus if not in Revolt. Resources, Marble, Denarii, and Workers used to pay the construction costs are returned to their respective general reserves. Important: a Specialist counts as two Workers when used to construct a build matching its color, but cannot be used to construct a building of a different color.
-
Now, place the building so that it is adjacent perpendicularly (never diagonally) to another building in that District, or to an Insula (whether neutral or belonging to any player). Building tiles have specific shapes depending on the type, and when a building tile is placed, it must be done so in a manner that completely occupies all necessary spaces in accordance with its shape. A building can never be placed intersecting a roadway (line) or outside the limits of the District (even partially). A rioting building still counts towards adjacency. If no building exists in the District, then a player may place the building tile on any valid spaces of their choice. From this moment on, all other buildings constructed in this District must be placed adjacent to this building or to any Insulae that were placed as a result of its construction.
Neutral Insulae: if a building cannot be constructed in a District because its shape would not allow for valid placement (occupying all necessary spaces while respecting adjacency), then, and only then, is a player allowed to create adjacency by placing the fewest possible neutral Insulae. Then, they carry out the construction action. Each neutral Insulae needed for this purpose incurs a cost of 1 Denarius. If a player does not have enough Denarii to assume the cost of placing neutral Insulae, then they may not construct that building in that District.
-
If by placing a building tile, areas of exactly 1 space become isolated (making it impossible to construct further buildings on them), then the player placing the building tile also places Insulae from their Player Board. Isolated spaces must be adjacent to the building tile just placed. Take Insulae from the row corresponding to the District where the building tile was placed, putting one in each space isolated in this manner. A building tile's relative position to roadways, other buildings, and District limits can cause spaces to become isolated. If a player has run out of Insulae in the row corresponding to that District, they must place neutral Insulae to cover all isolated spaces. Placing neutral Insulae in this case has no extra cost. Insulae Bonuses: if a player takes an Insula from their board from a space that contains a bonus, that bonus is received immediately.
Spaces isolated by the construction process: if any space becomes isolated after finishing the entire process, it is immediately filled with a neutral Insula from the reserve. This is done automatically after a player finishes their action and at no cost to them.
Very important: depending on the number of players, there is a limit to the number of each type of building that can be built. In a 4-player game, each District can contain one building of each type, that is to say, all the buildings on the Pars boards for each District can be constructed. However, in a 3-player game, only two buildings of each type can be built. This means that as soon as two Districts contain that building, the third one is removed from the game. Example: the Santuarium is already built in the Pars Servorum. Daniela builds a new Santuarium in the Pars Patricius. It is no longer possible to build the Santuarium in the Pars Plebeius. In a 2-player game or in solo play, only one of each type of building may be constructed. As soon as one building is constructed, the other two are removed from the game.
Build a Monument
Monuments have their own spaces on the game board and are not associated with any particular District. They do, however, benefit from a unique construction bonus: if the District is not in Revolt, a player building a Monument can apply one (and only one) District's construction bonus where said Monument increases their Prestige. To build a Monument, simply pay the indicated cost, returning resources, etc. to their respective general reserves, and place the Monument tile on its matching location on the game board. Then, take the Monument Bonus Token and place it in the appropriate space on the Player Board. Each Monument also provides several Prestige points in one or more Districts (any Prestige bonuses are received immediately), as indicated on the Player Aid and on the space that Monument tile occupied on the Macellum board. For the rest of the game, the player may make use of their Monument Bonus tokens (consult the Glossary for their description). Given that Monuments are not placed in Districts but rather have their own space on the game board, it is not necessary to follow rules of adjacency or place Insulae. Monuments do not create new actions and neither can they be affected by Riots.
Construction example (using neutral Insulae to create adjacency): Daniela announces she is going to construct a Forum in the patrician District. She takes the tile and checks the spaces that are available for construction, but sees there is no valid combination of spaces that would allow for this building's construction. However, she is willing to pay the extra cost to place neutral Insulae in order to get the required adjacency. She must choose the closest valid spaces in order to place the fewest possible neutral Insulae. First, she pays the cost of the building itself (3 Workers, 2 Denarii, 1 Tool, 1 Stone, and 2 Marble). Note that the original cost of 5 Denarii is reduced by 3 due to the construction bonus associated with the patrician District (which is not in Revolt). She then analyzes her three options (A, B, C). These three are valid places to construct the building since its placement would not intersect any roadways or District limits. Whichever space she chooses, one neutral Insula would be enough (a, b, c1, c2). In fact, if she did choose to place the building tile in space C, she would not be permitted to place two neutral Insulae since only one is enough to create the necessary adjacency. Remember, she may not place more neutral Insulae than necessary. Daniela decides to place the tile in space A. She pays 1 additional Denarius to cover the cost of the neutral Insula and places the Forum. She then places two of her own Insulae from her Player Board in the two spaces she isolated when placing the Forum tile (d1)(d2). Note that she could not place an Insulae in the (e) space because it is not adjacent to the building tile just placed. This space is instead filled with a neutral Insula automatically once the entire construction process has finished. Since she has used the last two Insulae from her patrician District row, she increases her Worker Register by 1 and immediately takes a Worker from the reserve. Plus, she gets two Prestige points in the patrician District, which gives her three Denarii as a Prestige bonus (f). Lastly, Daniela could decide to activate the building immediately, although unfortunately she cannot since she does not have enough Workers. The Forum is now available for activation by the rest of the players.
Activate a Building or Production Space
Most buildings and Production Spaces have more than one available action. Production Space action slots are independent and when a player takes an action there the remaining actions are still available to other players (only the action slot used is blocked). Buildings, on the other hand, are blocked as soon as a player activates them to perform one of the available actions. A blocked building is no longer available to other players until the next round. Monuments are never activated since they do not introduce new actions to the game.
To activate a Production Space, a player must send the necessary amount of Workers and place them in the spaces allocated (marked by a Worker icon). This way, it is clear that the action is now blocked. If a player activates a slot but there are not enough resources to provide the corresponding amount, the player receives as many as there are available. The costs associated with the CASTRA action slots are returned to their respective reserves.
To activate a building, a player chooses one of the possible actions, sends the required number of Workers, and pays any additional cost (normally Denarii). Costs for activation are paid by placing Workers on the building tile and returning Denarii to the reserve. A building with a Riot counter cannot be activated. When activating a building, players receive the bonuses indicated by the chosen action. Important: a Specialist that is sent to activate a building matching its color counts as two Workers, but cannot be used to activate a building of a different color. Players may not activate a building and then decide not to perform any of its actions.
All the actions in the game are described on the Player Aid. Consult the Glossary for detailed descriptions of the symbols. It normally only takes one game to become familiar with the different symbols.
Leo decides to activate the Arena, choosing to use the first action (a). He sends 2 Workers and in exchange receives 2 Denarii from the reserve and increases his Well-being (and with it, his Happiness). Alternatively, he could have decided to send his blue Specialist alone to perform this action. Now, this building is blocked and therefore unavailable for the rest of the round. Instead of this, Leo could have decided to send his blue Specialist and 1 Worker to increase his Well-being and Happiness by 1 and increase his Prestige by 1 in the District where he currently has the least Prestige (b).
Daniela sends her priest (purple Specialist) and 1 Worker to activate the Templum. In exchange, she receives a value 2 Offering. Note that this is the only action available at this building.
Sam needs resources and so decides to use this round to stock up. On his first turn, he sends 2 Workers to get 3 Stone. He does not really need that many, but the upper space is already taken. On his next turn, he has no Workers but does have a yellow Specialist. Although not the most efficient use of a Specialist, he nevertheless sends it to the Oleum to receive 1 Amphora.
Claim a Milestone (Res Gestae)
Depending on the number of players, there will be a limited number of Milestones drawn randomly during set-up. These Milestones represent great achievements that win the support of more Senators. As an action during their turn, players can claim a Milestone if they have met the requirements. To do so, they must send a Worker or Specialist and claim the corresponding Res Gestae token. Note: the 'Master Builder' Milestone can only be claimed by sending a red Specialist (no other Specialist can be sent, and neither can a Worker). Once claimed, a Milestone is no longer available to the rest of the players.
At the end of the game, each Milestone a player has in their possession rewards them a Senator.
See the Glossary for a complete description of the different Milestones in the game.
Pass
As an action, players can pass. Once a player passes, they must place their Turn Order Marker in the free space farthest to the left on the other Turn Order Track (that which does not already contain their Turn Order Marker). That player will no longer be able to take actions for the rest of the round. When all players have passed, the Action Phase ends. Once a player has passed, any resources, Denarii, Workers and Specialists they have not used are saved for the next round (even still, it is normally a good idea to use all your Specialists since you can never have more than one of each type). Note that in the following round players will receive the number of Workers indicated on their Worker Register (no matter how many they used last round). Workers may be accumulated from one round to the next.
For the first few rounds of the game, the Build action is the most interesting. Try to choose well which buildings you construct so they can be activated by your Specialists. Also try to place as many Insulae as you can. Even if you have given up on being the player with the highest Prestige in one District, it is never a bad idea to build there if you can place more Insulae than you could if you built in a different one. When calculating costs, try to optimize your actions by keeping track of how many Workers you will need to activate the building immediately after construction. Otherwise, you will leave the building open for your opponents to use. Keep in mind as well that when you construct a new building, you are creating adjacency. Your opponents can take advantage of the new possibilities this creates to place more of their own Insulae. One interesting strategy is to focus on building a Monument in the first few rounds. While expensive, the Bonus tokens they provide are extremely valuable and can be used for the rest of the game. So, the sooner you get one, the more use you can get out of it.
As the city grows and new buildings are constructed, there will be an increasing number of alternative ways to achieve your goals. Blocking buildings is always interesting as this keeps them from being used by other players. If one of your opponents has the same unlocked Specialists as you, try to use the buildings matching the Specialists' colors before they do, limiting the effectiveness of their Specialists. Even if this may not be your most optimized choice of actions, taking away their ability to use those buildings can be worth it. Who knows, maybe your opponent will not be able to get enough Offerings and Troops to meet the demands of Rome…
Regarding Milestones, pay close attention to the rest of the players so they do not get ahead of you. Sometimes there is no rush to claim a Milestone – you can put it off for a time. However, if you get distracted, you might miss your chance. Although difficult to get, Milestones are worth it.
Even if you can still take actions, remember that passing can be a good option so you can go before your opponents in the next round. Sometimes acting first is more important.
Free Actions
Apart from taking one action, players may perform the following free actions during their turn.
Send Merchant: once per Decade, players may send their Merchant to the Macellum to buy and/or sell whatever resources they like (see Using the Macellum, above). To use the Merchant, a player simply places its token on the coin purse icon in the Macellum corresponding to their color. Using the Merchant wisely is key to victory.
Use Family Card: each Family Card depicts two characters with different unique abilities. During set-up, players must choose one of them. The text on the Family Card clearly indicates when its ability can be used, or if it is a permanent effect or associated with another action. Unless otherwise indicated, players may only use these character abilities during their turn. Family Card abilities that do not have a permanent effect may only be used once per Decade or round. After using the Family Card, players should rotate it 90 degrees to indicate it has already been used this round or Decade.
Very important: during rounds 3, 6, and 8, when all players have passed, the Rome Demands Interphase takes place before Phase 4: Check Happiness. This interphase is explained in a later section.
Phase 4: Check Happiness
During this phase, players must check the happiness of their Workers and possibly feed or pay them for their services.
The Well-being Track is an abstract representation of players' popularity in the city. Many citizens are willing to support your cause even by giving up their salaries (perhaps because they are waiting to see if you will remember them when you get into power). The Well-being Track is stable and helps players start each round with a level of Happiness equal to their Well-being. The Happiness Track is more volatile and represents how closely players pay attention to the needs of their followers. Each round, Happiness falls down to 0, but is then repositioned according to the level of Well-being a player has.
In this phase, players check their Worker Register, which will be on a space between 1 and 10. Players add the number of unlocked Specialists to the value shown on their Worker Register, and then subtract their current level of Happiness. If a player's Happiness is less than their Worker/Specialist total, then they must pay 1 Food or 1 Denarius (or a combination thereof) to make up the difference. Amphorae may be used as if it were Food for this purpose. If Happiness is equal to or greater than their Worker/Specialist total, players do not have to pay anything. Important: players are forced to pay everything they can – they may not voluntarily refuse to pay one or more Workers/Specialists. However, they are not obligated to spend Amphorae as Food – this is optional even if they do not have enough Food to cover the total cost.
Costs paid: if players are able to cover the costs, whether by using Happiness or spending the appropriate amount of Food/Denarii, then they simply place their Happiness Marker on the Happiness Track in the space matching their current Well-being.
Costs unpaid: if players are unable to cover the cost for one or more Workers/Specialists, then they must:
a) take a number of Riot counters equal to the amount unpaid. b) advance their Riot Marker on the Riot Track a number of spaces equal to the amount unpaid.
Important: the Well-being and Happiness Tracks are independent and can have different values during the game. Any time a player gains Well-being, they also gain that same amount of Happiness. Likewise, when a player loses Well-being, they also lose that same amount of Happiness. The opposite does not occur, however: gaining or losing Happiness does not affect Well-being.
Example: Daniela's Worker Marker is on the VII (7) space and she has 3 Specialists, which means she needs to pay a total cost of 10. First, she spends all her Happiness, which is 8. The difference of 2 means she needs to pay 2 Denarii and/or Food. She decides to pay 2 Denarii, covering the total cost of 10 (8 Happiness + 2 Denarii = 10). Finally, her Happiness recovers up to the same level as her Well-being.
Example: Sam has 6 Workers and 3 Specialists, which means he needs to pay a total cost of 9. Unfortunately, his Happiness is only at 6 and all he has is 1 Denarius, which he must pay. Two of his Workers are left unpaid, so Sam takes 2 Riot counters from the reserve and advances two spaces on the Riot Track. In phase 1 of the next round, he will have to decrease his Well-being by 2 (and therefore his Happiness by 2 as well) and give other players the Riot counters he accumulated this round.
Distributing Riot counters: Riot counters obtained during this phase will be handed out to other players at the beginning of the following round. This way, any Riot counters obtained by a player harms them directly, but it also means other players may end up placing the Riots on buildings most beneficial to that player's strategy.
End of Round
At the end of each round, players take the number of Workers indicated on their Worker Register from the game board or the reserve, plus a Specialist of each type they have unlocked. It does not really matter where players get their Workers and Specialists from, but at the end of this phase all buildings and Production Spaces must be empty.
Rome Demands Interphase (only after Phase 3 on Rounds 3, 6, and 8)
At the end of Phase 3: Actions, but only on rounds 3, 6, and 8, a special interphase takes place in which players must deal with the demands of Rome. These demands include providing Troops, Offerings, and the type of resource indicated by the face-up Romae Postulationem card located on the Macellum board. Important: for some cards, Amphorae count as two resources of the required type (this is indicated in the bottom right corner of the card). This interphase occurs at the end of each Decade and follows the procedure below:
- Players announce the number of Troops they have available (indicating which types and adding up their value).
- Players announce the number of Offerings they have available (indicating which types and adding up their value).
- Players announce the number of Amphorae and resources of the type required by the Romae Postulationem they have available.
- Now, each player decides what amount of each element they are going to contribute and secretly places the tokens in their hand, hiding them in a closed fist. When all players are ready, everyone reveals their contributions simultaneously.
Lastly, the amount of Troops, Offerings, and required resources provided by each player is checked.
- Rome rewards a Senator to the player who contributes the highest Troop value (in case of a tie, tying players do not receive a Senator).
- Rome rewards a Senator to the player who contributes the highest Offering value (in case of a tie, tying players do not receive a Senator).
- Rome's rewards for who contributed most of the required type of resource depends on what the Romae Postulationem indicates and a player's contribution from highest to lowest (1st to 4th). Regardless of the number of players, if a player contributes nothing they will always be fourth on the Podium.
Consequences for Not Meeting Rome's Demands
Every player must contribute, at the very least, the minimum value of Troops and Offerings required for each Decade. If unable to achieve the minimum, a player must provide what they can. However, as long as the minimum requirement is met, players can save any extra Troops or Offerings for the next Decade. Players are not required to contribute the resources indicated on the Romae Postulationem, but there are normally negative consequences for whoever ends up in fourth place.
- Players who do not provide the minimum value in Troops will cause a Riot.
- Players who do not provide the minimum value in Offerings will cause a Riot.
- Players who do not turn in at least 1 resource of the type required will cause a Riot. Plus, if the combined amount of resources contributed by players was not enough to meet the required minimum (depending on the number of players), then every player is considered to be in fourth place regardless of what they contributed. Therefore, each player will cause an additional Riot.
- VERY IMPORTANT: In round 8 (the last round of the game), players lose a Senator for each Riot they cause.
You will soon discover how difficult it is to maintain a strategy while Rome demands you provide a series of services. You can always ignore these demands as long as you can contribute the minimum required amount each Decade, but do not pass up the chance to be Rome's golden child. Providing the highest value in Troops and Offerings will please Rome, who will reward you with a Senator. Pay close attention to how many Troops and Offerings your opponents are collecting each Decade in order to make an adequate assessment of how feasible it is to become the highest contributor.
The Romae Postulationem Cards are a different matter altogether…as long as you do not end up in fourth (or last) place, you may want to hold on to those resources for later. It may even be to your benefit to stymie the city's contribution efforts, penalizing every player including yourself. This strategy is especially useful if you know you are going to be first in turn order, allowing you to suppress the subsequent Riots.
Minimum requirements
Depending on the current Decade, Rome demands a minimum value of Troops and Offerings that players must provide individually, whether they aspire to obtaining a Senator or not. The Romae Postulationem space on the Macellum board includes a reminder of the minimum requirements, which can also be found on the Player Boards.
- Decade I: players must contribute a minimum value of 2 Troops and a minimum value of 1 Offering.
- Decade II: players must contribute a minimum value of 3 Troops and a minimum value of 2 Offerings.
- Decade III: players must contribute a minimum value of 4 Troops and a minimum value of 3 Offerings.
In addition, each Romae Postulationem Card lists a required minimum that must be matched by the total contribution of all players as a group (depending on the number of players). If the combined total meets or exceeds the minimum requirement, then compare each player's individual contributions. Players are rewarded according to the amount contributed, with the highest contributor receiving the best reward (1st on the Podium), the second highest the second best (2nd on the Podium), etc. In case of a tie, both players receive the reward for highest contributor and the position directly beneath it is ignored for the rest of the players. If players did not meet the minimum contribution as a group, then every player is considered 4th on the Podium and receives the corresponding penalty.
Troops, Offerings, and resources provided as contributions are returned to the general reserve. Then, this interphase ends and Phase 4 (Check Happiness) of the current round begins. Important: Troops and Offerings provided as contributions cannot be divided. Each token is turned in and its value added to the total contribution of Troops or Offerings (whichever the case). In other words, players may not 'make change,' such as turning in an Equites token for two Velites tokens or a value 2 Offering for two value 1 Offerings.
At the end of the third Decade, instead of providing the bonus indicated by the Podium, the player who contributes the most resources of the required type obtains a Senator, and the player who contributes the least loses one. As a reminder, place the tile shown on top of the Podium on the Romae Postulationem card, obscuring its printed values.
Example: it is currently Decade II and the Romae Postulationem Card demands Stone. Daniela, Sam, and Leo announce the total amount of Troops, Offerings, and Stone they have in their possession. Daniela has one Velites token (2) and one Equites (4), for a total Troop value of 6. She also has two value 1 Offering tokens and two Stone. Sam has a Legionaries token (3), one value 2 Offering, one Stone and one Amphora. Leo has one Velites (2), two value 2 Offering tokens, two Stone and two Amphorae. Now, each player decides what to contribute, placing the tokens in their hand in a closed fist. When everyone is ready, they all open their hands to show their contributions:
Daniela has made a contribution of one Equites (4), two value 1 Offering tokens (2), and two Stone (2)
Sam has made a contribution of one Legion (3), one value 2 Offering (2), one Stone and one Amphora (1+2)
Leo has made a contribution of one Velites (2), two value 2 Offering tokens (4), two Stone and one Amphorae (2+2)
Since the current Decade is II, each player had the obligation to contribute a minimum Troop value of 3 and a minimum Offering value of 2. The total contribution of Stone among the players must equal or exceed 9 (given there are 3 players), which is exactly the amount that was provided. According to each player's contribution, the rewards and penalties are the following:
- Daniela met Rome's demands and also provided the highest Troop value, for which she obtains a Senator and 1 Denarii (for being in 3rd place, seen on the active Romae Postulationem Card).
- Sam met Rome's demands and also increases his Well-being by 1 (for being in 2nd place).
- Leo did not contribute the minimum required Troop value, but does obtain a Senator for providing the highest Offering value. He was also the highest contributor of Stone, for which he increases his Prestige by two in the District where he has the least Prestige (the reward listed for 1st on the Podium).
Note that Leo had no chance of meeting Rome's demand for a total Troop value of 3, but he would not have been able to hold on to them anyway since the rules state he must turn them in. On the other hand, he could have kept one value 2 Offering, which would have resulted in a three-way tie meaning no one would have received a Senator. Likewise, Daniela did not have the option to only turn in one value 1 Offering.
End of the Game
At the end of the Politics segment of the last Decade, the game ends and the winner is determined. Apart from the Senators players have obtained throughout the game, extra Senators might be awarded. First, players sell all their remaining resources at the Macellum at the current price listed for each resource.
- Each Res Gestae a player has in their possession awards them a Senator.
- Each Senator token a player has in their possession awards them a Senator.
- The player with the most Denarii obtains a Senator.
- The player whose Riot Marker is in the highest position loses a Senator. In case of a tie, all tying players lose a Senator.
- Players lose a Senator for each Riot they caused in the last Rome Demands Interphase.
- All Senators awarded are placed in the Senate. The player with the most Senators wins the game. In case of a tie, tying players compare their Prestige Markers on each Prestige Track. The one who has the highest Prestige on more Prestige Tracks is the winner. If there is still a tie, the player whose Turn Order Marker is closest to the 'I' space on the Turn Order Track is the winner.
Easily Missed
In general:
- The amount of resources according to the number of players is limited and established during set-up (3 resources of each type per player). Any remaining resources are not used.
- The Macellum can only hold a specific total amount of each type of resource (depending on the number of players).
- Depending on the number of players, it is possible to build the same type of building in each district (4 players), only two buildings of the same type (3 players), or just one building of each type (1-2 players).
- A District in Revolt does not provide its construction bonus.
- Monuments never create actions and are never affected by Riots.
In a 3-player game:
- There are a total of 5 Res Gestae.
- The starting resource reserve contains 9 of each type of resource.
- The Macellum storage limits are those corresponding to a 3-player game.
- The resource limit at the end of each Decade is that which corresponds to a 3-player game.
- The Podium on the event cards (Romae Postulationem) still rewards 1st, 2nd, and 3rd places, but 4th place is used as the penalty for players who do not meet Rome's demands.
- The maximum number of each type of building that can be constructed is two. As soon as two Districts have the same type of building, the third remaining building of that type is removed from its Pars board.
In a two-player game (and in solo play):
- There are a total of 4 Res Gestae.
- The starting resource reserve contains 6 of each type of resource.
- The Macellum storage limits are those corresponding to a 2-player game.
- The resource limit at the end of each Decade is that which corresponds to a 2-player game.
- The Podium on the event cards (Romae Postulationem) still rewards 1st and 2nd places, but 4th place is used as the penalty for players who do not meet Rome's demands.
- The maximum number of each type of building that can be constructed is one. As soon as one District has one type of building, the two remaining buildings of that type are removed from their Pars boards.
- As soon as a Production Space is used (sending 1 or 2 Workers), the other action slot on the Production Space is immediately blocked (except for the Castra, which is never affected by this rule). Use a 'blocked' tile as a reminder that the action can no longer be taken this round.
Solo Play
In the year 23 BC, the Princeps Augustus is on his death bed. His closest advisors, Agrippa, Maecenus, and Murena, are inconsolable as Augustus falls victim to his illness. The Empire is without a leader.
But Murena's tears are a front. He begins plotting against his friend with the intention of sabotaging his control over the Empire's core provinces.
Fannius Caepio, a Republican firebrand sent by Murena, has arrived in Corduba to wrest control from the Senate.
In Corduba's solo play mode, you will face Caepio, who will act as your opponent.
Set-Up
Follow the rules for setting up a 2-player game, implementing the following changes:
- Res Gestae are not used, so it is not necessary to place the tokens on these spaces.
- Remove the Disposita Confarreatio card from the Romae Postulationem deck.
- Place the Aedificium Cards to the side and within your reach. Create three decks, one per Decade, with the following buildings:
- DECADE I: Herbarium, Tributum Procurator, Santuarium, Fabrum Corporatorum, Cudendum, Odeum, and Schola.
- DECADE II: Balneum, Forum, Templum, Scultura Fabrum, Emporium, Librarium, and Ludus.
- DECADE III: Sanatorium, Basilica, and Anphitheatrum.
Shuffle each deck separately and place them in order (Decade I, II, and III) next to each other.
Choose a color to represent Caepio and:
- Take all components of the chosen color except the Merchant and Happiness Marker.
- Place Insulae and Specialists on his Player Board.
- Place his Worker Marker on space 4.
- Place his Well-being Marker on space 4.
Choose a difficulty:
- EDIL: Place Caepio's Prestige Markers on space 'II' of each of the three District Prestige Tracks. Place his Riot Marker on space 'II' of the Riot Track.
- PRETOR: place Caepio's Prestige Markers on space 'III' of each of the three District Prestige Tracks. Place his Riot Marker on space 'I' of the Riot Track. Give Caepio a Velites token and a value 1 Offering.
- CONSUL: place Caepio's Prestige Markers on space IV of each of the three District Prestige Tracks. Place his Riot Marker on space I of the Riot Track. Give Caepio a Legionaries token and a value 2 Offering.
Create Caepio's Action Deck: Caepio uses a special Action Deck which will determine what actions he performs during the game. This deck is composed of 30 cards, with 10 cards corresponding to each Decade. These cards show several rows of actions that Caepio will take during his turn. Create the 3 Action Decks, one per Decade, and shuffle them separately. Keep these decks close by, as they will be used often during the game.
Each of Caepio's Action Decks are associated with a Decade. The number of opaque hourglasses denotes which Decade each deck corresponds to (Decades I, II, and III, respectively).
Goal
The goal of the game is different than when playing against other human players. Caepio adds Senators to the Senate in a similar fashion, but according to his own specific rules:
- When he constructs a building, sort through the matching deck to find it and add it to a separate deck you have to create, called the Constructed Buildings Deck. Each constructed building should have a matching card, regardless of who constructs it (you or Caepio). Each time a building card is added to this deck, shuffle it (how Caepio constructs buildings is explained later). Exception: the Praefecturae does not have a matching building card.
- When Caepio obtains a good or goods (by activating a building or earning Prestige bonuses, for example), temporarily remove the goods received from the general reserve and place them (or it) in Caepio's reserve. These goods are returned to the general reserve at the end of the current round. Caepio does NOT accumulate goods from one round to the next.
- When Caepio obtains one or more Denarii (by activating a building or earning Prestige bonuses, for example), take the Denarii (or Denarius) received from the general reserve and add them (or it) to Caepio's reserve. Caepio DOES accumulate Denarii he earns from one round to the next and until the end of the game.
Changes to the Different Game Phases
Decade Summary
All rules of the game remain unchanged, but explained below are certain alterations that should be implemented:
I. Romae Postulationem
II. Restock the Macellvm
III. Peculium (Caepio receives nothing)
IV. Rounds of Play
1.1 Riots spread: if, at the beginning of a round, one or two Districts are in Revolt, reveal one or two cards from the Constructed Buildings Deck and add Riot counters to those buildings. If one of the buildings already has a Riot counter, reveal new cards until the necessary number of Riot counters has been added (1 or 2).
1.2 Causing Riots: when Caepio causes a Riot for not meeting the demands of Rome, the player decides on which building(s) to place the Riot counter(s). When the player causes a Riot, Caepio decides at random where to place the counter(s). Draw as many cards from the Constructed Buildings Deck as necessary and place a Riot counter on each of them. Then, reshuffle the deck, including any cards drawn during this step. If a card is drawn depicting a building that already has a Riot counter, discard it and draw another one until the Riot can be placed.
-
Macellum Phase: the normal rules apply.
-
Action Phase: at the beginning of his turn, Caepio draws a card from the current Decade's Action Deck and carries out the action(s) listed in the first row. If an action cannot be completed for any reason, ignore it and move on to the next executable action. After each of Caepio's actions, the player performs an action. To mark Caepio's actions, use one of his colored cubes and move it towards the bottom of the card each time he takes his turn. Suggestion: pay close attention to each Action Card drawn, this way you can know exactly what actions Caepio will take in the current round and how to best plan your strategy.
Uprising! If at the beginning of a round all three Districts are in Revolt, Caepio will have achieved his goal and you lose the game.
Perform Caepio's actions alternating with your own, one at a time, until there are no more actions available on the Action Card drawn. When Caepio has performed the last action on his Card, after you take your turn, draw a second Action Card and Caepio performs the first action listed. Again, if Caepio cannot complete an action, move on to the next executable one. Caepio continues taking actions, alternating with the player, until the last action on the second Action Card has been completed. When Caepio has no more actions to perform, his next action will be 'pass.' You may continue taking any actions you like until passing, but for each action taken after Caepio passes, he receives a Denarius from the reserve. Each round, therefore, Caepio draws two Action Cards from the current Decade's Action Card Deck.
When Caepio performs an action, he will try to take the first action listed on the current row. If this is not possible, the arrow indicates the next alternative action to take. If that action is not executable either, continue to the next, and so on. Caepio's cube drops to the next row if he cannot take any of the actions listed on the current one. Repeat this step until he can perform an action.
Example: during rounds 1 and 2 of Decade I, Caepio drew the cards shown here. Explained below is how a series of Caepio's actions would be carried out according to these cards. (More actions will be explained later on. Consult the Glossary for a complete description of each card.)
Round 1: Action Card 1 Round 1, turn 1: Caepio sends two Workers to the Wood Production Space to get 3 Wood. If this space is already occupied by the player, Caepio sends his Workers to the Food Production Space. If this space is not free either, Caepio skips down to the next row and performs the action listed. Round 1, turn 2: Caepio constructs a building from Decade I. Round 1, turn 3: Caepio sends a Worker to the Stone Production Space. If it is already occupied, he sends the Worker to the Portum to get one Denarius instead.
Round 1: Action Card 2 Round 1, turn 4: Caepio activates the Santuarium. However, since it is not built, he activates a random building. Round 1, turn 5: Caepio goes to the Castra to get Troops. Since the Legionaries action slot is free, he performs this action and blocks the slot. Round 1, turn 6: Caepio would normally activate the Herbolarium, but it is not built. Therefore, he skips down to the next row, which states he activates a random building. There are no free buildings remaining, however, so he passes.
Round 2: Action Card 1 Round 2, turn 1: Caepio visits the Castra and trains a unit of Velites. Round 2, turn 2: Caepio sends 3 Workers to the Marble Production Space to get 2 Marble. There is only 1 Marble, however, which he takes. Round 2, turn 3: Caepio activates a random building. Round 2, turn 4: Caepio visits the Macellum to sell a random resource and buy another random resource.
Round 2: Action Card 2 Round 2, turn 5: Caepio skips down to the next row because the Production Spaces for 2 Workers for both Stone and Wood are occupied. He constructs a building. Round 2, turn 6: Caepio sends a Worker to the Portum because the Food Production Space is already occupied. Round 2, turn 7: Caepio passes.
a) Construct a Building. When Caepio constructs a building, follow the steps outlined below:
-
Draw a card from the current Decade's Buildings Deck.
-
Roll a 6-sided die to determine which District the building will be constructed in, according to the table below, and place the corresponding building tile so that Caepio can place as many Insulae as possible (respecting the normal rules of construction). If there is more than one position that will add the most Insulae, choose one. Caepio never pays Workers, resources, or Denarii when constructing buildings.
- 1-2: Pars Servorum
- 3-4: Pars Plebeius
- 5-6: Pars Patricium
-
Increase Caepio's Prestige in the District as normal.
-
Block the building with a Worker from the reserve and perform that building's corresponding action for Caepio, as stated on the Building Card.
-
Return all building tiles of that same type to the box (as is the case in a 2-player game, only one building of each type can be constructed).
-
Add the Building Card to the Constructed Buildings Deck, then shuffle it.
The Praefecturum does not have a matching Building card, so it is not added to the Constructed Buildings Deck. Only the human player can construct and activate the Praefecturum during the game.
Example: it is currently Decade I and the Tributum Procurator Building Card is drawn. The die roll is a 3, so the building tile is placed in Pars Plebeius in such a way that Caepio may place as many Insulae as possible. He increases his Prestige by 1 in this District, in accordance with the normal rules. Now, Caepio performs that building's action and blocks it. Then, the Building Card is shuffled into the Constructed Buildings Deck. Lastly, the remaining Tributum Procurator building tiles are removed from their Pars boards.
b) Activate Production Spaces. When Caepio activates a Production Space, follow the steps outlined below:
-
Depending on the current action, take one or two Workers from the reserve and place it (or them) on the Production Space indicated. This space is now blocked.
-
Temporarily remove the indicated resources from the general reserve. These goods are placed in Caepio's reserve and will be returned at the end of the round.
Note: remember that, like in a 2-player game, Production Spaces can only be activated once per round. They are blocked as soon as the human player or Caepio uses them.
c) Activate a building. When Caepio activates a building, follow the steps outlined below:
-
If the action depicts a specific building, activate that building and perform its matching action for Caepio.
-
If the building has already been activated, is not constructed, or the action has no symbol, ignore this step and move on to the next.
-
If no specific building is depicted, shuffle the Constructed Buildings Deck and draw a card.
-
Place a Worker from the general reserve on the building to indicate it is blocked for the rest of the round.
-
Perform that building's action for Caepio, as indicated on its Building Card.
Note: remember that Caepio never pays Denarii when activating buildings.
d) Claim a Milestone. This is not possible in solo play.
Caepio at the Macellvm – when Caepio activates the Macellum, follow these steps:
- Shuffle one of the Decade Decks that does not correspond to the current one. Then, Caepio buys and sells as many resources as indicated by the action. To do this, draw cards from Caepio's Action Deck (corresponding to a non-current Decade), and sell or buy the resources according to the rules explained below. If he cannot sell, continue drawing cards until the necessary amount has been sold. Repeat this process for buying the amount indicated.
- Sell: if Caepio has a resource in his personal reserve, add the indicated amount to the Macellum and give him Denarii in accordance with the current price for each resource sold. Afterwards, reduce the price of the resource sold by 1. Remember that the Macellum's storage limit for each type of resource is 2. Like in a normal game, any extra resources are returned to the general reserve.
- Buy: temporarily remove the resources indicated by the buy action from the Macellum. These resources will be returned to the general reserve at the end of the current round. Increase the price of the resourced bought by 1.
- Reshuffle the Caepio deck that was used and place it off to the side.
Example: it is currently Decade I. Caepio must perform one buy and one sell action, as indicated by the current action on his Action Card. Caepio draws a card from Decade II, which shows he must sell Food. He does not have any, however, so he draws another card, which shows he must sell Stone. Caepio then sells one of the Stone resources he has in his possession and the price is adjusted. Now, he must perform a buy action and so draws a new card, which states he must buy Wood. He buys one unit of Wood from the Macellum and the price is adjusted.
e) Pass. After Caepio's final action, the human player may continue to take actions as normal, but for each action performed, Caepio receives a Denarius from the reserve, which is added to his personal treasury.
Rome Demands Interphase. (only in the last round of each Decade)
Event Card: the human player must meet the demands of Rome as per a normal 2-player game, with the difference that Caepio will not contribute anything from his personal reserve:
- If the player meets the demands, they receive the bonus associated with 1st place.
- If the player does not meet the demands, they receive the penalty associated with 4th place and cause a Riot as normal.
- Caepio never takes the bonus or penalty indicated by an Event Card. Neither does he cause Riots.
Troops: Caepio will always contribute the lowest number of Troops possible, but he will always try to contribute more than the human player, if possible. If he does not meet the minimum requirement, he causes a Riot. Advance his Riot Marker on the Riot Track. Like in a normal multiplayer game, the one who contributes the highest value in Troops receives a Senator.
Example: it is currently the first Decade of the game, so both you and Caepio must contribute Troops equal to a value of 2. Caepio has two units of Velites (2) and one of Legionaries (3), while you have two units of Velites. Even though the current Decade only requires a total Troop value of 2, Caepio sends one Velites and his Legionaries for a final total of 5. He does this because this is the only combination that would definitely result in a higher contribution than yours, which can only be 4. Since you know full well that it is impossible to contribute more Troops than Caepio, you decide to limit your contribution to the minimum requirement of 2, sending one unit of Velites (2). This way you keep your other Velites unit for the next Decade.
Example: it is currently Decade II, so both you and Caepio must contribute Troops equal to a value of 3. Caepio has two units of Velites and one of Legionaries (for a total value of 7), while you have three units of Legionaries (for a total of 9). Caepio realizes he cannot in any way contribute more than you, so he decides to simply meet the current Decade's minimum requirement by sending one unit of Legionaries (3). It is now your turn to decide: you could just send one unit of Legionaries and meet the minimum requirement, which would result in a tie and neither of you would receive a Senator. However, you decide to send two units of Legionaries (for a total value of 6). This contribution is higher than Caepio's so you are rewarded with a Senator.
Offerings: Caepio will always contribute the lowest number of Offerings possible, but he will always try to contribute more than the human player, if possible. If he does not meet the minimum requirement, he causes a Riot. Advance his Riot Marker on the Riot Track. Like in a normal multiplayer game, the one who contributes the highest value in Offerings receives a Senator.
4. Check Happiness. Just because Caepio does not have to keep Corduba's citizens happy does not mean you can do the same. This step is carried out as normal. Caepio does not participate in this step, so he does not have to pay his Workers Denarii or Food.
V. Warehouse Maintenance
Caepio returns all resources he obtained this round to their respective reserves. Everything else occurs as normal.
VI. Politics Phase
Normal rules are observed.
End of a Decade
Add any Building Cards for buildings that have not been constructed this Decade and shuffle them into the deck for the next Decade. Then, remove all Action Cards from the current Decade and place the Action Cards for the next Decade nearby. The next Decade starts.
End of the Game
When the game ends, sell all your remaining resources according to the current price listed at the Macellum and add the Denarii received to the amount you already have. Compare this value to the Denarii Caepio has in his personal treasury. Whoever has the most Denarii is awarded a Senator (no one in the case of a tie).
In addition, Caepio receives a Senator if he has:
- placed all 18 Insulae on the game board.
- unlocked all six Specialists.
- reached the '10' space on his Worker Register.
- reached the '10' space on the Well-being Track.
Finally, whoever's Riot Marker is further along on the Riot Track loses a Senator.
You win if you have more Senators than Caepio. In case of a tie, there is no winner. You have done well, but Corduba still awaits her savior!
Solo Play Variant: Monument Builder
All rules indicated previously are observed as normal, but neither you nor Caepio obtains Senators (which also means neither of you will lose a Senator for being further along on the Riot Track). The goal of the game, depending on the difficulty chosen, is to build a minimum number of Monuments. If you manage to do this, the citizens will think so highly of you that Caepio will have no choice but to renounce his quest for power.
- EDIL: build 3 Monuments before the end of the game.
- PRETOR: build 4 Monuments before the end of the game.
- CONSUL: build 5 Monuments before the end of the game.
Looking for more of a challenge? Combine the two solo play variants. Try to beat me by obtaining more Senators AND building the number of Monuments required by the difficulty level. If you can manage to pull this off, congratulations! You have mastered the game as well as the designer has.