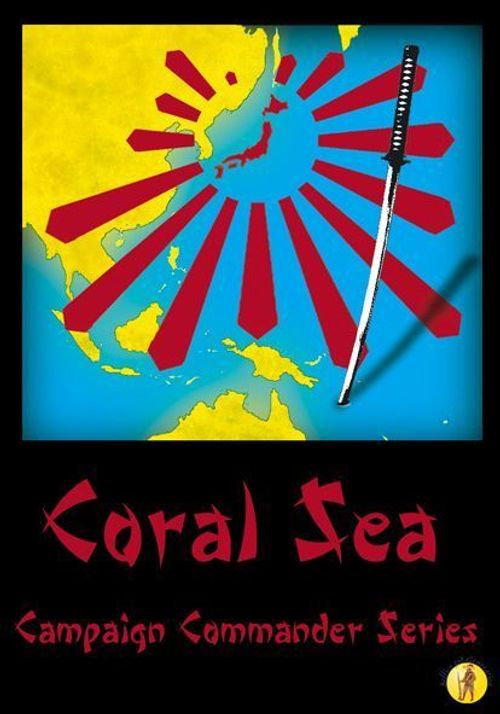
Coral Sea: Campaign Commander Series
Coral Sea: Campaign Commander Series Rulebook
Table of Contents
Table of Contents
CAMPAIGN COMMANDER SERIES RULES
1. Introduction
We designed the games in the Campaign Commander Series with three guidelines in mind. #1) Create a realistic gaming simulation of the greatest campaigns of military history so that each time the games are played a different result would be had; #2) our gaming simulations should be playable by two players in under four hours; #3) our games should allow for flexibility in outcomes as players react to the environmental conditions facing the real commanders of the campaigns being simulated.
Our game scale is operational, and the players represent the field commanders of the opposing armies. Players must use their forces judiciously as they strive to achieve victory by acquiring Victory Points through the attainment of objectives.
Players will direct their strategies through the use and management of resources, the use of their combat units, the impact of random events, and of course, the enemy's strategies.
The rules described below govern all the games in the Campaign Commander Series. Each game is accompanied by its own Campaign Specific Rules which will indicate special guidelines for the specific game.
2. Components
2.1. Game Board: The area in which the military campaign historically took place is printed on the Game Board. Both sea and land are divided in areas in order to regulate movement and locate the units on the map. There are spaces left aside on the game board for the placement of Campaign Cards, discards, destroyed units, and other counters used in the game. The Map's terrain legend describes the various terrain features, and effects, as well. All of these elements affect game play and should be considered in players' choices.
2.2. Game Counters: There are four different types of Game counters. They represent ground units, naval units, leaders, and other markers used in the game (Card/Map, Isolated, Disorganized, Resource Points, Battle Chits and others). The markers are used to indicate information on the board or for the resolution of a game process (ie: Card/Map, Battle Chits.)
2.3. Campaign Cards: They are used during the game for several purposes. You can have up to 5 in your hand at any one time.
2.3.1. There are four types:
- Tactics (blue edge) affect the outcome of a battle. You can only play them during a battle.
- Attack (yellow edge) supports the attacker in a battle. You can only play them during a battle you initiate.
- Events (red edge) have strategic impact, and are played exclusively during an on-board operation.
- Operational (green edge) dictate the impact and availability of resources, reinforcements, replacements, and other strategic options.
2.3.2. The descriptions on the Campaign Cards take precedence over the Campaign Commander Series, and Campaign Specific Rules.
2.3.3. The effects of the Campaign Cards are applied by the player who plays them, unless otherwise specified on the Card.
2.3.4. If a Tactics, or Event Campaign Card is played while an opponent is taking an action, it is recommended that the opponent be given ample time to react to the impact of the card's actions as they may be severe.
Example 1: Cards. A card shows: title (e.g. TOWNSVILLE BOMBED), side identity, card text (e.g. "Play if you control Port Moresby. You gain 4 Victory Points."), illustration, and card type (e.g. Operational).
3. Units
3.1. According to the campaign, there may be up to two types of combat units used in the game: Ground and Naval.
3.2. Ground Units have the following indicators on their counters: Unit type indicator, which may affect combat (infantry, armor, cavalry, etc.); historical identification (if any), helpful in understanding the historical elements of the game; Cohesion Value, utilized to determine combat outcomes; Movement Factor, consumed when the unit is activated to move from place to place on the map-board; Tactical Value, utilized to resolve battles.
3.3. Naval Units have the following indicators on their counters: Unit type indicator which may affect combat; historical identification (if any), helpful in understanding the historical elements of the game; Cohesion Value, utilized to determine combat outcomes; Range, utilized to determine the extent to which a Naval Unit may move; Tactical Value, utilized to resolve battles.
Example 2: Units. Ground and Naval counters each have a FRONT (full strength) and a BACK (Depleted). Ground counter indicators: Cohesion Value, Unit Type, Tactical Value, Depleted Movement Factor, Historical ID (if any). Naval counter indicators: Range, Background & symbols.
4. Game Sequence
4.1. Game Preparation: After setting up the game each Player shuffles his/her own Campaign Card deck, and places it on the space provided on the Game Board face-down. Each player draws five cards from their Campaign Card deck. They may look at their own cards to familiarize themselves with their starting strategies. Campaign Specific Rules will indicate further Game Preparation.
4.2. Operational Sequence:
4.2.1. The Campaign Commander Series does not utilize a conventional turn-based system found in most board game combat simulations. Players instead decide whether they will play a Strategic Effect, or Conduct an On-Board Operation. Based on each player's choice there may be different Operational Sequences involved.
4.2.2. At the beginning of each Operational Sequence both players select the Card/Map Counter, secretly choosing Card or Map operational option, then simultaneously showing each other their choice.
Operational Options:
- Both chose Map: Both players roll 1d10. The player with initiative adds +2 to his result. Both sides add any other modifiers that are available. The player with the highest modified die roll may conduct one On-Board Operation. Initiative side wins ties. Whenever a player conducts one On-Board Operation, they must spend one Resource Point from those located on the map to conduct any actions with his units. The player with the lowest modified die roll must wait for the next Operational Sequence and try again. He/she cannot do anything.
- Both chose Card: The player with the initiative can play a Campaign Card from their hand or draw a card from their face-down deck, or discard a card. The player must choose only one of them. The other player may now do the same.
- One chooses Card, the other chooses Map: The player choosing Map will resolve ONE On-Board Operation. Whenever a player chooses the Map option, they must spend One Supply Point from those located on the map to conduct any operation with his units. Then the other player may play a card from their hand, draw a card from their face-down deck, or discard a card.
4.2.3. When a player chooses the Card Operational Option, they may do one of three things: a) Play a card: now you can play one Operational Card from your hand. Some cards require certain pre-requisites (ie: Sudden Death). Playing these cards may result in new resource points, reinforcements and other aids. b) Draw a Card: When a player has less than five cards in their hand, they may draw a new card from their face-down deck. When a player draws the last card from their face-down deck, the game ends. c) Discard: A player who has cards in his/her hand can discard a card and obtain one Resource Point that he can place on the map according to the Campaign Specific Rules. These cards are discarded, face-down on the Discard pile and their descriptions cannot be referenced by either player during the game.
4.2.4. The operational sequence is repeated until a game ending event occurs. a) When a player draws the last card from their face-down deck, the game ends. b) Some Strategic Campaign Cards may dictate a game ending event (ie: Sudden Death). If the conditions on the card are met, the game is over.
4.3. Victory Point Calculation
4.3.1. Players total their accumulated Victory Points (VP) and the one with the highest point total wins.
4.3.2. In the case of a tie in VP total, the game is a draw.
4.3.3. The Campaign Specific Rules will indicate the specific objectives for each player and their associated Victory Points. Generally, these will be tied to the occupation of map areas, the destruction of enemy units, and the attainment of objectives that appear in Campaign Cards.
5. Resource Points, Operations and Supply Points
5.1. Resource Points (RPs) markers are used on the board to supply On Board Operations.
5.2. Whenever a player conducts an On-Board Operation he/she will spend One Resource Point - just one, no more. Each RP is used to help supply units within their reach. Put the marker Active Operation in the area to mark where the RP was spent.
5.2.1. Each RP provides 6 Supply Points.
5.2.2. Units cannot take part in On-Board Operations without the expenditure of Supply Points (SPs).
5.2.3. SPs are used by units that can trace a path consisting of no more than 3 ground areas free of non-besieged enemy units from their location to the Active Operation area.
5.2.4. RPs on board naval units in a naval area can only be used by those naval units in the area and any ground unit in a land area adjacent to that naval area.
5.2.5. A unit cannot perform more than one action in the same On-Board Operation.
5.3. Movement of RPs
5.3.1. RPs cannot be moved by ground except through the use of a Strategic Card.
5.3.2. Naval units can transport RPs. (see: #7 NAVAL TRANSPORT)
5.4. RPs and Combat.
5.4.1. If a unit finds itself alone in an area with an enemy RP, the unit immediately captures HALF of the RPs (rounding down) stored in the area placing his/her own RP markers, and destroys the rest.
5.4.2. A RP in a fortress that is under siege can only be utilized by the units within that fortress.
5.5. Use of Supply Points.
5.5.1. SPs are used to move units, stack units, conduct combat, play Campaign Cards (if they require it), to reorganize units and to rebuild units that have become Depleted.
5.5.2. The SP costs are listed in the following table, however Special Campaign Rules may have modifications to this list:
| Action | SP COSTS |
|---|---|
| To move 1 unit or stack | 1 SP |
| To stack more than 1 unit | 2 SP |
| To play an Attack Campaign Card | The cost indicated on the Card |
| To reorganize 1 unit that is disorganized | 1 SP |
| To rebuild a Depleted unit (only 1 unit per operation) | 1 SP |
| To besiege | 4 SP |
5.5.3. Usually every game map will provide a SUPPLY TRACK for each side to track supply points expenditure.
6. Movement
6.1. Ground units can only move through land areas, including islands, and naval units can only move through naval areas.
6.2. Naval units can also be inside ports that are in ground areas.
6.3. Ground units conducting an On-Board Operation can move as many areas as allowed by their Movement Factor, and the terrain they have traversed, according to Campaign Specific Rules.
6.3.1. The normal cost for moving into a land area is One Movement Factor.
6.3.2. In the case that ground units enter into a land area with a port and the only enemy units are naval units, those naval units must leave the area according to the rule regarding naval retreat (See: 9.6.3.e. Concerning Naval Retreats)
6.4. Naval units can move through naval areas and ports in the same way that ground units move through land areas.
6.4.1. However, naval units must start and finish their movement inside a port or in a naval area adjacent to a port. Unless Campaign Specific Rules state otherwise.
6.4.2. The Naval Unit's Range is the number of areas and ports which they can enter whenever they are activated.
6.4.3. Each naval area or port passed through costs one point of their Range.
6.4.4. A Naval Unit cannot enter a port if it is enemy-occupied (i.e. contains any type of enemy units)
6.5. When ground or naval units move into an area containing opposing units of the same type (ground/naval) a battle must immediately take place, and is solved before continuing to conduct the remainder of the On-Board Operation.
7. Naval Transport
7.1. Embarkation and Debarkation.
7.1.1. A naval unit or stack can suspend its movement to either embark or disembark ground units from or into ONE land area adjacent to the naval area it occupies, but not both during the same On-Board Operation. Just one embarkation/debarkation per On-Board Operation.
7.1.2. Naval units that embark, or disembark, may continue their movement assuming they have Range Factors left.
7.1.3. Naval units can only embark, or disembark the units they are transporting onto a single area per On-Board Operation.
7.1.4. Ground units that have disembarked from a naval area cannot be activated during the same operation.
7.1.5. Ground units stacked with naval units in a port at the beginning of an On-Board Operation can be transported by those naval units.
7.1.6. Naval units use 2 Range Factors at the moment of embarkation, due 7.1.1. or 7.1.5. So your naval unit/stack must have at least 2 Range Factors left in order to embark land units. Debarking does not consume Range Factors.
7.1.7. Naval units stacked with any land unit on a naval area have its Range Factor reduced by 2 (-2), during an On-Board Operation. (In addition to 7.1.6. above).
7.1.8. Naval units may disembark any Ground Unit they are transporting in any Port they pass through during their movement.
7.1.9. Ground Units transported by naval units that finish their movement within a port disembark automatically.
7.2. If at the end of any operation, there are ever more than three ground units in any one naval area, the excess ground units are eliminated at the discretion of the owner.
7.3. Naval units may transport RPs.
7.3.1. The Naval Units and the RPs must begin the operation in the same port or naval area.
7.3.2. The naval units can debark the RPs into any port which they enter throughout their movement during the operation.
7.3.3. RPs transported by naval units that finish their movement within a port disembark automatically.
7.4. Effects of Combat on Transported Units and RP.
7.4.1. Whenever a naval unit becomes disorganized a ground unit being transported, chosen by the owner, also becomes disorganized.
7.4.2. If a naval unit becomes Depleted, one ground unit being transported, chosen by the owner, is also Depleted.
7.4.3. If a naval unit is destroyed, a ground unit is destroyed, chosen by the owner.
7.4.4. If the naval stack is eliminated completely all the ground units and RP they are transporting are destroyed.
8. Stacking
8.1. Any number of units may be stacked in any naval or ground area. (See: #7 NAVAL TRANSPORT)
8.2. During an On-Board Operation, to stack units in a ground area a player must expend Two Supply Points.
8.2.1. The cost to stack units is paid immediately, at the moment the stacking is accomplished, regardless of how many units are stacking together.
8.2.2. The moment at which the stack is made is the moment in which a unit/stack finishes its movement in an area in which there is another friendly stack or unit.
8.2.3. This cost is independent of the distance from the stack to the place where the Active Operation marker is located.
8.3. Units that begin stacked at the start of a campaign are assumed to have been stacked prior to the game start, so the cost of stacking the units has already been consumed prior to the game start.
8.4. When a stack of units is moved simultaneously, the stack must begin in the same area/port, and remain together throughout the operation, finishing in the same area together.
8.5. You don't need to move every unit in an area as a stack. It is possible to move only a portion of them or some individually and some stacked or whatever combination you want.
Operation Example
- Allied player is going to conduct an On-Board Operation. So he uses one Resource Point from the map and he sets his "Supply Points Available" marker at 6 on the Supply Track. Now he can use Supply Points to perform actions with his units. He decides to use up one RP from those in the naval area adjacent to Port Moresby.
- He spends 2 SP to move the USA naval unit accompanied by the Australian infantry unit and the remaining RP. That naval unit's range is 4 as he is stacked with a land unit in a naval area at the beginning of his movement (-2 to Range). He moves into the adjacent naval area and disembarks the Australian infantry - halting temporarily the naval movement. If a battle results, due to enemy land presence, the battle would be resolved and then naval movement would resume. The USA naval unit returns to his initial area and finishes his movement here. Set the "Supply Points Remaining" at 4.
- The Australian HS unit moves to Australia. His range is 6 as there is no land units stacked with him. He arrives at port. Set the "Supply Points Remaining" at 4.
- Ending his movement into the port the Australian HS unit stacks with other units - land or naval - in a land area, so Allied player must pay another 2 SP for stacking. "Supply Points Remaining" reach number 0 so the On-Board Operation ends.
- Allied player could have done actions with the USA infantry unit at Port Moresby, but not with the USA naval unit present at the port, as he used a Resource Point located in a naval area.
9. Combat
9.1. A unit can only conduct a battle by way of an On-Board Operation.
9.2. When opposing ground or naval units are in the same area with units of the same type (ground/naval) battle immediately ensues before continuing the On-Board Operation underway.
9.3. After resolving a battle the side who was involved in an On-Board Operation can continue spending SPs in that operation. However, the units that have participated in the battle have already acted, and cannot continue the On-Board Operation, or spend any further SPs.
9.4. During battles that you initiate Attack Campaign Cards can be played that have an SP cost attached.
9.4.1. In order to play them, and the actions described, this SP cost will have to be paid.
9.4.2. This cost does not depend on the distance from the area the Battle is in, to the area where the Active Operation marker is.
9.5. Battle Mechanics.
9.5.1. Each side places a number of Battle Chits (BCs) into a cup of their own. The number of Battle Chits they place will be determined by the Campaign Specific Rules.
9.5.2. Each side then draws a number of BCs from their cup equal to the highest Tactical Value of their units involved in the combat.
9.5.3. Alternatively, each side then reveals a BC from those they just removed from their cup to the other player. The Attacker reveals their BC first, then the defender. A player with several Chits chooses which one he will play.
9.5.4. Each BC will produce a specific effect or will force a die roll which may result in Depleted or disorganized units. All Combat Effects are resolved first on the defending player's units, then the attacking player's units. Usually the owner chooses which units check and suffer effects of combat, unless stated by the BC or any Campaign Card played.
9.5.5. When a side is out of BCs, he/she then draws a number of BCs out of their cup equal to the current highest Tactical Value of their units involved in the combat. If there are no more BCs in a cup, the player then refills the cup with the prescribed number of BCs, and continues playing (as in 9.5.2. above).
9.5.6. The battle finishes when all the units on one side have become disorganized, and retreat.
9.6. Combat Effects
9.6.1. During a battle units are required to check for Cohesion: a Cohesion check is made by rolling a D10, and comparing the result (modified by any effect of any BCs in play) with the unit's Cohesion Value. If the modified die roll is equal to or less than the Cohesion Value of the unit, the unit has passed its Cohesion check. Otherwise it has failed.
9.6.2. Units can become both Disorganized and Depleted during the course of the game. a) If a unit gets both, the effects of Disorganization are combined with the effects of Depletion resulting in a cumulative effect on the unit. b) When a unit that is Depleted becomes Depleted again, it becomes Disorganized instead (in addition to its existing Depleted state.) c) None of the unit's values can ever be reduced below one.
9.6.3. When a unit becomes Disorganized all of its values are reduced by ONE. a) Place a Disorganized marker on the unit. b) A unit may only have one disorganization marker. c) A disorganized unit that becomes disorganized again only is affected if it is in the middle of battle. d) As soon as a unit becomes disorganized it must retreat immediately from the battle. e) Naval Units must retreat inside of a friendly port within Range of its current position. If there are no friendly ports within range, then they must move towards the nearest friendly port to the extent of their Range. f) Ground Units retreat two areas towards their nearest RP. If they cannot retreat more than one area they must do so, and conclude their retreat. If a retreating Ground Unit retreats into an area with a friendly RP, then they may end their retreat in that area. The same happens if the retreating unit retreats into an area that has a friendly fortress. If there are no friendly RPs on the map, then the retreating units must retreat towards the board edge indicated in the Campaign Specific Rules. A unit may never retreat into an Enemy Occupied Area (whether it is occupied by an enemy unit or RP makes no difference.) A defending unit cannot retreat into the area that the Attacking Units came from. An attacking unit must retreat, initially, into the area that it came from to enter the battle.
9.6.4. A Depleted unit's counter is flipped over to show its Depleted values.
9.6.5. Units are usually only destroyed if they must retreat but cannot. a) Naval units are also destroyed if they were Depleted and Disorganized and receive another Depleted result. b) Destroyed units cannot return to the game unless stated in Specific Campaign Rules or Campaign Card text.
9.6.6. Isolated Units. a) A unit surrounded by Enemy occupied or impassable areas is considered Isolated. b) An Isolated marker is placed on this unit the MOMENT the unit becomes isolated. c) An Isolated unit applies a -1 to its Cohesion Value, and will be destroyed if it becomes disorganized during combat. d) The unit is still considered isolated if one or more of the units surrounding it, attack it. e) When the prior conditions cease to exist, the unit is no longer considered isolated; remove the marker. f) An isolated unit ceases to be considered isolated if it leaves the area that it occupied, the area it leaves is not enemy held, so 9.6.6.a. above no longer applies. g) An isolated unit cannot be reorganized or rebuilt.
Example Battle of Rossosh
German forces (attackers) have initiated the battle by entering the Soviet-occupied area. Battle Chits shown: German: Air Strike, Flank Attack, Assault; Soviet: Human Wave, Poor Coordination, Assault.
A) German forces have initiated the battle by entering the Soviet-occupied area. So Germans are attackers. They will play the first Battle Chit. Both players must draw, at random, a number of Battle Chits from an opaque container. They will draw a number of Battle Chits equal to their best Tactical Value present in the battle. German is 4 for 48th Pz Corps and Soviet is 1 for any of his participating armies. Battle Chits effects are explained at the end of this booklet. Battle Chits initially drawn for this battle are shown face up.
B1) Axis player plays AIR STRIKE first. This BC makes a Soviet unit check Cohesion with a malus of +2, if he fails he will Disorganize. Soviet player chooses to check with 65th Army. He rolls 1d10 and gets a 7, modified to 9 for the malus. 9 is greater than 65th Army Cohesion Value (6), so he gets Disorganized and retreats immediately from battle. He must retreat towards the nearest Soviet Resource Point, this is towards Buturlinovka, two areas away. 65th Army is displaced there immediately.
B2) Now Soviet player must play one BC. As he only has one he must play it: HUMAN WAVE. This BC depletes one Soviet unit immediately and makes one German unit check Cohesion. If this unit fails it will Disorganize. Soviet player depletes 46th Army. Axis player chooses to check with 48th Panzer Corps. He rolls 1d10 and gets a 7, which is the same as 48th Panzer Corps Cohesion Value. So he passes the check. As Soviet player has no more BC in his hand he must draw more. His best Tactical Value is 1 so he draws another one BC. He gets POOR COORDINATION.
C1) Now, Axis player must play another BC. This time he plays ASSAULT. This BC makes one Soviet unit check Cohesion to avoid getting Disorganized and one German unit check Cohesion to avoid getting Depleted. Axis player chooses to check with 29th Infantry Corps. Soviet has no choice. Soviet player rolls 1d10 and gets a 2, so 46th Army is unscathed. Axis player rolls a 8 and 29th German Infantry Corps is Depleted.
C2) Soviet player must play his only BC: POOR COORDINATION. This chit makes one Soviet unit check Cohesion to avoid getting Disorganized. Soviet player rolls a 6. This is greater than 46th Army's Cohesion Value, so he gets Disorganized and must retreat as 65th Army did previously.
Battle ends as there are no more Soviet troops in the area. Active On-Board Operation resumes.
10. Reorganization and Rebuilding
10.1. When SPs are used to reorganize a Disorganized unit, the reorganization is automatic, and it is not necessary to roll dice.
10.2. One SP per On-Board Operation can be used to rebuild a unit that is Depleted.
10.3. Only ONE SP, on ONE unit, may be spent this way per On-Board Operation.
11. Fortresses
11.1. Each fortress has an intrinsic garrison, and must be besieged in order to be taken over. The intrinsic garrisons are considered a ground unit but do not stop the movement of enemy units and cannot be attacked in the normal fashion. They also do not count for stacking, or against the limit of stacking of ground units inside the fortification.
11.2. In addition, up to 4 unit counters can be inside the fortification at any one time, and contribute to its defense.
11.3. When a unit/stack enters an area with a friendly fortress, the ground units stacked within the fortress can either engage in battle outside the fortress in the normal fashion, or take refuge inside the fortress in which case a siege will commence.
11.3.1. If a ground battle is fought in the area with a fortress, up to 4 units of the side who controls the fortress may retreat into the fortress instead of moving away from the area.
11.3.2. As soon as the enemy units finish their movement, or a ground battle in the area with a friendly fortress fails to clear the area of enemy units, the fortress is then placed under Siege. Place a Siege counter of the besieging side on the fortress.
11.3.3. The siege is resolved by activating the stack that is carrying out the siege through an On-Board Operation. Upon activation, the player controlling this stack rolls a D10 against the number printed on the SIEGE counter. If the result of the modified die roll is equal to or less than that number, the fortress falls and all the besieged units are destroyed. The modifiers to this roll are: a) + The factor of the fortress. b) + Number of enemy units within the fortress. c) - Number of units that form the stack activated to besiege the fortress.
11.3.4. Remove the SIEGE counter once all Enemy Units have left the Area the friendly besieged fortress is in.
11.3.5. Besieged units and On-Board Operations. a) Units that are inside a besieged fortress can conduct On-Board Operations normally, but can only use Resource Points that are in the Fortress, and can only carry out a battle with the units which are besieging them. b) In the case that the besieged units need to retreat, they must retreat back into the besieged fortress. c) They can also participate normally in a battle that is initiated by units that are coming to their rescue from another area.
12. Leaders
12.1. Some counters represent the commanders that took part in the historical campaign and have a number of special abilities that produce modifications to the rules. These abilities and modifications are discussed in the Campaign Specific Rules.
12.2. LEADERS AND MOVEMENT: Leaders always move as part of a stack of units, and may never move independently.
12.3. LEADERS AND COMBAT: If all the units a leader is stacked with are eliminated, so is the leader.
CORAL SEA. CAMPAIGN SPECIFIC RULES
1. Terrain
Relevant terrain features in the Coral Sea campaign are sea areas, ground areas, mountains, urban areas, airfields, and ports.
a) Sea Areas: Only naval units can move through sea areas. Sea areas are impassable by ground units unless they are being transported by Naval Units (See: Series Rule: #7)
b) Land Areas: Only ground units can move through or be deployed in land areas. Only areas within named islands are counted as land areas. All other islands on the map are purely decorative, and do not represent playable land areas. Rabaul is Japan's main base in the area so it usually gets crowded with counters. So, we have provided an augmented area near the Japanese Supply Track to ease handling of counters at Rabaul.
c) Mountains: Mountains are considered land areas for all purposes except that airfields cannot be constructed on them.
d) Urban Areas: Urban areas are the only zones in which Resource Points can be placed. The victory point value of the urban area is found printed directly next to the urban area, and is awarded to whichever side controls it at the end of the game.
e) Urban areas denoted by an airfield symbol function as an airfield for the player who controls them.
f) Urban areas denoted by a port symbol function as a port for the player who controls them.
g) Controlling an Area: During the course of game play it is necessary to determine which player controls an area. An area may come under the control of one or the other player multiple times throughout the game. The last player to have units in or pass through an area controls that area. For the purpose of Victory Point calculation it is necessary to control whole islands. Uncontrolled islands do not score victory points for either player. Initially the Japanese control New Ireland, New Hanover and New Britain. The Allies control the rest of the land zones.
h) Units may enter any area on the map at the cost of ONE Movement Factor.
i) The box marked Australia counts as a land area with an urban area, airfield, and a port for the Allied player. The Japanese player cannot move ground or naval units into this box. The box is considered to be two naval zones away from any of the zones adjacent to it.
2. Units
Both sides have several types of units represented by counters of different colors. (Illustrated: USA Infantry, USA Naval, Australian Infantry, Japanese Infantry, Australian Naval, Japanese Naval.)
3. Initiative
The Japanese player has the initiative at the start of the game; take into account Allied Strategic Card entitled Tracking Stations. Allied player gains the Initiative for the rest of the game if: a) Allies control at least three of the following urban areas or islands: Lae, Buna, Port Moresby, Bouganville, Guadalcanal. b) The Allies have destroyed at least eight Japanese ground or naval units.
Historically the time period of the simulation reflects the Japanese expansion throughout the theater. At the end of this period, the Japanese retired from Buna and Guadalcanal yielding the initiative to the Allies for the rest of the war.
4. Resource Points
Resource points may only be placed in or moved to or from urban areas. Resource points can only be moved by naval transport. When new resource points are received they are placed on the map as follows: a) Japanese: in Rabaul. b) Allies: Australia and Noumea
5. Reinforcements
Reinforcements are placed on the map in the same way as resource points. Some units have special placement instructions as dictated by strategic cards. If a reinforcement called by a strategic card must be placed on the map in an enemy controlled area then the corresponding card cannot be used.
6. War in the Jungle
Any ground unit that begins its movement in a ground area and moves to another ground area is automatically depleted. If it was already depleted it is disorganized. If it is already depleted and disorganized the unit does not suffer any additional effect.
The severe conditions of jungle fighting wore down the forces of both sides in the South Seas campaign. Japanese army suffered tremendous casualties due to a lack of properly prepared medical support services. Americans and Australians also suffered tremendous casualties in the Guadalcanal and Buna campaigns.
7. Naval Units
a) Stack of naval units requires two resource points to move not one as established in Series Rule #5.
b) Naval transport: A stack of one or more Naval Units can transport
- Up to three (3) ground units
- Or one resource point per naval unit in the stack.
c) Naval units can finish their movement in any sea area. They are not forced to finish their movement in a port or sea area adjacent to a port (as in Series Rule 6.4.1.) In order to activate a naval unit for an operation, resource points are either expended from those stored in the port the naval unit occupies, or from those stacked with the naval unit itself.
d) The Japanese have special reinforcements: The Truk Fleet. Truk Fleet units cannot be stacked with any other Japanese unit nor can they ever enter a port. When the Truk Fleet uses its last resource point stacked with it, they are removed from the board. When a Truk Fleet unit becomes disorganized it is immediately removed from the board. There are two strategic cards that allow for the arrival of the Truk Fleet, so they may actually enter the game twice. The units that are lost the first time the Truk Fleet enters will count towards Victory Points and for Special Rule 3 (Initiative), but they return if the fleet is called by the second card.
e) Disorganized or Depleted naval units may only be reorganized or replenished while in a friendly controlled port.
8. Retreats
a) Unlike Series Rule 9.6.3.f. ground units that lose a battle must retreat one area, not two.
b) Ground units that lose a battle can retreat onto naval units that are in an adjacent sea area to the area where the battle took place, subject to the transport limit of the stack of naval units (three ground units.) Units that retreat as such ignore the effect of being isolated.
In an amphibious assault, maintaining sea supremacy around an island confers an advantage to the attacker. They may re-embark if the attack goes bad. The defender, however, is much more exposed to the risk of destruction since he has nowhere to go once an attacker gains a foot hold and starts to clear the island.
9. Construction of Airfields
Both sides have three airfields they can construct in non-mountain ground zones that do not already have one. In order to construct an airfield, the area must contain a friendly unit, and the player must initiate an operation with that unit in that area. The friendly unit may not move during this operation. The cost to construct an airfield is three Supply points. Upon construction, the player places an airfield counter on the area. This counter will have the same effect as an airfield imprinted on the map does. If a friendly unit occupies an area with an enemy airfield counter the counter is replaced with a friendly counter, and removed from play. Airfield Removal: The process of removing an airfield is the same as creating it. (i.e.: It costs three Supply points, and a unit operating in the area.) Japanese Airfields have a range of three zones (sea or ground) and Allied airfields have a range of four zones. Each side is limited to only three airfield counters.
The construction of an airfield on Guadalcanal by the Japanese alerted the USA command who retaliated with Operation Shoestring. U.S. Marines took the airfield and called it Henderson Field. From this field, the U.S. Army Air Force gave inestimable support to Allied ground, and naval forces during the campaign.
10. Permanent Cards and Effects
a) Some strategic cards produce a permanent effect on the game. These are: for the Japanese Townsville Bombed & Midway; for the Allies George C. Kenny & Air Superiority.
b) When one of these cards is played it is placed in its placeholder on the map and the permanent effect is triggered for the remainder of the game.
c) In the case of the Japanese Midway card, the counters that go away do not count towards victory point calculations.
d) Allied George C. Kenny card allows play of Air Superiority, Air Transport and Skip Bombing.
e) Allied Air Superiority card allows play of Allied Air Attack cards as EVENT cards as red border cards, during a Japanese On-board Operation. Before Allied player plays Air Superiority he/she must use Air Attack cards as OPERATIONAL cards green border cards.
11. Optional Rule: Air Attacks on Airfields
Every time you play an Air attack card on an area with an airfield - printed on map or constructed - roll 1d10 for the airfield. With a result of 1-6 nothing happens. If you roll 7-10 the airfield is Disorganized. A DG airfield is put out of action and cannot perform any function (playing cards or Battle Chits). You can retire a DG marker on an airfield like in other units, during an On-board Operation and consuming 1 Supply Point.
Both sides tried to suppress enemy air capacity by bombing and strafing each other's airfields. This rule reflects that effort. Anyway a lot of raids are necessary to put out of action an airfield for more than a couple of hours. Henderson Field was always a major objective for air and naval bombardment during the Guadalcanal struggle.
12. Optional Rule: Limited Intelligence
You cannot look at enemy stacks in an area with a port or in a sea area. You just can look at the top unit or marker in the stack.
Air-naval warfare in the Pacific was determined by the uncertainty of enemy forces and dispositions. We don't want to add complexity to the game, but this rule allows for several surprises to occur just at the right moment.
13. Victory Conditions
When the game ends, both players calculate their victory points as follows:
a) City Values: Each city has a Victory Point value printed on the map.
b) Destroyed enemy units:
- One Victory Point is awarded for each ground or LS Naval Unit.
- Two Victory Points is awarded for each HS Naval Unit.
- Three Victory Points for each CV Naval Unit.
c) Other Victory Points are granted by played strategic cards.
d) The player with the highest Victory Point total is declared the winner.
14. Initial Setup and Game Preparation
The initial setup of counters, and resources is printed at the end of these rules (Initial Deployment page, a map graphic showing the counters placed at Rabaul, Port Moresby, Australia and Noumea; not transcribed).
a) Place each unit counter in its appropriate area according to the placement instructions.
b) Remaining units are then placed in the reinforcement box printed on the map.
c) Each player shuffles his deck, and draws five cards.
d) Players then place their decks in their respective locations on the game board.
e) And finally players place proper counters on the map to mark their control of zones and the markers to track their use of supplies.
15. Markers
The following markers are included in the game counter inventory. Their use is explained in either the Series Rules or the Campaign Rules: CARD, MAP, DISORGANIZED, RESOURCES, SUPPLY POINTS AVAILABLE, OPERATION UNDERWAY, CONTROL, ISOLATED.
Player Notes
Allied Player's Notes
In the beginning of the game the Allied player is on the defensive, with few ground troops and a naval force that barely matches the Japanese, and is overwhelmed if we take into account the Truk Fleet. One of the Allied priorities must be reinforcements as soon as possible. However, being on the defensive does not mean that the Allied player needs to be passive.
The Australian brigade in Port Moresby can be a serious threat for the Imperial Japanese fleet. Creating an airfield in Buna or nearby can expose the Japanese base of Rabaul to devastating aerial attacks. Unlike other games in the Series this one doesn't have phases (first one attack, then the other), except for the initial Allied inferiority, both sides are very even. Both sides have strategic cards that can result in sudden death.
As soon as the Allied player reinforces himself he should damage the Japanese as much as possible by attacking them where they are weakest. Beware the Japanese threat of the sudden death strategic card if they expand through the Salomon Islands. If the Japanese have decided to expand in this side of the mapboard, this card will become decisive.
The primary problem for the Japanese is the fact that they are fighting on two fronts. The Allied player must keep both fronts active. The supply problem this creates for the Japanese is just big enough to cause a shortage of resources. This strategy may cause a sudden death victory for the Allies. However, the Japanese are able to chain operations better than the Allied player since he will have the Initiative.
In the long term the Allied player has more resources and troops than their opponent so they can become much more aggressive than the Japanese as the game progresses. The Japanese will avoid great naval actions, because a defeat could leave its fleet out of action for too long. The arrival of the Truk Fleet may be a decisive weapon used against the Allies.
Japanese Player Notes
The Japanese player has exceptional, motivated and tough ground troops, the Strategic Initiative, and a seasoned fleet. The Truk Fleet is a decisive weapon and is even stronger if utilized in the opening stages of the campaign. The Japanese weakness is in logistics. The Japanese Player has very few resources to initiate their expansion and their strategic cards will not help much in this regard.
The Japanese Player will probably discard strategic cards to put resources on the map. Despite the fact that the Japanese have the initiative, careful management of their resources is necessary for sure victory. The Japanese sudden death strategic cards will help the player choose their game objective. The expansion strategy must be planned and executed to save Japanese ground troops. Always have a reserve ready in Rabaul to go to where there is an Allied threat. The Japanese start on the offensive but the allies will not take too much time before they undertake their own counter offensive. The fight will be terrible and costly until the end.
The main challenge for the Japanese is the Victory Points gains. There are two fronts for these gains, New Guinea and the Salomon Islands. The Japanese Command committed the error of trying to win simultaneously in both fronts. The Japanese player cannot leave either one completely because they will give up too many Victory points to the Allies. However, the Allies have a sudden death card that can finish the game if they have control over Port Moresby and Guadalcanal. Those are the two territorial keys of the game.
Designer Notes
This second Volume of the Series, Campaign Commander, introduces the use of naval units and places the players in a completely different scenario than the Roads to Stalingrad Campaign. The tactics and challenges they face are completely different since the campaign of Coral Sea is mainly naval and amphibious. Despite this, the design of the game fulfills the intention of the first Volume; to be a good simulation of a military campaign. The series is dedicated to campaigns in their operational aspect. Some of the cards of each game reflect strategic or political elements that are outside the direct control of the commander of the theater of operations.
The first objective of the game design is to be able to faithfully simulate the factors for the decision making involved in all military campaigns. Players will make decisions on the development of the campaign, as much by directing battles as accumulating resources or managing their deck of battle cards to cause effects that they deem necessary. The key of the game is to make the correct decisions for the moment.
The second objective of the design is simplicity. The game system is the easiest we have been able to construct and still maintain its goal of being a faithful simulation of a military campaign. There are several mechanics that we need to learn and manage, but the decision making is always oriented so that it is not necessary to spend hours deciding what to do nor dozens of factors or modifiers to memorize at the time of executing an action in the game. The battle system is an example of this: the combination of Battle Cards - adapted to each side in each game, the values of the unit counters and the use of some Cards produce realistic results in a very agile way. There are no tables to memorize. Cards are played with effects that are then applied, and dice are rolled to solve any uncertainties.
The third dimension of the design is playability. Not everyone has the time, the space or the opportunity to play long detailed games with large groups of players. For this reason Field Commander is a series designed for two players, with a 3-4 hour game time. Games are usually finished in one sitting, without the need to leave a game board setup to resume another day. Coral Sea plays in two to three hours since the map operations and strategies require less battle and movement than Roads to Stalingrad. However, although a game can be played in a single session should not mean they should be less demanding or less interesting. Field Commander is not a simple Series; it takes time and effort to figure out the trick to winning on each side, and each opponent will place each campaign differently.
We wanted the series to allow for variability and diversion in an interactive and exciting experience by design. Through playing the game, the rules and mechanics become second hand and players are then able to focus their concentrations on attempting to outwit each other tactically.
Explanation of Battle Counters
Ground
Japanese Counters: 15
- Close Combat (3): 1 Allied unit must check cohesion. If it fails it becomes disorganized. 1 Japanese unit checks cohesion. If it fails it becomes depleted.
- Might of Will (2): 1 Japanese unit is depleted automatically. 1 Allied unit must check cohesion with a +1 die roll modifier. If it fails it is disorganized.
- Ambush (2): 1 Allied unit checks cohesion. If it fails it is depleted.
- Poor Coordination (1): 1 Japanese unit must check cohesion. If it fails it is disorganized.
- Bunkers (3): These counters are added to the cup if the Japanese is the defending side in the battle. It is assigned to 1 Japanese unit and, during the rest of the battle this unit has a die roll modifier of -2 for cohesion tests.
- If the units involved in the battle are all either attached to a bunker or you draw more bunkers than Japanese units remain in the battle, remove any excess bunker counters and draw another Battle Chit/s.
- When a unit attached to a bunker leaves the battle, remove the bunker counter.
- If at the moment of play there is no unit to assign it to, the bunker has no effect.
- Shore Bombardment (3): Add these counters to the cup if there are Light or Heavy Surface naval units in an adjacent sea area in which the ground battle takes place. 1 Allied unit must check cohesion. If it fails it is depleted. If it is used in a battle that contains an enemy airfield the enemy cannot use the airfield to make use of Battle Chits that require one for the rest of the current On-Board Operation.
- Air Strike (1): Add this counter to the cup if the battle takes place within 3 areas of a Japanese airfield or adjacent to a sea area that includes a Japanese Carrier. 1 Allied unit must check cohesion. If it fails it is depleted.
Allied Counters: 15
- Shore Bombardment (3): Add these counters to the cup if there are Light or Heavy Surface naval units in an adjacent sea area to the area in which the ground battle takes place. 1 Japanese unit must check cohesion. If it fails it is depleted. If it is used in a battle that contains an enemy airfield the enemy cannot use the airfield to make use of Battle Chits that require one for the rest of the current On-Board Operation.
- Air Strike (4): Add these counters to the cup if the battle takes place within 4 areas of an Allied airfield or adjacent to a sea area that includes a U.S. Carrier. 1 Japanese unit checks cohesion with a die roll modifier of +1. If it fails it is depleted.
- Bombardment (3): 1 Japanese unit checks cohesion with a die roll modifier of +2. If it fails it is depleted.
- Poor Coordination (2): 1 Allied unit checks cohesion. If it fails it is disorganized.
- Assault (3): 1 Allied unit and 1 Japanese unit must check cohesion. If they fail they are disorganized.
Naval
Japanese Counters: 13
- Night Battle (4): 1 Japanese naval unit must check cohesion. If it fails it is disorganized. 1 Allied naval unit checks cohesion with a +2 die roll modifier. If it fails it is depleted and disorganized.
- Long Lance (2): This counter can only be used if there is at least one Japanese Light Surface naval unit in the battle. 1 Allied naval unit checks cohesion. If it fails it is depleted. If no LS is involved in the battle when you draw the Chit, discard it and draw another one. If no LS is involved in the battle when the counter is played, it has no effect and the Japanese turn is over. Play passes to the Allies.
- Gunnery (3): 1 Allied and 1 Japanese naval unit each checks cohesion. If that unit is not a Heavy Surface naval unit cohesion check is modified by a die roll modifier of +2. If any unit fails the cohesion check it is disorganized.
- Air Strike (4): Add these counters to the cup if the battle takes place within 3 areas of a Japanese airfield or if there is a Japanese Carrier unit present in the battle. 1 Allied unit must check cohesion with a die roll modifier of +1. If it fails it is depleted. Take these counters from the cup if there is neither a Japanese Carrier Unit present in the battle nor any Japanese airfield within 3 areas. If the counter is played and there is neither a Japanese Carrier Unit in the battle nor any Japanese airfield within 3 areas, ignore the effects, and play is passed to the Allies.
Allied Counters: 13
- Night Battle (2): 1 Japanese naval unit checks cohesion. If it fails it is depleted and disorganized.
- Torpedoes (2): This counter can only be used if there is at least one US Light Surface naval unit in the battle. 1 Japanese naval unit checks cohesion. If it fails it is depleted. If no US LS is involved in the battle when you draw the Chit, discard it and draw another one. If no US LS is involved in the battle when the counter is played, it has no effect and the Allied turn is over. Play passes to the Japanese.
- Gunnery (5): 1 Allied and 1 Japanese naval unit each checks cohesion. Surface naval unit cohesion check is modified by a die roll modifier of +2. The unit that fails is disorganized.
- Air Strike (4): Add these counters to the cup if the battle takes place within 4 areas of an Allied airfield or if there is an US Carrier unit present in the battle. 1 Japanese unit must check cohesion with a die roll modifier of +1. If it fails it is depleted. Take these counters from the cup if there is neither an US Carrier Unit present in the battle nor any Allied airfield within 4 areas. If the counter is played and there is neither an US Carrier Unit in the battle nor any Allied airfield within 4 areas, ignore the effects, and play is passed to the Japanese.