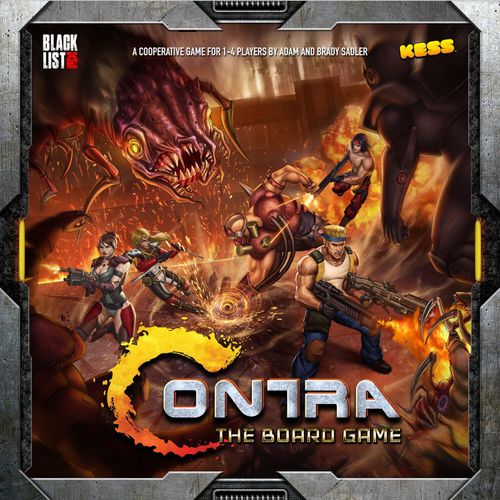
Contra: The Board Game
Contra: The Board Game Rulebook
Table of Contents
Table of Contents
Overview
Contra: The Board Game is a cooperative board game for 1-4 players based on the acclaimed Contra video game series. In Contra: The Board Game, each player takes on the role of a commando, defending Earth from alien invaders and the evil machinations of the Red Falcon Army. Each game consists of a stage that the players traverse, completing objectives while confronting a dangerous boss. The players lose if any commando must discard a medal token and cannot, and win by destroying the boss.
Golden Rule
If any card effect contradicts a rule found in this rulebook, the card effect takes priority. If there is ever any conflict in card effect timing when several effects would resolve at the same time, priority goes to stage cards, then enemy cards, then commando cards, in that order.
Components
- 2 double-sided stage tiles
- 8 miniatures: 4 commandos, 4 bosses
- 212 standard cards: 80 commando cards, 80 enemy cards, 44 stage cards, 4 turn cards, 4 mission cards
- 42 small cards: 16 weapon cards, 18 objective cards, 4 move reminder cards, 4 attack reminder cards
- 12 card dividers
- 10 custom dice: 5 commando dice, 5 enemy dice
- 170 tokens: 36 advantage tokens (3 types), 4 pillbox sensor tokens, 12 medal tokens, 12 objective tokens, 8 bubble dimer tokens, 12 stage tokens, 56 damage tokens, 5 greeders (1 of each color), 5 gunners (1 of each color), 5 snipers (1 of each color), 5 buggers (1 of each color), 5 garths (1 of each color), 5 rangels (1 of each color)
Card Overview
Commando Deck Breakdown
Commando Character Card
- Commando's Name: the commando the card belongs to.
- Default Weapon: This is the standard weapon the commando starts with (weapon name, attack power, and range). Weapon cards are placed here when gained.
- Commando Ability: This is the commando's unique ability and the type of advantage token it costs to perform it. (Example: Bill's "Tactical Leader" — Use before a commando attacks to add +1 (attack die) to that attack.)
Commando Card
- Advantage Type: Each card belongs to a certain type of advantage, indicating which type of advantage the card can be spent as.
- Commando Card Name
- Card Ability: This card may be played for this ability. (Example: "Sustain Fire" — You may attack.)
Enemy Deck Breakdown
Boss Card
- Boss Commando Value: Each boss card contains an indicator (a row of four circles) that corresponds to how many commandos are in the game—during setup, players include each boss card that does not exceed the number of commandos in the game.
- Health Value: This value represents the amount of damage a card must suffer before being defeated.
- Boss Card Name: Boss cards may have different names, but each card still corresponds to the boss.
- Enemy Ability: Some enemies have constant abilities that change how commandos interact with them. (Example: "Defense Wall" — This card can only be dealt a maximum of 4 damage during a single commando attack.)
- Special Ability: When a special (enemy die) result is rolled during an enemy attack, this ability might be triggered as an additional effect during the attack. (Example: Each commando suffers 2 damage of an advantage type. Then, each commando with less than 2 enemies in their play area draws 1 enemy card.)
- Defeated Ability: When defeated, some boss cards add an additional ability for the remainder of the game.
Enemy Card
- Health Value: the amount of damage the card must suffer before being defeated.
- Enemy Color: Each enemy card corresponds to an enemy of a specific color, as indicated by the color on the enemy card.
- Enemy Name
- Special Ability: (Example: "Greeder Scout" — This enemy moves 3 spaces toward the empty objective space nearest it.)
Setup
1. Choose Commandos
Each player chooses 1 commando to play as, gathering their commando deck and miniature, as well as a mission card and one of each objective token.
- A. Each player searches their commando deck for their commando's character card and places it in their play area, shuffling the remaining cards to form their draw deck and placing it facedown to the left of their character card.
- B. Each player draws a starting hand of 4 cards and places 3 medal tokens on their commando's character card.
- C. Each player may resolve a mulligan by discarding any number of cards from their hand, then drawing back up to their hand of 4 cards. Then, they shuffle the discarded cards back into their decks.
- D. Each player places their mission card near their play area and places one of each objective token next to it.
Mission card: "When you successfully complete an objective, place the corresponding objective token on this card. While an objective token is on this card, you gain the corresponding effect." The three objective tokens (red Mobility, blue Accuracy, green Subtlety) each correspond to an effect: "During your attacks, you may convert any number of [Mobility / Accuracy / Subtlety] results to [hit] results."
2. Choose Stage
The players choose a stage to play and gather its stage tile and stage deck; for your first game it is recommended that you choose the "Jungle" stage. Place the stage tile in the center of the play area. Place 1 pillbox sensor token on each pillbox sensor icon. Place each commando miniature in a commando start space. Then, create a stage play area by performing the following steps:
- A. Find the stage "Reference" card in the stage deck and place it "Setup" side up near the stage tile, leaving room to its right for additional cards. Players should also leave room for the stage deck and discard pile to the left of the stage "Reference" card.
- B. Follow the Setup effect on the stage "Reference" card; cards added to the stage play area should be added to the right of the rightmost card there in the exact order specified (left to right).
- C. Shuffle the stage deck and place it facedown to the left of the stage "Reference" card. Leave room to the left of the stage deck for the stage discard pile.
Difficulty Ratings
Each stage's "Stage Setup" card lists the relative difficulty of that stage so players can customize their game's relative complexity and challenge.
Similar to stages, each enemy deck's reference card lists the relative difficulty of that enemy deck so players can customize their game's relative complexity and challenge.
3. Choose Enemy
The players choose an enemy deck to fight.
- A. Remove each boss card and the "Reference" card from the enemy deck and set them aside, shuffling the remaining cards of the enemy deck and placing the enemy deck facedown near the stage tile. Place the "Reference" card "Setup" side up to the right of the enemy deck.
- B. Gather the boss miniature and enemy tokens that correspond to the chosen enemy deck and place them near the enemy deck.
- C. Follow the Setup effect on the "Reference" card.
- D. Remove from the game each boss card that exceeds the number of commandos in the game according to its indicator (a row of four circles), then place 1 of each remaining boss card in a different commando's play area ("Defeated" side down) so that each commando has 1 boss card in their commando play area. Finally, place the boss miniature on the boss spaces of the stage map.
4. Prepare Dice, Tokens, Weapon Cards, and Objective Cards
Place the commando dice and enemy dice near the play area. Create token pools for each of the different types of advantage tokens and damage tokens. Shuffle the objective cards deck and weapon cards deck and place them facedown near the play area.
5. Gain Starting Advantage, Reminder Cards and Turn Cards
Each commando gains 1 of each type of advantage token and places them in their play area. Then, they each take 1 Move reminder card and 1 Attack reminder card. Finally, each player takes 1 turn card and places it "Commando Turn" faceup above their commando character card.
6. Draw Enemies
Each commando draws 1 enemy card from the enemy deck (see "Drawing Enemies" on page 9).
Two-Player Setup Example
(Illustration: each player has a play area containing their commando deck, discard pile, mission card and objective tokens, turn card, commando character card, and their boss/enemy cards. Shared between players: the enemy deck and enemy discard pile with the enemy "Reference" card, the weapon deck, the objective deck, the stage deck, stage discard pile and stage play area, the dice and tokens, and the stage tile with the commando miniatures on their start spaces.)
Drawing Enemies
Each time a commando draws an enemy card, they draw 1 card from the enemy deck and place that card to the right of the rightmost card in their commando play area. Then, they find the corresponding enemy token and place it in the empty enemy space nearest their commando; if all enemy spaces are occupied, the enemy is placed in the empty space nearest the enemy space closest to the commando.
A commando cannot have more than 3 enemies in their play area at any given time (including their boss card). If a commando must draw an enemy card while they already have 3 enemies in their play area, they instead immediately suffer 1 any-type damage (see "Suffering and Preventing Damage" on page 19).
Game Round
Each game is played over a number of rounds until the players either win or lose (see "End of the Game" on page 10). Each game round consists of the following turns, resolved in order:
- Commando Turns: In an order of the group's choosing, each player takes a turn, following the steps of the commando turn.
- Enemy Turn: In an order of the group's choosing, each player resolves an enemy attack, one at a time.
- Stage Turn: The players Activate each stage card in the stage play area and then draw and resolve 1 stage card.
After players complete the stage turn, they begin another round by flipping their turn cards and each drawing an enemy (as noted on the turn card). This continues until the game ends.
End of the Game
The players can lose the game in 1 of 2 ways:
- A commando must discard a medal token and cannot, becoming defeated, or
- A stage card must be drawn and none remain in the stage deck.
Players win the game by destroying the boss, which occurs the moment all boss cards in play are "Defeated" side up.
Advantage
Advantage represents a commando's various skills and abilities that allow them to get the job done. Advantage is represented in-game by advantage tokens, as well as advantage symbols on each commando card.
Advantage Types
Advantage types are indicated on tokens, cards and dice using the following icons:
- Mobility (red): This represents a commando's evasiveness and agility.
- Accuracy (blue): This represents a commando's skill with firearms.
- Subtlety (green): This represents a commando's skill at stealth and close combat.
- Any (gray): This symbol is used to represent any advantage type (the commando's choice).
Current Advantage
A commando's current advantage is composed of their advantage tokens and the advantage symbols on each of the commando cards in their hand. When asked to check how much advantage they have, a commando checks their current advantage.
Gaining Advantage
When instructed to gain advantage, a commando gains advantage tokens of the corresponding types and in the quantities specified.
Advantage Token Limit
A commando can never possess more than 3 of each type of advantage token. If a commando ever has more than 3 of any type of advantage token, discard the excess until they have 3 of that type. Note that this limit is only for advantage tokens; there is no limit to how many cards a commando can have in their hand, regardless of the advantage symbols shown on them.
Spending Advantage
Many game effects require commandos to spend advantage in different quantities and types. A commando can spend any matching advantage from their current advantage to pay for these effects. When spending an advantage token, it is returned to the supply. When spending a card from hand for its advantage symbol, it is discarded without resolving its effects. If a commando "must" spend advantage, they cannot avoid paying the cost unless they are offered an alternate choice such as suffering a consequence; in these cases, they may choose to suffer the consequence instead of spending the advantage.
Commando Attacks
Typically, commandos only successfully hit targets of their attacks on a hit result. However, commandos may always choose to spend advantage to convert an advantage result on a commando die (Accuracy, Mobility or Subtlety) to a hit result. See "Commando Attacks" on page 14.
Suffering Damage
When commandos suffer damage, it is always damage of an advantage type. Commandos must either spend advantage matching the type and quantity of the damage being suffered to prevent it or lose a medal (see "Losing a Medal" on page 21). See "Suffering and Preventing Damage" on page 19.
Commando Turns
Players can take their turns in any order. Each commando takes their turn individually, and must finish their turn entirely before the next commando takes their turn.
While performing their turn, a player is referred to as the active player. On a player's commando turn, they may do the following in any order they choose.
- Move: Once during their turn, the active player may choose to Run or Jump (see "Commando Movement" on page 13). They may flip their Move reminder card to keep track of if they have performed this.
- Attack: Once during their turn, the active player may attack an enemy within range (see "Commando Attacks" on page 14). They may flip their Attack reminder card to keep track of if they have performed this.
- Play Cards: The active player may play any number of cards from their hand; as well as allowing a commando to perform special abilities, these cards may allow the commando to move or attack—these effects are additional moves and attacks and do not affect the normal move and attack a commando receives during their turn.
Commando Character Card Abilities
Each commando has a unique ability on their character card. These abilities may be activated by spending the corresponding type of advantage. Commando character card abilities may be activated and resolved during any commando turn, enemy turn, or stage turn. Unless otherwise specified, commando abilities cannot be activated during a commando attack and cannot interrupt effects that have already begun to resolve—they must be used before or after a game or card effect (see "Effects" on page 21).
Unless otherwise specified, each commando character card ability may be resolved multiple times, as long as the commando can afford to pay the cost of activating it.
End of the Commando Turn
After the active player finishes performing all activities during their turn, they draw 1 card from their deck and flip their turn card over to complete their turn. Then, play passes on to the next player (in any order); this continues until each commando has taken a turn, at which point play continues to the enemy turn.
Turn card: the "Commando Turn" side reads "In an order of their choosing, players each take 1 commando turn. On their commando turn, the active player may perform the following steps (in any order): Attack; Move — Run (3 spaces) or Jump (1 space, ignoring special space effects if desired); Play any number of cards. When a player has finished their commando turn, they draw 1 card and flip this card." The other side reads "Enemy Turn: In an order of their choosing, players each resolve a single enemy attack. Stage Turn: The players activate each card in the stage play area, from left to right. Then, they draw and resolve 1 stage card. After the stage turn is complete, each commando flips their turn card to the "Commando Turns" side to begin a new round." (Its flip-side header also reads: "When this card is flipped to this side, each player draws 1 enemy card.")
Commando Movement
Each time a commando is able to move (once during their turn, and possibly through card effects), that commando chooses to Run or Jump. Commandos must choose their type of movement before moving, and may choose different types of movement each time they are allowed to move.
- Running allows a commando to move up to 3 spaces.
- Jumping allows a commando to move 1 space, ignoring the effects of special spaces if desired.
Commandos may move through spaces occupied by other commandos, but cannot end their movement in another commando's space; if they would, they return to the most recent space they occupied. Commandos cannot move into spaces occupied by enemies. Commandos can move into spaces occupied by tokens, unless otherwise specified.
Each time a commando would move into a special space, they must resolve its effect before continuing their movement (unless they entered that space by jumping). If a commando enters a special space while jumping, they may choose to resolve any effects of that space and ignore any effects they do not wish to trigger.
Special Spaces
The following list explains the effects of various special spaces:
- Ledge Spaces: Spaces within a red outline are ledge spaces. They are considered to be changes in elevation. Unless specified otherwise, a commando can only cross a red line to enter a ledge space by jumping. Some spaces are "grouped" together within a red outline; they are all considered ledge spaces, but commandos only need to jump when increasing their elevation (moving across a red line into a ledge space). Commandos can run when within a grouping of ledge spaces and when decreasing their elevation (moving across a red line into a non-ledge space).
- Objective Spaces: Once on their turn, when a commando moves into an objective space, they may interrupt their turn to resolve that objective space (see "Objectives" on page 20).
- Pillbox Sensor Spaces: When a commando moves (or is moved) into a pillbox sensor space containing a pillbox sensor token, they may interrupt the game to discard that token to draw 1 weapon card (see "Weapons" on page 21).
- Stage-Specific Spaces: Some stages have special spaces that are unique to them, and they are described on the appropriate stage cards.
- Enemy & Boss Spaces: These spaces have no effect when commandos move into them, but they are where enemies and bosses enter play.
Enemies ignore special spaces when moving (see "Enemy Movement" under the "Enemy Turn" section on page 17).
Commando Attacks
During their turn, each commando may perform 1 attack. Additionally, some card effects provide additional attacks. Each attack must be fully resolved before another attack is performed.
Each time a commando attacks, they resolve the following steps in order:
- Choose a Target: The attacking commando chooses an enemy within range (see "Range" on page 15) of their current weapon to be the target of the attack, unless otherwise specified by a card effect.
- Gather & Roll Dice: Unless a card effect already specifies an attack pool to use, the attacking commando creates an attack pool by gathering the number of commando dice that their current weapon provides. Note that various game effects can add dice to attacks. When the attack pool is assembled, it is rolled. Any critical results rolled are then resolved before resolving the attack:
- a. Resolving Criticals: Each critical result counts as 1 success and "explodes," adding 1 additional commando die to the attack pool, which is rolled immediately. Continue resolving any criticals as they are rolled. There is no limit to the number of criticals that an attack can produce.
- Resolve Attack: For each advantage symbol result, the attacking commando may spend advantage of the corresponding type to convert it to a success. Then, each success in the attack pool deals 1 damage to the target. When an attack affects more than a single target, each single damage is applied to each target of the attack.
- Gain Advantage: For each advantage symbol that was not converted in the previous step, the attacking commando gains 1 matching advantage token.
Example 1: Lance plays his "Engage" card. He selects an enemy within 1 space of him as his target, so the card grants him a +1 die bonus to his attack. Lance's current weapon is his basic rifle, so his attack pool will be 3 dice (2 dice provided by the rifle, and 1 extra die provided by the effect on "Engage"). The results of the roll are 2 successes and 1 critical. He resolves the critical by "exploding" it, immediately adding an extra die to the attack and rolling it. It results in a critical as well! He therefore "explodes" it too, immediately adding an extra die to the attack and rolling it. It results in 1 success. The attack is then resolved, with a total of 5 successes (3 successes and 2 criticals, which each count as 1 success). Lance therefore deals 5 damage to his target.
Example 2: Lucia plays her "Shockwave Pulse" card. This card's effect is an attack that targets multiple enemies and specifies both a range and an attack pool, which means she will not be using her current weapon for this attack. Since this attack is not using her current weapon, it does not benefit from her current weapon's special ability. The result of her roll is 2 successes and 1 Subtlety (green) result. She then resolves the attack, choosing not to spend a Subtlety advantage to convert the Subtlety result. Therefore, she has 2 successes total and deals 2 damage to each target. She then gains 1 Subtlety advantage token.
Range
Range is counted using spaces on the stage map. A target is in range when its token/miniature is a number of spaces away that is less than or equal to the range of the attack. When counting spaces for range, players may count through special spaces and spaces containing miniatures or tokens.
Dealing Damage
When commandos deal damage (either by attacking or through card effects), that damage is assigned to the target's enemy card. When an enemy card suffers an amount of damage equal to its health value, that enemy is defeated.
Defeating Enemies
When a non-boss enemy is defeated, its card is discarded and its token is returned to the enemy supply. When a boss card is defeated, it is flipped to its "Defeated" side.
Each time a commando attacks and defeats an enemy or a boss card, that commando draws 1 card. If a stage effect would defeat an enemy, choose any commando to draw a card.
For more details on defeating enemies and bosses, see "Enemies" on page 20.
Commando Dice Results
- Success: Each success deals 1 damage during a commando attack.
- Critical: Each critical is treated like a success and "explodes," immediately adding 1 additional die to the roll.
- Advantage Results (Mobility, Accuracy, Subtlety): Each of these results can be converted into successes if the attacking commando spends the corresponding type of advantage. Additionally, any advantage symbols that are not converted during an attack allows the attacking commando to gain 1 advantage of the corresponding type.
Enemy Turn
During the enemy turn, the players take turns (in an order of their choosing) resolving enemy attacks. Unless specified otherwise, enemies will always attack the commando whose play area they are in—regardless of range.
Enemy Attacks
Each enemy attack must be fully resolved before the next player resolves their enemy attack. A player resolves an enemy attack by doing the following in order:
-
Gather and Roll Enemy Dice: The attacked commando gathers 1 enemy die for each enemy card in their play area (or more if certain effects are in play) to create the enemy attack pool, which is then rolled.
Example: Sweets has 3 enemy cards in her play area: 1 boss card ("Defeated" side up) and 2 other enemies. The boss card has a constant ability on its "Defeated" side that says she must roll 1 additional die during her enemy attacks. Therefore, she will roll 4 enemy dice for this enemy attack: 1 for each of the enemy cards in her play area, and 1 additional enemy die due to the boss' constant ability.
-
Resolve Specials: For each special result rolled, the attacked commando resolves the special ability on the leftmost enemy card in their play area that has not yet had its special ability triggered during this attack (each enemy's special ability can only be triggered once per enemy attack). Each special result is resolved as its own separate effect and is fully resolved before resolving the next one.
- A. For each special result remaining in the enemy attack pool that cannot be resolved, the attacked commando draws 1 enemy card.
-
Resolve Incoming Damage: The attacked commando now suffers the remaining enemy damage results in the enemy attack pool as a single effect. The attacked commando may spend advantage to prevent the damage (see "Suffering and Preventing Damage" on page 19). If enough advantage is not spent to prevent all damage, the attacked commando loses a medal (see "Losing a Medal" on page 21). Regardless of how much unprevented damage remains in the enemy attack pool, a commando cannot lose more than 1 medal per effect that deals damage.
Enemy Dice Results
- Enemy Damage (Mobility, Accuracy, Subtlety, or Any): During an enemy attack, each of these results make the attacked commando suffer the corresponding type of damage.
- Enemy Special: During an enemy attack, each of these results trigger an enemy's special ability. They might also spawn additional enemies.
Adding Results to the Enemy Attack Pool
Some game effects add specific results to the enemy attack pool. These are resolved along with the rest of the rolled results as if they had been rolled on enemy dice.
Example 1: Lance has the Sniper Elite enemy card in his play area, which has a constant ability that says "Add 1 Subtlety to the enemy attack pool during each of your enemy attacks." Therefore, after rolling the enemy dice in his enemy attack pool, he would treat the results as if there were an extra die showing a Subtlety damage result among them.
Example 2: Bill rolls his enemy attack. The results are 1 special and 1 Subtlety. He must first resolve the special ability of the leftmost enemy card in his play area. Part of that special ability says "Add 1 special to the enemy attack pool." Bill must immediately treat his attack pool results as if there were an extra die showing a special result (which will be resolved next) among them.
Enemy Movement
Some enemies may have effects that cause them to move. When an enemy moves, players should move that enemy's token/miniature following the shortest path toward the destination listed in the effect. When moving, enemies ignore special spaces (see "Special Spaces" on page 13) and cannot move through spaces containing commandos or other enemies.
If an enemy's destination space is blocked, the enemy will move toward the next closest eligible destination. If all potential destinations are blocked for an enemy's movement, or if an effect prevents the enemy from moving at all, that enemy does not move.
If an enemy has different valid options as to where it can end its movement, it will always choose a space that puts it as close to as many commandos as possible.
Bosses can only move or be moved by effects on boss cards (see "Bosses" on page 20).
Stage Turn
The players collectively resolve each Activate effect on each stage card in the stage play area from left to right. Then, the players draw and resolve 1 stage card—if unable to, the players immediately lose!
When resolving a stage card, first check to see if it has a pillbox sensor icon on it. If it does, the players may place a pillbox sensor token in one pillbox sensor space on the map that doesn't already contain a pillbox sensor token, if able. If a commando is in a pillbox sensor space when a pillbox sensor token is added to it, that commando may choose to immediately discard the newly added pillbox sensor token and draw a weapon card.
After checking the stage card for a pillbox sensor icon, resolve each effect on the card from top to bottom (each effect is its own unique paragraph on a card).
Unless otherwise specified, stage cards are discarded after they are fully resolved.
After resolving the stage turn, each commando flips over their turn card, draws 1 enemy card, and play continues with a new commando turn.
Additional Rules
Player Choice
When the players are faced with multiple valid options for a game effect, unless otherwise specified, they may collectively decide how to resolve the effect.
Empty Spaces
An empty space is a space that contains no commandos or enemies.
Interrupt
When an effect allows a player to "interrupt" the game, this means the game is momentarily paused to take care of the effect. After the effect is taken care of, the game resumes where things left off.
Cards
Card Types & Discard Piles: Each card deck has its own discard pile. When cards are discarded, unless otherwise specified, they are placed faceup in that deck's discard pile. Unless otherwise specified, when a deck has no cards remaining in it, players shuffle that deck's discard pile to create a new deck. However, the stage card deck is not reshuffled—when a stage card must be drawn and none remain in the stage deck, the commandos lose the game.
Revealing Cards: If an effect would reveal a card from a deck, that card is shown to all players but its effects are not resolved, unless otherwise specified. After being revealed to all players, the card is returned to the top of the deck facedown, unless otherwise specified.
Similarly, if an effect would force a player to reveal any number of cards in their hand, the revealed cards are returned to the player's hand, unless otherwise specified.
Cards in a Player's Hand: When determining which cards are considered in their hand (such as when determining current advantage), players do not include any cards that are currently being resolved as a result of being played—players only count the cards currently in their hand.
Player's Hand Size: There is no limit to how many cards a player can have in their hand.
Suffering and Preventing Damage
When commandos suffer damage, it is always damage of an advantage type (see "Advantage" on page 10). Commandos must either spend advantage matching the type and quantity of the damage being suffered to prevent it or lose a medal (see "Losing a Medal" on page 21). Commandos only ever lose 1 medal from a single effect that causes a commando to suffer damage.
It is possible that a commando will be faced with a series of multiple individual effects that cause them to suffer damage in a single turn. These must be resolved individually, meaning a commando could potentially lose more than 1 medal in a turn if they cannot prevent damage from some of those individual effects.
Example: Bill resolves his enemy attack and rolls 3 enemy dice. The results are one special and two Accuracy damage. The special result is resolved first as its own effect, and part of the special ability on the leftmost enemy card in his play area indicates he suffers 2 Mobility damage. He spends the 2 Mobility advantage to avoid the damage and completes the rest of the special ability. Then, he resolves the damage results in his enemy attack pool (the two Accuracy damage) as a single effect. He only has 1 Accuracy advantage and decides to not spend it. He therefore suffers the two Accuracy damage, losing a medal as a result. As per the "Losing a Medal" rules on page 21, he discards 1 of his medal tokens, discards his equipped weapon card, and draws back up to 4 cards.
Objectives
Once during their turn, a commando entering an objective space may interrupt their turn to do one of the following:
- If the objective space does not match an objective token on their mission card: they may draw the top card of the objective deck and attempt that objective.
- If the objective space matches an objective token on their mission card: they may draw 1 card from their deck.
Attempting Objectives: When a commando attempts an objective, they compare the drawn objective card's requirements with their current advantage. If the commando's current advantage contains enough matching advantage to equal or exceed the objective's requirements, they complete that objective and get to place the objective token matching the objective space they currently occupy on their mission card (in the appropriate spot). Otherwise, they do not complete the objective and must resolve the card's Scout effect.
Important: a commando does not need to spend advantage when attempting an objective; it is only a check to see if they have the right combination of advantage.
Regardless of the outcome, an objective card is discarded after being resolved.
Objective Tokens: While an objective token is on their mission card, a commando gains the corresponding effect listed on the mission card. Each mission card can only have 1 of each type of objective token on it.
If an objective token is ever discarded from a commando's mission card, it is placed next to that mission card and the commando may attempt that objective again (see "Attempting Objectives" above).
Enemies
Drawing Enemy Cards & Placing Enemy Tokens: Each time a player must "draw an enemy," that player draws an enemy card, places that card to the right of the rightmost card in their play area, and places the corresponding enemy token (whose color matches the color on the card) in the empty enemy space on the map nearest their commando; if all enemy spaces on the map are occupied, choose the enemy space nearest the commando and place that enemy in the empty space nearest that enemy space.
A commando cannot have more than 3 enemy cards in their play area at any given time (including their boss card). If a commando must draw an enemy card while they already have 3 enemy cards in their play area, they instead immediately suffer 1 any-type damage.
Defeating Enemies: When enemies suffer damage equal to their health value, they are defeated—their token is removed from the map (returned to the supply) and their enemy card is discarded to the enemy deck discard pile (with the exception of boss cards; see "Bosses" below). The commando that defeated that enemy may draw 1 card from their deck. If a game effect defeats an enemy, choose any commando to draw a card.
Bosses
Boss cards are a unique type of enemy card. Each enemy deck usually has several boss cards which are numbered 1 through 4. These numbers refer to the number of commandos in the game and have no inherent game effect beyond setup (see "Setup" on page 6).
Bosses can only move or be moved by effects on boss cards.
Targeting and Damaging a Boss: Each boss card corresponds to the boss' miniature, meaning any time the boss is attacked, the attacking commando may divide and assign that damage to any number of undefeated boss cards as they see fit. Even though the boss can have more than a single card in play, the boss itself only counts as a single target during attacks.
Defeating and Destroying a Boss: When a boss card is defeated, it is flipped to its "Defeated" side. The commando who defeated it draws 1 card. Note that some boss cards have constant abilities on their "Defeated" sides that come into effect for the rest of the game.
Defeated boss cards cannot be flipped back to their opposite side. Defeated boss cards cannot be assigned damage or leave play.
The boss is considered destroyed only when all boss cards are on their "Defeated" side.
Boss cards are always considered an enemy in your play area, regardless of if they are defeated or not. This means they always contribute, at a minimum, 1 enemy die during enemy attacks. They also always count towards the limit of 3 enemy cards in your play area, meaning you only have room for 2 additional enemies in your play area.
Boss cards are otherwise treated the same as enemy cards.
Medals
Each commando begins the game with 3 medal tokens, representing their endurance. Each time a commando suffers damage and cannot prevent it, they lose a medal. Only 1 medal can be lost for each effect where damage is suffered, regardless of how much damage is suffered during that effect (see "Suffering and Preventing Damage" on page 19).
Losing a Medal: Each time a commando loses a medal, they must discard 1 medal token and discard any weapon card they have. They may also discard any number of cards from their hand. Then, they draw cards from their deck until they have a hand of 4 cards.
Weapons
Each commando has a default weapon printed on their character card, providing a range and attack power (number of dice) used when that commando attacks using that weapon. Each time a commando gains a weapon card, they may place that card on their character card (overlapping their default weapon or discarding any previously equipped weapon), becoming their new current weapon.
Each time a commando loses a medal, they must also discard a weapon card they have, if able.
Effects
Each paragraph on a card (separated by a horizontal line) is a separate effect.
Additionally, each time "each commando" is instructed to do something, that commando's reaction is considered its own separate effect.
Example: The "Infection Spreads" card in the Alien Lair stage deck says: "Each commando must either discard 1 damage from the map or place 2 infectious gels from the supply in the wadder space nearest them." Each commando's individual reaction to this card is considered its own effect. So, if one of the commandos cannot discard 1 damage from the map and cannot place 2 infectious gels, this will trigger the "We're overrun!" effect on the Alien Lair Reference card. Then, if yet another commando has the same issue, they too will trigger the "We're overrun!" effect on the Alien Lair Reference card.
Paying for Effect Costs
If players are given the option of paying for an effect (often using the word "may"), they can only trigger the effect if they pay the cost in full.
Example: The "Seeking Hosts" card in the Alien Lair stage deck says: "Each commando may discard a card from the top of the stage deck to remove all infectious gels from their character card." A commando can only pay for this effect's cost if there is at least 1 stage card left in the stage deck. Otherwise, they cannot pay for this effect and it does not resolve.
Paying for Forced Negative Effect Costs
If players are presented with a single forced negative effect, they must perform it or pay its cost to the best of their ability. Some game effects give players a choice of more than 1 forced negative effect. In these cases, players must choose the effect they can fully perform or pay the full cost for, if able. If unable to fully perform or pay for any of these effects, the player must choose the one they can come closest to fulfilling and perform it to the best of their ability.
Note that not being able to fully perform or pay a cost of a negative effect can come with additional negative consequences, specified in the various unique special rules found in enemy and stage decks.
Example: The "Infection Spreads" card in the Alien Lair stage deck says: "Each commando must either discard 1 damage from the map or place 2 infectious gels from the supply in the wadder space nearest them." If a commando cannot discard 1 damage from the map and there is only 1 infectious gel token left in the supply, that commando places 1 infectious gel token in the wadder space nearest them. This however triggers the "We're overrun!" effect on the Alien Lair Reference card.
Per Commando Values (x commando icon)
When a number is followed by a commando icon, that value is multiplied by the number of commandos in the game.
Example: a "2 (commando icon)" value in a game with 2 commandos in play would be a value of "4"—2 x 2 commandos = 4.
Component Limitations
Advantage Tokens: Advantage tokens are limited to the number of tokens included in the game, which form the advantage token supply. Some effects will require the use of advantage tokens from the supply (example: placing advantage tokens on the map). Commandos cannot gain advantage tokens if there are none left in the supply, and they cannot gain advantage tokens used for other game effects until they are returned to the supply (unless otherwise specified).
Damage Tokens: Damage tokens are considered "unlimited." If you run out, you may use substitutes.
Other Tokens: All other tokens are limited by what is included in the game. If their supply runs out, you cannot gain more of that token until their supply refills.
Frequently Asked Questions
Tokens
Q: Do bubble dimers count as enemies? A: No. Therefore a space with a bubble dimer is still considered an empty space. Additionally, a bubble dimer cannot be the target of an attack as it is not an enemy.
Q: Can a commando ever have more than 3 of each advantage token? A: No. See "Advantage Token Limit" on page 11.
Q: Do the cards in my hand count towards the limit of 3 of each advantage token? A: No. While you can spend a card from hand to pay for an advantage cost, cards are not considered advantage tokens.
Q: What happens if I need to draw a specific token but there are none left in the supply? Can I take one off a component (card, map, etc) if there are some on it? A: No. If there are not enough of a specific token type in the supply, you cannot gain one. You cannot discard a token from a component unless a game effect allows it. See "Component Limitations" on page 22.
Special Spaces
Q: Can I resolve an objective space if I moved into it during another commando's turn, the enemy turn, or the stage turn? A: No, you can only resolve an objective space on your turn (and only once on your turn). See "Objectives" on page 20.
Q: Can I resolve a pillbox sensor space outside of my turn? A: Yes. The moment you enter a pillbox sensor space, regardless of the reason, you may choose to discard the token and draw a weapon card.
Q: Do enemies trigger the effects of special spaces if they enter them? A: Enemies ignore the effects of all special spaces unless specified otherwise.
Stage Cards
Q: If I am told to "discard the top card of the stage deck," do I resolve that stage card when it is discarded? A: No. It is simply discarded without effect.
Q: Both the "Acuba" and "Locking Them In" stage cards have effects that state each commando "must" discard tokens and that "if at least 1 commando does not," an effect triggers. Do we have the option to avoid discarding the tokens if we know one of the commandos will be unable to? A: No. Commandos must discard the tokens if able.
Boss Cards
Q: Does the boss card in my play area count towards the maximum of 3 enemy cards per play area? A: Yes. Therefore, with the boss card, you only have room for 2 more enemy cards in your play area. See "Enemies" on page 20.
Q: Does the boss card still count as an enemy in my play area if it is on its "defeated" side? A: Yes. Therefore it continues to contribute 1 enemy die during your enemy attacks. Watch out, because some "defeated" boss cards also have a unique constant ability that remains active for the rest of the game once revealed. See "Defeating and Destroying a Boss" on page 21.
Optional Rules
Try one or more of the following optional rules to modify the challenge level to suit your play group.
Optional Cards
Future Contra: The Board Game products may include Optional cards that players can add to their games. Each Optional card contains all the rules and effects that players need to add new challenges and rewards to their game.
Jump Start Mode
Each commando starts with 2 of each advantage token.
Rough Start Mode
The commandos start with no advantage tokens.
Unpredictable Environment Mode
After setup, but before starting the game, randomly remove a stage card from the stage deck without looking at it and return it to the box. You may remove an additional stage card to attempt an "expert" version of Unpredictable Environment Mode.
Battle Damage Mode
During gameplay, whenever a commando loses a medal, they also permanently remove the top card of their deck from the game by returning it to the box.
Story Mode
A story in Contra: The Board Game is a series of several narratively linked stages that a fixed group of commandos play through. Each story is made up of "parts" that commandos must play through in order.
To play story mode, players first select a story (two of which are included in this rulebook; see page 25) and begin by reading the "Prologue" section of Part 1. After reading the narrative section, the players then set up the scenario using the listed stage and enemy decks. The players also perform any special setup instructions listed.
Some story parts have special rules that affect the game; players should make sure to remember these when playing (we recommend keeping the rulebook nearby for easy reference mid-game).
Once the commandos win or lose a stage, they read the related "Epilogue" for that part and take note of any rewards or penalties. If taking a break between parts, we recommend logging your progress and any rewards/penalties on a piece of paper for later reference when you continue the story.
Players must keep the same commandos during the entirety of the story.
A story is concluded when the players are informed the commandos either win or lose the story.
Stories
Source note: the narrative Prologue and Epilogue fiction text of each story part is omitted here as flavour text; the setup, special rules, and win/lose consequences are transcribed.
Story: Return to Galuga
This is a report of our recent operation in the Galuga Archipelago off the coast of New Zealand—the site of Contra's first encounter with the Red Falcon Army (RFA). The mission was simple: confirm the presence of the entity known as Java and eliminate it with extreme prejudice.
Part 1
- Stage: Jungle
- Enemy: Defense Wall
- Special Setup: During step 6 of setup, choose a commando to draw an additional enemy card.
- Special Rules: None.
- If the commandos win: Each commando starts the next stage with 1 additional advantage token of their choice. Advance to Part 2.
- If the commandos lose: The commandos have failed their mission. Regroup and try Part 1 again!
Part 2
- Stage: Waterfall
- Enemy: Garmakilma
- Special Setup: The Slip Track begins on the second (success-symbol) space.
- Special Rules: None.
- If the commandos win: Choose a commando to start the next stage with an objective token of their choice on their mission card. Advance to Part 3.
- If the commandos lose: Advance to Part 3.
Part 3
- Stage: Snow Field
- Enemy: Gordea
- Special Setup: After step 2 of setup, search the stage deck for a copy of "Dogra Mk. II." Shuffle that card into the top 3 cards of the stage deck.
- Special Rules: None.
- If the commandos win: During the next stage, after setup but before the start of the first round, the commandos may reveal the top card of the stage deck. Advance to Part 4.
- If the commandos lose: Advance to Part 4.
Part 4
- Stage: Alien Lair
- Enemy: Java
- Special Setup: After setup, each commando must hatch a bugger (see Java Reference card).
- Special Rules: None.
- If the commandos win: The commandos win this story!
- If the commandos lose: The commandos lose this story.
Story: Escape from Galuga
This is a classified report, detailing what happened between the moment the commandos destroyed Java and the moment they boarded the chopper to escape Galuga...
Part 1
- Stage: Alien Lair
- Enemy: Gordea
- Special Setup: The commandos start in the boss spaces, not the commando spaces. Gordea starts within 1 space of a boss space.
- Special Rules: None.
- If the commandos win: Each commando starts the next stage with 1 additional advantage token of their choice. Advance to Part 2.
- If the commandos lose: The commandos have failed their mission. Regroup and try Part 1 again!
Part 2
- Stage: Snow Field
- Enemy: Defense Wall
- Special Setup: None.
- Special Rules: Each boss card gains +5 to its health value.
- If the commandos win: During the next part, after Special Setup, the commandos may return 1 additional card from the top of the stage deck to the box without looking at it. Advance to Part 3.
- If the commandos lose: Advance to Part 3.
Part 3
- Stage: Waterfall
- Enemy: Garmakilma
- Special Setup: Each commando begins within 1 space of a boss space. After step 2 of setup, return the top card of the stage deck to the box without looking at it.
- Special Rules: The Garmakilma boss card cannot take damage. When a stage card cannot be drawn, the commandos win. Ignore the Slow Down! special rule on the Waterfall stage reference card during this game.
- If the commandos win: Choose a commando to start the next stage with a random weapon card. Advance to Part 4.
- If the commandos lose: Choose a commando to start the next stage with one less medal. Advance to Part 4.
Part 4
- Stage: Jungle
- Enemy: Java
- Special Setup: The commandos start in the boss spaces. The boss starts in the commando spaces. During step 6 of setup, each commando draws an additional enemy card.
- Special Rules: Each boss card gains +5 to its health value.
- If the commandos win: The commandos win this story!
- If the commandos lose: The commandos lose this story.