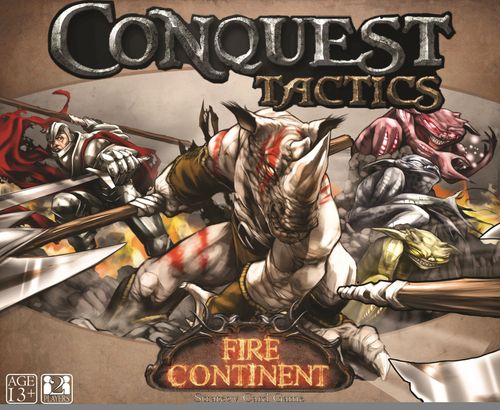
Conquest Tactics
Conquest Tactics Rulebook
Table of Contents
Table of Contents
Card Types and Deckbuilding
In Conquest Tactics each player plays with exactly sixty-eight cards selected from eight unique card types. Each of these is a major part of your deck and is played in a different way. The sections below detail each card type.
Bases
The Base is the center of your Conquest Tactics deck. Many Bases limit the types of troops you may have in your deck or affect the abilities of your army, so it is important to select a Base that will not only support your troops but will also fit your play style. Bases are deployed in the setup phase of the game; you must carry one and only one Base in your deck. Your Base does not count towards your sixty card supply pile.
Victory Conditions
Victory Conditions will determine your strategy for a game and the final score of your match. To win a match of Conquest Tactics, you must achieve three Victory Conditions before your opponent. Victory Condition cards specify the terms of a victory and are necessary to earn a trophy. You must carry four Victory Conditions in your deck and may have no more than two copies of a single Victory Condition. Victory Conditions do not count towards your sixty card supply pile.
Trophies
Trophies are prizes for achieving certain game conditions, most often by achieving Victory Conditions. However, Trophies are more than just loot – they are powerful cards that you can use to swing a match further in your favor. Trophies have two possible options. Redeem allows you to use a powerful effect but removes the Trophy from the game. Recycle results in a less powerful effect but allows you to shuffle the Trophy into your supply pile where it may be drawn and played again. You must carry exactly three Trophies in your deck. Players may not carry more than one copy of any Trophy. Trophies do not count towards your sixty card supply pile.
Troops
Troops are the mainstay of your deck: these are the cards that will do battle with your opponent's Troops. They may attack up close with melee, use archery and ranged attacks, cast spells, and defend your base. Troops are categorized by Faction, Level, and Classification and can be upgraded to higher levels as the game progresses. The diagram below shows each of the numbers on a Troop card and the corresponding characteristic. Troops are shuffled into the supply pile at the beginning of the game. There is no limit to the number of Troop cards a player may carry, but there may be no more than five copies of a particular Troop in your deck.
Troop card diagram (labels as printed on the card): Health; Name; Cost (Tactical Points); Level & Classification; Spell/Skill Icons; Defense Value; Game/Ability Text; Counter Attack Value; Attack Value.
Spells & Skills
Spells and Skills are powerful abilities that troops can use to attack, defend, heal, and more. These abilities can only be used by Troops that have a minimum level of mastery in that type of Spell or Skill, but once learned, they are kept in the Knowledge Pool and can be used by multiple troops. The diagram below shows each of characteristics found on a Spell or Skill card. Spells and Skills are shuffled into the supply pile at the beginning of the game. There is no limit on the number of Spell or Skill cards a player may carry, but there may be no more than three copies of a particular Spell or Skill in your deck.
Spell or Skill card diagram (labels as printed on the card): Spell/Skill Icon; Cost (Tactical Points); Name; Level & Type; Game Text.
There are 6 different types of Spells and Skills on the Fire Continent, each of which has their own symbol. These icons and their corresponding Spell or Skill are listed below:
- Arms Skill (icon)
- Brawn Skill (icon)
- Dark Magic (icon)
- Fire Magic (icon)
- Light Magic (icon)
- Ranged Skill (icon)
Equipment
Equipment is used to improve the strength and survivability of your army. Placing Equipment on a Troop costs Tactical Points, but it remains with the Troop until it is destroyed, at which point the Equipment is destroyed as well. Equipment is shuffled into the supply pile at the beginning of the game. There is no limit on the number of Equipment cards a player may carry, but there may be no more than three copies of a particular piece of Equipment in your deck.
There are three different types of Equipment: Accessories, Armor, and Weapons. An individual troop card may only equip one of each type. Additionally, Equipment may not be attached in initial deployment during setup.
Circumstances
Circumstances are powerful cards that can instantly shift the balance of power. They can deal large amounts of damage, provide additional Tactical Points, protect against incoming attacks, and more. Once a Circumstance is played and its effects are resolved it is removed from the game. Most Circumstances also cost additional cards, which are removed from your hand and discarded. Circumstances are shuffled into the supply pile at the beginning of the game and you may have up to 5 Circumstance cards in your deck. There may be no more than one copy of a particular Circumstance in your deck.
Summary of Deck Building Guidelines
- One Base
- Four Victory Conditions, no more than two copies of any Victory Condition
- Three Trophies, no more than one copy of any Trophy
- Supply Pile- 60 Cards total, excludes Trophies, Victory Conditions and Base
- Up to five Circumstances, no more than one copy of any Circumstance
- No more than five copies of any Troop
- No more than three copies of any Spell, Skill, or Equipment
Setup
After building a deck and finding an opponent, it is time to begin setting up for a game of Conquest Tactics. Lay out the game board between you and your opponent so that the edge closest to each of you has the Conquest Tactics logo on it. The starter set includes a 5 space by 5 space game board. Remove your Base, Victory Conditions, and Trophies from your deck. Place your Base on the Field in any space in the two rows nearest to you. Both players place their Trophies face-up to the side of the board and place their Victory Conditions face-up in a line adjacent to the Trophies.
Next, players select up to twenty Tactical Points worth of Troops, Spells, and/or Skills: these are the forces that the player will deploy to start the game. These points may be any combination of Level 0 and Level 1 Troops. Additionally, up to three Level 1 Spells and/or Skills may be chosen as part of the starting forces. If the cost of a Spell is listed as "X", it will instead cost a number of Tactical Points equivalent to its level. If a Spell or Skill is cost "+Y" use Y as the cost for deployment. At this point, shuffle the remainder of your deck and place it face down to the side of the game board – this is your supply pile.
After both players have selected their starting forces and Spells/Skills, initial deployment begins. Players compare the number of Tactical Points they have selected with their opponent. The player with the least number of Tactical Points receives Initiative and deploys first. If both players have the same number of Tactical Points, flip a coin to determine who receives Initiative.
The player with Initiative places any Spells or Skills they selected face-up in their Knowledge Pool and places their selected Troops on the Field within their deployment zone. The deployment zone is made up of the two rows closest to each player. Players can only place one Troop card in each space, although a Troop may be deployed on the Base. Troops that are positioned on the Base receive a +1 Defense bonus, and damage cannot be dealt to the Base until the troop occupying the Base is destroyed. After the player with Initiative completes his deployment, the other player follows the same procedure.
Gameplay
The steps of Conquest Tactics are easiest remembered using the acronym TRIUMPH. Each turn, both players progress through the individual letters of TRIUMPH and the associated actions.
- Tactical Points
- Resupply
- Initiative
- Up the Field
- Mobilize
- Play
- Halt
Players continue through the turns until one player has won or the match is declared a draw (See the Victory! section for details on how to win a match.)
T - Tactical Points
Place a counter on your Tactical Points slider on the side of the game board. This will mark the number of Tactical Points you have for the turn. Tactical Points are the resource used for almost all actions in Conquest Tactics – deployment of new troops, movement, attack, and defense. So spend them wisely each turn! In the first turn, you and your opponent set your sliders to five Tactical Points. For each subsequent turn, the number of Tactical Points increases by two. In other words, in the second turn you each set your counters to seven Tactical Points, in the third you set your counters to nine Tactical Points, and so forth.
R - Resupply
In the Resupply phase, each player draws cards from their supply pile and places them in their hands until they have a five card hand (excluding Trophies). If you already have five or more cards in your hand, draw one more card. Additionally, at this time players flip all cards in their Knowledge Pool to face up.
I - Initiative
In the Initiative phase, the Initiative token is passed from one player to the other. In the first turn the Initiative token should not be passed. The player who deployed first maintains Initiative through the Halt phase of the first turn.
U - Up the Field
Both players now have the opportunity to advance Troops up the field. Players alternate moving one troop directly towards their opponent's board edge without paying any Tactical Points. Each Troop can only be moved one space in this phase, regardless of their movement value. If the Troop has a movement value of 0 it cannot move. Troops also cannot move if another Troop or an opposing Base is blocking their path. Troops are not required to move, and if a player is done moving the Troops he wants to during this phase, he may Pass. The option to move a Troop continues to alternate back and forth, even after a pass, and players continue to "Up the Field" until both players pass consecutively or until no more Troops can move.
M - Mobilize
The Mobilize phase is also considered the "Deployment" phase. Players can choose to pay Tactical Points to deploy additional Troops or Equipment. To place more Troops on the field, players pay the cost of the Troop in Tactical Points by moving the marker on their slider down the equivalent number of Tactical Points. If there are not enough Tactical Points (meaning the slider would go below zero) you may not deploy the Troop. After paying the appropriate number of Tactical Points, the Troop card is placed in any open space in your deployment zone.
Equipment is deployed in a similar fashion. Pay the appropriate Tactical Points cost and attach the Equipment card to any of your Troops on the field by placing it underneath the chosen Troop with the title of the Equipment showing. If there is already another card attached to the Troop, place the new Equipment under that card with both titles showing.
Lastly, a Spell or Skill can be added to your Knowledge Pool in the Mobilize phase. To do this, you must pay the cost of the Spell and can then place the card face-up in your Knowledge Pool. If the cost listed on the Spell or Skill card has a plus (+) sign pay the number of points listed after the plus. If the cost on the Spell or Skill card is listed as X, pay the number of points equivalent to the level of that card.
Another option in the Mobilize phase is to upgrade an existing Troop. To upgrade a Troop you pay one Tactical Point and place a card of the next higher level on top of the appropriate Troop on the field. If the Troop being upgraded has been damaged, remove half of the damage tokens from the Troop (rounding down). Troops do not need to be in your deployment zone to be upgraded but Troops must be upgraded from a Troop of an appropriate classification. Troops can become more specialized as they upgrade but specializations cannot be reversed. In other words, a Level 1 Human Infantry can upgrade to a Level 2 Human Defensive Infantry, but a Level 1 Human Defensive Infantry cannot upgrade to a Level 2 Human Infantry. Troops must always upgrade in consecutive levels (a Level 1 cannot upgrade to a Level 3), and only one upgrade can be played on each Troop during a single Mobilize phase.
Players may choose to discard some of the cards in their hand to help reduce the cost of Mobilizing. Each card discarded is worth two Tactical Points towards the cost of Mobilizing. The cost of mobilizing a Troop or deploying Equipment can be any combination of Tactical Points from the slider and Tactical Points generated by discarding from your hand.
Example: In the first turn a player wants to deploy a Kaborha Tier 1 Contender which costs four Tactical Points. They would deduct the four Tactical Points from their starting points, leaving them with one remaining Tactical Point for the rest of the turn. Alternatively, the player may choose to discard one or two cards reducing the cost of deploying to two (2) or zero (0) Tactical Points respectively.
Players may discard enough cards to reduce the cost of deploying a Troop, Spell, or Equipment card to zero but may not carry additional Tactical Points into the next phase. In other words, if a player discards three cards to deploy a five Tactical Point card for a cost of zero, they may not add the remaining Tactical Point to their Tactical Points slider for the turn. However a player may discard three cards to deploy two cards that cost three TP each for a cost of zero. Players may use points generated from discarding cards in the Mobilize phase to reduce the cost of multiple card deployments by splitting the points among any number of cards. For example, three cards may be discarded to generate six (6) points that may then be used to deploy two cost three (3) cards or to deploy a cost five (5) and a cost one (1) card or any other combination that adds to no more than six. If at the end of the Mobilize phase, your Tactical Points slider is higher than it was at the beginning of the Resupply phase, reset your slider to where it was at the beginning of the Resupply phase.
Any Circumstances that have a classification of Mobilization may be played during this phase alone.
P - Play
Prepare for Battle! The Play phase will take up the bulk of the game time, and many different options are available at any time. Players execute a wide range of actions by paying the associated cost in Tactical Points. Tactical Points are deducted when the player declares their action (before any action is taken and before any instant cards are played).
During the Play phase, one player at a time will have control. The player with control is always the player with the most Tactical Points (if both players have the same number of Tactical Points, the player with Initiative has control). This player will choose how to spend their Tactical Points and play their cards according to the description on each. Further details on how to use each card are provided below. Should a player not wish to or be able to act, they can Pass, which shifts control to their opponent for one action. Once both players have either used all of their Tactical Points or Passed, the Play Phase ends.
Move
You may choose to move your selected Troop according to their movement value at a cost of one Tactical Point. All Troops are assumed to have a movement value of one unless otherwise listed, and Troops with higher values do not have to use their full amount. Units may only move to open, adjacent spaces or onto a friendly base. Diagonal spaces are not considered adjacent. Even if they have a movement value greater than one, Troops cannot "jump" other units unless otherwise specified.
The diagram on the next page shows a Kaborha Contender and the name and range of the nearby spaces:
[Distance diagram, page 8: a grid of spaces around a Kaborha Contender labelled "Adjacent Space", "Surrounding Space", "Distance 1", "Distance 2", "Distance 3" and "Distance 4" to show the range of nearby spaces.]
After moving, your chosen Troop may perform one of the following actions even if the cost of movement put you below your opponent's number of Tactical Points:
- Attack in Melee
- Perform a Ranged Attack
- Cast a Spell
- Use a Skill
- Play a Circumstance
Let's learn exactly what each of these actions entails.
Melee Attack
You may choose to melee attack an adjacent unit by paying the number of Tactical Points listed as your Troop's Attack Cost. In order to declare a melee attack, the Troop needs to have an Attack Value and be able to attack at Range 1. Troops are assumed to have Range 1 unless otherwise stated. Many troops with ranged skill have an attack range of 2-4, which specifically excludes Range 1. These troops may not melee attack. Other cards may have a single range value such as Range 5. It is assumed in this case that they have an attack range of 1-5 and may therefore declare a melee attack. The Troop will then deal the amount of damage listed on their card for attack; however, the defending card will retaliate by dealing the amount of damage listed on their card for Counterattack.
Dealing Damage
You should track the amount of damage a unit has taken by placing markers on the card. When damage is directed at a unit, the unit should subtract its Defense (if it has one) from the incoming damage to calculate the damage dealt. For instance, if (3) damage is directed at a unit with (1) Defense, the attack would deal a total of two damage. Defense is always subtracted from incoming attacks, regardless of whether they are melee, counter, magical, or ranged attacks, unless an attack states otherwise. Defense can be increased through the use of equipment, spells, and skills.
It is important to clarify the general rules and progression of combat. The first step is to declare an action and pay the associated Tactical Points. After declaring an action, your opponent has the option to play one instant card, Defensive Spell, or Defensive Skill before attack damage is dealt. Once the effects of these instant cards are accounted for, attack damage is calculated and marked on the defending card. If the defending card survives, the attacking player then has the opportunity to pay for and play instant cards, Spells, and/or Skills before Counterattack damage is dealt (if applicable). Finally, Counterattack damage is marked on the attacking card if the defending card survived. In other words, combat always progresses in the order below, although some steps may not be necessary during every combat:
1.) Attacker: Declare Action & Pay Tactical Points 2.) Defender: Declare an instant effect (if applicable) & pay tactical points 3.) Defender: Resolve instant effect 4.) Attacker: Calculate resulting damage and mark on defending card 5) Attacker: Resolve any additional effects of attack 6.) Attacker: Declare incoming Counterattack Damage (if applicable) 7.) Defender: Declare an instant effect (if applicable) & pay Tactical Points 8.) Defender: Calculate resulting damage and mark on attacking card
Ranged Attack
Units with a range value on their card are capable of ranged attacks. As mentioned above, many ranged Troops exclude Range 1 and therefore are incapable of attacking adjacent Troops. Despite this, they still deal Counterattack damage if attacked in melee. Attacking with ranged attacks is similar to attacking in melee except that the target does not deal Counterattack damage, even if they are also ranged units. As with movement, ranged attacks cannot occur along diagonals. In instances where ranged units are attacking an adjacent unit, melee rules should be used and the attacker will receive Counterattack damage
Ranged Attacks must also take into account line of sight. A Ranged Attack cannot target an enemy unit that is "behind" another enemy. In order to be targeted by a Ranged Attack, the shortest distance between the attacker and the potential target must be able to be counted out without counting a space occupied by an enemy unit. Friendly units do not block line of sight. If there are two ways to count the shortest distance to the planned target and only one is blocked, it is assumed that the Troop has line of sight. This applies to Ranged Attacks as well any Skills or Spells that use Range. See the next page for clarification on line of sight.
Line of sight examples, page 11 (captions as printed):
- "The Archers may NOT attack this Noxious Gunget with a ranged attack as the line of sight is blocked by the Buff Gunget."
- "The Archers may attack this Exploding Gunget. Although one of the shortest paths to the troop is blocked, the other is not."
- "The Archers may attack this Gunget with a Sword with a range 2 attack as the line of sight is NOT blocked."
- "The Archers may attack this Buff Gunget with a range 3 attack as the line of sight is NOT blocked by the friendly Footsoliders."
Cast Spell
In Conquest Tactics there are different types of magic and various power levels. A Troop may only cast a Spell if they have the correct icon denoting access to that Spell type and are of the proper level. In most cases, a unit with a magic icon is assumed to know all Spells of that type that are equal to or less than the Troop's level. Variations from this rule will be clearly noted on the Troop card. Some Spells have different effects based on the caster's level; in these cases, the casting level of the Troop overrides the level of the Spell.
Example 1: A Level 2 Veteran Heretic Fire Mage knows Fire Magic and is Level 2. Therefore it knows all Level 1 and Level 2 Fire Spells. Alternatively, a Level 1 Malice Convert has knowledge of dark magic but can only cast Level 1 Dark Magic Spells.
Example 2: A Level 3 Demonhunter knows Fire Magic, but the card states that he only knows Level 2 Fire Magic. In this case, the Demonhunter can only cast Level 1 and Level 2 Spells despite being Level 3.
There are many different kinds of Spells in Conquest Tactics. All Spells are subject to the same line of sight rules as Ranged Attacks, and Offensive Spells deal damage in the same manner. Instant Spells are played defensively after your opponent declares an action. They are typically used to protect your forces and prevent incoming damage. Only one Instant Spell may be cast each time an action takes place (in other words, three Level 1 spells can't be cast to block the same attack). Buff spells are cast on a friendly or enemy target, imparting a bonus to that Troop. Debuff skills do the opposite – they are cast on a friendly opposing target and have a negative effect.
You may cast Spells from your Knowledge Pool or from your hand by paying the casting cost in Tactical Points and following the order of steps discussed previously. If the card is in your hand, place the card face-down in your Knowledge Pool unless it is a debuff or buff Spell. Buffs and Debuffs are attached to the target Troop and return to the Knowledge Pool when the target dies or the effect expires. The Spell has now been learned and can be recast from the Knowledge Pool in subsequent turns. Each Spell card can only be cast once per turn; however, multiple cards of the same Spell can be used in a turn. When attacking with Spells, the Attack Damage and Range of the Spell should be used, not the attack damage and range of the Troop casting the spell. However, range and line of sight should be measured from the location of the caster.
Each Troop on the field may have no more than one Buff and one Debuff attached to them at a time. If a Troop with a Buff attached to it is targeted by another Buff spell, the previous Buff is removed and the new one is attached to the troop. Debuffs are to be handled in the same manner.
Use Skill
Skills are very similar to Spells. Troops may only use Skills that are equal to or less than the level of the Troop and if the unit has knowledge of that Skill, unless otherwise noted. Players use a Skill card by paying the cost in Tactical Points and may play Skills from their Knowledge Pool or hand, similar to Spells. Once a Skill is used from their hand, it is placed in the Knowledge Pool and remains there for the remainder of the game. Like Spells, Skills can only be used once a turn and are flipped face-down in the Knowledge Pool after use. Multiple Skills may be placed in the Knowledge Pool.
Skills follow the same line of sight and range rules as Ranged Attacks and Spells. Any Skills involving range that do not state their own range should use that of the involved Troop. Some Skills list their Cost, Range, or Attack Damage as "+1", "-1", "+2" or "+X". This means that the Troop's Attack Cost, Range, or Attack Damage is used along with the listed modifier.
Play Circumstance
Circumstances are powerful cards that can change the course of the game. There are three large categories of Circumstance card. Mobilization Circumstances must be played during the Mobilize phase of a turn. Control Circumstances are used in the Play phase by the player who has control. Other Circumstances are Instants and may be played at any time. When this happens in response to something another player has done, the effects of the Circumstance are resolved before the action performed by the other player, but after the other player has paid the cost in Tactical Points. Refer to the order of actions described above to settle any confusion.
To play a Circumstance, follow the instructions on the individual card. If a Circumstance dictates that additional cards must be discarded, discard those cards before implementing the other instructions on the Circumstance card. If you do not have enough cards in your hand to discard the proper amount, the Circumstance may not be played.
End of the Play Phase
The Play phase is over when both you and your opponent are out of Tactical Points or both of you have passed consecutively.
H - Halt
When the Play phase has ended, players enter the Halt phase. Some card effects occur during this phase and must be resolved first. After doing so, check to see if you've achieved any Victory Conditions, draw Trophies if you did, and tally the number of Victory Conditions you have achieved to check for victory of the match.
Victory
Victory in a standard Conquest Tactics match is achieved by tallying three (3) Victory Conditions. Victories are tallied in the Halt Phase and are used to score the match, as seen in the table below:
| Final Score | Match Result |
|---|---|
| 3-3 | Draw |
| 3-2 | Narrow Victory/Strategic Retreat |
| 3-1 | Sound Victory/Firm Defeat |
| 3-0 | Massacre |
A Victory is achieved when a condition on a Victory Condition card is met. At this time, the Victory Condition is flipped face down and a Trophy is drawn from the Trophy card pile. A Victory Condition card can only be achieved once per game but multiple copies of a Victory Condition can be carried.
Glossary
- Act – To move (during any phase of the game), attack, cast a spell, use a skill, or use an ability.
- Adjacent Space – The four spaces directly next to a card that share a card edge.
- Surrounding Space – The eight spaces around a card – the four adjacent spaces and the four corner spaces.
- Directly towards – A straight line to a target which passes through one of the adjacent spaces to the target.
- Directly in front of – The space adjacent to a card closest to the opponent's deployment edge.
- Deployment Zone – The two rows of a gameboard closest to each player and directly across from each other. Players Mobilize their troops in the deployment zone closest to themselves.
- Deployment Edge – The short edge of the board closest to each player.
- Line of Sight – The path through which a ranged attack, spell, or skill travels from attacker to target. Must not be blocked by enemy troops to perform an action unless otherwise specified.
- Target – A card or gameboard space upon which an action is taken.
- Incoming/Directed Damage – The amount of damage an attack, spell, or skill has after adding in any buffs or bonuses and before accounting for conditions on the defending troop.
- Damage dealt – The amount of damage marked on a Troop in a single action or counter attack.