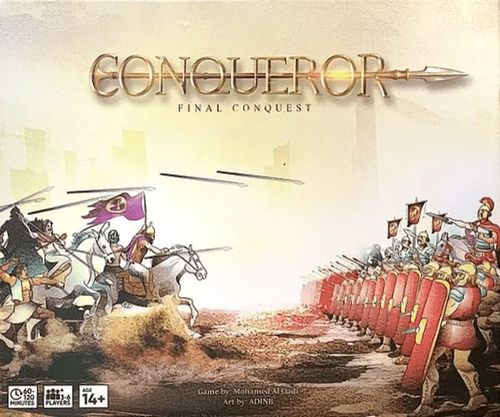
Conqueror: Final Conquest
Conqueror: Final Conquest Rulebook
Table of Contents
Table of Contents
Factions
The six Factions are Rome (red), Gaul (green), Egypt (yellow), Persia (black), Carthage (purple) and Greece (grey).
Introduction
Conqueror: Final Conquest is an area control game played over a maximum of 8 rounds.
The board is a map of the ancient world. The map is divided into several Land and Sea Territories which are demarcated by black lines called borders.
Each Territory also has a name, written in a brown header. Territories are connected if they share a border.
You control a Territory if at least 1 of your Units is in that Territory. When you control a Territory, you benefit from all its resources (if any) including Forts (Small Fort, Great Fort), Food Supply and Currency found within it.
Controlling Territories Notes
- A territory can only be controlled by one player.
- Players can control sea territories.
Victory
At the end of any round, you can win the game if you control 5 or more Forts. If no player does so by the end of the 8th round, you move to scoring and the player with the highest victory points wins.
Players earn victory points as follows:
Victory Points for territories controlled at the end of the game:
I. 10 VP for each Capital II. 6 VP for each Great Fort that is not a Capital III. 4 VP for each Small Fort.
Other Victory Points:
I. VP for each Bonus Mission completed, equal to the prize currency indicated on that mission. II. 1VP for each 5 Currency you possess at the end of the game.
Example: Player 1 controls Rome, Carthage and Sicily. He earns 24 VP (10 from Rome, 10 from Carthage, and 4 from Sicily). He also completed a Bonus Mission with a prize currency of 6 Currency, earning him an additional 6VP. Finally, he has 4 currency at the end of the game. This earns him no points.
Setup
- Place the main board in the middle of the table. a. For 3-4 players, place the main board faceup on the 3-4 Player side. b. For 5-6 players, flip the board over and place it faceup on the 5-6 Player side.
- Next, each player picks a Faction.
- In 5 Player games, you cannot play as Gaul.
- In 4 Player games, you cannot play as Gaul or Persia.
- In 3 Player games, you can only play as Rome, Carthage and Greece.
- Place your starting units on the main board as seen here (in the setup illustration) with Red representing Rome, Purple representing Carthage, Grey representing Greece, and Yellow representing Egypt. a. In a 3 Player game, remove all Yellow units representing Egypt. b. In a 5 Player game, add 2 Black Cavalry units in Babylon and 1 Black Infantry unit in both Cappadocia and Caucuses. This represents Persia. c. In a 6 Player game, add 2 Green Cavalry units in Gaul Aquitania, and 1 Infantry unit in Brittania and Celtica. This represents Gaul.
- Each player places 1 Cavalry unit on number 2 slot of the Food Supply matrix.
- All players place their remaining units (called their Barracks), 5 Currency and their 4 Hero Cards in front of them. Players then select 2 of their 3 Bonus Missions. Discard the rest facedown. Do not show your selected Bonus Missions to other players.
- Carthage starts with the first player marker (the hour-glass).
- Place the remaining currency within reach of players. Additionally, remove "The Huns Attack", "Germanic invasion" and "Slave Revolt" from the Chronicles deck and return them to the box. Then shuffle the remaining Chronicle cards and place them facedown next to the board.
- Independent Armies: In 4 player games, place the white units as depicted on the Setup map. When playing with other counts, in addition to the 4 player setup, place the White-colored units as described below: a. For 3 Player games, add 2 White Cavalry units in Alexandria. b. For 5-6 Player games, add 1 White Cavalry and 1 Infantry unit in Palestina and Iberia. c. For 5 Player games only, also add 1 White Infantry and Cavalry unit in Gaul Aquitania.
Independent Armies
These are Units not controlled by any player. To control the territories they occupy, you must defeat them.
Units
Players conquer and control territories through their units. There are two types of units that can be recruited:
- Infantry units have a strength of +1. Once recruited, Infantry units cannot be upgraded to cavalry units.
- Cavalry units have a strength of +2. Once recruited, cavalry units cannot be replaced by infantry units (ex: replacing 1 cavalry by 2 infantry units).
How to Play
Conqueror is a turn-based game played over 8 rounds. A round is made of 2 phases:
I. Planning Phase: After passing the player marker and drawing a Chronicle Card (skipped in round 1), all players earn income then recruit units and heroes simultaneously. II. Campaigning Phase: In turn order starting with the player holding the first player marker, each player may move each of their units once.
Planning Phase
Move the first-player marker clockwise, then draw a Chronicle card at the beginning of each round. Its effects will apply to all players this round. This step is skipped in Round 1.
Then, all players simultaneously:
I. Earn 1 currency AND 1 currency from every Currency icon found on each Territory they control. II. May purchase Hero cards provided they pay their price shown at the back of the card. III. Recruit Units by spawning them from Forts they control. This is done by moving a unit from their Barracks to that Territory. A Fort can spawn different types of Units based on whether it is a Great Fort or a Small Fort: a. Every Great Fort you control allows you to spawn 1 Cavalry unit OR 2 other Infantry units. b. Every Small Fort you control allows you to spawn 1 Infantry unit.
Four important notes:
a. You may only recruit a Unit if you have that type of Unit available in your barracks. b. You may recruit a Unit if you have sufficient Food Supply (see Food Supply on page 4). c. When you recruit a Unit, you must place it in the Territory were the Fort that spawned that Unit is located. d. Players may decide to carry out recruitment in turn order. This helps mitigate players waiting for other players to complete their unit placement before they do so themselves.
Food Supply
You must feed your armies. You do so by controlling Territories that provide you with Food Supply. Your total Food Supply is equal to the total number of Food Supply available in your Territories.
Your total Food Supply determines the maximum number of Units you can have on the board (indicated on the Food Supply Matrix on the board). Thus, if the number of Units equals or exceed your Food Supply quota, you may not recruit any additional Units. Furthermore, at the start of Planning Phase, if your Units exceed the amount of Food Supply available (perhaps because you lost a Territory that contains a Food Supply in the previous round), you must eliminate any excess Units and return them to your barracks.
Example: Egypt has 1 food supply and 6 Cavalry units. It cannot recruit any additional units this round given the Food Supply quote. During the Campaign Phase, if Egypt moves one of its units to Libya, it will control 2 food supply allowing for 8 units. Thus, next round, Egypt can recruit either 1 Cavalry unit or 2 Infantry units in Alexandria given its Food Supply unit quote (8 units) is higher than their total number of units (6).
Recruit a Hero
Heroes are the most lethal weapon a Player can deploy during battle. They can shift the tides of war, protect your retreating Army, or eliminate a large number of enemy foes. Heroes can be recruited by paying the price listed on the back of the Hero Card during the Planning Phase only.
Each Faction has 4 Heroes they can recruit during the game, each with different abilities and traits. A Hero Card can be used twice during the game (in 2 different battles) before being permanently discarded.
The first time a Hero Card is played during battle, it is played directly from your hand, facedown on the table. Thus, your opponent will not know which Hero you are playing until all cards are revealed during battle. After the battle, the Hero Card is placed faceup next to your Player Board. You may use it one more time in a future battle of your choice by playing it faceup. Once you do so, the card is permanently discarded from the game.
What happens if you use all your Hero Cards? You may repurchase your Heroes for a 2 Currency discount each.
Card Anatomy - Hero Card
- Front, top right: specifies the battle strength of the Hero.
- Front, Special Abilities: Hero traits / benefits of using this card in addition to battle strength.
- Back, emblem: specifies which faction can recruit this Hero.
- Back, bottom right: specifies the price of this card in currency.
Campaigning Phase
Campaign Phase is carried out in turn order, starting with the Faction that holds the First-Player marker and continuing clockwise.
During this phase, there are two steps in each Player's turn:
I. Move your Units. II. Once you are done with your turn, activate all your exhausted Units by standing them up.
Moving
While Campaigning, a Player may move each one of his Units once, provided they are not "exhausted". Non-exhausted Units are called Active Units. If there is more than one Active Unit in a Territory, they may move together. When more than one Unit is in the same Territory, they are called an Army.
Every active Unit or Army can move ONE SPACE orthogonally from one Territory into any adjacent Territory with a shared border. This could be a Land Territory or a Sea Territory. Once a Unit or Army has moved, it is "exhausted" and is no longer active. The Unit(s) is turned sideways to indicate that it is exhausted.
Example: an Active unit stands upright; an Exhausted unit is laid on its side.
Attacking
If your Unit or Army moves into a Territory that is occupied by another Faction or an Independent Army, you have chosen to attack that Faction.
You are known as the attacker and the other Faction is known as the defender. A battle is immediately initiated.
Note: Given that a battle is immediately initiated, you cannot attack using armies or Units from 2 different Territories. An attack is launched from one Territory to another only.
Example: Moving and Attacking. Greece (in Grey) can choose to move units from Rome to Sardinia and occupy it (as it is unoccupied) OR to attempt to conquer Brundium by attacking Rome (In Red) OR to attack the independent units in the Alpes. It could also move one or all its units into the sea!
Battles
When a player chooses to attack another player, a battle ensues.
The outcome of the battle depends on the final strength of both armies. The army with the higher cumulative strength at the end of the battle wins. In case of a tie, the attacker army retreats.
Final battle strength is determined by 4 factors:
I. Preliminary strength of the attacking units and the strength of the defending units (2 strength for each Cavalry, and 1 strength for each Infantry) II. Defensive Bonus: When defending a Fort, a defender gains +1 Strength. When defending a Great Fort, a defender gains +2 strength. When defending their home territory (represented by their icon on the map), a defender gains a total of +4 strength. III. Hero cards: The attacker, followed by the defender may play any number of Hero Card(s) they recruited previously. If the Hero Card has not been played before (the card is still in your hand), place it facedown with your thumb covering the price without unveiling the Hero to your opponent. If, however, the Hero Card was played previously (once) in a previous battle (the card is currently faceup on the table) then play the Hero faceup for all to see. IV. Each players rolls 1 Die: This board game's dice has two 1s, one 2, one 3, and two 4s. The result of your roll is added to your army strength to determine your final battle strength and the winner.
Battle Outcomes
I. Casualties: a. The defeated army loses units proportional to the size of the loss which is the difference in final strength at the end of the battle. The eliminated unit(s) is returned to the barracks. For example, if they lost 10 to 7 in final strength, they must eliminate units with a total strength of 3 (the difference between 10 and 7). b. Hard Battle: The losing army rolls 1 die if their total strength is 6 or less or 2 dice if their strength is 7 or more. If they roll any 4s, the victorious army must lose 1 unit, returning it to the barracks.
Important Note: When resolving casualties, resolve any effects from Hero Cards as well. Hero cards may protect your units or deal further casualties to your opponent.
II. Retreat: a. If the attacking army lost or incase of a tie, it must retreat to the territory it attacked from. b. If the attacking army won, it may move 1 unit back to the territory it attacked from. Furthermore, the defending army must retreat to any adjacent Territory that is vacant or controlled by the defender. Defenders cannot retreat from Land to Sea but may retreat from Sea Territories to Land Territories. If the defender cannot retreat, the army is eliminated and returned to the barracks.
Example: Battle Between 2 Players
- Rome attacks Berber from Espanga with an army of 2 Cavalry and 2 Infantry units. Their total strength is 6. Carthage is defending with 1 Cavalry and 1 Infantry for a total strength of 3.
- Rome states they do not want to use one of their Hero cards. Carthage states that they do and play a Hero card from their hand that gives them an added strength of 2, increasing their strength to 5. Note: Rome can no longer opt to use their Hero card. Rome must decide to play a card before the defender does.
- Each player rolls one die. Rome rolls a 4 giving them a total strength of 10 (6 from the army + 4 from the die roll). Carthage rolls a 3 giving them a total strength of 8 (5 from the army and Hero card and 3 from the die roll). Rome wins 10 to 8.
- Carthage lost the battle by a margin of 2. They must lose units with a total strength of 2 In this case, they choose to eliminate their Cavalry (strength 2). As the loser, Carthage rolls 2 dice (given their strength was 7 or more) rolling two 4s. Because Carthage rolled at least 1 four, Rome must eliminate a unit. They choose to eliminate an Infantry unit.
- Carthage must retreat. The remaining infantry unit can retreat to Numidia (which is empty) or to Carthage. Carthage chooses to retreat to Carthage where there is a Carthaginian Army there.
- Rome moves to Berber and gains 1 currency for looting and can decide to move one unit back to Espanga if they please.
- Finally, Carthage places their Hero Card faceup in front of them to indicate its been used. If they choose to use it again, its discarded from the game.
III. Hero Cards: Any Hero Cards played from your hand (first time played) are placed face up next to you in a stack. If the Hero Card was played from your faceup stack (second time played), they are discarded from the game.
Note: You can only repurchase Heroes after you've purchased and discarded all of them a first time. Apply a price discount of -2 when repurchasing.
IV. Looting: Finally, if the attacker attacked with a strength of 6 or more, they gain 1 currency, regardless of the outcome.
Reminder: Exhaustion: All attacking units are exhausted, regardless of the outcome.
Additional Rules
Independent Armies
Attacking independent armies follows the same rules highlighted in the "Battles" and "Battle Outcome" sections (page 5-6) above with the following exceptions:
- You may not attack an independent army if the total strength of your attacking army is 4 or less.
- The player to your right rolls for the independent army during battle and casualties phase.
- If you defeat an independent army, you eliminate the entire army (it does not retreat). The player to your right still rolls a "hard battle" roll.
- Independent armies do not have Hero Cards, though you may use yours against them.
Help!
At any point during the game, if you lose all your territories, you are eliminated.
But don't let it get to that! Here are 2 rules that can help a struggling player.
If you do not control any Capitals or Great Forts:
I. You may designate any Land Territory you control as your Temporary Capital. That territory will allow you to recruit 1 Cavalry unit per turn and earns you 1 additional income during the Planning Phase. If you lose control over that territory, simply designate another one. II. You may recruit Heroes for a discount of 2 currency.
Home Territory Clarification
I. If you move all your units out of your Home Territory, you maintain control over it. However, if it is attacked with no defenders, the attacker automatically wins and takes control over it. II. If you control another player's Home Territory, you will score 10 VP at the end of the game. However, when defending that territory, you only gain a 2+ strength as a defensive bonus from the Great Fort.
Bonus Missions
Bonus Missions are secret non-mandatory missions specific to each faction. If you complete them, you earn currency as listed in the Prize section of the card.
Furthermore, if the game ends with Victory Point scoring, completed missions count towards your victory points (see Victory on page 1).
Note: Some bonus missions are completed as soon as you meet a certain condition. Others require you to present your mission publicly and/or to control territories for several rounds. Read the missions carefully to ensure you present the card and complete your mission correctly.
Bonus Mission card anatomy: the Prize (top) is the money you earn; the text beneath the map is the Condition; the small print at the bottom says when to present the card.
Danube River
The river connects Celtica, Thracia and the Black Sea with one move. Thus, players can use the Danube river to move from one end of the map to the other; i.e. move from Celtica to attack Thracia or the Black Sea or vice versa. This is counted as one move.
Bridges
Bridges connect two land territories separated by sea. Thus, a unit can use a bridge to move from one land territory to another in one move.
Ties
If 2 or more players tie for victory, the player with the most Forts wins. Further ties are broken by the number of Great Forts controlled. If still tied, the game ends in a draw.
Designer's Notes
- One of the unique elements in Conqueror's game design is its Sea Territories. Using the Sea and River, you can transport your armies from one end of the map to the other or attack an enemy where they least expect it. Leverage the sea and be wary of it!
- This game excels at 4 and 6 player counts. If you are playing with 5 players, remember to keep Rome in check. In the absence of Gaul, Rome has the potential to expand rapidly.
- Table talk is not only allowed, it is encouraged. Feel free to strike deals with neighbours, negotiate peace or alliances, and whatever else you may fancy. You may even transfer currency to another player during the campaigning phase to help close a deal. Be wary though as deals are not binding!
- If you are ever in doubt of a rule, check our website for frequently asked questions.