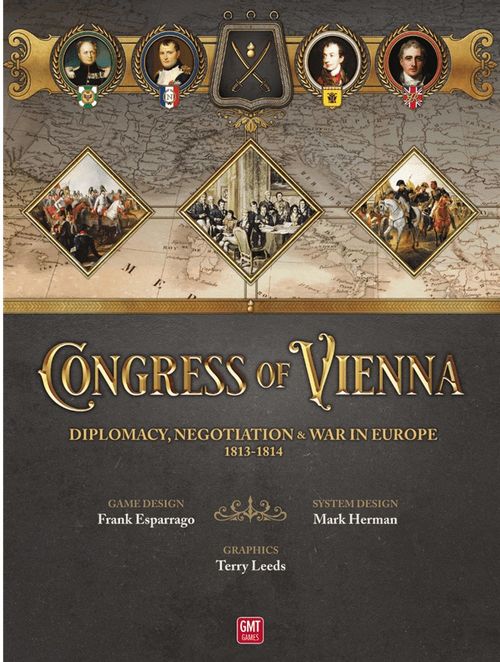
Congress of Vienna
Congress of Vienna Rulebook
Table of Contents
Table of Contents
- 1.0 Historical Context
- 2.0 Overview
- 3.0 Components
- 4.0 The Game Board
- 5.0 The Cards
- 6.0 Issue Markers
- 7.0 Other Markers and Pieces
- 8.0 Campaign Setup
- 9.0 Sequence of Play
- 10.0 Initial Phase
- 11.0 Diplomacy Phase
- 12.0 Government Phase
- 13.0 War Phase
- 13.1 Placing Military Operation Markers (Step 1)
- 13.2 Placing Military Support Markers (Step 2)
- 13.3 Strategic Movement (Step 3)
- 13.4 Military Operations and Battles (Step 4)
- 13.4.1 Battle Step A: Calculate Each Side's Initial Battle DRM
- 13.4.2 Battle Step B: Withdrawal and DRM Adjustment
- 13.4.3 Battle Step C: Military Cards/Final Battle DRM
- 13.4.4 Battle Step D: Determine/Remove Battle Losses
- 13.4.5 Battle Step E: Results of Battle (Advance/Retreat)
- 13.4.6 Battle Step F: Major Battle and VP Effects
- 14.0 End of Turn and Victory Check Phase (Every Game Turn)
- 15.0 Optional Historical Rules (OHR)
1.0 Historical Context
At the beginning of 1813, the pitiful survivors of the once magnificent French Grande Armée arrived in Germany after a horrific retreat from Moscow. An eyewitness remembers: "I did not see any weapons or cavalry, only men suffering hardships with frightful wounds, those who lack their hands, arms or feet completely lost by the freezing." The catastrophe of Napoleon's Grande Armée had resulted in a dramatic diplomatic realignment of the major European powers. The British Prime Minister, Lord Liverpool, wrote to Wellington in Portugal that "the most formidable army of all time assembled by Bonaparte has been destroyed to a great extent. ... Under these circumstances ... will the French army leave Spain? ... I think he will prefer that alternative to the loss of Germany..."
A vengeful Tsar Alexander was determined to liberate Europe from Napoleon or at least to reorder the balance of European power to his interests. Austria declared itself neutral at first, but Metternich, its Foreign Minister, feared both the expansion of Russian influence in Europe as well as the current domination of Napoleon: albeit a domination now severely threatened by the Emperor's recent Russian fiasco. On the other hand, Great Britain had always affirmed she was engaged in a struggle for survival against Napoleon's tyranny. Other European powers had a less altruistic view of Britain's true motives.
Meanwhile, by force of truly extraordinary efforts, together with the remains and officers saved from the Moscow Retreat and troop transfers from other fronts… particularly Spain, Napoleon sought to replace his Grande Armée lost in Russia with a new one that would eventually reach a strength of 650,000 troops. With it, he planned to reassert Imperial France's European ascendency.
The preceding historical context introduces the Congress of Vienna game. Its military campaign begins in March 1813. Napoleon faces The Sixth Coalition, an alliance of Britain, Russia, Prussia, Spain, and Portugal, which were later joined by Sweden, Austria, and some minor German states.
Congress of Vienna is a one-to four-player game dealing with both the diplomatic and military aspects of the time to recreate the titanic struggle between the armies of the Napoleonic Empire and their opponents (generically also known as the Allies or Coalition in this game—the terms are interchangeable). The game's military map covers the conflict's arena from Prussia to Paris to Spain; it includes the Italian front, the maritime struggle between Britain and France, as well as the War of 1812 in North America.
Will the player(s) be able to repeat history? Will Napoleon resist the Coalition's forces and prevent a French surrender and his own abdication? Will he even possibly be able to defeat the Allies, holding on all fronts? Shall Britain achieve world hegemony thanks to her maritime expansion and new commercial strength? Is it possible through a Peace Congress to end the war and achieve a status quo acceptable to the Great Powers?
The aim of the game is to become the leading European power at the end of the Napoleonic Wars by employing a wise combination of diplomatic negotiation and military strength. Solely using bludgeon-like tactics is an approach doomed to fail, whereas deliberation and elegant finesse among ambassadors are key characteristics for successful play of Congress of Vienna. Nevertheless, armies and generals will be ready to do their duty and carry out military operations which culminate in dramatic battles across Europe and America. This is a fight for the soul of a continent. Will the Europe the players create entrench the rule of autocracy or shall the spirit of liberalism prevail?
All these and other related questions can be answered after a game of Congress of Vienna, during which players may follow the historical path, or can make their own decisions and, just perhaps, change the world as we know it today.
2.0 Overview
Congress of Vienna comes with a Standard Version and a set of Optional Historical Rules (OHR) detailed in Section [15.0] of this Rulebook for players desiring a more challenging and historically immersive experience.
During the Initial Phase, an Initial Situation Card sets conditions for all Major Powers and the Initial Environment Table's results are established for the turn. In addition, the British player has the option to remove fleets from the map. For every two fleets removed this way, Britain receives either 1VP or 1 Resource, player's choice.
During the Diplomacy Phase, players must negotiate different geopolitical Issues using the Diplomacy section of the game board and seek to advance their interests by effectively using their hands of cards. In each of the Diplomacy Phase's six Diplomacy Rounds, they will play cards: to try to win a negotiated Issue, to trade cards, or to debate (that is, impede or completely foil) another player's Issue movement action.
To be successful, each player must take advantage of their Major Power's characteristics and the abilities that their Character Cards (their statesmen and generals) provide to them.
Players earn VPs and other advantages by winning the Diplomacy Phase through controlling the most important political, economic, diplomatic, and military Issues. Issues are represented by markers.
During the Government Phase, players spend their limited Resources on Issues won during the Diplomacy Phase to gain political influence in the form of VPs, acquire unit replacements/reinforcements, military operations, support, and more.
In the War Phase, the players decide which fronts to engage in battle, dictated by the placement of Military Operation and Military Support markers. Battles are carried out at a high strategic level (i.e., Army vs. Army) and the number of units and generals present, terrain, and other factors potentially influence a battle's outcome.
When the game ends, a Major Power victor is determined. The winner will be the player who has accumulated the most VPs at game end. These VPs can be obtained in various ways, including winning Diplomacy Phases, battles, political influence, etc. However, the game could end earlier through the surrender of Napoleon or if any Major Power can achieve an Early Triumph victory of 80 VP or more.
If you decide to use an Optional Historical Rule [15.4], the game can possibly end through a successful Peace Congress Issue resolution. This represents a political, rather than a military, ending to the Napoleonic Wars.
2.1 Number of Players
Each of the four players represents one of the Major Powers involved in the Napoleonic Campaigns of 1813–1814: France, Russia, Britain, and Austria.
Each of these Major Powers is color-coded.
Several European countries and the United States of America (for the War of 1812) are also controlled by the Major Powers. The Minor Countries of Poland, Saxony, Bavaria, Italy, Naples, Holland, Denmark/Norway, and Hanover are incorporated in the game through play of Issues [11.2] and potentially provide Victory Points (VPs) and units through occupation and negotiation.
When fewer than four players are available, two players can play, with one player controlling the three Allied Powers and the other player controlling France [18.2].
With three players, one player is France, one is Britain, and the third controls both Austria and Russia [18.3].
Finally, a single player can play solitaire games as either France or the Allies, or in a non-competitive mode by using the appropriate Bots included with the game [19.0-23.0].
2.2 Sequence of Play and Game Phases
Each game turn is divided into five Phases that are played in order: Initial, Diplomacy, Government, War, and the End Turn/Victory Check Phases.
2.3 Scenarios
The Full Campaign scenario can be played in up to 10 turns (with an option for a Turn 11). Each turn represents one month, except for winter turns which represent two months.
Congress of Vienna also offers shorter scenarios in the Playbook. These scenarios focus on key dramatic points of the overall campaign. In this way, players can adapt the game to their available playing time and/or interests.
The five scenarios are:
- "Napoleon Resurgent: Spring 1813" (two to four turns)
- "The Liberation War for Germany 1813" (eight turns)
- "The Clash of Armies 1813" (four turns)
- "Desperate Times: The France Campaign 1814" (an intense three turns)
- "Full Campaign" (ten turns, with options for an 11th turn or shorter 9-turn game).
To enjoy a fully immersive Congress of Vienna gaming experience, more than one playing session may be appropriate for playing the Full Campaign.
Rules for Solitaire games have also been included in the Playbook.
2.4 Scale
Each unit represents approximately 20,000 soldiers, while each fleet represents 20–30 ships-of-the-line with their attendant lighter support ships, escorts, and transports.
2.5 Strategy, Diplomacy and Politics
Congress of Vienna is an asymmetric game where each Major Power has its own distinct national advantages, VP opportunities and leader characteristics. Learning to best use your nation's advantages is part of the game (and a fun one to puzzle out).
Field battles conducted during the War Phase are not always the most effective nor sole solution to achieving game success. Players should seek the ways of political influence (and intrigue) to obtain VPs, or provoke or delay the entry of Austria into the war if that's to the player's advantage.
These strategies include many ways that can lead a single player to game victory if that player knows how to make best use of their Major Power's national advantages, the statesmen and generals that comprise their government and, when the War Phase arrives, the military leaders and any battle event cards of their armed forces.
Of course, as previously stated, war is a means to attain victory… but it should be a part of a multi-faceted path towards that end.
Re-playability is an aspect guaranteed by the CoV game design. You should explore all possibilities this game offers with each of the Major Powers it encompasses.
DESIGN NOTE: This game was inspired by the acclaimed GMT publication Churchill, designed by Mark Herman, whom we thank for his creation, inspiration, and to whom we owe the essence of Congress of Vienna. Mark also made some most-appreciated contributions to this game.
2.6 Abbreviations
The Rulebook and other game components use these abbreviations:
- VP/VPs: Victory Point(s)
- DRM: Dice Roll Modifier (2d6)
- drm: die roll modifier (1d6)
- 1d6: One 6-sided die
- 2d6: Two 6-sided dice
- CoV: Congress of Vienna
Also refer to [2.1] for Major and Minor Power abbreviations.
3.0 Components
Your copy of Congress of Vienna contains the following components:
- 1 Rulebook
- 1 Playbook with scenarios and various notes
- 1 Quick Start Rules Summary with key Charts and Tables
- 1 game board with Tables, divided into Diplomacy and Military Sections
- 1 deck of 70 Leader and Game cards (Characters and Events)
- 1 deck of 30 Initial Situation Turn cards
- 1 deck of 10 Handicap cards
- 4 Player Aid Charts, one for each Major Power
- Allied and French Bot Chart-Flow and Tables (double-sided)
- 14 wooden blocks (Armies)
- 1 sheet of stickers (to apply to the 14 Army blocks)
- 30 Negotiation Issue markers
- 7 Pawns and 2 Tokens [7.2]:
- Absolutism/Liberalism (2)
- Future Government of France (1)
- Pax Britannica (1)
- First Player order (1)
- Battle DRM Track (2)
- Generalissimo in Central Europe (2)
- 8 six-sided dice: 2 for each Major Power, color-coded by nation
- 109 small wooden cubes and cylinders depicting units and ships (fleets) respectively. The total counts of these are listed in the Major Powers' Diplomacy Section Force Pool [4.1].
- 130 die-cut markers (indicating Financial Resources, Military Support, Debate, Diplomacy Round, die roll modifier reminders, status and reminder markers, etc.)
3.1 The Rulebook and the Playbook
Congress of Vienna contains three manuals: this Rulebook, the accompanying Playbook, and a Quick Start Rules Summary for overview purposes. In this rulebook, you will find all the rules needed for playing a complete campaign or scenario of Congress of Vienna.
These rules, the Quick Start Rules Summary and/or the "Detailed Example of Play"—Section [16.0] of the Playbook—are all components to start playing Congress of Vienna.
Once learned, this rulebook can serve as a resource to resolve potential player disputes or doubts. Furthermore, the relatively shorter Quick Start Rules Summary acts as an at-a-glance reference.
In the Playbook, you will find variants according to the number of players, including solitaire rules and other scenarios available to play. These variants include the initial game piece set-up for each scenario as well as changes to the usual game rules.
The Rulebook also incorporates a selection of Optional Historical Rules for player consideration.
Additional OHR rules [15.6 through 15.17] can be located via the Congress of Vienna page on the GMT Website at www.gmtgames.com.
4.0 The Game Board
The board displays two primary areas: on the right, the Diplomacy section (green background) is where the Diplomacy Phase is conducted; on the left, the Military Map section (buff background) is where military activities take place during the War Phase. The Military Map section presents a stylized map of Europe containing Tracks (Fronts) for deploying game pieces. In addition, the game board incorporates tables, tracks, and boxes for various game purposes.
4.1 The Diplomacy Section
The Diplomacy section on the right half of the board holds the green Negotiation Table in its center with four National Tracks radiating out forming a large cross. Around the Negotiation Table, charts, tracks, and tables are located to record various diplomatic conditions and game states.
National Tracks: There is a track for each Major Power, each containing seven spaces. The first six are numbered 1 to 6 with the last one containing an image of each Major Power's Leader, known as its "Seat" or "Chair", which is counted as space 7.
The National Tracks are a key element during Diplomacy Phase play as Issues, represented by markers, are placed and moved on them.
Each player attempts to move (negotiate or debate) these Issues to win them or to impede other Major Powers from securing them [11.0].
Force Pool: There is one box for each Major Power to contain all units and British fleets not currently deployed on the Military Map section.
Eliminated pieces are returned to their owner's Force Pool. They can be returned to play as reinforcements, recruitment, or replacements.
Initial Environment Table: This table is used for resolving the Initial Phase of each game turn [10.0].
Liberalism/Absolutism Track: This is where Europe's post-war governing philosophy is determined. This is a double track in green and red with a common At Start area for two pawns. Tracks for Liberalism (red: Britain/France) and Absolutism (green: Russia/Austria) each have four boxes.
Turn Track: This track is used to record game turns. Each turn represents one or two months of real time depending on the season. To remind players when replacements are available on alternate turns, there is a faint red band and soldier silhouette with a red capital letter R to its right.
PLAYER NOTE: Historical major battles, sieges, and significant diplomatic events which took place during a turn are noted in italics: e.g., turn 7's, Leipzig. They are only for historical reference purposes and have no relevance in the game!
Future Government of France Track: This track consists of six spaces bounded in different colors which represent greater or lesser influence of this Issue by the Major Powers. The location of the pawn at game end determines the French Government's fate.
Diplomacy Round Tracks: These indicate the Diplomacy Phase's six Rounds which occur each game turn. These Rounds are tracked with a corresponding marker for each Major Power on its own individual Diplomacy Round Track.
The Diplomacy Section's Discard Pile is for Diplomacy Round and military card discards after each battle in the War Phase.
Pax Britannica Track: This is a red track with At Start and five spaces, representing historical aspects of Britain's political and economic dominion during the 19th century [12.4.11].
Diplomacy Display: This table has a grid of 10x3 spaces and is used to place the diplomatic, military, and economic Issue markers (examples below) which can be negotiated during a Diplomacy Phase. The corresponding available Issue markers are placed here at the start of each game turn.
Due to each turn's Initial Situation Card and during a Diplomacy Phase, some of these Issue markers will be removed from the Display and put into play (e.g., on one or more National Tracks and/or the Negotiation Table).
After resolution of each played Issue (during the Diplomacy, Government, or War Phases), all eligible Issue markers are returned to their display positions for potential use during the next game turn.
French Debate Pre-Empts Used track: In the upper right corner of the Diplomacy section, this track records use of the French national advantage during diplomatic negotiations [11.1.2].
Other Minor Countries are indicated by a nameplate containing the name of the country with a circle above it containing its national flag of the historical period. These countries can receive influence from a Major Power [12.4.6] during the Diplomacy Phase.
Mountain spaces have dark brown shaded areas containing the space's name in white letters with a circled mountain symbol on one of its borders. They provide certain benefits for defenders. See [13.4] for related rules.
Some spaces show icons (cards, coins, soldier silhouettes, etc.) which indicate advantages/benefits if controlled. A Legend summarizes these icons and associated rules.
Some map features only come into play when their associated Optional Historical Rule (OHR) is agreed to by the players (e.g., the Denmark/Norway Box and Scheldt Landing space). All OHR features are indicated by a violet label, rule case number reference, and a flaming grenade icon.
Place Armies, represented by colored wooden blocks, in their corresponding spaces on the lettered battle Fronts as indicated by their scenario.
4.2 The Military Map, Units, and Armies
The stylized map of Europe represents the Military Map section of the board where military operations and battles occur. It contains six different tracks, also known as Fronts, and the War of 1812 Box (Front G). Front tracks are divided into spaces each linked to one or more adjacent spaces starting from distinct locations. All but two Front tracks converge to end on the central space of Paris.
Each Major and Minor Power space has a colored border and a two-letter code indicating its nationality. The space at the start of each front containing a large letter A-F is that Front's Start Space.
PLAYER NOTE: Before your first game, apply a sticker to each Army block by national color; e.g., a British army sticker on a red block, etc.
Only a single army per Major Power is placed on each Front. Armies may advance, retreat, withdraw through, and battle throughout the game on these Fronts. Each Front has a capital letter identifier (A–G) to indicate the order in which military operations' battles resolve and which armies can operate at a Front.
EXCEPTION: A special symbol indicates that only French units may move, retreat, or withdraw through certain spaces (e.g., through Toulouse and Pyrennees).
An Army controls the space it occupies and each space behind it (from the army to, and including, its starting space).
For Fronts A through F, Allied Army blocks occupy spaces adjacent to their French Army counterparts. Exception: Paris [13.6.5].
During a turn, if a Military Operation Issue marker has been assigned to it, an Army block may initiate military operations to resolve subsequent battles. Each Army block can only move, advance or retreat as the result of a battle.
Units (colored wooden cubes) are placed in the named Army boxes adjacent to each Front. These are color-coded by nation with its national flag and a number indicating the maximum number of units it can contain (4–16). No army can have more units in their box than indicated. A Unit's Homeland are the spaces matching its nationality; units in their homeland may confer a bonus during Military Operations [13.4].
Each unit can be added and removed from the board for various historical reasons: replacements, recruitment, battle losses, etc.
Some spaces and boxes have an anchor symbol where British fleets can be placed. These may involve:
- Landing Spaces: Track E's Sicily [13.6.3] and, if in play under Landing in Holland OHR [15.3], Track B's Scheldt.
- The War of 1812 Box: The upper left corner of the map is the War of 1812 Box (Front G), representing the war between Britain and the United States [13.6.4]. British units and fleets and US units are placed directly on the marked spaces in this box (no Army blocks are used here since the war in North America's theater was of a smaller scale compared to Europe). The squares and anchor circles indicate the maximum number of units and British fleets which may be placed here.
- Royal Navy Reserve Box [10.3]: Round British fleet pieces may also be placed, without quantity limit, in the Royal Navy Reserve Box.
The octagonal Generalissimo space is used for the placement of a Generalissimo hexagonal wooden piece after Austria joins the war in alliance with Russia and that Issue is won. If the Generalissimo is under Russian or Austrian control [12.4.7], an associated marker allows Front A's Russian and Austrian Army blocks to be combined as if a single Army and provides other military advantages.
The Battle DRM Track is a numbered double track with light blue and red boxes which serves to track military cumulative calculations (force size, DRMs, etc.) for battles as well as indicating casualties in the form of eliminated units suffered in battle [13.4].
The Card Hand Size Track references the current card hand size for each of the four Major Powers. These markers are adjusted after the conquest or loss of key card spaces on the military map. The numeric value position of each Major Power's marker shown on this track dictates the number of cards dealt to each Major Power at the start of a turn.
Around the Military Map's perimeter is the Victory Point Track. It is used to record the VPs of each Major Power throughout the game. Their markers are adjusted as game circumstances change either to add or subtract VPs.
5.0 The Cards
The game contains four types of Cards: Initial Situation, Leader, Game, and Handicap (optional).
IMPORTANT: In the event of a conflict, a card's text always takes priority over the Playbook or Rulebook.
5.1 Initial Situation Cards
The game provides three sets of Initial Situation cards, coded A, B, and C in the top-right corner of the card face. These cards affect each of the Major Powers by benefiting or hampering them.
The A set's situations reflect historical events to ensure the game follows a historical line of events. The other two sets offer the options of historical variability by being pro-Allied (B) or pro-French (C) to enhance replayability and/or game balance between players of unequal CoV experience [8.1].
These cards have four color-coded sections, one for each Major Power with mandatory events for the designated turn.
5.2 Leader Cards
The Leaders of each Major Power with their abilities and potential penalties are represented by cards with a value from 5 to 7:
- Napoleon (France)
- Castlereagh (Britain)
- Tsar Alexander I (Russia)
- Metternich (Austria)
5.3 Game Cards (Characters and Events)
There is a 66-card deck consisting of both character and event cards shared by all players. Each character card represents a historical personage (statesman, diplomat, or general) and each event card a historical event (military or diplomatic). These cards have various uses and effects, such as bonuses, additional Resources, reinforcements, etc.
The names of the persons depicted in the game are shortened in some cases; e.g. Gentz for von Gentz. Either way, it should be clear which person is being referenced.
- A card's value, from 2 to 5, is indicated in the upper-left corner within a circle color-coded to a Major Power or neutral (dark gray). A card's bonuses and penalties may increase or decrease its value, but never above 7 or below 1.
- Additionally, the right upper corner of each national Character card has a color-coded triangle with its abbreviated Major Power identifier: AU, RU, BR, and FR. This is to assist with the card trading procedure [11.8].
- The lower part of most game cards (national and neutral) has a black diamond icon with a Major Power identifier and text describing any specific modifier(s) to the referenced Issues for that player during the Diplomacy Phase.
- Some game cards also have a diamond with a white feather. This indicates its modifier is applicable to all players.
- Cards bearing a crossed swords symbol can be used to influence battles. These cards also have a label with a black hex within a national color. If not played during the Diplomacy Phase, the card can be used during that turn's War Phase to improve that player's DRM during battle resolution [13.4].
- Some cards have a black circle with their national indicator. This notes an additional bonus for that Major Power in one of the game Phases which becomes possible when the conditions indicated by the label are met.
When a card is used during the Diplomacy or War Phase, its value includes appropriate modifiers for specific issues, nationality, and year. Its modifiers may not be ignored nor declined, including any special abilities or relevant penalties.
Any cards not used during a turn's Diplomacy or War Phases [11.0 and 13.0] are discarded during the End of Turn/Victory Check Phase.
If a Character card is eliminated from play, remove it from the game and return it to the box so it is not shuffled into the draw pile on a future turn.
The Military Character cards that face potential removal [13.4.5] are: Poniatowski and Duroc for France, Tecumseh for Britain, and Kutusov and Von Scharnhorst for Russia.
EXAMPLE (Fouché): The Fouché card is a complex diplomatic card with no effect during the War Phase. The first band affects only allied players. The second band—containing a white pen on a black diamond—indicates its effect applies to all players. Finally, the last band only affects the French player.
5.4 Handicap Cards (Optional)
There is a special 10-card deck of Handicap cards for use with an optional rule [10.4]. These Handicap cards facilitate more game playability and variability by offering balancing elements to help inexperienced players be more competitive. They can make a game more challenging and variable for experienced players.
Handicap cards can also be used in the solitaire version to increase the Bot's might and present a player with additional challenges. Remember: "It's YOUR game!" Feel free to modify game conditions as you believe best to achieve a fun and interesting gaming experience.
6.0 Issue Markers
There are 30 diplomatic, military, and economic Issues with corresponding markers. The Issues are actively negotiated and debated during the Diplomacy Phase [11.0]. Any Issues won by players are activated by spending resources and then resolved during the following Government Phase [12.0].
During the War Phase, the won and activated Military Operation Issues determine where Military Operation markers will be placed on the map and where battles will occur [13.0].
7.0 Other Markers and Pieces
7.1 Markers
Each Major Power has its own set of markers in their national flag or color which are used to indicate that a particular Character card's bonus is activated for Diplomacy Round and Debate, for standard issued and additional Resources, for Military Support, and for battle DRMs specified by an Initial Situation card.
When not in use on the game board, markers may be placed near the player's Major Power Force Pool or in front of each player on the gaming table.
7.2 Wooden Pieces
Armies, units, and British fleets are discussed in section [4.2]. Seven additional wooden pawns track the status of:
- Future Government of France (dark blue)
- Liberalism (red)
- Absolutism (green)
- Pax Britannica (purple)
- First Player order (large gold pawn)
- two pawns (blue and red) for tracking DRM in battles
The game also includes two octagonal wooden pieces to indicate the Generalissimo's controlling nationality: green for Russia and white for Austria.
Finally, markers for tracking the Turn and each player's VPs and hand sizes are provided. These markers are placed in their corresponding spaces in the Turn Track, VP, and Card Hand Size Record Tracks by their respective Playbook "Set-up" indicators (per selected scenario).
8.0 Campaign Setup
The following setup described in this Rulebook is for four players (as France, Russia, Britain, and Austria) using the Full Campaign of ten turns.
PLAYER NOTE: Scenarios and games for fewer players and use of Bots are covered by the Playbook and associated Player Aids.
8.1 Initial Situation Deck Construction Procedure
To play the historical game, use only the cards from the A deck in numerical order.
For more variability, you can use more than one deck, still played in numerical order. Every turn you shuffle the cards for that turn and draw one at random.
EXAMPLE (Deck Selection): Players have chosen to play with all three decks. For Turn 1, they place the first card from each deck (A-1, B-1, and C-1) in a pile, mix them up, and draw one at random to play. The other two cards are removed from the game.
On the next turn, they will place the second card from each deck in a pile and repeat the process.
Using multiple decks will result in a game of exciting shifting play balance on a turn-by-turn basis; the B deck favors the Allied Coalition (inside a red rounded rectangle) while the C deck provides advantages to Imperial France (inside a blue rounded rectangle).
Players with varied experience and/or the desire for uncertainty can also choose to play an entire game with any one deck or various combinations of the three decks.
For shorter scenarios, remove cards from unplayed turns from the game; i.e., if the game starts on Turn 5, remove cards 1−4 from the A, B, and/or C decks before beginning play.
After you construct the deck, place it near the game board.
8.2 Game Length
The Full Campaign scenario of ten turns begins with March–April 1813 (Turn 1) and ends March–April 1814 (Turn 10)—unless there is an Early Triumph victory [14.0], which represents a Major Power imposing its military and political hegemony upon Europe.
Alternately, a Surrender of Napoleon [13.6.6] can result in a Campaign game of less than the maximum number of ten turns.
8.3 Army Set-Up
Place all Army blocks on each Track Front, and the specified units in each Army's Box (and the War of 1812 Box) as follows:
Front A: Central Europe
- RU Army of Silesia: Army block in Polesia + 3 Russian units
- AU Army of Bohemia: Army block in Vienna + 3 Austrian units
- FR Grande Armée: Army block in Poland + 1 French unit
Front B: Northern Front
- RU Northern Army: Army block in East Prussia + 3 Russian units + 1 Prussian unit
- FR Army of the Elbe: Army block in Prussia + 2 French units
Front C: Portugal
- BR Army of Portugal: Army block in Portugal + 4 British units + 2 Portuguese units + 2 Spanish units
- FR Army of Spain: Army block in Léon + 6 French units
Front D: Mediterranean Front
- BR Eastern Army: Army block in Southern Spain + 2 Spanish units + 1 British unit
- FR Army of Mediterranean: Army block in Valencia + 4 French units
Front E: Naples
- BR Army of Sicily: Army block in Sicily + 0 units
- FR Army of Naples: Army block in Naples + 1 French unit
Front F: Italy
- AU Army of Tyrol: Army block in Tyrol + 0 units
- FR Army of Italy: Army block in Venice + 1 French unit
Front G: War of 1812
- BR: 1 British fleet
All remaining units and fleets: Place these in their respective Major Power Force Pools.
Place the Armistice and Sweden at War Issues on their appropriate sides as shown below.
Now place the following pawns in their assigned Tracks:
- the red pawn and the green pawn in the Liberalism/Absolutism Track start space
- the purple pawn in the start space of the Pax Britannica Track
- the dark blue pawn in the "Emperor Napoleon Bonaparte" space on the Future Government of France Track
- the large gold pawn is set near the Negotiation Table. It will indicate the initial player during the Diplomacy Phase
- the French (blue) and Allied (red) small pawns by the DRM Track
For the first turn, place the four national VP markers as follows:
- The British and Austrian VP markers in the 5 space
- The Russian VP marker in the 10 space
- The French VP marker in the 60 space
PLAYER NOTE: This huge initial difference of VPs between France and the three other Major Powers is deliberate as, historically and in the game, the French player will lose many of these VP from spaces initially controlled throughout Europe. That VP total declines with French losses of territory, battlefield defeats, and other factors. This, therefore, compels aggressive Allied play to defeat and bring Napoleon down lest he win the game by simply retaining what France initially has. Yes, the pressure is on the Coalition Allies!
8.4 Leaders and the Game Deck
Deal the appropriate Leader card to each player, face-up, ready to be played during the Diplomacy Phase (or Napoleon during the War Phase, after Turn 1, should the French player so choose).
Give the Kutuzov card (#31) to the Russian player. (It is available to the Russian player each turn of the Full Campaign until Kutuzov dies.) Shuffle the remaining deck (65 cards) and place it next to the game board, accessible to the players.
8.5 Markers and Other Elements
Players take their national resource markers. The French player takes six, the British player five, and the Russian and Austrian players take three each.
Each player should create their own resource marker pool for their National Resource markers, additional Resource markers, and Military Support markers near their respective Force Pools.
Place the Turn marker in space 1 (March–April 1813) of the Turn Record Track.
Place the four Diplomacy Round markers (one for each Major Power) near the At Start spaces on the Diplomacy Round Record Tracks. The order of these markers will be determined during each turn's Initial Phase. The back of each Round marker indicates the respective VP gained by a player who wins the Diplomacy Phase [11.9].
Each player also takes a National Debate marker with its Major Power flag and places it on its space (to the left of the Liberalism/Absolutism Tracks) for future use.
Place the 30 Issues markers (diplomatic, military, and economic) in their corresponding Diplomacy Display spaces in the left center of the game board's Diplomacy Section. Most Issues are available for selection during the Diplomacy Phase of each game turn. There are six exceptions (Armistice-related) which are placed face-down in a special section of the Display with a light green border surrounding them.
Place the players' Hand Size markers on the Card Hand Size Track as follows: France, 15 space; Britain, 12 space; Austria, 11 space; and Russia 10 space.
Provide two dice in their Major Power national color to each player. Place the green and white octagons near the game board within easy reach of the Russian and Austrian players; these indicate control of the Generalissimo Issue when it is in play [12.4.7].
Place the French Pre-emptive Debate marker at space 0 on the French Debate Pre-Empts Used Track.
Place the War of 1812 Status marker at the zero space of the War of 1812 Status track [13.6.4].
The remaining markers and other game components are placed aside in case they are needed during play.
9.0 Sequence of Play
Each turn represents one or two months of 1813 or 1814. The number of turns in a game is dictated by the selected scenario. Each turn of the selected scenario or Full Campaign follows the same sequence of play, as described in detail below and outlined in the Player Aid Charts.
In the Playbook, you will find scenarios with changes to the Campaign Game that correspond to that specific version of the game [17.0].
Each turn has five phases which are executed in this order:
- Initial Phase [10.0]
- Diplomacy Phase [11.0]
- Government Phase [12.0]
- War Phase [13.0]
- End of Turn and Victory Check Phase [14.0]
10.0 Initial Phase
10.1 Initial Situation Card
An Initial Situation Card for the current turn is drawn from the deck at the beginning of each turn. Depending on how you set up the deck in step [8.1], this will be the first card from deck A, B, C, or randomly drawn.
Each card is divided into four bands with different national colors, each affecting one Major Power: green for Russia, white for Austria, red for Britain, and blue for France. These Initial Situation Mandatory Events are carried out sequentially from top to bottom (that is, first Russia, then Austria, then Britain, and lastly France).
The effects shown by the card attempt to represent the overarching situation during the campaign. Issue markers may be placed on the Negotiation Table or National Tracks as indicated by the Card. The card may dictate adding Character cards to a player's hand, provide DRMs to future battles, an effect to the Initial Environment Table's resolution and/or provide military reinforcements. Specifically:
- Any unit/fleet directed for placement is drawn from the indicated player's Force Pool. If a piece is unavailable, it cannot be taken.
- A drm to the Initial Environment Table's result(s) for this turn. The Table's results apply to all Major Powers.
- Any card(s) directed to be placed into a player's hand is in addition to their regular card draw [11.1] (e.g., Blücher for the Russian player in the first turn per card A-1). Ignore any instruction to place a card whose character has died during play; e.g., France's Duroc card.
- An Issue directed to be placed onto a player's National Track or the Negotiation Table is in addition to those selected in the subsequent Diplomacy Phase [11.2].
- Some card text may indicate Issue(s) which have already been played (e.g., Armistice). If so, ignore that effect. If not, the Issue is activated and fully in effect per the Initial Situation Card with its marker flipped to the appropriate side.
IMPORTANT: If, due to the current conditions, a Major Power's mandatory event cannot be carried out in full, they must follow instructions for those parts of it which can be done and ignore the rest.
EXAMPLE (Initial Situation 1): The current Initial Situation Card indicates that France must place 1 FR unit in Paris and place the "French Recruitment", "Sweden at War" and "Italy" Issues on the French National Track. If France had no units available, they would skip that portion and still place the three Issues as directed.
EXAMPLE (Initial Situation 2): The turn's Initial Situation Card places Blücher's card in the Russian player's hand. This is in addition to that player's regular card draw (e.g., 10 cards plus any for controlling card-related map spaces such as Prussia). It also indicates that, if Russia is selected by the Initial Environment Table, a re-roll is required. Furthermore, the Initial Situation Card enables a +1 drm for the first die roll using this Table. The first die is rolled and a "4" is obtained +1 drm=5. Russia is selected! The die must be re-rolled since Russia was selected. If a "5" is obtained + 1 drm=6; and France would now get an additional card. But as luck would have it, you again roll "4"+1 drm=5, which is the same as the first roll! Russia is selected and the Russian player gets an extra Russian Character card of choice in addition to the previously obtained Blücher card.
10.2 Initial Environment Table
Following the resolution of the turn's Initial Situation Card, roll two six-sided dice (one after the other) and consult the Initial Environment table. The first die result indicates the column used and the second die indicates the row used, which can be modified by instructions from the Initial Situation Card.
The 1st die roll indicates three different results:
- The name of a Major Power whose player then chooses an available Character Card of their Major Power (usually a high value card). The indicated player may go through the deck to select it. The Game Deck is then reshuffled. This additional card does not count against that player's regular card hand size, as indicated by their marker on the Card Hand Size Track.
The identity of the selected card is not revealed to the other players. (Each National Card has a color code in the upper right corner and a two-letter code of its Major Power to confirm a correct Major Power card has been selected should in-person players desire verification.)
In some cases, the Initial Situation Card indicates the need for a die re-roll when a particular condition is met. If so, then use the re-roll, adjusted if needed, to determine a result from that card. This applies even if the adjusted re-roll produces the same result as the first. That result must now be accepted. In other words, the re-rolled result prevails.
-
If the War of 1812 is still active, there is a number indicating how many US militia units are added to the War of 1812 Box for that turn. Occasionally, there may be US militia unit(s) already in the War of 1812 Box when this die roll is made. In that case, the units indicated by the Table are added to those already there to a maximum of seven. Once the Treaty of Ghent/Canada Annexed Issue occurs [13.6.4], the war is over and this result is then ignored for the remainder of the game.
-
A "Yes" or "No" indicates if a US Military Operation marker is placed in the War of 1812 Box for that turn [13.6.4]. If a US Military Operation marker is placed in this manner, neither the British nor French may place a Military Operation marker in the War of 1812 Box this turn.
The second die roll indicates the row used which is cross-referenced with the column from the first die roll. This result can add or remove a British Fleet, add or remove a British Resource, add a French Resource, or designates no effect.
This second die roll conveys the effects of the war at sea between France and Great Britain.
- If the result indicates that a British fleet must be added, it is taken from the British Force Pool and placed in London.
- If the result is that a British fleet is eliminated, the fleet is taken from any place on the military map (the British player decides) and placed in the British Force Pool. Should Britain not have any fleet on the map, this result is ignored.
- If a British resource is eliminated, a British resource marker is immediately flipped to its used side.
- If an extra resource is received, one available additional resource marker is added to the resource marker pool of the corresponding Major Power for that turn.
10.3 British Fleet Demobilization
Britain has the option to remove two or more fleets from anywhere on the Military Map and place them into the British Force Pool. For every two fleets removed this way, Britain receives either 1VP or 1 Resource, player's choice. This trade does not work in reverse—British VPs or resources cannot be exchanged for fleets.
10.4 Handicap Cards (Optional Rule)
If players have decided to use the Handicap card deck, one or more players draw one or more cards depending on player agreement before starting the scenario. The selected handicap cards will then be played during the current turn.
Alternatively, players may agree to let the Major Power with the lowest VP total select two Handicap cards and then choose one. The variations of these cards' use are entirely up to the players.
Once all effects of the Initial Situation Card, Initial Environment Table, and any Handicap cards have been applied, the Initial Phase concludes and the Diplomacy Phase begins.
11.0 Diplomacy Phase
The Diplomacy Phase is crucial to conducting a turn as everything the players do during this phase could affect the rest of the turn's phases (Government, War, and End of Turn and Victory Check Phases).
11.1 Shuffle the Game Deck and Deal Cards
Shuffle the draw pile and discard pile together to form a new draw pile and deal ten cards to each player.
Face-down Leader cards played during the previous turn are now turned face-up, ready to be played again.
11.1.1 Additional Cards
Players can receive additional cards, as follows:
- Certain map spaces contain card icons as a reminder that the designated Major Power controlling that space receives an additional card draw as indicated. See Control [13.5]. One player (FR or BR) receives a card when The War of 1812 ends [13.6.4.2 and 13.6.4.3].
- The Austrian player draws one additional card per turn until Austria enters the war. See Austria at War [12.4.2].
- The Russian player receives the Kutuzov card (#31) every turn if Kutuzov is still alive.
- The French player receives the Berthier card (#3) any turn in which the Grande Armée starts the turn in Paris [13.6.5].
PLAYER NOTE: Each Major Power's marker on the Card Hand Size Track indicates their total of the 10-card hand for each turn plus any additional cards awarded to them.
11.1.2 National Advantages
The French Debate Pre-Empts Used Track on the board's Diplomacy Section indicates the use(s) each turn of this pre-emptive debate ability. A marker is provided for this tracking purpose.
Each nation has its own advantage(s) during the Diplomacy Phase.
France, "Persuasion by Force": This advantage has three aspects:
- When the French player wishes to initiate a card trade [11.8], the Major Power player asked by France must accept an offered trade if they possess a French Character card. If more than one French card is available, the Allied player has the choice of which of their French cards to trade.
- Allied players have a −1 imposed upon their card's value in moving any Issue on or from the French Track during negotiation or debate [11.4 and 11.6]. This penalty (referred to as "stickiness" by playtesters) is always applied, even if the result of the played card does not allow the Issue to be completely removed from the French Track.
- Up to twice per Diplomacy Phase, the French player can debate [11.6] an Issue first, pre-empting the other Major Powers from declaring debate. This can be done even after another player declares a debate, but not after the debate effect has been executed. A French National Card (coded "FR") must be used by France for a pre-emptive debate.
Britain, "Arsenal of the Coalition": In any tiebreak situation during the Diplomacy Phase involving Britain, the British player wins. If Britain is not directly involved in the tiebreak situation, the British player determines which of the tied Major Powers wins. This includes determining the Wager and Diplomacy Phase winner.
Russia, "Imperial Staff": For the Initial Issues Selection Wager by the Russian Player [11.2], a Russian or Neutral card played by Russia has its value increased by +1.
Furthermore, if either Austria or Britain wins the Initial Issue Wager—even after a tiebreak determined by the British National Advantage—the Russian player may stop the action and substitute a higher-value Russian Character card (which will also include the Imperial Staff +1 Advantage) by replacing their previous bid card. If this new card has the highest wager value, Russia wins the Initial Issue Wager. The first bid card is returned to the Russian hand.
Austria, "Diplomacy First and Foremost": When used by the Austrian player in debate, Austrian or Neutral cards (excluding the Leader Metternich card) have +1 value. This is in addition to any other attribute(s) that the card indicates, to a maximum value of seven.
11.2 Issues Selection
Some Issues may already have been placed into play (on the Negotiation Table and/or the National Tracks) by the Initial Situation Card or by rule. The players will jointly select nine more Issues for potential negotiation/debate during the Diplomacy Phase, as follows:
- The Wager: Each player chooses one game card from their hand [11.1], considering only the card's numerical value. The selected card can be of any Major Power or neutral, it need not be the player's own. Any card text is ignored for this wager. The chosen card may not be the player's Leader card. Once selected, the card is placed face-down until all players have selected a card. Then players simultaneously reveal their cards.
REMINDER: The Russian player adds +1 due to their Imperial Staff bonus if their selected card is Russian or neutral.
- The player with the highest-value card selects an available Issue and places it on their National Track at a distance equal to the difference between the highest and lowest wagered cards.
EXAMPLE (Issue Selection): The winning player has a card with a value of 5, the lowest card value revealed is 2. The player with the highest-value card selects an available Issue and places it on their National Track at its 3-space.
- The cards used for the Wager are discarded.
- The Major Power to the left of the Wager Winner places their Round marker in the "At Start 1st Major Power" box. In clockwise order, the other Major Powers place their markers in the 2nd, 3rd, and 4th boxes so that the Wager Winner is the last to play in each Round.
- Starting with the 1st Major Power, each player selects two available Issues and places them in the center of the Negotiation Table. The wager winner will be the "4th Major Power" and selects the final two Issues for potential negotiation/debate during this turn's Diplomacy Phase (in addition to the Issue selected through winning the wager).
- Britain's Arsenal of the Coalition National Advantage applies in the case of a tie. If Britain is directly involved, the British player selects an available Issue. If not directly involved, the British player selects one of the tied players to select the Issue.
Issue Selection Exclusions: Until the Armistice Issue is in effect, Austria at War, Future Government of France, Generalissimo, both Austrian Military Operation, and Peace Congress cannot be selected.
The Treaty of Ghent/Canada Annexed Issue can only be selected when either the British or French player has previously achieved the mandatory requirement of the War of 1812 Status marker [12.4.1.3].
The winner of the wager will be the last to play in each of the six Diplomacy Rounds [11.3]. The wager winner may indicate their status by placing the large gold pawn near their Negotiation Track to reinforce the designated sequence.
11.3 Conduct Diplomacy Rounds
In clockwise order, the players conduct six Diplomacy Rounds. The Major Power to the left of the Wager Winner begins each Diplomacy Round.
The Diplomacy Phase's Rounds continue clockwise, one player at a time, until all four players finish that round. When the first round is over, a second round begins in the same manner and so on until six rounds have been completed.
During each Round, the player first moves their Round marker to the next Track box and then conducts one of three options:
- Play a card to negotiate an Issue [11.4 and 11.5]
- Pass, but only if the player debated at least one Issue during the prior Round [11.7]
- Trade a Character card with another Major Power [11.8]
11.4 Negotiating an Issue
If a player opts to negotiate, they select a card from their hand, reveal it, and then select an Issue marker on the Negotiation Table or on a Major Power's Track (including their own).
First, check if the revealed card contains any effects that must be executed (black diamond with its two-letter code, a white feather, and/or text that describes specific modifiers). If there are no indications for the player, the card's text is ignored and only its basic value is applied.
PLAYER NOTE: Don't forget to apply the French National Advantage of −1 if a non-French Major Power is moving an Issue on or from the French track [11.1.2].
The Issue must move towards their Track's Seat as many spaces as the card's value allows (using all applicable National bonuses and any penalties in the card's text), no more and no less. Then the card is placed face up atop the discard pile.
An Issue marker being moved from another player's National Track must pass through the center of the Negotiation Table to bring it closer to the moving player's own Seat. The center of the Negotiating Table counts as a space.
An Issue is always moved towards the player's own Seat when they play a card. It is not permitted to move an Issue from one opponent's track to the National Track of another opponent.
Following the negotiation play of an Issue, one other player can choose to debate that Issue. See "Debating an Issue" [11.6].
Some cards have a bonus indicated by a black circle with its national indicator when they are used for certain Issues. They award the player an additional resource that's placed near the player's Seat [12.2] or a unit that's placed per [12.6].
Certain Bonus cards may also modify a die roll during the Government Phase [12.4.5 and 12.4.11], award VP, or prevent another player from receiving VPs at the end of the turn. Use reminder markers to remember these effects. When this capability is used, flip the Character marker to its "Reserved" side and place it near the appropriate Track or affected military map space/Box.
"Locking" an Issue: If an Issue reaches a Track's Seat (seventh space) or more after accounting for any declared debate [11.6], it is considered "secured" by the owning player and can no longer be negotiated in future rounds during this turn.
PLAYER NOTE: The Issue will be available for negotiation again on the next turn (provided it is not removed from play) but is secured for the remaining rounds of this current turn.
EXAMPLE (Locking an Issue): The Generalissimo Issue marker is in the 4-space of the Russian National Track. The Russian player plays a 5-card value to move the Issue further along their Track. Counting five spaces from the 4-space adds up to a total of 9, which is two spaces "beyond" the Russian Seat. If nobody debates, that Issue is won by the Russian player and can no longer be negotiated during the current turn's Diplomacy Phase. However, if any player debates it, this will count from an imaginary 9-space. That imaginary 9 space only exists for this instant purpose. Ignore it once the opportunity for debate passes (since it will be "locked").
EXCEPTION: Only the Armistice Issue allows the option of reducing the value of a played card to end that Issue's movement on the Negotiation Table (to enable implementation of the Armistice), thereby ignoring the rest of the played card's point value.
The Armistice Issue will ONLY take effect if it is in the center Negotiation Table space and not on any National Track. If on a National Track at the end of a turn, the Issue will be won and must be paid for with a resource but cannot be activated.
If the value of the card is higher than the number of remaining spaces to the player's Seat, count those spaces as if there were additional boxes on the track. The number of this final "box" is relevant only if the Issue is debated this turn by another player.
11.5 Negotiating/Debating Issues with a Leader Card
In addition to the regular hand of cards, each player has their Major Power's Leader card available for play at the start of each turn's Diplomacy Phase (unless prevented by the text of the current Initial Situation Card or a Handicap Card).
REMINDER: France can pre-emptively debate using its National Advantage up to two times during the current Diplomacy Phase, ignoring the usual clockwise player sequence.
- A player may use their Leader card instead of playing a game card from their hand to either negotiate or debate an Issue.
- To enable the Leader's use, the player must discard one card of choice from their hand when they play the Leader.
IMPORTANT: A Leader can only be debated by another Leader.
- Once the Leader card is played, it becomes unavailable during the rest of the current turn. Flip the card over to indicate it has been used for the turn and place it near you on the table.
NOTE: Napoleon is the game's sole Leader who is both a Diplomacy and Military Character. If Napoleon is used during the Diplomacy Phase, he cannot be used as a Military card for the current turn's subsequent War Phase [13.0].
"The Meddling Tsar" Rule: The Russian Tsar Alexander Leader inflicts a −2 DRM on all battles involving one or more Russian units during the upcoming War Phase if he is used during the Diplomacy Phase for the British Financial Aid, Liberalism/Absolutism, or Generalissimo Issues as indicated on the Russian Leader's card.
11.6 Debating an Issue
One player may debate the Issue just negotiated [11.4]. This is an immediate negotiation played against an opponent who just moved an Issue involving one or more National Tracks and/or the Negotiating Table.
The opportunity to debate is available in clockwise Major Power order from the player who conducted the negotiation (e.g., if Britain plays a card to negotiate an Issue, Austria will have the first option to debate). The first player to declare a debate when the choice comes to them ends this process as only one debate per Issue is allowed.
If a debate is declared, that player debates the Issue by playing a card (with all attributes) to move the Issue back towards their National Track Seat.
EXAMPLE (Debating an Issue): The negotiating player would have just moved the Issue marker. The debating player then moves that Issue back from its current position towards their own Seat based on the value of the card used for debate including all that card's relevant attributes and, if applicable, the French and/or Austrian National Advantages [11.1.2].
REMINDER: The Armistice card may stop on the Negotiation Table and forego any remaining point value.
Record the debate by placing that Major Power's Debate marker from its holding space near the Diplomacy Round Tracks and place it on the debating Major Power's next Round Box. This indicates a Pass option is available to that Major Power during the upcoming Round [11.7].
After resolution of the debate, the played card is placed in the discard pile. Exception: see Leaders [11.5].
IMPORTANT: Each negotiated Issue can only be debated by a single Major Power player and a debate cannot be "counter-debated."
11.7 The Pass Option
Debating an Issue allows a player the option to Pass on the following Round instead of negotiating or trading.
If a player's Debate marker is in the current round box of the Diplomacy Round Track at the start of their turn during a Diplomacy Round, they may elect to negotiate, trade, or pass and take no action. No matter which option is selected, their Debate marker is returned to its holding space.
If a player starts their turn with no cards available to play, they must automatically pass even if they did not debate in the prior Round.
PLAYER NOTE: When it is your turn during a Diplomacy Round, unless you make a successful trade or have ability to pass (lacking any game card in hand or due to debating earlier that Round), YOU MUST NEGOTIATE AN ISSUE. This could force you to play a Military card that you would otherwise choose to save for the War Phase.
11.8 Trade Character Cards between Players
On their turn, a player may decide to offer a Character card trade with another player instead of negotiating an Issue or passing.
- When offering a trade, the player must offer a card of the other player's Nationality. Neutral cards may not be traded.
- A player may declare a card "attractive" to the other player, but no specific card identity information may be provided except showing the card's Major Power identifier in the upper right corner.
- If the trade is accepted, the two players must each turn a card of the appropriate Nationality from their hand face down and trade with the other.
- The trade may be rejected by the receiving player. If the receiving player does not have a card of the active player's Nationality, they must decline the trade.
- If the trade is declined for any reason, the active player must negotiate an Issue or pass if they are eligible to do so.
PLAYER NOTE: The definition of what constitutes an "attractive" or "valuable" card could cause potential dispute between players. To avoid this and govern what can and cannot be mentioned during trading, the players should decide before commencing play what type of statements should or should not be permitted. Remember: "It's your game!" Whatever is agreed to is fine and within the spirit of the design… forthright and devious diplomacy were the norm during the game's historical period. Nevertheless, a player can always trade a very different character card than the one "offered"… if it is of the correct nationality! Feel free to expose the card's upper right corner two-letter color-coded Major Power identifier, keeping the rest of the card covered, to prove that a legitimate character card is being traded… "trust but verify", eh?
France Making a Trade Offer Which Can't Be Refused: If the French player requests trading a card with another player, that player has no choice and is obligated to trade if they have a French card [11.1.2]. If that player has more than one French card to trade, it is the player's choice which card to provide France.
11.9 Winning the Diplomacy Phase
When six Rounds are completed, the Diplomacy Phase ends and the turn's Diplomacy Phase winner is determined.
Issue markers remaining anywhere within each National Track at the end of the Diplomacy Phase are counted as won and the player with the most Issues wins the Diplomacy Phase.
REMINDER: The British National Advantage determines the winner in ties [11.1.2].
Designate the winner by flipping that Major Power's Round marker to its "Diplomacy Phase Winner" side. Award 2VPs if the winner is Britain, Austria, or Russia; 4VPs if France. Move the appropriate player's VP marker on the Victory Point Track.
To further note the winner, move the gold pawn to the winning Major Power's National Track Seat to indicate that player shall have the advantage of going last during the turn's upcoming Phases.
EXCEPTION: Issues are considered "won" and are counted whether or not the player is able to activate the Issues with resources in the Government Phase that follows.
12.0 Government Phase
Following the conclusion of the Diplomacy Phase, it is time to make Resourcing decisions regarding the Issues each Major Power won. Beginning with the player to the left of the Diplomacy Phase Winner, each player decides which won Issues they want (or, in certain situations, are required) to finance (activate the Issue in CoV game parlance) from their available resources pool.
PLAYER NOTE: To save time and accelerate play, the Government Phase could be played by all players at the same time. However, we consider it desirable for beginner players to play this Phase sequentially. It will facilitate the appreciation of this aspect of the game.
12.1 Resources
The players receive a base number of resources each game turn. The Resource markers abstractly represent the economic, logistic, diplomatic, and material capacity of each Major Power.
| Major Power | Resources |
|---|---|
| Austria | 3 |
| Britain | 5 |
| France | 6 |
| Russia | 3 |
These can be adjusted due to the Initial Situation Card, Initial Environment Table, or through play of certain cards during the Diplomacy Phase.
Each player now takes the Resources for their Major Power from their resource marker pool and places them in a separate pile for use during the turn.
The available Resource markers of each Major Power are replenished as unspent Resources are returned to the resource marker pool at the end of each turn.
12.2 Additional Resource Markers
A player can obtain additional Resource markers as follows:
For each British Financial Aid Issue that another Major Power has won during the Diplomacy Phase, that player receives one British Resource marker from Britain's pool, which the other player can spend as if it were their own.
DESIGN NOTE: If France wins a British Financial Aid Issue, this means their strategy of breaking Britain's naval blockade has been successful this turn.
There are two British Financial Aid Issues available in the game. Consequently, the British player may be compelled to deliver up to two British resource markers to another Major Power player(s) during a turn.
If the British player wins their own Financial Aid Issue, there is no resource increase nor expenditure (although winning of a Financial Aid Issue is still calculated in determining the Diplomacy Phase winner).
Additional resources can be received, usable only during the current turn, due to the Initial Situation Card, Initial Environment Table, or through playing certain character cards during the Diplomacy Phase. For these reasons, additional Resource markers are provided for each Major Power.
DESIGN NOTE: Simply winning an Issue during the Diplomacy Phase is insufficient for implementing it. That takes allocation of 1 Resource each, i.e. the expenditure of a nation's treasure—or other forms of fungible wealth [12.1]. What is won must be paid for to be used! You can decide not to pay, of course, which means you don't gain the Issue's effects. Remember: Priority 1-4 Issues must be paid for!
12.3 Assignment of Resources
Issues won by a player during the Diplomacy Phase each require expenditure of a Resource marker to be activated [12.0].
Once a Resource marker is used, it is flipped to its "USED" side and returned to the player's resource marker pool at the end of the turn to show it is available next turn.
Beginning with the player to the left of the Diplomacy Phase winner, each player finances the Issues won (by expending a resource, and thereby, activating it) per the below priority constraints. Some Issues have a Roman numeral in the upper right corner of their markers to designate priority.
- First Priority: The British player for each British Financial Aid Issue won by other player(s) [12.2].
- Second Priority: In this order.
- Peace Congress [12.4.1.1]
- Armistice [12.4.1.2]
- Austria at War [12.4.2]
- Treaty of Ghent/Canada Annexed Issues [12.4.1.3]
- Sweden at War [12.4.3]
- Third Priority: The player's own Military Operation Issues [12.4.4], including any located on another Major Power's National Track.
- Fourth Priority: Absolutism/Liberalism Issue: a 1d6 roll is needed to determine a result [12.4.5].
- All Other Issues: Remaining Issues may then be activated at the player's discretion. The player can activate any of their remaining won Issues at the cost of a Resource marker for each.
REMINDER: Remember to fund Issues by Priority (including within a Priority, e.g., for 2nd Priority Issues, Peace Congress is funded first)! Any remaining Resources are used discretionally.
See the Quick Start Summary back page, Issues Resolution and Effects (Table I) for quick reference and convenience.
Issues with priority 1−4 must be financed if there are resources available. Then "All Other Issues" are financed at the player's discretion.
Issues won but not funded/activated do not occur! (They will be returned to the Diplomacy Display during step 14.3.)
After financing Priority Issues, the player decides which remaining non-Priority Issues they won will be financed (and activated) by their remaining Resources. This is wholly optional.
If a player still has unspent resources at the conclusion of Issues Resolution, they can use them to acquire Military Support markers [12.4.10], Sound Government [12.4.12], or a +1 drm per spent resource for a Liberalism/Absolutism, or the Pax Britannica (Britain only) die roll. Unspent resources are lost at the end of the turn.
12.4 Issues Resolution
12.4.1 Peace Issues
There are three Issues related to peace: Peace Congress, Armistice, and Treaty of Ghent/Canada Annexed.
12.4.1.1 Peace Congress Issue
This is an Issue marker displaying an olive branch and the text "Peace Congress". You cannot play this Issue until the Armistice between France and Russia is in effect. It is then available for the duration of the game.
DESIGN NOTE: Historically, all Peace Congresses before the end of the Napoleonic Campaigns depicted by CoV were fiascos. Winning this Issue therefore inflicts VP penalties on those Major Powers viewed as obstacles to peace. It also offers Austria a rationale to reprise its role, via play of its Metternich Leader card, as a "seeker of peace" … however hopeless that goal is or may seem.
The player who wins the Peace Congress Issue must always pay a resource to activate it (this Issue is the first Second Priority issue to be paid for). Following the allocation of that resource, the following VP effects are immediately applied:
- If Austria wins the Issue and the Metternich card was played for this Issue, the Austrian player immediately receives 1−3 VPs: roll 1d6 (halved, round any fraction up) to determine this VP bonus. Metternich has a reminder marker. Flip this marker as a VP reminder.
- −1 to −3 VPs for the player (or if tied, players) with the highest VP score at the start of the Government Phase: roll 1d6 (halved, round any fraction up: if VPs are tied, each player separately rolls 1d6) to determine this VP penalty.
- −1 to −3 VPs for the player who won the turn's Diplomacy Phase: roll 1d6 (halved, round any fraction up) to determine this VP penalty.
12.4.1.2 Armistice Issue
This is an Issue marker displaying an olive branch with the text "Armistice". This is a conditional Issue that, unlike the usual way of activating an Issue, must remain upon the Negotiation Table (not on a National Track) when the Diplomacy Phase ends in order for it to take effect. None of the Major Powers are required to expend a Resource to resolve/activate this Issue.
Should a player win this Issue through it remaining on their National Track instead of at the center of the Negotiation Table, that Major Power must pay a Resource for it as a Second Priority Issue, but the Armistice does not occur.
DESIGN NOTE: This represents that the player is making serious efforts to ensure the corresponding cessation of hostilities does not take place. In terms of the game, this is embodied by spending a Resource marker to win this Issue and prevent the Armistice that turn.
When the Armistice Issue is successfully implemented (the marker remains upon the Negotiation Table at the end of the Diplomacy Phase), flip the Armistice marker to its Armistice in Effect side and place it on the Diplomacy Phase. The Armistice marker is permanently removed from the game once Austria at War occurs.
The resolution of this Issue also makes available six Issues for play during future Diplomacy Phases:
- Peace Congress [12.4.1.1]
- Austria at War [12.4.2]
- Generalissimo [12.4.7]
- Future Government of France [12.4.8]
- both Austrian Military Operation [12.4.4] Issue markers
There are markers used for tracking the war's advance which are placed near the Generalissimo space (adjacent the Vienna space). No Military Operations can now occur between France and Russia until Austria enters the war through successful resolution of the Austria at War Issue [12.4.2]. However, the Russian and Austrian players must still, as usual, pay a Resource for each of their Military Operation markers regardless of their Diplomacy Track location.
DESIGN NOTE: France, of course, has other Fronts to conduct Military Operations in during the Armistice … not including Tracks A and B.
12.4.1.3 Treaty of Ghent/Canada Annexed Issue
This is an Issue marker with the flags of Britain and the text "Treaty of Ghent" on the front side, and the USA flag with the text "Canada Annexed" on the back.
The British player must win the Treaty of Ghent Issue to activate and earn its benefits per [12.4.1.3.1]. The marker's back side Canada Annexed Issue must be won by the French player acting on behalf of the United States to activate it per [12.4.1.3.2]. When the respective player wins it, they must pay a resource to activate the Issue. If any other player wins this Issue, they must also pay a resource but the Issue does not take effect [12.3].
When Treaty of Ghent or Canada Annexed occurs, the Issue marker is permanently removed from the game and the War of 1812 ends. The War of 1812 STATUS reminder marker is flipped to its ENDED side. For the effects resulting from this Issue's activation [13.6.4].
12.4.1.3.1 Treaty of Ghent Requirements
The War of 1812 Status Marker [13.6.4] must start the current game turn on the red +2 box of the War of 1812 Status Track for the Treaty of Ghent Issue to be available for selection by any Major Power from the Diplomacy Display for the upcoming turn's Diplomacy Phase.
12.4.1.3.2 Canada Annexed Requirements
The War of 1812 Status Marker [13.6.4] must start the current game turn on the blue +2 box of the War of 1812 Status Track for the Canada Annexed Issue to be available from the Diplomacy Display for selection by any Major Power during the upcoming turn's Diplomacy Phase.
12.4.2 Austria at War Issue
This is an Issue marker with the Austrian flag and text "Austria at War". This Issue cannot be played during the Diplomacy Phase until the Armistice Issue has been successfully resolved and the Armistice Marker is in the Diplomacy Display with its Armistice in Effect side face up.
Beginning the game turn after the Armistice Issue has occurred, the Austria at War Issue is automatically placed on the Negotiation Table (in addition to the usual nine Issues selected by the players) during all turns until the Austria at War Issue is activated.
Any player who wins the Austria at War Issue must pay a resource for it. Winning this Issue precipitates a fundamental decision which has important game repercussions depending on which player wins it.
- If the Russian or British player wins, Austria immediately enters the war.
- If the French player wins, Austria's entry into the war does not occur this turn, and the Austria at War Issue is returned to the Diplomacy Display for placement upon the Negotiation Table next turn.
- If the Austrian player wins the Issue, the player must decide whether to go to war immediately or postpone Austria's entry and return the Issue to the Diplomacy Display for placement upon the Negotiation Table next turn.
Austria's entry into the war immediately ends the Armistice between France and Russia, enabling both Austria and Russia to engage in battle with France (and vice versa) during the War Phase, including the current turn's War Phase if one or more of their Military Operations Issue markers were won and activated [12.4.4].
Once the Austria at War Issue occurs, Austria never returns to Neutrality. When Austria goes to war, the Austria at War marker is removed from the game.
When Austria joins the war, immediately place the Austrian Army of Bohemia in the same space as the Russian Army of Silesia on Track A. Henceforth, the Austrian player receives the same VPs as the Army of Silesia in all battles and vice versa [13.6.2].
Austria loses its one card bonus for being at peace, so decrease its Hand Size marker by one. Austria will no longer collect 2VPs during each turn for being at peace. France will now collect those points with Austria having entered the war [14.1].
12.4.3 Sweden at War Issue
This is an Issue marker displaying the flags of Sweden and Russia. It is available at the start of the game and, when activated, allows available Swedish units (three units) to join the Russian Northern Army on Front B.
If a player wins the Sweden at War Issue, they must pay a Resource for it because it is a Second Priority Issue.
- If the French player wins the Issue, it delays entry of Sweden into the war and the Sweden at War Issue marker is returned to the Diplomacy Display. It is available to be selected again during a future Diplomacy Phase.
- If the Russian, Austrian or British player wins the Issue, Sweden enters the war immediately and the Issue marker is permanently removed from the game. The three Swedish units are immediately added to Russia's Northern Army.
- If the Northern Army's units limit is exceeded as a result, any excess Russian unit(s), in any combination desired by the Russian player, can be moved to either the Russian Army of Silesia or the Russian Force Pool.
12.4.4 Military Operation Issues
There are two Military Operation Issue markers for each Major Power as well as one for the USA's potential use in The War of 1812 Box.
DESIGN NOTE: Since there are only two Military Operation markers per Power, these Issues are especially important for a beleaguered France, as they represent a deliberate resource limitation. France has many potential active military Fronts to vex it.
A Military Operation is a 3rd Priority in resource assignment. The player must spend a resource marker for each of their own Military Operation markers on any National Track. However, a Military Operation marker that remains on the Negotiation Table does not need to be paid for.
PLAYER NOTE: Remember that any Military Operation marker on a National Track must always be paid for by the marker's owning nation, which is not necessarily the player whose National Track the marker is on (e.g., a British Military Operation marker on the Austrian Track must still be paid for by the British player).
These markers are taken from the National Track and placed on the appropriate Capital of the map (Paris, St. Petersburg, Vienna, and London). They will be subsequently assigned to an available Army or Box (A-G) of that Major Power during the War Phase (13.1).
- An Austrian Military Operation marker cannot be selected by any player until the Armistice Issue takes effect and cannot be placed on the Military Map until the Austria at War Issue is resolved and Austria enters the war (which can occur earlier in the same Diplomacy Phase, allowing for an Austrian Military Operation placement during the current turn).
- One Russian Military Operation marker can be placed in The Russian-Persian War Box which is located near the Military Map's Track A Polesia space—see [13.1], Placing Military Operation Issue markers. As the marker's placement upon the board is decided by the player who won the Issue during the Diplomacy Phase [13.1], another Major Power could force the placement of their gained Russian Military Operation marker into The Russian-Persian War Box.
PLAYER NOTE: This forces the Russian player to "waste" a Resource as no VPs can be gained from a Russian Military Operation marker placed in the "Russian-Persian War" Box.
DESIGN NOTE: Historically, the "Russian-Persian War" lasted until the end of 1813; but it, or another similar foreign conflict, could have distracted Russia from its main effort against Napoleon. This represents a potential ongoing threat to Russia's interests during the entire period of the game.
- If a player does not have enough resources to pay for all their Military Operation markers that have been put into play during the Diplomacy Phase, they must first fund any placed on another player's National Track. An unpaid Military Operation marker is not activated and is returned to its space on the Diplomacy Display.
- Military Operation markers must be activated if the owning player has resources available, even if the marker cannot be used during the subsequent War Phase (e.g., when there is no Army/Box to legally place it in).
- If the Napoleon Leader is available for the War Phase, the French player receives an additional Military Operation marker for free during placement of Military Operation markers [13.1], directly from the Diplomacy Display or Negotiation Table, if one is available. This Military Operation marker does not cost a resource for the French player to place it on the Military Map.
12.4.5 Absolutism/Liberalism Issue
This is an Issue marker with the four Major Powers' flags upon it along with the text "Liberalism" on one side and "Absolutism" on the reverse.
A 4th Priority Issue, it affects the Major Powers in pairs: Absolutism for Russia and Austria, and Liberalism for France and Britain. Flip the Issue marker to its appropriate side for the National Track it occupies during the Diplomacy Phase.
The player who wins the Issue must spend a resource to activate it, attempting to move the appropriate green (Absolutism) or red (Liberalism) pawn along the Liberalism/Absolutism Track. Starting from the "At Start" position below the double tracks, each pawn has a track of three boxes leading to a fourth box providing potential bonus VP.
The player who wins and activates this Issue rolls 1d6. On a modified result of 4 or higher, they advance the pawn for their Major Power by one box. The 1d6 die roll can be modified by:
- Spending a Resource to gain +1; this must be done before the die roll is made. This may be done multiple times by either player of the pair whose pawn is being moved. This is in addition to the Resource that was spent to activate the Issue.
- Bonuses on cards played by either player of the pair during the current turn's Diplomacy Phase (Gentz, Stein, Gaudin, and Huskisson cards). When any of these cards are played, flip the associated marker and place it near the Liberalism/Absolutism Track as a reminder of its drm.
Therefore, any combination of three Resources and/or card bonuses would automatically advance the pawn on its Track.
Upon successful advance on or completion of an ideology track, both players of that ideology immediately receive the indicated VPs.
EXAMPLE (Issue Bonuses): Britain wins the Liberalism/Absolutism Issue and activates it by paying a resource. The red pawn for Britain/France is on the "Free Market" space of the Liberalism Track. Neither player of the pair pays resources or had played cards with bonuses, so the British player rolls and is fortunate to get a result of 5 on the die. The red pawn successfully advances into the "Democracy" space and both Britain and France each immediately receive 5 VPs as indicated.
Once either pawn enters the last box of its side of the track, the pair of players controlling that pawn have reached their "final status" which may influence game end VP scoring [14.2.1.1].
PLAYER NOTE: If both ideologies reach their final box on the track, the potential game-end bonus for successfully reaching the top of the track is lost to all four players.
12.4.6 European Minor Country Issues
There are eight Minor Countries in the game that influenced the course of events during this campaign, each of which is represented by a Minor Country Issue marker.
The lower part of each Minor Country marker has the Minor Country's name. At the top of each marker are two-letter codes and background colors to indicate the Major Powers who can obtain VPs from winning these Minor Country Issues during the Diplomacy Phase.
Regardless of two-letter Major Power coding, winning a Minor Country Issue counts in determining a Diplomacy Phase victor [11.9]: (e.g., Britain having the above-pictured Bavaria marker on its Track).
Victory Points for Winning a Minor Country Issue. If a player wins a Minor Country Issue related to their Power (two-letter code and national background color in the upper border of marker) and activates that Issue, the player gains 1VP. If the player does not spend a Resource to activate the Issue, no VP is awarded this turn for that Minor Country.
Troops (units) for Minor Countries: If a player activated a Minor Country Issue and the Minor Country space is under their control [13.5], that player also immediately receives a unit (if available) from their Force Pool and places it in their Capital. Russia may select either a Russian or Prussian unit.
EXAMPLE (Bonus & Neutrality): If Austria wins the Poland Issue after Russia removes French control from the Poland space on the Military Map, the Austrian player receives a unit for winning the Poland Issue even if Austria is neutral.
12.4.7 Generalissimo Issue
HISTORICAL NOTE: This Issue represents discussions between the Russian and Austrian Coalition allies about who would lead their armies in Central Europe during the campaign against Napoleon and Imperial France.
This is an Issue marker with the Russian and Austrian two-letter code and national background color in the upper part of the marker (if Austrian) or green (if Russian).
Generalissimo Award Situations: If either Russia or Austria wins the Issue and is not currently the Generalissimo, they become it by activating the Issue.
Once the Issue is activated for the first time, the Generalissimo HQ marker comes into play and is placed on Track A near the Armies of Bohemia and Silesia as a reminder of the Allied DRM in battles on Front A.
Should the British player win the Issue, Britain decides between the Russian or Austrian players who becomes Generalissimo if Britain activates it. Should Britain not spend a Resource after winning the Issue, the Generalissimo's current status carries over to the turn's War Phase.
Should the French player win the Issue and a Generalissimo is in play, if France activates the Issue, then the Generalissimo wooden piece is removed from the Military Map and there is no Generalissimo for the upcoming War Phase.
If the French player wins the Issue and no Generalissimo is in play, they need not pay a Resource. There will be no Generalissimo in play for the upcoming War Phase.
Generalissimo Perseverance: Control of the Generalissimo by Austria or Russia does not change from one turn to the next unless another player wins the Issue, activates it, and forces a change. If the Major Power already in control of the Generalissimo wins the Issue, they retain the marker and do not need to activate it as their control is automatic.
Whichever Power (AU or RU) controls the Generalissimo receives 1VP during the End of Turn and Victory Check Phase.
Three Generalissimo Battle Effects:
This is an Issue marker with the Russian and Austrian two-letter code and national background color in the upper part of the marker. Only the Russian or Austrian players can act as Generalissimo. Control may change throughout the game as Major Powers win the Issue, expend a Resource, and potentially institute a change.
The Generalissimo Issue cannot be played until the Armistice Issue [12.4.1.2] goes into effect. In addition to its Issue marker, the Generalissimo is represented by octagonal wooden pieces: white (if Austrian) or green (if Russian).
-
Battle DRM – Whether a Generalissimo is in play or not, the Generalissimo HQ marker is automatically placed with Track A's Armies of Silesia (Russian) and Bohemia (Austria). If the Generalissimo is under control of Russia or Austria with the marker face-up, the Allied Coalition players receive a +3 battle DRM bonus for any battle involving the two Track A Allied Armies. This marker is flipped to its reverse side when there is no Generalissimo. This is to note a −3 battle DRM penalty for Allied Armies in Front A, who are lacking a Generalissimo's unifying leadership.
-
Military Cards – Control of the Generalissimo allows the Russian and Austrian players to play any military cards containing the Generalissimo symbol (combined Russo/Austrian flags in an octagon) from their hand for Front Track A.
-
Military Operation Issue(s) – If the Allies wish to attack on Front Track A, only a single Military Operation Issue marker, either Russian or Austrian, is required to activate both Armies for the battle. For more regarding the military aspects of the Generalissimo Issue see [13.4.4] and [13.6.2].
12.4.8 Future Government of France Issue
HISTORICAL NOTE: This Issue represents negotiations between various Allied nations and French representatives. There were fiercely competing interests at work, all seeking favor to influence who should govern France once the conflict ended.
This Issue marker has the traditional fleur-de-lys coat of arms of France and the text "Future Govt. of France". It is only available for play after the Armistice Issue occurs [12.4.1.2].
The status of efforts to influence France's form of government after the war is marked by a dark blue pawn on the Future Government of France Track.
Once available following Armistice, the Future Government of France Issue may be selected by any player during the Diplomacy Phase.
If a player wins this Issue during the Diplomacy Phase, they may spend a resource to activate it and move the Track's pawn to a space adjacent to its current Track position towards their national flag final box. No die roll is involved.
Each space of the Future Government of France Track indicates the VP change effects upon placement of the pawn into that space. Once moved, all players immediately gain or lose the VPs indicated by the new space. The centrally placed "No Agreement" space is a single space containing four boxes with VP change information depending on which adjacent space the pawn was moved from.
EXAMPLE (No Agreement Space): Movement of the pawn from the "Austrian Regency" space into the "No Agreement" space triggers the VP adjustments indicated by the upper left corner of the "No Agreement" space.
If the pawn is in the "No Agreement" space, winning (and activating) the Future Government of France Issue allows the pawn to be moved into any of the four adjacent spaces by the winning Major Power (for example, the Russian player could move the pawn into the "King Jean III Bernadotte" space).
PLAYER NOTE: The four small boxes within the NO AGREEMENT box are not spaces. They are simply reminders of the adjustments to VPs depending on where the pawn moved from as it entered the NO AGREEMENT box.
EXAMPLE (Additional Issue Examples):
- The British player moves the pawn from Austria's "Austria Regency" back to the "No Agreement" space upon winning this Issue and paying a resource to activate it. All players immediately adjust their VP Track counters through reading the text in the "No Agreement" space near the white outlined colored Austrian "Austria Regency" adjacent space, that is: −5 VP to Austria; −4 VP to France and +2 VP each to Russia and Britain.
- In the next turn the Russian player wins the Future Government of France Issue, spends a resource, and moves the pawn to the green outlined "Russia" space. Players now receive the indicated VP in the Russian "King Jean III Bernadotte" space: France suffers a −2 VP loss; Britain and Austria gain +1 VP each, and Russia gains +5 VP.
12.4.9 Recruitment Issue
There are four Recruitment Issue markers, one for each Major Power, represented by their corresponding national symbol and two-letter code.
If a player wins their own Recruitment Issue, they may spend a resource to activate it and obtain their Issue marker to gain Recruitment Units [12.4.9.1] but lose 1VP.
There are exceptions to the 1VP loss:
- The Austrian player does not lose 1VP for this Issue until Austria enters the war.
- Once the Treaty of Ghent is in effect, the British player no longer loses 1VP for activating the British Recruitment. (Note that France still faces the VP penalty even if Canada Annexed is in effect.)
- France and Russia do not lose this 1VP while the Armistice is in force.
If a player wins another player's Recruitment Issue, it still counts in determining the Diplomacy Phase winner [11.9], but the Issue cannot be activated and no units are added to the Military Map.
12.4.9.1 Recruitment Units
A Major Power's Recruitment marker allows the owning player to select up to two pieces (wooden cubes and/or, for Britain only, a single fleet) of the player's choice if a choice is available after meeting all requirements.
British Recruitment: The British player chooses two pieces from their Force Pool: a British unit and their choice of a Spanish unit, Portuguese unit, or a British fleet.
Russian Recruitment: The Russian player may choose to receive one Prussian unit instead of a Russian one. A Swedish unit may not be taken as a Recruitment, even if Sweden has entered the war.
American Recruitment: The French player may decide not to obtain one of the French units and, instead, place a single light blue American militia unit into the War of 1812 Box.
Double Russian and French Recruitment: At the end of the Diplomacy Phase, France and Russia may optionally flip their Recruitment markers to their reverse "2x Recruit." sides to increase their Recruitment units available from two to four.
However, if this double Recruitment marker is used, it costs the loss of an additional 2VPs (so a loss of −3VPs in total) to activate by spending the usual one resource. This is independent of the current peace condition (e.g., this penalty is sustained during Armistice).
A 2x Recruit marker provides four units for the turn, instead of two. The restrictions and options listed above still apply.
12.4.9.2 Recruitment Placement
Recruitment units are placed in each Major Power's Capital space.
12.4.10 Military Support Markers
Once spending resources for Issues has concluded, Military Support markers may be purchased at the cost of one resource per marker. When acquired, a Military Support marker is initially placed in the Major Power's Capital space until it is deployed during the War Phase [13.2].
Once acquired, Military Support markers are placed on an Army (or in the War of 1812 Box) matching their depicted Major Power. All Military Support markers (used or unused) are returned at the End of Turn and Victory Check Phase.
DESIGN NOTE: A Military Support marker improves an Army's ability in both attack and defense. It simulates, among other things, providing Armies with sappers, entrenchments, additional artillery, elite units (e.g., guards, cavalry types, fusiliers, grenadiers, riflemen), military intelligence, and all manner of supplies and succor.
12.4.11 Pax Britannica
HISTORICAL NOTE: Through the Pax Britannica Track, Congress of Vienna's design reflects key historical aspects which shaped the political and economic world dominion achieved by Britain during the 19th century.
The Pax Britannica Track is a source of potential VPs solely for the British player. Its advances are represented in the game by a Track like that of Liberalism/Absolutism, but one whose pawn only the British player can advance.
Each turn, after Issues are resolved and before spending any Resources for Sound Government, the British player consults the Pax Britannica Track. If the prerequisite listed in the box to the right of the pawn's current position is met, they may roll 1d6 to determine this Track's result. If the indicated prerequisite(s) is not met, the die roll is forfeit.
If a die roll is permitted, a result of 4 or greater advances the pawn on the track and VPs are immediately awarded to the British player as noted in the pawn's new location. The pawn will not advance on a final die result less than 4.
The die roll may be modified by the British player (before rolling the die) by spending resource markers and/or British fleets, at a rate of +1 drm for each Resource spent or fleet removed from the Military Map to the British Force Pool.
Some British character cards also provide a +1 drm for the Pax Britannica die roll when played during the Diplomacy Phase. These include Baron Bexley, Liverpool, and Huskisson (who can alternately be used for a Liberalism Track drm). If so, place the appropriate "Reserved" marker on or near the Pax Britannica Track as a reminder of this upcoming drm.
Should a prerequisite status change after the pawn has advanced, the pawn is not moved backwards. However, it cannot advance further without the current prerequisite being fulfilled.
12.4.12 Sound Government
Once per turn, after Britain completes any movement on the Pax Britannica Track, each player may spend one resource marker to earn 1VP for Sound Government. This reflects that Major Power effectively focusing on internal improvements and concerns.
Each Major Power has a limited number of Military Support markers available: France 4, Russia 2, Austria 2, and Britain 3.
Each Military Support marker provides a +3 DRM in ONE battle [13.4.1]. Military Support markers may only be placed on an Army during the War Phase [13.2].
EXAMPLE (Pax Britannica): The Pax Britannica pawn advanced to its second box since the War of 1812 was going in Britain's favor while Secularization and Confiscation was not yet achieved on the Liberalism Track. In a later turn, the War of 1812 Track marker moves left of the British +1 space and the Liberalism Track condition had not changed. The Pax Britannica pawn does not retreat one space, but it cannot advance until one or the other prerequisite in its current space is met. Once the Pax Britannica pawn enters the last Track space, Britain has secured its goal: the domination of world trade through global economic hegemony.
12.5 Replacements
The Replacement step occurs every even numbered turn. These are indicated by a faint red band, and soldier silhouette with an "R" to its right on the Turn Record Track.
A Military Map space having replacement value is indicated by a soldier or ship symbol coded to its Major Power or minor ally. A Replacement Spaces Guide is provided for an easier search.
- Replacements are only received if the subject map space is controlled [13.5] by the corresponding Major Power.
- The Paris space is an exception. Even if occupied by one or more Allied armies, Paris is controlled by France for Replacement purposes until "Napoleon's Surrender" [13.6.6] or another form of game end.
- The Spanish Replacement unit is only taken while at least one French Army is in a space within Spain. This only applies to replacement(s) and not a Spanish unit received from another source (e.g., the British Recruitment Issue or card play).
DESIGN NOTE: The Spanish government, interested in retaining their rebellious colonies in the Americas, would not commit significant military resources to the war in Europe once Spain itself was liberated.
- Units are only received if there are enough of the appropriate units in the Major Power's Force Pool. Available replacements must be placed on the turn they are received or they are lost.
- Replacements and other new units/fleets will be placed in the following step.
12.6 Distribution of Units and Fleets
Once all units/fleet(s) have been received due to card play, a won and activated Recruitment, and/or Replacements, they are distributed between Major Powers' different Armies and/or the War of 1812 Box. Distribution is done in clockwise order beginning with the player to the left of the Diplomacy Phase winner.
- French units are placed in any of France's Armies.
- Austrian units are placed in either Austrian Army.
- Prussian and Russian units may be placed in either Russian Army.
- Spanish units may only be placed in Britain's Army of Portugal or the Eastern Army.
- Portuguese units may only be placed in the British Army of Portugal.
- British units are placed in any British Armies or the War of 1812 Box.
- British fleets are placed in the Royal Navy Reserve, Sicily space, and/or the War of 1812 Box.
- Swedish units can only be placed in Russia's Northern Army.
12.6.1 Limits of Units in Armies and Boxes
The number in the center of each Army Box's national symbol signifies the maximum number of units allowed in that Army. Squares or circled anchor symbols delineate limits for non-Army Boxes [12.6.2].
When a limit is achieved, no additional units may be added. Any excess units must be placed in another eligible Army/Box or back into their Force Pool.
DESIGN NOTE: The game's quantities of units were deliberately designed to make it impossible for Major Powers, e.g., Austria and Britain in particular, to have all Armies/Boxes at full strength. This compels players to prioritize where to dispatch their military strength.
12.6.2 British Fleets Limit
Three locations on the Military Map depict a maximum number of allowable fleets with circled anchor symbols. The War of 1812 Box holds up to four fleets, while the Scheldt space and the Sicily space may each hold up to three.
The Royal Navy Reserve space may hold an unlimited number of fleets.
12.7 Ending the Government Phase
Any Issues which are permanently resolved (such as Sweden at War) are flipped to their reverse side on the Diplomacy Display or removed from the game to indicate the Issue is no longer playable.
Any activated Military Operation and Military Support markers are maintained in or near each player's Capital, awaiting placement during the ensuing War Phase.
13.0 War Phase
The Military Operations and Battles are conducted via four steps using the preceding table's sequence of play:
- Placement of Military Operations
- Placing military support
- Strategic Movement
- Resolving Military Operations' Battles
The War Phase is started by the player sitting to the left of the Diplomacy Phase winner (as indicated by the gold pawn) and continues in clockwise order, with all players completing one Step before moving to the next Step (Steps 1-3), until the Strategic Movement is completed. Then, the Military Operations Battle sequences [13.4] are performed from Front A to G.
13.1 Placing Military Operation Markers (Step 1)
Players who won and activated Military Operation Issues this turn now place the associated markers with any Army/War of 1812 Box with at least one unit or fleet controlled by their Major Power except as noted below. Only one Military Operation marker may be placed per Army/Box.
When a Military Operation marker is placed next to its Major Power's Army block, it enables an attack with that Army that, if successful, allows that player to advance along a Front Track. An Army without a Military Operation marker may not advance, even if it defeats an enemy attack [13.4.5].
PLAYER'S AND DESIGN NOTE: Therefore, if you win your enemy's Military Operation marker, you must place it in an allowable space. However, that placement does not need to be optimal to your opponent (hint, hint). Furthermore, Russia and/or Austria may acquire Military Operation markers during Armistice in hopes of the Austria at War Issue being activated which allows Track A/Track B battles.
When a Military Operation marker is placed in the War of 1812 Box, it enables an attack in this war [13.6.4].
The US Military Operation marker may enter play because of the 1st die roll on the Initial Situation Table or through Britain's play of the James Gambier card. When obtained, this marker is always placed in the War of 1812 Box.
A French or British Military Operation marker may not be placed in the War of 1812 Box if the US Military Operation marker is present there.
If the US Military Operation marker is not present, either the French or British player may place a Military Operation marker in the War of 1812 Box.
Exceptions to placing Military Operation markers:
- The Russian-Persian War Box does not require the presence of unit(s) for placement of a Russian Military Operation.
- A British Military Operation in Sicily requires the presence of at least one British unit and one fleet, as well as all other prerequisites being met [13.6.3].
- The Generalissimo [12.4.7] allows placement of an Austrian or a Russian Military Operation marker to enable both the Armies of Silesia and Bohemia to attack together [13.6.2].
- The French player can never place a Military Operation marker to attack Sicily from Naples.
- While the Armistice is in effect, no Military Operation can be placed that would result in a battle in or against Austrian and/or Russian Armies (Front A, Front B and/or Front F).
13.2 Placing Military Support Markers (Step 2)
In turn order, each Major Power places any Military Support markers acquired during the current turn [12.4.10].
Up to one Military Support marker may be placed in any space containing your Army or in the War of 1812 Box, whether it contains a Military Operation marker or not. The War of 1812 Box can hold two Military Support markers—one for the British and one for the French.
When the Napoleon card is saved for use during the War Phase, France may assign up to two Military Support markers to the Grande Armée.
If any Military Support marker(s) cannot be placed due to the preceding described restrictions, the marker(s), as well as the Resource(s) previously spent to activate, are lost for that turn.
13.3 Strategic Movement (Step 3)
In turn order, Players may move up to two of its units from their capital to their Armies, or between its different Armies, subject to their limitations [12.6.1]. These two units can be sent to a single Army or one unit each to two different Armies.
In addition to moving up to two of its units, Britain may also move any number of its fleets on the Military Map.
At the conclusion of Strategic Movement, no Army may have more than its indicated limit and each Army must still contain a minimum of one unit.
Strategic Movement cannot be used to strip the last unit/fleet from an Army nor to void an amphibious attack (e.g., removing the last British fleet needed to attack Naples from Sicily once a British Military Operation marker is placed there).
If saved during the Diplomacy Phase, the French Military card Berthier can be used for one or both War Phase effects: moving additional units during Strategic Movement and/or +2DRM and choice of dice rolls in battle [13.4.3].
13.4 Military Operations and Battles (Step 4)
Military Operations are performed in order from Front A to Front G (the War of 1812 Box). At least one Military Operation marker must be present in an Army or Box to activate that Front/Box for battle.
- If only one side has any Military Operation marker(s), they are the attacker, and the other side is the defender. The terrain in the defender's space is used for battle DRM effects, if any.
- If both sides have Military Operation markers, they are both simultaneously attacker and defender. The battle must use all appropriate terrain and other DRMs for both spaces. However, the same DRM is only applied once per side (e.g., Homeland or Guerrilla bonus).
- If no defenders are present (no unit or fleet to oppose the attacker), the attacking side automatically wins: go directly to Step E [13.4.5].
Battle resolution is performed following Steps A–F in order and conducting all applicable steps.
Before applying any modifiers, check for the following situations:
- If an Army has no units within it at a battle's commencement, it immediately retreats and the attacker is automatically considered the winner and advances into the vacated space. Skip the rest of the battle sequence for this Front/Box and proceed to [13.4.5].
- If the French player attacks the War of 1812 Box without a single British unit/fleet present to defend, the French player is immediately declared the winner. Shift the War of 1812 Status Track marker one box to the left. Skip the rest of the battle sequence for this box and proceed to [13.6.4.1].
If neither of the preceding situations apply, then continue with Battle Step A.
13.4.1 Battle Step A: Calculate Each Side's Initial Battle DRM
A battle is resolved by applying different cumulative dice roll modifiers, expressed as DRMs, for each Army/Box of the engaged sides.
Using the blue (France) and red (Allies) pawns on the Battle DRM Track at the bottom of the Military Map, players tabulate their DRM totals and 2d6 rolls for each battle to determine the outcome and any resulting casualties (units lost). Both pawns start in the zero spaces of the track in the inner row matching their color.
Both players independently calculate their battle DRM totals by adding and/or subtracting the following modifiers and bonuses in order and adjusting their pawn's location on the track accordingly:
a. Add the number of your units (and fleets for the War of 1812 Box and amphibious landing) in the Army/Box at the start of the battle.
b. +3DRM for each of your Military Support markers placed with the corresponding Army/Box.
c. −3 DRM for RU/AU if the Army of Bohemia and Army of Silesia occupy the same Front A space without a Generalissimo.
d. +3 DRM for RU/AU if either Russia or Austria is the Generalissimo.
e. Homeland Bonus:
- +3DRM for French units fighting in France (spaces designated with an "FR").
- +3DRM for the Coalition if no other Allied nation has more units than the Homeland nation's.
EXAMPLE (Homeland Bonus): The Northern Army with a majority of Russian units is engaged in battle in Prussia. This army does not receive the +3 DRM since Prussia (PR) does not field as many units as Russia (RU). However, if the Northern Army consists of 4 Prussian, 2 Russian and 2 Swedish units, then the +3 DRM for Homeland applies. It would even receive this bonus with only 2 Prussian units.
Homeland Bonus Exceptions:
- British Armies in Spain or Portugal spaces do not receive the Homeland Bonus (see Guerilla Bonus below).
- The Homeland Bonus does not apply if a battle takes place within a controlled Minor Country (e.g., Bavaria, even if France won it during the preceding Diplomacy Phase).
- The Americans and the British do not receive a Homeland Bonus in the War of 1812 Box.
f. −3 DRM for a British attacker involved in an amphibious landing [13.6.3].
g. −3 DRM for an attacker when the defender is located within a mountain space (e.g., Alsace).
h. +3 DRM Guerilla Bonus for British Armies when a battle is fought in a space in Spain (SP) or Portugal (PT). This +3 DRM Guerilla Bonus is received regardless of a British Army's unit national composition.
i. ± DRM as indicated by some Initial Situation cards and the Meddling Tsar Rule for Russia [11.5].
13.4.2 Battle Step B: Withdrawal and DRM Adjustment
DESIGN NOTE: This procedure allows for strategic retreats. Such withdrawals could and did involve losses (sometimes considerable losses) due to attrition, desertions, rear guard actions, etc.
After calculating the Initial Battle DRMs, one eligible Army may choose to Withdraw from battle beginning with the French player.
The following cannot Withdraw:
- Any Allied Army in its Front Start Space (e.g., Front B's Lithuania for the Russian Northern Army).
- The Grande Armée in Paris.
- Allied Armies in spaces next to Paris (e.g., Track B's Belgium space).
- Either side in The War of 1812 Box.
A withdrawal can potentially reduce unit losses by avoiding a full-out battle and instead fighting a rearguard action while retiring from the current space one space backwards along the Front Track.
A battle fought with the Withdrawing Army uses a negative DRM that potentially mitigates losses to both Armies. Apply a -6 DRM to both the attacking and defending Armies.
PLAYER NOTE: On Front A, this −6 DRM is applied only once to the two Allied Armies (not twice, due to the presence of both the Army of Bohemia and Army of Silesia).
At the end of battle, if the defending Army withdrew, it must retreat one space backwards.
If the withdrawing Army was the attacker and the defending Army does not have a Military Operation marker placed on it from Step 1 of the War Phase [13.1], the attacking Army remains in its starting space. However, if both Armies have Military Operation markers, then the withdrawing Army must retreat one space backwards.
Then, if a Military Operation marker was placed on the non-withdrawing Army during the War Phase Step 1, that Army must advance into the vacated battle space regardless of the casualties incurred from the battle.
PLAYER AND DESIGN NOTE: Even an attacking Army may choose to withdraw. If the defending Army does not have a Military Operation marker, the attacking Army remains in its starting space. However, when both sides have Military Operation markers, the withdrawing Army must abandon its starting space.
The Military cards of Napoleon, Kutuzov and Blücher earn 1VP each when the opposing Army elects to Withdraw and any of these cards is used in the battle [13.4.3].
EXAMPLE OF A BATTLE RESOLUTION: The British Army of Portugal (8 units) in the Portugal space faces France's Army of Spain (7 units) defending the Leon space.
Diagram 1: There are two Military Operation markers (Issues won by the players during the previous Diplomacy Phase and paid for by a resource each during the turn's Government Phase, one from each side) while the Armies remain in their respective spaces. They are both simultaneously attacker and defender and must therefore use all appropriate terrain battle DRMs for this single battle.
Calculate initial Dice Roll Modifiers (DRM): The French Army has 7 units as its base force, so it places the blue DRM pawn on the +7 space of the blue Battle DRM Track. The French player has no more initial modifiers! The British Army has 8 units: 5 British, +2 Spanish, and +1 Portuguese, so they place the red DRM pawn at its Track's +8 space and then adds +3 for Spanish Guerrillas. The British player also receives another +3 DRM because they have a Military Support marker, which finally moves the pawn to the +14 Allied Battle DRM Track space.
Withdrawal: Neither Army chooses Withdrawal [13.4.2]; no DRM modifiers are applied for that.
Play Military cards and calculate final DRM: Both players secretly play Military game cards from their respective hands and reveal these cards at the same time. Once cards are revealed, the French player must first decide use of their cards' battle DRM modifiers followed by the British player, since this battle is fought in Allied Homeland spaces (Spain and Portugal). The British plays the Wellington and Castaños cards. The French plays the J. Bonaparte and military Event #65 cards.
The French Army now applies its card modifiers: +2 DRM for J. Bonaparte; +3 DRM for river crossing (#65 card). The French player prefers increasing the possibility of British losses more than minimizing their own potential losses, so they now have an additional +5 DRM. This moves the French Battle DRM Track pawn to its +12 space.
The British Army adds +4 for Wellington and +1 for Castaños. The British player also chooses the positive rather than negative modifier for Wellington's card since they prefer inflicting more French losses more than seeking a lower level of potential British losses. In this case, the British player finally moves the pawn to the +19 Allied Battle DRM Track space. Things are looking good for Wellington's Army!
13.4.3 Battle Step C: Military Cards/Final Battle DRM
Both players may now secretly select one or more eligible Military cards for placement face-down in front of them. When both have chosen at least one card or have declined to do so, the face-down cards are revealed.
A player may play an opposing side's military card if that card has a text block with its color (e.g., Britain playing the Joseph Bonaparte card [#2], so the French suffer its −4 battle DRM).
Many Military cards not only offer positive DRMs but also provide the choice of selecting negative DRMs for the enemy. Furthermore, there are cards which can only be used on a particular Front (or Fronts) and whose value can change before and after the Armistice.
PLAYER NOTE: Therefore, you should carefully read cards to determine their limitations, if any. How to best utilize them is highly situational. Keep in mind that positive modifiers increase the likelihood of inflicting casualties on the enemy while negative modifiers reduce your opponent's ability to inflict casualties on you.
Any applicable DRMs are applied to adjust the Battle DRM Track pawns as follows:
- If the French are attacking an Allied Homeland Space (including Prussian or Spanish spaces), the French player must decide first how to apply Military card DRMs. The Allies then decide on any Military card DRMs.
- In any other spaces and the War of 1812 Box, the Allies must decide first how to apply Military card DRMs. The French player then decides on any Military card DRMs.
- Finally, both players roll 2d6 and adjust their pawn by the result on the Battle DRM Track.
DESIGN NOTE: The Battle DRM Track is intended as a helpful mechanism to calculate both sides' DRM totals. When checking whether an Army meets the requirements to modify its dice roll (positive or negative), the pawns move to their required positions which, in the end, reveals each side's final DRM result. Since there are many potential battle modifiers, players are encouraged to use the Battle DRM Track to run this procedure.
Once a battle is resolved, determine if a subject Military Character card is "killed in action" and permanently removed from the game. Roll 1d6 for each such card. Remaining used game cards are placed on the discard pile. If played, the Napoleon Leader card is returned to the French player face-down for use in the next turn.
13.4.4 Battle Step D: Determine/Remove Battle Losses
The final position of the Tracks' pawns is referenced by the outer rows of each Battle DRM Track. The values shown in the outer rows adjacent to each pawn indicate any unit losses each Army inflicts upon its enemy for the current battle (from zero to a maximum of five). The side which inflicts more losses upon its opponent than it suffers itself is declared the battle victor.
EXAMPLE (Battle Losses): The French blue pawn is in the +20 space of its Track and the Allied red pawn is in the +24 space. For the French, the loss number is 2 and for the Allied player, the number is 3. For that reason, the French Army causes 2 unit losses to the Allies and the Allied Army inflicts 3 unit losses to the French Army. Since the French suffered more losses, this battle is an Allied victory!
The owning players simultaneously determine which of their units and/or fleets to eliminate to satisfy battle losses and move the pieces to their respective Force Pools.
EXAMPLE (Deciding Battle Losses): The Russian player determines which Russian, Prussian, and/or Swedish units are eliminated after a battle involving the Northern Army.
Losses on Front A: In Russian-Austrian battles in Central Europe Front A:
- The Generalissimo player decides the allocation of casualties inflicted by the French player.
- If there is no Generalissimo, the French player decides allocation of casualties to the Allied side between Austrian, Prussian and Russian units.
13.4.5 Battle Step E: Results of Battle (Advance/Retreat)
If one Army inflicts more casualties than its opponent and did not Withdraw from the battle, it is the winner.
If both Armies inflict the same number of casualties (or none) and neither Withdraw, the battle is a draw. The defending Army block remains in place, even if it no longer has any units.
After a battle is resolved, the Armies must advance and retreat as follows:
- If an Army with a Military Operation wins and did not Withdraw, the defeated Army must retreat from its occupied space into the next space immediately to its rear.
- The winning attacking Army must advance into the enemy's vacated space.
Exceptions to advancing:
- Allied Armies in their Front Start Spaces: do not retreat, and the attacking French Army remains in its original space;
- The Grande Armée in Paris;
- Units in the War of 1812 Box.
EXAMPLE (Grande Armée & Retreat): Defeated Allied armies battling against the Grande Armée in a space adjacent to Paris do not retreat [13.6.5].
- Allied Armies retreat toward their Home Front Start spaces.
- French Armies retreat towards Paris except Front D (Army of the Mediterranean) and Front E (Army of Naples), which have special rules [13.6.3].
- Canceling a Retreat: If the difference in battle losses is exactly one, an Army defending in a mountain space may cancel its retreat for the cost of one additional unit loss and at least one unit must remain in the defended space's Army after all lost units are removed. If a retreat is cancelled, the attacking Army must remain in its starting space. Reminder: This option cannot apply to a Withdrawing Army!
At the end of battle if any player has played a Character card which can be lost in battle, they roll 1d6 and on a result of 1 or 2 that card is removed from the game.
EXAMPLE (Canceling Retreat): The French Army of Spain, 7 units strong at the start of the battle, has been defeated defending the mountain space of Gascony sustaining a 3-unit loss while inflicting 2 Allied losses…a difference of one. It cancels its retreat by increasing its loss to 4 French units and 3 units remain holding the mountains. If the Army of Spain had commenced battle with only 3 units, it could not cancel its retreat.
13.4.6 Battle Step F: Major Battle and VP Effects
An engagement is considered a Major Battle if each Army has 4 or more units at the beginning of the battle and neither Withdrew.
EXCEPTION: If the Allied Armies of Silesia and Bohemia are engaged, they do not each need 4 units. If their combined units total at least 4, they qualify as a force adequate to fight a Major Battle.
No battles in The War of 1812 Box are considered a Major Battle, regardless of the number of units present.
A Major Battle victory awards 1VP to the winner and inflicts a −1VP loss to the loser.
If either the Army of Silesia or Army of Bohemia are engaged in battle, both Russia and Austria each incur a Major Battle's VP effects.
When the Napoleon card is used for a Major Battle, the award/penalty doubles to +/−2VPs. There is no VP penalty or award for Napoleon being used in a Minor Battle.
As each Front's battle is resolved, its Military Support markers are placed back near each player's Force Pool for potential reuse next turn and the Military Operation markers are returned to the Diplomacy Display.
Any purchased but unused Military Support markers in the Major Power's capital are placed near their Force Pool once all Front's battles are resolved.
13.5 Map Space VP and Control
A space is either under control of France or the Allies. See the Paris space exception [13.6.5].
When a space changes control as a result of battle, the player with the victorious Army must immediately gain the associated VPs and the defeated retreating Army's player must lose that same amount of VPs.
A space with a black VP number indicates the number of VPs gained/lost by Major Powers as control changes.
IMPORTANT: After Armistice, both the Austrian and Russian players control, and adjust VPs for, Central Europe Front A spaces with black VP numbers.
A space with a VP number in a Major Power's color provides VPs only to that Major Power. Loss of control of such a space inflicts a loss of the stated VPs to the associated Major Power.
EXAMPLE (VP Gains): Russia gains 4VPs when they capture the Silesia space and Russia loses 4VPs if a French attack advances into a formerly Russian-controlled Silesia. The French player does not gain 4VPs for the capture of Silesia, however, as the VPs are color-coded to Russia only.
13.6 Specific Military Operations
13.6.1 Advancing on Paired Fronts/Tracks
Front A (Central Europe) and Front B (Northern Europe) are paired, meaning Allied advance on Front A enables the Allies to engage in battles on Front B [13.6.1.1].
Similarly, Front C (Portugal) and Front D (Mediterranean) are also paired, with Allied advances in two spaces on Front D enabling the Allies to battle in two different spaces on Front C [see 13.6.1.2].
The pairing of spaces on these tracks are not reciprocal.
Neither of these pairings have any effect on France's ability to conduct battle on these Fronts.
If a Military Operation marker has been placed in any of these affected spaces, it must be paid for by the owning player with a resource. However, no battle will be carried out if the paired front prerequisite is not met at the instant of battle—see [13.6.1.4] for examples. These prerequisites are also stated on the military map.
If conditions change on a paired track after a space has changed control under legal conditions, the controlling Army does not retreat from the space as a consequence.
13.6.1.1 Paired Front Tracks A and B
The Russian player must control the space of Saxony to be able to attack the space of Hanover.
13.6.1.2 Paired Front Tracks C and D
The British player must have Valencia controlled to attack the space of Gascony and Catalonia must be controlled to attack Toulouse.
EXAMPLE (Control Does ≠ Battle): While control of Valencia by Britain on Front D allows the British player to battle in the Front C Gascony space, no prerequisite exists for them to battle in Valencia itself.
EXAMPLE (Military Operations Examples): Example 1: A Russian Track B Military Operation marker can be placed in Pomerania to attack Hanover in hopes that the preceding Allied attack on Track A's Saxony is successful. If that Track A attack fails to capture Saxony, however, the Track B Allied attack cannot be carried out.
13.6.1.3 The Eastern Army/The Army of Mediterranean
There are two cases when the British Eastern Army and the French Army of Mediterranean will leave play:
- When the British Army of Portugal enters the Toulouse space, all remaining units of the French Army of Mediterranean are immediately transferred to the Grande Armée. Units over the Grande Armée's 16-unit limit are returned to France's Force Pool. Then the British Eastern Army immediately transfers its units to the Army of Portugal. Units over the Army of Portugal's 10-unit limit are returned to Britain's Force Pool (the British player decides which units).
- If at any time the French Army of Mediterranean loses all its units, selects Withdrawal from the Pyrenees space to Toulouse during battle, or must retreat while defending the Pyrenees space, the Eastern Army's units are immediately transferred into the Army of Portugal as above.
13.6.1.4 Unusable Military Operations
A Military Operation marker must be paid for by the owning nation in all situations, even if it is on an opposing Major Power's National Track. This includes:
a. When Armistice is established, Military Operation markers must be paid for but cannot be placed in or against Austrian and/or Russian Armies.
b. Once the Armistice is in place, Russian and/or Austrian Military Operation Issue markers may be selected, negotiated, debated, and activated, but may only be placed if the Austria at War Issue is activated (an Allied gamble).
c. If the Northern Army's Military Operation marker is placed to attack into Hanover, Holland, or Belgium, and the Allies lose Saxony (a paired space) to a French counterattack, then the Northern Army's Military Operation marker can now no longer be used for a legal attack [13.6.1].
These Military Operation markers are returned to the Diplomacy Display when they cannot be legally utilized.
REMINDER: When both the Armies of Silesia and Bohemia are engaged in battle or a Withdrawal, both Allied players advance and retreat together, both gain and lose VPs for Major Battle victory or defeat, and both gain or lose VPs for control or loss of black VP indicated spaces. These VP rewards and penalties occur regardless of which players placed any Military Operation markers.
The Generalissimo allows Russia to play any designated Austrian military card(s) in Russia's hand for a battle on Front A and vice versa—see Generalissimo Battle Effects [12.4.7].
Example 2: A French-won British Military Operation marker cannot be placed with Britain's Army of Portugal to compel it to attack Track C's French Army of Spain in Toulouse before the Allies control Track D's Catalonia.
Example 3: If any player wins an Austrian and/or Russian Military Operation Issue during the Armistice, and it has not been made playable by the activation of the Austria at War Issue this turn, each Military Operation marker must still be paid for by the Russian and Austrian players. It is not placed on the Military Map, but instead is returned to the Diplomacy Display.
13.6.2 The Armies of Bohemia and Silesia
When Austria enters the war, the Austrian Army of Bohemia is immediately placed with the Russian Army of Silesia block wherever that Russian Army is located.
Both army blocks move, battle (in most cases), retreat, withdraw, and advance together for the remainder of the game.
If the Generalissimo is in play: There can never be more than one Allied Military Operation marker for the Front A (Central Europe). The Allied attack or defense receives +3 DRM HQ Generalissimo Military support [13.4.1.d].
Without a Generalissimo: Both Armies must place markers to attack: one Austrian Military Operation marker and one Russian Military Operation marker. The Allied attack or defense suffers a −3DRM penalty [13.4.1.c].
Lacking a Generalissimo, a separate Track A attack by either Power with its own Military Operation marker is permitted, but both Allied Powers will gain or lose VPs. Only the attacking Major Power suffers any unit losses and, if the attack is successful, both Allied Armies advance.
One Military Support marker for each Army (one Austrian and one Russian) can be placed with the two Armies when they share a Track A space.
13.6.3 Landings
The game presents the possibility for an amphibious landing by a British Army into Naples from the Sicily embarkation space. The following rules apply to an amphibious landing.
Requirements: At least one British fleet and one unit must be placed in an embarkation space for landing.
Other aspects of landings: The French player can never place a French Military Operation against an embarkation space.
The British player adds units and fleets together for landing battles [13.4.1.a].
A −3 DRM is applied for the attacking British in an amphibious landing [13.4.1.f].
Naples Prerequisite #1: Naples cannot be attacked by amphibious landing if Austria controls the Italy space as, in that case, Austria also controls Naples. (See Austrian Capture of Naples below.)
Naples Prerequisite #2: A British Military Operation marker is required to attack Naples even if there are no French units in Naples at the time.
The British landing is a success if the French Army of Naples retreats or elects to Withdraw from the space during battle, or if no French unit occupies Naples thereby forcing an automatic French retreat when the Army of Naples is attacked.
If the British do not succeed in landing, the British player retreats their Army to Sicily and may try again on ensuing turns to capture Naples.
In case of success, the British player places the Army of Sicily block in Naples. This space is now permanently free of French presence and the British player gains 3VPs. The British Army of Sicily cannot advance beyond Naples. All but one British unit within the Army and any fleets in the embarkation space may depart via normal Strategic Movement [13.3].
If the British control Naples, the French Army of Naples block is permanently removed from play. Its surviving units are immediately integrated into the Army of Italy. Place any excess units beyond the Army of Italy's capacity in France's Force Pool.
Austrian Capture of Naples: Austria gains 2VPs if it manages to control the Italy space before a successful British landing in Naples has occurred. Should Austria capture Italy, a British landing in Naples is no longer possible.
When Austria takes control of Italy, the French Army of Naples is permanently removed from play and its units immediately integrated into the French Army of Italy (place any excess units into France's Force Pool). It is therefore impossible for the French to recapture Naples once it is Allied controlled.
The British Army of Sicily remains on the map with its units/fleets available for Strategic Movement transfer to elsewhere on the map. A minimum of one unit must remain.
13.6.4 The War of 1812
The War of 1812 Box (Track/Box G) represents a conflict between Britain and the United States which occurred concurrently with the Napoleonic Wars.
The War of 1812 Box can hold a maximum of four British fleets, two British units (representing Canadian militia and regulars), seven US militia units, and only one Military Operation marker.
The French player, acting on behalf of the United States, controls US forces. US militia units are placed during the Initial Phase [10.2].
REMEMBER: One French unit (from the French Recruitment Issue's received units) may convert into a US militia unit each turn France wins and activates that Issue.
Battles are conducted in the War of 1812 Box if a Military Operation marker is present there during the War Phase.
The US Military Operation marker may enter play via a "6" result on the Initial Environment Table or through British play of the James Gambier card #23. When obtained, this US Military Operation marker is immediately placed in the War of 1812 Box.
If no US Military Operation marker is present in the box at the start of the War Phase, either the French player or British player may place a Military Operation marker there.
Neither player is allowed the Withdrawal option [13.4.2.d] nor Homeland bonus [13.4.1.e] when resolving a battle in the War of 1812 Box.
13.6.4.1 The War of 1812 Status
The War of 1812 Status marker indicates the relative difference in battles won by the French-played United States or Britain in the conflict, ranging from +2 US to +2 British.
The location of the Status marker indicates how many VPs are gained each turn by the prevailing Major Power.
At the conclusion of every battle in the War of 1812 Box, adjust the status marker one space in favor of the winner, if not a draw.
EXAMPLE (War of 1812 Status): The British player obtains a victory in a battle in America on Turn 1. The War of 1812 Status marker is moved into the British red +1 space (0+1=1). In Turn 2, the French player wins a battle to cancel the previous turn's British gain (1−1=0). In Turn 3, the French again get a victory and the status marker moves one space left into France's (the USA's) blue +1 space. At the end of each turn, Britain or France obtains the VPs indicated by the War of 1812 Status marker—see Updating VP Each Turn, the War of 1812 [14.1].
US Militia Demobilization: During the End of Turn and Victory Check Phase [14.3], US militia units are withdrawn from the War of 1812 Box as follows:
- If 1–2 US militia units remain, they are returned to the French Force Pool.
- If 3–4 US militia units remain, one stays in the War of 1812 Box and the rest are returned to the French Force Pool.
- If 5+ US militia units remain, two stay in the War of 1812 Box and the rest are returned to the French Force Pool.
DESIGN NOTE: Think of any remaining US units as the small American regular Army and/or representing a quantity of enthusiastic militia who re-enlist after enlistments expired.
13.6.4.2 The Treaty of Ghent
HISTORICAL NOTE: This is a diplomatic Issue to secure a negotiated peace between the United States and Great Britain to end the War of 1812.
The British player must win the Treaty of Ghent Issue and activate it by paying a resource to enact this treaty [12.4.1.3]. Any other player winning this Issue must pay a resource for it but the Treaty of Ghent does not occur.
IMPORTANT: Remember the precondition of gaining the +2 British VP Box for the War of 1812 Status track to enable playing the Treaty of Ghent Issue during the Diplomacy Phase [12.4.1.3.1]
Once the Treaty of Ghent Issue occurs, all British units in the War of 1812 Box can be redeployed by regular Strategic Movement to other British Armies and/or the Royal Navy Reserve and/or Sicily spaces (fleets).
The War of 1812 is now excluded from the War Phase and Initial Environment Table sequence. The Treaty of Ghent Issue is permanently removed. Flip the War of 1812 Status marker in the War of 1812 Status track to its "War of 1812 ENDED" side as reminder. The British player will receive 3VPs every turn for the rest of the game [14.1, fourth bullet] and no longer suffer a −1VP penalty for activating their Recruitment Issue. In addition, the British player receives an additional card each turn; advance the BR Card Hand Size marker one space on its track.
13.6.4.3 Canada Annexed
HISTORICAL NOTE: This is a diplomatic Issue to achieve the annexation of Canada as part of the United States and compel Britain to end the War of 1812 in abject shame and defeat.
The French player must win the Canada Annexed Issue and activate it by paying a resource. The US is considered to have conquered Canada. Any other player who wins this Issue must pay a resource for it but the Issue does not occur.
IMPORTANT: Remember the precondition of gaining the +2 French VP Box for the War of 1812 Status track to enable playing the Canada Annexed Issue during a Diplomacy Phase [12.4.1.3.2]
Once the Canada Annexed Issue occurs, the British player may no longer place any units/fleets into the War of 1812 Box as Canada is now part of the United States. Any British units remaining there are immediately sent to the British Force Pool. Any British fleets must move out of the War of 1812 Box by Strategic Movement (there's no sense keeping them there as the war is over).
The War of 1812 is now excluded from the War Phase and Initial Environment Table sequence. The Canada Annexed Issue is permanently removed. Flip the War of 1812 Status marker to its "War of 1812 ENDED" side as a reminder. The French player will receive 3VPs every turn for the rest of the game [14.1, fourth bullet]. In addition, the French player receives an additional card each turn; advance the FR Card Hand Size marker one space on its track.
13.6.5 Paris Space
HISTORICAL NOTE: The French capital of Paris is a map convergence point and the heart of the empire. These rules reflect the dire situation confronting Napoleon which includes a mix of military and political necessities imposed upon the emperor when enemy forces approach his capital.
Automatic Retreat of Grande Armée into Paris: When any French Army from Tracks B, C and/or F Withdraws or retreats into Paris, the Grande Armée, if not already in Paris, is immediately relocated to Paris. Both the Army of Bohemia and Army of Silesia are advanced to the Alsace space. Any Track A spaces abandoned by the French are now under Allied control with their VPs scored as if captured by the Allies through a Military Operations battle [13.5].
All other French Armies on the map which remain located outside Paris are unaffected by the Grande Armée's withdrawal into Paris.
Once the Grande Armée enters the Paris space, the following rules apply:
- The Grande Armée can never leave the Paris space for the remainder of the game.
- When the Grande Armée first enters Paris and is below its limit of units (16), it immediately absorbs any units in Paris up to that limit. Henceforth, any French units placed into Paris—after "Distribution of Units and Fleets" [12.6]—are immediately incorporated into the Grande Armée. Any units which the Grande Armée is unable to accept are placed into the French Force Pool. The French Army blocks for these units (incorporated or moved to the Force Pool) are removed from the game.
- The French player may not Strategically Move one or more units from the Grande Armée if it results in the Grande Armée having less than 4 units.
- Even if one or more Allied Armies are in Paris, always consider Paris as French-controlled until the Surrender of Napoleon [13.6.6] or another game-ending event occurs.
REMINDER: The French player receives the Berthier card (#3) on any turn in which the Grande Armée starts the turn in Paris.
In Paris, battles are resolved as follows:
- Allied Armies that are adjacent or otherwise attacking Paris resolve battles as normal and in Front order. This applies even to Allied Armies within the Paris space (e.g., an attack by the Armies of Silesia and Bohemia would be resolved before a Northern Army attack, even if all three Armies were within the Paris space. Remember, the Generalissimo's effects are only applied for Track A's two Allied Armies).
- An Allied Army adjacent to Paris may not elect to Withdraw and does not retreat, even when they lose a battle.
- An Allied Army (or the Armies of Bohemia and Silesia) that wins a battle against the Grande Armée in Paris, advances into Paris and coexists with the Grande Armée in this space together with any other eligible Allied Army. Paris is unique as the only space in which both French and Allied Armies may coexist.
- If the Grande Armée is reduced to less than four units while in Paris and France is not the game's VP leader, the Surrender of Napoleon [13.6.6] occurs.
- If the Grande Armée places a Military Operation marker to attack, the French player may choose which single Allied Front to attack in or adjacent to Paris. This includes choosing either the Army of Silesia or the Army of Bohemia if they are without the Generalissimo. If the Generalissimo is present, the two must be attacked as a combined single force.
PLAYER NOTE: In Paris, the Grande Armée can defend itself multiple times against attacks from numerous Fronts, but it may only attack one time using its own Military Operation marker.
- The French player may place one Military Support marker (two if Napoleon is available for the War Phase) on each Front. These markers must be assigned to a Front during the Placing Military Support Step of the War Phase.
- An Allied Army that loses a battle against the attacking Grande Armée in Paris retreats from Paris to the adjacent space on its lettered track (e.g., the Army of Tyrol goes back to Lyon on Track F). An Allied Army that loses an attack, wins, or draws a battle while it is in Paris remains in place.
- If Napoleon is available for a War Phase, his +6 DRM applies for every battle in Paris as he is in command of the Grande Armée. (This does not apply to Berthier, who can only be used for a single Paris battle if played during the War Phase). Napoleon's card is not retired to the discard pile between battle resolutions.
- The Grande Armée cannot take the Withdrawal option for a battle while it is in Paris.
13.6.6 Surrender of Napoleon
The instant the Grande Armée falls below four French units because of a battle in Paris and France is not the game's VP leader, the Surrender of Napoleon occurs, and the game is over at the end of that turn (even if the Grande Armée subsequently gets back to four or more units).
DESIGN NOTE: This signifies France's inability to fight Major Battles in the Paris space for a losing cause. Such a circumstance precipitates Napoleon's surrender (his abdication of the imperial throne).
The Allied Army(s) that produces this Surrender receives a 2VP bonus (in addition to any other battle and/or positional VP). If any other Allied army has an unresolved Military Operation adjacent to Paris, it will immediately advance into the Paris space unopposed without battle resolution.
IMPORTANT: Outside Paris, the Grande Armée can have less than four units without suffering the Surrender of Napoleon effect.
14.0 End of Turn and Victory Check Phase (Every Game Turn)
14.1 Updating VP Each Turn
At the end of every game turn, award End of Turn VP according to the following:
- If the Castile space (Track C) is:
- French-controlled, France receives 2VPs. This award can be negated by play of the Fernando VII card during the Diplomacy Phase.
- British-controlled, Britain receives 2VPs. This award can be negated by play of the Joseph Bonaparte card during the Diplomacy Phase.
PLAYER NOTE: As the preceding rules convey, once the Grande Armée becomes embedded and immobilized in Paris, the only way for the Allies to defeat it is to attrition it, thereby precipitating Napoleon's surrender and the end of game. The question is… will the Allies have sufficient time, units, and cards to accomplish this?
- If the Prussia space (Track B) is not controlled by the Allies, Russia loses 1VP. This is not noted on this Military Map space.
- Austria receives 2VPs if not at war. France receives 2VPs while Austria is at war.
- The War of 1812:
- Britain gains 3VPs if the Treaty of Ghent is in effect [13.6.4.2]. Britain gains 1 VP if the War of 1812 Status marker is in the red +1 box and 2 VP if it is in the red +2 box.
- France gains 3VPs if Canada Annexed is in effect [13.6.4.3]. France gains 1 VP if the War of 1812 Status marker is in the blue +1 box and 2 VP if it is in the blue +2 box.
- These War of 1812 Status Track VP awards can be negated by play of Andrew Jackson (to deny Britain VP) or Sherbrooke (to deny France VP), as indicated by their respective cards, if it is played during the Diplomacy Phase.
- The Russian or Austrian player who controls the Generalissimo receives 1VP.
- The first time that an Allied Army occupies a French (FR) Homeland space, the "Amour sacré de la Patrie" VP award to France occurs. Roll 1d6 and award France that many VPs. This is a once-per-game award.
- At the end of the game, Allied Powers with at least one Army in the Paris space receive 5VPs for each of their Armies in the Paris space (e.g., Russia would get 10VP if both its Army of Silesia and Northern Army were in the Paris space at the game end).
The minimum VP Track value for any player is 0 VP.
If a Major Power obtains more than 80 VP, flip its VP Track marker to the +80 VP side and place it accordingly (e.g., in the "3" space to indicate 83 VP).
14.2 Ending the Game
The game ends when:
- Early Triumph Victory: If any Major Power has 80 VP or more at the end of any game turn, it has achieved an Early Triumph victory. If more than one Power attains 80 VP or more, whichever has the higher VP total wins. If necessary, see tie breaker rule [14.2.2.b].
- Surrender of Napoleon: If Napoleon surrendered this turn [13.6.6], a victor is determined per [14.2.1] and [14.2.2].
- Final Turn: If this is the last turn of a scenario, a victor is determined per [14.2.1] and [14.2.2].
If the game has not ended, the next turn is played—see Continuing the Game [14.3].
14.2.1 Updating VP at Game End
In shorter scenarios, include any VP bonuses in the specific rules for that scenario. Otherwise, when a game ends for any reason other than an Early Triumph victory, the players add the following possible End of Game bonuses to their current VP markers:
14.2.1.1 Absolutism/Liberalism Goal Bonus
The bonus in the top space of the Absolutism or Liberalism track is awarded if one pawn has reached that location but the other has not. This bonus is not awarded if the game ends by Early Triumph.
a. Liberalism: Award an additional 5VPs each to France and Britain if their pawn occupies the "Liberalism/Democracy" box and their opponents' pawn does not occupy the "Absolutism/Holy Alliance" box.
b. Absolutism: Award an additional 3VPs each to Russia and Austria if their pawn occupies the "Absolutism/Holy Alliance" box and their opponents' pawn does not occupy the "Liberalism/Democracy" box.
14.2.1.2 Napoleon's Survival Bonus
a. If NO Allied Army is in Paris: If Napoleon has not surrendered [13.6.6] and no Allied Army is within the Paris space at game end, roll 2d6 (halve each die individually, round any fraction up, and add the two values together), and award the result to France (from 2–6 VP).
b. If at least one Allied Army is in Paris: If Napoleon has not surrendered [13.6.6] and at least one Allied Army is within Paris at game end, roll 1d6 (halved, round any fraction up) and award the result to France (from 1−3 VP).
14.2.1.3 For Surrender of Napoleon
Allied Powers receive 5VPs for each of their Armies in Paris.
REMINDER: This is in addition to the 2VPs bonus for the Allied Army(s) that produces this Surrender [see 13.6.6].
14.2.2 Determination of Game Winner other than an Early Triumph Victory
a. After totaling all Victory Points, the winner is the player with the most VP.
b. In case of VP tie, the winner is determined in the following order: France, Austria, Britain, and Russia. That is, Russia may never win a tie while France always does so.
14.3 Continuing the Game
If the game has not ended, set up for the next turn as follows:
- All Leader cards, including Russia's Kutuzov if he is alive, and France's Berthier if the Grande Armée is in Paris, are retained by their players.
- Any non-leader cards in players' hands are discarded.
- Conduct US Militia Demobilization in the War of 1812 Box [13.6.4.1].
- Any unspent Resource markers are returned to their available resources pool.
- The discard pile and any remaining unused cards in the current turn's deck and player's hands are consolidated and will be shuffled together to form a new draw deck at the beginning of the next turn.
REMINDER: Any cards permanently removed from the game should not be added back in; e.g., "dead characters" such as Duroc or Poniatowski.
- All Issues are returned to their spaces on the Diplomacy Display. The four Diplomacy Phase Round markers, Debate markers, any purchased but unused Military Support markers, and all "reminder" markers are returned to their locations, ready for commencement of the next turn.
With these last arrangements complete, the current turn ends, the game turn marker is advanced one space on the Turn Track, and the players start a new turn.
15.0 Optional Historical Rules (OHR)
Introduction & Design Note
Here we include rules created and played during development of Congress of Vienna. These are rules we did not want to include in the Standard Game, to make learning it easier, shorten playing time, and reduce the number of rules necessary to remember and apply. These are the game's Optional Historical Rules (OHR). Where applicable, these are appropriately referenced upon the gameboard. Several tables for these rules are located on the back of this rulebook.
If you want to add some complexity to the game, with more flavor and historical precision, and you don't mind extending the duration of play, you may use these additional rules (all or only some of them… the choice is yours). The goal is for everyone to have fun!
Each rule is rated per perceptions of the Congress of Vienna playtest team as to Pro Allied, Pro French, or Situational.
Additional OHR rules [15.6 through 15.17] can be located via the Congress of Vienna page on the GMT Website at www.gmtgames.com.
15.1 French Resource Reduction (Pro Allied)
When France loses control of Holland or Italy, its number of Resources is permanently reduced by one each. In both cases, a stack of coins symbol in these two spaces reminds players of this permanent reduction in French Resources.
DESIGNER'S NOTE: This Resource reduction is due to the loss of these wealthy spaces belonging to the French Empire but not necessarily an increase to the capturing Coalition nation (whose troops would loot such wealth and make it unavailable to a Major Power for game duration).
IMPORTANT: These two Resources are not received by any other player, nor can such a lost Resource be regained should France recapture its space (e.g., Italy). Place one of France's Resource markers, with its "USED" side up on the subject space as reminder.
15.2 Denmark / Norway Box (Pro Allied)
DESIGNER'S NOTE: This rule simulates the fighting between Danish forces (allies of France) along with the powerful French garrison of Hamburg commanded by Marshal Davout against Allied forces that besieged this fortress and tried to drive Denmark out of the war.
Loss of the Denmark/Norway Box costs France a −4VPs penalty and a source of potential Minor Country unit reinforcement when that Issue is won during a Diplomacy Phase. There is also the potential loss/gain of VP through battle.
Trigger to Occupy the Box: When the Northern Army takes control of the Hanover space after battle, the French player may immediately place part of their units from the Army of Elbe into the Denmark/Norway Box.
Military Operation markers cannot be placed in the Denmark/Norway Box if no enemy unit(s) are within the Box to make battle possible. Additionally, no more than one Military Operation marker may be placed within the Denmark/Norway Box.
A Major Battle in the Denmark/Norway Box occurs when there are at least 4 units on each side. The usual +1VP/−1VP result of a Major Battle victory applies.
Sequence: A battle in the Denmark/Norway Box is resolved after any Front B battle.
If, at the end of a battle:
- There are no French units remaining in the Denmark/Norway Box, Russia has just captured the Denmark/Norway Box and any Russian/Prussian/Swedish units within the Box may be immediately placed with the Northern Army. At least one Allied unit must remain behind as a garrison and to indicate Allied control of the Denmark/Norway Box.
- There is not at least one Allied unit remaining in the Box after a battle, the Russian player may immediately transfer any number of units from the Northern Army, regardless of its military map location, into the Denmark/Norway Box to re-engage the French.
Allied units in Denmark/Norway can be reinforced normally as any other Allied Army. The Box can receive reinforcements, replacements, and Strategic Movements can be made into it.
While France controls Hanover: French units in Denmark/Norway can be normally reinforced.
When France no longer controls Hanover: the Denmark/Norway Box can only be reinforced by Strategic Movement and/or when France gains the Norway Issue. French units may not leave the Box using Strategic Movement.
A mandatory Allied evacuation of the Denmark/Norway Box immediately occurs with French Reoccupation of the Hanover space. Should the Army of Elbe regain control of the Hanover space after Denmark/Norway has been captured by the Allies or is still being contested, the Russian player must immediately remove all their units from the Denmark/Norway Box and move them into the Northern Army. Any unit(s) which can't be absorbed by the Northern Army may be placed into the Army of Silesia instead. If no space exists within that Army, those units are placed into the Russian Force Pool.
The French player immediately gains 4VPs for the recovery of Denmark/Norway (had it been lost when Russia captured Hanover) and must immediately transfer all French units from Denmark/Norway Box into the Army of Elbe (or another French Army for any unit[s] that the Army of Elbe cannot accommodate). Once France has committed units to the Denmark/Norway Box, the Russian player may do the same with any of their Northern Army units.
The maximum number of units that may be placed in the Denmark/Norway Box: 6 Coalition units (which may be Russian, Prussian and/or Swedish) and 4 French units, as indicated by the boxes.
For purpose of Control (and the ability to receive a unit and 1VP for winning the Norway Issue during the Diplomacy Phase), France controls the Box until the Russian player seizes it. This replaces the standard game rule [12.4.6], which uses control of Hanover to determine eligibility to possibly receive the Norway Issue's unit.
If the French player decides not to place any of their Army of Elbe units into the Denmark/Norway Box, or all French units in the Box are eliminated in battle, and the Russian player dispatches/retains one Northern Army unit to serve as a garrison, then the French player immediately loses −4VPs for the loss of Denmark/Norway and this Box becomes controlled by Russia. However, the Norway Issue can still be played on ensuing turns.
In the Denmark/Norway Box, units may neither retreat nor advance. Whenever one of the players activates this Box with a Military Operation marker, no player is allowed the Withdrawal option.
Should the Northern Army regain the Hanover space, the potential struggle or abandonment of the Denmark/Norway Box is retriggered (see beginning of this rule).
If the Russian, Austrian, or British player wins the Sweden at War Issue [12.4.3], up to all 3 of its Swedish units are added to Russia's Northern Army or may go into the Denmark/Norway Box if at least 1 Russian or Prussian unit is already placed there (and there is space for them).
Denmark/Norway Box units are unaffected by the Grande Armée's withdrawal into Paris—see Withdrawal into Paris and Battle [13.6.5].
PLAYER'S NOTE: Whether diversion of French resources is worth preservation of France's 4VPs for Denmark/Norway is a difficult French player decision. Once the Denmark/Norway Box is lost to France, that portion of the board could become moot to Napoleon.
Scenarios Set-up: The Denmark/Norway Box is empty in all scenarios except for the "Desperate Times: The France Campaign 1814" scenario [17.5]. Add to the Denmark/Norway Box Set-Up for this scenario: 2 Russian, 3 Swedish, 1 Prussian, and 4 French units.
15.3 Landing in Holland (Pro Allied)
This OHR presents the possibility for amphibious landings by the British Army of Scheldt in Holland. Place this optional Army Block in the Scheldt Landing space until making a landing attempt in Holland. The maximum British strength in this space is 4 units and 3 fleets.
This landing can only take place when the French Army of Elbe occupies the Holland space. It cannot be undertaken once the Russian Northern Army captures Holland on its own.
DESIGN NOTE: This indicates that a key political prerequisite for such a British attack has been achieved. There is a narrow window of opportunity for this operation which the British player must keep aware of.
If conditions and requirements described for landing are met [13.6.3] when a Northern Europe Front B battle for Holland is ready to be resolved, the British player may announce this landing, if:
- A British Military Operation marker has been placed in the Army of Scheldt Landing space.
- The Russian player must have also placed a Military Operation marker with his Northern Army.
If this occurs, both Allied Armies attack together during a single battle resolution.
Should this be the case, the British fleet(s) and units of both Armies are added together and both players can use their Military cards for the battle as well as military support markers (French, Russian, and British). This attack by both armies still requires the Allies to suffer a −3DRM for their amphibious attack.
Should there be battle losses to the Allies, the French player decides which Coalition unit(s) to eliminate [13.4.4, second bullet].
Britain cannot go alone: The British player cannot "go it alone" in attacking the French Army of Elbe in Holland. Both Britain and Russia must attack Holland together, each with its own Military Operation marker. If the British player placed a British Military Operation marker but the Russian player decides not to place a Russian Military Operation marker to attack Holland, the British marker is lost and returned to the Diplomacy Display.
PLAYER'S NOTE: Therefore, a prudent British player will strive to ensure that Russia places its Military Operation marker(s) before they do to avoid potential betrayal (e.g., by Britain winning the turn's Diplomacy Phase).
Battle Results: The landing is deemed a success if the battle is an Allied victory or the French Army Withdraws. If this engagement is a Major Battle, France loses/receives 1VP and both Britain and Russia receive/lose 1VP each.
If an amphibious battle in Holland is unsuccessful for the Allies: the British and Russian players may try to capture Holland again on ensuing turns.
In the case of success, the British player places the Army of Scheldt in Holland and gains 3VPs. The Army of Scheldt can only advance into Holland and, having achieved the British goal, it may not attack from Holland into Belgium.
France Attacking British-held Holland: If the French player attacks the Allied Armies in Holland, both Allied Armies (Northern and Scheldt) units defend together, including any fleets. Both the British and Russian players must agree if a Withdrawal before battle is to be selected. If no agreement is reached, both Armies must battle.
Should France recapture Holland, the British lose −3VPs and the Scheldt landing may again be undertaken.
Scenario Set-up: For the "Desperate Times: The France Campaign 1814" [17.5] scenario, add the Army of Scheldt block with 1 British fleet in the Scheldt Landing space.
15.4 Sudden Death Time Limit
DESIGN NOTE: We have always disliked historical games that end on the same date they did historically. If a game is a simulation in which both characters and decisions, even random events, occur in a different way than the historical evolution, why not do the same with the end of the Napoleonic wars? This is what we propose with this Optional Historical Rule.
Before play begins, players can decide to adjust the timing of the end the game. Instead of the standard 10th turn (March–April 1814), the game end can be adjusted 1 turn earlier or extended to an 11th turn (May 1814), as such:
- Turn 9 game end: ignore the "Amour sacré de la Patrie" rule that awards VP to France [14.1, sixth bullet]. (Pro-French).
- Turn 11 game end: (Pro-Allied), add stipulations a–g below.
The Initial Situation Card for the 11th turn is printed on the back page of this rulebook:
a. Tsar Alexander's last thrust: Russia receives an additional Resource. Place the Future Government of France and one Russian Military Operation Issue at a distance of 1 on the Russian National Track. Draw the Blücher, Bernadotte, and Marmont cards into the Russian hand.
b. Metternich's last bid: Place the Peace Congress and Naples Issues at a distance of 1 on the Austrian National Track. Austria receives 1 additional Resource. Draw the Schwarzenberg, Trautmansdorff, and Gentz cards into the Austrian hand.
c. Rule Britannia: Britain receives 1 additional Resource. Place a British Military Operation Issue at a distance of 2 on the British National Track. Draw the Wellington, Talleyrand, and Gambier cards and place them in the British hand.
d. Desperate Game: Draw the Berthier, Soult, Davout, and Gaudin cards and place them into the French hand. Add 5VPs to the French player's total at the start of the 11th turn.
e. If The War of 1812 is still ongoing, and the War of 1812 Status marker is in either +2 space, place the Treaty of Ghent/Canada Annexed Issue on the Negotiation Table.
f. War Exhaustion: Each player draws 1 less card than indicated by their Major Power's Card Hand Size Track marker. This overrides the usual 10-card minimum hand draw rule.
g. The rest of CoV's rules remain the same, including the early ending of game by an 80VP or more Early Triumph or when the Surrender of Napoleon occurs.
PLAYER'S NOTE: Adding a turn to a campaign (or to the Campaign for France – 1814 Set-Up) can profoundly influence a game. This Optional Historical Rule can serve to balance a game with players of unequal experience.
15.5 The Tactical Battle Matrix (Balance Situational)
DESIGN NOTE: This rule is based on the tactical battle matrix of the excellent Avalon Hill games "1776" and "War and Peace" published in the distant years of 1974 and 1980 respectively. It does increase the amount of time needed for battle resolution. This OHR should only be used by experienced CoV players. However, it adds additional elements of fun, uncertainty, tactical flavor, and "fog of war" to resolving battles which players may enjoy.
This OHR adds a new modifier to battles based on a side's tactical choice—see Calculate Initial DRMs [13.4.1].
IMPORTANT: Never use this procedure when a player chooses to Withdraw from Battle, for the War of 1812 Box, or OHR [15.2] Denmark/Norway Box, if used.
The choice of Tactical Chits allows greater uncertainty and player interaction in battles.
a. Each side (Allied and French) secretly selects a single Tactical Chit: after Military cards have been played and resolved, but before Battle dice are rolled.
Once selected, the Allied and French markers are simultaneously revealed and a result determined by the Tactical Matrix for Battles table. This can be an additional DRM modifier for attacker and defender or another result.
b. Historical Tactical Deployment Preferences – Commanders' Battle Skills
DESIGN NOTE: The military cards have DRMs that synthesize army and corps commanders' military skills. Some high commanders such as Napoleon, Wellington, and Blücher have preferences and superior abilities when they adopt certain tactical choices.
As an addendum to the Tactical Matrix for Battle table, we added selected Battle DRM modifiers when particular commanders optionally use their "historically preferred" tactical deployment (see each general's preferred tactical deployment in the addendum). When one of these Military cards is used in a battle, include its tactical DRM as usual and then, if applicable, apply their preference result in addition to any DRM the matrix usually generates.
c. The Napoleon and Wellington Reselect Capacity
When the Napoleon or Wellington cards are used and employ their preferred tactic, once per battle either the French or British player may demand both sides reselect their Tactical Chits for the turn in secret.
DESIGN NOTE: Furthermore, in the case of the brilliantly adaptable commanders Napoleon and Wellington, under certain circumstances they can make both sides reselect new tactical chits if they do not like the initial pair of revealed tactics!
When either one of these Leaders demands a reselection, any original leader DRM bonuses are cancelled. The 2 originally-chosen chits are returned to their side's pool of 7 and a new Tactical Chit is selected for the battle, which could be the same chit as before.
The 2 replacement chits must be accepted and resolved by the Tactical Matrix for Battles table.
REMINDER: The previous Tactical Battle DRM for both players are disregarded and the new ones applied.
Other Tactical Battle Matrix Results
If an asterisk result of "No major victory/defeat" appears, it means regardless of the size of the Armies there is no VP gain or loss.
If the table shows a "No Battle" result in the Tactical Matrix, there will be no casualties nor VP award/loss for that battle; that battle does not occur.
IMPORTANT: Selecting a "Retreat" Tactical Chit does not result in the involved Army needing to actually Withdraw from its Space.
Additional OHR rules [15.6 through 15.17] can be located via the Congress of Vienna page on the GMT Website at www.gmtgames.com.