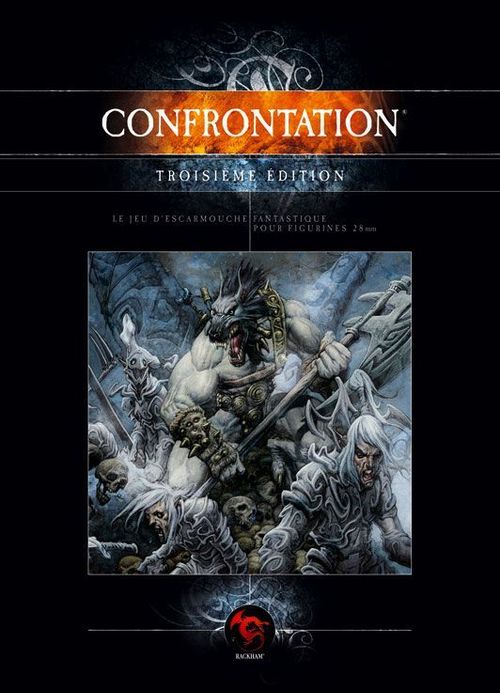
Confrontation
Confrontation Rulebook
Table of Contents
Table of Contents
1. Introduction
With this booklet in your hands, you have the complete rules of the miniatures game CONFRONTATION.
Almost everything you need to play CONFRONTATION is contained in one blister pack: the miniature at the standard scale, army cards, and the rulebook let you stage battles, ambushes, or duels of your own devising without much effort. You lead the armies of your people into fateful encounters on the battlefields of Aarklash; where armoured dwarves do not yield a foot of ground to hordes of the undead, where marauding goblin bands repeatedly plunder the settlements of the Kingdom of Alahan, or where the templars of the Griffin Empire proclaim their message to the heathen Wolfen people by fire and sword.
Even a handful of figures on the battlefield is enough to allow real tactics, and with every month the possibilities for varying your army's composition grow. New figures will appear at regular monthly intervals. Not only support for existing factions, but also new peoples are on the way. The barbarian Kelts of Avagddu or the Alchemists of Dirz will enrich the game as loyal allies or unpredictable enemies, populating the world of Aarklash.
Not least, the unpredictable powers of magic are also coming to Aarklash, so that from February 2001 shamans, sorcerers, and elementals will reinforce your army. Each of these blisters will contain, alongside the spellcasters' miniatures, all of their spells and curses, as well as the INCANTATION rulebook, which describes the magic system in detail.
Bit by bit, then, your army's fighting strength will grow, and you can decide from the very beginning which figures your troops are made up of. Factions can be assembled quickly and flexibly, and even small armies promise long-lasting fun, since interesting details can repeatedly lead to shifting and surprising tactics.
The INCARNATION rules, appearing in October 2001, can be worked into the existing rules without difficulty, while adding an exciting new element. It will become possible to develop individual characters, who play a very special role within your army, and to improve them in this way.
The only thing you need beyond the contents of a blister is a playing surface (about 60 x 60 cm) and a handful of six-sided dice. As soon as you have these two things available, you can begin playing CONFRONTATION without further ado.
The Cards
The game statistics of every figure are all found on one card, the so-called army card. Some figures also have additional cards describing, for example, magic artefacts, special items, or talismans.
Description of the Characteristics
The abilities of every figure are set out by its characteristics. Each main characteristic corresponds to a particular symbol.
The name shows which unit and which people the figure belongs to. Proper names always automatically apply the rules for personalities (characters).
Movement: Gives the distance in centimetres that a figure can be moved on the battlefield per round in standard situations.
Initiative: Stands for reflexes, speed of reaction. In a melee, the initiative value is used to determine who strikes first. The warrior with the higher initiative value has the better chance of being first to make an attack.
Attack: The first number sets the figure's weapon skill and degree of mastery of combat techniques. It is the melee skill. The higher the value, the more skilful and fearsome the fighter is when handling weapons. The second number stands for the strength of the attack. Muscle power and the ability to inflict serious or lesser wounds on the opponent are decisive here. Here too, higher is better.
Parry: The first value stands for evasion, warding off attacks, and the ability to use weapons and shields for defence. As with Attack: the higher the value, the easier it is for the figure to counter its opponents' blows. The second value is the resistance. It represents a figure's stamina and its ability to endure pain and injury without losing consciousness or dying.
Ranged Combat: The ability to use missile weapons (bows, muskets, etc.) and thrown weapons (spears, etc.). On some army cards no ranged combat skill appears, which simply means that the figure or unit has no missile weapons and therefore cannot shoot. The weapon used, the range of the shot (in cm), and its shooting strength are noted under "Equipment" on the army card.
Courage: Shows bravery and coolness under fire. It is the ability to withstand fear. The higher the value, the better the figure endures the sight of terrifying creatures. Courage and Fear share a similar symbol. Where it expresses Courage, the larger part of the symbol is light-coloured.
Fear: Is set opposite Courage. Terrifying beings can trigger panic among their enemies, which can lead to the outbreak of absolute chaos in the opposing ranks. Courage and Fear share a similar symbol. Where it expresses Fear, the larger part of the symbol is dark-coloured. Figures that cause Fear do not themselves fear other figures.
Discipline: Measures the will to take command or to react quickly to orders. Figures with a high Discipline value are valuable commanders.
Power: The only characteristic that does not appear in CONFRONTATION. It is the capacity to make use of magic and to decide fates. Only spellcasters and a few other figures have Power. You will learn more about this in Incantation, the magic system, available in German from February 2001 in every sorcerer blister.
The Equipment shows weapons, armour, and items that the figures carry. Some special equipment is reserved for certain troops, such as the Dark Elf scouts.
The Special Abilities show particular traits of the figures. At the end of the booklet you will find explanations of the various abilities.
The Army Points serve to assemble troop values of equal worth. The higher the point value of a single figure, the stronger its assessed combat value. The point value noted on the army card always applies to a single figure (three Griffin spearmen in a blister with one card therefore do not cost 15 army points, but 45. However, they are deployed together. When the card is drawn, all 3 figures are activated).
Characteristic Tests
In the course of the game, players must roll for particular characteristics. A six-sided die (D6) decides the success or failure of an action.
The result of the roll is added to the value of the relevant characteristic. The higher the result, the better the chances of successfully carrying out an action. (Example: base Initiative value of 2 + a rolled 5 gives 7!)
If a 6 is rolled, the roll is repeated. It is considered open-ended, meaning that subsequent pips are added to it. Conversely, the action automatically fails if a 1 is rolled first. The 1 is then not added to the original value either, but counts as 0. Exception: if the 1 follows a previously rolled 6, it is added to the preceding value and does not lose its point value.
Preparing for the Game
The two commanders (players) agree on the point total of their armies. Based on the units and personalities available, the players calculate the value of their troops (this gives the total sum of army points of all the figures they intend to field). For a balanced game, equal total point values are recommended. One player's total may lie slightly above their opponent's, as long as the difference is no more than 15%. In this way only the commander who pursues the better strategy will carry the victory over his opponents.
The Terrain
Confrontation can already be played on a playing area of 40cm x 60cm. This area can be varied as desired. We recommend 1m x 1m as the best size. The following preparation serves to establish the size and shape of the terrain. Impassable obstacles on the area are conceivable, for example rocks or simply blocked locations: dense forest or undergrowth, which hinder or slow the fighters' advance. The players decide together whether and where such special places are located on the playing area. Alternating placement of terrain elements is also a proven way to create interesting battlefields. Once the battlefield is set up, it is divided into two equal halves, the deployment zones. It is fairest if a die roll decides which of the two players may choose his deployment zone. A further advantage of this method is that the area is furnished evenly with obstacles, since neither player knows in advance which will be his half. If no gaming table is available, we recommend using a little imagination to represent, for example, hills and streams with stacks of books covered by cloth and cut-out strips painted blue. Forests and fields or roads can be marked out in colour the same way, and a decorated old tea tin or yoghurt cup quickly becomes a watchtower. Matches and toothpicks make excellent fences and offer an easy way to get started. Varied terrain features add more strategic elements and can also be used to generate small scenarios.
2. The Battle
Deploying the Figures
The army cards of both players are shuffled together and placed face down in one pile. A simple die roll (D6) determines which player may draw a card first. The figure(s) on the drawn card (when a card represents two or more figures in one blister, the card symbolises the whole unit) must be deployed in the corresponding player's half, i.e. if a player draws a card showing an enemy figure, his opponent must deploy the corresponding figure(s). A player may never place a figure that does not belong to his own army.
Once the figure is placed, cards continue to be drawn alternately until all figures are positioned on the battlefield.
Under no circumstances may a figure be deployed such that it could attack an enemy figure in the first round (movement value in cm x 2).
If a player draws one of his own cards, he may decide whether to deploy the figure immediately or whether he would rather keep it in hand and not activate it until the next time he draws a card. In the following round he then has the choice of either deploying the figure of the newly drawn card, or that of the card still in his hand, or even both at once. A player may never hold more than one card in hand.
If it is a player's turn to draw a card but no cards remain, he must deploy the figures shown on the card he still holds in his hand.
Deployment is complete once all cards have been drawn and played. The first round of CONFRONTATION can begin.
The Game Rounds
A game of CONFRONTATION is divided into rounds, each representing various actions by the warriors. Every round always consists of the same three phases, in the same order. First the players move their troops, then missile and thrown weapons come into play, and the last phase is the melee phase. Once this is finished, the next round of the game follows.
The Phases
- Movement Phase
- Ranged Combat Phase
- Melee Phase
The Discipline Roll
At the start of every round, a Discipline test is carried out. For this, the figure with the highest Discipline value in your army that is still in play is used. Roll a D6 and add the pips to your Discipline value. The player with the higher result gains the following advantages for this round:
- He may draw the first card in the movement phase.
- He may keep two cards in hand instead of one.
- In case of equal Initiative, his troops may act first in the ranged combat phase, and later — with Incantation — in the magic phase.
- He decides how the melees are divided up and in what order the fights take place.
I. The Movement Phase
In the movement phase, players move their figures across the battlefield. To determine which warrior moves first, all cards are shuffled together again and placed as a face-down pile once more. The player who won the Discipline test draws the first card (see Discipline Roll). Every figure may move at most the number of centimetres given by its Movement value. It may move freely in any direction toward any target. It is not obliged to use its full Movement value, and the player may also decide not to move it at all. Cards are then drawn alternately by each side.
Sometimes the movement of troops is made harder, that is, slowed, by obstacles. This means that their advance is reduced depending on the type of obstacle encountered. The Movement Table sets out how movement changes depending on the type of terrain or obstacle.
Movement Table
| Terrain | Effect |
|---|---|
| The area is obstructed (forest, swamp, undergrowth...) | every centimetre of difficult terrain crossed counts double (1 cm = 2 cm) |
| The area is impassable (walls, deep water, chasms...) | movement IMPOSSIBLE |
The Forced March
A figure can carry out a forced march (up to double its Movement value) if it meets the following conditions: it must not attack or shoot this round, and it may approach no closer than half its Movement value to an enemy figure (example: Agonn of Alahan decides to carry out a forced march, but may not come closer than 5 cm to the goblin Becbunzen, since this is half of Becbunzen's movement distance, whose base value is 10 cm).
The Charge
The attacker may double his Movement value. The charge is a very fast movement that results in a base-to-base meeting with an enemy figure. A warrior who is charged by an enemy has 1 point deducted from his Initiative value, his Attack value, and his Defence value. The reduced point value applies until the end of the round. After a successfully executed charge, i.e. when the enemy figure is within the given distance, the two figures must stand base to base with one another. How many opponents can take part in a melee at most depends on the size of the bases:
- an infantry base: max. 4 infantry or cavalry opponents, 4 creature opponents,
- a cavalry base: max. 6 infantry or cavalry opponents, 4 creature opponents,
- a creature base: max. 8 infantry or cavalry opponents, 4 creature opponents.
If the target lies outside range (Movement value x 2), the attacker in any case moves by his doubled Movement value in the stated direction, i.e. every charge must be clearly declared; measuring is not allowed beforehand. Only figures that are within a 180° field of view in front of the attacker and are not completely obscured by an obstacle, i.e. within line of sight of the charging figure, may be charged. In addition, the nearest enemy figure should be charged wherever possible. A figure that cannot make contact despite a declared charge may not shoot in the following ranged combat phase.
The Role of Fear
In CONFRONTATION there are very repulsive and terrifying beings; some of them are endowed with a malevolent intelligence or with extraordinary abilities.
At the sight of such creatures, some warriors lose their composure and can no longer act as usual: they no longer follow orders, they flee, and so on.
Before a warrior charges such a creature and becomes engaged in combat with it, he must undergo a test to find out whether he can overcome his fear. This rule also applies if a warrior is charged by a terrifying being.
For such a test, roll a D6 and add the result to the figure's Courage value. If the result equals or exceeds your opponent's Fear value, the test is passed and the fight proceeds normally.
If a figure wishes to charge a fear-causing creature, it must pass a Courage test before it moves. If it fails the test, it can no longer move during the current movement phase — it is paralysed by fear.
So if the test is failed, the warrior flees or stays where he is. He turns his back on the creature and moves away from it by double his Movement value (cm x 2) if he was charged, or remains frozen in paralysing fear if he wished to charge.
If a fear-causing creature has charged an enemy and that enemy flees, the creature must continue its charge. It names a new target and uses the remainder of its Movement value to reach it. This continues until it has fully used up its movement.
In each movement phase, the warrior may, at the moment it is his turn — that is, when his army card is drawn — attempt another Courage test to overcome his fear (fixed difficulty 6). On failure he continues to flee. When a warrior under the effect of fear is charged, 2 points are deducted from his Initiative, Attack, and Parry values. If the figure leaves the battlefield, it counts as a loss.
For a Courage test, a rolled 1 does not count as 0, but is added to the value as normal. This is the only exception to the rule of 1 (normally always a failure) for characteristic tests.
If several figures charge a creature that causes fear to their group, the whole group makes only a single test. The highest Courage value among them is used, and 1 additional point is added for each additional warrior involved. The result thus obtained applies to every warrior involved in this fight. The same procedure applies when several fear-causing creatures charge together: they likewise gain a bonus of +1 point per creature added to the highest Fear value.
Once a warrior has overcome his fear, he is no longer affected by it for the rest of the game. Fear-causing beings are themselves immune to fear.
II. Ranged Combat Phase (& Magic Phase)
The first sign of a fight is often the whistle of projectiles flying across the battlefield.
The Ranged Combat Roll
In the ranged combat phase, troops equipped with missile weapons come into action and can shoot at enemies within their line of sight. No obstacle that completely conceals the figure may stand between the shooter and his target.
To be able to shoot, a warrior may not be in a melee situation, must not have made a forced march, and must not have charged another figure in the movement phase. The player points to the enemy he wishes to hit. The target must be visible and lie within a 180° arc in front of the figure. The distance between the attacker and the target may not be measured before the player has clearly designated the target. As the shooter, you must rely on estimation to decide whether the target is within range of the weapon in question.
As soon as the player has pointed to his target, the distance is measured. If the range is greater than the weapon's maximum range, the shot automatically counts as missed.
Warriors shoot one after another, starting with the one with the higher Initiative value. If several combatants have the same Initiative value, the player who won the Discipline roll for his side this round decides. To carry out the shot, roll for its result: take a D6 and add the result to the shooter's Ranged Combat value. Depending on range, the difficulty plays a greater or lesser role. A shot at short range hits its target if the ranged combat roll result is 4 or higher. For a shot at medium range, 7 or more must be achieved, and 10 or more for a shot at long range. A rolled 1 is always considered a failure. If the shot hits its target, the attacker rolls two dice to determine the degree and type of injury. For this he refers to the Injury Table. The result takes effect immediately.
It sometimes happens that hitting the target is made harder in certain situations. In this case the difficulty to hit increases. These modifiers are found in the Ranged Combat Table and are cumulative, i.e. they add up.
Ranged Combat Table
| Situation | Difficulty |
|---|---|
| Shot at short range | 4 |
| Shot at medium range | 7 |
| Shot at long range | 10 |
| The target is only partially visible | +1 |
| The target is touching an obstacle | +1 |
| The shooter has moved during the round | +1 |
Shooting into a Melee
If a warrior wants to hit an enemy involved in a melee with a missile or thrown weapon, he can shoot into the crowd. Since he is knowingly accepting the risk of also hitting his own figure, on a hit the die decides which figure was struck. On a 1-3, his own figure is hit; on a 4-6, the opponent(s). If several figures are possible targets, the affected player chooses the figure to which the injury roll applies.
III. The Melee Phase
The melee is the decisive phase of CONFRONTATION. This is the moment when it becomes clear whether the commanders' tactics have the desired effect: here the fighters' fate is decided.
Untangling the Brawl
When forces collide, a group of combatants is called a brawl. These can sometimes seem very complicated, especially when large numbers of warriors from both sides are standing base to base. In this case the Discipline roll from the start of the round applies. The player with the better result decides how the respective brawl is untangled and separated out. With several brawls, he decides on each one in turn. To resolve a melee, either one warrior must fight another, or one warrior must fight several opponents. For example, if after movement two figures face three figures, the brawl is untangled into two separate melees: one figure against one opponent, and one figure against two opponents. If a figure was already engaged in combat at the start of the melee phase (standing base to base), it may never end up without an opponent after such a separation. Likewise, it is not permitted to move from one brawl to another through untangling.
The Course of a Melee
A warrior who has been charged by an enemy has 1 point deducted from his Initiative value, his Attack value, and his Parry value.
The course of every melee is decided individually and independently of the other fights. The results of a fight (injury, death) take effect immediately. Proceed as follows:
-
Each player rolls for his warrior's Initiative value. Whoever rolls the higher Initiative value strikes first. On equal results, roll again — until one side has the advantage. If several figures on one side are involved in a fight, the Initiative test applies to the whole group. The warrior with the highest Initiative value is used as the base, and 1 point is added to the Initiative value for each additional warrior. The result thus obtained then applies to every warrior involved in the fight. A rolled 1 counts as 0 as always, but the base Initiative value still stands.
-
Now the players choose between different combat tactics. They can attack, defend, or both. If the fight is only between two figures, i.e. one against one, each player takes two dice. If several fight against one, the player whose figures are in the majority takes two dice per figure. His opponent (who has only one warrior) takes as many dice as he has opponents, plus one more for himself. The player who lost the Initiative test divides up his dice first: the dice intended for attack he sets aside on the right, those intended for defence on the left. He may also choose to use only attack or only defence, placing all his dice on one side. The winner of the Initiative test then divides up his dice afterward. He has the advantage of already being able to gauge his opponent's tactics.
-
The attacker will try to carry out his attack with tactical skill, meaning he wants to land as forceful a blow as possible on his opponent, one that is correspondingly hard to parry. He announces the result he wants to achieve with his attack. He then rolls all of his attack dice. Every result (Attack value + one die value) that equals or exceeds his announced result is a hit against the opponent.
The defender now tries to ward off the blows. For this he rolls with all of his defence dice. He must roll a value equal to or higher than the attacker's announced result. With every success (Parry value + one die value), one of the attacker's hits is rendered ineffective. If all attacks are warded off, play continues as described under 5. If not, the attacker may, for each unwarded attack, roll for the injuries he has inflicted on his opponent. If no defence dice were set aside at all, every successful attack roll leads to an injury roll.
-
To determine injuries, the attacker rolls two dice, factoring in his Strength and the opponent's Armour value, and then refers to the Injury Table. The result takes effect immediately.
-
Now the roles of attacker and defender switch. If the former defender still has warriors and attack dice, he may now attack in turn. Hopefully the other player has not miscalculated and has set aside defence dice accordingly...
Minimum Difficulty for the Attack Roll
The difficulty set for an attack roll must be at least as high as the opponent's Parry value as given on his army card. This minimum difficulty applies only if the opponent set aside at least one defence die at the start of the fight. If a warrior attacks several opponents in one melee, use the highest Parry value among the figures defending with at least one die when applying this rule. If the opponent set aside no defence dice, there is no minimum value to observe (i.e. the attack difficulty may be freely chosen), but even so there are no automatic hits, and every rolled 1 is still a failure.
The Counterattack
A personality (he may not be a spellcaster!) can launch a counterattack while defending. The player must announce it before rolling his defence dice. The difficulty announced by the attacker increases by two points. With every successful roll, an enemy attack roll is considered parried, as with normal defence, but the personality also receives one additional attack die for the same fight for every attack warded off. It is possible to use only some of the dice from the pool of defence dice for the counterattack (tip: use dice of different colours, or roll them one at a time).
Multiple Attacks and Multiple Defences
Some of the beings in Confrontation are exceptionally powerful. These are the personalities: the champions, the heroes, the living legends, and their allies. They can launch several attacks within one fight and are also able to defend against several enemies at once.
If you decide to attack and/or defend multiple times, you may add one attack or defence die for each additional action. This applies until the end of the melee phase. For each additional die, the personality loses two points from his Attack value and two points from his Parry value. You may carry out as many actions as your Attack and Parry values allow, but the values may never fall below 0. (Also bear in mind the deductions if you were charged!)
For example, if you decide to take three additional dice, six points are deducted from both the Attack value and the Parry value! Proceed carefully with multiple actions, then, because while your attacks and defences immediately increase, so do the risks you take on from lower chances to hit.
The Injury Table
Roll two D6 (on a 6, do not roll again in this case). The lower result determines the location of the injury (horizontal axis).
The sum of both dice plus the attacker's Strength, minus the victim's Resistance value, determines the severity of the injury (vertical axis).
The combination of these two factors then gives the type of injury. All injuries take effect immediately. On a double, the special cases listed under the table apply.
| Damage | Legs (1) | Arms (2) | Torso (3) | Head (4-5-6) |
|---|---|---|---|---|
| 0 | Stunned | Stunned | Light wound | Serious wound |
| 1-5 | Stunned | Light wound | Light wound | Serious wound |
| 6-10 | Light wound | Light wound | Serious wound | Critical wound |
| 11-15 | Light wound | Serious wound | Critical wound | Instant death |
| 16-20 | Serious wound | Critical wound | Instant death |
Double 1: special failure — the blow glances off the armour — NO EFFECT Double 2: Stunned Double 3: Light wound Double 4: Serious wound Double 5: Critical wound Double 6: special success — the blow strikes a vital organ — INSTANT DEATH
If a figure is injured, all results for Initiative, Attack, Parry, and Ranged Combat rolls are changed as follows:
- Stunned: a rolled 1 or 2 on the D6 counts as a failure until the end of the round.
- Light wound: a rolled 1 or 2 counts as a failure until the end of the game.
- Serious wound: as with a light wound, but for 1, 2, and 3.
- Critical wound: as with a serious wound, but for 1, 2, 3, and 4, i.e. success only starting at 5!
- Instant death: the figure is immediately removed from the game.
If an already injured figure suffers a further injury, it is replaced by the new injury if that injury is more severe. If it is not more severe, the old injury is increased by one degree. Example: Agonn was lightly wounded and suffers another light wound. It now becomes a serious wound. If, on the other hand, he had had to take a critical wound on top of his light wound, this would not have become a fatal one, but would only have replaced the light wound with the critical one. Note: Stunned does not count as an injury in this case!
Follow-Up Move
At the end of a melee phase, a warrior who has killed his opponent may move in any direction, by up to half his Movement value. This special move is allowed only once per warrior per round.
In the course of a follow-up move, a figure may fight once more in this melee phase against enemy figures. The prerequisite is that it either meets figures that are not involved in a fight, or that it enters a brawl that has not yet been fought out. If a figure chooses this option, this additional move does not count as a charge. Due to the short distance, it simply lacks the effect of a determined, full-blooded charge. Nevertheless, the figure is counted when calculating the dice available.
Withdrawing from a Fight
If a warrior wants to withdraw from a fight, he must roll for his Initiative value. If the result equals or exceeds the opponent's Initiative +4, this counts as a success, and he may move normally. Otherwise, the fight is so fierce that he cannot manage to break free. In the following melee phase he may only use his dice for defence. The difficulty for the Initiative roll rises to 4 + 2 per additional opponent involved if one wishes to withdraw from this fight while facing several enemies. A warrior cannot withdraw if he had no opponent at the start of the round, i.e. if he was only charged this round.
In addition, a figure may not charge an enemy with whom it was in direct contact at the start of its move (break away and charge that same figure again).
Example
In the midst of the battle's chaos, Tharn, a champion of Alahan, has successfully held his own against a skeleton. Since he fought only one melee, he benefits from the option of a follow-up move. His normal Movement value is 10 cm, so he may move 5 cm. He decides to use this option to go after a golem, which a few metres away is currently causing a real bloodbath among the ranks of the Knights of Lion.
The champion now moves to stand base to base with the golem, but first he must overcome the fear that the living corpse inspires in him. He weighs his Courage (6) against the Fear (10). The Lion player must therefore roll at least a 4 with a D6. He rolls and gets a 5. He has thus passed the test successfully (5 + 6 = 11, i.e. a value equal to or higher than the golem's Fear value).
He now stands in melee against the golem. Each player carries out the Initiative test. The Acheron player — the golem — rolls a 4, meaning his Initiative value is 5 (4 + Initiative 1 = 5). His human counterpart rolls a 2, giving him a total value of 6, since his Initiative value is 4. The Alahan player has thus won the Initiative test. The slower golem divides up his dice first, so that Tharn can place his dice accordingly. Since this is a one-on-one fight, each figure has two D6 available at first. The golem, however, has two additional limbs, which entitles him to two more dice, four in total.
The golem player decides to use two of his dice for attack and two for defence, placing them to the right and left of his figure respectively. He will make two strikes and be able to defend against two attacks.
The champion, who has only two dice available, is especially watchful, since it will not be easy for him to defend alone against the golem. Since the champion is a personality, he can make use of the option for multiple attacks and defences by using additional dice. He decides to take one additional die, giving him three in total, and loses two points each from his Attack value and his Parry value as a result.
The Alahan player distributes his three dice as follows: since he knows he must defend against two attacks, he takes no risk and places one die for attack to the right of the figure, and two for defence to the left.
Tharn has won the Initiative test and therefore attacks first. He sets the difficulty at 7. His Attack value is normally 5, but because of the additional die it is now only 3. He must therefore roll at least a 4 to reach his announced target. He does in fact roll a 4, so he has carried out the attack successfully. So far it looks as though Tharn has chosen a winning tactic...
The golem has two defence dice available. He must beat the difficulty of 7 set by the Lion knight. His Parry value is 2. He rolls, one after another, a 4 (not parried) and a 1 (not parried). To ward off Tharn's attack, he would have needed to reach at least a 5 with one of the two dice.
Tharn now determines the injuries he has inflicted on the golem. For this he refers to the Injury Table. He sets his Strength (5) against the golem's Resistance (7).
The Alahan player rolls two dice and checks the Injury Table. He rolls a 2 and a 5. The lower number determines the location of the injury. The golem is therefore hit in the arm.
The sum of the two dice is 7. Tharn adds his Strength value (5) to this. The result is 12. The severity of the injury is calculated as 12 minus 7 (the golem's Resistance value) = 5, so a light wound to the arm.
The effects take hold immediately: for Initiative, Attack, Defence, and Ranged Combat rolls, a 1 and a 2 now always count as a failure.
Despite his injury, the golem (Attack value 2) can still go on the counterattack. He had set aside two attack dice. He sets the difficulty at 5, so he must roll at least a 3 with one of the two dice to hit his opponent. He rolls both dice and gets a 4 and a 5, so two successful rolls.
The Lion knight defends with a value of 2. Normally his Parry value is 4, but because of the additional die, two points have been deducted. He rolls his two dice and gets a 1 and a 2. This gives him no chance at all of warding off the golem's attacks. Completely overwhelmed by the strength of his opponent, he must simply endure his attack, unable to fend it off.
Now the golem determines the injuries dealt to his enemy. He has an immensely high Strength value: 12. Tharn's Resistance stands at 11. The Acheron player rolls the first injury for Tharn and checks the Injury Table. The numbers rolled are 4 and 5. The 4 means the injury is to the head. The damage dealt is calculated as 4 + 5 + 12 (the golem's Strength) minus 11 (Tharn's Resistance value) = 10. A serious head wound! From now on, all rolls of 1, 2, 3, and 4 for Initiative, Attack, Parry, and Ranged Combat count as failures.
The second injury roll deals the Lion knight the death blow...
3. The Special Abilities
Some fighters possess special abilities, either innate or acquired over a long apprenticeship. If a warrior has such special abilities, they are noted on his army card.
Ambidextrous (Ambidextre): Ambidextrous warriors can wield their weapons with the left and right hand at the same time, which makes them especially effective in combat. This gives them a special option to make a counterattack with no penalty to their Parry value: for every blow they successfully ward off, they gain one additional attack die.
Assassin (Assassin): Assassins are especially treacherous and fast warriors. They are trained for lightning strikes, whose danger lies in their speed and precision. A warrior drawn into a melee by an assassin remains unable to move until the end of the first round of combat. Because of the special speed of the action, he cannot escape the fight or go on the attack himself, and he also loses his special abilities for that round. He can only defend himself in the normal way. In the following round of melee, the fight proceeds under the normal rules.
Bravery (Bravoure): For a Courage test, a warrior with Bravery treats a rolled 5 as a 6.
Brutal (Brute épaisse): Some warriors are veritable beasts who deliver their blows with particular brutality. For attack rolls, every 5 counts as a 6.
Command (Commandement): When a personality takes part in a fight, his presence inspires the warriors under his command. All fighters who are within the distance of his Movement value and engaged in combat may use his Courage value and his Discipline value for their tests. All warriors who are similarly close to a standard-bearer may add one point to a Courage test. Warriors near a musician add one point to the Discipline test, or at the start of the round.
War Cry (Cri de guerre): The moment a warrior charges an enemy to draw him into a melee, he lets out a hate-filled cry. This cry gives him a Fear value of 5 for the current round.
Rallying Cry (Cri de ralliement): With this ability, warriors are able to instil in their troops the courage for particularly brave and heroic deeds. The Rallying Cry may be used only once per game. Until the end of the round, all fighters on his side are immune to fear. Warriors who were currently fleeing return and may act normally.
Tough as Nails (Dur à cuire): The result of the injury roll is shifted up one row, i.e. an arm injury (column 2) with damage 21 (critical) moves one row up, but in this case remains critical. For a torso hit (column 3) with damage 6-10 (serious), however, the severity is reduced to light. If the injury is already on the first row of the Injury Table, it is not raised further (so that there would no longer be an injury at all). If a double is rolled, this ability has no effect.
Scout (Eclaireur): A scout may be placed anywhere on the battlefield at the end of the deployment phase. Even if placed outside his own deployment zone, he may not be placed such that he could already charge an enemy figure in the first round. He uses terrain features as cover so as not to be seen by enemy troops (remember that figures have a 180° field of view).
Command Staff (Etat-Major): A command staff comprises a champion, a standard-bearer, and a musician. All warriors within the distance of their Movement value from one of these three use the champion's Courage and Discipline values +2 additional points for themselves. In this case, the Command ability is replaced by Command Staff and grants no further bonus.
War Frenzy (Furie guerrière): A warrior seized by war frenzy is under the influence of a combat drug that plunges him into a dull, uncontrollable rage of destruction. He gains one additional die, but he must automatically and exclusively use all of his dice to attack. Use of this ability must be declared after the Initiative roll.
Fanaticism (Fanatisme): A fanatical warrior never flees from an enemy. If a Courage test fails, 2 points are deducted from his Initiative, Attack, and Parry values. For a Discipline test, a result of 5 counts as a 6.
Harassing Move (Harcèlement): This special move allows a warrior who did not use his full Movement value when drawn to move again in any direction at the end of the ranged combat phase, by the distance he did not use on his first move.
Undead (Mort-Vivant): By nature, such a creature knows no fear. However, an undead figure is also not subject to Discipline like other figures, since it is under the influence of supernatural powers that dictate its actions.
Extra Limb (Membre supplémentaire): For each additional limb, the figure gains one more die for melee combat.
Battle Elixir (Mutagène): Before a clash, some peoples inject themselves with a substance to stimulate and increase their physical strength, resistance, and combat dexterity. You get one die for every 100 points (or part thereof) in your army (205 points = 3 dice; 195 points = 2 dice). At the start of every round, the player decides which figure(s) use the elixir, whereby a figure can benefit from only one dose of elixir per round. When rolling for the elixir, a 6 is not rolled again, but a 1 also does not count as 0. The number rolled can be freely assigned to any of the figure's values and lasts until the end of the round.
Regeneration (Régénération): At the end of every round, an injured figure may attempt to regenerate. Roll a D6. On a result of at least 5, the injury is reduced by one degree. A critical injury, for example, then becomes a serious injury. For every success you may keep rolling again, until no 5 or 6 is rolled.
Reinforcements (Renfort): During a game, some peoples have the option of calling up reinforcements. Every slain warrior with this ability is set aside at the edge of the battlefield. At the start of every new round, you roll and add the result to the number of warriors with the Reinforcements ability standing at the edge of the battlefield. If the result is at least 7, you may deploy one of the figures at the edge of the battlefield and treat it as a reinforcement. On a lower result, you get no reinforcement. A figure arriving as reinforcement may be positioned anywhere on the battlefield. The following three exceptions apply to this rule:
- The figure with the lowest army point value must be the one brought in as reinforcement.
- It may not be placed base to base with an enemy figure.
- It must be placed such that it can be charged in the following movement phase.
Born Fighter (Tueur Né): A born fighter is made for combat and possesses a pronounced survival instinct. He gains one additional die in melee.
Bestial Charge (Charge Bestiale): This is a particularly devastating attack technique. It relies on the shock of the initial impact and on the attacker's body weight. A warrior who has mastered this technique has one additional attack die in the round in which he charged.
The World of Aarklash
On the plains bordering Avagddu, dwarves and orcs faced one another, irreconcilable enemies, unmoved by the forces of nature raging above their heads.
Lightning tore across the sky and gave the signal to attack. The warriors of Khor charged across the plain toward the orcs. The impact was terrible and bloody within seconds. Weapons met in a dance of death. Their clash mingled with the cries of the fighters and was lost in the rolling thunder.
Death was already claiming its toll when, without warning, a giant rose up among the orcs.
The silhouette carved a path through the enemy ranks, leaving a great trail of blood behind it. Following it came the wild valkyries of Razorback, utterly swept up by the sight into a warlike frenzy.
What at first looked like a retreat was now a chaotic rout. The few remaining orcs had lost this important battle...
The goddess took the carved figure at her side in her hand and set it in line with the others. She smiled triumphantly and said: "You have lost, my dear!"
The man made a mysterious grimace and then brought out figures of his own. The superior smile on his opponent's face froze.
"Not at all, my dear. Who says the game is over?" — and he nodded to the man beside him.
That man in turn brought out golden and silver figures, which he arranged on the table.
And his booming laughter could be heard far and wide, so that even the orcs, who were fleeing, seemed to perceive a scornful and cruel laughter.
On the continent of Aarklash, the peoples prepare for the clash, driven by a mysterious and destructive longing.
The shadows are gathering, but the secrets of the Ancients are still well kept...
The guardians and proud warriors of the Kingdom of Alahan arm themselves against the murderous attacks of the living dead, sighted once more in their land...
The dark necromancers of Bélier and their armies open their portal once more, to slake their thirst for vengeance upon their future slaves...
The elves of Cynwäll and their dragons, as if awoken from a long sleep, once again turn their gaze across the continent and prepare to take part in the course of the world once more...
The dwarves of Tir-Nâ-Bor sense the end of their age, Argg-Am-Ork, and forge weapons and armour to withstand this hard trial...
The people of the realm of Griffon muster their armies to wage a new crusade, that shall bring them the reconquest of their holy place, where the tomb of their god lies...
The orcs mass together and choose a new leader, to sweep across the earth like an apocalyptic army...
The alchemists of Dirz and their superhuman warriors impatiently await the signal of the Commodores, to hurl themselves upon their enemies and establish a new world order...
The Akkyshan elves, with their dark skin and hearts as black as the deepest night, prepare to hand Aarklash over to the Spider Queen Lilith...
The wolfen shamans weave their mourning cloths, on which their warriors will write the names of those they capture in battle, to proclaim their power...
The goblins roam the continent, plundering and murdering, wiping out entire peoples to please their Rat God...
The elves of Daikinee, of whom only a few remain, prepare for the Great Exodus, to secure the survival of their people...
The barbarians, wild nomad warriors, have set out in search of the Great King, who will show them the way to the goddess Danu...
And you? Which people will you choose, to take part in the Great Game for the fate of the world?
"...and the gods turned away from the world and proclaimed a new and dark age, an age of battles and of heroes.