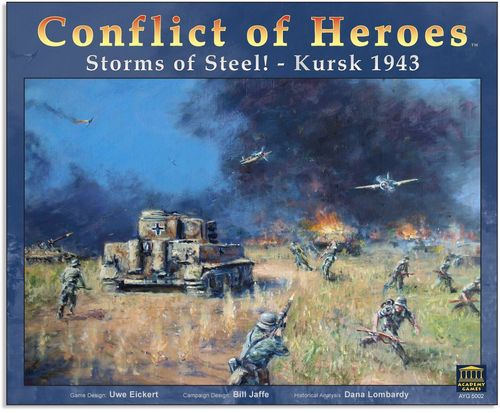
Conflict of Heroes: Storms of Steel! – Kursk 1943
Conflict of Heroes: Storms of Steel! – Kursk 1943 Rulebook
Table of Contents
Table of Contents
- First Mission Setup
- Game Overview
- How to Use This Rulebook
- Components
- General Setup
- Turns and Actions
- Command Action Points (CAPs)
- Position and Movement
- Fire Zone and Target Hex
- Resolve an Attack
- 6.0 Resolve an Attack
- 6.1 Defense Rating (DR)
- 6.2 Soft and Armored Targets
- 6.3 Flank Attacks
- 6.4 Terrain DR Modifiers
- 6.5 Attack Rating (AR)
- 6.6 Range AR Modifiers
- 6.7 Hit Number and Attack Roll
- 6.8 Attacking Stacked Units
- 6.9 Close Combat (CC)
- 6.10 Support Weapon AR Penalty
- 6.11 Withdraw from Close Combat
- Hits and Rallying
- Battle Cards
- Round End & Pre-Round Sequence
- Group Action
- Hidden Units
- Hills and Elevation
- Mortars and Artillery
- Smoke
- Vehicles
- 15.0 Vehicle Movement
- 15.1 Wheeled and Tracked Vehicles
- 15.2 Vehicle Bonus Moves
- 15.3 Difficult and Impassable Terrain
- 15.4 Vehicles on Roads
- 15.5 Vehicle Stacking
- 15.7 Vehicle Transport
- 15.8 Loading (Limbering) a Unit
- 15.9 Transporting (Towing) Units
- 15.10 Unloading (Unlimbering) Units
- 15.11 Towing Vehicles
- 15.12 Attacking Transporting Vehicles
- 15.13 Vehicle Combat
- 15.14 Vehicle Hits
- 15.15 Vehicles in Close Combat
- 15.16 Vehicles as Cover
- 15.17 Tanks Firing Down Steep Terrain
- Special Vehicle Rules
- Fortifications and Obstacles
- Flamethrowers
- Alternate Player Counts
- Note from the Designer
- Action Cards
- Bonus Cards
- Weapon Cards
- Event Cards
- Units in Storms of Steel 3rd Edition
First Mission Setup
Choose a Side
Each player chooses a side to command: the Germans or the Soviets. Take your side's corresponding Mission Book, Unit Tray, a Command Action Points (CAPs) Track Sheet, one d10 Spent Check die, and two d6 dice.
Section 1 rules are taught using Mission 1 - The Courier's Satchel.
In your side's Mission Book you will find listed:
- The historical situation your counterparts faced during this engagement, along with a Mission Briefing.
- The maps and overlays utilized, the Units at your disposal, and their locations on the map.
- The number of Battle Cards and Command Action Points (CAPs) you receive each Round, the number of Rounds in the Mission, your Victory Conditions, and any special rules.
Place Map
Place Map 7 in the center of the playing area.
Set Up Units
The Soviets place their Units on the map as shown in the Soviet Mission Book.
The Germans place the Units that are entering during Round 1 along the southern edge of the map.
Unit orientation is important! Place each Unit with the red bar face-down towards the map. The green bar at the top of the Unit must be facing in the direction shown on the Mission setup map.
Place Command Action Points (CAP) Markers
Each player takes a CAP Track Sheet and places their CAP Marker to show their allocated CAPs specified by the Mission Book. For this Mission, the Germans begin with 5 CAPs, and the Soviets begin with 6 CAPs.
Prepare Battle Draw Deck
Each player takes one "Card 01: Adrenaline" into their hand. Create the Battle Draw Deck with all Battle Cards numbered 02-11 in the bottom left corner. Shuffle the deck and place it within reach of all players. Each player draws 2 random Battle Cards into their hand, for a total of 3 Battle Cards.
Place Round & Victory Markers
Place the Victory Marker on the "4" space of the Victory Point Track, Soviet side up.
Place the Round Marker on the "1" space of the Mission Round Track.
Both sides place their Reinforcements on the Round 2 space of the Mission Round Track.
A VP marked has either German or Soviet symbol on each side. Only one side ever has an advantage, and the score may never be "0" or tied — one side's VP total drops below the score to the other's advantage.
Prepare Hit Draw Pile
Place all of the red Soft Target Hit Markers into one of the Card Tray's empty card wells, face-down.
The blue Armored Target Hit Markers are not used in this Mission.
After setting up this Mission, you can view teaching videos at:
AcademyGames.com/SoS YouTube.com/AcademyGames
Game Overview
Conflict of Heroes is a tactical war game of platoon- to company-sized missions. Each Mission portrays an actual historical engagement with different Objectives worth Victory Points (VPs). The side with the most VPs at the end of the Mission wins.
A Mission consists of several Rounds. During a Round, you and your opponent will alternate Turns. On your Turn you can take a single Action, such as moving a Unit to an adjacent hex, attacking a Unit, Rallying a Hit Unit, or playing a Battle Card.
As your Units take Actions, they will eventually become Spent and be unable to take further Actions. As the Round progresses, you and your opponent will have fewer and fewer Units available to take Actions, and you will both need to Pass in order to start the next Round and refresh your Units.
In addition to your Units, you have another important resource: Command Action Points (CAPs). You receive a limited number of CAPs to use each Round, which represent your force's leadership and logistics support on the battlefield.
You can spend CAPs to take extra Actions with Spent Units, or to adjust the odds of any die roll you make. Planning how to use your CAPs — whether you decide to spend them to assist a frontline Unit during an important attack or help a panicked Unit rally — is a key component to winning a Mission.
A Note for Returning Gamers
This ruleset changes several key elements of Conflict of Heroes from previous editions. Units are no longer given 7 Action Points. Instead, each Turn, a player selects one of their Units to take any Action. After completing the Action, they roll a custom d10 die to determine if the Unit becomes Spent.
If the player rolls higher than its Action Cost, the Unit is free to continue taking Actions on future Turns.
More involved Actions come with a higher Spent probability. On average, Units will be able to take the same number of Actions as in the 7AP system.
This and other new mechanics like Fatigue encourage players to experiment with integrated battlefield tactics that make use of multiple Units working together. They also heighten the experience of "Fog of War," in that players must now assess the risk attached to each Action they take, and determine the best time to use their CAPs to mitigate that risk.
All previous Conflict of Heroes editions are 100% compatible with this ruleset. This game can also be played with previous edition rulesets. Living rules are available at www.AcademyGames.com/SoS.
How to Use This Rulebook
The Storms of Steel Rulebook is divided up into sections based on the rules you will need to know to play each Mission.
Early Missions involve core game rules like movement and attacking, while later Missions introduce additional gameplay mechanisms and Units with unique capabilities.
If this is your first time playing Conflict of Heroes, we recommend that rather than reading the full rules all at once, you read Sections 1 through 9 until you reach the red box that says you are ready to play Missions 1 & 2.
After you have played Missions 1-2, you can read the Sections leading up to the next red box indicating you have learned all additional rules required for that Mission.
Red boxes provide illustrated step-by-step examples of gameplay.
Blue boxes provide Designer's Notes with strategy tips, historical background, and insights into the game's design philosophy.
Components
- Maps 7-10
- Four d6 Battle Dice
- Two custom d10 Spent Die
- Overlay Sheet
- Counter Sheets: Soviet Units, German Units, Hit Markers, Misc Counters
- 1 x Round & Victory Track
- 4 x CAPs Tracks
- Cards: 31 Action & Bonus Cards #01-30, 7 Score, Objective, Event Cards, 9 Weapon Cards, 10 Veteran Cards
General Setup
1.0 Setup
-
Choose Sides: Choose which Mission to play and which side each player will command.
-
Place Maps: Place the maps as described in the Mission.
-
Set Up Units: Place Units and Control Markers according to the setup locations listed in the Mission. Locations are specified using map coordinates:
[Map #]-[Column Letter][Row #]
Ex: 7-J05 designates map 7, hex J05.
Storms of Steel includes maps 7-10. Maps 1-5 are included in Awakening the Bear and Map 6 is an expansion Marsh map. Missions combining maps from various releases can be found at www.AcademyGames.com/SoS.
-
Place CAP Markers: Distribute Command Action Points (CAPs) Track Sheets to each player and place a CAP Marker on the starting CAP value as specified by their Mission Book.
-
Prepare Battle Draw Deck: Create the Battle Deck by separating out and shuffling the Battle Cards specified in the Mission (8.1). Each player draws their specified number of Battle Cards.
-
Place Round and Victory Markers: Place the Round and Victory Track Sheet near the map.
- Place the Victory Point (VP) Marker on the Victory Point Track space specified in the Mission.
- Place the Mission Round Marker on the "1" space on the Mission Round Track.
- Place any Reinforcement Units on the Mission Round Track in the space indicating the Round that they will become available.
-
Prepare Hit Markers: Separate the Soft Target and Armored Target Hit Markers into two Draw Piles. Make sure the yellow effect side of each Marker is face-down.
Armored Target Hit Markers are not used in early Missions.
1.1 Units
Conflict of Heroes includes Units that represent infantry squads of 6-12 men, crewed support weapons such as mortars, individual vehicles such as tanks, and many others.
Each Unit has a symbol and a unique Unit number in the top center. Summaries of all Units are listed on page 38.
Ex: ◆01 next to the Rifles '41 name.
Unit numbers are for sorting convenience. Unit symbols are used in Solo expansions.
Turns and Actions
2.0 Round Sequence
Each Round, players alternate taking Turns.
The player who has the Initiative takes the first Turn.
On your Turn, you must either take an Action or Pass.
The Round ends when both players Pass consecutively (2.7).
Each Mission specifies which side has the Initiative in the first Round. For subsequent Rounds, Initiative is determined during the Pre-Round Sequence (9.4).
2.1 Actions
An Action is performed by a Unit.
To take an Action, follow these steps in order:
- Select a Unit (2.2)
- Perform an Action (2.3)
- Determine the Action Cost (2.4)
- Make a Spent Check (2.5)
2.2 Select a Unit
Select one of your Fresh Units on the map to take an Action.
A Unit may be Fresh or Spent, as indicated by which of its sides is face-up.
Fresh Unit: may always be selected to take an Action.
Spent Unit: may only be selected to take Command Actions (3.4) or certain Card Actions (8.4).
2.3 Perform an Action
Take one Action with the selected Unit. Common Actions include:
- Move to an adjacent hex / pivot (4.5).
- Attack a Target Hex (6.0).
- Rally to remove a Hit Marker (7.6).
- Stall (2.8).
In later Sections, we will introduce additional Actions that can be taken as well as how to take Group Actions with multiple Units.
2.4 Determine Action Cost
Each Action has an associated Action Cost, which may be subject to Action Cost Modifiers, such as Fatigue (2.6), Difficult Terrain (4.8), or Hit Markers (7.3).
Action Cost is counted in Action Points (AP).
- A Unit's Attack Cost is printed in its top left corner.
- A Unit's Move Cost is printed in its top right corner.
Action Cost accounts for the efforts, planning, time, and resources it takes to carry out a specific Action. More involved Actions have a higher Cost, and some Units are better prepared for specific Actions than others.
2.5 Make a Spent Check
After determining the Action Cost, roll one red d10 Spent Die.
If the result is higher than the Action Cost, the Unit passes its Spent Check and remains Fresh.
If the result is equal to or lower than the Action Cost, the Unit fails its Spent Check and becomes Spent. Flip the Unit to its Spent Side that shows a red bar.
The Spent Die is a weighted d10 with face values of:
1, 1, 2, 3, 3, 4, 5, 5, 6, 7
A Unit taking a 3AP Action has a 50% chance of becoming Spent. This means that on average, a Unit will be able to take two 3AP Actions before becoming Spent. This is the same number of Actions as when using the 7AP 2nd Edition rules.
Move Action Example: German Turn: The Germans take an Action to move their Panzer Grenadiers forward one hex. German Spent Check: The Grenadiers' Move Cost is 1AP, and they are not affected by any modifiers, for an Action Cost of 1AP. They must roll a 2 or higher with the Spent Die to remain Fresh. They roll a 4 and succeed.
2.6 Fatigue
A Unit must add a +1AP Fatigue Penalty to its Action Cost if it took any Action on its owner's previous Turn.
Fatigue is not cumulative. A Unit taking two or more consecutive Actions will still only have a total +1AP Fatigue Penalty.
Fatigue represents a squad's or vehicle crew's mental and physical weariness, as well as weapons overheating, ammunition expenditure, etc.
Constant action without pause or support into known or unknown danger exerts tremendous mental stress on participants that can be very detrimental to their combat effectiveness. Continuous weapon fire can also overheat gun barrels, making them difficult to handle and fire accurately.
In large-scale Missions, players may want to place a penny on the Unit that last took an Action, to mark that it will experience Fatigue if used again on its player's very next Turn.
Fatigue Example: German Turn: The Grenadiers attack the Rifles from their new position and miss. German Spent Check: The Grenadiers took an Action on the Germans' last Turn, so they experience Fatigue (2.6). Their Attack Cost is 3AP. They must add +1AP for Fatigue, for a total Action Cost of 4AP. Their Spent Check roll is a 4, a failure. The Grenadiers are flipped to their Spent side.
2.7 Passing
You may Pass instead of taking an Action on your Turn.
Passing has no cost, and no Unit suffers from Fatigue or must make a Spent Check.
Passing does not prevent you from taking Actions on future Turns.
However, if both players Pass consecutively, the Round ends (9.0).
Passing allows you to keep your Units Fresh while seeing what your opponent does — but there is the danger that your opponent will also Pass, ending the Round.
Passing may be useful to you if you want the game to progress quickly. However, if you still have Actions you wish to take, you may not want to risk having the Round end and will choose to Stall with one of your Units instead.
Passing Example: German Turn: The Germans are happy with their HMG position and have no Actions they want to take, so they decide to Pass (2.7). Soviet Turn: The Rifles move forward into a Woods hex for 2AP Action Cost. They perform a Spent Check and fail, flipping the Rifles to Spent. German Turn: The German HMG fails its 2AP Spent Check and must be flipped to its Spent side. Soviet Turn: The Soviets have no Fresh Units, so they decide to Pass. German Turn: The Germans also have no Fresh Units, so they decide to Pass, and the Round ends.
2.8 Stall Action
Instead of Passing, one of your Units may take a Stall Action for an Action Cost of 1AP.
A Unit that Stalls does nothing, but must make a Spent Check.
Stalling Example: Note: If the Germans passed for their first Action, but the Soviets also pass on their very next Turn, the Round ends. If the Germans do not want to risk this, instead of passing, they will Stall. German Turn: The Germans are happy with their HMG position and have no Actions they want to take, so the HMG stalls for 1AP. It then makes a successful Spent Check.
Command Action Points (CAPs)
3.0 Command Support
Command Action Points (CAPs) represent a force's available Command resources that are shared by all of their Units during the Round.
CAP Allocation per Round is provided in the Mission Book.
CAPs represent the leadership and logistic support a fighting force depends on to remain effective.
Leaders, from sergeants up, are responsible for motivating men to take actions, coordinating attacks, interfacing with command, bolstering morale, and more.
Logistical support ensures that ammo and food is supplied to frontline troops, wounded soldiers are evacuated, and HQ communication channels are in place.
Effective Command Support is often the difference between a successful engagement or failure.
3.1 Spending CAPs
Each time you spend a CAP, move the CAPs Marker down one space on the CAPs Track. When your CAPs Marker is at 0, you are out of CAPs to spend for the Round.
3.2 Modify a Die Roll
To modify any d6 die roll checks:
- Spend up to 2 CAPs before rolling.
- For each CAP spent, raise or lower the Number you need to roll by 1.
Up to 2 CAPs may be spent to modify a required Attack Hit Number (6.4), Rally Check Number (7.7), Initiative Check Number (9.10), or any other Number requiring d6 die rolls.
3.3 Reduce Action Cost
To modify a d10 Spent Check:
- Spend ANY NUMBER of CAPs before rolling.
- For each CAP spent, lower the Action Cost by 1.
Reducing a Unit's Action Cost increases the probability that your Unit will pass its Spent Check (2.5). A Probability Table is listed on your CAP Track Sheet.
Reducing Action Cost Example: German Turn: The Grenadiers want to move for an Action Cost of 3AP, meaning they must roll a 4 or higher Spent Check to remain Fresh. They have 4 CAPs remaining on their CAPs Track. Before they roll a Spent Check, they decide to spend 2 CAPs to reduce the Action Cost from 3AP to 1AP (3.3). They then roll a 2 and remain Fresh. Note: Reducing the Grenadier's Action Cost from 3AP to 1AP lowers their probability of becoming Spent from 50% to 20% (see the Spent Check Probability Table).
3.4 0AP Action Cost
- If the Action Cost is 0AP, no Spent Check is made.
- A Spent Unit may take a 0AP Action.
- A Spent Unit remains Spent after it takes a 0AP Action.
Reducing an Action's cost to 0AP with CAPs can be costly, but is a great way for a Spent Unit to still be able to take an Action.
Spent Unit 0AP Action Check Example: Soviet Turn: The Spent Soviets want to fire back at the Grenadiers. The Soviets spend 4 of their remaining 5 CAPs to lower the Rifles' 4AP Attack Cost to 0AP (3.4). The Rifles miss, make no Spent Check, and remain Spent. German Turn: The Fresh Grenadiers decide to move forward next to the Soviet Rifles for a 2AP Action Cost (1AP Move Cost + 1AP Fatigue). The German player wants to guarantee that the Grenadiers remain fresh, so takes a Command Action by spending 2 CAPs to lower their Action Cost to 0AP. The Grenadiers move next to the Rifles and remain Fresh.
Position and Movement
4.0 Unit Position
Each Unit on the map must occupy one Full Hex.
Half-hexes at the edge of the map cannot be occupied by Units. Full Hexes comprised of two half-hexes formed by two side by side map boards are playable.
A hex represents an area approximately 50 meters across.
4.1 Unit Facing
A Unit's Front direction is indicated by the green field along its top edge.
A Unit must face one of the six edges of the hex it occupies. It cannot face a corner of the hex.
A Unit cannot freely change the direction it faces. It may only change direction by Pivoting, during a Move Action.
4.2 Front and Flank Hexes
The hex a Unit is facing and the hexes to its front left and front right are known as its Front Hexes.
The hex opposite the direction the Unit is facing and the hexes to its back left and back right are known as its Flank Hexes.
The direction a Unit is facing is critical. It indicates where the Unit's "focus" is and what positions its soldiers are taking.
While deployed behind a wall or against an embankment, a Unit is very vulnerable to fire coming from its Flank. Not only is the Unit often more exposed, but Flank attacks can be psychologically devastating. "Where did the enemy come from? Are we surrounded? Can we get away?"
The natural instinct is often to run for added cover or hunker down. A Unit's experience and leadership play a key role in resisting the urge to run and stay to fight.
4.3 Unit Stacking
Units may occupy the same hex as a friendly or enemy Unit. Units occupying the same hex are said to be Stacked.
There is no limit to the number of Units that can occupy a single hex and these Units may be facing different directions.
4.4 Control Markers
Control Markers are placed on the map during setup, to indicate control of objective hexes, as specified by the Mission.
The side of the Control Marker that is face-up indicates which side currently controls the hex. If the opposing side gains control of the hex, flip the Control Marker over to show the new controlling side's symbol.
A Control Marker changes sides if BOTH of the following are true at the end of a Turn:
- The controlling side has no Units in the Control Marker hex.
- The opposing side has at least one Unit in the Control Marker hex.
4.5 Foot Unit Movement
A Unit is considered a Foot Unit if it has a red Move Cost in its top right corner.
When a Foot Unit performs a Move Action, it may move from its current hex to any adjacent hex.
After moving to a new hex, the Unit may freely Pivot to face any of the six edges of the new hex. The Unit may not Pivot before moving.
4.6 Pivoting in Place
A Unit may use a Move Action to Pivot in Place without moving into a new hex.
1AP Action Cost for all Units to Pivot in Place.
4.7 Move Cost Modifiers
A Unit that makes a difficult move is more likely to become Spent as a result.
This is represented by adding Move Cost Penalties to its Action Cost.
Move Cost Penalties for Foot Units:
- Difficult Terrain (4.8)
- Backwards Move (4.10)
- Uphill Move (12.2)
4.8 Terrain Type
Each hex has a Terrain Type.
The Terrain features under the dot in the center of a hex indicate the Terrain Type for the entire hex. Any other features depicted on the hex are decorative only.
Open Terrain: Rolling fields with grasses and crops.
Wheat: Fields with low growing crops that provide cover in Missions during August and September. Fences in fields have no effect. (Wheat Hexes: 8-H05, 8-E17; Not Wheat: 8-E04, 8-A10, 8-I14)
Corn: Fields with higher growing crops that provide cover in Missions during August and September. (Corn Hexes: 7-H05, 7-G15)
Woods: Large, well-developed trees with underbrush. (Woods Hexes: 7-H03, 7-L07; Not Woods Hexes: 7-L02, 7-M09)
Wood Buildings: Light cover wooden structures and sheds. All are yellow/brown-toned. (Wood Building Hexes: 7-H06, 7-K08, 9-J02; Not Wood Building Hex: 9-Q06)
Stone Buildings: Sturdier structures such as barns and farms built using stone or bricks. All are grey-toned. (Stone Building Hexes: 7-H07, 7-I10; Not Stone Building Hex: 7-J06)
Terrain may increase Move Cost (4.8), block Line-of-Sight (5.2), provide defensive bonuses (6.5), or provide cover for Hidden Units (11.0).
4.9 Difficult Terrain
A Unit moving into a hex with Difficult Terrain suffers a Move Cost Penalty.
Difficult Terrain Move Penalties for Foot Units:
- Woods (+1AP)
- Wood Buildings (+1AP)
- Stone Buildings (+1AP)
Units moving out of Difficult Terrain or just pivoting in place (4.6) do not receive any Move Penalties. Only add these penalties when moving into a new Difficult Terrain hex.
Note: Units with Bonus Moves may utilize these during this entry 'No Spent Check' move (15.2).
4.10 Roads
Roads may appear on hexes of any Terrain Type.
Roads do not need to cross the center dot of a hex to take effect.
When moving along a Road from a hex with a Road to an adjacent hex with a Road, Units ignore Difficult Terrain Move Penalties.
4.11 Backwards Move
When a Unit moves into one of its own Flank Hexes (4.2), it is said to be moving backwards.
Moving backwards requires greater care and time, so it adds a +1AP Move Penalty.
This penalty is added to any other Move Cost Modifiers such as Difficult Terrain.
A Unit that moved backwards may then still freely Pivot in any direction.
Backwards Move Example: Soviet Turn: The Soviet Rifles move forward into a Woods hex behind them. The Move Action Cost is 1AP. Woods is Difficult Terrain, so the Rifles must add a +1AP penalty (4.8). Pivoting after moving adds no cost (4.5). This brings the total Action Cost to 2AP. The Soviets must roll higher than 2 on the Spent Die to remain Fresh. The Soviets do not want to risk the Rifles becoming Spent, so they spend 2 CAPs to reduce their Action Cost to 0AP (3.4), making the move a Command Action and no longer having to make a Spent Check.
4.12 Reinforcements Entering Mission
Move Reinforcements (9.9) available to you onto the map with Move Actions. Reinforcements may also move on as a Group (10.6) or while being transported (15.10).
A Reinforcement's first move must be onto a full entry hex (4.0) specified by the Mission.
If enemy Units occupy all entry hexes, the Reinforcement Unit may instead enter along the map edge within 2 hexes of the enemy Units.
A Unit may never exit the map, unless specified by a Mission.
Entering Map Example: German Turn: A German Infantry Reinforcement takes a Turn to enter the map with a Move Action. It moves onto the first full hex, ignoring half hexes. No Spent Check is made when entering the Map.
Fire Zone and Target Hex
5.0 Fire Zone
A Unit may only make an Attack on a Target Hex that is in its Fire Zone.
A hex is in a Unit's Fire Zone if it meets ALL of the following criteria:
- Within the Unit's Arc of Fire (5.1)
- Within the Unit's Line-of-Sight (5.2)
- Within twice the Unit's Range (5.3)
You may check whether the hex you wish to target is in a Unit's Fire Zone before committing to an Attack Action.
5.1 Arc of Fire
A Unit's Arc of Fire is defined by extending its three Front Hexes radially across the map.
5.2 Line-of-Sight (LOS)
Two hexes are in Line-of-Sight (LOS) of one another if a line can be drawn between the center dot of one hex and the center dot of the other without crossing an intervening hex that has LOS-Blocking Terrain.
All Units have a 360-degree LOS out of the hex they occupy.
LOS-Blocking Terrain:
- Woods
- Wood or Stone Buildings
- Corn (During Aug/Sept Missions only)
Note that Terrain only blocks LOS if it is between two hexes. A Unit may attack an enemy occupying a hex that has LOS-Blocking Terrain, as long as there is no additional Blocking Terrain in front of it.
The Attacker's LOS is blocked if any part of the line connecting its hex and the Target Hex cuts across any part of a Blocking Terrain hex. Ex: A Buildings hex blocks LOS even if the LOS line does not intersect the image of the building in the hex.
If LOS passes exactly along the edge between a Blocking Terrain hex and non-Blocking Terrain hex, LOS is not blocked.
Units never block each other's LOS.
All LOS rules are reversible. If Unit A has LOS on Unit B, then Unit B has LOS on Unit A.
5.3 Range
A Unit's Range is printed near the bottom center edge in yellow text.
The Attacker is in Range of the Target Hex if the distance from it to the Target Hex (in number of hexes) is equal to or less than its Range number.
The Attacker's hex is not included when determining Range to the Target hex, but the Target's hex is counted.
A Unit can attack a Target Hex up to twice its Range away, but will suffer a Long Range Penalty against a Target Hex that is beyond its Range number (6.6).
Any hex that is more than twice the Unit's Range away is not in its Fire Zone.
Resolve an Attack
6.0 Resolve an Attack
The Unit selected to perform an Attack Action is called the Attacker. Any Unit or Units occupying the Target Hex are called the Targets.
After choosing a Target Hex in the Attacker's Fire Zone, resolve a separate Attack against each Target in the hex (6.8).
To resolve an Attack, follow these steps in order:
- Determine the Target's Defense Rating (DR)
- Determine the Attacker's Attack Rating (AR)
- Determine the Hit Number
- Resolve a 2d6 Attack roll
6.1 Defense Rating (DR)
The Target's Defense Rating is its Defense plus any DR Modifiers (6.4).
A Unit's Defense numbers are in the bottom right corner.
Use the Target's higher Front Defense unless attacked from its flank (6.3).
DR = Target's Defense + DR Modifiers
6.2 Soft and Armored Targets
A Unit may either be a Soft Target or an Armored Target, depending on the color of its Defense numbers.
- Red Defense indicates a Soft Target.
- Blue Defense indicates an Armored Target.
6.3 Flank Attacks
If the Target is attacked from a hex that is NOT one of its Front Hexes (4.2), it is a Flank Attack.
For a Flank Attack, use the Target's lower Flank Defense instead of its Front Defense.
6.4 Terrain DR Modifiers
If the Target is in Terrain that provides cover, it gains a Terrain DR Modifier.
Terrain DR Modifiers for all Units:
- Woods: +2DR
- Wood Buildings: +1DR
- Stone Buildings: +2DR
6.5 Attack Rating (AR)
The Attacker's Attack Rating is its Firepower (FP) plus any AR Modifiers (6.8).
FP numbers are in the bottom left corner.
- Red Firepower is used to attack Soft Targets.
- Blue Firepower is used to attack Armored Targets.
Attacker's Firepower Color = Target's Defense Color
A Unit's red Firepower reflects its anti-personnel capabilities. Its blue Firepower reflects its armor-piercing capabilities.
Some Units are much more effective against one type of target than another. Infantry and machine guns usually are not very effective against tanks!
6.6 Range AR Modifiers
The Attacker's AR may be affected by a Range Modifier depending on its distance from the Target.
- Long Range Penalty: -2AR if the distance between the Attacker and Target Hex is beyond the Attacker's Range.
- Short Range Bonus: +3AR if the Attacker is adjacent to its Target Hex.
- Close Combat: +4AR if the Attacker is in Close Combat (6.9). Support Weapon Units have a -2AR penalty in CC (6.10).
6.7 Hit Number and Attack Roll
The Attack's Hit Number is determined by subtracting the Attacker's Attack Rating from the Target's Defense Rating.
DR - AR = Hit Number
Once the Hit Number has been determined, roll a 2d6 Attack. A roll equal to or higher than the Hit Number results in a Hit (7.0).
Remember that you may spend CAPs to adjust your Hit Number by up to 2, but you must do so before rolling! (3.2)
6.8 Attacking Stacked Units
If there are multiple Units stacked in the Target Hex (4.3), resolve a separate Attack Roll against each one (including friendly and enemy Units).
This counts as a single Attack Action, and the Attacker resolves only one Spent Check.
If there are both Soft Targets and Armored Targets stacked in the Target Hex, the Attacker uses its corresponding colored Firepower when rolling against each of them.
Each individual Target's facing determines whether it uses its Front Defense or Flank Defense.
If CAPs are spent to reduce a Hit Number, each CAP spent modifies only one 2d6 roll. Up to 2 CAPs may be spent on each separate roll (3.2).
It is often unwise to concentrate and stack your Units in one hex, since it makes them easier to hit. Military doctrine usually advises spreading Units out.
Attack Action Example: German Turn: The Grenadiers want to attack the Soviet Rifles. The Grenadiers confirm that the Rifles are within their Fire Zone (5.0). DR: The Grenadiers are attacking from within the Rifles' Arc of Fire, so the Rifles utilize their 12 Front Defense. To this they add the Woods' Terrain +2DR Modifier (6.4), for a total 14DR. AR: The Rifles' Defense is red, indicating a Soft Target (6.2), so the Grenadiers use their red 5 Firepower (6.5). The Rifles are in normal Range, so the Grenadiers receive no Range AR Modifier. They have a total 5AR. The Germans calculate their Hit Number: 14DR - 5AR = 9 Hit Number. The Germans then decide to spend 1 CAP to reduce their Hit Number to 8 (3.2). They roll 2d6 and miss with a 7. The Rifles get lucky this time! The Grenadiers' Attack has an Action Cost of 3AP. They make a successful d10 Spent Check.
Flank Attack Example: Soviet Turn: The Germans thought their Pak Gun was in a secure position in a Wood Building — but on their last Turn Soviet Rifles surprised them by moving behind them and now attack! DR: Since the Rifles are attacking from outside the Pak's Arc of Fire, the Pak must use its 10 Flank Defense (6.3). It also receives the +1DR for the Wood Building (6.4) hex it occupies, giving it a total 11DR. (The Pak being Spent has no impact on its Defense.) AR: The Pak's Flank Defense is a red Soft Target, so the Rifles use their red 3 Firepower (6.5). Since they are in a hex adjacent to the Pak, they also receive a +3AR Short Range Bonus (6.6), for a total 6AR. The Soviets calculate their Hit Number: 11DR - 6AR = 5 Hit Number. The Soviets feel it is very important this Attack succeeds, so they decide to spend the maximum allowable 2 CAPs (3.2) to reduce their Hit Number from 5 to 3, improving their odds of achieving a Hit. They make a 2d6 Attack and roll a 6, resulting in a Hit! The Rifles then spend 1 CAP to lower their 4AP Attack Cost to 3AP, roll their Spent Check, and still fail with a result of 3!
Attacking Stacked Units Example: Soviet Turn: The Soviet Rifles fire into a hex occupied by German Infantry and Panzer Grenadiers. The Rifles must roll a separate Attack for each enemy Unit. The Rifles decide to resolve the attack roll against the Infantry first. The Attack comes from the Infantry's flank, so they use their 11 Flank Defense. They are in Open Terrain and receive no Terrain bonus. They are a red Soft Target, so the Rifles use their red 3 Firepower with no modifier. The Hit Number against the Infantry is: 11DR - 3AR = 8 Hit Number. The Soviets roll a 6 and miss. The Grenadiers are facing the Rifles and use their 12 Front Defense to defend. They are a Soft Target, so the Rifles again use their red 3FP. This time the Hit Number is: 12DR - 3AR = 9 Hit Number. The Soviets roll a 10 and score a Hit. The Rifles' Action Cost is 4AP, and they only need to make one Spent Check. They roll a 5 and remain Fresh.
6.9 Close Combat (CC)
A Unit occupying the same hex as an enemy Unit may engage in Close Combat.
- It may only attack Units in that Close Combat hex.
- If there are stacked enemy Units in the Close Combat hex, it does not Attack each of them, but instead must choose a single Target to attack.
Units in Close Combat are affected by the following Close Combat Modifiers:
Attack Rating:
- +4AR Bonus to the Attacker in Close Combat.
Defense Rating:
- Targets always use their Flank Defense.
- Foot Units gain Terrain DR Modifiers (6.4).
MG and Mortar Units, comprised of 2-5 men, were easily overwhelmed in close quarters fighting by a squad of 10 or more men armed with SMGs, pistols, and grenades.
6.10 Support Weapon AR Penalty
Support Weapon Units are marked with a white field behind their Firepower.
Support Weapon Units in Close Combat:
- Do not gain a +4AR Bonus, but instead
- Suffer a -2AR Penalty.
6.11 Withdraw from Close Combat
Moving into an enemy hex to initiate Close Combat requires a Move Action, so the aggressor will have to wait a Turn before it is able to attack. This means their opponent will have the first chance to attack or withdraw — if they have Fresh Units.
If a player decides it would be better to withdraw from Close Combat rather than attack, the following restrictions apply:
You may not, on the Turn after an enemy moved into your hex, advance your Units into the hex that was previously occupied by that enemy, or any of the hexes adjacent to that previously occupied hex.
Close Combat Example: Assume all Units pass their Spent Checks. Soviet Turn: The Soviet Rifles move into a Wood Building hex 7-J06 to initiate Close Combat with a Spent German HMG. German Turn: The HMG is Spent, and the Germans do not have enough CAPs to take a Command Action, so they decide to move their Infantry from an adjacent hex to join the Close Combat. Soviet Turn: The Rifles may now attack one of the two German Units (6.8), or withdraw if they wish. Note that the Rifles may not withdraw to any of the red highlighted hexes (6.10). They decide to attack the HMG. The HMG defends with its 10 Flank Defense in Close Combat, regardless of facing (6.9). The HMG's DR is: 10 Flank Defense + 1DR Terrain Modifier = 11DR. The Rifles' AR is: 3 Firepower + 4AR Close Combat Bonus = 7AR. This means the Hit Number is: 11DR - 7AR = 4 Hit Number. The Soviets roll a 7 and Hit.
Hits and Rallying
7.0 Hits
When an Attack succeeds, the Target suffers a Hit.
7.1 Critical Hit
If the Attacker's roll result exceeds its Hit Number by 4 or more, the Hit Unit receives a Critical Hit and is instantly destroyed (7.11).
7.2 Hit Markers
If the Attacker's roll result is equal to or higher than the Hit Number, but less than a Critical Hit, the Hit Unit receives a Hit Marker.
Hit Markers come in two types:
- A Hit against a red Defense receives a Soft Target Hit Marker.
- A Hit against a blue Defense receives an Armored Target Hit Marker.
To apply a Hit, pull a Hit Marker of the appropriate type at random from the Draw Pile. Look at its hidden side, but do not show it to your opponent. Then place it face-down underneath the Hit Unit.
At any time, you may secretly look at Hit Markers under your own Units.
In the heat of battle, an attacker cannot immediately determine the extent of its target's casualties.
Soft Target Hit Markers (the number in parentheses shows how many copies are included in the game):
- Stunned (x2): Unit cannot take any Action other than Rally. Rally Number: 7.
- Unnerved (x2): No stats are affected. Rally Number: 7.
- KIA (x1): Reveal immediately. Unit is destroyed.
- Panicked (x2): Unit cannot Attack. Flank Def: +1. Front Def: -2. Rally Number: 8.
- Pinned (x5): Unit cannot Move or Pivot. Rally Number: 7.
- Suppressed (x5): Attack Cost: +1AP. Firepower: -2. Rally Number: 7.
- Cowering (x2): Attack Cost: +2AP. Move or Pivot Cost: +1AP. Range: Drops to 1. Def: +1. Rally Number: 8.
- Berserk (x1): Attack Cost: -1AP. Firepower: +1. Range: Drops to 1. Flank Def: +1. Front Def: +2. Rally Number: 8.
A "cannot" symbol means the Action may not be used. A blue or red number affects only the same-colored stat.
7.3 Hit Marker Effects
Hit Markers apply Modifiers to a Unit's stats and abilities.
Each Modifier printed on a Hit Marker applies to the stat in the corresponding location on the Unit. Ex: A +1 in the top left corner of a Hit Marker means the Hit Unit's Attack Cost is increased by 1AP.
A "cannot" symbol means the Unit may not use the corresponding Action at all. Ex: A "cannot" symbol in the top left corner of a Hit Marker means the Unit may not Attack.
If no value appears in the location of a Hit Marker, there is no effect on the corresponding stat of the Hit Unit.
Taking a Hit does not necessarily mean that men are killed. In battle, soldiers often panic when attacked and run away. At other times, they may be injured or psychologically unable to fight effectively. These combat effects are simulated through the Hit Markers.
Hit Marker Example: German Turn: The Panzer Grenadiers attack a Soviet Maxim MMG and score a Hit. The Soviets pull a Soft Target Hit Marker from the Draw Pile and secretly look at it (7.2). They drew a "Suppressed" Marker, which affects the Rifles' stats as follows: their 4AP Attack Cost increases to 5AP; their red 3FP decreases to 1FP; their blue 0FP decreases to -2FP; their Move Cost and Defense are not affected since these areas are blank. Without showing the Hit Marker to the German player, they place it face-down underneath the MMG. The Grenadiers succeed on their Spent Check. Soviet Turn: The MMG shoots back at the Grenadiers. It has a modified red 1 Firepower and immediately reveals its Hit Marker, placing it now face up under the MMG. The Grenadiers have a 12 Front Defense, resulting in an 11 Hit Number. The MMG makes its 2d6 Attack roll and misses with a 10. Next the MMG rolls a Spent Check against its 5 Action Cost and fails. The Soviets then reflect that attacking with a Suppressed Unit was perhaps not the best choice.
7.4 Receiving a Second Hit
If a Unit with a Hit Marker receives another Hit, it is destroyed (7.11).
7.5 Revealing Hit Markers
Reveal a Hit Marker when it modifies any:
- Action Cost, or
- Hit Number.
Then return the Hit Marker under the Hit Unit face-up. The Hit Marker is now public information.
7.6 Rally Action
A Hit Unit may attempt to remove its Hit Marker by Rallying.
Reveal and remove any Hit Marker it may have had and return it to the Draw Pile.
7.7 Rally Check
A Rally Number is located at the top center of each Hit Marker.
To Rally, the Unit must succeed on a 2d6 Rally Check equal to or higher than the Hit Marker's Rally Number.
If the Rally Check is successful, the Hit Marker is revealed, and returned to the Draw Pile.
If the Rally Check fails, the Hit Marker is not revealed. The Unit may attempt another Rally Check on future Turns.
7.8 Rally Number Modifiers
A Hit Marker's Rally Number is modified by Terrain and Friendly Units. These modifiers are cumulative.
Terrain Bonus (-1 to Rally Number):
- Woods, Wood or Stone Buildings
- Corn or Wheat (during Aug/Sept Missions only)
Friendly Stacking Bonus (-1 per Unit to Rally Number):
- Each friendly un-Hit Unit in its hex.
As with any die roll check, you may spend up to 2 CAPs to reduce your Unit's Rally Number.
7.9 Rally Restrictions
A Hit Unit may not take a Rally Action if either:
- It is in a hex with an enemy Unit.
- Its Hit Marker has "No Rally" printed on it.
7.10 Rally Spent Check
After performing a Rally Action, the Unit must make a Spent Check, regardless of whether its Rally Check succeeded.
The Action Cost to Rally is 5AP plus any applicable Action Cost Modifiers such as Fatigue.
Rally Action Cost = 5AP + Modifiers
Rallying Example: Soviet Turn: The Soviets, desperate to save their MMG (which is Spent and has a Suppressed Hit Marker), use a Command Action to attempt to Rally. The Action Cost to Rally is 5AP. Since the MMG attacked last Turn, it has Fatigue, giving it an Action Cost of 6AP. The Soviets must spend all 6 of their remaining CAPs for the Rally attempt! The Suppressed Hit Marker has a 7 Rally Number. The Rifles are located in a Woods hex for which they receive a -1 Terrain Bonus. The Soviets will also commit 1 CAP for another -1 modifier. The MMG has to roll 2d6 equal to or higher than its 5 Rally Number (7 - 1 Woods - 1 CAP). It rolls a 7, removes the Suppressed Hit Marker, shows it to the opponent, and returns it to the Hit Marker Draw Pool.
7.11 Destroyed Units
Remove the destroyed Unit from the map.
Reveal and remove any Hit Marker it may have had and return it to the Draw Pile.
Adjust the VP Track, if called for by the Mission (9.1).
Destroyed Unit Example: German Turn: The Grenadiers attack the Soviet MMG in the Woods hex, having successfully brought its Hit Number to 7. The Germans roll 2d6 and get an 11, which is a Critical Hit (7.1). The MMG is destroyed outright! The Soviets place the MMG on their CAPs Track, reducing their CAPs pool by 1 (7.12).
7.12 Reduce CAPs
Destroyed Units are placed on their owner's CAPs Track. The first destroyed Unit is placed on the starting CAP number specified in the Mission, the second destroyed Unit on the next lower CAP number, and so on.
Thus, a player's CAP Allocation per Round is reduced by 1 for each destroyed Unit for the remainder of the Mission.
If the CAPs Track Marker is on the space where a destroyed Unit should be placed, the CAPs Marker is moved down one space and the player immediately loses use of that CAP.
The loss and attrition of front line leaders affects a force's command structure and combat effectiveness.
7.13 Minimum CAPs
If a player has only 3 remaining open spaces on their CAPs Track, destroyed Units are no longer placed there.
A player will always have at least 3 CAPs available at the start of a Round.
Battle Cards
8.0 Battle, Weapon, and Veteran Cards
There are three types of Battle Cards:
- Action Cards are played as an Action.
- Bonus Cards are played to modify a separate Action.
- Event Cards trigger special events or scoring.
Also included in the game:
- Weapon Cards can be used as Attack Actions.
- Veteran Cards give some Units bonus abilities.
Individual card descriptions are listed on page 37.
8.1 Battle Draw Deck
The Mission specifies which Action, Bonus, and/or Event Cards are shuffled into the Battle Draw Deck during setup. It may also specify cards that start in players' hands. Most cards have multiple copies, all of which are included in the deck.
The Mission also specifies if a player receives any Weapon or Veteran Cards during setup, which they draw separately and may keep face-up on the table in front of them.
8.2 Holding and Playing Battle Cards
There is no limit to the number of Battle Cards a player may hold in their hand or play in a Round. Only one Action Card may be played in a Turn and/or any number of Bonus Cards.
Un-played cards may be held into future Rounds.
8.3 Action and Bonus Cards
Each card shows a Card Title, a Card Type Icon, a Cost, an Effect Description, a Card ID #, and a Copy Number.
8.4 Playing Action and Bonus Cards
You may play an Action Card for the cost printed in the box, instead of taking an Action listed in Section 2.3.
A Bonus Card is played in conjunction with any Action that it applies to and is not considered a separate Action. Playing an Action Card flags the Unit as being fatigued for the next Turn.
- Action Cost: This card is played by a Unit for the Action Cost listed in the green box. This cost may be modified with CAPs. If the Spent Check fails, the Unit that played the card becomes Spent.
- Command Action Cost: Play this card for the Action Cost listed in the blue box, paying the full cost with CAPs. The card may not be played if not enough CAPs are available. No Spent Check must be made and it may be played by any Spent or Fresh Unit.
Card Action Costs are NOT affected by any modifiers.
Resolve the card's effect and then discard it.
Playing an Action Card Example: Soviet Turn: The Soviets wish to play the 'Follow Me!' card to automatically Rally a hit Rifles. This card has a 2AP cost in a green box. The Soviets discard the card, remove the Hit Marker, and make a 2AP Spent Check. If the Rifles had been Spent, the Soviets could pay 2 CAPs to reduce the card's Action Cost to 0AP so they could Rally.
8.5 Event Cards
Event Cards initiate events such as Reinforcements entering the Mission or Objective scoring.
When you draw an Event Card, reveal and resolve it immediately.
Each Mission specifies if and how Event Cards are to be used.
8.6 Weapon Cards
Weapon Cards represent additional weapons that can be used during the Mission.
A Weapon Card with an Action Battle Icon in the bottom right can be used by a Unit as an Action.
A Weapon's Firepower, Range, and Action Cost are specified on the card and can be played by Spent Units if its cost is paid for with CAPs.
Artillery Weapon Cards (13.4) are not used as Actions, but are activated during the Pre-Round Sequence.
The number of times a Weapon Card may be used is specified in each Mission.
8.7 Veteran Cards
Veteran Cards give your Units extra capabilities and play options.
How often a Veteran Card may be played is specified at the bottom of the card.
Veteran Cards simulate the experience gained by Units in past battles.
8.8 Card Action Icons
The icons printed on the bottom of a card describe how it may be played:
- Action: Use this card as an Action.
- Group Action Icon: May be played as part of a Group Action.
- High Explosive (HE): Resolve the attack against the Target's Flank Defense.
Round End & Pre-Round Sequence
9.0 Ending the Round
After both players Pass consecutively, the Round ends.
- Award End of Round Victory Points (VPs).
- Determine if the Mission Ends.
9.1 Victory Points (VPs)
Victory Points (VPs) are gained, either during or at the end of a Round, as specified by each Mission, including:
- Destroying enemy Units during a Round (7.11).
- Controlling Control Markers at the end of a Round (4.4).
- Achieving Objectives during Mission-specified Scoring Rounds or when specific Event Cards are drawn (8.5).
If you destroy your own Unit (yes, it can happen), your opponent receives the VP for its destruction.
9.2 The Victory Points Track
There is only one Victory Point Track in the game, which tracks the VPs gained by all players.
The VP Marker has a German Cross on one side and a Soviet Star on the other. The side that is face-up indicates which side currently has Victory Advantage.
When the side that has Victory Advantage gains a VP, the VP Marker is moved forward one space. When the side that does not have Advantage gains a VP, the VP Marker is moved backward one space.
If the VP Marker drops below 1, the Marker is flipped, showing the opposing side now has advantage. There is no zero; one side or the other always has the advantage.
9.3 Check for Mission End
If this is the last Round, or the Mission's Victory Conditions have been met, the Mission ends.
The side that has Victory Advantage is the winner.
If the Mission does not end, continue with the next Round's Pre-Round Sequence.
9.4 Pre-Round Sequence
- Advance the Round Marker.
- Remove all Light Smoke.
- Flip all Heavy Smoke to Light Smoke.
- Flip all Spent Units to their Fresh side.
- Reset CAPs.
- Draw Battle Cards.
- Prepare Reinforcement Units.
- Plan next Round's Artillery Strikes.
- Resolve last Round's planned Artillery Strikes.
- Roll for Initiative.
9.5 Advance Round Marker
Advance the Round Marker forward one space on the Mission Round Track.
9.6 Flip Spent Units
Flip all Spent Units on the map to their Fresh side, retaining any Hit Markers that are present.
Make sure the Unit is facing the same direction after it is flipped.
9.7 Reset CAPs
Each player resets their CAP Marker to their allocated CAPs specified by the Mission, minus 1 CAP for each of their destroyed Units.
CAPs left over from the previous Round do not carry over.
9.8 Draw Battle Cards
Each player draws the number of Battle Cards specified by the Mission from the Battle Deck.
9.9 Prepare Reinforcements
If the Mission specifies that Reinforcement Units are available in the coming Round, they should be placed next to the map to show that they are now available.
They do not have to be moved onto the map on the Round they come into play, but may be held back for a later Round.
9.10 Smoke and Artillery Strikes
Smoke and Artillery are not available for Missions 1 & 2 and are discussed in later sections (13.4, 14.0).
9.11 Roll for Initiative
The side that does NOT have Victory Advantage rolls a 2d6 Initiative Check and may modify it with up to 2 CAPs.
The Initiative Check succeeds on a roll of 8 or higher and, if successful, that player takes the first Turn this Round. If they fail, their opponent takes the first Turn this Round.
You are now ready to play Missions 1 & 2!
Now that you have played the first two Missions and are familiar with the basic rules of Conflict of Heroes, you will learn to use Group Actions and Hidden Units.
Group Actions allow a player to use multiple Units on the same Turn, while Hidden Units can set up ambushes or move stealthily across the map.
Note: After you learn these Group Action and Hidden Unit rules you can always apply them to previous Missions for extra fun.
Group Action
10.0 Group Action
Instead of selecting a single Unit to take an Action, you may select a Group to take a Group Action. Only a single Spent Check is made for the entire Group.
To take a Group Action, follow these steps in order:
- Select a Group (10.1)
- Perform a Group Action (10.2)
- Determine the Group Action Cost (10.3)
- Make a single Group Spent Check (10.3)
10.1 Perform a Group Action
Perform one Action (2.3) or Card Action (8.4) with the selected Group.
A Group Action must be composed of Fresh Units.
Spent Units may be included in a Group if its Action Cost is 0AP, either by playing an appropriate Action Card or lowering its cost with CAPs.
If a Group's Action Cost is 0AP, no Spent Check is made.
10.2 Group Move
Groups move according to standard movement rules:
- Each individual Unit may move into any hex adjacent to it and then Pivot, or not move and just Pivot in Place (4.11).
- Not all Units in the selected Group must move.
- Units do not have to end their moves adjacent to each other.
10.3 Separating Units
During Group Movement, a moving Unit may move to a hex that is not adjacent to any other moving Units.
10.4 Group Move Action Cost
The Group Move Action Cost is equal to the highest Move Action Cost of any individual Unit in the Group.
Group Action Cost = Highest Individual Move Cost
Units can join a Group to form a larger connected group area, even if they do not participate in the Move Action. They will have no Move Action Cost, but they do risk being Spent if the Group fails its Spent Check!
Group Move Example: Soviet Turn: Four Rifles move as a Group towards the German HMG. Three of the Rifles move for 1AP. One Rifles moves into Woods for 2AP and Pivots. Thus, the Group Move has an Action Cost of 2AP. They take one Spent Check and roll a 5, and all Rifles remain Fresh. German Turn: The HMG fires at one of the Rifles, scores a Critical Hit, and destroys them. They are removed from the map and placed on the Soviets' CAPs Track (7.12). The Germans pass their Spent Check. Soviet Turn: The Soviets can either move the two adjacent Rifles, or move the lone Rifles. They decide to move all three as a Group, since they are no longer continuously adjacent hexes. They decide to move two of the Rifles. Both Rifles have a Move Cost of 1AP, and add +1AP Fatigue Penalty. This means the Group Move has an Action Cost of 2AP. They roll one Spent Check and get a 1, and both Rifles are Spent!
10.5 Group Attack
A Group Attack is a single Attack made by one Unit with support from other Units surrounding it.
- Attack Leader: A primary Unit attacking a Target Hex.
- Supporting Units: Any Units that are able to support the Attack Leader.
10.6 Supporting Units
To support the Attack Leader, a Supporting Unit must meet all of the following criteria:
- The Supporting Unit is in the Attack Leader's hex or one of its six adjacent hexes.
- The Target Hex is in the Supporting Unit's Fire Zone (5.0).
- The Target Hex is within the Supporting Unit's Normal Range (i.e., not in Long Range).
- The Supporting Unit does not have a Hit Marker affecting its Firepower.
- If the Attack Leader is in Close Combat, only Units in the same hex may support.
10.7 Group Attack Rating
The Attack Leader receives a Group Support Bonus of +1AR for each Supporting Unit.
All other AR modifiers are based on the Attack Leader.
Group AR = Leader's Firepower + 1AR per Supporting Unit
10.8 Group Attack Action Cost
The Group Attack Action Cost equals the Attack Leader's Action Cost.
Group Action Cost = Leader's Attack Cost
Group Attack Example: German Action: The Germans Group Attack Rifles 01. The HMG is the Group's Attack Leader (10.9). It has 4 Firepower against Soft Targets. Infantry Units 10 and 11 can support the HMG for +1AR each, because they are adjacent to the HMG Attack Leader, and the Target Hex is in their Fire Zone. Infantry 12 cannot join the Group Attack, since it is not adjacent to the HMG. The HMG's total AR is 4+1+1 = 6AR, avoiding a Critical Hit. It rolls an 8 and Hits. The Group's Attack Action Cost is the HMG's 2AP Attack Cost, with no other modifiers. They roll one Spent Check for a 1 and all 3 Units become Spent! If the HMG had fired at a different Rifles Unit, Infantry 10 and 11 could not have supported it, because the Woods hex the HMG occupies blocks their LOS.
10.9 Group Rally
Units adjacent to each other may attempt to Rally together as one Action.
Roll an individual Rally Check (7.6) for each Unit in the Group. Each Unit that succeeds in its Rally Check removes its Hit Marker.
Group Action Cost = 5AP Rally Cost
10.10 Group Spent Check
- Use the Action Cost for the Group Action taken.
- Add any Cost Modifiers, such as Fatigue (2.6), Difficult Terrain (4.8), or Hit Markers (7.3).
- May reduce the Group Action Cost with CAPs.
- Roll a single Spent Check for all Units in the Group.
If the Group fails its Spent Check, all Units in the Group become Spent, even if a Unit became separated from the Group (10.7).
If the Group succeeds its Spent Check, all Units in the Group remain Fresh.
10.11 Fatigue
Fatigue penalties can affect a Group Action Cost, but only the Units affected by Fatigue.
Group Move affected by Fatigue Example: Soviet Turn 1: Rifles 01 moved next to a group of 3 other Soviet Rifles. It passes a 1AP Spent Check. Soviet Turn 2: All 4 Rifles now group move forward into Open Terrain for a Move Cost of 1AP each. Rifles 01 must add +1AP to its Move Cost due to Fatigue, for a total 2AP (1AP Move Cost + 1AP Fatigue). The Group must make a 2AP Move Spent Check.
Group Attack affected by Fatigue Example: German Turn 1: Infantry 01 moves into a Woods hex next to an HMG for 2AP (1AP Move + 1AP Terrain Penalty). German Turn 2: The HMG and Infantry now Group Attack an advancing Rifles Unit in Open Terrain. The HMG is designated the Attack Leader with a 2AP Attack Cost and no other modifiers. The Infantry supports the Attack for +1AR, but its Fatigue does not affect the Group Action Cost, since this is based on the Group Leader's Attack Cost. The Group must make a 2AP Attack Spent Check.
10.12 Other Group Actions
Multiple Units may take other Group Actions such as creating Hasty Defenses, laying Barbed Wire, becoming Hidden, and more.
Groups may use Card Actions that have the Group Action Icon (8.8). The card's Group Action Cost is the Action Cost printed on the Card.
Ingenious combinations of Group Actions are limited only by a player's creativity.
Hidden Units
11.0 Hidden Units
Each Mission specifies if any Units are Hidden during setup.
To place Hidden Units, secretly choose and mark the coordinates of the hexes where your Hidden Units are located on a piece of paper or a Hidden Unit Tracking Map.
Printable Hidden Unit Tracking Maps are available at www.AcademyGames.com/SoS.
11.1 Revealing Hidden Units
A Hidden Unit must be revealed when any of the following occurs:
- The Unit performs any Action other than Stall, Rally, or Hidden Move.
- The Unit occupies a hex with any non-Hidden friendly or enemy Unit.
- The Unit occupies a non-Cover Terrain hex within 2 hexes and in clear LOS of an enemy Unit.
- An enemy Unit attacks the Hidden Unit's hex and scores a Hit (11.7).
A player may also reveal a Hidden Unit at will.
11.2 Place Revealed Units
When a Hidden Unit is revealed, place it on the map hex marked on your Tracking Map.
Hidden Units do not face any direction until they are revealed. Choose the direction the Unit faces when placing it on the map.
11.3 Hidden Movement
Only Foot Units can perform a Hidden Move Action for 5AP to become Hidden or move while Hidden.
- Ignore Terrain Move Penalties.
- Add Fatigue and Hit Marker Move Penalties.
11.4 Becoming Hidden
A Non-Hidden Foot Unit may take a 5AP Hidden Move Action to become Hidden. It must be:
- A Fresh Unit, and
- Not in any enemy LOS.
The Unit may be Hidden in the hex it previously occupied, or in any adjacent hex that is not in enemy LOS. Remove the Unit from the map and mark its location on your Tracking Map.
11.5 Move While Hidden
A Hidden Foot Unit may move for 5AP into any adjacent hex that will not reveal it. Mark the new location on your Tracking Map.
Hidden Movement Example: German Turn: The Germans have a Hidden Infantry Unit in hex 8-L08, which is marked on their Tracking Map. They tell the Soviets that a Unit will be taking a Hidden Move Action. They write down that the Infantry Unit is now in hex 8-K08 (11.4). Since hex K08 is Cover Terrain, the Mortar cannot see the Hidden Infantry, even though it is right behind it! (11.1). The Action Cost for the Infantry to Hidden Move is 5AP. The Germans spent 2 CAPs to reduce it to 3AP (11.3). The Germans roll a Spent Check and succeed with a 4.
Revealing a Hidden Unit Example: German Turn: On the Germans' next Turn, the Infantry reveals itself, is placed on the map, and moves into the hex containing the Soviet Rifles, with an Action Cost of: 1AP Move Cost + 1AP Woods + 1AP Fatigue = 3AP. The Germans roll a Spent Check and pass with a 5. Soviet Turn: The Mortar team will move out of the CC hex. It may not move into the hex the German Infantry moved from, or either of that hex's adjacent hexes. So the Mortar moves forward a hex and pivots to face the Germans.
Hiding a Unit Example: Soviet Turn: A Soviet Sniper moves backward to get out of the LOS of a German HMG which is set up behind the Wood Buildings. The Sniper is moving in Open Terrain with a Move Cost of 1AP, but must add a +1AP Backwards Move Penalty. It rolls a 2AP Spent Check and succeeds with a 3. German Turn: The Germans are occupied elsewhere. Soviet Turn: The Sniper, now out of LOS of the HMG, is able to take a Hidden Move Action to disappear into the wheat field. The Soviets remove the Sniper and place it beside the map, secretly writing down which hex it is Hidden in. Its Action Cost is: 5AP Hidden Move Cost + 1AP Fatigue = 6AP. They fail their Spent Check by rolling a 4. The Sniper beside the map is flipped to its Spent side, but remains Hidden. The Germans know the Sniper must be Hidden in hex E05 or D06, since the other hexes adjacent to its previous position are in LOS of the HMG. Note that hex E08 is not a Wood Building, as there is no Building feature under the hex's center dot.
Attacking a Hidden Unit Example: Soviet Turn: The Soviets believe Germans are hidden somewhere in the Wheat to the southeast. It is September, so Wheat hexes count as Cover Terrain (5.2). Wheat does not block LOS, even in September, so the Soviets are able to attack hex 8-M11 with their MMG. They Attack, rolling 2d6 with an 8 result. There is no Unit in the hex, so the Germans take a moment to pretend to calculate the Hit Number, then declare that no Hit was scored (11.7). If there had been a hidden German Infantry Unit in the hex, the German would have calculated a 9 Hit Number (12 Front Defense - 3 Firepower). The MMG rolled an 8, so the German declares that no Hit was scored. The MMG makes a 3AP Spent Check and fails. The Soviet still does not know if there is anything hidden in the hex, but does feel a bit more secure...
You are now ready to play Mission 3!
11.6 Spent Hidden Units
If a Hidden Unit fails its Spent Check when performing a Move, Rally, or Stall Action, it remains Hidden.
Mark the Unit as Spent on your Tracking Map or paper.
11.7 Attacking Hidden Units
You may Attack an empty hex in the hope of revealing a Hidden Unit.
Choose a Target Hex that is in the Attacker's Fire Zone. Roll a 2d6 Attack without calculating the Hit Number.
- If there is a Hidden Unit in the Target Hex: your opponent secretly calculates the Attack's Hit Number using the Target's Defense and the Attacker's Firepower of matching color. If your Attack roll result was equal to or higher than the secret Hit Number, the Unit is immediately revealed and receives a Hit Marker. If your result was lower than the secret Hit Number, your opponent declares you did not score a Hit.
- If there is no Hidden Unit in the Target Hex: your opponent declares you did not score a Hit.
If you Attack an empty hex and roll low, you will not know if you missed the Unit, or if there was not one there.
11.8 Sniper Units
Snipers are specially trained Units outfitted to neutralize specific Targets at long range.
Sniper Units are marked with the Sniper symbol next to their red and blue Firepowers.
Sniper Attack Modifiers:
- Snipers attack both red or blue Target Flank Defenses.
- When attacking Targets in a Close Combat hex (6.9), Snipers only roll Attacks against enemy Units.
Snipers are adept at shooting from cover. They will often begin Missions Hidden and as Foot Units they may move without being revealed.
The "Concealed Fire" Veteran Card gives Hidden Sniper Units the chance to remain Hidden after attacking.
Before you play the next Missions, you will learn how to deal with changes of elevation on maps, and how this affects movement, Line-of-Sight, and defensive bonuses.
We will also introduce rules for Mortars, Artillery, and using Smoke to protect your Units.
Hills and Elevation
12.0 Elevation
Each hex has an Elevation relative to Level 0 Ground.
Elevation ranges between Level 0 Ground up to Level 2 (L2) Hills, or down to Level -2 (L-2) Balkas. Areas that do not have an Elevation symbol are at Level 0 Ground.
Like Terrain Type, the Elevation under the dot in the center of a hex applies to the entire hex.
12.1 Hills
Hills are marked on the map as:
- An L1 icon indicates a Level 1 (L1) Hill.
- An L2 icon indicates a Level 2 (L2) Hill.
Note that Hills are not a Terrain Type. A Hill hex may have any Terrain Type, such as Open Terrain, Woods, or Buildings. In Storms of Steel, Hill hexes only appear on overlay tiles that are placed on maps during setup.
12.2 Ascending and Descending Hills
Whenever a Unit moves into a Hill hex from a lower level hex, it suffers a Move Cost Penalty.
Hill Move Cost Modifiers:
- Uphill Terrain Penalty: +1AP when moving to a hex that is one level higher than previous Elevation.
- Steep Terrain Penalty: +2AP when moving to a hex that is two levels higher than previous Elevation. Note: Steep Terrain is impassable to ALL Vehicles (15.3).
- Downhill: Units receive no penalties/bonuses moving downhill.
Roads do not negate Hill Move Cost Penalties.
12.3 Balkas
Balka: A deep ravine created by floodwater. Surrounded by steep rocky banks that are difficult for Vehicles to traverse.
Balka hexes are at L-2 (i.e. 2 Levels below Ground Level) and are Marked with a Balka icon. (Balka Hexes: 9-D04, 10-K08)
12.4 Ascending and Descending Balkas
Whenever a Foot Unit moves into or out of a Balka hex from a non-Balka hex, it suffers a Move Cost Penalty.
Balka Move Cost Modifiers:
- Steep Terrain Penalty: +2AP when moving between a Level -2 Balka hex and any Level 0 Ground hex.
12.5 Balka Openings
Balka Openings are L-1 banks that all Units may use to enter or exit Balkas.
Units pay +1AP Uphill Terrain Penalties when moving from a L-2 Balka to a L-1 Balka Opening and from a L-1 Balka Opening to a L-0 Ground Hex.
They pay no Penalties when descending.
12.6 Small Balkas and Anti-Tank Ditches
Small Balkas and Anti-Tank Ditches are features that add Move Penalties for Foot Units and hinder Vehicles from crossing.
- Small Balkas run along an edge between two hexes. Crossing a Small Balka adds a +2AP Steep Terrain Penalty for Foot Units. Vehicles cannot cross a Small Balka hex-side.
- Anti-Tank Ditches run across a row of hexes. Moving into a hex with an Anti-Tank Ditch adds a +2AP Steep Terrain Penalty for Foot Units. Vehicles cannot enter an Anti-Tank Ditch hex.
12.7 Elevation Combat Modifiers
If the Attacker or Target is on higher ground than its opponent, it gains a corresponding combat bonus.
Elevation AR and DR Modifiers:
- Attacker High Ground Bonus: +1AR if the Attacker is at a higher Elevation than the Target.
- Target High Ground Bonus: +1DR if the Target is at higher Elevation than the Attacker.
- Small Balka/Ditch Bonus: +1DR for Foot Units if the Attack crosses a Small Balka bordering the Target's hex.
Changing Elevation Example: Over the course of several Turns, the German Infantry Unit takes the following path: (A) +0AP Balka Opening L-1 to Balka L-2 (B) +2AP Balka L-2 to Ground L0 (Steep) (C) +1AP Ground L0 to Hill L1 (Uphill) (D) +1AP Hill L1 to Hill L2 (Uphill) (E) +0AP Hill L2 to Hill L1 (Downhill)
12.8 Elevation and LOS
When establishing LOS between two hexes at different Elevations, identify which of the two hexes is higher in Elevation. An intervening hex blocks LOS between them if it is at the same level or higher than the higher of the two hexes.
Note that like LOS-Blocking Terrain, higher Elevation hexes only block LOS if they are between the Attacker and Target Hex. A Unit at Ground Level may attack an enemy occupying a L1 or L2 Hill Target Hex, as long as there is no additional equal height Hill hex in front of it.
Elevation and LOS Example: The German Grenadiers on L0 cannot see the Soviet Rifles in the L-2 Balka, because there is a L0 Ground hex between the two of them. The Grenadiers can see other Rifles since there is no terrain of equal or higher level between the two.
12.9 Elevation and LOS-Blocking Terrain
An intervening hex with LOS-Blocking Terrain (such as Woods) blocks LOS to one level higher in Elevation.
Example: The German Grenadiers on the L1 Hill cannot see the Soviet Rifles, because of the L1 Woods in between. If the German Grenadiers were on a L2 Hill, they would be able to see the Soviet Rifles.
12.10 Blind Spots
LOS-Blocking Terrain at any Elevation creates a Blind Spot Hex directly behind it from the perspective of an Attacker. A Blind Spot is never in LOS, regardless of the Attacker's Elevation.
Likewise, a Unit occupying a Blind Spot may not attack a Target Hex that is two levels higher in Elevation.
This means that an Attacker may never establish LOS on a hex immediately behind LOS-Blocking Terrain, even if they are at maximum Elevation.
Blind Spots simulate a Unit hugging a tree line or row of buildings to stay out of sight of a high-ground shooter.
If an area of LOS-Blocking Terrain is multiple hexes wide, then each hex creates its own Blind Spot. This may create a Blind Area of contiguous hexes.
Remember, all LOS rules are reversible. If a Unit on a Level 2 Hill cannot see an enemy on Level 0 Ground, then this enemy cannot see the Unit on the Hill.
Small Balka +1DR Example: German Turn: The Grenadiers fire at the Soviet Rifles. The Attack crosses the Small Balka, giving the Rifles a +1DR bonus. Foot Units would often shore up defensive positions along small Balkas, which offered protection and could be used to launch a surprise attack against an unaware enemy.
Mortars and Artillery
13.0 Mortar Units
Mortar Units are teams of 2-6 men that fire High Explosive shells. They are able to fire at targets they cannot see.
- Make a Direct Attack on a Target Hex that is in its LOS using its Direct Attack Cost.
- Make an Indirect Attack on a hex that is out of its LOS using its Indirect Attack Cost (in parentheses).
13.1 Direct Attacks
A Direct Attack follows the rules for a normal Fire Zone attack.
A Mortar Unit may only attack a Target Hex that is beyond its Minimum Range but within its Maximum Range.
Mortars have NO Long Range (5.3) Attack capabilities.
Mortars MAY conduct Close Combat with a -2AR CC Penalty.
13.2 Indirect Attacks
A valid Target Hex for an Indirect Attack must be:
- Within the Mortar Unit's Arc of Fire
- Within LOS of a Mortar Spotter Hex (13.3)
- Outside the Mortar Unit's Minimum Range
- Within the Mortar Unit's Maximum Range
13.3 Spotter Hexes
Select any hex that is within 2 hexes and clear LOS of the Mortar Unit to be its Spotter Hex.
For an Indirect Attack, a Mortar Unit establishes LOS and any Elevation Combat Bonus (12.7) from its Spotter Hex, rather than from its own hex.
A Mortar Unit always uses its own hex to determine whether a Target Hex is between its Minimum and Maximum Range.
Hidden Mortars making Indirect Attacks remain hidden if they are not in LOS of any enemy Units. The hidden player must tell their opponent over which Target hex-side the Mortar Fire came from.
Mortars fired Indirectly did not require direct LOS to their Target. Spotters had to be relatively nearby to signal or call instructions to the mortar team, since very few teams had radios at this time.
Mortar Attack Example: A Soviet Mortar is positioned behind a L2 Hill and wishes to fire indirectly at the Panzer Grenadiers. They choose a Spotter Hex at the top of the Hill, since it is within 2 hexes of and clear LOS of the Mortar. There is a Wood Building Hex between the Spotter Hex and the Target Hex, but because the Spotter is on a L2 Hill it is able to see over the L1 Wood Building. The Target Hex is 7 hexes away from the Mortar, which is within its Minimum Range (3) and Maximum Range (18). The Mortar rounds are HE, so the Grenadiers' Flank Defense is Attacked: 11 Flank Def = 11DR. The Mortar's AR is: 3FP + 1AR (Spotter High Ground 12.7) = 4AR. The Hit Number is: 11DR - 4AR = 7 Hit Number. The Soviets roll 2d6 for an 8, scoring a Hit. The Germans draw a Hit Marker. The Soviets then roll a Spent Check for the Mortar using its 4AP Indirect Action Cost. They roll a 3 and become Spent.
13.4 Off-Board Artillery
Off-Board Artillery (OBA) is represented by Artillery Weapon Cards that are available to players in specific Missions. The Mission will specify which Rounds each player may use OBA. OBA is planned and resolved during the Pre-Round Sequence (9.4).
13.5 Plan an OBA Strike
Activate an OBA Card during the Pre-Round Sequence to plan an OBA Strike. Secretly note the Target Hex by writing it down or by marking the hex on a Planning Map.
The planned OBA Strike will be resolved in the next Pre-Round Sequence.
If the Mission gives no restrictions about where OBA may be targeted, you may select any Target Hex on the map.
13.6 Resolve an OBA Strike
After planning new OBA Strikes, resolve any Strikes that were planned on the previous Round.
To resolve an OBA Strike:
- Place the Artillery Marker on the Target Hex, with the arrow pointing any direction.
- Resolve a Drift Check.
- Resolve all OBA Attacks.
13.7 Resolve a Drift Check
Roll a 1d6 Drift Check.
- The Germans succeed on a 3 or higher.
- The Soviets succeed on a 4 or higher.
If the check succeeds, the OBA Strike lands on the Target Hex.
If the Drift Check fails, the Artillery Marker will move from the Target Hex by a number of hexes equal to the Drift Check failed result (1-2 for Germans or 1-3 for Soviets). Roll 1d6 to determine the direction the Artillery Marker moves, using the numbered directions on the Artillery Marker as the reference.
Artillery Strike Example: Both players have Passed consecutively and Round 2 ends. They proceed through Round 3's Pre-Round Sequence. Any Artillery Strikes planned last Round (the beginning of Round 2) are executed. Because the Germans decided last Round they are planning a Strike, they secretly write down Target Hex J07, predicting that this is the area the Soviet convoy will occupy at the end of Round 3. At the end of Round 3, the Soviet convoy has reached the predicted hex. During the Pre-Round 4 Sequence, the Germans reveal that they targeted hex J07 and place the Artillery Marker on this hex. The Germans then resolve a 1d6 Drift Check to determine if they hit the Target Hex. They need a 3 or higher to strike accurately, and roll a 2, resulting in the OBA Strike drifting 2 hexes. Note, the Germans could have spent 2 CAPs lowering their Drift Check to 1 or higher, guaranteeing no drift. Next they roll a Direction Check, and again roll a 2. The Strike drifts northeast two hexes — striking their own HMG stationed on the far side of the Balka! The Germans must resolve an Attack against their own Unit. Because Artillery is High Explosive (HE), the HMG must use its Flank 10 Defense. The Artillery has a red 5 Firepower, resulting in a 5 Hit Number. They decide to spend 2 CAPs to increase their Hit Number to 7 to reduce the chance of scoring a hit against their own Unit. They roll a 3 — a miss, and breathe a sigh of relief!
13.8 Resolve OBA Attacks
Using the Firepower specified on the Artillery Card, roll a separate Attack on each Unit located in the hex of, and the hexes surrounding, the Artillery Marker.
You must also roll against friendly Units in the affected hexes.
Artillery was usually fired from kilometers away at pre-marked targets and was either called in by radio, field telephone, or prearranged signals such as flares. The targets were marked on maps and were usually easily identifiable terrain features such as crossroads, developed areas, or high ground.
The Soviets often had indirect artillery support only when defending or attacking a fixed front line. On the move, most Soviet Field Guns fired only over open sights, providing direct heavy artillery attacks. The German Army could call in OBA on the move by radio from a command tank or APC using reference points on a map.
13.9 Mortar and Artillery Combat Modifiers
Mortar and Artillery Combat Modifiers:
- Mortar Spotter Elevation Modifier: When making an Indirect Attack, a Mortar gains any Elevation Modifiers based on the Elevation of its Spotter Hex (rather than the Elevation of its own hex).
- High Explosive (HE) Bonus: Mortar and Artillery Attacks are always resolved against the Target's Flank Defense.
- Air Bursts: Units with red Flank Defense do not receive a Woods +2DR Bonus when attacked by Mortar or Artillery.
When artillery shells hit dense tree cover, the shells would burst in the air, sending shell and tree fragments raining down upon soldiers causing devastating damage.
Smoke
14.0 Smoke
Smoke can be fired to create cover for Units on the map.
Mortars 8cm (80mm) and larger, all Artillery Cards, and Engineers (18.1) can use an Attack Action to Fire Smoke.
Smoke Attacks can target any Terrain type except Water.
Instead of resolving an Attack, a +2DR Heavy Smoke Marker is placed on the Target Hex.
Smoke never causes damage to friendly or enemy Units.
14.1 Fire Smoke with Mortar
To Fire Smoke with a Mortar Unit:
- Choose a Target Hex to Direct or Indirect Attack.
- Instead of resolving the Attack, place a +2DR Heavy Smoke Marker in the Target Hex.
- Make a Spent Check for the Unit's Attack Action Cost.
14.2 Fire Smoke with OBA
To Fire Smoke with OBA:
- When planning an OBA Strike, secretly note that you will be firing Smoke.
- When resolving the OBA Strike, roll a Drift Check to determine where the Smoke lands.
- Place +2DR Heavy Smoke Markers in the hex where the Strike lands and all six adjacent hexes.
14.3 Smoke Effects
Heavy Smoke Modifiers:
- +2DR Smoke Bonus when defending in a hex with Heavy Smoke.
- -2AR Smoke Penalty when attacking out of a hex with Heavy Smoke.
- LOS is blocked for ALL Elevations.
- Negates vehicle Bonus Moves (15.4).
14.4 Smoke Dissipation
Heavy Smoke markers are flipped to their +1DR Light Smoke sides during the Pre-Round Sequence.
Light Smoke Modifiers:
- +1DR Smoke Bonus when defending in a hex with Light Smoke.
- -1AR Smoke Penalty when attacking out of a hex with Light Smoke.
- LOS is not blocked by Light Smoke, but +1DR Smoke Bonus if LOS passes through its hex.
- LOS is blocked if it passes through two or more Light Smoke Markers.
Light Smoke markers are removed from the map during a Pre-Round Sequence.
Stacked and Adjacent Smoke Markers are limited to cumulative +2DR or -2AR modifiers.
You are now ready to play Missions 4 & 5!
For the next Missions, you will learn to use Vehicles, including movement for Wheeled and Tracked Vehicles, transporting Foot Units, and Vehicle combat.
Vehicles
15.0 Vehicle Movement
Vehicles follow the same Movement rules as Foot Units (4.5), with the following rules and exceptions.
15.1 Wheeled and Tracked Vehicles
A Vehicle Unit may either be Wheeled or Tracked, depending on the color of the Move Cost located in its top right corner.
- Green Move Cost indicates a Wheeled Vehicle.
- Blue Move Cost indicates a Tracked Vehicle.
- The number of Track or Wheel symbols below the Move Cost indicates how much Bonus Movement (15.4) the Vehicle has.
15.2 Vehicle Bonus Moves
Bonus Moves allow Vehicles to move more than one hex in a single Move Action.
Wheeled Vehicles may Bonus Move:
- Moving from one Road hex to an adjacent Road hex.
Tracked Vehicles may Bonus Move:
- Moving from one Road hex to an adjacent Road hex.
- Moving in Open Terrain.
- Moving into Corn or Wheat.
Bonus Moves may not be used:
- Into Difficult Terrain (15.3).
- If a Unit's first move is into Difficult Terrain.
- Into +2DR Heavy Smoke Hexes (14.3).
- Moving Backwards.
Each Bonus Move symbol on a Vehicle allows it to move one additional hex per Move Action.
Pivot: A Vehicle may Pivot after each hex it moves into.
Ex: The Soviet T-34 has two Tracked Bonus Move symbols, so it may move a total of three hexes on Road or Open Terrain for one 1AP Move Action.
15.3 Difficult and Impassable Terrain
Difficult Terrain for Tracked Vehicles:
- Woods (+2AP)
- Wood Buildings (+2AP)
- Stone Buildings (+3AP)
Impassable to Wheeled Vehicles:
- Woods
- Wood or Stone Buildings
Impassable to ALL Vehicles:
- Steep Terrain (Steep Elevation, Balkas, Anti-Tank Ditches) (12.2, 12.4, 12.6)
15.4 Vehicles on Roads
When moving from a hex with a Road to an adjacent hex with a Road, Vehicles may ignore both Difficult and Impassable Terrain.
15.5 Vehicle Stacking
Vehicles may move into and/or out of a hex occupied by friendly or enemy Units with Bonus Moves.
A Vehicle moving through an enemy occupied hex (into and out of a hex in the same Turn utilizing Bonus Moves) CANNOT be engaged in Close Combat.
A Wheeled Vehicle may not use a Bonus Move to move from one Road hex into another Vehicle-occupied Road hex.
Vehicle Bonus Movement Example: Over several Turns, the Soviets make the following Move Actions. Assume the Germans are occupied elsewhere. Turn 1: The T-34 Tank moves north into Woods. It cannot use Bonus Moves because its first move was into Difficult Terrain. Its Move Cost is 1AP + 2AP (Difficult Terrain) = 3AP. It rolls a 4 on its Spent Check and succeeds. Turn 2: The truck moves north along the Road. It is Wheeled and has one Bonus Move symbol, so it is able to move one bonus hex on Roads. It rolls a Spent Check and succeeds. Turn 3: The GAZ moves into Open Terrain, and it is Tracked, so it is able to use its Bonus Movement in any non-Difficult Terrain. It has two Bonus Move symbols, so the GAZ can move up to three hexes: northeast two hexes, and then southeast one hex, for a total of 3AP Move Cost. The GAZ makes a 1AP Spent Check and succeeds. Turn 4: The GAZ cannot use Bonus Movement to move into the same hex as the T-34, because this would cause Road Congestion. Since it can only move one hex anyway, the Soviets instead decide to move it off the Road into Open Terrain. It is Wheeled and only gains Bonus Movement on Roads, and must stop after one hex. It makes a 1AP Spent Check and succeeds. Note: By alternating Units, the Soviets avoid Fatigue.
Vehicle Moving Uphill Example: A German APC drives up a Hill. It has two Track Bonus Move symbols. The Hill is two Levels higher, so the APC uses two Bonus Moves for one Move Action. Its Move Cost is 1AP, but it must add +1AP for moving from Ground Level to Level 1 Hill and +1AP for moving from Level 1 Hill to Level 2 Hill. This brings its Action Cost to 3AP. It rolls a 4 and succeeds.
15.7 Vehicle Transport
A Vehicle may:
- Transport one Foot Unit; or
- Tow one Gun (15.9) or one Immobilized/Stunned Vehicle.
15.8 Loading (Limbering) a Unit
To begin Transporting or Towing a Unit, the Transport Vehicle and Loading Unit must take a Load Action as a Group.
To perform a Load Action:
- A Unit that begins its Turn in the Vehicle's hex must pay its Move Cost to load onto the Vehicle, ignoring Difficult Terrain Penalties, but not Fatigue. A Unit that moves into the Vehicle's hex pays that Action's Move Cost and loads onto the Vehicle for no additional cost.
- Place the Unit on top of the Vehicle, facing the same direction as the Vehicle.
- The Load Action Cost is the Unit's cost to move into the hex the Vehicle occupies, even if the Unit already occupied the hex at the beginning of the Turn.
- The Unit and Vehicle make a single Group Spent Check.
Load Action Cost = Loading Unit's Move Cost
15.9 Transporting (Towing) Units
The Vehicle and Transported/Towed Units move together and may use the Vehicle's Bonus Moves.
While a Vehicle is Transporting or Towing a Unit, the Vehicle and Transported/Towed Units must take Group Actions.
Group Move Cost is the Move Cost for the Transporting Vehicle.
Transported (Towed) Unit:
- May NOT Attack from the Vehicle.
- May Rally, Stall, etc.
Transporting (Towing) Vehicle:
- May Attack, Rally, Stall, etc.
All Actions require Group Spent Checks.
Ex: A hit Rifles Unit loaded on a Halftrack takes an Action to make a successful Rally attempt for an Action Cost of 5AP. They fail the 5AP Spent Check and both the Rifles and Halftrack become Spent.
15.10 Unloading (Unlimbering) Units
To stop Transporting or Towing a Unit, the Transport Vehicle and Loaded Unit must take an Unload Action as a Group.
To perform an Unload Action:
- Place the Unit under the Vehicle, facing any direction.
- The Unload Action Cost is the Unit's cost to move into the hex they occupy.
Unload Action Cost = Unloading Unit's Move Cost
Vehicle Transport Example: Over several Turns, the Germans make the following Move Actions. Turn 1: A squad of Grenadiers and an SdKfz APC in an adjacent hex take a Load Action. The Grenadier's cost to move into the APC's hex is 1AP. Therefore, the Group Move has an Action Cost of 1AP. The Germans roll a Spent Check for both Units and succeed. Turn 2: The APC and Grenadiers Group Move three hexes, using the APC's 2 Bonus Movement. The APC has a 1AP Move Cost and suffers +1AP for Fatigue since it Loaded the previous Turn. It rolls a 2AP Spent Check for the Group and succeeds. Turn 3: The APC and Grenadiers take an Unload Action. The Germans place the Grenadiers under the APC, facing southeast. The Grenadiers roll a 2AP Spent Check (1AP Move Cost + 1AP Fatigue), get a 1 and fail. Both the Grenadiers and the APC become Spent!
15.11 Towing Vehicles
Immobilized or Stunned Vehicles (15.19) may be towed by another Vehicle.
- Wheeled Vehicles may be towed by any Vehicle.
- Tracked Vehicles may only be towed by other Tracked Vehicles.
15.12 Attacking Transporting Vehicles
When resolving an Attack against a Transporting Vehicle, roll an Attack first against the Transported Unit, then against the Transport Vehicle.
The Transported Unit only must always use its Flank Defense.
Both Units receive all Terrain DR Modifiers for the hex.
If the Transport Vehicle is destroyed, the Transported Unit is immediately Unloaded at no cost, and is placed in the hex facing any direction.
15.13 Vehicle Combat
Vehicles follow the same Combat rules as Foot Units (Sections 5 and 6), with the following additional rules and exceptions.
15.14 Vehicle Hits
Armored Target Hits follow the same rules as Soft Target Hits.
Armored Target Hit Markers (the number in parentheses shows how many copies are included in the game):
- Stunned (x1): Unit cannot take any Action other than Rally. Rally Number: 9.
- Gun Damaged (x2): Unit cannot Attack with red or blue Firepower. Cannot Rally.
- Destroyed (x1): Reveal immediately. Unit is destroyed.
- Panicked (x1): Unit cannot Attack. Front Def: -4. Rally Number: 9.
- Immobilized (x5): Unit cannot Move or Pivot. Flank Def: +1. Front Def: -1. Cannot Rally.
- Suppressed (x5): Attack Cost: +1AP. Red FP: -3. Blue FP: -5. Rally Number: 8.
- Light Damage (x5): No stats are affected. Cannot Rally.
Hit Markers with "No Rally" indicate physical damage that cannot be repaired in the heat of battle.
15.15 Vehicles in Close Combat
Vehicles DO NOT receive Terrain Modifiers in Close Combat like Foot Units do (6.9).
Tanks cannot utilize Terrain well when in Close Combat.
15.16 Vehicles as Cover
Foot Units gain a +1DR Vehicle Cover Bonus when occupying the same hex as a friendly Vehicle (but not being transported), along with other Terrain Modifiers.
Foot Units often advanced with tanks, hugging them for cover from incoming fire.
15.17 Tanks Firing Down Steep Terrain
Vehicles may not attack down Steep Terrain (12.2) into an adjacent hex. Ex: Attacking from L0 Ground into an adjacent L-2 Balka hex, or from a L2 Hill down a cliff to an adjacent L0 Ground hex.
Tanks could raise their main guns quite high, but could not depress them enough to fire down a steep cliff face.
Special Vehicle Rules
16.0 Special Vehicle Rules
16.1 Trucks
Trucks are Wheeled Vehicles designed to move other Units and supplies over Roads.
A Truck has a Range of 0 and negative Firepower, so it may only Attack (poorly) in Close Combat.
16.2 Half-Tracks
Wheeled Vehicles that have Tracked Bonus Move symbols may use this Bonus Move on Roads or Open, Corn, and Wheat Terrain.
They obey all other rules for Wheeled Vehicles, and may not move into hexes that are Impassable to Wheeled Vehicles.
Ex: A German Maultier has one Wheeled Bonus Move and one Tracked Bonus Move. It may travel two bonus hexes on Roads, or it may combine these to move over one Road and then into an Open Terrain hex (and vice versa).
16.3 Turreted Vehicles
Turreted Vehicles are designated with a white circle under their Attack Cost. These have 360 degree rotating turret guns that can fire in any direction.
A Turreted Vehicle may attack a Target Hex outside of its Arc of Fire without changing its facing.
A Turreted Vehicle suffers a +2AP Attack Cost Penalty when attacking a Target outside of its Arc of Fire.
Most tankers kept their turret firing action within the front 120-degree rotational arc of their tank. However, sometimes a tank would need to move or face in one direction, while facing its turret towards enemy forces to its flank. This was not done often, since being forced to take this action added flank attack vulnerability and psychological battle stress.
16.4 Self-Propelled Guns (SPGs)
Self-Propelled Guns (SPGs) were not turreted and had Field Guns mounted onto a tank chassis that required the SPG to Pivot when Tracking a Target.
An SPG may only Attack within its Arc of Fire, and must take a Move Action to Pivot and face its Targets.
16.5 Open-Topped Vehicles
Open-Topped Vehicles are designated with a white field with a red border under their Flank Defense. They are vulnerable to High Explosive Attacks (13.10) and Close Combat.
When defending against a HE (ex: Artillery) or any Close Combat Attack, an Open-Topped Vehicle's blue Flank Defense is treated as a red Flank Defense. For any other type of Attack, it is treated as a blue Flank Defense.
16.6 Armored Personnel Carriers
Armored Personnel Carriers (APCs) transport and protect other Units.
Foot Units gain a +2DR APC Bonus when being Transported by an APC with a red shield icon.
Foot Units inside an APC must still use their Flank Defense.
16.7 Airplanes
Airplanes are represented by Airplane Weapon Cards that are available to players in specific Missions. Airplane Cards are played as an Action.
To conduct an Air Attack:
- Place the Airplane counter matching the card on a Target Hex of your choice, facing the desired direction.
- The opponent may immediately Attack the Airplane with an Anti-Air Unit (16.8), and makes a Spent Check.
- If the Anti-Air Attack results in a Hit, the Airplane Attack is repulsed.
- If the Anti-Air Attack misses, resolve the Airplane Attack against the Target hex and any additional hexes as marked on the card, attacking both friendly and enemy Targets.
- After repulsing or resolving the Air Attack, remove the Airplane Counter. It is now the opponent's Turn.
16.8 Anti-Air Units
Anti-Air (AA) Units have a light blue circle under their blue Firepower. They may attempt to repulse Air Attacks.
An AA Unit may Attack an Airplane if it is in its Fire Zone.
Resolve an Attack against the Airplane's blue Defense. Range Attack Modifiers are applied, but Terrain is ignored.
Air Attack Example: The Soviets play a Shturmovik Airplane Weapon Card and place the Shturmovik counter on a Target Hex. The Target Hex is within a German 251-17 APC's Fire Zone, so the Germans may attempt to repel the Shturmovik attack. The 251-17 scores a hit, so the Shturmovik is removed from the map and the 251-17 makes a Spent Check. It is now the German's Turn.
16.9 Gun Units
Guns are a type of Foot Unit with the word "Gun" or "PaK" in the name.
Guns have red Foot Move costs. Guns may make Hidden Moves during a Mission (11.4).
Guns may only occupy certain types of Fortifications (17.1).
You are now ready to play Mission 6!
In this Section, you will learn about Fortifications like Trenches and Bunkers and Obstacles like Barbed Wire and Land Mines.
Fortifications and Obstacles
17.0 Fortifications and Obstacles
Fortifications:
- Trenches
- Gun Pits
- Bunkers
Obstacles:
- Barbed Wire
- Land Mines
17.1 Fortifications
Fortifications are placed on the map during Mission setup. They may not be moved once placed.
Fortifications with a red Front direction indicator must face a specific direction and may not move or pivot once placed.
17.2 Occupying a Fortification
Certain Units may occupy each type of Fortification to gain Defense Bonuses.
Unless specified, there is no limit to the number of stacked friendly Units that can occupy a Fortification.
A Unit not occupying a Fortification, occupied by friendly Units, may still move into Close Combat.
17.3 Entering and Exiting Fortifications
When a Unit performs a Move Action into a hex with a friendly or unoccupied Fortification, it may immediately occupy the Fortification for no additional AP cost. Place the Unit UNDER the Fortification Counter.
A Unit that begins its Turn in the same hex as a Fortification, but is not occupying it, may use a Move Action to occupy the Fortification ignoring Difficult Terrain Penalties, but not Fatigue.
Use a Move Action to move a Unit out of the Fortification and place it ON TOP of the Fortification or into an adjacent hex.
17.4 Trenches
Trenches may be occupied by:
- All Foot Units except Guns
A Unit in a Trench may face any direction, and receives a DR bonus when attacked from any direction.
Trench Modifiers:
- Trench Fortification Bonus: +2DR to Units occupying a Trench when attacked from any direction.
- Impassable to Wheeled Vehicles.
- Tracked Vehicles may not use a Bonus Move to enter a Trench hex.
17.5 Gun Pits
Gun Pits may be occupied by:
- Guns
- Vehicles (only if specified by Mission)
A Unit in a Gun Pit may face in any direction, but only receives a defense bonus when it is attacked by a Unit in the Gun Pit's Arc of Fire.
Gun Pit Modifier:
- Gun Pit Fortification Bonus (Front only): +3DR to Units occupying a Gun Pit when attacked from within the Gun Pit's Arc of Fire.
17.6 Bunkers
Bunkers may be occupied by:
- All Foot Units except Mortars
A Unit in a Bunker must face the same direction as the Bunker and may only attack Target Hexes in the Bunker's Arc of Fire.
Bunker Modifiers:
- Bunker Fortification Bonus (Front): +5DR to Units in Bunker when attacked from within Bunker's Arc of Fire.
- Bunker Fortification Bonus (Flank): +3DR to Units in Bunker when it is attacked from outside its Arc of Fire.
Black colored Defense Ratings are effective against both Blue and Red Firepower Attacks.
17.7 Hasty Defenses
Hasty Defenses represent a Unit's attempt to quickly fortify its position.
A Foot Unit that has not moved this Round may use its Hasty Defenses Action to build a Hasty Defense for 5AP. Place a Hasty Defense Marker on top of the Unit.
Hasty Defense Modifier:
- Hasty Defense Bonus: +1DR to Foot Units occupying Hasty Defenses.
A Hasty Defense Marker can only be occupied by the Unit that built it. Multiple Units in the same hex may all build Hasty Defenses, but each Marker only protects the one Unit that built it.
As soon as the Unit Moves, Pivots, or is destroyed, its Hasty Defenses Marker is removed. It does not take an Action to exit a Hasty Defense. A player may freely remove a Hasty Defense at will.
Attacking Fortifications Example: The German Infantry wants to attack the Soviet MMG in the Bunker at the top of the Hill. Since the attack comes from within the Bunker's Arc of Fire, the MMG uses its 12 Front Defense: 12 Front Def + 5DR Bunker + 1DR High Ground = 18DR. The Infantry have a red 4 Firepower. This gives a Hit Number of: 18DR - 4AR = 14 Hit Number. Unless the Germans Spend CAPs, the Infantry cannot hit the MMG at all! They decide to rethink their plan of action for the Turn.
17.8 Obstacles
Obstacles are placed during Mission setup. Like Fortifications, they may not be moved once placed. Obstacles affect all players, regardless of who placed them.
17.9 Barbed Wire
Barbed Wire is a temporary hindrance that slows enemy movement.
Barbed Wire Modifiers:
- When a Foot Unit moves into the hex, roll 1d6 and add the result to its Move Cost.
- Impassable to Wheeled Vehicles.
- Tracked Vehicles may not use Bonus Movement to move into the hex. When a Tracked Vehicle moves into the hex, the Barbed Wire is destroyed and removed.
17.10 Land Mines
Land Mines may be either placed on the map with Battle Card #40 or Hidden during setup, as specified by the Mission.
When a Unit(s) moves into a hex with Land Mines, the player that placed the Mines reveals the Land Mines (11.1), places the Mines Marker on the map, and makes a 2d6 Land Mine Attack against each Unit that entered the hex.
A Land Mine Attacks with an 8 Hit Number against both Soft and Armored Targets.
No Combat Modifiers are applied, but the player making the Attack may decide to modify the Land Mine Hit Number with CAPs.
If successful, the Unit is Hit or even Critical Hit.
Do not Land Mine Attack:
- Units already occupying the Mined hex.
- Units moving out of the Mined hex.
If one of your own Units enters a hex you mined, you can choose not to reveal the Mines, at your own risk.
Land Mines Example: The Germans maneuver a Panzer IIIn, transporting Engineers, behind the Bunker to take advantage of its weaker Flank Defense. Fortunately, the Soviets have anticipated their approach and have placed Land Mines to guard the Bunker's flank! The Panzer plans on moving two hexes along the Open Terrain Hill. Immediately upon moving into the first hex, the Soviet reveals and places a Mines Marker in it. (If you do not trust your opponent, which I would not either, you may insist on seeing his hidden Mines setup.) The Mines automatically Attack with an 8 Hit Number against both the red Defense Engineers and the blue Defense Tank. The Soviet first Attacks the Engineers, rolling the 2d6 for a 10, and misses. They then Attack the Tank and the Soviet spends 2 CAPs to lower the Hit Number to 6, then rolls 2d6 for a 7. The Panzer is Hit! The German pulls a 'Light Damage' Hit Marker, which does not affect any of the Panzer's stats. It Bonus Moves forward up into the L2 Hill hex next to the Bunker, completing its move. The Panzer's move had an Action Cost of 2 (1AP to move, plus a +1AP Uphill Penalty). It rolls a 3 and remains fresh. It is the Soviet's Turn.
17.11 Destroying Fortifications and Obstacles
Fortifications and Obstacles with a red Defense in their bottom right corner can be destroyed by Attacks.
Vehicles, Guns, and Units with High Explosives may attempt to destroy a Fortification/Obstacle when they range Attack the Target Hex it occupies.
Foot Units with no High Explosives can make a Close Combat Attack against the Fortification/Obstacle to attempt to destroy it.
The Fortification/Obstacle gains all Defense Modifiers affecting the hex, including Terrain, Elevation, and Smoke.
If the Fortification/Obstacle is Hit, it is immediately destroyed and removed from the map.
When attacking an occupied Fortification/Obstacle, resolve all Attacks against the Units first, and then roll a separate Attack against the Fortification. The Attacker makes only one Spent Check.
Destroying Fortifications Example: The Hit German PzIIIn from the previous example only has a "Light Damage" Hit Marker, so is able to attack the Bunker. Because the Panzer is a Unit type that can destroy Fortifications, it rolls separate Attacks against the Bunker and the MMG occupying it. First it rolls against the MMG, whose DR is: 10 Flank Def + 3DR Bunker Flank = 13DR. Note the MMG does not gain a High Ground Bonus, since the Panzer is also on an L2 Hill hex. The Panzer's AR is: 5 FP + 3AR Short Range = 8AR. This gives a Hit Number of 5. The Germans roll an unlucky 3, and the MMG survives unscathed. The Bunker has 16 Defense, and the Panzer uses the same 8AR. It needs an 8 to Hit. The Germans roll an 11, and the Bunker is destroyed and removed from the map! The Panzer has a 4 Action Cost (3AP Attack + 1AP Fatigue because of its previous move) and fails its Spent Check.
High Explosives vs. Fortifications Example: The Germans have an 8cm Mortar in position to fire on an Anti-Tank Gun in a Gun Pit. The Mortar makes an Indirect Attack on the Gun Pit. Because it is High Explosive (HE), it rolls against the ATG's Flank Defense, and ignores the Front Defense bonus from the Gun Pit! The ATG has a red 10 Flank Defense. The Mortar has a red 3FP, and the Germans also play a 'Careful Aiming' Bonus Card from their hand to gain +2AR, for a 5 Hit Number. They roll a 10 and destroy the ATG with a Critical Hit! The Mortar then attacks the Gun Pit with a 9 Hit Number (12 DR - 3AR) and misses. The Mortar then rolls an Indirect Attack 4AP Spent Check and succeeds.
You are now ready to play Mission 7!
In this final section, you will learn rules for Flamethrowers and 3- and 4-player games. After that, you will be ready to play all remaining Missions.
Flamethrowers
18.0 Flamethrower Capabilities
Foot and Vehicle Units with Flamethrower capabilities are marked with a Flame Symbol.
Units with Flamethrowers may choose to Attack with the Flamethrower instead of their normal Attack Firepower.
Flamethrowers, for both Foot Units and Tanks, have the following Attack stats:
- 2 Red Firepower
- 2 Blue Firepower
- Maximum Range of 1 hex. Short Range and Close Combat AR bonuses apply.
- Target must use Flank Defense
- Ignore ALL DR Modifiers except for Smoke
- Hidden Units are automatically revealed when attacked
18.1 Engineer Units
Engineers were specially trained Units outfitted to assault enemy positions.
Engineers follow all rules for Foot Units, with the following exceptions:
- Flamethrowers: Engineers can attack with Flamethrowers.
- Land Mines: Engineers may enter a land mine hex without triggering an attack. Hidden Mines are revealed.
- Fire Smoke: Engineers can use an Attack Action to Fire Smoke (14.0) at a maximum Range of 1 hex.
Flamethrower Attack Example: A Soviet SU76 occupies a Stone Building hex. An adjacent German Flammpanzer Attacks with its Flamethrower. The Flamethrower always strikes an opponent's Flank, and the SU76 is Open-Topped, so for this Attack it has a red Flank 12DR. The SU76 is also in a Stone Building hex, but Flamethrowers ignore Defensive Terrain. The Flamethrower has red 2FP, plus a 3AR Short Range Bonus for a 5AR. The Flammpanzer has a 7 Hit Number (12DR - 5AR). The Germans roll 2d6 for a 9 and Hit. The SU76 pulls a Soft Target RED Hit Marker, because it was hit by red Firepower! Note: Even though the SU76 is a tank and usually draws blue Armored Hit Markers, in this situation it pulls a red Soft Target Hit Marker. The Panzer's Attack had an Action Cost of 3AP. It fails its Spent Check and is flipped to its Spent side.
Alternate Player Counts
19.0 Missions with More Players
When playing a Mission that is designed for 3 or 4 players:
- Provide each player a CAP Track Sheet and specified Units and Battle Cards.
- Players on the same side win or lose together as a team.
- All players on one side take their Turns simultaneously (i.e., German 1 and German 2, then Soviet 1 and Soviet 2).
- Teammates may not trade Units, Cards, or CAPs.
- End the Round when all players but 1 Pass consecutively.
Ex: Soviet 1 passes and Soviet 2 takes an Action. Both Germans then pass, and the Round ends.
19.1 Player Number Variants
When 2 players play a Mission designed for 4 players:
- Each player places and controls all Units on their side.
- Each player receives CAPs equal to one less than the sum of both players on their side.
- Each player receives the Battle Cards for both players on their side, as one combined hand.
- Each player takes one Action per Turn, and the Round ends when both players Pass consecutively.
When 3 players play a Mission designed for 4 players:
- Two players on one side play normally.
- The player on the opposing side must keep their Units, CAPs, and Battle Card hands separate for each force they control. On their Turn they take two Actions, one with each force.
19.2 Handy CAPs
If one player is significantly more experienced than their opponent, players may agree to give the disadvantaged player 1 or 2 additional CAPs each Round.
42. Common Sense
One cannot foresee all possibilities in a game with so many variables. If you cannot find a rule for a situation or there is a disagreement in the rule interpretations, use common sense and come to a friendly agreement on how to resolve the situation.
If your opponent has no common sense and the twit will not agree with your superior analysis, then the answer is 42.
It always works.
You are now ready to play all remaining Missions. Enjoy!
Note from the Designer
Modern day tactics employed by most of today's armies find their roots in early WWII doctrine. The tactics employed evolved (and sometimes slipped) throughout the conflicts and wars that followed in Korea, Vietnam, Bosnia, Afghanistan, and Iraq.
I designed CoH to follow this evolution in tactics in a series of games, the first of which was Awakening the Bear! Russia 1941-42. It is a fast and fluid system that is easy to learn but tactically realistic for each unique period portrayed.
In developing any new system, there is the temptation to add more and more rules in an attempt to make the game more "realistic." Unfortunately this can have the opposite effect, as the big picture gets lost in a forest of detail. I wanted the system to stress the flow of battle and quick reaction to adversities and opportunities. It had to have the right level of abstraction so more time could be spent fighting the opponent and exploring unique tactics than fighting the rules.
Staying true to these goals was challenging, but the developers constantly came up with new ideas. In the end, we relied on a rule of thumb: to be included in the game, a proposed rule must apply in more than 5% of relevant situations and add important period flavor. We operated under the belief that mountains of detail do not make a good game; a clean and easily implemented core system does.
How we decided to portray command structure in the game is an example of our efforts to make core gameplay elements as robust and easy-to-use as possible. Successful play is dependent on management of CAPs; the probabilities of successful attacks have been purposefully calculated to make hits very difficult without CAP modifications.
Command structure is the all-important force that keeps units together in the face of brutality. Soviet peasants were often handed rifles (if they were lucky) and pushed towards a battle without training. They were brave, but just did not know what to do tactically when confronted by a German MG nest. This is represented in Missions where the Soviets begin with few CAPs.
So find some friends, set up a game, and I wish you hours of fun!
Uwe Eickert
Action Cards
Action Cards must be played during a player's turn. Playing an Action Card constitutes an Action. Cards with Green costs must be played on a fresh Unit or Group that will make the Spent Check. Cards with Blue CAP costs or with an Action Cost of 0AP may be played on any Fresh or Spent Unit.
Adrenaline (x4) — Card #01: Any Spent Unit or Group may take any one Action at 0 CAP cost.
Command Action (x13) — Card #02: This Turn may take any one Fresh or Spent Unit's Action, paid with CAPs.
Follow Me! (x3) — Card #03: Automatically rally a Unit, even if in Close Combat or for Hit Markers with "No Rally" conditions.
Rally Up! (x3) — Card #04: Any Unit or Group may roll to attempt to rally. Each attempt must be rolled separately.
Rapid Deployment (x2) — Card #05: Any Unit or Group, including Hidden, may move up to 2 hexes, plus allowable bonus moves, at no cost. May not be used on Immobilized, Pinned, or Stunned Units. Intervening mines affect the moving Unit. Unit may not move into prohibited hexes.
Battlefield Confusion (x2) — Card #06: Flip any one enemy Unit to its spent side. The affected Unit may no longer activate or use APs for the remainder of the Round. It may use CAPs and Cards. This card may not be played on a Group or off-board Units, but may be played on Hidden Units.
Frontline Leader (x2) — Card #08: Roll 1D6 for additional CAPs and add to the CAP Track. Newly acquired CAPs are added one time only and the CAP total may now be temporarily higher than the number of CAPs the Mission began with.
Seek Cover! (x2) — Card #14: A Hasty Defense counter(s) may be placed on any fresh or spent Unit (including Vehicles). Hasty Defense may not be placed on a Unit in CC.
Sniper Fire (x3) — Card #13: Opponent loses CAPs immediately for this Round only: Roll 1 = 0 CAPs; Roll 2-3 = 1 CAP; Roll 4-5 = 2 CAPs; Roll 6 = 3 CAPs.
Scout Teams (x1) — Card #30: Choose any one of your Units: You may look at any one Hidden enemy Unit's coordinates if it is within LOS of the Unit you chose.
Mine-Laying (x1) — Card #40: Any one Fresh or Spent Foot Unit may lay an available mine on its own or adjacent hex, but not on an enemy occupied hex. The mine may be placed in or out of LOS. Cannot Rally.
Obstacle-Clearing (x1) — Card #41: Any Fresh or Spent Foot Unit may remove one Obstacle from its own hex. Obstacles include Barbed Wire, Road Blocks and Land Mines; played as an Action after a Unit has moved into the hex.
Bonus Cards
Playing a Bonus Card does not constitute an Action. Bonus Cards may be played in conjunction with another Action or as described below.
Careful Aiming (x2) — Card #09: Playing this card increases a Unit's Firepower by 2. This card may also increase a Group's Attack by 2AR.
Swift Action (x2) — Card #10: A player may take two consecutive Actions, skipping an opponent's Turn. A player must announce the use of this card before his first Action is taken. This card may be used by a Group.
Luck (x3) — Card #12: A player may play this card in an attempt to modify their own die roll result. This card may be played after their die roll has been made.
Weapon Cards
Weapon Cards are played as an Action or in support of a Group Action. Grenades and Molotovs must be played into a Unit's Fire Zone.
Grenades (x1 or x2): German Foot Units use this card to attack as an action at 0 cost. May be used at 1 range with a -2AR penalty (long range). No CC modifiers at 0 range. May support a Group attack. Attacks a target's flank defense. Terrain modifiers apply.
Molotov Cocktail (x1): Soviet Foot Units use this card to attack as an action at 0 cost. May be used at 1 range with a -2AR penalty (long range). No CC modifiers at 0 range. May support a Group attack. Attacks a target's flank defense. Terrain modifiers apply.
Tellermine (x1): German Foot Units use this card to attack vehicles as an action at a cost of 2AP/CAP. May only be used at 0 range. Attacks a target's flank defense. Terrain and CC modifiers do not apply. Tellermines may also be placed as a Land Mine within one hex of a Unit's position. The same rules apply as for Mine Laying (#40).
Off-Board Artillery (OBA) — German Off-Board Artillery (x1) 10.5cm leFH18 Light Howitzer; Soviet Off-Board Artillery (x1) 122mm m.38 Field Howitzer: OBA represents off-board resources available to the players as set by a Mission. This card is played on an action at 0 cost. Roll d6 to determine when it hits; drift patterns are printed on the card. OBA attacks a Target's flank defense; terrain modifiers apply except for Woods Air Bursts (13.10).
Stuka and Sturmovik Airplanes (x2 each): Place the Airplane counter on the Target hex (16.7). Defender Attacks with Anti-Air. If not Hit, Airplane Attacks Target hexes.
Event Cards
Event Cards are played immediately when drawn at the beginning of a Round. The player then draws a new card.
Score (x1): A Mission will dictate if the score card is mixed into the card deck. When pulled, follow the scoring instructions set by the Mission. Pull a new card after the score is resolved.
Objective (x4): Objective cards are shuffled and one is drawn randomly. This card usually defines a player's secret objective for the Mission. The card is revealed at Mission's end.
Mission Event (x1): The event card is sometimes mixed into the card deck and when pulled triggers an event set by the Mission. Draw a new card after the event is resolved.
End (x1): This card is sometimes mixed into the card deck and when pulled ends the Mission.
Units in Storms of Steel 3rd Edition
Listed below are the names, years in active service, and descriptions of the Units supplied in the game.
German Forces: Die Wehrmacht
Panzer Engineer Squad (x3) 43-45: Specially trained units used to assault and destroy positions. Similar to Pioneers.
8cm Mortar Squad (x2) 39-45: These mortars could be fired indirectly by three-man crews. They replaced all 5cm mortars.
HMG 34 Squad (x1) 39-43: An MG 34 mounted on a tripod made the machine gun very lethal and accurate. Fired over 300 rounds/min.
HMG 42 Squad (x3) 42-45: The modified version of the LMG 34, this HMG was feared for its long range lethality.
Infantry Squad '43 (x9) 43-44: Ten-man squad armed with rifles and an LMG.
Panzer Grenadier Squad (x9) 43-45: Infantry attached to panzer (tank) formations and armed with two LMGs to lay down heavy suppressive fire.
Sniper Squad (x2) 41-45: Snipers were often camouflaged and carried semiautomatic rifles (Gewehr 41) with telescopic sights.
PaK38 5cm AT Gun (x1) 41-45: This AT gun was too weak against the heavily armed T-34 and KV tanks and was useful only at short ranges.
PaK40 AT Gun (x1) 42-45: The 7.5cm rounds finally gave the Germans a gun that could stand up to the Soviet tanks.
Maultier (x2) 39-45: The southern army at Kursk was lucky to have a very mobile force, with trucks that carried supplies for the panzers.
SdKfz 251/1 APC (x9) 39-45: Heavy-duty armored troop carrier that could keep up with the tanks. Armed with two mounted LMG 42s.
SdKfz 251/2 APC (x2) 40-45: Mounted an 8cm mortar. The 251 became very multi-purpose due to its excellent performance.
SdKfz 251/9 APC (x2) 42-45: Mounted a 7.5cm KwK 37L gun retrieved from up-gunned PzIVs and was a useful infantry support weapon.
SdKfz 251/10 APC (x2) 39-43: Mounted a 3.7cm PaK36 anti-tank gun effective only against older model Soviet tanks.
SdKfz 251/17 APC (x1) 39-45: Mounted a 2cm Flak38 light anti-aircraft gun that fired 120 rounds/min.
Panzer IIf 2cm L55 (x1) 40-43: Mounting a 2cm L55 auto-cannon, this tank was used as a command and observation tank.
Panzer IIIh/j 5cm L42 (x1) 39-43: These tanks were under-gunned by this time in the war.
Panzer IIIL 5cm L60 (x5) 42-43: An up-gunned Pz IIIj, retrofitted with a longer L60 barrel, higher-velocity 5cm gun, and spaced front hull and turret armor.
Panzer IIIm Flamm (x1) 43-44: Twin flame projectors were run through the barrels of PzIIIs to make a very effective bunker-busting flame thrower.
Panzer IIIn 7.5cm L24 (x1) 43-45: As the PzIII lost its value, many were converted to infantry support tanks similar to the Pz IVe.
Panzer IVe 7.5cm L24 (x1) 39-43: An infantry support tank that sported a short 7.5cm barrel effective against soft targets only.
Panzer IVf2 7.5cm L43 (x1) 42-43: Upgraded to a 7.5cm anti-tank gun, making it the new main battle tank for the Germans, replacing the aging PzIIIs.
Panzer IVh 7.5cm L48 (x4) 43-45: This main battle tank added a new gun, better sighting optics, and stand-off side armor skirts.
Panther D 7.5cm L70 (x5) 43-44: The Panther was one of the best all around tanks built by the Germans, though it was plagued by transmission problems at Kursk.
Tiger 1e 8.8cm L56 (x4) 42-44: This was the most advanced tank built by the Germans. It was feared for its powerful anti-tank gun and accuracy.
T-34b Captured Tank (x2) 39-43: The Germans thrived on captured equipment. These T-34s were outfitted with radio communications.
StuG IIIg 7.5cm L48 (x3) 39-43: This self-propelled anti-tank gun had a low silhouette and strong armor. It had no bow machine gun until a later model.
Marder II PaK40 (x1) 42-43: AT guns were mounted on old tank hulls to create self-propelled guns. Small size and stealth gave them excellent ambush capabilities.
Marder IIIh PaK40 (x1) 42-45: The open hull design gave this SPG's crew much room and an excellent view, but they were vulnerable to enemy fire.
Marder IIIm PaK40 (x1) 43-45: The anti-tank gun was mounted on the back of the hull for better recoil control.
Soviet Forces: The Red Army
Rifle '41 Squad (x12) 41-44: A squad of 10-11 men armed with bolt action Mosin-Nagant rifles and a Degtyaryov (DP) light MG.
Rifle '43 Squad (x6) 43-45: The '43 squad added another LMG for a total of two DP LMGs per squad.
Maxim MMG Squad (x2) 39-45: The model 1910 Maxim was heavy and cumbersome, but rugged and reliable.
SMG Squad (x4) 42-45: Men armed almost entirely with PPSh sub-machine guns developed for close combat house-to-house fighting.
Sniper Squad (x2) 41-45: Armed with customized M1891/30 bolt action rifles, the Soviet sniper was a feared unseen force.
PTRD AT Rifle Squad (x4) 39-45: The PTRD rifle had to be carried by two men and could not penetrate most tanks, but it was often the only AT option the Soviets had.
50mm Light Mortar (x2) 39-43: The 50mm mortar proved to be too underpowered to have any great effect on the battlefield.
82mm Mortar (x3) 39-45: Most heavily produced Soviet mortar. Some had wheels affixed to the base for easier movement. Could fire indirectly and fire smoke.
45mm Anti-Tank Gun m42 (x5) 42-45: Upgraded from the German PaK36, this m1942 gun was very versatile, firing armor-piercing and high-explosive ammo.
57LL ZiS-2 AT Gun (x2) 43-45: The 57LL AT gun had a 4m long barrel that fired rounds at a very high velocity.
76.2mm ZiS3 AT Gun (x4) 39-43: The ZiS3 AT gun did not have the muzzle velocity of the 57LL, but was used at Kursk because of its versatility.
GAZ Trucks (x4) 39-43: A Ford copy manufactured in Russia, the GAZ 2x4 wheel truck was the workhorse for the Soviets.
Churchill MkIII 6 pdr (x4) 42-43: This English tank was sent to Russia through the Lend-Lease program. It was originally designed to cross wide trenches and shelled terrain.
SU-76 76mm ZiS3 (x2) 43-45: The Suka (SU) tank destroyer was not effective against the new German tanks, but was good against half-tracks and infantry.
SU-122 122mm M30 (x3) 43-45: This assault gun was mounted on a T-34 hull and carried a 122mm field howitzer.
SU-152 ML-20S (x2) 43-45: The Soviet's answer to the Tiger tanks, the SU-152 had excellent firepower, range, and armor, but carried very limited ammunition.
KV-1s Med/Heavy Tank (x3) 42-44: An upgraded version of the Heavy KV-1C, the 1s had lighter armor to make it faster and more mobile. But this made it much more vulnerable.
T-34b 76.2mm F34 (x1) 41-43: One of the best tanks of the war, this version of the T-34 was very spartan in order to increase production output.
T-34c 76.2mm F34 (x9) 42-45: A more comfortable turret and commander's cupola was added to this version of the T-34.
T-70 45mm m32/38 (x5) 42-45: With only a 2 man crew, the commander was also the gunner and loader.
M3 APC (x4) 43-45: This American armored personnel carrier often carried the .50 cal. Browning HMG, an excellent AA gun.
M3 Scout (x2) 43-45: The American-made M3A1 Scout Car could patrol, tow guns, and carry up to seven men. It sported up to 3MGs for defense, including a .50 cal. HMG.
Unit stats and abilities are calculated based on how they performed relative to each other during specific war periods. You will notice that some Units' stats change from game to game as the war progresses.