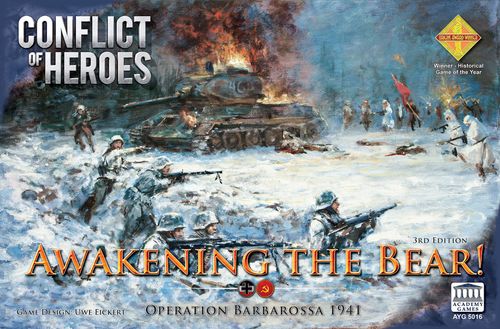
Conflict of Heroes: Awakening the Bear! – Operation Barbarossa 1941 (Third Edition)
Conflict of Heroes: Awakening the Bear – Operation Barbarossa 1941 (Third Edition) Rulebook
Table of Contents
Table of Contents
- Game Components
- 1.0 Setup
- 1.1 Units
- 2.0 Round Sequence
- 3.0 Command Support
- 4.0 Unit Position
- 5.0 Fire Zone and Target Hex
- 6.0 Resolve an Attack
- 7.0 Hits
- 8.0 Battle and Weapon Cards
- 9.0 Ending the Round
- 10.0 Group Action
- 11.0 Hidden Units
- 12.0 Elevation
- 13.0 Mortar Units
- 14.0 Smoke
- 15.0 Vehicle Movement
- 15.6 Vehicle Transport
- 15.12 Vehicle Combat
- 16.1 Trucks and Wagons
- 16.2 Turreted Vehicles
- 16.3 Self-Propelled Guns (SPGs)
- 16.4 Mobile Vehicles
- 16.5 Open-Topped Vehicles
- 16.6 Armored Personnel Carriers
- 16.7 Field Guns
- 17.0 Fortifications and Obstacles
- 18.0 Flamethrower Capabilities
- 19.0 Missions with More Players
- 42. Common Sense
- Note from the Designers
- Battle Card List
- Weapon Card List
- Units in Awakening the Bear 3rd Edition
Game Components
- Maps 1–5
- Two d6 Battle Dice
- Two custom d10 Spent Dice
- Four Stress Markers
- Counter Sheets: Hit Markers, Soviet Units, German Units
- 1 Round and Victory Track
- 4 CAPs (Command Action Points) Tracks
- Cards: 50 Battle Cards (Nos: 01–24), 5 Weapon Cards (Nos: W01–W05)
Awakening the Bear includes Maps 1–5. Map 6 is an expansion Marsh Map. Maps 7–10 are included in Storms of Steel. Missions combining Maps from various releases can be found at www.AcademyGames.com/AtB.
1.0 Setup
-
Choose Sides: Choose which Mission to play and which side each player will command.
-
Place Maps: Place Maps as described in the Mission.
-
Set Up Units: Place Units and Control Markers on the setup Hexes listed in the Mission Brief. These Units must face the direction shown on the Mission Map.
Hexes are identified by their: (Map #)–(Column Letter & Row #). 1-E05 designates Map 1, Hex E05.
-
Place CAPs Markers: Distribute Command Action Points (CAPs) Track Sheets to all players. Each player then places a CAPs Marker on their starting CAP value as specified in the Mission.
-
Prepare Battle Draw Deck: Create the Battle Deck by separating out and shuffling the Battle Cards specified by the Mission (8.1). Each player draws their specified number of Battle Cards.
-
Place Round and Victory Markers: Place the Round and Victory Track Sheet near the Map.
- Place the Victory Point (VP) Marker on the Victory Point Track space as specified in the Mission.
- Place the Mission Round Marker on the '1' space of the Mission Round Track.
- Place any Reinforcement Units on the Mission Round Track in the space indicating the Round they will become available.
-
Separate the Soft Target and Armored Target Hit Markers into two Draw Piles. Make sure the yellow effect side of each Marker is face-down.
Armored Target Hit Markers are not used in early Missions.
1.1 Units
Conflict of Heroes includes Units that represent infantry squads of 6–12 men, crewed units such as mortars, individual vehicles such as tanks, and many others.
Each Unit has a symbol and a unique Unit number in the top center — for example, 01 above the Rifles '41 name.
Unit symbols are used in Solo expansions. Unit numbers are for sorting convenience.
Unit Summaries are listed on pg 38.
2.0 Round Sequence
Each Round, players alternate taking Turns.
The player who has the Initiative takes the first Turn.
On your Turn, take a single Action or Pass.
The Round ends when both players Pass consecutively (2.7).
Each Mission specifies which side has the Initiative in the first Round. For subsequent Rounds, Initiative is determined during the Pre-Round Sequence (9.11).
2.1 Actions
An Action is performed by a Unit.
To take an Action, follow these steps in order:
- Select a Unit (2.2)
- Perform an Action (2.3)
- Determine the Action Cost (2.4)
- Make a d10 Spent Check (2.5)
In later Sections, we will introduce additional Actions that can be taken, as well as how to take Group Actions with multiple Units.
2.2 Select a Unit
Select one of your Fresh Units on the Map to take one Action.
A Unit may be Fresh or Spent, as indicated by which of its sides is face-up.
Fresh Unit: may always be selected to take an Action.
Spent Unit: may only be selected to take an Action under certain circumstances (3.4).
A Unit is designated as Spent by flipping it to its side with the red bar. A Unit's stats are the same on its Fresh and Spent sides.
2.3 Perform an Action
Take one Action with the selected Unit.
Common Actions include:
- Move to an adjacent Hex / Pivot (4.5)
- Attack a Target Hex (6.0)
- Rally to remove a Hit Marker (7.6)
- Stall (2.8)
- Play Action Card (8.5)
2.4 Determine Action Cost
Each Action has an associated Action Cost, which may be subject to Action Cost Modifiers, such as Stress (2.6), Difficult Terrain (4.9), or Hit Markers (7.3).
Action Cost is counted in Action Points (AP).
- A Unit's Attack Cost is printed in its top left corner.
- A Unit's Move Cost is printed in its top right corner.
A Unit's training and disposition, communications capability, and resources available to carry out a specific type of Action are reflected in the cost for that Unit.
Ex: A 3AP Attack Cost for a German Rifles '41 vs a 4AP Attack Cost for a Soviet Rifles '41.
2.5 Make a Spent Check
After determining the Action Cost, roll one red d10 Spent Die.
If the result is higher than the Action Cost, the Unit passes its Spent Check and remains Fresh.
If the result is equal to or lower than the Action Cost, the Unit fails its Spent Check and becomes Spent. Flip the Unit to its Spent side that shows a red bar.
The Spent Die is a weighted d10 with face values of: 1, 1, 2, 3, 3, 4, 5, 5, 6, 7
A Unit taking a 3AP Action has a 50% chance of becoming Spent. This means that on average, a Unit will be able to take two 3AP Actions before becoming Spent. This is the same number of Actions as when using the 7AP 2nd Edition rules.
Example — Move Action: A German Turn: The Germans take an Action to move their MG34 Unit forward one Hex. German d10 Spent Check: The MG34's Move Cost is 1AP, and it is not affected by any modifiers. It must roll a 2 or higher with the d10 Spent Die to remain Fresh. They roll a 4 and succeed.
Example — Attack Action: Soviet Turn: The Soviet Rifles attack the MG34 and miss. Soviet Spent Check: The Rifles' Attack Cost is 4AP and no modifiers affect the Attack, so the Attack has an Action Cost of 4AP. The Rifles must roll higher than 4 with the d10 Spent Die to remain Fresh. They roll a 3 and fail, so the Rifles are flipped to their Spent side (2.5).
2.6 Stress
A Unit must add a +1AP Stress Penalty to its Action Cost if it took any Action on its player's previous Turn.
Stress is not cumulative. A Unit taking two or more consecutive Actions will still only have a total +1AP Stress Penalty each Turn.
Stress represents a squad's or vehicle crew's mental and physical state, as well as logistical constraints, that can affect its Unit cohesion and effectiveness.
Constant action, without pause or support, into known or unknown danger exerts tremendous stress on participants that can be highly detrimental to their combat effectiveness. This includes enemy engagement, real or imagined ammunition depletion, injured comrades, poor situational awareness, and fear – all of which amplify a Unit's propensity to stall, freeze, or fall back.
Stress Marker: Optional: Place a Stress Marker on your Unit after taking an Action, to mark that it is Stressed and will receive a Stress Penalty if used again on your very next Turn. On your next Turn, if you take an Action with a different Unit, the Stress Marker is moved onto it.
Example — Stress: German Turn: The MG34 attacks the Soviet Rifles from its new position and misses. German Spent Check: The MG34 was Stressed, since it had moved on the last German Turn (2.6). Its Attack Cost is 2AP. It must add a +1AP Stress Penalty, for a modified Attack Cost of 3AP. The MG34 must roll higher than a 3 with the d10 Spent Die to remain Fresh. It rolls a 3, fails its Spent Check, is flipped to its Spent side, and remains Stressed.
2.7 Passing
You may Pass, instead of taking an Action on your Turn. Passing has no cost, no Spent Checks are made, and no Units are Stressed. Any Stress Marker on a Unit is removed.
Passing does not prevent you from taking Actions on future Turns.
However, if both players Pass consecutively, the Round ends (9.0).
Example — Passing: German Turn: The Germans are satisfied with their Pioneers' position and decide to Pass. No German Unit is now Stressed. Soviet Turn: The Rifles move forward into a Light Woods Hex for a 1AP Action Cost. They perform a Spent Check, fail, flip the Rifles to their Spent side, and are Stressed. German Turn: The Fresh German Pioneers attack the Rifles and miss. They fail their 2AP Spent Check, flip their counter to its Spent side, and are Stressed. Soviet Turn: The Soviets have no Fresh Units, so decide to Pass. German Turn: The Germans also have no Fresh Units, so they decide to Pass. Because both sides Passed consecutively, the Round ends and no Units are Stressed.
2.8 Stall Action
Instead of Passing, one of your Units may take a Stall Action for an Action Cost of 1AP.
A Unit that Stalls does nothing, but must make a d10 Spent Check and is Stressed.
Stalling allows a player to assess the next enemy Action without Passing. But stalling a Unit during combat can increase its propensity to not move or continue to actively engage the enemy. This is simulated by Stressing the Unit.
Passing allows you to keep your Units Fresh while seeing what your opponent does – but there is the danger that your opponent will also Pass, ending the Round.
Passing may be useful to you if you want the game to progress quickly. However, if you still have Actions you wish to take, you may not want to risk having the Round end, instead choosing to Stall with one of your Units.
Example — Stalling: Note: In the previous example, the Pioneers Passed for their (A) Turn Action. If the Soviets Passed on their very next (B) Turn Action, the Round would have ended. If the Pioneers did not want to risk the Round ending, instead of Passing they would have performed the Stall Action. German Turn (A) Redo: The Pioneers Stall for 1AP. They make a successful Spent Check and are Stressed.
3.0 Command Support
Command Action Points (CAPs) represent a force's available Command resources that are shared by all of their Units during the Round.
CAP Allocation per Round is provided in the Mission Book.
CAPs represent the leadership and logistic support a fighting force depends on to remain effective.
Leaders are responsible for keeping Unit cohesion and motivating men to take actions, coordinating attacks, interfacing with command, bolstering morale, and more.
Logistical support ensures that ammunition is supplied to frontline Units, wounded soldiers are evacuated, and HQ communication channels are in place.
Effective Command Support is often the difference between a successful engagement or failure.
3.1 Spending CAPs
Each time you spend a CAP, move the CAPs Marker down one space on the CAPs Track. When your CAPs Marker has reached 0, you are out of CAPs to spend for the Round.
Your CAPs are replenished at the start of each Round (9.7).
3.2 Modify a d6 Number Check
To modify YOUR d6 or 2d6 Number Check:
- Spend up to 2 CAPs before rolling.
- For each CAP spent, raise or lower the Number you need to roll by 1.
Up to 2 CAPs may be spent to modify a required Attack Hit Number (6.8), Rally Number (7.7), Initiative Check Number (9.11), or any other Number requiring d6 die rolls.
3.3 Modify a d10 Spent Check
To modify a d10 Spent Check (2.5):
- Spend ANY NUMBER of CAPs before rolling.
- For each CAP spent, reduce the Action Cost by 1.
Reducing a Unit's Action Cost increases the probability that your Unit will pass its Spent Check (2.5). The pictured Reference Table is included on your CAPs Track Sheet.
Spent Check Reference Table
| Action Cost | 1 | 2 | 3 | 4 | 5 | 6 | 7 |
|---|---|---|---|---|---|---|---|
| Spent Chance | 20% | 30% | 50% | 60% | 80% | 90% | 100% |
3.4 0AP Action Cost
- If the Action Cost is reduced to 0AP, no Spent Check is made.
- A Spent Unit may take a 0AP Action.
A Spent Unit remains Spent after it takes a 0AP Action.
Reducing an Action's cost to 0AP with CAPs can be costly, but may be crucial for Spent Units in critical situations.
Example — Reducing Action Cost: German Turn: The German MG34 attacks the Spent Soviet Rifles and misses for an Action Cost of 2AP, meaning it must roll a 3 or higher d10 Spent Check to remain Fresh. The Germans have 5 CAPs remaining on their CAPs Track. Before they roll the Spent Check, they decide to spend 1 CAP to reduce the Action Cost from 2AP to 1AP (3.3). They then roll a 2 and remain Fresh, and are Stressed. Note: Reducing the MG34's Action Cost from 2AP to 1AP lowers their probability of becoming Spent from 30% to 20% (see the Spent Check Reference Table).
Example — Spent Unit Action: Soviet Turn: The Spent Rifles want to fire back at the MG34. The Soviets spend 4 of their remaining 5 CAPs to reduce the Rifles' 4AP Attack Cost to 0AP, so they may take the Action (3.4). They miss, remain Spent, and are Stressed.
German Turn: The Fresh MG34 decides to move forward adjacent to the Soviet Rifles for a 2AP Action Cost (1AP Move Cost + 1AP Stress). The Germans want to guarantee that the MG34 remains Fresh, so they spend 2 CAPs to reduce the Move Action Cost to 0AP. The MG34 moves, makes no Spent Check and remains Fresh, and is still Stressed.
4.0 Unit Position
Units can only occupy Full Hexes on the Map.
Half-hexes at the edge of the Map are never playable. Full Hexes comprised of two Half-hexes formed by two side-by-side map boards are playable.
A Hex represents an area approximately 50 meters across.
4.1 Unit Facing
A Unit's Front direction is indicated by the green field along its top edge.
A Unit must face one of the six sides of the Hex it occupies. It cannot face a corner of the Hex.
A Unit may change the direction it is facing by taking an Action to Pivot in place (4.6) or after moving into a new Hex (4.5).
4.2 Front and Flank Hexes
The Hex a Unit is facing and the Hexes to its front left and front right are known as its Front Hexes.
The Hex opposite the direction the Unit is facing and the Hexes to its back left and back right are known as its Flank Hexes.
The direction a Unit is facing is critical. It indicates where the Unit's 'focus' is and what positions its soldiers are taking.
While deployed behind a wall or against an embankment, a Unit is very vulnerable to fire coming from its Flank. Not only is the Unit often more exposed, but Flank attacks can be psychologically devastating. 'Where did the enemy come from? Are we surrounded? Can we get away?'
The natural instinct is often to run away from the threat or to hunker down. A Unit's experience and leadership play a key role in assessing the new threat, keeping Unit cohesion, and conducting an effective reaction.
4.3 Unit Stacking
Units may occupy the same Hex as friendly or enemy Units. Units occupying the same Hex are said to be Stacked.
There is no limit to the number of Units that can occupy a single Hex and these Units may be facing different directions.
4.4 Control Markers
Control Markers are placed on the Map during Mission setup to indicate key Objective Hexes.
The side of the Control Marker that is face-up indicates which side currently controls the Hex.
If the opposing side gains control of the Hex, flip the Control Marker over to show the new controlling side's symbol.
A Control Marker changes sides if BOTH of the following are true:
- The controlling side has no Units in the Objective Hex.
- The opposing side has a Unit with positive Firepower (either red or blue) in the Objective Hex, even if just moving through.
4.5 Foot Unit Movement
A Unit is considered a Foot Unit if it has a red Move Cost in its top right corner.
When a Foot Unit performs a Move Action, it may move from its current Hex to any adjacent Hex.
After moving into a new Hex, the Unit may freely Pivot, for no extra AP cost, to face any of the six sides of the new Hex. The Unit may not Pivot before moving.
A Unit may never exit the Map, unless specified by a Mission.
4.6 Pivoting in Place
A Unit may use a Move Action to Pivot in Place, rotating as far as it wants, without moving into a new Hex.
1AP Cost for any type of Unit to Pivot in Place.
4.7 Move Cost Modifiers
A Unit that makes a difficult move is more likely to become Spent as a result.
This is represented by adding Move Cost Penalties to its Action Cost.
Move Cost Penalties for Foot Units & Field Guns:
- Difficult Terrain (4.9)
- Backwards Move (4.11)
- Elevation Move (12.2)
Example — Move Action: The Soviet Rifles move forward into a Heavy Woods Hex and then Pivot. The Rifles' Move Cost is 1AP. Heavy Woods is Difficult Terrain, so the Rifles must add a +1AP Move Cost Penalty (4.9). Pivoting after moving adds no cost (4.5). The total Move Cost is 2AP.
4.8 Terrain Type
Each Hex has a Terrain Type.
The Terrain Feature under the dot in the center of a Hex indicates the Terrain Type for the entire Hex. Any other features depicted on the Hex are decorative only.
- Open Terrain: Rolling fields with intermittent clumps of brush and low crops.
- Plowed Fields: Open terrain of fresh-tilled or muddy fields that inhibit tracked vehicle movement. Wheeled vehicles are prohibited.
- Water (Rivers and Lakes): Open terrain bodies of water with a depth of over 1 meter. Only passable to Foot Units, which may not attack while in water Hexes.
- Walls: Constructed stone walls that protect Units which are directly behind them (6.5). They follow a Hex's side and do not change terrain type.
- Light Woods: Overgrown areas with light tree and brush that provide defense (6.4).
- Heavy Woods: Large, well-developed trees with undergrowth that provide defense (6.4).
- Wood Buildings: Light wooden buildings and sheds that provide defense (6.4). All are yellow/brown-toned.
- Stone Buildings: Sturdy stone, brick, and heavy wood structures such as barns and city buildings that provide defense (6.4). All are gray-toned.
4.9 Difficult Terrain
A Unit moving into a Hex with Difficult Terrain suffers a Move Cost Penalty.
Common Difficult Terrain Move Penalties for Foot Units:
- Wall: +1AP for crossing a wall Hexside.
- Heavy Woods: +1AP to move into Hex.
- Wood or Stone Buildings: +1AP to move into Hex.
- Water: +5AP to move into Hex.
Units moving out of Difficult Terrain or just Pivoting in place (4.6) do not receive any Move Penalties. Only add these penalties when moving into a new Difficult Terrain Hex.
4.10 Roads
Roads may appear in Hexes of any Terrain Type. Roads do not need to cross the center dot of a Hex to take effect.
When moving along a Road from a Hex with the Road to an adjacent Hex with the Road, Units ignore Difficult Terrain Move Penalties (4.9).
Example — Movement on Road: (A) The Soviet Rifles move from an Open Terrain Hex with a Road to a Heavy Woods Hex with a Road. Woods is Difficult Terrain, but moving along the Road negates the +1AP penalty, so the Rifles' total Move Action Cost is 1AP.
(B) The German Rifles move from an Open Terrain Hex to a Heavy Woods Hex with a Road. Since the Rifles are not starting and ending their move on a Road, they must add +1AP for Difficult Terrain. Their total Move Cost is therefore 2AP.
4.11 Backwards Move
When a Unit moves into one of its own Flank Hexes (4.2), it is said to be moving backwards.
Moving backwards adds a +1AP Move Penalty to a Unit's Move Cost.
This penalty is added to any other Move Penalties such as Difficult Terrain.
A Unit that moved backwards may then still freely Pivot in any direction.
4.12 Units Entering the Mission
A Unit moving onto the Map costs 0AP and never requires a Spent Check, but it still experiences Stress (2.6).
An Entry Move must be onto any full entry Hex (4.0) specified by the Mission. Note: Units with Bonus Moves (15.2) may utilize these during an Entry Move Action and make no Spent Check.
Multiple Reinforcement Units may enter as a Group (10.2) (on the same or spread out on adjacent entry hexes) or while being transported (15.6) and make no Spent Check.
If enemy Units occupy all entry Hexes, the Reinforcement Unit may instead enter along the map edge within 2 Hexes of the enemy Units.
5.0 Fire Zone and Target Hex
A Unit may only Attack a Target Hex that is in its Fire Zone.
A Hex is in a Unit's Fire Zone if it meets ALL of the following criteria:
- It is within the Unit's Arc of Fire (5.1)
- It is within the Unit's Line-of-Sight (5.2)
- It is within twice the Unit's Range (5.3)
You may check whether the Hex you wish to target is in a Unit's Fire Zone before committing to an Attack Action.
5.1 Arc of Fire
A Unit's Arc of Fire is defined by extending its three Front Hexes radially across the Map.
5.2 Line-of-Sight (LOS)
Two Hexes are in Line-of-Sight (LOS) of one another if a line can be drawn between the center dot of one Hex to the center dot of the other without crossing an intervening Hex that has LOS-Blocking Terrain.
All Units have a 360 degree LOS out of the Hex they occupy.
LOS-Blocking Terrain:
- Light or Heavy Woods
- Wood or Stone Buildings
Note that Terrain only blocks LOS if it is between two Hexes. A Unit may attack an enemy occupying a Hex that has LOS-Blocking Terrain, as long as there is no additional Blocking Terrain in front of it.
The Attacker's LOS is blocked if any part of the line connecting its Hex and the Target Hex cuts across any part of a Blocking Terrain Hex.
Reminder: Only Terrain under the Hex's center dot dictates the Terrain type for the entire Hex and if it affects LOS (4.8). Ex: A Buildings Hex blocks LOS even if the LOS line does not intersect the image of the building in the Hex.
If LOS passes exactly along the edge between a Blocking Terrain Hex and non-Blocking Terrain Hex, LOS is not blocked.
All Units, friendly and enemy, do not block LOS.
All LOS rules are reversible. If Unit A has LOS to Unit B, then Unit B has LOS to Unit A.
5.3 Range
A Unit's Range is printed near its bottom center edge in yellow text.
The Attacker is in Range of the Target Hex if the distance from it to the Target Hex (in number of Hexes) is equal to or less than its Range number.
The Attacker's Hex is not included when determining Range to the Target Hex, but the Target's Hex is counted.
A Unit can attack a Target Hex up to twice its Range away, but will suffer a -2AR (Attack Rating) Long Range Penalty (6.7) against a Target Hex that is beyond its Range number.
Any Hex that is more than twice the Unit's Range away is not in its Fire Zone.
6.0 Resolve an Attack
The Unit selected to execute an Attack Action is called the Attacker. Any Unit or Units occupying the Target Hex are called the Targets.
After choosing a Target Hex in the Attacker's Fire Zone, resolve a separate Attack against each Target in the Hex (6.9).
To execute an Attack, follow these steps in order:
- Determine the Target's Defense Rating (DR)
- Determine the Attacker's Attack Rating (AR)
- Calculate the Hit Number (DR − AR)
- Resolve a 2d6 Attack Roll against the Hit Number
6.1 Defense Rating (DR)
The Target's Defense Rating is its Defense plus any DR Modifiers (6.4).
A Unit's Defense numbers are in the bottom right corner.
Use the Target's higher Front Defense unless attacked from its Flank (6.3).
DR = Target's Defense + DR Modifiers
6.2 Soft and Armored Targets
A Unit may either be a Soft Target or an Armored Target, depending on the color of its Defense numbers.
- Red Defense indicates a Soft Target.
- Blue Defense indicates an Armored Target.
6.3 Flank Attacks
An Attack initiated from outside of the Target's Arc of Fire is a Flank Attack.
For a Flank Attack, use the Target's lower value Flank Defense instead of its Front Defense.
6.4 Defensive & Exposed Terrain
Defensive Terrain is any Terrain that gives a +DR Modifier.
Defensive Terrain DR Modifiers for all Units include:
| Terrain | DR Modifier |
|---|---|
| Light Woods | +1DR |
| Heavy Woods | +2DR |
| Wood Buildings | +1DR |
| Stone Buildings | +2DR |
| Walls | +1DR |
Exposed Terrain DR Modifiers for all Foot Units:
| Terrain | DR Modifier |
|---|---|
| Water | −1DR |
6.5 Walls
Wall Cover Bonus: +1DR if Attack crosses a Wall bordering the Target's Hex.
Walls do not block LOS.
Wall Cover (+1DR) does not apply against Mortar and Artillery fire.
6.6 Attack Rating (AR)
The Attacker's Attack Rating is its Firepower (FP) plus any AR Modifiers.
AR = Attacker's Firepower + AR Modifiers
A Unit's FP numbers are in the bottom left corner.
- Red Firepower is used to attack Soft Targets.
- Blue Firepower is used to attack Armored Targets.
Attacker's Firepower Color = Target's Defense Color
A Unit's red Firepower reflects its anti-personnel capabilities. Its blue Firepower reflects its armor-piercing capabilities.
Some Units are much more effective against one type of target than another. Infantry and machine gun fire are not usually very effective against heavily armored tanks!
6.7 Range AR Modifiers
The Attacker's AR may be affected by a Range Modifier depending on its distance from the Target.
- Long Range Penalty: −2AR if the distance between the Attacker and its Target Hex exceeds its Range (5.3).
- Short Range Bonus: +3AR if the Attacker is adjacent to its Target Hex.
- Close Combat: +4AR if the Attacker is in its Target Hex (6.10). Crewed Units have a −2AR penalty in CC (6.11).
6.8 Hit Number & Attack Roll
The Attack's Hit Number is determined by subtracting the Attacker's Attack Rating from the Target's Defense Rating.
Hit Number = DR − AR
A 2d6 Attack Roll equal to or higher than the Hit Number results in a Hit (7.0).
Remember that you may spend up to 2 CAPs to lower the Hit Number, but you must do so before rolling! (3.2)
6.9 Attacking Stacked Units
If multiple Units occupy the Target Hex (4.3), resolve a separate Attack Roll against each one (including friendly and enemy Units).
This counts as a single Attack Action, and the Attacker resolves only one d10 Spent Check.
If there are both Soft Targets and Armored Targets stacked in the Target Hex, the Attacker uses its corresponding colored Firepower when rolling against each Target.
Each individual Target's facing determines whether it uses its Front Defense or Flank Defense.
If CAPs are spent to reduce a Hit Number, each CAP spent modifies only one 2d6 roll. Up to 2 CAPs may be spent on each separate roll (3.2).
It is often unwise to concentrate and stack your Units in one Hex, since it makes them easier to hit. Military doctrine usually advises spreading Units out.
Example — Attack Action: German Turn: The German MG34 wants to attack the Soviet Rifles. The MG34 confirms that the Rifles are within its Fire Zone (5.0).
DR: The MG34 is attacking from within the Rifles' Arc of Fire, so the Rifles utilize their red 12 Front Defense. To this they add the Light Woods +1DR Terrain Modifier (6.4), for a total 13DR.
AR: The Rifles' Defense is red, indicating a Soft Target (6.2), so the MG34 uses its red 4 Firepower (6.6). The Rifles are in normal Range, so the MG34 receives no Range AR Modifier. It has a total 4AR.
The Germans calculate their Hit Number: 13DR − 4AR = 9 Hit Number.
The Germans then decide to spend 1 CAP to reduce their Hit Number to 8 (3.2). They roll 2d6 and miss with a 7. The Rifles got lucky this time!
The MG34's Attack has an Action Cost of 2AP. They make a successful d10 Spent Check, remain Fresh, and are Stressed.
Example — Flank Attack: Soviet Turn: The Germans thought their PaK 38 was in a secure position in a Wood Building – but on a previous turn the Soviet Rifles surprised them by moving behind them and now attack!
DR: Since the Rifles are attacking from outside the PaK's Arc of Fire, the PaK must use its 10 Flank Defense (6.3). It also receives the +1DR for the Wood Building Hex (6.4) it occupies, giving it a total 11DR. (The PaK being Spent has no impact on its Defense.)
AR: The PaK's Flank Defense is a red Soft Target, so the Rifles use their red 3 Firepower (6.5). Since they are in a Hex adjacent to the PaK, they also receive a +3AR Short Range Bonus (6.7), for a total 6AR.
The Soviets calculate their Hit Number: 11DR − 6AR = 5 Hit Number.
The Soviets feel it is very important this Attack succeeds, so they decide to spend the maximum allowable 2 CAPs (3.2) to reduce their Hit Number from 5 to 3, improving their odds of achieving a Hit. They make a 2d6 Attack and roll 6, resulting in a Hit!
The Rifles then spend 1 CAP to lower their 4AP Attack Cost to 3AP. They fail their Spent Check with a 3 result, flip the counter to its Spent side, and are Stressed!
Example — Attacking Stacked Units: Soviet Turn: The Soviet Rifles fire into a Hex occupied by German Rifles and an MG34. The Soviets must roll a separate Attack against each enemy Unit.
(A) The Soviets decide to resolve their Attack against the Rifles first. This Attack initiates from the German Rifles' flank, so they use their red 11 Flank Defense. They are in Open Terrain and get no Terrain bonus. They are a red Soft Target, so the Soviet Rifles use their red 3 Firepower (FP) with no modifiers. The Hit Number against the Rifles is: 11DR − 3AR = 8 Hit Number. The Soviets roll a 6 and miss.
(B) The MG34 is facing the Soviets and uses its red 12 Front Defense. It is a Soft Target, so the Rifles again use their red 3FP. This time the Hit Number is: 12DR − 3AR = 9 Hit Number. The Soviets roll a 10 and score a Hit.
The Rifles' Attack Cost is 4AP, and they only need to make ONE d10 Spent Check for both Attack rolls. They roll a 5, remain Fresh, and are Stressed.
6.10 Close Combat (CC)
A Unit occupying the same Hex as an enemy Unit is considered being in Close Combat.
- It may only attack another Unit in that Close Combat Hex. It may not fire at Targets outside of its CC Hex.
- If there are stacked enemy Units in the Close Combat Hex, it does not Attack each of them but instead must choose a single Target to attack.
Close Combat Modifiers
Attack Rating: +4AR Bonus to the Attacker.
Defense Rating: Targets use their Flank Defense.
Foot Units and Crewed Units (6.11) gain Terrain DR Modifiers (6.4).
6.11 Crewed Units
Crewed Units are marked with a white field behind one or both of their Firepower values.
Firepower on a White Field
- Does not gain a +4AR Bonus in Close Combat (6.10), but instead
- Suffers a -2AR Penalty.
Crewed Units include MGs, Mortars (13.0), and Field Guns (16.7). They are supported by 2-8 men who are easily overwhelmed in close quarters fighting by a squad of 10 or more opponents armed with SMGs, pistols, and grenades.
6.12 Withdraw from Close Combat
Moving into an enemy Hex to initiate Close Combat requires a Move Action, so the attacker will have to wait a Turn before they are able to attack. This means their opponent will have the first chance to attack or withdraw – if they have the resources to do so.
If a player decides it would be best to withdraw from CC rather than attack, the following restrictions apply:
You may not, on the Turn after an enemy moved into your Hex, advance your Units into the Hex that was previously occupied by that enemy, or either of the two Hexes adjacent to the previously enemy-occupied Hex.
Example — Close Combat: Assume all Units pass their Spent Checks.
(A) Soviet Turn: The Soviet Rifles move into Light Woods Hex 1-J06 (+1DR Modifier) to initiate Close Combat with a Spent German HMG.
(B) German Turn: The HMG is Spent, and the Germans do not have enough CAPs to lower its Attack Cost to 0AP, so it cannot fire. Instead, they move their Rifles '41 from the adjacent Hex to join the Close Combat.
Soviet Turn: The Soviet Rifles may only attack one of the two German Units (6.10), or withdraw if they wish. Note that the Rifles may not withdraw to any of the red highlighted Hexes (6.12).
(C) They decide to attack the HMG. The HMG defends with its 10 Flank Defense in Close Combat, regardless of facing (6.10).
The German HMG has an 11DR: 10 Flank Defense + 1DR Light Woods Bonus.
The Soviet Rifles have a 7AR: 3 Firepower + 4AR CC Bonus.
11DR − 7AR = 4 Hit Number.
The Soviets roll a 7 and Hit.
7.0 Hits
When an Attack succeeds, the Target suffers a Hit.
7.1 Critical Hit
If the Attacker's roll result exceeds the Hit Number by 4 or more, the Target suffers a Critical Hit and is instantly destroyed (7.11).
7.2 Hit Markers
If the Attacker's roll result is equal to or higher than the Hit Number, but less than a Critical Hit, the Hit Unit pulls a Hit Marker.
Hit Markers come in two types:
- If the Hit is against the Target's red Defense, pull a red Soft Target Hit Marker.
- If the Hit is against the Target's blue Defense, pull a blue Armored Target Hit Marker.
To apply a Hit, randomly pull a Hit Marker from the appropriate Draw Pile. Look at its effects, but do not show it to your opponent. Then place it face-down underneath the Hit Unit.
At any time, you may look at Hit Markers under your own Units.
In the heat of battle, an attacker cannot immediately determine the extent of its target's casualties.
Soft Target Hit Markers (x2 means two copies are included in the game):
- Stunned (x2): Unit cannot take any Action other than Rally. Rally Number: 7.
- Unnerved (x2): No stats are affected. Rally Number: 7.
- Destroyed (x1): Unit is destroyed and can take no further Actions. Reveal Hit Marker & remove Unit when it is fired at again, adjacent to enemy, or at end of Round.
- Panicked (x2): Unit cannot Attack. Flank Def: +1. Front Def: −2. Rally Number: 8.
- Pinned (x5): Unit cannot Move or Pivot. Rally Number: 7.
- Suppressed (x5): Attack Cost: +1AP. Firepower: −2. Rally Number: 7.
- Cowering (x2): Attack Cost: +2AP. Move or Pivot Cost: +1AP. Range: Drops to 1. Def: +1. Rally Number: 8.
- Berserk (x1): Attack Cost: −1AP. Firepower: +1. Range: Drops to 1. Flank Def: +1. Front Def: +2. Rally Number: 8.
⊘ = The Action may not be used. XX = May never Rally (7.9). A blue or red number affects only the same-colored stat.
7.3 Hit Marker Effects
Hit Markers apply Modifiers to a Unit's stats and abilities.
Each Modifier printed on a Hit Marker applies to the stat in the corresponding location on the Unit. A +1 in the top left corner of a Hit Marker means the Hit Unit's Attack Cost is increased by 1AP.
A ⊘ symbol means the Unit may not use the corresponding Action at all. A ⊘ symbol in the top left corner of a Hit Marker means the Unit may no longer Attack.
If no value appears in the location of a Hit Marker, there is no effect on the corresponding stat of the Hit Unit.
Taking a Hit does not necessarily mean that men are killed. In battle, soldiers often lose Unit cohesion, resulting in them freezing or running away. At other times, they may be injured or mentally unable to continue to fight effectively. Modern combat effects are simulated through the Hit Markers.
7.4 Receiving a Second Hit
If a Unit with a Hit Marker receives another Hit, it is destroyed (7.11).
7.5 Revealing Hit Markers
Reveal a Hit Marker when it affects the Unit's:
- Attack or Move Cost for a Spent Check (2.4), or
- Defense or Attack Rating during Combat (6.1, 6.6)
Then return the Hit Marker under the Hit Unit face-up. The Hit Marker is now public information.
Example — Hit Marker: German Turn: A German HMG attacks the Soviet Rifles and scores a Hit. The Soviets pull a Soft Target Hit Marker from the Draw Pile and secretly look at it (7.2). They drew a 'Suppressed' Hit Marker, which affects the Rifles' stats as follows:
- Their 4AP Attack Cost increases to 5AP.
- Their red 3FP decreases to 1FP.
- Their blue 0FP decreases to −2FP.
- Their Move Cost and Defense are not affected since these areas are blank.
Without showing the Hit Marker to the German player, the Soviets place it face-down underneath the Rifles.
The HMG succeeds on its d10 Spent Check and is Stressed.
Soviet Turn: The Rifles shoot back at the HMG, which has a red 12 Front Defense.
The Suppressed MMG attacks with its modified red 1 FP and must immediately reveal its Hit Marker, placing it face up under the MMG.
12 DR − 1AR = 11 Hit Number.
The Rifles make their 2d6 Attack roll and miss with a 10.
The Rifles roll a d10 Spent Check against their 5AP Attack Cost, fail, and are Stressed.
7.6 Rally Action
A Hit Unit may attempt to remove its Hit Marker by Rallying.
7.7 Rally Check
A Rally Number is located at the top center of most Hit Markers.
To Rally, resolve a 2d6 Rally Check equal to or higher than the Hit Marker's Rally Number.
If the Rally Check is successful, the Hit Marker is revealed and returned to the Draw Pile.
If the Rally Check fails, the Hit Marker is not revealed. It may attempt another Rally Check on future Turns.
7.8 Rally Number Modifiers
A Unit's Rally Number is lowered by Terrain, Fortifications, and other friendly Units in its Hex. These modifiers are cumulative.
Concealing Terrain (11.5) & Friendly Unit Rally Bonus. Lower a Hit Unit's Rally Number by 1 if it occupies:
- Light / Heavy Woods
- Wood / Stone Buildings
- Walls (6.5) or Fortifications (17.0)
- Heavy Smoke (14.3)
- Per friendly un-Hit Unit in its Hex
As with any 2d6 Number Check, you may spend up to 2 CAPs to reduce your Unit's Rally Number before you roll.
7.9 Rally Restrictions
A Hit Unit may not take a Rally Action if either:
- It is in a Hex with an enemy Unit.
- Its Hit Marker is marked with an 'XX' or 'No Rally'.
7.10 Rally Spent Check
After performing a Rally Action, the Unit must make a Spent Check, regardless of whether its Rally Check succeeded.
The Action Cost to Rally is 5AP plus any applicable Action Cost Modifiers such as Stress.
Rally Attempt Action Cost = 5AP + Modifiers
Example — Rallying: (A) Soviet Turn: The Soviets, desperate to save their MMG (which is Spent, has a Stunned Hit Marker, and is Stressed), decide to attempt a Rally.
The cost to Rally is 5AP +1AP due to Stress. The Soviets spend 6 CAPs to reduce the Rally Cost to 0AP! (3.4)
The Stunned Hit Marker has a Rally Number of 7. The MMG occupies Light Woods, which lowers its Rally Number by 1. The Soviets also commit 1 CAP to lower the Rally Number 1 further.
The MMG must roll 2d6 equal to or higher than its modified 5 Rally Number (7 Hit Counter Rally Number − 1 Woods Rally Bonus − 1 CAP modifier). It successfully rolls a 7, removes the Stunned Hit Marker, shows it to the opponent, and returns it to the Hit Marker Draw Pile. The MMG is now no longer hit, but it is still Spent and Stressed.
7.11 Destroyed Units
Remove the destroyed Unit (7.1, 7.4) from the Map and place it on the CAPs Track (7.12).
Reveal and remove any Hit Marker it may have had and return it to the Draw Pile.
Adjust the VP Track, if called for by the Mission (9.1).
7.12 Reduce CAPs
Destroyed Units are placed on their owner's CAPs Track. The first destroyed Unit is placed on the starting CAP number specified in the Mission, the second destroyed Unit is placed on the next lower CAP number, and so on.
Shown is a German CAPs Track that started with 7 CAPs. Two German Units have been destroyed, reducing the German's future CAPs allocations for the remainder of the Mission. So at the beginning of the next Round, the Germans will only be allocated 5 CAPs instead of 7 (9.7). This number will be even less if more German Units are destroyed!
Thus, a player's CAP Allocation per Round is reduced by 1 for each destroyed Unit for the remainder of the Mission.
If the CAPs Track Marker is on the space where a destroyed Unit should be placed, the CAPs Marker is moved down one space and the player immediately loses use of that CAP.
The loss and attrition of front line leaders affects a force's command structure, cohesion, and combat effectiveness.
Example — Destroyed Unit: (B) German Turn: The HMG34 attacks the MMG Maxim in the Heavy Woods Hex with a Hit Number of 9. The Germans spend 2 CAPs to reduce their Hit Number to 7.
The Germans roll 2d6 and get an 11, which is four higher than the required 7 Hit Number, resulting in a Critical Hit (7.1). The Maxim is destroyed outright! The Soviets place the Maxim on their CAPs Track, reducing their CAPs pool by 1 (7.12).
7.13 Minimum CAPs
If a player has only 3 remaining open spaces on their CAPs Track, destroyed Units are no longer placed there.
A player will always have at least 3 CAPs available at the beginning of a new Round.
8.0 Battle and Weapon Cards
There are two categories of Cards, designated on their backs as: Battle Card and Weapon Card.
The Cards have an ID Number in their bottom left corner and each Mission specifies which cards will be available for play.
There is no limit to the number of Cards a player may hold.
Un-played cards may be held into future Rounds.
8.1 Battle Cards
Each Mission specifies which numbered Battle Cards are included to make up a Battle Card Draw Deck. Multiple copies of most Battle Cards are available, all of which are included in the Draw Deck when called for.
This Mission calls for Battle Cards 01 thru 13 to be included in the Battle Card Draw Deck. This deck will thus include all four copies of Battle Card 01, eight of Card 02, and so on.
Each Player then draws Battle Cards into their hand at the beginning of each Round, as specified by the Mission.
Battle Cards are discarded when played.
Battle Cards add an additional Fog of War layer to game play that allows players to execute special and unexpected Actions! Players must use them sparingly and wisely.
8.2 Weapon Cards
Weapon Cards are sometimes made available to a player. They include special Explosives and Artillery.
The Mission will specify how often and/or when a Weapon Card can be played.
8.3 Card Type Icons
Each Card is marked in its top left corner with a Type Icon.
Cards with:
- Action Icons are played as an Action.
- Bonus Icons modify the Action you take.
- Mission Icons trigger special events or scoring.
- Artillery Icons resolve Artillery Strikes during the Pre-Round Sequence.
A card's layout includes: Card Title, Card Type Icon, Action Cost, Card Effect text, Card ID #, and Battle Icons.
8.4 Action and Bonus Icon Cards
Most Battle and Weapon cards are designated as either Action or Bonus Cards.
Action Card: One may be played as a player's Action during their Turn, just like a Common Action (2.3).
Bonus Card: Any number may be played in a Turn and are not themselves Actions.
8.5 Playing Action and Bonus Cards
You may play an Action or Bonus Icon Card for its Green or Blue Action Point cost.
Green AP Cost: This card is played by a specific Unit. Then the listed Action Cost may be reduced with CAPs (3.3) before making the Unit's Spent Check.
When played by a Fresh Unit, the Unit becomes Spent if it fails its d10 Spent Check. If taken as a 0AP Action (3.4), any Fresh or Spent Unit may play this card and no Spent Check is made.
Blue AP Cost: The full cost of this card must be paid with CAPs (3.4) to play. Any Spent or Fresh Unit may play the card and no Spent Check is made.
Green and Blue AP Costs are NEVER affected by ANY modifiers, including Stress. However, an Action Icon Card will Stress the Unit(s) that played it.
8.6 Mission Icon Cards
Mission Cards determine Mission Objectives or initiate a Mission Scoring, Event, or End at no cost.
When you draw a Mission Card from the Battle Card Draw Deck, reveal and resolve it immediately, then discard it and draw another Battle Card.
8.7 Artillery Icon Cards
Artillery Icon Weapon Cards that give a player Off-Board Artillery (OBA) support at no cost.
You will plan and resolve your Artillery Strikes during the Pre-Round Sequence (9.4).
The Artillery's Firepower and Area of Effect is listed on each Artillery Card.
8.8 Battle Icons
Battle Icons printed on the bottom of a card indicate special ways a card may be used:
- Hidden Unit may take this card's Action and remain hidden, except if revealed through movement (11.5).
- Groups may play a card as part of a Group Action (10.1).
- High Explosive (HE): Resolve the Attack against the Target's Flank Defense. Air Burst (13.9).
Individual card descriptions are listed on page 37.
9.0 Ending the Round
After both players Pass consecutively, the Round ends.
- Award End of Round Victory Points (VPs).
- Determine if the Mission Ends.
9.1 Victory Points (VPs)
Victory Points (VPs) are gained, either during or at the end of a Round, as specified by each Mission, including:
- Destroying enemy Units during a Round (7.11).
- Controlling Control Markers at the end of a Round (4.4).
- Achieving Objectives during Mission-specified Scoring Rounds or when specific Mission Cards are drawn (8.6).
If you destroy your own Unit (yes, it can happen), your opponent receives the VP for its destruction.
9.2 'No-Tie' Victory Points Track
There is only one Victory Point Track in the game, which tracks the VPs gained by all players.
The VP Marker has a German Cross symbol on one side and a Soviet Star symbol on the other. The symbol that is face-up indicates which side currently has the VP Advantage.
When the side that has VP Advantage gains a VP, the VP Marker is moved forward one space. When the side that does not have VP Advantage gains a VP, the VP Marker is moved backward one space.
If the VP Marker drops below 1, the Marker is flipped, showing the opposing side now has VP Advantage. There is no zero; one side or the other always has VP Advantage.
The Germans have 2VP. The Soviets take an Objective that gains them 2VP. The VP Marker is first moved down to 1VP and then is flipped to its Soviet side to show that the Soviets now have a 1VP advantage.
9.3 Check for Mission End
If this is the last Round, or the Mission's Victory Conditions have been met, the Mission ends.
The side that has VP Advantage is the winner.
If the Mission does not end, continue with the next Round's Pre-Round Sequence.
9.4 Pre-Round Sequence
- Advance the Round Marker
- Remove all Light Smoke
- Flip all Heavy Smoke to Light Smoke
- Flip all Spent Units to their Fresh side
- Reset CAPs
- Draw Battle Cards
- Prepare Reinforcement Units
- Plan next Round's off-board Artillery Strikes
- Resolve last Round's planned Artillery Strikes
- Roll for Initiative
9.5 Advance Round Marker
Advance the Round Marker forward one space on the Mission Round Track.
9.6 Flip Spent Units
Flip all Spent Units on the Map to their Fresh side, retaining any Hit Markers that are present.
Make sure the Unit is facing the same direction after it is flipped.
9.7 Reset CAPs
Each player resets their CAPs Marker to their allocated CAPs specified by the Mission, minus 1CAP for each of their destroyed Units. Reminder: CAPs are never reset below 3.
CAPs left over from the previous Round do not carry over.
9.8 Draw Battle Cards
Each player draws the number of Battle Cards specified by the Mission from the Battle Draw Deck.
9.9 Prepare Reinforcements
If the Mission specifies that Reinforcement Units are available in the coming Round, they should be placed next to the Map to show that they are now available.
They do not have to be moved onto the Map in the Round they come into play, but may be held back for a later Round.
9.10 Artillery and Smoke Strikes
Artillery and Smoke are not available until Mission 4, and are discussed in later sections (13.4, 14.0).
9.11 Roll for Initiative
The side that DOES NOT have VP Advantage rolls a 2d6 Initiative Check and may modify it with up to 2 CAPs.
The Initiative Check succeeds on a roll of 7 or higher and, if successful, that player takes the first Turn this Round. If the roll fails, their opponent takes the first Turn this Round.
You are now ready to play Mission 1.
10.0 Group Action
Group Actions allow a player to use multiple Units on the same Turn, while Hidden Units can set up ambushes or move stealthily across the Map.
Note: After you learn these Group Action and Hidden Unit rules you can always apply them to previous Missions for a new experience.
Instead of selecting a single Unit to take an Action, you may select a Group to take a Group Action. Only a single d10 Spent Check is made for the entire Group.
To take a Group Action, follow these steps in order:
- Select a Group
- Perform a Group Action
- Determine the Group Action Cost
- Make a single Group Spent Check
10.1 Perform a Group Action
Perform one Action (2.3) or Card Action (8.8) with the selected Group.
A Group Action is composed of Fresh Units.
Spent Units may be included in the Group Action if its Cost is 0AP (3.4).
Spent Checks affect all Units in the Group (10.10).
A Group Action Stresses all participating Units.
10.2 Group Move
Select any number of Units that are in the same or continuously adjacent Hexes.
Groups move according to standard movement rules:
- Each individual Unit may move into any Hex adjacent to it and then Pivot, or not move and just Pivot in Place (4.6).
- Not all Units in the selected Group must move or be capable of movement.
10.3 Separating Units
During a Group Move, a Unit may move into a Hex that is not adjacent to any Hexes the other moving Units moved into.
Note: Units participating in a Group Move must begin in continuously adjacent Hexes, but may split apart during the move.
10.4 Group Move Action Cost
The Group Move Action Cost is equal to the highest Move Action Cost of any individual Unit in the Group (10.10).
Group Move Action Cost = Highest Individual Cost
Units can be part of a Group to form a larger connected group, even if they do not participate in the Move Action.
They do not affect the Group Move Action Cost, but they do risk being Spent if the Group fails its Spent Check!
Example — Group Move: (A) Soviet Turn: Four Rifles move as a Group towards the German HMG. Three Rifles move into Open Terrain for 1AP, but Rifles 01 moves into Heavy Woods for 2AP. Thus, the entire Group's Move has an Action Cost of 2AP.
The Soviets make one Spent Check and roll a 5. All four Rifles remain Fresh and are Stressed.
(B) German Turn: The HMG fires at Rifles 02, scores a Critical Hit, and destroys them. The Rifles 02 are removed from the Map and placed on the Soviet CAPs Track (7.12). The HMG passes its Spent Check and is Stressed.
(C) Soviet Turn: The Soviets can either Group Move the two adjacent Rifles 03 and 04, or move the lone Rifles 01. The three Rifles may not move as a Group, since they are no longer in continuously adjacent Hexes.
They decide to move Rifles 03 and 04. Both Rifles have a Move Cost of 1AP, and add +1AP Stress Penalty. This means the Group Move has an Action Cost of 2AP.
They make one Spent Check, roll a 1, and both Rifles become Spent and remain Stressed!
10.5 Group Attack
A Group Attack is a single Attack made by one Unit with support from other Units surrounding it.
- Attack Leader: Any Unit chosen to attack a Target Hex.
- Supporting Units: Any Units within one Hex of the Attack Leader.
10.6 Supporting Units
To support the Attack Leader, a Supporting Unit must meet all of the following criteria:
- The Supporting Unit is in the Attack Leader's Hex or one of its six adjacent Hexes.
- The Target Hex is in the Supporting Unit's Fire Zone (5.0).
- The Target Hex is within the Supporting Unit's Normal Range (i.e. not in Long Range).
- The Supporting Unit does not have a Hit Marker affecting its Firepower.
If the Attack Leader is in Close Combat, only Units in the same Hex can provide support.
10.7 Group Attack Rating
The Attack Leader receives a Group Support Bonus of +1AR for each Supporting Unit.
All other AR modifiers are based on the Attack Leader.
Group AR = Leader's AR + 1AR per Supporting Unit
10.8 Group Attack Action Cost
The Group Attack Action Cost equals the Attack Leader's Action Cost.
Group Attack Action Cost = Leader's Attack Cost
Example — Group Attack: German Action: The Germans Group Attack the Rifles 01.
The HMG34 (A) is the Group's Attack Leader (10.5). It has a red 5 Firepower against Soft Targets.
German Rifles 01 and 02 (B) can support the HMG for +1AR each because they are adjacent to the HMG Attack Leader and the Target Hex is in their Fire Zone. Rifles 03 (C) cannot join the Group Attack since it is not adjacent to the HMG.
The Group Attack has a combined 7AR versus the Soviet Rifles' 12DR. The HMG Group needs a 5 to Hit and a 9 to Critical Hit. The Group rolls an 8 and Hits.
The Attack Leader has an Action Cost of 2AP, so the Group must roll a 3 or higher to remain Fresh (10.8). The Germans make one Spent Check, roll a 4, and all three Units remain Fresh (10.10), but are Stressed.
If the HMG had instead fired at the bottom-most Rifles 04, Infantry 01 and 02 could not have supported it, since the Woods Hex the HMG occupies blocks their LOS to the Target.
10.9 Group Rally
Units in the same and/or adjacent hexes may attempt to Rally together as one Action.
Roll an individual Rally Check (7.7) for each Unit in the Group. Each Unit that succeeds in its Rally Check removes its Hit Marker.
Group Rally Action Cost = 5AP
10.10 Group Spent Check
- Use the Action Cost for the Group Action taken.
- Add any Cost Modifiers from Stress (2.6), Difficult Terrain (4.9), or a Hit Marker (7.2).
- May reduce the Group Action Cost with any number of CAPs (3.3).
- Roll a single d10 Spent Check for all Units in the Group.
If the Group fails its Spent Check, all Units in the Group become Spent, even if a Unit became separated from the Group (10.3), and all are Stressed.
If the Group succeeds at its Spent Check, all Units in the Group remain Fresh, and all are Stressed.
10.11 Stress
Stress penalizes the Group Action Cost if any Unit in the Group had taken an Action on the player's previous Turn.
Example — Group Move affected by Stress: Soviet Turn 1: Rifles 01 moved next to a group of 3 other Soviet Rifles. It passes a 1AP Spent Check and is Stressed.
Soviet Turn 2: All 4 Rifles now Group Move forward into Open Terrain for a 1AP Move Cost.
But because Rifles 01 was Stressed, the Group must add a +1AP Stress Penalty to its Move Cost, for a total 2AP Group Move Cost (1AP Move Cost + 1AP Stress).
The Group must make one 2AP Move Spent Check.
Example — Group Attack affected by Stress: German Turn 1: Rifles 01 moves into a Woods Hex next to an HMG. It passes a 2AP Spent Check and is Stressed.
German Turn 2: The HMG and Rifles now Group Attack an advancing Soviet Rifles Unit in Open Terrain. The HMG is designated the Attack Leader with a 2AP Attack Cost and no other modifiers.
The Rifles support the Attack for +1AR. Because the Rifles were Stressed, the Group must add a +1AP Stress Penalty to the Attack Cost, for a total 3AP Group Attack Cost (2AP Attack Cost + 1AP Stress).
Both Units are now Stressed.
10.12 Other Group Actions
Units may take other Group Actions such as creating Hasty Defenses, laying Wire, firing Smoke, Hiding, etc. The AP cost for these Group Actions is the same as the highest individual Unit's cost.
Groups may use Card Actions that have the Group Action Icon (8.8). The card's Group Action Cost is the Action Cost printed on the Card.
You are now ready to play Mission 2.
11.0 Hidden Units
Each Mission specifies if any Units are Hidden during setup.
To place Hidden Units, secretly choose and mark the coordinates of the Hexes where your Hidden Units are located on a piece of paper or a Hidden Unit Tracking Map.
Hidden Unit Tracking Maps are available for printing at www.AcademyGames.com/AtB.
11.1 Revealing Hidden Units
A Hidden Unit must be revealed when:
- It performs any Action other than Stall, Rally, Hidden Move, or a Battle Card Hidden Action (8.8).
- It occupies a Hex with any non-Hidden Unit.
- Wheeled or Tracked Units occupy Open Terrain in LOS of any enemy.
- Foot Units occupy Open Terrain in LOS and within 2 Hexes of any enemy. (They remain hidden if further away.)
- An enemy Unit attacks the Hidden Unit's Hex and scores a Recon by Fire (11.7).
Multiple hidden Units may be in the same area without revealing one another, even if in the same hex.
A player may reveal a Hidden Unit at will. Any hidden enemy Units could then also be revealed per the rules above.
11.2 Place Revealed Units
When a Hidden Unit is revealed, place it on the Map Hex marked on your Tracking Map.
Hidden Units do not face any direction until they are revealed. Choose the direction the Unit faces when placing it on the Map.
11.3 Hidden Move Actions
Units may perform a 5AP Hidden Move Action to become Hidden or move while Hidden. These Units:
- Ignore Terrain Move Penalties.
- Add any Stress and Hit Marker Move Penalties to their 5AP Cost.
11.4 Becoming Hidden
A Non-Hidden Unit may take a 5AP Hidden Move Action to become Hidden. It must:
- Be able to move, and
- Be out of ALL non-hidden enemy LOS
The Unit may be Hidden in the Hex it previously occupied, or in any adjacent Hex that is not in enemy LOS. Remove the Unit from the Map and mark its location on your Tracking Map.
11.5 Move While Hidden
All hidden Units may move or Group Move for 5AP. They remain hidden if they stay out of enemy LOS for the entire move.
Hidden Foot Units may move into a Hex in enemy LOS and remain hidden if the Hex is:
- Open Terrain more than 2 Hexes from the enemy, or
- Concealing Terrain not in the same Hex as the enemy.
Mark the new hidden Unit location on your Tracking Map.
Concealing Terrain helps a moving Foot Unit remain hidden, even if adjacent to an opponent.
Concealing Terrain includes:
- Defensive Terrain (6.4)
- Heavy Smoke in ANY Terrain
11.6 Spent Hidden Units
If a Hidden Unit fails its Spent Check when performing a Hidden Move, Rally, or Stall Action, it remains Hidden.
Mark the Unit as Spent on your Tracking Map.
11.7 Recon by Fire
Reveal Hidden Units: As an Action, you may Attack a suspected Hidden Unit Hex in the hope of revealing a Hidden Unit.
- Choose a Target Hex that is in the Attacker's Fire Zone.
- Roll a 2d6 equal to or higher than the Reveal Number.
Reveal Number = 6 + Terrain DR Modifier (6.4).
If you roll below the required Reveal Number, your opponent ridicules you for even attempting to find their Unit.
If your roll is successful and NO Hidden Unit occupies the Hex, your opponent tells you so and may again ridicule you.
If your roll is successful and a Hidden Unit does occupy the Hex:
- Immediately place the revealed Hidden Unit on the Map, facing any direction.
- Your Unit now Attacks the revealed Target with its red or blue FP, depending on the Target's Defense color.
Your Unit makes one Spent Check based on its Attack Cost.
Reminder: The Reveal Number and Hit Number may each be modified with up to 2 CAPs (3.2).
If you roll under a required Reveal Number, you will not know if you missed a Hidden Unit or if there is not one there.
Example — Hiding a Unit: (A) Soviet Turn: A Soviet Rifles Unit moves backward to get out of the LOS of a German HMG which is set up behind the Wood Buildings Hex 2-E09. The Rifles are moving into Open Terrain with a Move Cost of 1AP, but must add a +1AP Backwards Move Penalty. They make a 2AP Spent Check, roll a 3 and remain fresh, and are Stressed. German Turn: The Germans are occupied elsewhere.
(B) Soviet Turn: The Rifles, now out of LOS of the HMG, are able to take a Hidden Move Action to disappear into the fields. The Soviets remove the Rifles and place them beside the Map, secretly writing down which Hex they are Hidden in. Their Action Cost is: 5AP Hidden Move Cost + 1AP Stress = 6AP. They make a 6AP Spent Check, fail with a 4 roll, and become spent. The Soviets mark the Rifles as Spent and Stressed on their Tracking Map. The Germans know the Rifles must be Hidden in Hex G06, H05, H06, or I05, since the other Hexes adjacent to its previous position are in LOS of the HMG.
Example — Hidden Movement: (A) German Turn: The Germans have a Hidden Rifles in Hex 1-N07, which is marked on their Tracking Map. They tell the Soviets that a Unit will be taking a Hidden Move Action. They write down that the Rifles moves into Woods Hex M07, which is adjacent to the Soviet Mortar. Since Hex M07 is Concealing Terrain, the Rifles remain hidden, even though they are adjacent to the Soviet Mortar! (11.5) The Action Cost for the Rifles to Hidden Move is 5AP. The Germans spend 2CAPs to reduce the cost to 3AP (11.3). The hidden Rifles make a 3AP Spent Check, roll a 4 and remain fresh, and are Stressed.
Example — Revealing a Hidden Unit: (B) German Turn: On the Germans' next Turn, they choose to reveal their Rifles and place them on the Map. They then move into the Hex containing the Soviet Mortar. The Rifles' Action Cost is: 1AP Move Cost + 1AP Heavy Woods Penalty + 1AP Stress = 3AP. The Germans make a Spent Check, roll a 5, and remain Fresh and Stressed. The Germans could have Hidden Moved into the Hex, revealing the Infantry automatically, rather than revealing the Infantry and then moving. However, this would have cost 6AP, instead of the 3AP for the normal Move Action.
Example — Attacking a Hidden Unit: Soviet Turn: The Soviets believe Germans are hidden somewhere in the Light Woods to the southeast. They decide to Attack Hex 1-P05 with their MMG Maxim. The Hex's Reveal Number is 6, plus 1DR Modifier for the Light Woods, for a 7 Reveal Number (11.7). The Soviets spend 2CAPs to reduce the Reveal Number to 5 before rolling. They roll an 8 and succeed. A German Rifles Unit was hiding in Hex P05. The Germans reveal and place it on the Map, facing it towards the MMG. The Soviets MMG now determines if it hit the revealed Rifles. The Hit Number is 10 (the Rifles' 12 Defense + 1DR Light Woods − the MMG's 3 Firepower = 10). The MMG may modify its Hit Number with CAPs, since the CAPs spent to modify the Reveal Number do not affect the Hit Number (11.7). The MMG rolls an 8 and misses. The MMG makes a 3AP Spent Check, rolls a 3 and becomes Spent, and is Stressed.
You are now ready to play Mission 3.
12.0 Elevation
You will now learn about elevation changes and how these affect movement, Line-of-Sight, and combat.
Each Hex has an Elevation relative to Level 0 Ground.
Elevation ranges between Level 0 Ground up to Level 2 Hills. All Hexes that do not have an Elevation symbol are at Level 0 Ground.
The Elevation printed next to the Hex coordinates apply to the entire Hex.
12.1 Hills
Hills are marked on the Map as:
- a single triangle indicates a Level 1 Hill (L1)
- two triangles indicates a Level 2 Hill (L2)
A Hill Hex may have any Terrain Type such as Open Terrain, Woods, or Buildings.
12.2 Elevation Move Cost Penalties
When a Foot Unit or Field Gun (16.7) moves into a higher Elevation Hex, it suffers a Move Cost Penalty.
Elevation Move Cost Penalties:
- Sloping Terrain: 1 Level Elevation Change
- Ascending: +1AP for Foot Units and Field Guns when moving into an adjacent Hex that is one Elevation level higher.
- Descending: No penalty when moving into an adjacent Hex that is one Elevation level lower.
- Steep Terrain: 2 Level Elevation Change
- Ascending or Descending: +2AP for Foot Units and Field Guns.
- Impassable to ALL Wheeled and Tracked Vehicles.
Roads do not negate Elevation Move Cost Penalties.
12.3 Elevation Combat Modifiers
If the Attacker or Target occupies higher ground (Elevation) than the opponent, it gains a Combat Bonus.
Elevation AR and DR Modifiers:
- Attacker Elevation Bonus: +1AR if the Attacker is at a higher Elevation than the Target.
- Target Elevation Bonus: +1DR if the Target is at higher Elevation than the Attacker.
Example — Changing Elevation: Over several Turns, the German Rifles take the following path. Only Move Cost Penalties are shown.
(A) +1AP Ground L0 to Hill L1 (Ascending Slope) (B) +1AP Hill L1 to Hill L2 (Ascending Slope) (C) +0AP Hill L2 to Hill L1 (Descending Slope) (D) +0AP Hill L1 to Ground L0 (Descending Slope)
Example — Steep Terrain: The German Rifles move from Ground L0 to a L2 Hill (A). They suffer a +2AP Steep Terrain penalty, for a total Move Action Cost of 3AP. On a later Turn the Rifles move back down to Ground L0 from the Hill (B). They suffer a +2AP Move penalty.
Example — Roads and Hills: The German Rifles move from Ground L0 to a L1 Hill (A), following a Road. Even on the Road, they suffer a +1AP Sloping Terrain penalty, for a 2AP Move Cost. On their next Turn, the Rifles continue along the Road into the Light Woods (B). They are still on a L1 Hill so they suffer no Elevation penalty, but do have a Stress Penalty for a total 2AP Move Cost.
12.4 LOS between different level Hexes
- Determine the Elevation Levels of the Attack and Target Hexes. Whichever is highest is the High Ground Hex.
- LOS is established, if no intervening Hex is of equal or higher Level than the High Ground Hex.
LOS rules apply in both directions. If Hex A has LOS to Hex B, then Hex B always has LOS to Hex A.
The Plateau Effect: Consider a row of Hexes A (L0), B (L1), C (L1), D (L2), E (L2).
LOS between Hexes 'A' and 'C': L1 Hex C is determined to be the High Ground Hex. No LOS is established, because intervening Hex 'B' is the same elevation as High Ground Hex C. We call this the Plateau Effect.
LOS between Hexes 'A' and 'D': L2 Hex D is determined to be the High Ground Hex. LOS is established, because neither intervening L1 Hexes B or C are as high as High Ground Hex D. Hex A has no LOS beyond L2 Hex D to L2 Hex E, because of the Plateau Effect.
Example — LOS from a L1 Hill: The German MG34 on L1 Hill cannot see the Soviet Rifles on L0 Ground, because there is a L1 Hill Hex between the two of them. The MG34 can see the ATG on L0 Ground since there is no terrain of equal or higher level between the two.
12.5 Elevation and LOS-Blocking Terrain
LOS-Blocking Terrain (Woods or Buildings, 5.2) adds 1 Level to the Hex it appears on for LOS-blocking purposes only.
Buildings on a L0 Ground Hex make it a L1 LOS-Blocking Hex. Woods on a L1 Hill Hex make it a L2 LOS-Blocking Hex.
Example: The German MG34 on the L1 Hill cannot see the Soviet Rifles, because of the Woods in between. If the German MG34 was instead on a L2 Hill, they would be able to see the Rifles.
12.6 Blind Spots
LOS-Blocking Terrain creates a Blind Spot Hex directly behind it from the perspective of the High Ground Hex. A High Ground Hex, regardless of its Elevation, never has LOS to a Blind Spot Hex (and vice versa).
Example: Hex 1 (the L2 Hill) has a clear LOS into the green numbered Hexes, but no LOS to red numbered Blind Spot Hexes because of L1 Blocking Terrain along the LOS path (Woods Hexes 10 and 4 and Building Hexes 6 and 8).
Blind Spots simulate Units hugging a tree line or row of buildings to stay out of sight of a high-ground shooter.
Hex 1 has LOS to Hexes 2, 3, 4, and 6, and vice versa. L1 Hex 3 above has LOS into Hex 4, but nothing beyond, because the Woods act as a L1 Blocking Terrain and thus is the same elevation as Hex 3, creating a plateau effect. Anything beyond the woods is not visible.
13.0 Mortar Units
Mortar Units are teams of 2–6 men that fire High Explosive shells. Some are able to fire indirectly at Targets they cannot see.
A Mortar Unit's card shows both a Direct Attack Cost and, in parentheses, an Indirect Attack Cost, along with High Explosive Firepower, Minimum Range, and (maximum) Range.
A Mortar Unit is a specialized Unit that may:
- Make a Direct Attack on a Target Hex that is in its LOS using its Direct Attack Cost.
- Make an Indirect Attack on a Hex that is out of its LOS using its Indirect Attack Cost (number in parentheses).
13.1 Direct Attacks
A Direct Attack follows the rules for a normal Fire Zone attack, except that a Mortar Unit may only attack a Target Hex that is not closer its Minimum Range.
Mortars MAY conduct Close Combat with a −2AR CC Penalty (6.9).
13.2 Indirect Attacks
A valid Target Hex for an Indirect Attack must be:
- Within the Mortar Unit's Arc of Fire
- Within LOS of a Mortar Spotter Hex (13.3)
- Not closer than the Mortar Unit's Minimum Range
13.3 Spotter Hexes for Indirect LOS
Select any Hex that is within 2 Hexes and clear LOS of the Mortar Unit to be its Spotter Hex.
For an Indirect Attack, a Mortar Unit establishes LOS and any Elevation Combat Bonus (12.3) from its Spotter Hex, rather than from its own Hex.
A Mortar Unit always uses its own Hex to determine whether a Target Hex is within its Min and Max Range.
Hidden Mortars making Indirect Attacks remain hidden if they are not in LOS of any enemy Units.
Mortar Units sent out spotter teams to direct their attacks. Spotters had to be relatively nearby to signal or call instructions to the mortar team, since very few teams had radios at that time.
Example — Mortar Attack: A Soviet Mortar is positioned on a L0 Ground Hex behind a L2 Hill and wishes to fire indirectly at the German HMG.
They choose a Spotter Hex (A) at the top of the Hill, since it is within 2 Hexes and clear LOS of the Mortar. There are Woods between the Spotter Hex and the Target Hex, but because the Spotter is on a L2 Hill it is able to see over the L1 Woods. Plus, there is an Open Hex between the Woods and the Target, so the Target is not in a Blind Spot.
The Target Hex is 7 Hexes away from the Mortar, which is not closer than its 3 Hex Minimum Range or further than its Long Range.
The Mortar rounds are High Explosive (13.9), so the MG34's Flank Defense is attacked: 10 Flank Def = 10DR.
The Mortar's AR is: 3FP + 1AR (Spotter High Ground 13.3) = 4AR.
The Hit Number is: 10DR − 4AR = 6 Hit Number.
The Mortar rolls 2d6 for an 8, scoring a Hit. The MG34 draws a Hit Marker.
The Mortar then rolls a 4AP Indirect Attack Spent Check. It rolls a 2, becomes Spent, and is Stressed.
13.4 Off-Board Artillery
Off-Board Artillery (OBA) is represented by Artillery Weapon Cards that are available to players in specific Missions.
The Mission will specify during which Rounds each player may use OBA. OBA is planned during the Pre-Round Sequence (9.4) and resolved in a later Round.
13.5 Plan an OBA Strike
Activate an OBA Card during the Pre-Round Sequence to plan an OBA Strike. Secretly note the Target Hex by writing it down or by marking the Hex on a Planning Map.
The planned OBA Strike will be resolved in the next Pre-Round Sequence.
If the Mission gives no restrictions about where OBA may be targeted, you may select any Target Hex on the Map.
13.6 Resolve an OBA Strike
After planning new OBA Strikes, resolve any Strikes that were planned on the previous Round.
To resolve an OBA Strike:
- Place the Artillery Marker on the Target Hex, with the arrow pointing any direction.
- Resolve a Drift Check.
- Resolve all OBA Attacks.
13.7 Resolve a Drift Check
The attacker must roll 1d6 equal to or higher than their Drift Check Number to strike the Target Hex successfully.
- German Drift Check Number = 3
- Soviet Drift Check Number = 4
The attacker may modify the Drift Check Number with up to 2 CAPs before rolling the 1d6 (3.2).
Success: If the check succeeds, the OBA Strike lands on the Target Hex.
Failure: If the Drift Check fails, the Artillery Marker will drift (move) from the Target Hex by a number of Hexes equal to the failed 1d6 Drift Check result.
Roll 1d6 to determine the direction the Artillery Marker drifts, using the numbered directions on the Artillery Marker as the reference. This roll result may be modified up or down with up to 2 CAPs before rolling.
Example: The Soviets need a 1d6 result of 4 or higher to succeed on their Drift Check and roll a 3. They miss and the OBA will drift 3 Hexes from the Target Hex! They roll another 1d6 to determine the direction the Artillery will drift the 3 Hexes.
13.8 Resolve OBA Attacks
Using the Firepower specified on the Artillery Card, roll a separate Attack for each Unit located in the Hex of, and Hexes surrounding, the Artillery Marker.
You must also roll against friendly Units in the affected Hexes.
Artillery was usually fired from kilometers away at pre-marked targets and was either called in by radio, field telephone, or prearranged signals such as flares. The targets were marked on maps and were usually easily identifiable terrain features such as crossroads, developed areas, or high ground.
The Soviets often had indirect artillery support only when defending or attacking a fixed front line. On the move, most Soviet Field Guns fired only over open sights, providing direct heavy artillery attacks. The German Army could call in OBA on the move by radio from a command tank or APC.
13.9 Mortar and Artillery Combat Modifiers
Mortar and Artillery Combat Modifiers:
- Mortar Spotter Elevation Modifier: When making an Indirect Attack, a Mortar gains any Elevation Modifiers based on the Elevation of its Spotter Hex (rather than the Elevation of its own Hex).
- High Explosive (HE) Bonus: Mortar and Artillery Attacks are always resolved against soft and armored Target Flank Defenses.
- Air Bursts: Units with red Flank Defense do not receive a Heavy Woods +2DR Defensive Terrain Bonus when attacked by High Explosive Mortar or Artillery.
When artillery shells hit dense tree cover, the shells would burst in the air, sending shell and tree fragments raining down upon soldiers, causing devastating damage.
Example — Artillery Strike: Both players have Passed consecutively and Round 2 ends. They proceed through Round 3's Pre-Round Sequence. OBA Strikes are planned for Round 4, then Strikes planned the previous Round (beginning of Round 2) are executed.
The German's Mission Orders state that they are able to plan an OBA Strike now, for execution in Round 4. They declare they are planning a Strike and secretly write down Target Hex 4-J08 (A), predicting that this is the area the Soviet convoy will occupy at the end of Round 3.
At the end of Round 3, the Soviet convoy has reached the predicted Hex (A). During Round 4's Pre-Round Sequence, the Germans reveal that they targeted Hex J08 and place the Artillery Marker on this Hex.
The Germans then resolve a 1d6 Drift Check to determine if they hit the Target Hex. They need a 3 or higher to strike on target and roll a 2, resulting in the OBA Strike missing and drifting 2 Hexes from the Target Hex. Note, the Germans could have spent 2CAPs to lower their Drift Check Number to 1, guaranteeing an on-Target hit.
Next, the Germans roll a Direction Check and again roll a 2. The #2 on the Artillery Marker directs the Strike to drift northeast two Hexes (B), striking their own HMG!
The Germans must resolve an Attack against their own HMG. Because Artillery is High Explosive (HE), the HMG must use its Flank 10 Defense. The Divisional Artillery card has a red 5 Firepower, resulting in a 5 Hit Number.
The Germans decide to spend 2 CAPs to increase their Hit Number to 7 to reduce the probability of scoring a hit against their own Unit. They roll a 3 – a miss, and breathe a sigh of relief!
14.0 Smoke
Smoke can be fired to conceal Units (11.5).
Mortars 8cm (80mm) and larger, all Artillery Cards, Pioneers (18.1), and Tanks specified by a Mission can use an Attack Action to Fire Smoke.
Smoke Attacks can target any Terrain type except Water. Instead of resolving an Attack, a +2DR Heavy Smoke Marker is placed on the Target Hex.
Smoke never causes damage to friendly or enemy Units.
14.1 Fire Smoke with On-Map Units
To Fire Smoke:
- Choose a Target Hex to Direct or Indirect Attack.
- Instead of resolving the Attack, place a +2DR Heavy Smoke Marker in the Target Hex.
- Make a d10 Spent Check for the Unit's Attack Action Cost.
14.2 Fire Smoke with OBA
To Fire Smoke with OBA:
- When planning an OBA Strike, secretly note that you will be firing Smoke.
- When resolving the OBA Strike, roll a Drift Check to determine where the Smoke lands.
- Place +2DR Heavy Smoke Markers in the Hex where the Strike lands and all six adjacent Hexes.
14.3 Smoke Effects
Heavy Smoke Effects:
- +2DR Smoke Bonus when defending in a Hex with Heavy Smoke.
- −2AR Smoke Penalty when attacking out of a Hex with Heavy Smoke.
- LOS is blocked for ALL Elevations.
- +1 Rally Bonus (7.8)
- May not enter or exit with Bonus Moves (15.2).
14.4 Smoke Dissipation
Heavy Smoke Markers are flipped to their +1DR Light Smoke sides during each Pre-Round Sequence (9.4).
Light Smoke Effects:
- +1DR Smoke Bonus when defending in a Hex with Light Smoke.
- −1AR Smoke Penalty when attacking out of a Hex with Light Smoke.
- LOS is not blocked by Light Smoke. +1DR Smoke Bonus if LOS passes through its Hex.
- LOS is blocked, for ALL Elevations, if it passes through two or more Light Smoke Markers.
Light Smoke Markers are removed from the Map during each Pre-Round Sequence.
Stacked and in-LOS Smoke Markers are limited to cumulative +2DR or −2AR and gain Heavy Smoke effects (14.3).
You are now ready to play Missions 4 and 5.
15.0 Vehicle Movement
For the next Missions, you will learn to use Vehicles, including movement for Wheeled and Tracked Vehicles, transporting Foot Units, and Vehicle combat.
Vehicles follow the same Movement rules as Foot Units (Section 4), with the following additions.
15.1 Wheeled and Tracked Vehicles
A Vehicle Unit may either be Wheeled or Tracked, depending on the color of the Move Cost located in its top right corner.
- Green Move Cost indicates a Wheeled Unit.
- Blue Move Cost indicates a Tracked Unit.
- The number of Wheel or Track symbols below the Move Cost indicates how many Bonus Moves (15.2) the Vehicle can take.
15.2 Vehicle Bonus Moves
Each Bonus Move symbol (Wheel or Track) on a Vehicle counter allows it to move one additional Hex per Move Action without increasing its Move Cost.
After each Bonus Move, the Vehicle may freely Pivot, for no extra AP cost.
Wheel Bonus Moves may only be used to move:
- along one Road Hex to an adjacent Road Hex
Track Bonus Moves may be used to move:
- along one Road Hex to an adjacent Road Hex
- into Open Terrain
Wheel Bonus Moves MAY NOT be used to move:
- into a Vehicle-occupied Road hex (Road Congestion)
Bonus Moves (Wheel and Track) MAY NOT be used to enter or exit:
- Difficult Terrain (15.3)
- +2DR Heavy Smoke (14.3)
- any Fortification (17.0) or Obstacle (17.7) marked with the Bonus Move restriction symbols
- move Backwards (4.11) or Pivot in Place (4.6)
A vehicle forfeits ALL Bonus Moves if its first Move Action was into any of the conditions listed above.
A Vehicle's Move Action includes all Bonus Moves. The entire multi-Hex move is completed before the player's Turn ends.
A Soviet T-34 has two Track Bonus Move symbols. It may move a total of three Hexes on Road, Open, Corn, or Wheat Terrain for a 1AP Cost Move Action.
15.3 Difficult and Impassable Terrain
Difficult Terrain for Wheeled Vehicles:
- Light Woods (+2AP)
- Wood Buildings (+2AP) and Stone Buildings (+3AP)
Difficult Terrain for Tracked Vehicles:
- Light Woods (+1AP) and Heavy Woods (+2AP)
- Wood Buildings (+1AP) and Stone Buildings (+2AP)
- Plowed Fields (+0AP) and Walls (+0AP) act as Difficult Terrain for Bonus Moves, but do not affect AP.
Impassable to Wheeled Units:
- Plowed Fields
- Walls
- Heavy Woods
Impassable to ALL Vehicles:
- Water
- Steep Terrain (12.2)
15.4 Vehicles on Roads
When moving from a Hex with a Road to an adjacent Hex with a Road, Vehicles may ignore both Difficult and Impassable Terrain for both regular and Bonus Moves.
15.5 Vehicle Stacking
Vehicles may move into and/or out of Hexes occupied by friendly or enemy Units with regular or Bonus Moves.
A Vehicle moving through an enemy occupied Hex (into and out of a Hex in the same Turn utilizing Bonus Moves) CANNOT be engaged in Close Combat by the opponent.
Example — Vehicle Bonus Movement: Over several Turns, the Soviets make the following Move Actions. Assume that they succeed in all Spent Checks and that the Germans are occupied elsewhere.
(A) Turn 1: The T-34 Tank moves north into Heavy Woods. It forfeited its Bonus Moves because its first move was into Difficult Terrain. Its Move Cost is 1AP + 2AP Heavy Woods = 3AP. It makes a 3AP Spent Check.
(B) Turn 2: Truck 35 moves north along the Road. It is Wheeled and has one Bonus Move symbol, so it is able to move one extra Hex along Roads. It makes a 1AP Spent Check.
(C) Turn 3: The T-34 moves north one Hex into the spent Truck Hex and is NOT affected by Congestion. Since this first move was into non-Difficult Terrain, it can take another two Bonus Moves to the northeast through Open Terrain, for a total of three Hexes of movement. It makes a 1AP Spent Check.
(D) Turn 4: Truck 35 moves 1 Hex northwest along the Road. It wants to continue Northwest, but the spent Truck 36 in front of it causes Congestion (15.2) and Truck 35 cannot use its Bonus Move. It must wait for another Turn to continue moving. It makes a 1AP Spent Check.
Note: By alternating Units, the Soviets avoided Stress penalties.
Example — Vehicle Moving Uphill: A German Panzer drives up a Hill. It has one Track Bonus Move. The Hill is Open Terrain, so the Panzer is able to reach the top of the Hill in one Move Action.
Its base Move Cost is 1AP. To this it must add a +1AP Move Penalty for moving from the L0 Ground Hex to the higher elevation L1 Hill Hex (A) (12.2), and another +1AP Move Penalty for moving up to the L2 Hill Hex (B).
This brings its Action Cost to 3AP. It makes a 3AP Spent Check, rolls a 4, succeeds, and is Stressed.
15.6 Vehicle Transport
A Vehicle may:
- Transport one Foot Unit; or
- Tow one Field Gun (16.7).
15.7 Loading (Limbering) a Unit
A Unit must be loaded (limbered) onto a Transport Vehicle for it to begin transporting (towing). This requires a Group Move.
To Load:
-
Same Hex: A Unit that begins its Turn in the same Hex as a Vehicle pays its Move Cost to load onto the Vehicle, ignoring Hit Markers and Terrain Penalties, but not a Stress Penalty.
Adjacent Hex: A Unit that begins its Turn adjacent to a Vehicle's Hex pays its Move Cost into the Vehicle's Hex, including Difficult Terrain and Stress Penalties, and then loads onto the Vehicle for no additional cost.
-
Place the Unit on top of the Vehicle, facing the same direction as the Vehicle.
-
The Unit and Vehicle make a single Group Spent Check.
Load Action Cost = Loading Unit's Move Cost
15.8 Transporting (Towing) Units
While a Vehicle is Transporting or Towing a Unit, the Vehicle and Transported/Towed Units must take Group Actions (10.0).
The Vehicle and Transported/Towed Units move together for the Transporting Vehicle's move cost and may use that Vehicle's Bonus Moves.
Transport (Tow) Cost = Vehicle's Move Cost
The Transporting (Towing) Vehicle:
- May Move, Attack, Rally, Stall, and Hide.
The Transported (Towed) Unit:
- May NOT Attack from the Vehicle.
- May NOT use any of its unique abilities (18.1).
- May Rally and Stall.
The Transporting and Transported Units make a Group Spent Check that affects both Units (10.10).
Ex: A hit Rifles Unit, loaded on an APC, successfully Rallies. They then fail their 5AP Spent Check and both the Rifles and APC become Spent, and both are Stressed.
Ex: An APC transporting Pioneers (18.1) enters and triggers a Mine Hex. Both Units are attacked by the Mines.
15.9 Unloading (Unlimbering) Units
To stop Transporting or Towing a Unit, the Loaded Unit must be unloaded from the Transport Vehicle. This requires a Group Move. Note: Stunned Units cannot Unload.
To Unload:
- Place the Unit under the Vehicle or in any adjacent Hex, facing any direction.
- The Unit pays its Move Cost into the Hex it moves into. It is affected by Terrain and Stress Penalties.
- The Unit and Vehicle make a single Group Spent Check.
Unload Action Cost = Unloading Unit's Move Cost
Example — Vehicle Transport: Over several Turns, the Germans make the following Move Actions. Assume the Soviets are occupied elsewhere.
(A) Turn 1: The HMG moves into the Hex occupied by the SdKfz 251 APC and loads onto it. The HMG is placed on the APC, facing the same direction. The HMG's cost to move into the Hex is 2AP, and since it is Open Terrain, it suffers no Move Cost penalties. Therefore the Group Move has a 2AP Action Cost. The Germans roll a Spent Check for both Units and succeed, and both are Stressed.
(B) Turn 2: The APC and HMG Group Move three Hexes along the Road, using the APC's 2 Bonus Moves. The APC has a 1AP Move Cost and suffers +1AP for Stress since it Loaded the previous Turn. It rolls a 2AP Spent Check for the Group and succeeds.
(C) Turn 3: The APC and HMG take an Unload Action. The Germans place the HMG under the APC, facing southeast. The HMG makes a 3AP Spent Check (2AP Move Cost +1AP Stress), rolls a 1 and fails. Both the HMG and the APC become Spent, and both are still Stressed!
15.10 Towing Vehicles
Immobilized or Stunned Vehicles (15.13) may be towed by another Vehicle, which may use its Bonus Moves.
- Wheeled Units may be towed by any Vehicle.
- Tracked Units may only be towed by Tracked Vehicles.
The towed Vehicle may not Fire.
15.11 Attacking Transport Vehicles
When resolving an Attack against a Transporting Vehicle, first roll an Attack against the Transported Unit, then against the Transport Vehicle.
- Both the Transporting and Transported Units receive all Terrain Defense Modifiers for the Hex.
If the Transport Vehicle is destroyed, the transported Unit is immediately Unloaded at no cost, and is placed in the Hex facing any direction.
15.12 Vehicle Combat
Vehicles follow the same Combat rules as Foot Units (Sections 5, 6 and 7), with the following Vehicle-specific rules.
15.13 Vehicle Hits
Armored Target Hits follow the same rules as Soft Target Hits.
Armored Target Hit Markers (x2 means two copies are included in the game):
- Stunned (x2): Unit cannot take any Action other than Rally. Rally Number: 9.
- Gun Damaged (x2): Unit cannot Attack with red or blue Firepower. Cannot Rally.
- Destroyed (x1): Unit is destroyed and can take no further Actions. Reveal Hit Marker & remove Unit when it is fired at again, adjacent to enemy, or at end of Round.
- Panicked (x1): Unit cannot Attack. Front Def: −4. Rally Number: 9.
- Immobilized (x5): Unit cannot Move or Pivot. Flank Def: +1. Front Def: −1. Cannot Rally.
- Suppressed (x5): Attack Cost: +1AP. Red FP: −3. Blue FP: −5. Rally Number: 8.
- Light Damage (x4): No stats are affected. Cannot Rally.
⊘ = The Action may not be used. A blue or red number or ⊘ affects only the same-colored stat. XX = Destroyed/May never Rally.
Hit Markers with 'No Rally' or 'XX' indicate physical damage that cannot be repaired in the heat of battle.
15.14 Vehicles in Close Combat
Vehicles DO NOT receive a Defensive Terrain Bonus in Close Combat like Foot Units do (6.10).
Tanks cannot utilize Terrain well when in Close Combat.
15.15 Vehicles as Cover
Foot Units gain a +1DR Vehicle Cover Bonus when occupying the same Hex as any friendly Vehicle (but not being transported), along with other Terrain Modifiers.
Foot Units often advanced with tanks, hugging them for cover from incoming fire.
15.16 Tanks Firing Down Steep Terrain
Tanks may not attack down Steep Terrain (12.2) into an adjacent Hex. (They may attack up Steep Terrain.)
Ex: Attacking from a L2 Hill down a cliff to an adjacent L0 Ground Hex.
Tanks could raise their main guns quite high, but could not depress them enough to fire down a steep cliff face.
16.1 Trucks and Wagons
Trucks and Wagons are Wheeled Vehicles designed to move other Units and supplies over Roads.
- Trucks and Wagons cannot take control of a Hex (4.4).
- Destroyed Trucks and Wagons do not adjust the CAPs Track. They do count for VP scoring.
- Trucks may only attack in Close Combat. Wagons may not attack.
16.2 Turreted Vehicles
Turreted Vehicles are designated with a white circle under their Attack Cost. These have 360-degree rotating turret guns that can fire in any direction.
A Turreted Vehicle may attack a Target Hex outside of its Arc of Fire without changing its facing.
A Turreted Vehicle suffers a +2AP Attack Cost Penalty when attacking a Target outside of its Arc of Fire.
Most tankers kept their turret firing action within the front 120-degree rotational arc of their tank. However, sometimes a tank would need to move or face in one direction, while facing its turret towards enemy forces to its flank. This was not done often, since being forced to take this action added flank attack vulnerability and psychological battle stress.
16.3 Self-Propelled Guns (SPGs)
Self-Propelled Guns (SPGs) were not turreted and had Field Guns mounted onto a tank chassis that required the SPG to Pivot when Tracking a Target.
An SPG may only Attack within its Arc of Fire, and must take a Move Action to Pivot and face its Targets.
16.4 Mobile Vehicles
Wheeled Vehicles that have both Wheeled and Tracked Bonus Move symbols may use these in any order to move onto Roads or Open Terrain.
They obey all other rules for Wheeled Vehicles (15.2).
The Tracked Bonus move can be used to move out of a Vehicle-occupied Hex.
16.5 Open-Topped Vehicles
Open-Topped Vehicles are designated with a white field with a red border under their Flank Defense. They are vulnerable to High Explosive Attacks (13.9), Flamethrowers (18.0), and red FP Close Combat.
When defending against an HE (ex: Artillery), Flamethrower, red FP Close Combat, or Sniper Attacks, an Open-Topped Vehicle's blue Flank Defense is treated as a red Flank Defense and pulls a Soft Target Hit Marker! For any other type of Attack, it defends with a blue Flank Defense.
16.6 Armored Personnel Carriers
Armored Personnel Carriers (APCs) transport and protect other Units.
Soft Targets gain a +2DR APC Bonus, from all flanks, when being Transported by an APC with a red shield icon.
16.7 Field Guns
Field Guns are Crewed Units designated with 'Gun', 'PaK', 'ATG', or 'FlaK' in the name.
Field Guns have green Wheel Move costs.
You are now ready to play Mission 6.
17.0 Fortifications and Obstacles
In this Section, you will learn about Fortifications and Obstacles.
Fortifications: Trenches, Bunkers, Hasty Defenses.
Obstacles: Barbed Wire, Mines, Road Blocks.
Only one Fortification or Obstacle may occupy a Hex.
17.1 Fortifications
Fortifications are placed on the Map during Mission setup and may not move or pivot.
Some Fortifications have a red Facing to orient their Flanks (4.2) and Arc of Fire (5.1).
Black colored Defense Ratings are effective against both Blue and Red Firepower Attacks.
17.2 Occupying a Fortification
Units occupying a Fortification gain its Defense Bonus + the Hex's Terrain Bonus.
There is no limit to the number of stacked friendly Units that can occupy a Fortification, unless specified otherwise.
Units may not occupy a Fortification already occupied by enemy Units, but may move into the same Hex.
All Units can enter a Fortification Hex without occupying the Fortification.
17.3 Entering and Exiting Fortifications
When a Unit performs a Move Action into a Hex with a friendly or unoccupied Fortification, it may immediately occupy the Fortification for no additional AP cost. Place the Unit UNDER the Fortification Counter.
A Unit that begins its Turn in a Hex with a friendly or unoccupied Fortification, but is not occupying it, may use a Move Action to occupy the Fortification ignoring Difficult Terrain Penalties.
Use a Move Action to move a Unit out of the Fortification and place it ON TOP of the Fortification or into an adjacent Hex.
17.4 Trenches
Trenches may be occupied by:
- All Foot Units.
A Unit in a Trench may face any direction, and receives a DR bonus when attacked from any direction.
Trench Modifiers:
- Trench Fortification Bonus: +2DR to Units occupying a Trench when attacked from any direction.
- Impassable to Wheeled Units.
- Tracked Vehicles may not Bonus Move into or out of a Trench Hex.
17.5 Bunkers
Bunkers may be occupied by:
- All Foot and Field Gun Units
Units in a Bunker must face the same direction as the Bunker and may only attack Target Hexes in the Bunker's Arc of Fire.
A Unit inside a Bunker may conduct CC Attacks. If being attacked by CC, the Unit gains the Bunker's Flank Bonus.
Mortars may not fire from within a Bunker.
Bunker Modifiers:
- +5DR for Units in the Bunker when attacked from within the Bunker's Arc of Fire.
- +3DR for Units in the Bunker when Flank attacked.
17.6 Hasty Defenses
Hasty Defenses represent a Unit's attempt to quickly fortify its position.
A Foot Unit may use a Hasty Defenses Action to build a Hasty Defense for 5AP. Place a Hasty Defense Marker on top of the Unit.
Hasty Defense Modifier:
- Hasty Defense Bonus: +1DR for Foot Units occupying a Hasty Defense when attacked from any direction.
A Hasty Defense Marker can only be occupied by the Unit that built it. Multiple Units in the same Hex may all build Hasty Defenses, but each Marker only protects the one Unit that built it.
As soon as the Unit Moves, Pivots, or is destroyed, its Hasty Defenses Marker is removed. It does not take an Action to exit a Hasty Defense. A player may freely remove their Hasty Defense at will.
Example — Attacking Fortifications: The German MG34 wants to attack the Soviet MMG in the Bunker at the top of the Hill.
Since the attack comes from within the Bunker's Arc of Fire, the MMG uses its 12 Front Defense:
12 Front Def + 5DR Bunker Front + 1DR High Ground = 18DR
The MG34 has a red 5 Firepower. This gives a Hit Number of: 18DR − 5AR = 13 Hit Number.
Unless the Germans Spend CAPs, the Rifles cannot hit the MMG at all! They decide to rethink their plan of action.
17.7 Obstacles
Wire and Mine Obstacles are placed during Mission setup. Like Fortifications, they may not be moved once placed. Obstacles affect all players, regardless of who placed them.
17.8 Barbed Wire
Barbed Wire makes it more difficult for Units to move into or through a Hex.
Barbed Wire Move Modifiers:
- When a Foot Unit moves into the Hex, roll 1d6 and add the result to its Move Cost.
- Impassable to Wheeled Units.
- Tracked Vehicles may not Bonus Move into or out of a Wire Hex. When a Tracked Vehicle moves into the Hex, the Barbed Wire is destroyed and removed.
17.9 Road Blocks
Road Blocks make it more difficult for Vehicles to move into or through a Hex. They do not affect Foot Movement.
Road Block Move Modifiers:
- Impassable to Wheeled Units.
- Tracked Vehicles may not use a Bonus Move enter or exit a Road Block Hex.
17.10 Mines
Mines may be Hidden during setup, laid during a Mission with Battle Card #17, or placed as specified by a Mission.
Each Unit that moves into a Mines Hex is immediately subjected to a Mines Attack by the player that placed the Mines. If the Mines are hidden, the owning player reveals and places a Mines Marker on the Map, and then initiates the Mines Attack.
Mines do not have an Attack Rating, but attack both Soft and Armored Targets with the Hit Number shown on the Mines' counter.
The Hit Number can only be modified by the owning player, higher or lower, with CAPs before rolling. Nothing else affects the Hit Number, including Terrain, Armor, Smoke, etc.
All Units moving into, Pivoting in Place, or initiating Close Combat (CC) in a Mines Hex are attacked with the Mines' Hit Number, including Transported Units. A 2d6 roll equal to or greater than the Hit Number results in a Hit.
Mines DO NOT Attack:
- Units moving out of a Mines Hex or defending it in CC.
- Vehicles MAY NOT Bonus Move into or out of a Mines Hex.
If one of your Units enters a Hex that you mined, you can spend up to 2 CAPs to increase the Mines' Hit Number, making it less likely to Hit your Unit. This simulates your forces having prior knowledge of these fields.
Example — Mines Attack: The Germans maneuver a Panzer IVf2, transporting Pioneers, behind a Soviet Bunker with the intent of attacking its blind and weaker Flank.
Immediately upon moving into Hex (A), the Soviets reveal hidden Mines and place a Mines Marker in it.
The Mines automatically Attack, with an 8 Hit Number, both the blue DR Panzer and the red DR Pioneers.
The Soviets first resolve the attack against the Tank, spending 2CAPs to reduce the Mines' Hit Number to 6. They roll 2d6 for a 7, and Hit the Panzer! The Germans pull a 'Light Damage' Hit Marker, which does not affect any of the Panzer's stats.
The Soviets then resolve the attack against the Pioneers. They spend 1CAP to lower the Mines' Hit Number to 7. They roll 2d6 for an 11 and destroy the Pioneers with a Critical Hit!
The Panzer may not move further, since Mines forfeit Bonus Moves (15.2).
Spent Check: The Panzer's move had an Action Cost of 1AP. Remember - Vehicles are not penalized for uphill movement like Foot Units (12.2). It rolls a 5 and remains Fresh.
17.11 Destroying Fortifications and Obstacles
Fortifications and Obstacles with a red Defense in their bottom right corner can be destroyed.
If the Fortification/Obstacle is Hit, it is immediately destroyed and removed from the Map.
Range Attacks (not CC) are resolved first against Units occupying the Fortification/Obstacle Hex and then against the Fortification/Obstacle. Terrain modifies the ranged Attack.
The Attacker makes only one Spent Check.
Example — Destroying a Fortification: On the German's next Turn, the Panzer attacks the Bunker. The Panzer rolls separate Attacks against the Bunker and the MMG occupying it.
First it resolves its attack against the MMG, whose DR is: 10 Flank Def + 3DR Bunker Flank = 13DR
The MMG does not gain a High Ground Bonus, since the Panzer is also on an L2 Hill Hex.
The Panzer's AR is: 5 FP + 3AR Short Range = 8AR
The Panzer has a 5 Hit Number against the MMG (13DR − 5AR), rolls a 3, and the MMG remains unscathed!
Next the Panzer resolves its attack against the Bunker, which has a 16 Defense. The Panzer has the same 8AR for an 8 Hit Number (16DR − 8AR). The German spends one CAP to lower the Hit Number to 7.
The Panzer rolls a 9. The Bunker is destroyed and removed from the Map!
The Panzer makes one 4AP Spent Check (3AP Attack + 1AP Stress because it moved the previous Turn). It rolls a 2, becomes Spent, and remains Stressed.
17.12 CC Attacks vs Fortifications / Obstacles
CC Attacks are resolved against a single Target in the Hex (6.10). A Fortification/Obstacle targeted by a CC Attack receives no Terrain modifiers.
Reminder: In CC, a Unit can only attack one Target. In the previous example, if in CC, the Panzer would have chosen to fire against either the MMG or the Bunker, not both.
Example — High Explosives vs. Fortifications: The Germans have an 8cm Mortar in position to fire on a Soviet MMG Unit behind a Hasty Defense.
The German Mortar makes an Indirect Attack on the MMG. Because the Mortar is High Explosive (HE), it rolls against the MMG's red 10 Flank Defense (13.9), which is modified by the Hasty Defense's +1DR Modifier, for a total 11DR.
The Mortar has a red 3FP, and the Germans also play a 'Careful Aiming' Bonus Card from their hand to gain +2FP, for a 5AR. This results in a 6 Hit Number. They roll a 5 and miss! The Soviets are thankful that they had fortified their position!
The Mortar then resolves its attack against the Hasty Defense with an 8 Hit Number (13DR − 5AR). It rolls a 10 destroying the Hasty Defense, removing it from the map.
The Mortar makes one Indirect Attack 4AP Spent Check, rolls a 4, becomes Spent, and is Stressed.
You are now ready to play Missions 7 and 8.
18.0 Flamethrower Capabilities
In this final section, you will learn rules for Flamethrowers and 3- and 4-player games. You will then be ready to play all remaining Missions.
Foot and Vehicle Units with Flamethrower capabilities are marked with a Flamethrower symbol.
Units with Flamethrowers may choose to Attack with the Flamethrower instead of their normal Attack Firepower.
Flamethrowers, for both Foot Units and Tanks, have the following Attack stats:
- 3 Red Firepower
- 3 Blue Firepower
- Maximum Range of 1 Hex. Note: +3AR Short Range and +4AR Close Combat bonuses apply.
- Target must use its Flank Defense.
- Ignore ALL DR Modifiers except for Smoke.
- Hidden Units are automatically revealed when attacked.
18.1 Pioneer Units
Pioneers were specially-trained Units outfitted to assault enemy positions.
Pioneers follow all rules for Foot Units, with the following exceptions:
- Flamethrowers: Pioneers can attack with Flamethrowers.
- Mines: Pioneers, on foot, may enter a Mine Hex without triggering a Mine Attack. Hidden Mines are revealed.
- Fire Smoke: Pioneers can use an Attack Action to Fire Smoke (14.0) at a maximum Range of 1 Hex.
Example — Flamethrower Attack: A Russian Infantry Gun occupies a Stone Building Hex. The adjacent German Pioneers attack with their red 3FP Flamethrower, plus a 3AR Short Range Bonus for a 6AR.
The Flamethrower always strikes an opponent's Flank, so the Inf Gun uses its red Flank 10DR. The Inf Gun is in a Stone Building Hex, but Flamethrowers ignore Defensive Terrain.
The Pioneers have a 4 Hit Number (10DR − 6AR).
The Germans roll 2d6 and Hit with a 5. The Inf Gun takes a red Soft Target Hit Marker.
The Attack had an Action Cost of 2AP. The Pioneers succeed on their Spent Check and remain Fresh.
19.0 Missions with More Players
When playing a Mission that is designed for 3 or 4 players:
- Provide each player with a CAPs Track Sheet, specified Units, and Battle Cards.
- Players on the same side win or lose together as a team.
- Teammates may not trade Units, Cards, or CAPs.
- All players on one side each simultaneously take an Action on their side's Turn (i.e., German 1 and German 2 each take an Action on the German Turn, then Soviet 1 and Soviet 2 each take an Action on the Soviet Turn, and so on).
- End the Round when all players but 1 Pass consecutively.
On the Soviets' Turn, Soviet 1 Passes and Soviet 2 takes Action. On the Germans' Turn, both Germans Pass, and the Round ends.
19.1 Player Number Variants
When 2 players play a Mission designed for 4 players:
- Each player places and controls all Units on their side.
- Each player totals the CAPs for both commanders on their side and marks these on one CAPs Track. The CAPs may be used at the single commander's discretion on any Units in their force.
- Each player receives the Battle Cards for both players on their side, as one combined hand. If playing with the 'Optional Adrenalin Card' rule (see Mission 1 in the Mission Book), the player only draws one Adrenalin Card.
- Each player takes one Action per Turn, and the Round ends when both players Pass consecutively.
When 3 players play a Mission designed for 4 players:
- Two players on one side play normally.
- The player on the opposing side must keep their Units, CAPs, and Battle Card hands separate for each force they control. On their Turn they take two Actions, one with each force.
19.2 Handy CAPs
If one player is more experienced than their opponent, players may agree to give the disadvantaged player 1 or 2 additional CAPs each Round. Or consider the using optional Adrenaline card rule described in Mission 1.
42. Common Sense
One cannot foresee all possibilities in a game with so many variables. If you cannot find a rule for a situation or there is a disagreement in the rule interpretations, use common sense and come to a friendly agreement on how to resolve the situation.
If your opponent has no common sense and the twit will not agree with your superior analysis, then the answer is 42.
It always works.
You are now ready to play all remaining Missions. Enjoy!
Note from the Designers
Modern-day tactics employed by most of today's advanced armies find their roots in WWII doctrine. These tactics evolved (and often slipped) throughout the conflicts and wars that followed in Korea, Vietnam, Bosnia, Afghanistan, Iraq, and others.
We designed CoH to follow this evolution in tactics in a series of games, the first of which was Awakening the Bear! Operation Barbarossa 1941. It is a fast and fluid system that is easy to learn but tactically realistic for each unique period portrayed.
In developing any new system, there is the temptation to add more and more rules in an attempt to make the game more 'realistic.' Unfortunately this can have the opposite effect, as the big picture gets lost in a forest of detail. We wanted the system to stress the flow of battle and quick reaction to adversities and opportunities. It had to have the right level of abstraction so more time could be spent fighting the opponent and exploring unique tactics, than fighting the rules.
Staying true to these goals was challenging, as the developers constantly came up with new ideas. In the end, we relied on a rule of thumb: to be included in the game, a proposed rule must apply in more than 5% of relevant situations and add important period flavor. We operated under the belief that mountains of detail do not make a good game; a clean and easily-implemented core system does.
The game's command structure is an example of our efforts to make core gameplay elements as robust and easy-to-use as possible. Successful play is dependent on management of CAPs; the probabilities of successful attacks and keeping Units fresh (cohesion) have been purposefully calculated to be difficult without CAP support.
Command structure and communication are the all-important forces that keep soldiers cohesive and responsive to orders in the face of brutality. At this stage of the war, Soviet peasants were often pushed into battle without proper training. They were brave, but often not mentally and tactically prepared to withstand a coordinated German assault, resulting in a quick drop in morale and resistance. These disparities are represented by each Unit's unique Stats and CAP support.
The 3rd Edition rules are the product of years of fan input and military interface, and stress psychological studies in an effort to model the unexpected effects combat situations exert on all fighting forces.
So find some friends, set up a game, and we wish you hours of fun!
Uwe Eickert
Battle Card List
An Action Card must be played during a player's Turn and constitutes their Action. Only one Action Card may be played per Turn.
Bonus Cards are played in conjunction with an Action and are not considered Actions. Any number of Bonus Cards may be played during a Turn.
Mission Cards trigger special Events and Scoring. They are played immediately when drawn. The player then draws a new card.
Cards with Green AP Costs must be played on the fresh Unit that will make the Spent Check. Reducing the cost to 0AP with CAPs allows any Fresh or Spent Unit to take the Action. Cards with Blue Action Costs are fully paid with CAPs and may be played by any Fresh or Spent Unit with no Spent Check.
Adrenaline (x4) Card #01 — Any Spent Unit or Group may take any one Action at 0AP Cost.
Command Action (x8) Card #02 — Any Unit or Group may take any one Action at 0AP Cost.
Follow Me! (x2) Card #03 — Automatically rally a Unit, even if in a Hex with an enemy Unit or if the Hit Marker has a 'No Rally' condition. 'Destroyed' Hit Markers with an 'XX' marking can NEVER be rallied.
Rally Up! (x2) Card #04 — Any Unit or Group may roll to attempt to rally. Each attempt must be rolled separately.
Rapid Deployment (x2) Card #05 — After taking a full normal Move Action, the Unit may move an extra Hex into any passable terrain at no added AP Cost. The Unit then makes a Spent Check.
Battlefield Confusion (x2) Card #06 — During your Opponent's Turn, add a 3AP Penalty to their Unit's Action Cost. The opponent may then still spend CAPs to reduce the Action Cost.
Veteran NCO (x3) Card #07 — Re-roll any one of your die. This can be done after rolling a d10, d6, or 2d6.
Frontline Officer (x2) Card #08 — Roll 1D6 for additional CAPs and add them to the CAPs Track. These CAPs are added one time only and the CAP total may now be temporarily higher than the number of CAPs the Mission began with.
Seek Cover (x2) Card #09 — A Hasty Defense marker(s) may be placed on any Fresh or Spent Unit or Group (including vehicles). May not be placed on a Unit in Close Combat.
Sniper Fire (x2) Card #10 — Opponent loses 1d6 CAPs immediately for this Round only: 1 = 0 CAPs, 2–3 = 1 CAP, 4–5 = 2 CAPs, 6 = 3 CAPs.
Careful Aiming (x2) Card #11 — Increases a Unit's Firepower by 2. This card may also increase a Group Attack by 2AR.
Swift Action (x4) Card #12 — Take 2 consecutive Turns, skipping the opponent's Turn. Turn Actions may be taken by different Units. The 1st Action does not stress the 2nd Action, since both happen in the same Turn.
Luck (x3) Card #13 — A player may attempt to modify their own die roll result. This card may be played after the die roll has been made.
Scout Teams (x2) Card #14 — Before or after taking an Action with a Unit, either play to reveal any hidden opponent Units or hide the Unit that took/will take the Action.
Bogged Down (x1) Card #15 — If an enemy Vehicle is immobilized, place the Immobilized Marker underneath it. The Vehicle may not move on its own for the rest of the Round, but may fire if able. It may be towed out of the Hex by another Vehicle to immediately remove the Marker.
Obstacle-Clearing (x1) Card #16 — An un-hit Unit may remove one Obstacle from a non-CC Hex it occupies.
Mine-Laying (x1) Card #17 — One Foot Unit may lay a Mine on its own or adjacent Hex, but not on an enemy occupied Hex. The Mine may be placed as Hidden if out of enemy LOS. Cannot be placed by Units in CC.
Score (x1) Card #18 — A Mission will dictate if the Score Card is mixed into the Battle Card Deck. When pulled, follow the scoring instructions set by the Mission.
Mission Event (x1) Card #19 — The Event Card is sometimes mixed into the Battle Card Deck and when pulled triggers an Event set by the Mission.
Halt Order (x1) Card #20 — This card is sometimes mixed into the Battle Card Deck and, when pulled, immediately ends the Mission.
Objectives 1–4 (x4) Cards #21–24 — These cards often define a player's secret Objective for a Mission.
Weapon Card List
Grenades (x1) Card #W01 — For use by German Foot Units. Short Range and CC Attack Bonus modifiers apply. Defender's Terrain modifiers apply.
Molotov Cocktail (x1) Card #W02 — For use by Soviet Foot Units. CC Bonus modifiers apply. May be used from an adjacent Hex with a −2AR Long Range penalty. Defender's Terrain modifiers apply.
Demo Charge (x1) Card #W03 — For use by German Foot Units. May only be used at 0 range and CC Bonus modifier still apply. Terrain modifiers do not apply.
Off-Board Divisional Artillery (OBA): German 10.5cm leFH18 (x1) Card #W04; Soviet 122mm m.38 (x1) Card #W05 — Terrain modifiers apply except for Heavy Woods Air Bursts (13.9).
Units in Awakening the Bear 3rd Edition
Listed below are the names, years in active service, and descriptions of the Units supplied in the game.
Unit stats and abilities are calculated based on how they performed relative to each other during specific war periods. You will notice that some Units' stats change from game to game as the war progressed.
German Forces: Die Wehrmacht
- Rifles Squad '41 (x8) 39–45: Seven men and officers armed with rifles and some sub-machine guns, a Squad included an MG34 unit below.
- MG34 - Belt Fed (x7) 39–45: With 200-round belt-fed ammo, the MG34 became the classic infantry medium support weapon.
- Pioneers Squad (x3) 39–43: Specially trained squads of 8–10 men that assaulted fortified positions, laid mines and set traps.
- HMG34 (x2) 39–43: An MG34 mounted on a tripod made the machine gun very lethal and accurate.
- Mortar 5cm (x2) 39–42: The 5cm light mortar proved to be underpowered and was later supplanted by the 8cm mortar.
- Mortar 8cm (x2) 39–45: Three-man crews manned these mortars which could attack indirectly. They replaced the 5cm mortars.
- Tank Hunters (x1) 39–42: Two man teams trained to assault tanks with bundled grenades (Geballte Ladung), mines and other improvised explosives.
- 7.5cm Inf Gun (x2) 39–45: The short-barrel LeIG 18 light infantry gun was used for close infantry support against soft targets and fired high-explosive shells.
- PaK36 (x2) 39–42: The Germans were totally unprepared for the Soviet T-34 tank and the PaK36 3.7 cm shells literally bounced off of its armor.
- PaK38 (x2) 41–45: This 5cm anti-tank gun was too weak against the heavily armed T-34 and KV tanks and was useful only at short ranges.
- 7.62cm FK 297 (x1) 41–43: To stop the T-34 and KV-1, the Germans used many captured Soviet guns, here the un-modified F-22 USV M39 anti-tank gun.
Soviet Forces: The Red Army
- Rifles '41 Squad (x12) 39–41: 10 men and officers armed with rifles. Though not as tactically trained as the Germans, they had greater firepower.
- SMG/Rifles Squad (x4) 41–42: The Soviets began to supply more men with dreaded sub-machine guns. By war's end, 34% of all Soviet hand weapons were comprised of SMGs.
- MMG Maxim Squad (x3) 39–45: The model 1910 Maxim was heavy and cumbersome, but rugged and reliable.
- NKVD Squad (x3) 39–45: Security troops used for internal 'order' as well as anti-German fighting. Many fought ferociously during 1941.
- Mortar 50mm (x2) 39–42: The 50mm light mortar proved to be too underpowered to have any great effect on the battlefield.
- Mortar 82mm (x2) 39–45: Most heavily-produced Soviet mortar. Some had wheels affixed to the base for easier movement. Could attack indirectly and fire smoke.
- Inf Gun 76mm (x1) 39–45: The 76.2mm regimental field gun M1927 was a Soviet infantry support gun, and was issued to rifle and cavalry regiments.
- 45mm Anti-Tank Gun m42 (x2) 39–45: Upgraded from the German PaK36, the m37 19-K L43 gun was very versatile, firing armor-piercing and high-explosive ammo.
- F22 m36 76mm (x1) 39–45: Designed as both an AA and AT gun, it had awkward sights and controls. It was disappointing in handling and performance.
- Wagons (x4) 39–45: A majority of both armies were supplied by wagons. Wagons outnumbered all other vehicles combined.