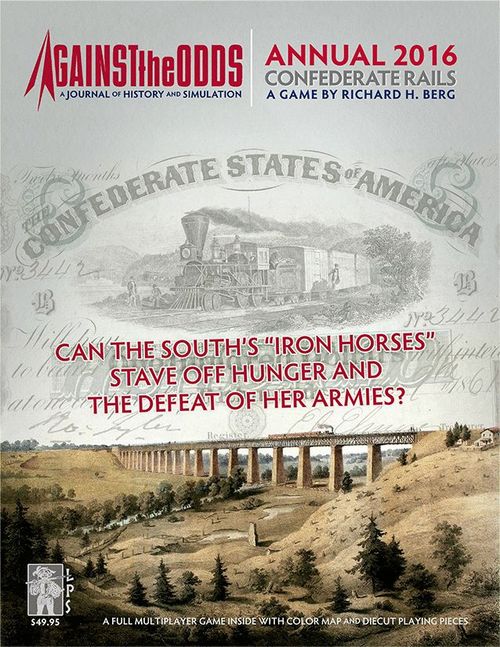
Confederate Rails: Railroading in the American Civil War 1861-1865
Confederate Rails: Railroading in the American Civil War 1861-1865 Rulebook
Table of Contents
Table of Contents
Read This First
We've organized the overall structure of the rules of this LPS simulation game to follow this game's sequence of play in introducing concepts. The rules themselves are written in a format known as the Case System. This approach divides the rules into Modules (each of which deals with a major important aspect of play). Modules are numbered sequentially as well as possessing a title. Each Module is divided into Sections (that deal with a major sub-topic inside the Module) which are also numbered sequentially. Modules and Sections are introduced by some text that briefly describes the subject covered by that particular Module or Section. Finally, the majority of each Section consists of Cases. These are the specific, detailed rules that govern play. Each Case is also numbered sequentially. The numbering follows a logical progression based upon the number of the Module of which the Cases are a part. A Case with the number 7.5.1, for example, is the first Case of the fifth Section of the seventh Module of the rules. The numbering system is designed as an organizational aid. Use it to determine where a Case is located in the rules.
3.1.4 This example is the number of the fourth Case of the first Section of the third Module of the rules.
Learning to Play the Game
Begin by familiarizing yourself with all of the components listed for this game. Then skim through the charts and rules, reading all the titles of the Modules and Sections. Set up a game scenario or portion of a scenario (after reading the applicable Module) and play a trial game against yourself. During this trial game, try referring to the rules only when you have a question and remember the numbering system we employ makes it easy to look up rules when you do. While a trial game may take you an hour or two, it is the quickest and most pleasant way to learn (short of having an experienced friend teach you). We also don't recommend attempting to learn the rules word-for-word. Memorizing all the details is an effort that few can do. We've written these rules to be as comprehensive as possible, but they are not designed to be memorized. Taking in the rules in this way (as you play along) is the best approach to mastering this game. We're always open to suggestions on how to improve the comprehension of our rules. Write to us (see addresses below) if you have an idea on how we can communicate better with you.
If any of the supplied parts are missing or damaged, write to: Against the Odds Magazine, PO Box 165, Southeastern, PA 19399-0165 USA, Attn: Confederate Rails. Or e-mail us at: [email protected].
We hope you enjoy this game. Should you have any difficulty interpreting the rules, please write to us at the above postal address, or send an e-mail to: [email protected], phrasing your questions so that a simple sentence, word, or number can answer them. If you send a letter by mail, you must enclose a stamped, self-addressed envelope to receive a reply. We recommend e-mail as the best way to resolve a query. Although we welcome comments and suggestions about the game's interpretation of events, we cannot promise to respond to questions on theory or design intent. Additionally, check out the Against the Odds and Confederate Rails discussion folders at www.consimworld.com.
1.0 Introduction
Confederate Rails: Railroading in the American Civil War 1861-1865 is a 2-5 player game that allows the players to operate the historical railways of the Confederate States of America (CSA).
The object of the game is to be the player with the most money when the game ends. To earn money, the players will undertake contracts to deliver Loads from one place to another, for which they receive a Payout.
As the game progresses, they will spend their hard-earned money on a variety of competing necessities:
- train operation
- repairing broken Trains and line segments
- usage of opponents' lines
- paying bribes to other players to do things (or not do things), which is fully allowed at any time
- various onerous penalties
While all this is happening, the Civil War is going on. Aside from the many outside Events this introduces, it means that the rail network will gradually shrink over the course of play—rather than growing as in most rail games. The trick is, when you have the chance, to make sure that it's your opponent's ability to deliver goods that shrinks, not yours.
Confederate Rails begins just as the War starts. It takes about 3-4 hours to play, depending on your familiarity with the system—as well as how quickly the Union defeats the Confederacy.
1.1 Extended Game Option
An optional Extended Game starts in the years just before the War, and mostly consists of a bidding mechanic to represent the players' acquisition of railroads. The Extended Game adds about 1½ hours to playing time. Note: We recommend it mostly to players who enjoy "bidding" games; it gets quite lively.
At certain points, the rules for the Extended Game will vary from the regular game (especially for the distribution of RRCs and the sequence of play). Such rules will appear in blue type, like this one. When not playing the Extended Game, all such blue text should be ignored.
(Transcriber note: in the printed rules the Extended Game text is set in blue type. It is marked here as "Extended Game:" wherever it appears.)
1.2 Game Terms
These abbreviations and terms are used in the game:
- DR — Die Roll. Sometimes one die (1d6) is rolled; other times two dice (2d6) are rolled and added together. Any relevant die roll modifiers (DRMs) listed are also applied to the roll.
- MP — Movement Point
- RRC — Railroad Company
- Draw — A player randomly takes a (face-down) chit from the Draw Pile.
- Select — A player specifically chooses a (face-up) chit that had already been drawn.
- Load — This term refers to a cargo and its contract that needs to be picked up and delivered to earn a payout. The Load has a contract number to reference it on the Loads Table (see PAC).
- Payout — Money a player collects (from the bank) after he delivers a Load.
- Activation — One Train's movement, ending when the player no longer wishes to move, or is out of MPs.
- Player Turn — One complete run through the Sequence of Play by the active player. (Module 4.0)
- Round — One complete cycle of the 2-5 Player Turns.
- Fee — Money a player pays to another player—for using their Line (Section 5.6), or as a bribe to do or not do a thing.
- Tariff — Money a player pays to the bank—see the Treasury Cost Summary on the Player's Aid Charts.
2.0 Components
Confederate Rails contains:
- this rules booklet
- 4 pages of pullout Player's Aid Charts (PAC)
- a 22" x 34" mapsheet
- 24 cards
- 281 ½" playing pieces
Also required are 2 six-sided dice.
2.1 The Mapsheet
The gameplay area covers the Confederate rail network (mostly east of the Mississippi River).
Historical Note: This network was comprised of 125 different companies, none of which were especially cooperative. We have eliminated several of these (mostly those in Texas plus a few minor spurs of 5 or 6 miles length) and combined the rest into a game-workable 24 lines. Also, certain sections of line were built during the war, and, for game purposes, we have opted to have most of them be in effect at the start of the game. See the "Historical Rail Lines Reference List" PDF on the game's product page at atomagazine.com if you want more detail.
The various map elements are noted on the map key, and/or described below.
2.1.1 The Railroad Company (RRC) Lines
The 24 numbered rail lines in the game are each one of four different colors. These colors serve no purpose other than to aid visual differentiation between the individual lines; they simply allow players to see where a given RRC's line starts, goes, and ends.
Example: RRC#23 The Mississippi Central—red color—runs from Jackson (TN) south, through Jackson (MS), all the way into New Orleans, and then slightly beyond.
- Bridges are points where rail lines crossed minor rivers. They have no effect on play unless they are Disrupted (Case 2.3.3) during the course of play.
- Ferries — The six Ferries are points where freight was hauled across a major river by ferry. They slow movement by +1MP (Case 5.3.3), and are not subject to being ripped up, but otherwise function as a normal line segment between stations.
- Overland Transfers — The five Overland Transfers are points where line was not yet built by war's end, but hauling freight overland was common and/or possible. They slow movement even more (+2MPs) than ferries, and are also not subject to being ripped up—but again, otherwise function as a normal line segment between stations.
- Unbuilt Rail Line segments — The two Unbuilt Rail Line segments do not exist at the start of the game. If and when the applicable RRC Construction Event (Sections 7.10 and 7.11) is played, the listed line is finished, putting it into play.
2.1.2 Stations
All named points along lines are stations. Stations are used to regulate movement. The standard round stations have no special characteristics.
- Square Load Stations are stations in which Loads start (and most finish).
- Hexagonal Depots are stations where Troops are picked up for Troops Movement purposes. (Depots also double as Load Stations.)
- The eight highlighted Victory Depots are Depots (and therefore also Load Stations, of course) that are also used to determine the level of Union advance—and eventually the end of the game (Module 8.0) when they win the war.
Any multi-colored Shared Station where two or more rail lines join is considered to be part of all of those lines. Examples: Corinth, MS is part of RRC#17 as well as being part of RRC#18. Savannah, GA is part of three RRCs!
2.1.3 Union Army Entry Points
These four entry points (Illinois, Indiana, Ohio, and Maryland) show where most Union troops staged before entering the Confederacy (Case 5.9.2).
2.1.4 Raleigh Repair Box
This box is where disabled Trains are repaired (Section 5.8). It is considered part of the Raleigh, NC station—but never contributes to Stacking and Traffic (Section 5.4).
2.1.5 Available Loads Display
These eight boxes are where available Load Chits are displayed to be Selected during the course of play.
2.1.6 Player Displays
These five displays are used by specific players. Each contains:
- a lower bar showing a given player's color and "suit" (both purely for visual distinction between players), player number, and which version(s) of the game (2-5 players) that player display is used in.
- The top two rows show a player's numbered Trains, with a space below to hold any Load they are each currently transporting. Note: In 3-5 player games, some of the trains shown on the display may not actually be in play. The number of trains in play varies as more players are added to the mix (Section 3.1).
- The "Treasury" row is simply a track for the player's Treasury counters—a means to keep track of how much money each player has.
2.2 The Cards
The game's 24 Railroad Company (RRC) cards each correspond to one of the rail lines on the map. Each card displays:
- the RRC's map identifier (the colored dot and number at upper right),
- the RRC number and name (at upper left),
- the states through which the RRC operates (as an aid in locating the line on the map),
- the overall number of Stations on the RRC's line,
- the number and names of Depots on the RRC's line,
- the number and names of Load Stations on the RRC's line,
- the number and names of Shared Stations on the RRC's line,
- and the number (0 or 1) and name of Victory Depots (V) on the RRC's line (at lower right).
Players acquire these cards as per Section 3.4. RRC cards never change ownership during the course of play.
2.3 The Playing Pieces
There are three basic types of playing pieces in the game; chits, counters, and markers.
2.3.1 Chits
Chits are playing pieces drawn from a collective pile during the course of play. There are two kinds:
- Event Chits — There are 28 Event Chits. Module 7.0 details these Events and their effects.
- Load Chits — The 89 Load Chits portray a variety of types of Loads, everything from Passengers to Cannon, that the players must transport during the game. The Loads Table in the center of the PAC details the information for each Load Chit, displaying:
- the Load contract number and graphic corresponding to each Load Chit,
- the actual type of goods, solely for historical flavor,
- the "Pickup" Station [and the RRC line it is on],
- the "Dropoff" Station(s) where the Load must be delivered to [and the RRC lines they are on],
- how much money a player is paid for a successful delivery (the Payout),
- and a reminder column ("War?") noting if the Load is war-matériel.
The 36 Load Chits with red text (including Troops) are war-matériel loads—which are unusual in two ways: Trains carrying them are not subject to Trains Seizure (Section 7.14), and they trigger a roll on the War Progress Table (Section 5.9) when undertaken.
Note that 5 Load Chits with black text are also considered war-matériel loads: Shoes (x1), Railwheels (x1), and Machinery (x3). Trains carrying them are also not subject to Trains Seizure (Section 7.14), and they also trigger a roll on the War Progress Table (Section 5.9) when undertaken.
The 7 Load Chits with blue-italic text are "Blockade Runner" Load Chits (Section 5.7). Importantly, they too are war-matériel loads, with the same two effects as above.
2.3.2 Counters
Counters are playing pieces controlled by a certain player in the game. There are four kinds:
-
Special Event Counters — The twelve Special Event Counters are dealt out to the players at the beginning of each game (Section 3.6), and one may be played/used at any time (Modules 4.0 and 6.0).
-
Train Counters — Each player's numbered Train Counters represent the ubiquitous 4-4-0 engines with the huge bell smokestacks (and of course their freight and passenger cars). Each Train Counter may only carry one Load at a time. Note: Both civilian "Passengers" and the Confederate "Troops" are considered "Loads" for gameplay purposes—with no insult intended.
Players are restricted to the number of Trains with which they start the game; there is no new construction of Trains during play. Exception: A player's extra "E" Train counter may enter play when a "Trains Seizure" Event Chit (Section 7.14) or the "Great Train Raid" Special Event Counter (Section 6.8) is played. Historical Note: Throughout the war, the South had a horrendous shortage of both locomotives and cars, compounded by an equally debilitating shortage of iron.
-
Pickup and Dropoff Counters — Each player's numbered Pickup and Dropoff Counters are associated with a particular Train Counter. They are used as an on-map aid to show the relevant Pickup and Dropoff stations a Train must travel to in order to deliver its Load (Section 5.1).
-
Treasury Counters — Treasury Counters let players keep track of how much money they have (on their Treasury Track in their player display on the map). When they get paid or have to make a payment, they adjust their Treasury Counters accordingly. Note that the game operates only in $100 increments.
Note: All other Counters are color-coded (and "suited") front and back in five specific sets, used depending on the number of players in a given game.
2.3.3 Markers
Markers are playing pieces that record various effects on the map for all players. Markers have blank backs. There are five kinds:
- Union-occupied Markers (Case 5.9.2) represent Union presence and control of stations. Trains may not enter a Union-occupied station.
- New Depot Markers — Two New Depot markers are used to show new depots, built per a drawn Event Chit (Section 7.3).
- Congested Markers indicate a station is so congested that it adds +2MPs to any movement into that station (Section 5.5). Historical Note: That is, congested even beyond the usual heavy traffic, warehousing snafus, high-level mismanagement, and rampant employee incompetence.
- Bridge Disruption Markers are placed on a bridged line segment (only) to denote an unusable bridge. Movement along that line segment is no longer allowed—until the marker is removed by the line owner paying $300 to the bank during his Player Turn. Only one Bridge Disruption Marker may be present at a time on any one line segment. Gameplay Note: On the few shared line segments (such as the one between Lawton, GA and Live Oak, FL), the owner of either line may pay for repairs.
- Ripped Up! Markers are placed on line segments that have been ripped up via an Event. They block movement along that line segment, and can only be removed by the line owner paying $200 to the bank during his Player Turn. Multiple "Ripped Up!" markers can be present on the same line segment, and all must be removed to restore movement. They may not be placed on Ferries or Overland Transfers. Gameplay Note: The connection between Hanover and Richmond consists of two line segments—either can be used by any player, and so both would have to be ripped-up to slow movement.
3.0 Preparing for Play
The players perform the following in the order listed below to set up the game for play:
3.1 Player Colors and Train Counters
Depending on the number of players, receive Train Counters as listed below:
- 2 Players — Use the buff and grey player counters with their respective player tracks on the map. Each player receives 7 Train Counters.
- 3 Players — Use the buff, grey, and mint player counters with their respective player tracks on the map. Each player receives only 5 Train Counters. (Any Trains numbered 6-7 can never enter play.)
- 4 Players — Use the buff, grey, mint, and wine player counters with their respective player tracks on the map. Each player receives only 4 Train Counters. (Any Trains numbered 5-7 can never enter play.)
- 5 Players — Use all 5 player counter colors (buff, grey, mint, wine, and sky) along with their respective player tracks on the map. Each player receives only 3 Train Counters. (Any Trains numbered 4-7 can never enter play.)
3.2 Money
Each player starts with $2500. Set up their Treasury counters on their Treasury Tracks accordingly. Extended Game: In the Extended Game, each player instead starts with $5000.
3.3 Who Goes First?
Each player rolls 1d6. Tied players roll again. High roll is the Initiative (first) Player.
3.4 Railroad Companies
Depending on the number of players, distribute the RRC cards as listed below (all RRC cards are revealed immediately and placed, info-side up, on the table).
Players get to choose some RRCs, and the rest are randomly dealt, based on the number of players:
Extended Game: In the Extended Game, players are instead randomly dealt some RRCs—and then will bid for the rest (Case 4.1.1)—as noted in blue text below.
- 2 Players — Each player gets to choose 2 RRCs. The Initiative Player chooses one RRC first, the other player the next two, and the Initiative Player the last. Then, shuffle the RRC deck and randomly deal each player 10 more RRCs. Extended Game: In the 2-player Extended Game, each player is instead randomly dealt 2 RRCs, and the remaining 20 RRCs are set aside for bidding.
- 3 Players — Each player gets to choose 1 RRC, starting with the Initiative player, and going clockwise. Then, shuffle the RRC deck and randomly deal each player 7 more RRCs. Extended Game: In the 3-player Extended Game, each player is instead randomly dealt 2 RRCs, and the remaining 18 RRCs are set aside for bidding.
- 4 Players — Each player gets to choose 1 RRC, starting with the Initiative Player, and going clockwise. Then, shuffle the RRC deck and randomly deal each player 5 more RRCs. Extended Game: In the 4-player Extended Game, each player is instead randomly dealt 1 RRC, and the remaining 20 RRCs are set aside for bidding.
- 5 Players — Each player gets to choose 1 RRC, starting with the Initiative Player, and going clockwise. Then, shuffle the RRC deck and randomly deal each player 4 more RRCs. Exception: The Initiative Player in the 5-player game is only dealt 3 RRC cards. (This distribution is not as unfair as it appears on its face. The effects of line ownership are not of major effect; all players still have the same number of Trains.) Extended Game: In the 5-player Extended Game, each player is instead randomly dealt 1 RRC, and the remaining 19 RRCs are set aside for bidding.
3.5 Train Placement
Players place each of their available Train Counters on any station on one of their own RRC lines (but no more than one Train Counter per RRC line). As players may place Trains in the same station, this may be done simultaneously.
Extended Game: In the Extended Game, only two (with 2-3 players) or one (with 4-5 players) of each player's available Train counters are placed initially—their remaining available Train counters are placed one at a time as each new RRC is acquired (Case 4.1.1).
3.6 The Special Event Counters
The Special Event Counters are randomly dealt out as listed below. These counters are kept secret by the players until actually played.
- 2 Players — Each player gets 6 Special Events
- 3 Players — Each player gets 4 Special Events
- 4 Players — Each player gets 3 Special Events
- 5 Players — Each player gets 2 Special Events, after removing the "Through-Freight Law" (No.8) and "Foreign Intervention" (No.4) counters—they are not used in a 5-player game.
3.7 The Draw Pile
Remove the 28 Event Chits, the 16 "Troops" Load Chits, and the 7 blue-italic text (Blockade Runner) Load Chits from the Draw Pile and set all 51 aside temporarily.
Mix up the remaining 66 Load chits, then draw a number of chits equal to the total number of Trains on the map and place them face up on the table for all players to see.
Starting with the Initiative Player and going clockwise, each player will one at a time select a Load for each of his Trains on the map. When the Load is selected for a Train, place the Train's Pickup and Dropoff counters in the locations designated by the Loads Table in the PAC for this Load's number. Place the Load Chit in the player's display box number matching the Train it was assigned to.
Once each Train on the map has a starting Load, draw 8 more Load Chits and place them face-up in the Available Loads display on the map.
You now mix back in the 51 chits removed above to the draw pile.
Exception: In the Extended Game, these 51 Chits are kept aside a little longer, until the War starts.
You are now ready to start playing!
4.0 Sequence of Play
Beginning with the Initiative Player, and proceeding clockwise around the table, each player undertakes and completes his Player Turn—the sequence of which must be followed in the order given below.
After each player has completed his Player Turn, they have collectively completed a Round, and play returns to the beginning of a new Round (determine a new Initiative Player).
Important Note: Remember that at any time during the game, any player may interrupt the normal sequence and play one of his Special Event counters (Module 6.0). The game immediately stops, the counter's effects are resolved, the counter is permanently discarded, and play then continues from where it was interrupted. Exception: In the Extended Game, Special Event Counters may only be played after the War (Section 5.9) has started.
4.1 The Player Turn
4.1.1 The Railroad Company Phase [Extended Game Only] Assuming all the RRCs have not yet been purchased (skip this phase if they have), the active player selects one un-owned RRC that he wishes to purchase and makes a bid amount (or he may pass this privilege to the next player for whatever reason). Each player (in clockwise order) gets to place a higher bid amount for this RRC selected or pass. The minimum bid, whether starting or upping the ante, is $100. As long as bids are being made, a player who passed at one point can step back in and make a bid when it is his turn to do so.
If one player makes a bid, and all the other players pass after him, he has won the bidding and now controls that RRC. He deducts his bid amount from his treasury and takes the RRC card and adds it to his group of owned companies.
If he has an available numbered Train Counter not yet in play (Section 3.5), it is now placed in any station along his newly-acquired RRC line.
4.1.2 The Contract Phase [Extended Game Only] Assuming the War (Section 5.9) has not yet begun (skip this phase if it has), the active player draws one Load chit from the Draw Pile, and replaces a chit of his choice on the map's Available Loads Display. The replaced Load chit is removed from the game (its contract timeframe is over). The new Load is now available. If there is no Load available in the Draw Pile, the player proceeds directly to the Load Phase.
4.1.3 The Load Phase is the heart of the game, and is more fully detailed in Module 5.0:
5.0 The Load Phase
A player earns money by carrying Loads on his Trains from their Pickup stations and delivering them to their Dropoff stations as designated by the Loads Table in the center of the PAC.
The player must choose up front how many and which trains he wishes activate for this Player Turn. He immediately reduces his treasury by $100 each for all of these Trains. Each Train Counter can be activated only once per Player Turn.
The player may now move each of his activated Trains (one at a time) up to 10 Movement Points (MPs) each (per Rail Movement, Section 5.3). During this activation, he may:
- Pick-up a Load at a designated Pickup station, and/or
- drop-off a Load at its designated Dropoff station. When he has done so, he collects the Payout (from the bank) and discards the Load Chit from play.
5.1 Undertaking Loads
A player will undertake a Load with any active and empty Train (whether just-activated, or with an active Train that just dropped-off or abandoned its Load and still has MPs remaining).
5.1.1 If there is a "Troops" Load Chit in the Available Loads Display on the map, the player must undertake it with the active Train (and make decisions as per Section 5.2). He then draws another Load Chit from the draw pile to replace it on the Display. Note: If an Event is drawn now, put it back into the Draw Pile (ignore it) and draw again until a Load Chit is found.
5.1.2 If there is no "Troops" Load Chit showing, the player draws a chit from the Draw Pile.
- If the draw is an Event Chit, resolve the Event immediately (Module 7.0). The activation of the player's Train is then ended (even if the event is not actually enacted for any reason) and the player proceeds to move his next train. If he has already moved all the Trains he paid to activate, his Player Turn ends and play proceeds to the next player.
- If the draw is a "Troops" Load Chit, the player must undertake it with the active Train (and decisions made per Section 5.2).
- If the draw is any other Load Chit, the player can choose it for his Train—or choose one of the Load Chits from the Available Loads Display on the map (and replace it on the display with the drawn Chit).
5.1.3 The Train's Pickup and Dropoff counters are now placed onto the stations on the map where the Load will be picked up and dropped off (per the Loads Table in the center of the PAC).
Note: There are three special cases in the Loads Table where the player must immediately designate the Pickup and/or Dropoff stations himself (he may not intentionally select a Union-occupied station):
- In some instances, there are two choices shown for the Dropoff Station, in which case the player must immediately designate to which the freight will go. (Gameplay Note: Once he has made that decision, it may not be changed, even if it means he loses the contract for failure to be able to deliver the Load. Given the nature of the war, that may be a very distinct possibility, so choice of delivery destinations should be made carefully.)
- In other instances, the Loads Table shows "Any station within 3 stations of a Union-occupied marker" for the Dropoff Station. (Gameplay Note: When counting stations in the game, as here, you can indeed count across Ferries and Overland Transfers.) However, the Dropoff Station cannot be on the same RRC(s) as the Pickup Station, unless no other station is available.
- Finally, the 16 "Troops" Load Chits are a special case where the player selects both the Pickup and Dropoff Stations (Section 5.2).
5.1.4 If the designated Pickup or Dropoff Station is Union-occupied (or unreachable because of Union occupation), immediately discard the Load Chit from the game. It is still counted as drawn for that activation, and that Train's movement is over.
Otherwise, place the Load Chit in the Train's numbered box on your player display.
At this point, if the Load Chit being undertaken is war-matériel (Case 2.3.1), the player must immediately roll on the War Progress Table before moving his Train (Case 5.9.1).
5.1.5 The player now moves the active Train to the designated Pickup Station to pickup the Load (costing +1 MP). If and when the Train reached the designated Pickup Station and picks up the Load, the Pickup counter is placed under the Train counter until it is abandoned (Case 5.1.7) or delivered to the designated Dropoff Station (Case 5.1.6).
Note: A special check is made here if picking up a Blockade Runner Load (Section 5.7).
5.1.6 Dropping Off a Load is considered part of movement (just like Pickup) and it also costs +1 MP, in addition to the cost for moving into the station.
When a Load is dropped off in its designated Dropoff Station, the player:
- collects his Payout (adjust his Treasury counters),
- discards the Load Chit from play,
- and if he still has MPs remaining, he may (returning to Case 5.1.1) continue its activation.
5.1.7 At any time during a Train's movement, a player may abandon a Load he is carrying at any station along the rail line that the Train is traveling on. If he does this, two things happen (regardless of the reason he did so):
- Place the Load Chit in the station in which it is abandoned (paying the extra 1 MP as if it was a dropoff). Return the Train's Pickup and Dropoff counters from the map to the player display box. From this point on, the abandoned Load Chit may be picked-up and delivered to its Dropoff Station (by any player) as if it were in its designated Pickup Station.
- The Player pays a $300 Penalty Tariff (player adjusts his Treasury counters).
If the Train still has MPs available, it may (returning to Case 5.1.1) undertake another Load and carry on with its activation.
5.1.8 If, because of the Union's forward progress in the War (Section 5.9), a player finds he cannot deliver a Load through existing Union-occupied markers, he may either:
- Abandon it in the current station, paying the extra 1 MP and the $300 Penalty Tariff as in Case 5.1.7 above. Under this circumstance, however, the Load Chit is discarded from play rather than left on the map, or
- drop-off the Load at any Depot (not just any station). He gets no Payout for this—but he also does not have to pay the Abandonment Tariff. The Load Chit is then discarded from play.
5.2 Troops Load Chits
The 16 Troops Load Chits are unusual in that:
- The player who Draws (or is forced to Select) one must undertake it; and he must do so in as expeditious a way as possible (in terms of MP usage and direction),
- the player designates both the Pickup and Dropoff Stations (rather than the Loads Table),
- and their Line Usage Fee (Section 5.6) is $100—not the usual $200.
5.2.1 Pickup Station When a Troops Load Chit is drawn, the player drawing that chit must designate a Depot where these troops are to be picked up by placing the Train's Pickup counter in that Depot.
That Depot must be at least 6 stations (not MPs) distant from the nearest Union-occupied marker. If that is not possible, select the Depot farthest from the nearest Union-occupied marker.
5.2.2 Dropoff Station To receive his $1000 Payout, the player must drop-off the Troops in any station that is within 3 stations of a Union-occupied marker.
This Dropoff Station must be designated and announced up front when the Load is undertaken, by placing the Train's Dropoff marker at that station.
The Dropoff Station may not be the same station as the Pickup station, but may be on the same line. A station containing a Union-occupied marker may not be chosen.
5.3 Rail Movement
Trains may be moved to different stations only by Rail Movement. An in-play Train counter must always be in a station. You may not pick them up and place them elsewhere. Exception: Disabled Trains may be so-removed to the Raleigh Repair Box (Train Repair, Section 5.8).
Movement over "Bridge Disruption" and "Ripped Up!" markers is prohibited.
5.3.1 How Many Trains? How many Trains a player may move in a Player Turn is dependent on how much of his money he wants to spend. It costs $100 per Train to activate a Train for movement in a given Player Turn.
5.3.2 How Far? Each activated Train is eligible to move up to 10 MPs per Player Turn. It does not have to use all its available MPs.
5.3.3 Movement Points are expended as follows:
It normally costs a base of 1 MP to move to the next station on the rail network.
It costs a base of 2 MPs to move to the next station when you are moving on another player's line without having paid a Line Usage Fee (Section 5.6).
Note: If your RRC shares a station, it is treated as yours for all MP purposes.
It costs an additional (and cumulative) +2 MPs:
- to use an Overland Transfer (Case 2.1.1).
- to enter a station containing a "Congested" marker (Section 5.5).
It costs an additional (and cumulative) +1 MP:
- to use a Ferry (Case 2.1.1).
- to Pickup a Load in a designated Pickup station (Case 5.1.5).
- to Dropoff a Load in a designated Dropoff station (Case 5.1.6), or to abandon a Load (Case 5.1.7).
- to enter each station on a line with Bad Rails (Section 7.1).
- for each Train counter already in a station you are entering (Traffic, Case 5.4.2).
- to change RRC lines (even between RRCs you own) per Case 5.3.4 below.
5.3.4 Changing Lines A line is changed when you enter a station entirely owned by an RRC different from the one you were just on (regardless of Line Usage Fees).
Example: Assuming he owns both lines, a Train moving from Whitesville (along RRC #7) to Strickland's Depot (on RRC #5) through the shared station of Wilmington would pay 5 MPs to do so; 1 MP to move into Wilmington (+2 MPs for the Ferry), and then 1 MP to move into Strickland's Depot (+1 MP to now change lines).
Historical Note: This cost represents the differences in gauges prevalent throughout the rail network, as well as the predilection to not have rail line run through a city.
Gameplay Note: Remember that many stations are shared (part of multiple lines). For example, Atlanta is a Depot on both Line #11 and #12. Atlanta is thus a station for movement on both; a Train moving from East Point to Atlanta is not yet changing lines.
5.3.5 Trains may not move to the next station down the line unless they have the required MPs.
5.3.6 The player must complete the movement of one Train before moving any other.
5.4 Stacking and Traffic
5.4.1 Stacking The maximum number of Trains that may end movement stacked in a Station is:
- 3 for any Depot. Note: The 3-Train limit for Depots does not apply to the Raleigh Repair Box; but it does apply to Raleigh itself, which is where repaired Trains must start out.
- 2 for any other Station.
5.4.2 Traffic This Traffic also adds cost to entering a station; the moving player spends one additional MP for each Train present. Example: A Train moving into a station which already has 2 Trains in it would pay 3 MPs to do so; 1 to move in, plus 2 for the Traffic.
5.5 Congestion
Anytime an Event chit is enacted (Module 7.0), but before it is applied, the player must roll on the Congestion Table on the PAC.
Exception: If additional Event chits are enacted in the same player's Player Turn, they do not trigger another roll on the Congestion Table. Congestion is only checked once per Player Turn.
The Congestion Table results show which station(s) receive a "Congested" marker, each of which effects a +2 MP cost to enter the congested station.
A station that is Congested will remain so until the next roll on the Congestion Table is required. At that point, all old Congested markers are removed from the map before placing the new ones.
Note: The 36 stations subject to the Congestion Table are marked with a small congested icon on the map.
5.6 Line Usage Fee
It will most assuredly happen that, to reach a destination, a player will have to use portions of an opponent's RRC line. To do this, the moving player must make a choice. Either:
- he declines to pay the fee for Line Usage. He now pays 2 MPs to enter each station along that line. or
- he pays the owner of the line a fee of $200. He then may use the normal 1MP cost per station entered. Extended Game: If no one owns the line (possible only before the War in the Extended Game), the money goes to the bank (simply reduce your Treasury counters).
5.6.1 There are two exceptions to the above;
- Trains travelling light (without any Load) do not have to pay a Line Usage Fee; they may still use the normal 1 MP cost.
- Trains carrying Troops need pay only a $100 fee.
5.6.2 Payment of a Line Usage Fee entitles that Train to move along that line at the normal 1 MP movement cost, until it leaves that line. (Thus, if the Train ends its turn mid-line, it does not need to pay the fee again next Player Turn for continuing its movement.) If the Train returns to a line again after leaving it (or picks-up a Load while travelling light on another player's line) the player has to choose again whether or not to pay the Line Usage Fee.
Historical Note: There was no through-freight system; the owners of the individual RRC treated their lines like feudal fiefdoms, screaming "individual/states' rights" every time the government tried to change the system. Such a system created massive log-jams as goods changed lines and, usually, cars. We also note that the average speed during the war was about 15mph (often less), mostly because of the poor track.
5.7 Blockade Runner Load Chits
Seven Load Chits have blue-italic text on them. These are Loads with goods that are being shipped in by blockade runners; their actual availability is dependent on the ability of these Confederate raiders to slip through the Union blockade.
When a player's Train picking up a Blockade Runner Load reaches the designated Pickup Station, he rolls 1d6 to see if those goods have run the blockade. Add to that die roll the number of "Union Blockade Increase" Event chits (Section 7.8) in play, if any.
- If the adjusted DR is '5' or less, the goods are available and are picked up as usual.
- If the adjusted DR is '6' or more, the shipment was seized by Union warships. That Load Chit is now void (although there is no penalty for the player other than a wasted trip) and is discarded from play.
5.8 Train Repair
Trains sometimes break down and cannot be used, although they are still in the game. This occurs by play of an Event chit. When that happens, place the Train in the Raleigh Repair Box. There is no movement cost to do so; just place it in that Box.
In any following Player Turn in which the player pays $300 (to the bank), he is now free to use/move that Train again. (The $300 includes the usual $100 Activation Fee). While it does not cost any MP to place the Train in the Raleigh station, it is subject to Stacking limits (Section 5.4).
Exception: To move a disabled Train to the Raleigh Repair Box, that Train must be able to trace a rail path from where it was disabled to the Raleigh station (in North Carolina, on RRCs #5 and #6). This path is only blocked by Union-occupied markers. If such a path cannot be traced, the Train is destroyed.
Any Train counters (including extra "E" trains) destroyed by war, or other Events, may not be reused; they are out of the game permanently.
5.9 The War
Extended Game: While the standard game starts with War in effect, when playing the Extended Game, the War starts the Round immediately following the purchase of the last RRC card. Before that, the Deck does not include the Troops or Blockade Runner Load Chits, nor the Event Chits. When the War starts, all of these are added to the draw pile.
Whenever any Event Chit is enacted (not just drawn) or any war-matériel Load is undertaken (not just drawn), the player must roll on the War Progress Table on the PAC before enacting the Event or undertaking the Load.
5.9.1 Consulting the War Progress Table The player rolls 2d6. He cross-references the total with the number of Victory Depots already occupied by the Union. The results include:
- A specific station (e.g., "New Orleans"). Place a Union-occupied marker in that station. If the station is already occupied by the Union, roll again. Note: The 10 stations specifically subject to the War Progress Table are marked with a small Federal shield icon on the map.
- Choice. The player must place a Union-occupied marker in any station (excluding Victory Depots) that is within 2 stations (not MPs) of another Union-occupied marker (including of course the four Union Army Entry points).
- Choice (V). Same as "Choice," but the player may select a Victory Depot.
- No station taken. Play proceeds without placing a Union-occupied marker.
Gameplay Note: Remember that players may use some Special Event counters (namely, Generals) to attempt to cancel any Occupation result (Sections 6.1, 6.3, 6.5).
Note: If no more Union-occupied markers are available, one may be moved forward from "behind the front."
5.9.2 Union-occupied Markers Trains may never enter a station with a Union-occupied marker. In addition, any Trains present in a station that becomes Union-occupied are permanently eliminated, and their Loads discarded (no Penalty Tariff is charged in this case).
Note: The four Union Army Entry points on the map each function as a permanent Union-occupied Marker. The white-arrow Union Entry lines connecting them to the network may never be disrupted or affected in any way; and so for all purposes these four Union-occupied markers are always adjacent to the Confederate rail network.
Historical Note: When the war started, at least half of what the game labels the B&O Railroad became unusable by the Confederate trains; mostly the northern half of that line. Rather than write a rule excluding that, we assume that, given the Union Army Entry Points sitting atop that line, it will quickly be shut down by Union incursions anyway.
6.0 Special Event Counters
Each player starts the game with a number of Special Event counters (Section 3.6), which he keeps hidden until he wishes to play them. A player is never required to play any of his Special Events; not playing one or more may be to his advantage.
A Special Event counter may be played at any time during the game, including during other player's Player Turns…any time. However, each player may play only one Special Event during a given Player Turn.
Exception: A player may combine a Confederate Offensive counter with a General Lee or General Jackson counter in the same Player Turn, and may also play "Foreign Intervention" (Section 6.4) in the same Player Turn as any of the above.
Extended Game: In the Extended Game, Special Event Counters may only be played after the War (Section 5.9) has started.
Special Events that will affect a die roll value must be played before the die is rolled. Special Events that cancel an event are played after the die is rolled.
6.1 General Lee [3] When played, the player may either:
- Cancel a War Progress Table result by rolling a 1-3 on a single die, or
- combine General Lee with a Confederate Offensive counter (Section 6.2) to add +1 to its die roll.
6.2 Confederate Offensive [2] When played, the player designates any one Union-occupied station and rolls 1d6.
He may adjust the DR by playing a General Lee or General Jackson counter as well (or having another player do so, which is allowable). However, only one General counter may be played per Offensive.
If the adjusted DR is '6' or higher, the Confederates have retaken that station. Remove the Union-occupied marker—and note that the "Foreign Intervention" Special Event may now be played (Section 6.4).
Note: The four Union Army Entry Points may never be targeted by this (or indeed, any) Event.
6.3 General Jackson [2] When played, the player may either:
- Cancel a War Progress Table result by rolling a 1-2 on a single die, or
- combine General Jackson with a Confederate Offensive (Section 6.2) to add +1 to its die roll.
6.4 Foreign Intervention [1] This chit may be played immediately after any Confederate Offensive (Section 6.2) in which a Union-occupied Victory Depot is re-taken. When played, discard all Union Blockade Increase Event chits (Section 7.8) presently in play. This event has no effect on play of additional Blockade chits.
Historical Note: Now this never happened, but some form of intervention (probably of a naval nature) by England and/or France was possible, if not probable.
Gameplay Note: This chit is not used in 5-player games (Section 3.6).
6.5 General McClellan [1] When played, the player may cancel any War Progress Table result by rolling a 1-4 on a single die.
6.6 The Great Iron Treasure Hunt [1] This chit is used to cancel an existing Bad Rails chit (Section 7.1) for any one line. However, to do so, 3 line segments must be ripped up and (and noted with "Ripped Up!" markers).
- The Ripped-up line segments are chosen by the other players (not the one playing the counter), one line segment at a time, going around the table starting to the left of he who played the counter.
- A player may not rip up any line segment within 2 stations of either a Depot or Load Station, unless the segment leads to a dead-end Station (such as Proctorville, LA or Spring Hill, AL).
- A player may not rip up a line segment that is unreachable because of Union occupation.
There is no cost to do this; another rare government-sponsored event.
Gameplay Note: Be careful what you select. Virtually every player uses every other line sometime in the game. Some lines, though, obviously invite little traffic.
6.7 The Great Train Raid [1] The player having this chit may play it if and while Strasburg (RRC#1) is still open to the Confederacy (that is, players would still be able to move a Train Counter into Strasburg from the rest of the Confederacy, unblocked by Union-occupied markers). The player may place an additional Train (his extra "E" Train) in the Staunton station (RRC#2) for his use. This allows that player to exceed the normal available Train limit rules by one.
Historical Note: From late May through June 1861, Confederate forces controlled the railroad throughout the Virginia portion of the B&O Railroad. In a major feat of engineering, fourteen locomotives from the Union depot at Martinsburg were disassembled by troops under (then-Colonel) Thomas Jackson and moved across country by horse-drawn teams to Strasburg, Virginia, thence to Staunton to be put on rails. Eventually the locomotives and cars were moved to Richmond where they were put to use by the Confederacy.
6.8 The Through-Freight Law [1] When this counter is played, the player rolls 1d6. Any and all players may add +1 to that dieroll for each $3000 they "donate" (before the dieroll) to the bank (owners may not combine funds to reach $3000, but each may donate as many times as he wishes).
If the adjusted DR is 7 or higher, the Through-Freight Law has passed. If passed, all players may move their Trains at normal rates on and through any opponent's lines without paying any Line Usage Fee. They do still have to pay the extra MP when leaving a station to enter a new line (different gauges being the problem).
Historical Note: Several times during the war, the CSA government sought—in vain—to establish a through-freight system, where trains could travel on and through all (or some) lines without having to change cars and pay passage. However, the Confederate belief in individual rights—and a healthy dose of "Not in My Backyard" type of greed—outweighed any sense of reason and patriotic fervor. We give you the chance to change this.
Gameplay Note: This chit is not used in 5-player games (Section 3.6).
Note: After this counter is played, any and all Railroad Convention Event chits (Section 7.12) drawn are treated as Trains Seizure (Section 7.14).
7.0 Event Chits
There are 28 Event chits, all of which are intermixed with the Load chits as one Draw Pile at the start of the War.
Event Chits may not be saved; they must be played when drawn. The player drawing an Event Chit must (if possible) apply the specific event as described in the Sections below. Exception: Three Event Chits (Depot Construction, Divert Iron Shipment, and Trains Seizure) are voluntary, as noted.
Each time an Event Chit is actually enacted (not simply each time one is drawn, nor any time it is discarded without effect), and before applying the event, the player must roll on both the War Progress Table (Section 5.9) and the Congestion Table (Section 5.5) on the PAC. Exception: If the player has already rolled on the Congestion Table in his current Player Turn, he will only roll on the War Progress Table, not both tables.
Drawn Event Chits are discarded and permanently removed from play after they are resolved—unless specifically stated otherwise in their description.
Remember that drawing an Event chit always ends the current Train's activation (Case 5.1.2).
Note: The bracketed numerals after each Event title indicate the number of Event chits of that type present in the game.
7.1 Bad Rails [3] The player rolls four dice, totaling them. The resultant number (from 4 - 24) is the RRC number affected (yes, RRCs #1, #2, and #3 are indeed immune from this event). Example: A '4', '2', '5', and '1' = 12; RRC#12 now has Bad Rails. If that line already has Bad Rails, or if any Load Station (including Depots) on that line is Union-occupied, roll again.
Otherwise, place the Event chit atop the RRC's number on the map to indicate the line has Bad Rails. The only way it can be discarded is with the "Great Iron Treasure Hunt" Special Event counter (Section 6.6).
All travel along that line now costs and additional +1 MP for each station.
Important Note: This chit is put into effect only if the Union occupies at least 2 Victory Depots. If not, ignore the event; discard the chit, and end the current Train's activation.
Historical Note: Without iron to replace worn rails, one of the major plagues of the CSA rail network was worn-out rails which forced trains to slow to a crawl. (Many trains, until 1864, ran at about 18mph. Speeds had been lowered to reduce track wear, but that was from sprints of up to 30mph.)
7.2 Bridge Collapse [3] The player must place a "Bridge Disruption" marker on any bridge on the map; his choice. The bridge has collapsed, and no movement is permitted on that line segment until the bridge is repaired by its line owner.
Historical Note: Confederate bridges were sometimes rickety wooden structures; heavy storms (or heavy traffic) could force them to collapse. Even a sturdy stone or metal bridge could become unsafe due to lack of attention or routine maintenance.
7.3 Depot Construction [2] These allow the Drawing player to build a new Depot. He may do this by placing a New Depot marker or this chit on any non-Depot station on the map. There is no cost to do so, and that new Depot is now treated like any other Depot.
If the drawing player does not wish to build a new depot, he discards the Event Chit with no effect.
7.4 Collisions! [2] When drawn, the next Train that passes through (not just into) a station occupied by another Train in one activation may have a head-on collision. Each player rolls one die. If doubles (matching numbers) are rolled, the Trains have collided; both Trains are disabled and removed from play to the Raleigh Repair Box, and any Loads they are carrying are discarded from play (and they pay the $300 Penalty Tariff if so).
Collision applies regardless who owns the Trains, even if they are your own. If there is more than one Train present in the station, roll once for each Train, with the roll for the moving Train being the one of comparison.
7.5 Cotton Embargo [1] When drawn, any and all Payouts for cotton Loads are halved until a Railroad Convention chit (Section 7.12) is played.
Historical Note: Most cotton was fairly well useless to the South during the war, although they did sell "contracts" for delivery after the war. The government therefore tried to stop railroads from carrying cotton altogether—with only partial success.
7.6 Divert Iron Shipment [1] The Player may repair any one of his RRCs that has Bad Rails by using a bit of "ironic" serendipity. He may do this in one of two ways:
- there is an Iron Load showing to be picked-up (either in the Available Loads Display, or abandoned on the map) and he undertakes the Load (or, he already happens to have an Iron Load for one of his Trains). Once he picks it up, instead of delivering it to its designated Dropoff Station, he "abandons" it in any station along his Bad Rails line. When that happens, the Bad Rails chit is removed—but he pays a $300 penalty tariff for failure to deliver (even if the designated Dropoff station is on that line)! Discard the Iron Load Chit from play.
- There is a Train carrying an Iron Load presently on one of his lines. He may seize that shipment by forcing its immediate abandonment at that station with no payment to the unfortunate player (although the latter does not have to pay the Penalty Tariff in this case). He may then pick it up at his leisure, as no other player may do so, and "deliver" it as above (although he does not pay the Penalty Tariff either in this case).
If the drawing player does not wish to repair Bad Rails, or there are no Bad Rails on any of his RRC lines, he discards the Event Chit with no effect.
7.7 Engine Wear & Tear [2] All players must pay $300 to the bank for each Train they have in play. Any Train not paid for is permanently removed from the game. Important Note: This chit is put into effect only if the Union occupies at least 2 Victory Depots. If not, ignore the event; discard the chit, and end the current Train's activation.
Historical Note: Again, lack of iron, as well as a dearth of facilities, engine parts and, often, manpower, meant that the number of available locomotives and rolling stock was constantly dwindling.
7.8 Union Blockade Increase [2] The Union increases the naval pressure on all Confederate ports. Add one (+1) to all Blockade Runner shipment die rolls (Section 5.7); place the chit on the map in the Atlantic. These chits are cumulative, and may only be removed by Foreign Intervention (Section 6.4).
7.9 Partisan Sabotage [1] Anywhere within the partisan sabotage area outlined and noted on the map, the player must either:
-
Place a "Bridge Disruption" marker on any bridge; his choice. The bridge has been blown, and no trains may move along that line segment until the bridge is repaired. It costs $300 to repair the bridge, payment made by the owner of the line to the bank (at any time during his Player Turn, by stating so to the other players, and reducing his Treasury counters).
-
Place one "Ripped Up!" marker across any line segment he wishes to cut. No trains may move along a line segment with such a marker. It costs $200 to remove the marker, payment made by the owner of the line to the bank (at any time during his Player Turn, by stating so to the other players, and reducing his Treasury counters).
Historical Note: This event represents the machinations of Union sympathizers (such as Parson William Brownlow) throughout Tennessee.
7.10 RRC#6 Construction [1] The Danville-Greensboro line segment is now usable. (There is no payment required; construction was government-subsidized.) Place this chit on-map for the remainder of the game as a reminder that the unbuilt icon no longer applies.
7.11 RRC#24 Construction [1] The Meridian-McDowell's Bluff line segment is now usable. (There is no payment required; construction was government-subsidized.) Place this chit on-map for the remainder of the game as a reminder that the unbuilt icon no longer applies.
7.12 Railroad Convention [2] When this chit is drawn, immediately cancel any active Cotton Embargo (Section 7.5) in play. Also increase Payouts by $100 for all Loads other than Passengers (which the conventions explicitly excluded) for the remainder of the game. This effect of these two chits is cumulative—so a second chit will increase Payouts another $100.
Historical Note: The government called these conventions seemingly every season to solve all of the problems you can see they had, but mostly in an effort to get some cooperation. They never did get any; what they did get was raised rates. Yet despite these efforts to increase income, few, if any, RRC owners were rich at the end of the war; then again, it was all in useless Confederate money and government bonds.
Note: If drawn after passage of the Through-Freight Law (Section 6.8), Railroad Convention chits are instead treated as a "Trains Seizure" Event Chit (Section 7.14).
7.13 Trains Break Down [2] One of your locomotives has simply broken down from overuse. You must place (no actual movement is required) any one of your Trains in the Raleigh Repair Box (if possible, Section 5.8). If all of your Trains are carrying freight, you must abandon the Load of one (and pay the Penalty Tariff, Case 5.1.7).
7.14 Trains Seizure [3] When this chit is drawn, the active player may seize any one Train from another player that is on one of the active player's RRC's lines and is not carrying war-matériel (Case 2.3.1).
Replace his Train piece with your extra "E" train, if available. Discard any Load chit the opponent's Train was carrying from play; it is considered out of the game, but not abandoned (no one has to pay a Penalty Tariff, and it does not remain on the map).
If the drawing player does not wish to seize a Train, or is unable to, he discards the Event Chit with no effect.
Note: All Shared Stations are treated as safe havens from this event for the trains of players who own the RRCs.
Historical Note: It was a constant hassle for companies to obtain needed locomotives and rolling stock. Sometimes, and mostly by government order, they simply took whatever they could find. No, it's not nice…but most of the RRC owners weren't very patriotic-minded either.
7.15 Union Cavalry Raid [2] The player must either:
- Place a "Ripped Up!" marker on any line segment that adjoins any station that is within 4MPs (not stations) of a station with a Union-occupied marker, or
- Disable one Train within 4MPs (not stations) of a station with a Union-occupied marker. If loaded, the Load must be abandoned in its current station, and the player owning the Train must pay the $300 Penalty Tariff (Case 5.1.7). Place the Train in the Raleigh Repair Box (if possible, Section 5.8).
Historical Note: This event represents such events as Grierson's Raid, which cut up a substantial portion of the Mississippi's network prior to Vicksburg.
Missing Modules: 8.0 and 9.0
The publisher's rules PDF (atomagazine.com/extras/CR_rules_final.pdf, 15 pages) ends at Case 7.15 (Union Cavalry Raid), page 15. The table of contents in the same document lists "8.0 END of the GAME" (page 16) and "9.0 SOURCES", but neither section is present in this file, and they could not be recovered from any other reachable copy (the Wayback Machine capture replays the same bytes; no BGG file or 1j1ju copy is listed). The end-of-game conditions (including how the Victory Depots and the Union advance determine the game's end, and the final scoring of Treasury) are therefore NOT transcribed here. Do not rely on this file alone for the game's end and scoring; consult the official printed rulebook. Nothing has been filled in from memory.
Appendix: Official Errata (2016 Annual Combined Addenda as of Jan. 1, 2019)
Source: the publisher's errata sheet (atomagazine.com/errata/errata_Con_Rails.pdf), reproduced as published. Errata are applied to the rules above where they apply.
The Rules:
- 3.7 Initial Loads (clarification): Players must honor initial Load assignments and Pick-up locations, even if the deal is terrible and you don't "want" to make that run (for example: starting location for Train #1 is Memphis, the Load assignment is #53, Pick up is in Cleveland, TN, and Drop off is in Norfolk, VA). A player will need to get to the Pick-up marker for the train as it has the Contract marker. It only becomes the Load assignment when the Pick-up marker is on the train as well. It's OK to decide a contract is not feasible, and dump the load (paying the penalty) and select a new one. Good play is knowing when to activate the train and do that—and get a new contract.
- 5.9.1 War Progress Check (clarification): When a depot is captured by the Union due to a "War Progress" check, any load chits on the Available Loads Display become inaccessible (and will clog up the Display) but remain there, until the depot is re-taken by a Confederate offensive action. Example: Assume Load chit #41 (Passengers) has a pickup station of Memphis. If the Union takes or already controls Memphis keep the chit there (though no one can pick it up) in case the Confederacy gets its act together and somehow retakes the place.
The Map:
- Wyetheville, a town in southwestern Virginia on the RRC #4 line should be spelled "Wytheville".
The PAC:
- Loads Table (correction): Chit #68 Saltpetre has a pickup location of Pendleton, SC. Listed. This should instead be Anderson, SC.
- War Table (correction): In column 1, a dice roll result of 9 is listed as "PC". It should read "Choice" like all the others.
- Congestion Table (clarification): Result 9 calls for a congestion chit to be placed in Manassas, VA. This is Manassas Junction on the map (note the congestion icon there).
Before You Begin:
- As mentioned in the back of the rules, note that one required game counter (Special Event #8) is located on the second small counter block included with the package.
No Safe Harbor: Nothing reported yet.