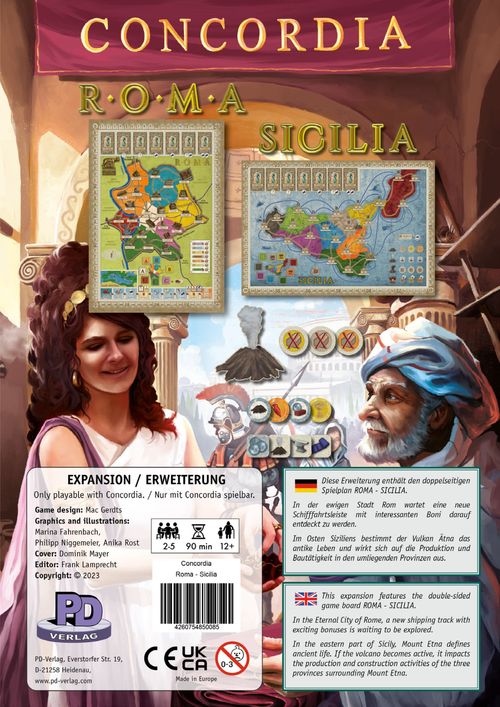
Concordia: Roma / Sicilia
Concordia: Roma / Sicilia Rulebook
Table of Contents
Table of Contents
Concordia Roma
The normal rules of Concordia apply unless stated otherwise.
Game Concept
The 7 historical quarters of Rome with its 25 iconic sites for your houses form the center of this map. They replace the provinces and cities from the base game. The city of Rome notably features only land routes, so only your land colonists are allowed to move in the city according to the usual rules. Your sea colonists have their own new ship track at the bottom of the map. Here you find 5 additional building sites for your houses.
Setup
To play Roma you will only need the Roma map as well as the components from the base game (that includes the bonus markers from Concordia).
Bonus Display: The mini map serves as your bonus display. The assignment of the city tokens to the historical sites in the quarters (A, B or C) is also displayed on the mini map.
Starting Spaces: At the start of the game, all players place one land colonist on the oval starting space to the left from the green quarter, and one sea colonist in OSTIA, the first space on the left side of the ship track. These 2 spots replace "ROME" on the personality cards TRIBUNE and COLONIST.
The Movement of the Land Colonists
Land colonists move as usual on the brown routes within the city. Only the very first step of each land colonist is different as this step always leads a colonist through one of the city gates of the players choice (north, south, east or west), placing it on one route just behind the gate. Land colonists are never allowed to leave the city again.
Example: The depicted city gate is a special case, because there are three different routes to adjacent sites. In the example on the right, "TEMPL. ISIDIS..." is the only neighboring building site. Moving the land colonist from the starting space directly to the route between "THERMAE TRAIANI" and "TEMPL. ISIDIS..." would cost him two movement steps.
The Movement of the Sea Colonists and the Ship Track
Sea colonists only move on the new ship track from space to space throughout the game. The map of the Mediterranean Sea to the top left from the ship track illustrates the journey starting in OSTIA, the harbor of Rome.
New sea colonists are always placed in OSTIA. Moving a sea colonist from one space to any other space on the track costs one movement step, regardless of distance. Sea colonists can only ever move forward along the track, never backward.
Example: With one movement step, the yellow sea colonist in OSTIA can move to any other space on the ship track. The red colonist on ATHENAE can only move to BYZANTIUM.
Note:
- You can move each of your sea colonists only once per turn.
- You can move only one of your sea colonists to BYZANTIUM each turn.
- Multiple sea colonists can occupy the same space, regardless of color.
Moving a sea colonist onto a light blue space immediately gives you the indicated bonus. Moving a sea colonist onto a sand-colored space enables you to build a house there. Moving to BYZANTIUM lets you score a god.
Bonus: Take the depicted coins and/or goods. ALEXANDRIA and ANTIOCHIA offer you a choice which good to take. Obtained goods are lost if they cannot be stored immediately.
Building Houses: When you enter CARTHAGO or ATHENAE, you can immediately build 1 house there for the usual costs. Therefore, you cannot build 2 or 3 houses at the same time with the same sea colonist, and you cannot build an additional house there later without having moved to the space in the same turn. If there are already other houses in the same building site, additional costs for existing houses must be paid as usual. If there are other houses in the same space, but in a different building site, no additional costs are paid.
Example: The yellow sea colonist moves from OSTIA to ATHENAE. Yellow cannot build another house for wine as he already owns a house there. But yellow could build one house on a building site for either tool or cloth. The house for tool would cost 1 brick, 1 tool and 3 coins. The house for cloth would cost 1 brick, 1 cloth and 10 coins.
Houses on the shipping track count for the production of specialists. CARTHAGO and ATHENAE also count for SATURNUS and VENUS, where they are considered as 2 additional provinces during endgame scoring.
Gaining Victory Points in BYZANTIUM: A sea colonist who enters BYZANTIUM receives the reward from a god of their choice. Scoring is conducted as normal end game scoring for one card of the particular god, with the exception that scoring is triggered immediately when a sea colonist enters BYZANTIUM. Minerva can be scored as any specialist card of your choice, even if you don't own the actual card.
Mark the chosen god which you want to score with a house of your color. If the god is already marked by another color, you only score half the points (rounded up). Each player can score each god only once per game. If you place your last house to mark a god, you trigger the end of the game and take the Concordia Card.
If (in rare cases) you have no houses left you cannot use BYZANTIUM.
Note: The god VENUS is introduced in the expansion "Concordia Venus". She scores 2 points for each quarter in Rome and sand-colored space where you own at least 2 houses.
Example: You still have your 2 starting colonists available (in ROME and on the ship track). You have built houses in 5 different quarters and on the ship track in CARTHAGO. 3 of your houses produce brick. The gods MARS and SATURNUS have no houses on them yet, MINERVA is already occupied by 2 other players. You could score the following victory points upon entering BYZANTIUM:
MARS: 2 x 2 = 4
SATURNUS: 5 + 1 = 6
MINERVA: 3 x 3 / 2 = 4,5 (rounded up to 5)
Considering the 3 alternatives, SATURNUS would score the most points.
Personality Cards
Personality card PREFECT:
a) You can only produce in one of the 7 quarters of Rome but not in CARTHAGO or ATHENAE.
b) If you choose to take the coin bonus, you may move exactly one of your sea colonists forward. Follow the previously mentioned rules and gain the depicted bonus.
Personality card ARCHITECT: The sequence is:
- Move your colonists
- Obtain bonuses
- Build houses
- Score BYZANTIUM
Game End: End game scoring is done as usual except that some additional points have been scored from BYZANTIUM already. Houses in CARTHAGO and ATHENAE count as a province for SATURNUS, VENUS (when playing with the Venus expansion) and as houses of the indicated good for JUPITER, MERCURIUS and MINERVA.
Roma and the Expansion Solitaria
Whenever Contrarius builds a house, he also moves his frontmost ship. Starting in OSTIA, he moves only onto the spaces CARTHAGO, then ATHENAE and finally BYZANTIUM where he scores the highest scoring god for him. In standard mode, he doesn't build in CARTHAGO and ATHENAE. In Veteran or Expert mode, he rolls the white die and builds a house when the result fits any of the possible building sites.
Concordia Sicilia
Game Concept
On the island of Sicily, Mount Etna defines ancient life. When the volcano awakens, the three provinces close to it will be affected in construction and production.
The state of the volcano is depicted on the bottom right of the map. In stage 1 nothing happens: Mount Etna remains calm, but could awaken anytime. In stage 2, a light ash rain affects production, affected provinces no longer yield a production bonus. In stage 3 Mount Etna is close to eruption. The cities and their citizens moan about the burden of the ashes. Nobody would consider building a new house at this point. In stage 4, Mount Etna has finally erupted, fires and ashes rain down from the sky, streams of lava threaten the fields and cities. Production has become impossible.
Contents
- 21 volcano tiles (front side): 12 of them are "province tiles" with the colors of the 3 provinces on their back. 9 of them are "neutral tiles" with coin/brick on the backside.
- 25 new bonus markers with rounded edges and blue-gray backside.
- 3 special bonus markers, volcano with a pillar of smoke on their backside.
- 3 markers "no building".
- 1 Sicilia map.
- 1 two-piece volcano standee (for visual representation).
Setup
Bonus Display: The mini map serves as the bonus marker display. Use the new bonus markers with the rounded corners. These have 1 extra coin on the backside.
Starting city: SYRACUSAE is the new starting city and replaces "Rome" on the personality cards TRIBUNE and COLONIST.
Volcanic Activity: On the bottom right of the map you'll find an overview of the volcanic activity consisting of 4 rows. Place the markers as indicated:
- In the 2nd row place the 3 special volcano bonus markers.
- In the 3rd row, place the 3 markers "no building".
Volcano tiles: In the game, all 12 province tiles will be used together with a number of neutral tiles according to the number of players as follows:
- 2 players: no neutral tiles
- 3 players: 3 neutral tiles
- 4 players: 6 neutral tiles
- 5 players: all 9 neutral tiles
The respective number of neutral tiles is randomly drawn and shuffled together with the 12 province tiles (volcano side up). These tiles are placed as a facedown pile.
Whenever you play the TRIBUNE, draw one of the facedown tiles. The total number of tiles therefore varies at different player counts. To mitigate this, draw a number of tiles before starting the game:
- 2 players: 3 tiles
- 3 players: 2 tiles
- 4 players: 1 tile
- 5 players: 0 tiles
If you draw a neutral tile during setup, nothing happens. Put that tile aside. Any drawn province tiles are placed in the column of the respective province in the topmost spot not yet occupied.
In case you draw 3 volcano tiles of the same province (only possible at 2 players), put one back in the pile and draw a new tile. Repeat this process if necessary. Shuffle afterwards.
If you put a province tile in the second row, remove the current bonus marker from that space and put onto the mini map on the spot of that province. It replaces the bonus marker of its color.
Example: 2 yellow and 1 orange tile have been drawn. At first the top row is filled with one tile each. The second yellow tile replaces the bonus marker which is in turn placed on the mini map replacing the bonus marker of its color.
Activity of the Volcano
The volcanic eruption is being controlled by the TRIBUNE personality card. A new action is carried out between step 1 "recover cards" and step 2 "place a new colonist": Draw a volcano tile and place it. The new course of play is:
- Recover personality cards (as usual).
- Draw and place a volcano tile.
- Place a new colonist (as usual).
Draw and place a volcano tile: Draw a volcano tile and take the indicated bonus. Any goods must be stored immediately, if you don't have space, the good cannot be obtained.
If you've drawn a neutral tile this way, discard it without any further effect.
Place a province tile in the corresponding column of its color on the topmost space not yet occupied by another province tile.
Rows 2, 3 and 4 each trigger an effect to be carried out. Rows 2 and 3 require the player to replace the tile and place it on the mini map or the province respectively.
- Row 2: The tile replaces the bonus marker which in turn replaces the original bonus marker on the mini map. This is to indicate that no province bonus is available in the province during production for the rest of the game. The marker is still being turned to its coin side during production.
- Row 3: Put the "no building" marker into the corresponding province. This is to indicate that for the rest of the game building houses is no longer possible in this province.
- Row 4: When you place a province marker here, remove the bonus marker from the mini map entirely: The volcano has now erupted and production is no longer possible.
Note: If you ever run out of volcano tiles, take all 9 neutral tiles and shuffle them to form a new pile to draw from.
Example: 3 brown and 2 orange tiles have already been placed, so the volcano overview looks as follows.
If another brown tile is drawn, it takes on the spot of the bottommost place with the fiery volcano. The volcano bonus marker would be removed from the mini map entirely.
A yellow tile would be placed in the first row and have no effect.
Another orange tile would be put in the 3rd row and replace the "no building" marker which in turn would be put in the orange province.
Interaction with Other Personality Cards
Personality card PREFECT: Production may be limited in the 3 volcanic provinces. If a volcano tile is located inside a province on the mini map, that province can still produce, but there will be no bonus goods anymore. The tile is still turned to the coin side when the province produces and flipped back to the volcano side when someone collects the coin bonus. If there are no more bonus markers at all on the mini map and instead the fiery volcano tile is there, the province cannot produce anymore for the rest of the game.
(The new bonus markers have one extra coin on the back.)
Personality cards Mason, Farmer, Smith, Vintner, Weaver: Production may be limited in the 3 volcanic provinces:
If there are no more bonus markers on the mini map and instead the fiery volcano tile is there, the specialists also cannot produce in this province anymore.
Personality card ARCHITECT: If a province has the "no building" tile, no further houses can be built in that province. Movement of the colonists is not being limited by the volcano in any way.
Interaction with Expansion Solitaria
When Contrarius reacts to your TRIBUNE, he also draws a volcano tile. All other special rules also apply to Contrarius.