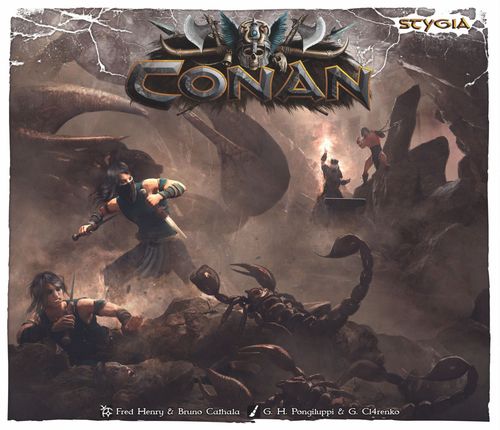
Conan: Stygia
Conan: Stygia Rulebook
Table of Contents
Table of Contents
Scenario 1: The Lost King
Players: 4-5.
Overthrown by a conspiracy seeking to seat Valerius, the heir of the former king Numedides, on the throne of Aquilonia, Conan has disappeared. To save his kingdom, on which the banners of the Nemedian Dragon now flutter, the Cimmerian has traveled to Stygia, a dark region of sorcery and unspeakable horrors. He left to look for the Heart of Ahriman, a magical jewel needed to defeat the sorcerer Xaltotun, the powerful partisan of the plotters, and take back the reins of what is rightfully his.
So, the uncrowned king went after Thuthotmes, a priest of Set who also covet the legendary gem for his own. Conan's trail then vanished somewhere between the port town of Khemi and the capital city of Luxur, as he might have been imprisoned.
But all hope is not lost. A small group of adventurers who remained loyal to King Conan have followed his trail to the doorsteps of Luxur and its massive, bleak, and oppressive buildings, typical of the local architecture. Lead by Ikhmet, a renegade Stygian assassin, not very concerned about his employer's identity as long as he is well paid, the king's followers have found the entrance to a complex network of underground caves alongside the river Styx. This is where they believe Conan to be held.
The rumor says that Set himself, the ancient god of chaos, still roams in the shadows of the mysterious Stygian temples. But who knows what looms in the dark depths of the underground tunnels in which the heroes just entered...
Winning the Game
- If the Scorpion Broodmother dies before the end of turn 8, the heroes win the game.
- If all heroes die or if the Scorpion Broodmother is still alive at the end of turn 8, the Overlord wins the game.
The game starts with the heroes' turn. The heroes start in the 1 area.
Suggested Heroes and Equipment:
- For 3 heroes: Ikhmet (2 Assassin's Dagger), Shevatas (Battle Axe), Hadrathus (Dagger, Pass through Wall).
- For 4 heroes: Bêlit (Sword).
After setup, each hero moves 3 gems from their Reserve zone to their Fatigue zone.
- 3 Heroes: The Overlord starts with 8 gems in their Reserve zone and 3 in their Fatigue zone, and places the recovery token showing a value of "5" in the Book of Skelos.
- 4 Heroes: The Overlord starts with 9 gems in their Reserve zone and 4 in their Fatigue zone, and places the recovery token showing a value of "7" in the Book of Skelos.
Reinforcements: 3 reinforcement points.
Source note: the scenario's setup diagram and the unit cards printed under it (Eternal Guard, Giant Scorpions, Assassins, Scorpion Broodmother) carry the per-unit numbers for this scenario. They are printed on the artwork and are not reproduced as text here.
Special Rules
Well: The game board represents 2 levels of a Stygian temple with level "1" being exactly on top of level "0". The level is indicated by an icon on the lower-left corner of each level. Six wells connect the two levels but only one is opened enough to let a human pass through it. During setup, the Overlord looks at the six well tokens (marked with a red X and a green check) and places them facedown on the level "1" of the board as indicated by the setup diagram. Then the Overlord places the other six well tokens on the level "0" of the board as indicated by the setup diagram. A hero in an area with a facedown well may perform a complex Manipulation with a difficulty of 1 to reveal it. If the well token shows a red X, the token is placed faceup in that area and the hero draws one card from the asset deck. If the Well token shows a green check, the token is placed faceup in that area and represents the opened well.
Moving Through a Well: A character with or without Climb in the opened well's area may move from level "1" to level "0" (and the other way) by spending 2 extra movement points. Moving through a well takes a character's model to the area with a well token directly above or below. The Giant Scorpions may move through all the wells, opened or not, with no movement penalty. The Scorpion Broodmother cannot move through wells.
Moving Through Secret Passages: Each level is traversed by a network of secret passages which entrances are represented by secret passage tokens. A character in an area with a secret passage may move to another area with a secret passage of the same level by spending 2 extra movement points. To move through a secret passage, both areas with the entrance and the exit must be clear of enemies. The Overlord's units and Ikhmet know the nooks of the temple and may move through a secret passage with no movement penalty. The Scorpion Broodmother cannot move through secret passages.
Poisoned: When attacked by a Giant Scorpion, instead of suffering damage as usual, a hero must place a number of poison tokens equal to the amount of damage either on the Melee Attack space or the Move space of their hero's sheet. Each poison token on an action space reduces by 1 the exertion limit of that action. When both exertion limits are reduced to zero, that hero immediately dies. If additionnal poison tokens are needed, you can use any other token to represent them.
Immune: A hero with this ability has developed a resistance to poison. At the beginning of the Action phase, whether the hero is aggressive or cautious, that hero may remove one poison token from one of the action spaces of their hero's sheet. Ikhmet is Immune for this scenario.
Special Rules (part two)
Darkness: The maze of tunnels is plunged into an impenetrable darkness. There is no line of sight between two different areas of the whole board. Each action that requires a line of sight can only be performed within a single area.
Assassins: The Assassins are stealthy. During setup, the Overlord shuffles 6 assassin tokens (3 with a face showing a red X and 3 with a face showing a green check), and randomly places them facedown on the board as indicated by the setup diagram, then looks at them secretly. The Overlord may look at the assassin tokens secretly anytime during the game. When the Assassin's tile is activated, the Overlord may move all the Assassin models and all the assassin tokens as if they were Assassin models. When an assassin token is moved into a hero's area, or when a hero moves into an assassin token's area, that token is revealed. If the token shows a red X, it was a decoy and that token is discarded. If the token shows a green check, the token is replaced by an Assassin model. When all the Assassin models have been placed on the board, discard the remaining assassin tokens. Assassin tokens do not block secret passages.
Waters of the Styx: The water area is not accessible for this scenario.
Body Search: Each time a hero kills an Eternal Guard, that hero may perform a complex Manipulation with a difficulty of 1 to search that guard. If successful, that hero draws a card from the asset deck. Then that Eternal Guard model is removed from the board whether that hero chooses to search it or not.
Reinforcements: Reinforcements are placed in an area with a secret passage token in level "0" or "1". The reinforcement cost of a model is doubled when a model is reinforced in level "0".
The Scorpion Broodmother: When the Scorpion Broodmother tile is activated, the Overlord starts the activation by rolling the dice shown (yellow, orange and red). For each symbol shown on the dice, the Overlord may place a Giant Scorpion model in the Scorpion Broodmother's area or in an area adjacent to that area. If that area is already occupied (and the model's base cannot fit entirely in the area), the Overlord may place that model in an area adjacent to the occupied area.
Torch: At the beginning of their action phase, a hero in aggressive stance with a Torch may discard it to kill all the Giant Scorpion models in that hero's area.
Antidote: A hero with an Antidote may discard it to remove all the poison tokens from one of the action spaces of their hero's sheet.
Chests: The asset deck contains: 2 Torch, 3 Antidote.
Scenario 2: Defeat or Die
Players: 4-5.
The abomination that was lurking beneath the Stygian temple has been slain, but Conan is nowhere to be found. As the adventurers are about to continue their search, a crazy laugh echoes on the walls of the vast cave: "This place will be your grave!"
The chilling voice belongs to the instigator of Conan's disappearance: Thot-Amon, the Great Priest of Set himself. He found out that Thuthotmes was after the Heart of Ahriman, one of the most powerful artifacts, which he planned on using to seize the title of Great Priest for himself and dictate his will to King Ctesphon.
As Conan was getting closer to Thuthotmes, the Great Priest set up a false lead to get rid of the Cimmerian and capture the ambitious priest. It is said that treachery is common in this dark land, but Thuthotmes will have to repent for his betrayal.
Thot-Amon is cunning. He knew that Conan's companions would come to try rescuing him, so he set up a trap that just closed on them. For Conan's friends, the choice is simple if they want to save him : Defeat Thot-Amon or die.
Winning the Game
- If one hero flees the Stygian temple with the map to Conan's location before the end of turn 8, the heroes win the game.
- If all the heroes are dead or do not successfully flee the Stygian temple with the map to Conan's location before the end of turn 8, the Overlord wins the game.
The game starts with the heroes' turn.
Suggested Heroes and Equipment:
- For 3 heroes: Ikhmet (2 Assassin's Dagger), Shevatas (Battle Axe), Hadrathus (Dagger, Pass through Wall).
- For 4 heroes: Bêlit (Sword).
After setup, each hero moves 5 gems from their Reserve zone to their Fatigue zone.
- 3 Heroes: The Overlord starts with 8 gems in their Reserve zone and 3 in their Fatigue zone, and places the recovery token showing a value of "5" in the Book of Skelos.
- 4 Heroes: The Overlord starts with 9 gems in their Reserve zone and 4 in their Fatigue zone, and places the recovery token showing a value of "7" in the Book of Skelos.
Reinforcements: 3 reinforcement points.
Stone Rain: The Overlord chooses an area with a secret passage token or well token. Remove that token and attack that area; roll two red dice. Characters cannot defend against this attack and suffer damage equal to the attack power.
Thot-Amon has the Stone Rain and Psychic Strike spells.
Source note: the scenario's setup diagram and the unit cards printed under it carry the per-unit numbers for this scenario. They are printed on the artwork and are not reproduced as text here.
Special Rules
Thot-Amon: When Thot-Amon dies, remove his model and place the Spellbook card on Thot-Amon's area to represent the map to Conan's location.
Body Search: Each time a hero kills an Eternal Guard, that hero may perform a complex Manipulation with a difficulty of 1 to search that guard. If successful, that hero draws a card from the asset deck. Then that Eternal Guard model is removed from the board whether that hero chooses to search it or not.
Fleeing the temple: A hero can flee the temple by entering the pontoon's area south of the level "1".
Moving Through a Well: The game board represents 2 levels of a Stygian temple with level "1" being exactly on top of level "0". The level is indicated by an icon on the lower-left corner of each level. A character with or without Climb in the opened well's area may move from level "1" to level "0" (and the other way) by spending 2 extra movement points. Moving through a well takes a character's model to the area with a well token directly above or below. The Giant Scorpions may move through all the wells, opened or not, with no movement penalty.
Moving Through Secret Passages: Each level is traversed by a network of secret passages which entrances are represented by secret passage tokens. A character in an area with a secret passage may move to another area with a secret passage of the same level by spending 2 extra movement points. To move through a secret passage, both areas with the entrance and the exit must be clear of enemies. The Overlord's units and Ikhmet know the nooks of the temple and may move through a secret passage with no movement penalty.
Poisoned: When attacked by a Giant Scorpion, instead of suffering damage as usual, a hero must place a number of poison tokens equal to the amount of damage either on the Melee Attack space or the Move space of their hero's sheet. Each poison token on an action space reduces by 1 the exertion limit of that action. When both exertion limits are reduced to zero, that hero immediately dies. If additionnal poison tokens are needed, you can use any other token to represent them.
Immune: A hero with this ability has developed a resistance to poison. At the beginning of the Action phase, whether the hero is aggressive or cautious, that hero may remove one poison token from one of the action spaces of their hero's sheet. Ikhmet is Immune for this scenario.
Special Rules (part two)
Darkness: The maze of tunnels is plunged into an impenetrable darkness. There is no line of sight between two different areas of the whole board. Each action that requires a line of sight can only be performed within a single area.
Assassins: The Assassins are stealthy. At the beginning of setup, the Overlord shuffles 6 assassin tokens (3 with a face showing a red X and 3 with a face showing a green check), and randomly places them facedown on the board as indicated by the setup diagram, then looks at them secretly. The Overlord may look at the assassin tokens secretly anytime during the game. When an Assassin tile is activated, the Overlord may move all the Assassin models and all the assassin tokens as if they were Assassin models. When an assassin token is moved into a hero's area, or when a hero moves into an assassin token's area, that token is revealed. If the token shows a red X, it was a decoy and that token is discarded. If the token shows a green check, the token is replaced by an Assassin model. When all the Assassin models have been placed on the board, discard the remaining assassin tokens. Assassin tokens do not block secret passages.
Torch: At the beginning of their action phase, a hero in aggressive stance with a Torch may discard it to kill all the Giant Scorpion models in that hero's area.
Reinforcements: Reinforcements are placed in an area with a Secret Passage token in level "0" or "1". The reinforcement cost of a model is doubled when a model is reinforced in level "0".
Waters of the Styx: The water area is not accessible for this scenario.
Antidote: A hero with an Antidote may discard it to remove all the poison tokens from one of the action spaces of their hero's sheet.
Chests: The asset deck contains: 2 Torch, 2 Antidote.
Scenario 3: The Fifth Plague of Stygia
Players: 4.
Peace has returned between the kingdoms of Argos and Stygia where a diplomatic meeting is about to take place in the port of Khemi. But Thot-Amon, the most influent Priest of Set, wants to become the next Great Priest of the Ancient Serpent's cult and will put all his might into sabotaging the negotiations. Having denounced the Argosseans as spies, he plans on killing them by using his magical powers to resurrect the dead Giant Snake offered as a gift by Stygia to Argos. However, he does not know that among the emissaries' escort is a tenacious Cimmerian mercenary, always prompt to punish disloyalty.
Winning the Game
- If Thot-Amon dies, the heroes win the game.
- If the two Argossean emissaries die, the Overlord wins the game.
The game starts with the heroes' turn.
Suggested Heroes and Equipment:
- Conan (Battle Axe, Leather Armor),
- Shevatas (Kris, Throwing Knives),
- Hadratus (Dagger, Teleportation, Mitra's Halo, Lightning Storm). Hadrathus starts with Mitra's Halo cast.
After setup, each hero moves 5 gems from their Reserve zone to their Fatigue zone.
The Overlord starts with 4 gems in their Reserve zone and 8 in their Fatigue zone, and places the recovery token showing a value of "5" in the Book of Skelos.
Reinforcements: 5 reinforcement points.
Plague of Stygia: Thot-Amon unleashes the ancient forces in a deluge of fire and death. The Overlord chooses an area of the board other than the ones located in the three building of the city (the trading post, the barracks and the warehouse) and places a flame token in that area (ignoring the number on it). Then the Overlord attacks that area; roll two red dice.
Thot-Amon has the following spells: Set's Halo, Pestilential Swarm, and Bori's Rage.
Source note: the scenario's setup diagram and the unit cards printed under it carry the per-unit numbers for this scenario. They are printed on the artwork and are not reproduced as text here. The printed word "Ovelord" in the Plague of Stygia entry is read as "Overlord".
Special Rules
Argossean Emissaries: During setup, the heroes shuffle and place facedown nine tokens numbered from "1" to "9" as indicated by the setup diagram; then they look at these tokens. The two emissaries targeted by Thot-Amon are represented by the tokens numbered "1" and "2". The emissaries cannot move and do not count for Hindering.
Killing an Emissary: Each Argossean (including the emissaries) has 1 Armor and 1 Life Point. All Argosseans have Protected. When an Argossean dies, its token is flipped faceup and discarded from the game.
Burning Areas: When a character moves into an area with a flame token, that character rolls two red dice for burning damage with no Guard bonus for their weapons; that character may Guard, use their Armor bonus and the Guard bonus of shields.
Leaping over Water: A character with Leap may leap over the areas marked with the Leap icon (a green figure with the number 2). If a hero fails to leap, the character remains in its area.
Plank: Two planks connect the docks to the ship. A plank's area is considered to be a normal area and gives an elevation bonus on the water areas.
Jumping into Water: A character adjacent to a water area may move into that area with no movement penalty. When a character without Swimming moves into a water area, that character dies immediately.
Moving Back onto the Docks: A character in a water area adjacent to a ladder may move back onto the docks by spending 1 extra movement point.
Roof Top: The areas located on the roof top of the building on the left side of the board provide an elevation bonus, including on the stairs areas. A character may jump from these areas to the areas of the street level. That character rolls two orange dice for falling damage. If that character has Leap, that character rolls one orange die. A character cannot move onto the roof top areas directly from the street level except when moving through the stairs areas.
Wall Wrecker: A character with Wall Wrecker can only use this skill to move across the wall in the warehouse on the right side of the board.
Chests: The asset deck contains: Life Potion, 3 Explosive Orb, Crossbow, Chain Mail.
Scenario 4: The Curse of the Scorpion
Players: 4.
In the port of Luxur, three shadows sneak onto the docks alongside the Styx river. There are only a few hours left before the break of dawn, and the discreet marauders have yet to lay hands on the items they are looking for: three artifacts that were used to cast a dark and cruel curse on the village of one of them, Ikhmet, the Stygian renegade. That is the price to pay for questioning the absolute authority of the priests of Set.
The items have been brought to the port city to be spread and hidden throughout Stygia so that the curse would never be broken. However, the three companions managed to discover that the artifacts have not yet been scattered by interrogating the priest of Set responsible for the malediction. But the artifacts are well guarded and the only way to lift the curse is to purify the three items by submerging them in the waters of the Styx.
After ending the life of the Stygian priest, Ikhmet and his two friends, Shevatas the Zamorian master-thief, and Conan the powerful Cimmerian warrior, journeyed to the port of Luxur to steal the evil artifacts and plunge them into the river.
Winning the Game
- If the three artifacts have been submerged in the water before the end of turn 7, the curse on Ikhmet's village is broken, and the heroes win the game.
- If all the heroes are dead or do not successfully submerged the three artifacts in the water before the end of turn 7, the Overlord wins the game.
The game starts with the heroes' turn.
Suggested Heroes and Equipment:
- Conan (Battle Axe, Leather Armor),
- Shevatas (Kris, Throwing Knives),
- Ikhmet (2 Assassin's Dagger).
After setup, each hero moves 5 gems from their Reserve zone to their Fatigue zone.
The Overlord starts with 6 gems in their Reserve zone and 3 in their Fatigue zone, and places the recovery token showing a value of "5" in the Book of Skelos.
Each time the Overlord activates the Event tile, the Overlord may use both events in any order.
Reinforcements: 3 reinforcement points.
Surge of Scorpions: The Overlord may place up to 6 Giant Scorpion models in any area of the board except the rooftops and stairs on the left-side of the board. Those 6 Giant Scorpion models can be those killed during the scenario or taken from the box (maximum limit of 10 Giant Scorpions on the board at any one time).
Source note: the scenario's setup diagram and the unit cards printed under it carry the per-unit numbers for this scenario. They are printed on the artwork and are not reproduced as text here.
Special Rules
Scorpion Broodmother Movement: The Scorpion Broodmother can sidle in the narrow streets and the buildings of the city. Its model can be placed in any of the areas of the board, even if its base encroaches on the adjacent areas.
Submerge an Artifact: The three artifacts the heroes must submerge to stop the curse are:
- The Sorcerer's Scepter
- The Stygian Artifact
- The Spellbook
A hero with an artifact may perform a complex Manipulation to throw it into a water area of the board. A hero with an artifact may also jump into a water area to immerge that artifact.
Trapped Chest: When a hero draws the Trapped Chest from the asset deck, the trap is triggered. Discard that card and attack the hero's area; roll one red die.
Jumping into Water: A character adjacent to a water area may move into that area with no movement penalty. When a character without Swimming, moves into a water area, that character dies immediately.
Moving Back onto the Docks: A character in a water area adjacent to a ladder may move back onto the docks by spending 1 extra movement point.
Roof Top: The areas located on the roof top of the building on the left side of the board provide an elevation bonus, including on the stairs areas. A character may jump from these areas to the areas of the street level. That character rolls two orange dice for falling damage. If that character has Leap, that character rolls one orange die. A character cannot move onto the roof top areas directly from the street level except when moving through the stairs areas.
Wall Wrecker: A character with Wall Wrecker can only use this skill to move across the wall in the warehouse on the right side of the board.
Special Rules (part two)
Poisoned: When attacked by a Giant Scorpion, instead of suffering damage as usual, a hero must place a number of poison tokens equal to the amount of damage either on the Melee Attack space or the Move space of their hero's sheet. Each poison token on an action space reduces by 1 the exertion limit of that action. When both exertion limits are reduced to zero, that hero immediately dies. If additionnal poison tokens are needed, you can use any other token to represent them.
Immune: A hero with this ability has developed a resistance to poison. During the Action phase, whether the hero is aggressive or cautious, that hero may remove one poison token from one of the action spaces of their hero's sheet. Ikhmet is Immune for this scenario.
Antidote: A hero with an Antidote may discard it to remove all the poison tokens from one of the action spaces of their hero's sheet.
Chests: The asset deck contains: Sorcerer's Scepter, Stygian Artifact, Spellbook, Life Potion, Trapped Chest, Explosive Orb, Crossbow, Antidote.