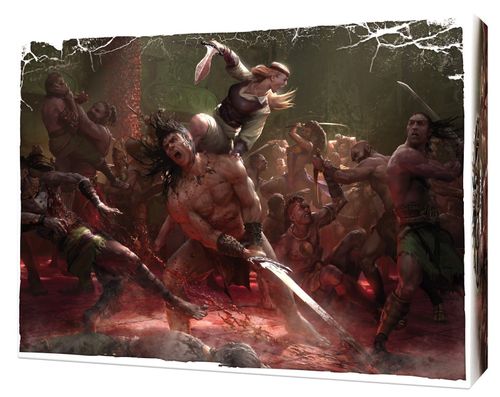
Conan: Red Nails
Conan: Red Nails Rulebook
Table of Contents
Table of Contents
- Game Board Rules
- Additional Rules
- Solo/Cooperative Mode
- Solo/Co-op Scenarios
- City of the Howling Souls
- Scenario 1: Escape from Xuchotl
- Scenario 2: Green Hell (Part 1)
- Scenario 3: Green Hell (Part 2)
- Scenario 4: Dredge the Waters
- Scenario 4.5: The Deep Unknown
- Scenario 5: Redemption of Souls
- Adventure Mode
- Taming The Dragon (3 Players)
- Door of the Eagle (4 Players)
- The Mad Tyrant (5 Players)
- Dragons Fell Upon Them (5 Players)
Game Board Rules
Jungle
- Trees & Ruins: These trees and ruins block movement and line of sight, even from Cliff Tops.
- Deep Water: A unit adjacent to a water area may move into that area with no movement penalty. When a unit without Swimming moves into a Deep Water area, that unit dies immediately.
- Ford: Units with or without Swimming can move onto the rocks in this Deep Water area by spending 2 extra movement points. If they have Climb, this costs no extra movement points.
- Rope Vine (Ascend): A unit with Climb in a ground area with a Rope Vine may ascend to the Cliff Top by spending 2 movement points. This movement is affected by Hindering.
- Rope Vine (Descend): A unit in a Cliff Top area with a Rope Vine may descend to the ground below by performing a complex Manipulation with a difficulty of 2 (for Heroes) or for 2 movement points (Overlord tiles). Reduce these values to 1 if the unit has Climb.
- Cliff Top: These areas provide an elevation bonus. A unit can move from a Cliff Top area to an adjacent ground area as though it were a border. The unit rolls three red dice for falling damage. If the unit has Leap, the unit rolls two red dice instead.
- There is no line of sight between these areas and the ground.
Xuchotl
- Elevated Areas: A unit with or without Leap or Climb may move onto the sacrificial altar, torture rack, or dais areas by spending 1 extra movement point (unless they use the stairs for the dais). A unit in these areas, with or without Reach, may attack a unit in an adjacent area with a Melee Attack. These areas provide an elevation bonus for Melee and Ranged Attacks. These areas do not block line of sight. A unit may exit these areas with no movement penalty.
- Balconies: A unit can move across a railing from a balcony area to a ground floor area as though it were a border. The unit rolls two red dice for falling damage. If the unit has Leap, the unit rolls one red die instead. A unit cannot move from a ground floor area to a balcony area. Balcony areas provide an elevation bonus to ground floor areas.
- Cell: There is no line of sight into or out of the cell. A unit may only enter or exit the cell through the door on the left.
- Walls: All walls are stone and cannot be wrecked using Wall Wrecker.
- Apartments: These areas provide an elevation bonus to ground floor areas.
Additional Rules
Max Units: Whenever a tile in the River has a max number in parentheses below it, that number indicates the maximum number of miniatures of that tile that can be on the game board at the same time.
New Equipment Types
Rope: The Rope Asset card introduces a new mechanism. A Hero with the Rope card may perform a simple Manipulation to discard it and place a Rope token on the game board as defined by the scenario. Any Hero in an area with a Rope token may perform a simple Manipulation to remove the Rope token from the board and place the Rope card in their inventory.
Jade Wand: The Jade Wand introduces a way to deal damage with Manipulation. This artifact deals unavoidable damage to a single target. For Heroes, this requires placing gems in the Manipulation space (rather than the Melee or Ranged Attack spaces). Overlord units don't have Manipulation, so the Overlord merely spends the appropriate number of gems.
Shuriken: Shuriken are a lightweight, short-ranged weapon. They follow all of the standard rules for ranged weapons (line of sight requirements, hindering, etc.), but they may only be used to target enemies in the attacker's area, or an adjacent area. This includes areas at different elevations, which may include an elevation bonus.
Whip: The Whip is a weapon that also acts as a Rope card whenever a scenario indicates a Rope token can be used.
New Spell Types
Spectral Shroud: Spectral Shroud is new defensive spell. Spectral Shroud protects from a maximum of 3 damage before it loses effectiveness. This protects against attack damage, falling damage, and unavoidable damage. Removing the tokens to prevent damage is not optional. The caster may cast Spectral Shroud before all 3 tokens are removed, but this will only refresh the tokens to 3.
Scenario Cards
One of the scenarios in this book, The Door of the Eagle, introduces a new element for replayability for Adventure Mode. Neither the Overlord nor the Hero players will know what enemies lurk behind the doors. Players can place either the Numbered tokens or the Scenario cards on the game board, which are revealed when the Heroes open the door.
These cards have two effects: an immediate effect which adds enemies to the board and a permanent effect that benefits the Overlord (or hinders the Heroes).
Not all of the cards are used in the scenario, so each time you play no one will know exactly which enemies will be used or where they will spawn.
For example, Xotalanc Barracks 1:
- Enemy: Add 4 Xotalanc Huntresses to this area and their tile to the end of the River. Roll four yellow dice. For each non-blank result, immediately activate 1 Xotalanc Huntress.
- Effect (Embolden): The Overlord gains 1 extra reinforcement point every time they reinforce (for the rest of the game).
New Tile Types
To get more use out of existing miniatures, we have created tiles for previously released units. Some, like the Stygian Captain and the Kushite Warriors, are direct replacements to be used in these new scenarios. Others, like the Soulless and the Tlazitlans, use multiple types of miniatures to represent the new units. For example, the Soulless can be represented by Skeletons, Mummies, or both. All Soulless units, regardless of whether they are represented by a Skeleton or a Mummy, behave exactly the same.
Solo/Cooperative Mode
"Olmec spoke further of dark and mysterious matters…" The solo/cooperative rules allow you to play through a single solo/coop scenario, or a campaign of linked scenarios, with no need for an Overlord player. Players choose their Heroes from a variety of Archetypes and progress in terms of equipment and abilities. This rule set does not replace the original game or diminish its spirit and style; it is a separate mode, with its own flavor and motivations. These rules were originally printed in the Conan Monolith Sourcebook (published by Modiphius) and have been slightly revamped for this book.
Solo/Cooperative Play Rules
The following rules assume players have a thorough knowledge of how to play Monolith's Conan Board Game. Those rules are not reprinted here, but are referenced herein, so prior experience playing the game is required.
Solo/cooperative rules allow players to play through specially designed scenarios that eliminate the role of the Overlord. Instead, the players follow a system of automated commands to control the Overlord's tiles and miniatures. The players do not need to think or strategize for the Overlord tiles and miniatures; the rules and the scenario will do the strategizing for the Overlord. If a situation ever arises that is not covered by the rules or scenario, the players may choose whichever option is in their own best interest.
For the Heroes, the Rules Don't Change
The first thing to understand is that the rules for Heroes are the same as in the original Adventure Mode rules. They move, attack, manipulate, and cast spells as they always have. Their initial setup remains unchanged and is dictated by each scenario. The only difference is strategic. It requires a slightly different approach when battling the pre-determined commands of this non-player Overlord than it does against a human opponent.
The Overlord
Overlord Setup
In addition to controlling one or more of the Heroes, the player(s) of solo/co-op mode must also serve as hands for the Overlord. This task could be assigned to a single player or be a shared responsibility for those at the table.
Fortunately, the process is simple. Each scenario will show you which game boards to use, where to place the miniatures during setup, and which Overlord tiles to place in the River on the Book of Skelos. Once these components are in place, locate the required double-sided tokens from the board game box.
It is important that you have one for each corresponding tile in the River. In most cases, you will require numbers 1 through 6, but this depends on the scenario. Remember to use the tokens that have the same grayish star-like design on the backside to ensure you will not know which Overlord tile is next to activate (see below).
Once you have these tokens, place them numbered side down in the Reserve zone of the Book of Skelos where the Overlord normally places their gems to create the Activation token pool. (In this game mode, the Overlord does not use gems.) Note, however, that some scenarios have their own rules for Overlord activations; this is just the default method.
Determining Overlord Activations
The Overlord has a series of automatic commands, and it is up to the players to follow the scenario instructions, move the Overlord's miniatures, and roll the dice for attacks against their own Heroes. Before we outline these commands, we must know in what order, by what process, and how often the Overlord activates their tiles.
Each turn, the Overlord activates a number of tiles equal to the number of Heroes on the board. If at any time one of the Heroes is killed, the Overlord loses one activation (see Number of Overlord Activations below).
To activate a tile:
- One of the players randomly picks up an Activation token and flips it over to reveal the number.
- Temporarily place this numbered token in the top left slot of the Book of Skelos Benefits token slots (normally reserved for the Movement Benefit token). This number will correspond to one of the numbers on the River.
- Whichever tile corresponds to this number will immediately activate (see Overlord Commands/Activating the Overlord Tiles below). The tile remains in its position and is not placed at the end of the River.
- Once this activation is finished, take any additional activations the Overlord gets (again, this is dictated by the number of Heroes currently on the board or by the scenario's special rules). Place the second Activation token in the Guard action slot, and the third Activation token in the Reroll action slot. If you're playing with four Heroes, place the fourth Activation token directly into the Fatigue zone, as that is the maximum number of activations the Overlord will ever get per turn.
- Once you are done activating tiles, remove all spent tokens from the three Benefit token slots and place them number side facing up in the Fatigue zone on the Book of Skelos.
Refreshing the Activation Token Pool
If the Overlord has activations available but all of their tokens are in the Fatigue zone, it is time to refresh the Activation token pool.
To do this, flip the tokens in the Fatigue zone and the Benefit token slots so the number sides are down, shuffle them, and place them in the Reserve zone. In this way, it is possible for a particular tile to activate twice during a single Overlord's turn. This will increase in frequency as tiles are flipped (see "Dead" Tiles and Corresponding Activation Tokens below).
Alternatively, you may use a small bowl or pouch to store the tokens in, so they are drawn blindly.
Overlord Defense
The Overlord does not roll for defense. To damage an Overlord unit, Heroes must simply overcome the unit's Armor Value (unless the scenario specifies otherwise).
Number of Overlord Activations
If one of the Heroes dies, the Overlord immediately loses one activation. For example, at the beginning of a turn, with three Heroes on the board, the Overlord receives three activations. If a Hero is killed during the Overlord's second activation, that Hero is immediately removed from the board and the Overlord will not receive their third activation. On the next Overlord's turn, the Overlord only receives two activations (assuming there are still two Heroes on the board and one didn't blow themselves up with an Explosive Orb or fall victim to a Counterattack).
Activation Example
Here the Overlord is taking their third activation for the turn. Tiles 4 (Dragon of Xuchotl) and 5 (Thak) have already activated and number 2 has just been drawn randomly from the Activation token pool, meaning the Giant Snake activates. These Activation tokens are drawn one at a time and the tile with the corresponding number is activated. They are placed left to right in the slots normally reserved for Overlord Benefits tokens. This is to remind you which activation you're on and how many you've taken. Once the Overlord has activated a number of times equal to the number of Heroes on the board, move the spent Activation tokens to the Fatigue zone of the Book of Skelos.
If you're playing with 4 Heroes, the 4th token simply goes straight to the Fatigue zone as it is the final possible activation. Once all Activation tokens in the Activation Pool have been spent, refresh the Activation Pool (see Refreshing the Activation Token Pool above).
"Dead" Tiles and Corresponding Activation Tokens
There will be times when a particular tile will be killed and won't return (via Reinforcements, for example). When you draw an Activation token associated with a tile that has no miniatures left on the board and will not return, flip the tile, remove the Activation token from the Book of Skelos, and draw a replacement Activation token. The flipped (and bloodied) tile stays in the River as a visual indicator that it won't be bothering you anymore and its token is removed from rotation.
However, when you draw an Activation token associated with a tile that has no miniatures left on the board but can be reinforced, that Overlord activation is wasted.
If, at any time during a scenario, a unit that can be reinforced loses the ability to be reinforced, follow the rules to remove the Activation token as described in this section.
Overlord's Turn Quick Reference
- Determine the number of Overlord activations (activations = number of Heroes on the board).
- Anytime the Reserve zone is empty, return all Activation tokens to the Reserve zone (numbered side facing down). Then, draw an Activation token (as long as the Overlord has more activations available).
- Activate the tile on the River that corresponds to the number on the Activation token you have just drawn.
- If the Overlord still has available activations, activate again by drawing another random token from the Activation token pool.
Overlord Commands/Activating the Overlord Tiles
As a general rule, an activating Overlord unit will attempt to attack the most vulnerable target, known henceforth as the Target Hero (see Determining the Target Hero below). The unit(s) associated with the activating tile will attempt to attack the Target Hero by moving into the Hero's area for a Melee Attack, firing a ranged weapon, or moving and firing a ranged weapon. If some of the units in the activating tile can attack the Hero, they will, even if others cannot. Those that cannot will attempt to attack an Alternate Target Hero, if possible (see Determining an Alternate Target Hero) or will simply move as close to the Target Hero as possible. These rules will be detailed below. Once you have read them you are encouraged to consult the Determining Target Hero and Alternate Target Hero Quick Reference Table on page 12.
Determining the Target Hero
If possible, all units associated with the activating tile will attack the Target Hero by using a Ranged Attack or Melee Attack action (or any special action such as a spell detailed in the scenario). The Target Hero is the Hero with the fewest energy gems in their Reserve zone. That means, as long as the activating Overlord unit can attack the Target Hero by moving into their area for a Melee Attack, firing a ranged weapon, or by a combination of moving and firing a ranged weapon, they will attack that Hero. If there are two or more Heroes with the same number of energy gems in their Reserve zone and they can be reached by the activating Overlord unit for an attack, whichever of these Heroes has the most gems in their Wounds zone will become the target. If both of these values are equal, the players may choose which Hero will be attacked.
Note that most scenarios have special rules indicating which Hero a particular Overlord tile will attack. In some cases it will mean attacking the Hero with the most gems in their Reserve zone (see The Strongest Hero). In these cases, the scenario rules always override these rules.
Path of Least Resistance
An activating Overlord unit will always follow the path of least resistance, and a route that would not risk damage to the unit, to make its attack. Sometimes this means not moving at all (if they share the area with the Target Hero), and sometimes this means moving a number of areas up to their movement value in order to make an attack (either a Melee Attack or Ranged Attack action). Hindering conditions and paths that could cause damage should be taken into account when determining the path of least resistance.
Cunning Attackers
In this game mode, when an Overlord tile associated with multiple units activates, each of these units will move, resolve their attacks, and then the next unit associated with the tile will activate. This is different than the regular rules where Overlord units must move before attacking or lose all unspent movement points. Players choose the order in which these units activate.
Hindering and Ranged Attacks
Once line of sight is determined against the Target Hero, but before making a Ranged Attack that would be affected by hindering, the activating Overlord unit will first attempt to move to avoid the penalty. In most cases, particular skills make this movement easy (Evasive) or entirely unnecessary (Elite Shooter). If the activating Overlord unit using the Ranged Attack is unable to avoid or ignore the penalties caused by hindering, or they would lose line of sight by moving, they will still attack the Target Hero and receive the penalty.
Avoiding Hindering with Ranged Attacks: Let's say Kerim Shah occupies the same area as two Heroes, but neither of these two is the Target Hero. If Kerim Shah had line of sight to the Target Hero, and he is several areas away, Kerim Shah will try to avoid any hindering penalties before making the Ranged Attack. Because Kerim Shah does not have either the Elite Shooter or Concentration skill, he would need to move to another area (not occupied by Heroes) where he still has line of sight, to avoid the hindering penalty. If Kerim Shah had the Evasive skill, he would not suffer a penalty for leaving this area, but since he does not, he will need to rely on his base movement value of 2. Because the two Heroes would effectively reduce Kerim Shah's movement by two, he would be unable to leave the area. Though there is no way Kerim Shah can avoid the hindering penalty, he will still attack the Target Hero.
Hindering and Melee Attacks
If, while on its way to make a Melee Attack against a Target Hero, an activating Overlord unit would encounter hindering conditions, it will only make the move if it can actually reach the Target Hero's area in the same move. Otherwise, it will select an Alternate Target Hero (see Determining an Alternate Target Hero) that it can reach for an attack as part of this activation. If it can't reach an Alternate Target Hero for an attack, it will simply move as close to the Target Hero as possible. Since units resolve their activations sequentially, hindering conditions should be reevaluated after each unit's activation.
Tiles with Units in Different Areas
It should be noted that not all units associated with a single tile will necessarily occupy the same area when they activate. With that in mind, it may mean that some of the units will move to attack the Target Hero, while others will make their way closer to the Target Hero, or, if it's within their capabilities, will select an Alternate Target Hero instead (again, see Determining an Alternate Target Hero).
The Strongest Hero
In many scenarios, there is a rule stating that a particular tile or tiles will attack the "strongest" Hero. In this case, follow these guidelines to determine the Target Hero:
- First, check which Hero has the most energy gems in their Reserve zone. That Hero becomes the Target Hero.
- If two Heroes have the same amount of gems in their Reserve zone, the Target Hero will be the Hero who has suffered fewer damage.
- If both of these amounts are equal, the players choose which of these Heroes is the Target Hero.
Determining an Alternate Target Hero
The following conditions will prevent an activating Overlord unit from attacking the Target Hero (again, that's the Hero with the fewest energy gems in their Reserve zone), causing them to determine an Alternate Target Hero.
- The activating unit cannot reach the Target Hero for a Melee Attack (due to other Heroes hindering this miniature's movement or simply because it does not have a high enough movement value to reach the Target Hero).
- The activating unit cannot get a clear line of sight to attack the Target Hero with a Ranged Attack (even after moving up to their movement value).
- The Target Hero has a power or effect that prevents that Hero from being targeted by an attack.
- An Event or special rule may dictate that a particular tile will attack a particular Hero. In some cases, it will be the Hero who has the most energy gems in their Reserve zone that will be targeted (see The Strongest Hero above). These instances will be detailed in the scenario.
If any of these circumstances prevent the activating Overlord unit from attacking the Target Hero, they will attack an Alternate Target Hero. In this case, the Hero they attack will be the Hero who has the second fewest gems in their Reserve zone and who can be reached for a Melee or Ranged Attack (as per the same conditions above). If ever two or more Heroes have the same (fewest in number) energy gems in their Reserve zone, then the activating Overlord unit will attack whichever Hero has more gems in their Wound zone. If all these values are equal, the players may choose which Hero is the target of the attack.
Reminder
An activating Overlord unit will always first try to attack the Target Hero. Even if the activating Overlord unit is in the same area as another Hero, it will still break away to attack the Target Hero, if it can reach them during the same activation.
If an activating Overlord unit is unable to attack any of the Heroes on the board, they will target the nearest Ally (if applicable). Otherwise, they will move as close as possible to the Target Hero.
Rerolls
Activating Overlord units that possess the reroll symbol on their attack dice will always reroll a blank result, but will never reroll any other results. They will use all of the reroll options they have, but again, only to reroll any blank results. The Support skill works in addition to and by the same rules as any of these reroll symbols, though players should note that Support works differently for Heroes in this game mode. See Support below.
Target Hero / Alternate Target Hero Quick Reference
An activating Overlord unit must determine a Target Hero:
- Check which Hero has the fewest energy gems in their Reserve zone. That Hero becomes the Target Hero.
- If two Heroes have the same amount of gems in their Reserve, the Target Hero will be the Hero who has suffered more damage.
- If both of these amounts are equal, the players choose which of these Heroes is the Target Hero.
Determining an Alternate Hero:
- If an activating Overlord unit would be unable to attack the Target Hero for any reason (even after moving), players will determine an Alternate Target Hero.
- The Alternate Target Hero is the Hero that has the second fewest gems in its Reserve zone and can be reached for an attack.
- If two or more Heroes (that can be reached for an attack) have the same amount of gems in their reserve, the Alternate Target Hero will be the Hero who has suffered more damage.
- If these amounts are equal, the players choose which of these Heroes is the Target Hero.
- If an activating Overlord unit is unable to attack any of the Heroes on the board, they will target the nearest Ally (players choose which Ally).
On the ultra-rare occasion that players are unable to determine which Hero should be attacked by an Overlord unit, players choose any Hero within reach (for Melee or Ranged Attack action) as the target of the attack.
Solo/Co-op Scenarios
We believe these scenarios are best played as a campaign, where equipment, Victory Points and story all contribute to the sense of progression. However, these scenarios can also be played independently of the campaign in Non-Campaign Mode. The Options section of each scenario provides the equipment and spells you should use for your Hero Archetypes in Non-campaign Mode.
Skills
Sacrifice, Bodyguard, Spell Caster, Fascination: Overlord units only use these skills if the scenario outlines how they are to be used. Indeed, some scenarios provide rules for how an Overlord unit must cast a spell.
Wall Wrecker, Swimming, Intangible, Flying: Overlord units only use these skills when it allows them to reach the Target Hero more easily. If using this Skill allows them to avoid any movement or attack restrictions imposed by non-Target Heroes, or gets them to the Target Hero's area (or an area from which they can attack the Target Hero), they will use this skill. Otherwise, they will simply move to the Target Hero's area for a Melee Attack or to the closest area from where they can make a Ranged Attack.
Climb, Leap: Overlord units only use these skills if the scenario gives rules for doing so.
Poison: Unless a scenario defines Poison's effects, use these rules: When a unit with Poison attacks a Hero, instead of suffering damage, the Hero must place a number of Poison tokens equal to the amount of damage either on the Melee Attack space or the Move space of their Hero sheet. Each Poison token on an action space reduces by 1 the exertion limit of that action. When both exertion limits are reduced to zero, that Hero immediately dies. If additional Poison tokens are needed, you can use any other token to represent them.
Web: Overlord units will use this skill whenever possible, unless the unit is affected by hindering.
Support: For Overlord units, this skill works the same as the reroll rules for solo/co-op play and works in addition to any reroll symbols on the tile's attack value(s). For the Heroes, it works as in the Adventure Mode rules.
Counterattack: For Overlord units, this Skill works as in the Adventure Mode rules. For Heroes who possess this skill, they may only use it once per Overlord's turn.
Blocking: For Overlord units, this skill works as in the Adventure Mode rules. For balancing purposes, a Hero who possesses this skill may not use it in this game mode.
Protected: For Overlord units, this skill works as in the Adventure Mode rules. For balancing purposes, a Hero who possesses this skill may not use it in this game mode.
Jinx: For Overlord units, this skill works as in the Adventure Mode rules. Heroes who possess this skill may use it normally, but it may create a significant advantage. Use it at the players' discretion.
Leadership: Heroes who possess this skill may use it normally. Note: Overlord units do not target allies unless they cannot reach a Hero for a Melee or Ranged Attack.
Optional Scenario
A scenario using a game board from the Versus expansion is included in this campaign. This scenario is optional. Although not required for this campaign, it provides an additional challenge and additional rewards. The optional scenario is indicated by .5 after its campaign number.
Campaign Rules
The scenarios provided in this chapter are meant to be played as part of a campaign where the players will accumulate Equipment, Spells, Victory Points, and other progressive elements. Whether players intend to play through the campaign mode or not, we recommend players first try Scenario 1: Escape from Xuchotl.
For those who play in Campaign Mode, it is highly recommended that players keep a tally of the equipment and Victory Points acquired. These concepts are detailed below.
Equipment and Cache
Each scenario provides the opportunity for the Heroes to attain better equipment. Equipment is cumulative. Once acquired, Heroes have access to it for the remainder of the campaign. There are a few limitations and exceptions, however.
Starting a Scenario: Before playing a scenario, each Hero chooses equipment from their Cache to use (see below). Players are encouraged to read ahead about the scenario so they may choose their equipment accordingly. Equipment is not tied to any one Hero and players may trade amongst themselves in-between scenarios or during scenarios, if they want to drop or pass items as per the Adventure Mode rules.
Cache: The Cache is a pool of all the equipment gathered over the course of the campaign. If you drop or throw an item and don't recover it during a scenario, and you lose that scenario, you lose the piece of equipment. If you win the scenario, add it, and all equipment acquired during the scenario, to your Cache. Some scenarios have stipulations on adding items to your Cache if you lose the scenario. If players wish to play a scenario in Non-Campaign Mode, their Cache is listed in the Options section of the scenario.
Starting Equipment: Starting equipment is assigned to each Hero at the beginning of the campaign. They have access to this equipment during the first scenario and every scenario beyond that point. Starting equipment is never lost, not even if it is dropped or thrown. This equipment is stored in your Cache and may be shared among other Heroes as players see fit.
Spells
Heroes find Spells the same way as other equipment. In Campaign Mode, however, Heroes do not lose their spells, not even after a defeat. When putting together the Asset deck for a scenario, place the Spell Book Asset card into the deck. This will ensure that, when face down, it will be indistinguishable from other Asset cards. In many scenarios, one Spell Book will yield more than one spell.
Once attained, assign these spells to the Sorcerer Archetype (see Archetypes and Starting Equipment below) so the player always has access to the spells, even if they select a different sorcerer Hero between scenarios.
Archetypes and Starting Equipment
For a standard 3 Hero game, decide which player will control each of the three archetypes.
With this campaign, we wanted to give players plenty of options as far as which Heroes they could choose. This, however, is a tricky balancing act. Particular skills and stats have the potential to "break the game." With that in mind, we compiled a list of Heroes players may choose from and grouped them into three Archetypes: Warriors, Rogues, and Sorcerers. Note that some of the Heroes' Skills will be less potent or potentially useless (see Skills above).
Each scenario has been written for 1-3 players assuming control of three Heroes, one from each of the Archetype groups. Players may either play as the same Hero from one scenario to the next, trade who plays which Hero, or select an entirely new one from the archetype options.
Adding a Fourth Hero
To play with four Heroes, add a Hero from the Sellsword Archetype (see below) and increase the starting number of Overlord activations from 3 to 4. Be sure to follow the rules for adding a fourth player in the Options section of each scenario.
Warrior: Warriors are your heavy hitters, such as Conan and Olmec. These characters will be expected to deal death during every scenario.
The options for Warriors are: Afari, Ageera, Amra the Lion, Baal-Pteor, Conan, Conan Free Companion, Conan the Conqueror, Conan the Destroyer, Conan the General, Conan the Mercenary, Conan the Pirate, Conan the Thief, Conan the Wanderer, Conan the Warlord, Constantius, Ganbaattar, Gorm, Grom, King Conan, King Kull, Niord, Olgerd Vladislav, Olmec, Othryades, Pallantides, Shentu, Valeria the Warrior, Zaporavo, Achilles,* Brunhilde,* Heimdul,* Heracles,* Lagertha,* Osric,* Rudd,* Sonya,* Wulfhere.*
The following Heroes are considered warriors, but are not recommended for thematic reasons or due to their potential to affect balance: Conan the Berserker, Nameless Horror, Thak, Vanir Valkyrie, Winged One, Yogah of Yag.
Starting equipment: Conan's Sword
Rogue: Rogues rely on their dexterity and mobility in addition to their martial prowess. They can be very useful for securing objectives and/or acquiring equipment from chests.
The options for Rogue Heroes are: Amboola, Balthus, Bêlit, Bêlit the Princess, Brule, Conan the Rogue, Ghayoor, Ikhmet, N'Gora, Nestor, Niord, Octavia, Othna, Savage Bêlit, Shevatas, Taurus, Techotl, Zenobia, Asgrimm,* Aslaug,* Atalanta,* Bragi,* Tostig.*
Starting equipment: Pirate Saber, Shuriken
Sorcerer: Sorcerers are adept at casting spells. These spells provide aid to other Heroes, make themselves more difficult to hit, and/or allow them to deal their own share of damage.
The options for Sorcerer Heroes are: Atla, Hadrathus, N'Yaga, Pelias, Shubba, Skuthus, Taramis, Tascela, Xaltotun, Zelata, Gullveig,* Zelata the Wanderer.*
The following Heroes should be considered Sorcerers, but are not recommended for thematic reasons or due to their potential to affect balance: Tolkemec, Yogah of Yag, Zogar Sag, Hrym.*
Starting equipment: Sorcerer's Staff, Eldritch Lance (spell)
Sellsword (Fourth player option): Sellswords can fill many roles. Some are more adept at combat, while others play a supporting role. We recommend the following options for the most balanced experience: Aja, Amboola, Bêlit, Bêlit (Queen of the Black Coast), Bran Mak Morn, Constantius, Ikhmet, Kerim Shah, N'Gora, Nestor, Shafiah, Valeria, Valeria Free Companion, Hialmar,* Horsa,* Leonidas,* Odysseus,* Thorfinn.*
Starting equipment: Sword
*Crossover Heroes from the Mythic Battles product line.
Defeat
If all Heroes are killed during a scenario, or fail to meet the scenario's victory conditions, the Heroes suffer a Defeat and face the consequences. First, they lose one Victory Point from their pool (see Victory Points and Rank below). Additionally, they might not gain any or all the equipment available in the scenario (see individual scenario descriptions). Some scenarios include a few thematic punishments as well. All of these are detailed at the end of scenario descriptions.
Victory Points and Rank
To add an additional challenge to the already challenging scenarios, players may wish to run a tally of their accomplishments. At the end of each scenario, players will acquire Victory Points based on how well they did in the scenario. Each scenario details the victory conditions, but in general one Victory Point is awarded for each Hero that did not die during the scenario. Some scenarios will offer the players a chance to collect extra Victory Points. If Players suffer a Defeat, they lose one Victory Point from their pool (and gain zero, obviously). If they haven't collected any Victory Points when they suffer a defeat, their Victory Point tally drops to negative 1.
Hero Death
When a Hero dies, drop their Asset cards and remove that Hero from the game. Replace the miniature on the game board with a Mummy or Skeleton miniature to represent the Soulless. The Soulless activate at the end of every Overlord's turn (unless otherwise specified in a scenario). It is recommended to keep this tile nearby for every scenario in the City of the Howling Souls campaign.
For subsequent scenarios, the player will need to choose a different Hero and cannot reuse the dead Hero.
Victory Points and the Fourth Player Option
If you have decided to play one or more of the scenarios using the fourth player option, ignore the fourth player when calculating Victory Points. For example, if during a four player game, all four Heroes survive, they will only acquire 3 Victory Points.
Final Rank
At the end of the campaign, players should add up all the Victory Points they received during the campaign and compare their earnings to the chart below.
| Victory Points Total | Rank | Description |
|---|---|---|
| Up to 6 | Haunted | The howling of the tortured souls lingers in your nightmares. You don't sleep anymore, and take to drinking. Soon the tales you tell of that cursed city are merely a madman's ravings that no one heeds. |
| 7 - 10 | Unsettled | You don't often speak of your time in Xuchotl. There's no need to drag to memory the unnatural howls, tattered flesh and hollow eyes of your foes... and your friends who fell behind. |
| 11 - 14 | Vainglorious | Your exploits earn you wide renown. Opportunities for future adventure abound. The howls of the Soulless soon fade from your thoughts. |
| 15+ | Fortune Hunter | You are heralded as a Ghost Hunter, Dragon Slayer, and Savior of Souls. You earn plenty of coins embellishing your adventures, but do you dare accept the challenges that await in other distant web shrouded catacombs? |
City of the Howling Souls
Beware the City of the Howling Souls.
The scenario maps, River diagrams and Overlord tile counts are printed as diagrams on each scenario's pages and are not reproduced in this text. Follow the printed diagrams for board layout and tile placement.
Scenario 1: Escape from Xuchotl
Like the sun's glowing rays, the green mist moved inexorably closer as they fled down the great hallway. That damn rogue had promised them an entire city full of treasure with no one to guard it but the bones of the dead. They lost half their crew, and most of their gear, when that mist appeared and seared the flesh from their bones. Suddenly, noises stopped them in their tracks. Up ahead, the warrior saw a horde of angry natives emerging from closed doors, armed and ready for battle. With an angry glare at the rogue, the warrior shouted, "No time to explain. Let's loot any gear we find and escape quickly! And let that death-mist take the hindmost!"
Players: 3-4
Objective
If the Heroes open all 5 chests and at least one Hero reaches the Hidden Chamber before the end of turn 10, the Heroes win.
Setup
The game starts with the Heroes' turn.
After setup, each Hero moves 4 gems from their Reserve zone to their Fatigue zone.
Asset Deck
Chests require a simple Manipulation to open. The Asset deck contains: Leather Armor, Shuko, Sacrificial Dagger, Spellbook (Spectral Shroud), Zingaran Bow.
Special Rules
Game Board Rules: Standard game board rules apply.
Rope Placement: A Hero in an area with a pillar may perform a simple Manipulation and discard the Rope card to place a Rope token on that pillar. A Hero in an area with a Rope token may perform a simple Manipulation to remove the token from the board to pick up the Rope card.
Rope Use: A unit (Hero or Overlord) in an area with a Rope token may descend to the floor below by performing a complex Manipulation with a difficulty of 2 (Hero) or for 2 movement points (Overlord). Reduce these values to 1 if the unit has Climb. In addition, a unit with Climb in an area with a Rope token may ascend to the floor above by spending 2 movement points. Ascending is affected by hindering.
Doors: The door with the red border requires a complex Manipulation with a difficulty of 2 or Wall Wrecker to open. All other doors require a simple Manipulation to open.
Prisoner: A Stygian Captain is being held prisoner in the Cell. If a Hero opens the cell door, he joins the Heroes for the rest of the campaign. Any Hero with the Leadership skill may activate him following standard Ally rules. At the start of each scenario, place him in the same area as the Heroes (even if he died in the previous scenario).
Reanimation: Whenever a human Overlord unit is killed, remove it from the board and place a Soulless in the reinforcement area.
The Soulless: The Soulless cannot open doors.
Important: They activate at the END of every Overlord's turn. This counts as one of the Overlord's activations for the turn.
Behind Closed Doors: When the Tecuhltli Swordsmen tile is activated, only activate units whose door has been opened. If none of their doors have been opened, the activation is wasted.
Hidden Chamber: The Hidden Chamber's opening connects to the stairs in the bottom right area of the Xuchotl board as though it were a border WITH line of sight.
Options
Non-Campaign Mode
Cache: Conan's Sword, Pirate Saber, Shuriken, Sorcerer's Staff.
Spells: Eldritch Lance.
Four Player Mode
- Outer Dark Demon has 6 life points.
- At least one Hero must reach the Hidden Chamber by the end of turn 8 instead of turn 10.
- Reminder: The Overlord activates four times per turn.
Hero Victory: If the Heroes win, they are awarded 1 Victory Point for each Hero who reached the Hidden Chamber and all cards from the Asset deck.
Hero Defeat: If this scenario results in a Defeat, lose one Victory Point. Players choose 3 cards from the Asset deck to add to the Cache and proceed to the next scenario.
Scenario 2: Green Hell (Part 1)
The warrior paused to catch his breath. The catacombs beneath Xuchotl had been more ominous than deadly, but they had awakened something on their journey. It would be best to avoid returning to those web-filled halls. Thirst drove them toward the sound of rushing water. Soon the sight of a shipwrecked vessel's mast appeared through the trees. Fearful shouts and splashes echoed from the river.
"Look!" The rogue pointed to a creature in the river. Its massive tentacles pulled pirates and natives into the depths, drowning them before stuffing them into its gaping maw. Sensing their presence, the creature turned the heroes. The natives, too, turned with a deranged look in their eyes. As one, they attacked with a frenzied fury. Only the pirates seemed unfazed, though that offered little consolation, since the object of their attention was the shipwrecked treasure.
Players: 3-4
Objective
If the Heroes kill Thaug before the end of turn 10 without letting the Pirates escape with any chests, the Heroes win.
Setup
The game starts with the Overlord's turn. The Heroes start in the area marked 1. Shuffle the following Asset cards and randomly place them face-down as indicated: Explosive Orb, Key, Life Potion.
After setup, each Hero moves 0 gems from their Reserve zone to their Fatigue zone.
Asset Deck
To open a chest, a Hero must have the Key and perform a simple Manipulation. The Asset deck contains: Battle Axe, Chain Mail, Harpoon, Shield, Spellbook (Archer of Acheron).
Special Rules
Game Board Rules: Standard game board rules apply, except for the Deep Water rule modified as follows.
Deep Water: Heroes cannot make Ranged Attacks while in a Deep Water area, and their Melee Attack attribute level is reduced by one color (red to orange, orange to yellow).
Dropped Loot: A Hero in an area with a face-down Asset card may perform a simple Manipulation to search the area and take the card.
Pirates: The Pirates are trying to steal the chests. They spend ALL movement points trying to reach the closest area with a chest. When moving, Pirates will avoid hindering if possible. Pirates will only attack a Hero if they end their activation in the area with a Hero.
Every time the Pirates tile is activated, first add a Pirate miniature to each reinforcement area.
If a Pirate activates in an area with a chest that is not being carried, they pick it up and move towards the closest area with a reinforcement area token.
If a Pirate carrying a chest enters a reinforcement area, the Heroes lose.
Chests: Chests have an Encumbrance value of 5.
Tentacles: Tentacles are attempting to pull Heroes into the River. Tentacles target the Strongest Hero in range who isn't Constricted. If the only Heroes in range are already Constricted, they will attack the Strongest Constricted Hero but will NOT constrict them again. When activating Tentacles, begin with those closest to their target.
If a Tentacle activates while Constricting a Hero, instead of attacking it will move 1 area closer to a Deep Water area. If it is already in a Deep Water area, it drowns that Hero, regardless of whether or not the Hero has the Swimming skill.
Flailing: If a Hero is pulled from a land area into a Deep Water area by a Tentacle via Constriction, the Hero does not drown immediately until the Tentacle's next activation. The Hero is not considered to be Swimming, but may only attack that Tentacle. If the Tentacle Constricting them is killed, the Hero returns to an adjacent land area of their choice.
Thaug: When Thaug activates, it performs the following actions in order:
- If one or more Heroes are in Deep Water areas, Thaug moves to the area with the Strongest Hero and attacks that Hero.
- Casts Dagon's Attack to activate 3 Tentacles. When moving, Tentacles will stay as close as possible to a Deep Water area while still being able to reach their target.
Events
Perform the following actions in order:
- Regenerate: Add 1 Tentacle to Thaug's area. If Thaug's area is occupied, place them in an adjacent water area.
- Onward!: Activate all Pirates.
Thaug has the spell Dagon's Attack.
Options
Non-Campaign Mode
Cache: Conan's Sword, Leather Armor, Pirate Saber, Sacrificial Dagger, Shuriken, Shuko, Sorcerer's Staff, Zingaran Bow.
Spells: Eldritch Lance, Spectral Shroud.
Four Player Mode
- Thaug has 6 life points. Dagon's Attack activates 4 Tentacles instead of 3.
- The Heroes must kill Thaug by the end of turn 9 instead of turn 10.
- Reminder: The Overlord activates four times per turn.
Hero Victory: If the Heroes win, they are awarded 1 Victory Point for each Hero who survived and all cards from the Asset deck.
Hero Defeat: If this scenario results in a Defeat, lose one Victory Point. Players choose 3 cards from the Asset deck to add to the Cache and proceed to the next scenario.
Scenario 3: Green Hell (Part 2)
"By Crom! What just happened?" the warrior exclaimed as he surveyed the bloody carcasses scattered around them. "I don't know," the sorcerer replied, "but something unnatural possessed that creature. Did you see how it focused all of its attention on us?"
The rogue covered his nose with a cloth, adding, "Yes, something wicked is happening here. And this stench will attract predators for miles. I don't want to be here when they arrive."
"Too late," the warrior shouted, pointing to the trees across the river. "Something's coming. Something big!"
Players: 3-4
Objective
If the Heroes kill the Dragon of Xuchotl before the end of turn 10, the Heroes win.
Setup
The game starts with the Overlord's turn. The Heroes start in the area marked 1. Place 1 Apple of Derketo on the board to represent an Apple of Derketo.
After setup, each Hero moves 0 gems from their Reserve zone to their Fatigue zone.
Asset Deck
Chests require a complex Manipulation with a difficulty of 2 to open. The Asset deck contains: Empty Chest x2, Life Potion x2, Spellbook (Mitra's Healing), Two-Handed Sword.
Special Rules
Game Board Rules: Standard game board rules apply.
Dragon: The Dragon of Xuchotl targets the Strongest Hero. Contrary to standard rules, its Reach ability allows it to attack units at a different elevation as long as it has line of sight. The Dragon does not lose life points except by poison (see Poisoning the Dragon). If the Dragon ever activates and cannot reach any target, move it to the nearest area adjacent to a Deep Water area and remove 1 Apple of Derketo from its tile (if possible).
Camel: The Camel tries to exit the board from the area with the 3 token. When moving, the Camel will avoid hindering if possible. Whenever a Camel is killed, lay the miniature down and add a chest to the area.
Crocodiles: Whenever a Crocodile is killed, flip the miniature upside down.
Apples of Derketo: The Apples of Derketo grow on the side of the cliff. A Hero in the area with the 1 token may perform a simple Manipulation to move 1 Apple of Derketo from the board to their Hero sheet, or a complex Manipulation with a difficulty of 4 for a Hero in the area with the 2 token. Apples cannot be traded, dropped, or thrown.
Poisoning the Dragon: A Hero can apply poison to a melee or ranged weapon with a simple Manipulation by discarding 1 Apple of Derketo. Move the Apple of Derketo to the Weapon card. Poison lasts for 1 attack. If that attack exceeds the Dragon of Xuchotl's Armor, place the Apple of Derketo on the Dragon's tile. Otherwise, discard the apple on the Weapon card. At the start of the Overlord's turn, the Dragon suffers 1 unavoidable damage for each Apple of Derketo on its tile.
Events
When an Event tile is activated, roll an orange die and trigger the Event corresponding to the result:
- Blank: Activate the Crocodiles and the Camel. Then, reinforce all dead Crocodiles. If the Camel has died or exited the board, reinforce the Camel in its starting location.
- One: Activate the Dragon of Xuchotl. If there is a laid down Crocodile or Camel in range, the Dragon moves to that area and eats one. Remove the laid down miniature and increase the Dragon's life points by 2 (15 max). Otherwise, the Dragon targets the Strongest Hero. Either way, add 1 Apple of Derketo to the Apple of Derketo starting area.
- Two (Event Tile 1 - Stomp): All Heroes in or adjacent to the Dragon of Xuchotl's area move 2 gems from their Reserve Zone to their Fatigue Zone (if possible).
- Two (Event Tile 2 - Charge): Activate the Dragon of Xuchotl with an additional 2 movement points (for a total of 5). Target the furthest Hero it can reach and choose a route that passes through the most areas with Heroes/Allies (without backtracking). Perform a Melee Attack with two red dice against each Hero/Ally in every area the Dragon enters (including the destination area).
- Two (Event 3 Tile - Swipe): Activate the Dragon of Xuchotl. Apply the attack dice to all Heroes/Allies in the area with the Dragon's target. Each Hero/Ally use their own Guard and Armor. Sacrifice, Bodyguard, and Protected have no effect for this attack.
Options
Non-Campaign Mode
Cache: Battle Axe, Conan's Sword, Chain Mail, Leather Armor, Pirate Saber, Sacrificial Dagger, Shield, Shuriken, Shuko, Sorcerer's Staff, Zingaran Bow.
Spells: Archer of Acheron, Eldritch Lance, Spectral Shroud.
Four Player Mode
- The Dragon of Xuchotl has 8 life points.
- Reminder: The Overlord activates four times per turn.
Hero Victory: If the Heroes win, they are awarded 1 Victory Point for each Hero who survived and any cards they recovered from the chests. For each Camel that exited the board, remove one card from the remaining Asset deck. The Heroes receive all remaining cards.
Hero Defeat: If this scenario results in a Defeat, lose one Victory Point. The Heroes may keep any cards they recovered from chests and proceed to the next scenario.
Scenario 4: Dredge the Waters
The warrior's boots sank into the mud beneath the knee-high water as a water snake swam towards him. He cursed the foul magic that had turned the creatures in Darfar against them. "Tell me again about this black stone we're searching for?"
Trying, and failing, to keep his robes dry, the sorcerer responded, "According to the expedition journal from that shipwrecked vessel, Xuchotl is cursed, as are all who enter it. Nature is attempting to cleanse the world, as if we are some abomination. Dissenters from the city stole the stone almost a decade ago, and its power protects them from the curse."
With a swift motion, the warrior grabbed the approaching snake by the neck and severed its head. "Let's hope this infernal orb can end this curse. And woe to anyone who tries to keep us from it!"
Players: 3-4
Objective
Heroes must find the Black Stone and place it on the altar in the center of the village.
Setup
The game starts with the Heroes' turn. The Heroes start in the areas marked 1. Randomly shuffle Numbered tokens 4-9 and place them face-down on as indicated on the setup diagram.
After setup, each Hero moves 4 gems from their Reserve zone to their Fatigue zone.
Special Rules
Some units in the River will not activate until their Activation tokens have been added to the Activation token pool (see Searching for the Black Stone).
Game Board Rules: Standard game board rules apply except a unit with Climb must only spend 1 extra movement point to move from a water area to a wood/platform area and units with Swimming do not pay extra to move between water areas.
Encumbrance: In water areas, the Encumbrance value of each Asset card is increased by 1. Note: Melee weapons must still have a printed Encumbrance value of 3 or higher to be considered 2-handed weapons.
Whip: A Rogue with the Whip does not pay extra to move from a water area to a wood/platform area, does not increase the Encumbrance value of their Asset cards in water areas, and may use a simple Manipulation to search for the Black Stone.
Outer Dark Demon: Targets the Strongest Hero that flipped a Numbered token in the previous turn. If no Hero flipped a token last turn, the Outer Dark Demon targets the Strongest Hero. If the Outer Dark Demon is wounded, instead of taking damage, return it to its start area.
Unwanted Attention: If an Activation token is drawn that cannot activate any units and would otherwise be wasted, activate the Outer Dark Demon instead.
Leap: If a Hero fails to Leap, the Hero remains in their area. Overlord units do not use Leap.
Searching for the Black Stone: A Hero in an area with a Numbered token may perform a complex Manipulation with a difficulty of 1 to search the area and flip over a Numbered token. Apply the effects immediately.
- Numbered token 4: Add Activation token 4 to the Activation token pool. Place 5 Xotalanc Warriors, 1 per Reinforcement area. Xotalanc Warriors target the Strongest Hero.
- Numbered token 5: Add Activation token 5 to the Activation token pool. Place 3 Xotalanc Hunters, 1 per Reinforcement area.
- Numbered token 6: Add Activation token 6 to the Activation token pool. Place 3 Xotalanc Huntresses, 1 per Reinforcement area.
- Numbered tokens 7 and 8: Add the corresponding Activation token to the Activation token pool.
- Numbered token 9 (Slippery): Move each Hero in a wood/platform area into an adjacent water area. A Hero with Leap can use Leap with a difficulty of 2 to remain on the wood/platform area.
Once the last Numbered token is flipped over and the effects applied, the Hero who performed the search takes the Black Stone card.
Events
Event 1: Reinforce up to 2 Crocodiles and 2 Hyenas, 1 per Reinforcement area. Activate the Outer Dark Demon.
Event 2: Reinforce up to 2 Xotalanc Warriors, 2 Xotalanc Hunters and 2 Xotalanc Huntresses, 1 per Reinforcement area. Activate the Outer Dark Demon.
Options
Non-Campaign Mode
Cache: Battle Axe, Conan's Sword, Chain Mail, Leather Armor, Pirate Saber, Sacrificial Dagger, Shield, Shuriken, Shuko, Sorcerer's Staff, Two-handed Sword, Zingaran Bow.
Spells: Archer of Acheron, Eldritch Lance, Mitra's Healing, Spectral Shroud.
Four Player Mode
- After setup, each Hero moves 5 gems from their Reserve zone to their Fatigue zone.
- Reminder: The Overlord activates four times per turn.
Hero Victory: If the Heroes win, they are awarded 1 Victory Point for each Hero who survives.
Hero Defeat: If this scenario results in a Defeat, lose one Victory Point and replay the scenario.
Scenario 4.5: The Deep Unknown
They paused at the entrance to the catacombs. "I sense black magic and wizardry in these dark tunnels. I tell you, our previous journey through these catacombs woke some dark evil," the warrior said.
"I agree," the sorcerer whispered, eyeing the darkness. "But with great danger comes great power. I sense these decrepit tombs hold magic from an ancient kingdom, and even a small taste of these treasures could aid us in the next part of our quest."
The rogue's eyes lit up at the word treasure, but quickly lost interest. "I vote we get in and out as quickly as possible. I've risked my life for treasure before, but I'll pass on anything from these cursed tombs."
Players: 3-4
This is an optional scenario, indicated by .5 after its campaign number.
Objective
The game ends once the last surviving Hero escapes. If all the Heroes are killed and none escaped, the scenario ends in defeat.
Setup
Form a Spell deck with the following Spell cards: Changing Destiny, Deceleration, Set's Bite, Lightning Storm, Tears of Dagon, Withering.
The game starts with the Overlord's turn. The Heroes start in the areas marked 1.
After setup, each Hero moves 2 gems from their Reserve zone to their Fatigue zone.
Special Rules
Game Board Rules: Standard game board rules apply. A Hero with Climb must spend 2 extra movement points to cross a border with a Web token. Overlord units may cross borders with a Web token for no extra cost. Web tokens on borders block line of sight. Borders with a Boulder token cannot be crossed and block line of sight.
Escape: A Hero may exit the board from a reinforcement area by spending movement points as though crossing a border. A Hero that escapes the board is NOT considered to be killed; they are still counted for the number of Activation tokens to be drawn.
Skulls of My Enemies: When the Burning Skull is killed, lay the miniature down in the area instead of removing it from the board. The Burning Skull's skills are still in effect. A Hero who is not under the effects of Fascination can perform a complex Manipulation with a difficulty of 2 to crush the skull and receive a brown rectangular token (the token is shown as a printed icon; the rulebook does not name it in text). When the skull is crushed, return the Burning Skull to its starting area and stand it up.
Burning Skull: If the Burning Skull is laying down when activated, stand it back up and activate it as normal.
Crawler: Targets the Strongest Hero.
Giant Spider: Attacks the closest Hero with a Web token. If no Hero has a Web token, the Giant Spider will use Web Projection on the closest Hero, if it isn't hindered, instead of its attack. If it is hindered, the Giant Spider will attack a Hero in its area.
Events
Event 1 - Pipes of Madness: "A strange, alluring music echoes throughout the catacombs." Move each Hero and Ally 1 area away from the Burning Skull's area. Hindering does not apply. The Heroes and Ally are considered to be under the effects of the Burning Skull's Fascination skill again.
Event 2 - Black Magic and Wizardry: The players choose a Hero or Ally. Draw a spell from the Spell deck and apply the effects to that Hero, Ally, or their area as if they were the target of the spell. When the last card is drawn from the Spell deck, reshuffle all the spells to form a new deck.
Event 3 - Invoked out of Darkness: Do the following in order:
- Reinforce 1 Flaming Skeleton in each reinforcement area.
- Reinforce the Crawler and the Giant Spider to their starting areas.
- Activate all units reinforced during this Event.
Hero Victory and Defeat
Hero Victory: At the end of the game, the players are not awarded Victory Points but each surviving Hero with a Treasure token randomly draws one of the following:
- Spellbook: Add the Stone Skin spell to the Cache.
- Unguent: A pot filled with a vile venom. A Hero with the Zingaran Bow may dip their arrows into the liquid. Discard the Zingaran Bow and the Unguent to replace them with the Bow of Set.
- Pipes of Madness: A Hero may discard the Pipes of Madness to gain the effects of the Mind Control spell (up to 3 movement points) for 1 turn. This does not require any gems and the user does not need to have the Spell Caster skill to use.
In Four Player Mode, add the following card:
- Phial: A Hero may discard the Phial to gain the effects of the Bel's Hand spell for 1 turn. This does not require any gems and the user does not need to have the Spell Caster skill to use.
Hero Defeat: The Heroes do not lose Victory Points and proceed to the next scenario.
Options
Non-Campaign Mode
Cache: Battle Axe, Conan's Sword, Chain Mail, Leather Armor, Pirate Saber, Sacrificial Dagger, Shield, Shuriken, Shuko, Sorcerer's Staff, Two-handed Sword, Whip, Zingaran Bow.
Spells: Archer of Acheron, Eldritch Lance, Mitra's Healing, Spectral Shroud.
Four Player Mode
- The Giant Spider and Crawler each have 4 life points.
- After setup, each Hero moves 4 gems from their Reserve zone to their Fatigue zone.
- Reminder: The Overlord activates four times per turn.
Scenario 5: Redemption of Souls
The black stone grew warm when they emerged from the catacombs. Its etching began swirling like lost souls trapped inside. Deep, rumbling quakes began soon after, shaking the very foundations of the city.
The inhabitants had returned, or else they had been immune to the green mist. When the inhabitants saw them, the warrior recognized the bloodlust in their eyes, but also something else. Fear. Were they afraid of the black stone? Or were they tied to the curse, as one with the stone? Suddenly he realized what they needed to do.
"We need to free their souls," he shouted. "They aren't human, they are the curse!" Just then, the ground heaved and a piece of stone fell from the ceiling, clattering across the balcony. Soon the entire hall would be rubble, and its destruction would end their chance to remove the curse.
Players: 3-4
Objective
If the Heroes eliminate all enemies before 7 brown stone tokens are placed, the Heroes win.
Setup
The game starts with the Heroes' turn. The Heroes start in the areas marked 1.
After setup, each Hero moves 0 gems from their Reserve zone to their Fatigue zone.
Asset Deck
Chests require a complex Manipulation with a difficulty of 2 to open. The Asset deck contains: Spellbook (Lightning Storm), Life Potion x2, Rope. If the Heroes already have the Rope in their Cache, replace it with an Empty Chest.
Special Rules
Game Board Rules: Standard game board rules apply.
Doors: The balcony door requires a complex Manipulation with a difficulty of 3 or Wall Wrecker to open. The door with the red border requires a simple Manipulation by a Hero with the Key. Overlord units will not move if there is a door between them and their Target Hero, except for the Soulless, who will move to the door and wait for a Hero to open it.
Crumbled Pillars: Any area adjacent to a pillar with a brown stone token costs 2 extra movement points to enter. A Hero with Climb, the Whip, or the Rope spends only 1 extra movement point. Overlord units are not affected by the Crumbled Pillars.
The Soulless: When a Xotalanc Hunter or Tecuhltli Swordsman is killed, remove their miniature from the board and place a Soulless miniature in the Hidden Chamber. The Soulless cannot open doors.
Caged Threat: If the Heroes did not rescue the Stygian Captain in Scenario 1: Escape from Xuchotl, replace the Crawler with the Bone Golem. This unit (whether the Bone Golem or the Crawler) targets the Strongest Hero.
Khosatral Khel: Khosatral Khel can only be wounded by the Jade Wand. He targets the Hero with the Jade Wand. If no Hero has the Jade Wand, he targets the Strongest Hero.
Relentless: If a tile is activated and the activation would be wasted, activate all the Soulless instead. If there are no Soulless to activate, place 1 Soulless in the Hidden Chamber.
Tolkemec: Tolkemec cannot be wounded except by a Hero using the Black Stone on him while he is captured (see Grab Him! and F*ck Your Sorcery!). When Tolkemec is killed, place the Jade Wand in his area.
Grab Him!: A Hero in the same area as Tolkemec with the Whip or Rope can perform a complex Manipulation with a difficulty of 1 to capture Tolkemec. He remains captured until the start of the next Overlord's turn.
F*ck Your Sorcery!: A Hero with the Black Stone in the same area as a captured Tolkemec can attack him using Manipulation instead of a Melee Attack. The Black Stone provides no additional dice.
Silence the Howling: A Hero in the Hidden Chamber may remove the Black Stone from the game with a simple Manipulation. Once it is removed, Overlord units no longer reinforce and the Soulless are no longer added.
Hidden Chamber: The Hidden Chamber's opening connects to the stairs in the bottom right area of the Xuchotl gameboard as though it were a border WITH line of sight.
Event
Do the following in this order:
- Reinforce 1 Flaming Skeleton, 1 Xotalanc Hunter and 1 Tecuhltli Swordsman and the Crawler (or Bone Golem). 1 unit per reinforcement token.
- Place a brown stone token on one of the pillars marked 2.
- Activate Tolkemec.
Hero Victory and Defeat
Hero Victory: If the Heroes win, they are awarded 1 Victory Point for each Hero who survived. Consult the Victory Chart on page 15 to see how history will remember you.
Hero Defeat: If this scenario results in a Defeat, lose one Victory Point. Consult the Victory Chart on page 15 to see how history will remember you.
Options
Non-Campaign Mode
Cache: Battle Axe, Black Stone, Conan's Sword, Chain Mail, Leather Armor, Pirate Saber, Sacrificial Dagger, Shield, Shuriken, Shuko, Sorcerer's Staff, Two-handed Sword, Whip, Zingaran Bow.
Spells: Archer of Acheron, Eldritch Lance, Mitra's Healing, Spectral Shroud.
Four Player Mode
- Tolkemec has 12 life points. Khosatral Khel has 8.
- Reminder: The Overlord activates four times per turn.
Adventure Mode
The scenario maps (miniature placement and tile layout) are printed as diagrams on each scenario's pages and are not reproduced in this text. The text below is the printed text of each scenario.
Taming The Dragon (3 Players)
Conan crept forward through the dark jungle in the depths of Darfar. Up ahead, he spied Valeria moving lithely through the tropical vegetation. Her head perked up and he froze, listening for the sound of whatever caught her attention. With a beastly howl, Pictish warriors emerged from the brush all around them.
Conan drew his sword and the Picts paused, as if sensing their prey would not be as easy as they initially thought. Their war cry changed pitch into a series of guttural roars, as if calling for help. Conan tensed, ready to spring at the lead warrior when the guttural roars echoed back from the forest, far louder than the Picts had chanted and accompanied a thunderous shaking. Suddenly, a dragon emerged from the forest. Shockingly, it ignored the Picts and almost seemed to obey them. How could this tribe have domesticated such a terrible creature? Determination gripped Conan. Not only would they need to defeat the Picts, but this monstrous beast as well.
Winning the Game
To win, the Heroes must slay the Dragon of Xuchotl to scare away the Picts.
To win, the Overlord must kill both Heroes.
Setup
The game starts with the Heroes' turn. The Heroes start in the areas indicated by the setup diagram.
Heroes:
- Conan Free Companion (Battle Axe, Leather Armor, Life Potion), commands 2 Pirates
- Valeria Free Companion (Sword, Dagger, Leather Armor, Throwing Knives, Life Potion)
After setup, each Hero moves 4 gems from their Reserve zone to their Fatigue zone.
The Overlord starts with 8 gems in their Reserve zone and 4 in their Fatigue zone, and places the Recovery token showing a recovery value of 5 in the Book of Skelos.
The Overlord chooses one event:
- Reinforcement: Gain 3 reinforcement points.
- Attack: Activate the Dragon of Xuchotl without moving its tile.
Special Rules
Game Board Rules: Standard game board rules apply.
Setup: During setup, the Overlord takes 4 Chest tokens marked 1 (which represent Thick Branches) and 4 Chest tokens marked 2 (which represent poisonous Apples of Derketo) and places them as they wish face down in the indicated areas.
Thick Hide: Heroes cannot damage the Dragon of Xuchotl until it has 2 Poison Spear tokens on its tile.
Makeshift Supplies: Heroes need to find supplies and build a weapon to weaken the Dragon of Xuchotl. A Hero can have a maximum of 2 Thick Branches and 2 Apples of Derketo at a time. A Hero in an area with a face down Chest token can search the area by performing a complex Manipulation with a difficulty of 1 to flip the token and take it if possible. Otherwise, leave it face up in the area. A Hero in an area with a face up Chest token can pick it up by performing a simple Manipulation. Thick Branches and Apples of Derketo have an Encumbrance value of 0.
Make a Poison Spear: A Hero with 2 Thick Branches tokens and 2 Apple of Derketo tokens may perform a complex Manipulation with a difficulty of 1 to make a Poison Spear. Discard all 4 Chest tokens and take 1 token (which represents a Poison Spear). This has an Encumbrance value of 0 and can only be used to poison the Dragon of Xuchotl. A Hero can have 2 Poison Spear tokens.
Poison the Dragon: A Hero with a Poison Spear may attempt to poison the Dragon of Xuchotl by rolling 2 successes with a Melee Attack. The attack does not need to exceed the Dragon's Armor and the Overlord cannot Guard against this attack. However, this attack does not benefit from Weapon or Item cards Attack bonuses. If the attack succeeds, place the Poison Spear token on the Dragon's tile. Then the Overlord removes 1 energy gem from the Book of Skelos (from the zone of the Overlord's choice) and the Dragon loses 1 point of Armor. If the attack fails, the Hero keeps the Poison Spear token.
Enraged: If the Dragon of Xuchotl has 2 Poison Spear tokens when it activates, the Overlord must move the Dragon towards the closest Hero and attack them if possible. In the event of a tie, the Overlord chooses which Hero to attack.
Door of the Eagle (4 Players)
Valeria shivered in spite of herself. She feared no man. But the weird floor beneath her feet, the uncanny jewels over her head, dividing the lurking shadows among them, the stealth and terror of their guide, impressed her with a nameless apprehension, a sensation of lurking, inhuman peril.
Techotl smote on the bronze door with his clenched hand, and then turned sidewise, so that he could watch back along the hall. "Men have been smitten down before this door, when they thought they were safe," he said. He lifted his voice and called: "Open the door, Xecelan! It is I, Techotl, with friends from the great world beyond the forest!—They will open," he assured his allies. "They'd better do it in a hurry, then," said Conan grimly. "I hear something crawling along the floor beyond the hall."
Techotl went ashy again and attacked the door with his fists, screaming: "Open, you fools, open! The Crawler is at our heels!"
Winning the Game
The Heroes must topple the Red Nails pillar before the end of turn 12 to win.
The Overlord must keep the Red Nails pillar from being toppled by the end of turn 12 to win.
Setup
The game starts with the Heroes' turn. The Heroes start in the areas indicated by the setup diagram.
Heroes:
- Conan (Turanian Sword, Dagger, Zingaran Breastplate, Life Potion)
- Valeria (Whip, Parrying Dagger, Throwing Knives, Leather Armor)
- Techotl (Sword, Leather Armor, Kris, Life Potion)
After setup, each Hero moves 0 gems from their Reserve zone to their Fatigue zone.
The Overlord starts with 0 gems in their Reserve zone and 10 in their Fatigue zone, and places the Recovery token showing a recovery value of 3 in the Book of Skelos.
Reinforcements: The Overlord gains 2 reinforcement points.
Special Rules
Game Board Rules: Standard game board rules apply.
Setup: The Overlord shuffles 3 Stairs tokens (1 green, 2 red) and places them face-down as indicated on the setup diagram. Then the Overlord shuffles the Numbered tokens 1 through 12 (or the Scenario cards, see page 5) and randomly places six of them face-down in the rooms indicated. Remove the extra tokens/cards from the game without looking at them.
Printed note: the cross-reference above reads "see page 5". The Scenario Cards are explained on page 7 of this rulebook; the reference is transcribed as printed.
Rope Placement: A Hero in an area with a pillar may perform a simple Manipulation and discard the Whip card to place a Rope token on that pillar. A Hero in an area with a Rope token may perform a simple Manipulation to remove the token from the board to pick up the Whip card.
Rope Use: A unit (Hero or Overlord) in an area with a Rope token may descend to the floor below by performing a complex Manipulation with a difficulty of 2 (Hero) or for 2 movement points (Overlord). Reduce these values to 1 if the unit has Climb. In addition, a unit with Climb in an area with a Rope token may ascend to the floor above by spending 2 movement points. Ascending is affected by hindering.
Doors: The door with the red border can never be opened by the Heroes or removed from the board. Overlord units may move freely through this door as if it were a border. The door with a blue border can only be opened by a Hero with the Pipes of Madness performing a simple Manipulation. All other doors can be opened with a complex Manipulation with a difficulty of 2 or Wall Wrecker.
Room Events: The Numbered tokens/Scenario cards represent Room Events. Whenever a door is opened, reveal the token or corresponding Scenario card and perform both actions on the Scenario card.
Stairs: When a Hero enters an area with a Stairs token, flip the token. If there is a red X on the other side, remove the token. It is a dead end. If there is a green check on the other side, it represents a hidden stairway that connects to the Stairs token in the Hidden Chamber. The area with the green Stairs token now connects with the Hidden Chamber as though it were a border WITHOUT line of sight.
Hidden Chamber: The Hidden Chamber's opening connects to the stairs in the bottom right area of the Xuchotl board as though it were a border WITH line of sight.
Red Nails Pillar: The pillar on the dais 1 represents the cycle of violence that needs to end. A Hero in an area adjacent to the pillar may topple it by performing a complex Manipulation with a difficulty of 13. Reduce this difficulty by 2 for each Room Event revealed.
Chests: Chests require a complex Manipulation with a difficulty of 1 to open. The Asset deck contains: Pipes of Madness, Chain Mail, Life Potion x2, Stygian Scepter, Halberd. The Pipes of Madness cannot be destroyed. If an effect would destroy them, choose another item instead.
The Mad Tyrant (5 Players)
Conan awoke gradually as the drums banging inside his skull subsided into dull thumps. As his eyes opened, Olmec's hulking figure came into focus over him. With a start, Conan leapt up and slammed the king against the steel bars of their cage. "What treachery is this?" Conan shouted. Olmec held his hands up in a sign of appeasement. "It's that madman Tolkemec. He's imprisoned Valeria and Tascela in his chambers, and guards us with his warriors and pet dragon." Footsteps alerted Conan to the arrival of two allies, whose faces dropped when they saw the locked gate. With a laugh, Conan said, "Let's bust this door down and rescue the women!"
In the chambers near the throne room, the soldiers still loyal to Tascela knelt in obeisance, awaiting her command. "Well," Valeria shouted through the hallway, "what are we waiting for? Let's kill this tyrant and rescue the men!"
Winning the Game
Conan & Valeria win if the Dragon of Xuchotl and Tolkemec are killed before the end of turn 10 and they are both still alive. Olmec and Tascela win if the Dragon and Tolkemec are killed before the end of turn 10 and they are both still alive.
The Overlord wins immediately if either Conan or Valeria AND either Olmec or Tascela are killed - or if either the Dragon or Tolkemec are still alive at the end of turn 10.
Setup
The game starts with the Heroes' turn. The Heroes start in the areas indicated by the setup diagram.
Heroes:
- Conan (Dagger), commands Stygian Captain
- Valeria (Pirate Saber, Leather Armor)
- Olmec (Dagger), commands Techotl
- Tascela (Stygian Scepter, spell: Enthrallment), commands 4 Tecuhltli Swordsmen
After setup, each Hero moves 4 gems from their Reserve zone to their Fatigue zone.
The Overlord starts with 6 gems in their Reserve zone and 6 in their Fatigue zone, and places the Recovery token showing a recovery value of 3 in the Book of Skelos.
Reinforcements: The Overlord gains 4 reinforcement points. Only one unit can be reinforced in each reinforcement area.
Tolkemec has the Jade Wand.
Special Rules
Game Board Rules: Standard game board rules apply.
Hidden Chamber: The Hidden Chamber's opening connects to the stairs in the bottom right area of the Xuchotl board as though it were a border WITH line of sight.
Setup: During setup, the Overlord shuffles the 13 Treasure tokens and places them facedown as indicated on the setup diagram.
Doors: The door with the red border can only be opened by a Hero using Wall Wrecker. The door with the blue border opens automatically when the Dragon of Xuchotl is killed or if the Energy Globe is shattered. All other doors can be opened with a simple Manipulation.
Indestructible: The Dragon of Xuchotl cannot be harmed except by melee weapons that have been dipped in poison. Tolkemec cannot be harmed until the Energy Globe is shattered.
Energy Globe: A Hero with the Tools card in the same area as the Energy Globe may shatter it with a simple Manipulation.
Dragon: The Dragon of Xuchotl cannot climb stairs. Contrary to standard rules, its Reach ability allows the Dragon to attack units at a different elevation as long as it has line of sight.
Makeshift Tools: Treasure tokens represent various items throughout the area. A Hero in an area with a facedown Treasure token may perform a simple Manipulation to search for components. Flip the token. If the number of the reverse side is 1, the item is trash: remove it from the game. If the number is 2, the item is usable: keep it. These tokens have an Encumbrance value of 0 and may be dropped, thrown, or traded like other items. As a free action, a Hero with four tokens may exchange them for the Tools card.
Mixed Motivations: If Conan or Valeria dies, remove them both from the board, since the survivor has lost the motivation to continue with the rescue. If Olmec or Tascela dies, remove them both from the board for the same reason. In either case, the remaining Heroes recover gems as though two Heroes had died.
Mixing the Poison: A Hero adjacent to the bath marked 1 may discard the Phial to poison the water. Afterwards, any Hero adjacent to the bath may dip their weapon in the poison as a free action. The poison lasts for the remainder of the game.
Chests: Chests require a complex Manipulation with a difficulty of 1 to open. The Asset deck contains: Chain Mail, Halberd, Life Potion x2, Phial, Shield.
Dragons Fell Upon Them (5 Players)
"Aye. More than half a century ago a tribe of the Tlazitlans rebelled against the Stygian king, and, being defeated in battle, fled southward… a thousand fighting-men with their women and children. It was in the forest that the dragons fell upon them, and tore many to pieces; so the people fled in a frenzy of fear before them, and at last came into the plain and saw the city of Xuchotl in the midst of it. The people of the city shut their gates and shot arrows at our people from the walls."
Olmec - Red Nails, R.E. Howard
Winning the Game
The Heroes win if 5 Tlazitlans and both Sacred Treasures have exited the board.
The Overlord wins if 7 Tlazitlans are killed or if the Heroes fail to get both Sacred Treasures off the board.
Setup
The Heroes start in the areas indicated by the setup diagram.
Heroes:
- Olmec (Turanian Sword), commands 4 Tlazitlans with a purple base
- Techotl (Sword), commands 4 Tlazitlans with a red base
- Tascela (Mitra's Staff, Shuko, spell: Protective Circle), commands 4 Tlazitlans with a blue base
- Tolkemec (Sorcerer's Staff, Shuriken, spells: Mind Control, Drying Earth)
After setup, each Hero moves 0 gems from their Reserve zone to their Fatigue zone.
The game starts with the Overlord's turn. The Overlord starts with 1 gem in their Reserve zone and 3 in their Fatigue zone, and places the Recovery token showing a recovery value of 3 in the Book of Skelos.
Event: Dragons Fell Upon Them
Do the following in order:
- Activate the Dragon token.
- Choose 1 of the following:
- 3 Reinforcement Points. Xuchotlan Archer reinforcements must be placed in a cliff area of the Overlord's choosing and Crocodile reinforcements must be placed in a water area.
- Activate the Crocodiles. Crocodiles in water areas are submerged and may not be attacked.
Special Rules
Game Board Rules: Standard game board rules apply.
Setup: Place the Dragon of Xuchotl in the bottom right area of the board, as indicated in the setup diagram. Then, place the Dragon token in the area with the 1. This Dragon token represents a second Dragon that is identical to the Dragon of Xuchotl for all purposes and is activated by the Event tile. Place the Crocodiles tile near the Book of Skelos to be used as a reference, but do not place it in the River with the other tiles. Crocodiles can only be activated by the Event tile.
Tlazitlans: Regardless of their colored base, all Tlazitlans have the same characteristics.
Battlefield Promotion: If a Hero with Leadership is killed or flees the board, their Allies may be commanded by any other Hero with Leadership. When the last Hero is killed, the Tlazitlans still on the board are immediately devoured by the Dragon.
Shot Arrows from the Walls: The Xuchotlan Archers cannot leave the cliff top areas.
Tore Many to Pieces: Before a Tlazitlan can enter an area with a Skull Pile, the Hero that activated the unit must first make a complex Manipulation with a difficulty of 2. If the complex Manipulation fails, the Tlazitlan's movement ends in its current area.
Dragons Are Immortal: The Dragon of Xuchotl and the Dragon token cannot be killed. When wounded, instead of taking damage the Overlord must move it into an adjacent area.
Crashing through the Woods: Place a token (shown as a round brown icon in the printed rules; the text does not name it) in any area where the Dragon of Xuchotl or Dragon token end their activation (maximum 1 per area).
Unstable Areas: Areas with these tokens are considered unstable. It costs 2 extra movement points to move out of an unstable area. The Dragon of Xuchotl and Dragon token are not affected by unstable areas.
Fleeing the Board: Any Hero or Ally can flee the board from a reinforcement area by spending movement points as if they were crossing a border. When the last Hero flees, the Tlazitlans still on the board are immediately devoured by the Dragon.