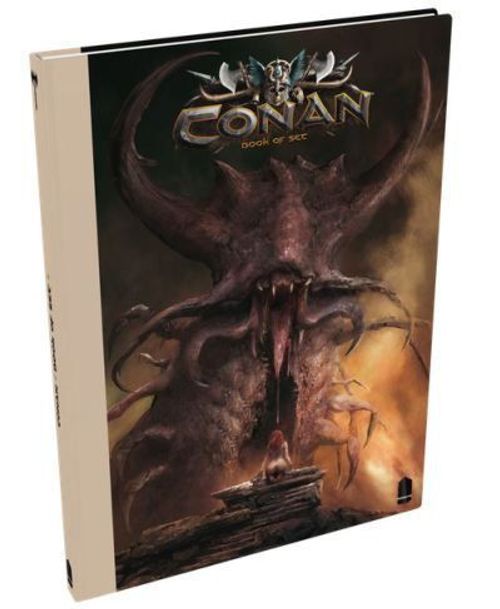
Conan: Book of Set
Conan: Book of Set Rulebook
Table of Contents
Table of Contents
- Yara's Trap
- The White Witch
- Sedition
- The Price of Success
- The Cursed Mirrors
- Where the Thunder Rumbles
- Damned Resurrection
- The Terrible Lovers
- A Lion Among Panthers
- The Last-Ditch Invocation
- For the Blood of a Barbarian
- Death from the North
- Conspiracy in Khauran
- Yogah's Rebirth
- A Dragon on the Marches
- An Ape, Several Kegs and a Girl
- The Zamboula Strangler
- Sacrificial Heroes
- The Curse of the Shape-shifter
- The Iron Hand
Yara's Trap
For 2 players. Complexity 1. Barbarian + Yogah of Yag.
Objective
Winning the Game:
- If Yogah of Yag has fled the village with the two Xuthal's Crowns in his possession before the end of turn 10; the hero wins the game.
- If the Overlord prevents Yogah of Yag from fleeing with the two Xuthal's Crowns by the end of turn 10; the Overlord wins.
Setup
The game starts with the hero's turn.
Suggestion for 1 hero:
- Yogah of Yag (Halberd, Set's Possession, Mitra's Healing). After setup, Yogah of Yag does not move any gems from his Reserve zone to his Fatigue zone. The hero plays their stance phase as if one hero had died during the game. They move 3 gems from their Fatigue zone to their Reserve zone when they choose an aggressive stance and 6 gems when the hero is cautious.
The Overlord starts with 5 gems in their Reserve zone and 3 in their Fatigue zone, and places the recovery token showing a recovery value of "3" in the Book of Skelos.
Reinforcement: 2 reinforcement points.
Overlord units: Bossonian Guards (two cards), Bossonian Archers, Captain, Thak.
Special Rules
Xuthal's Crowns: When Yogah of Yag picks up a Xuthal's Crown, place one gem from his Fatigue zone to the Xuthal's Crown equipment card. If there are no gems in his Fatigue zone, take a gem from those assigned to action spaces or spell cards. If those are also empty, take a gem from his Reserve zone. As long as this gem is on the Xuthal's Crown card, it is no longer available to Yogah of Yag and thus no longer counts toward his life point total.
If Yogah of Yag drops the Xuthal's Crown, move the gem to his Fatigue zone.
Hut Flaps: A character must spend 1 extra movement point to move across a border into or out of a hut. The hut flaps at the entrance of each hut block line of sight.
Climbing: A character with Climb can move across boulders as though they were a border by spending 2 extra movement points.
Wooden Huts: A character with Wall Wrecker can use it to move across the wall of one of the wooden huts.
Fleeing the Village: A hero can flee the village from one of the three village entrance areas (northwest, southwest and east) by spending movement points as though the hero was moving across a border. The hero's model is then removed from the board. Once a hero has fled, the hero's model cannot be returned to the board.
Chests: During setup, the Overlord places 4 chests on the board as indicated by the setup diagram. For this scenario, opening a chest is a simple manipulation. The asset deck contains 2 Life Potions and 2 Xuthal's Crowns.
The White Witch
For 2 players. Complexity 1. King + Stretch goals + Giant Wolves.
Objective
Winning the Game:
- If Zelata kills the Swamp Demon before the end of round 6, the hero wins the game.
- If the Overlord prevents Zelata from killing the Swamp Demon, or kills all the Giant Wolves before the end of round 6, the Overlord wins the game.
Setup
The game starts with the hero's turn.
Suggestion for 1 hero:
- Zelata (2 spells: Mitra's Halo and Bel's Caress) with 10 Giant Wolves. Zelata starts with Mitra's Halo cast. After setup, the hero moves no gem from their Reserve zone to their Fatigue zone.
The Overlord starts with 7 gems in their Reserve zone and 1 in their Fatigue zone, and places the recovery token showing a recovery value of "3" in the Book of Skelos.
Reinforcement: 3 reinforcement points.
Forced march: The Overlord chooses a unit tile. All the models of this unit tile may move according to their base movement value.
Overlord units: Pict Hunters (two cards), Pict Archers, Pict Warriors, Swamp Demon (two cards).
Special Rules
Giant Wolf: During setup, the hero places two Giant Wolves tiles next to Zelata's hero sheet. When Zelata uses her Leadership skill to activate the Giant Wolves by spending one gem, she activates two Giant Wolves characters instead of one. She must move both Giant Wolves, then perform their attack. Each Giant Wolf can only be activated once per hero's turn. The Giant Wolves follow the standard rules of the Allies for rerolls, Guard and additional movement points.
As soon as 5 Giant Wolves have been killed, the hero removes a Giant Wolves tile from the game. From this point on, when Zelata uses her Leadership skill to activate the Giant Wolves by spending one gem, she only activates one Giant Wolf character.
Wolf Pack: When Zelata is in the same area as a Giant Wolf, she gains the Protected skill. When there are strictly more Giant Wolves characters than Overlord's characters in one area:
- The Armor Value of the Giant Wolves is 2 against Melee attacks.
- The Armor Value of their target in Melee attack is reduced by 1.
Shaman's Staff: During setup, the Overlord places the Withering Spell card next to the board. The character carrying the Shaman's Staff gains the Withering spell.
Censer: During setup, the Overlord places the Pestilential Swarm card next to the board. The character carrying the Censer gains the Pestilential Swarm spell.
Totem: During setup, the Overlord places 4 totems as indicated on the map. If Zelata is in the same area as a Totem, she may perform a complex Manipulation of difficulty 2 to destroy that Totem. When a Totem is destroyed, the Overlord removes that Totem from the board, then the Swamp Demon suffers 2 wounds with no possible defense.
Water areas: A character must spend 1 extra movement point to move out of a water area. A character can move from a water area to an adjacent wood area by spending 2 extra movement points.
Leap: Leaping over the water area around the altar in a single movement is not possible. The character must stop in the altar area before performing a second leap.
Wooden Huts: A character with Wall Wrecker can use it to move across the wall of one of the wooden huts.
Chests: During setup, the Overlord places 3 chests as indicated by the setup diagram. The asset deck contains 1 Shaman's Staff, 1 Censer and 1 Life Potion.
Sedition
For 2 players. Complexity 2. King + Stretch goals.
Objective
Winning the Game:
- If Conan the Mercenary reduces the rebellion level to 0 before the end of turn 7; the hero wins the game.
- If Conan the Mercenary dies before the end of turn 7 or the rebellion level is not reduced to 0 before the end of turn 7; the Overlord wins the game.
Setup
The game starts with the hero's turn.
Suggested hero and Equipment:
- Conan the Mercenary (Sword). After setup, the hero moves 5 gems from their Reserve zone to their Fatigue zone.
The Overlord starts with 6 gems in their Reserve zone and 2 in their Fatigue zone, and places the recovery token showing a recovery value of "3" in the Book of Skelos.
Reinforcement: 2 reinforcement points.
Overpowering Conan: (see Special Rules).
Overlord units: Pirates, Amboola, Bossonian Guards, Kerim Shah, Bossonian Archers, Balthus.
Special Rules
Recovery: During setup, the hero places 2 Recovery tokens next to their hero's sheet. During the hero's Recovery phase, each Recovery token placed next to their hero's sheet counts for a dead hero in terms of Recovery.
Rebellion Level: During setup, the Overlord places the Rebellion Level token on the position "8" of the turn track. This represents the current Rebellion Level.
The Rebellion Level is decreased by 1 if the hero kills at least two models of the Overlord other than Amboola, Kerim Shah and Balthus during the same hero's turn. The Rebellion Level is each time decreased by 2 when Amboola, Kerim Shah or Balthus dies. The Rebellion Level is each time decreased by 1, when Conan picks up the Axe, the Chain Mail or the Cape. The Rebellion Level is once increased by 1 when the hero has for the first time 6 gems in their Wound zone. The Rebellion Level is increased by 1 when both banners are burnt.
Legendary Equipment: During setup, the Overlord places as indicated by the setup diagram, the following Equipment cards: Cape, Chain Mail and Axe. This is Conan's Legendary Equipment which he will have to recover to establish his authority.
Overpowering Conan: When the Overlord activates this Event, they chose a tile. All the models of that tile immediately gain their base movement value. The Overlord can use the Movement benefit to purchase extra Movement points. Then, the Overlord creates a dice pool with one orange die for each of their models located in the same area as the hero, then rolls that dice pool. The hero can then use the Guard benefit with no bonus attached to the Equipment, Armors included. If the Overlord's result is superior to the hero's, Conan bends his knees and is considered overpowered. Then, the hero removes from the game one of the Recovery tokens which are next to their hero's sheet. If Conan has been overpowered, the Event "Overpowering Conan" cannot be performed for the rest of the scenario.
Banners: During setup, the Overlord places on the board two Banner tokens as indicated by the setup diagram. If Amboola, Kerim Shah or Balthus are in an area with a Banner token, they can target the banner by performing a Melee attack and roll at least 3 symbols; the banner is burnt and the Banner token is removed from the game.
When the second banner is burnt, the hero removes from the game one of the Recovery tokens placed next to their hero's sheet.
Lines of Sight: A character in a wall area has line of sight to each ground area within the fortress walls. An area in a tower and an area outside that tower are within each other's line of sight only if the areas are in or adjacent to the tower.
Leaping from Walls: A character can move across a parapet from a wall area to a ground area as though it were a border. The character rolls two red dice for falling damage. If the character has Leap, the character rolls one red die instead. A character cannot move from a ground area to a wall area.
Rock Slide: A character can move into a rock slide area from an adjacent area. The character must spend 2 extra movement points unless the character has Climbing.
Chests: During setup, the Overlord places 2 chests on the board as indicated by the setup diagram. The asset deck contains: 2 Life Potion.
The Price of Success
For 2 players. Complexity 2. King + Stretch goals + Black Dragons.
Objective
Winning the Game:
- If Zaporavo sounds the alarm before the end of round 6 or prevents Conan from being freed before the end of turn 6; the hero wins the game.
- If the Overlord frees Conan or kills Zaporavo before the end of round 6; the Overlord wins the game.
Setup
The game starts with the hero's turn.
Suggestion:
- Zaporavo (Zingarian Breastplate, Pirate Saber and Cape) with Amboola, Kothian Archer and 10 Pirates. After setup, the hero moves no gem from their Reserve zone to their Fatigue zone.
The Overlord starts with 6 gems in their Reserve zone and 3 in their Fatigue zone, and places the recovery token showing a recovery value of "5" in the Book of Skelos.
Reinforcement: 3 reinforcement points.
Return of the Dragons: 3 Black Dragons come into play as reinforcements.
New Energy: The Overlord immediately activates Valeria, Balthus or Pallantides (without moving the corresponding tile in the river).
Overlord units: Bossonian Guards, Black Dragons, Balthus, Bossonian Archers, Pallantides, Valeria.
Special Rules
Warning Fire: During setup, the Overlord places 3 Warning Fire tokens as indicated by the setup diagram. The hero in a Warning Fire token's area may perform a complex Manipulation with a difficulty of 2 to light the fire. When a warning fire is lit, the hero removes the corresponding token from the board.
Activating Levers: During setup, the Overlord places 3 Lever tokens as indicated by the setup diagram. At the end of the Overlord's turn, if there are more models of the Overlord's side than models of the hero's side in an area with a Lever token, then that lever is activated and the Overlord removes that Lever token from the board.
Sounding the Alarm: The hero sounds the alarm when the 3 Warning Fires are lit.
Freeing Conan: Conan is freed when the 3 levers have been activated.
Pirates: When the Hero uses Zaporavo's Leadership skill to activate Pirates by spending one gem, they activate a Pirate model plus one model per lit Warning Fire instead of a single one. They must move all the activated Pirate models and then perform their attacks. Each Pirate can only be activated once per hero's turn. Regarding the purchase of Rerolls, Guard and Movement Points, Pirates follow the usual rules of the Allies.
Leadership Cape: During setup, the hero places 3 red gems on the Cape card. The hero can use the gems placed on the Cape card only to activate Pirates. When the hero with the Cape wants to use these red gems to activate Pirates, they transfer the red gems from the Cape card to the Pirates tile. The hero may use both red gems and his own energy gems to activate the Pirates. During the Hero's End/Start Phases, the hero with the Cape transfers the red gems placed on the Pirates tile to the Cape card. The red gems are never taken into account when calculating a hero's life points.
Leaping from/Climbing a Balcony: A character can move across a railing from a balcony area to a ground floor area as though it were a border. The character rolls two red dice for falling damage with no possible defense. If the character has Leap, the character rolls one red die instead. A character with Climb can move across a railing from a ground floor area to a balcony area by spending 1 extra Movement point.
Pit: A character must spend 1 extra Movement point to move out of the pit area.
Chests: During setup, the Overlord places 3 chests on the board as indicated by the setup diagram. The asset deck contains 1 Life Potion, 1 Shield and 1 Turanian Sword.
The Cursed Mirrors
For 3 players. Complexity 1. Barbarian + Kushite Witch Hunters.
Objective
Winning the Game:
- The Heroes must protect the artifacts. If there is at least one artifact on the board at the end of turn 7; the heroes win the game.
- If the Overlord destroys the three artifacts before the end of turn 7; the Overlord wins.
Setup
Suggestions for 2 heroes:
- Bêlit (Halberd) and 5 Bêlit's Guards.
- Hadrathus (Sword, Borne by the Wind, Set's Possession and Lightning Storm).
After setup, each hero moves 3 gems from their Reserve zone to their Fatigue zone.
The game starts with the Overlord's turn.
The Overlord starts with 10 gems in their Reserve zone and 0 in their Fatigue zone, and places the recovery token showing a recovery value of "3" in the Book of Skelos.
Crowd Control: See Special Rules.
Overlord units: Afari, Ghayoor, Shafiah, Shubba. Shubba has Energy Drain, Mind Control, and Teleportation.
Special Rules
Artifacts: During setup, the Overlord places the artifacts, represented by the tokens as indicated by the setup diagram. A Kushite (Afari, Ghayoor, Shafiah and Shubba) in an artifact's area may perform a Melee Attack and roll at least 2 symbols in a single attack to destroy that artifact. This Melee Attack follows the same rules as any Melee Attack (Sacrifice, Circular Strike, etc.) and Bêlit's Guards can use Sacrifice to defend the artifacts.
Crowd Control: The Overlord activates up to two Bêlit's Guards as if they were units. During these activations, the Overlord follows all rules regarding unit tile activation (movement, attack etc.) and can use benefits. The Overlord cannot use Leap with a Bêlit's Guard model to leap from the walls.
Line of Sight: A character in a wall area has line of sight to each ground area within the fortress walls. An area in a tower and an area outside that tower are within each other's line of sight only if the areas are in or adjacent to the tower.
Leaping from Walls: A character can move across a parapet from a wall area to a ground area as though it were a border. The character rolls two red dice for falling damage. If the character has Leap, the character rolls one red die instead.
Rock Slide: A character can move into a rock slide area from an adjacent area. The character must spend 2 extra movement points unless the character has Climb.
Where the Thunder Rumbles
For 3 players. Complexity 1. King + Stretch goals + Sabertooth Tiger.
Objective
Winning the Game:
- If at least 1 Bossonian Guard is left on the board by the end of turn 7; the heroes win the game.
- If all the Bossonian Guards are killed before the end of turn 7; the Overlord wins the game.
Setup
Suggestions for 2 heroes:
- Conan the General (Conan's Sword and Chain Mail) and 8 Bossonian Guards.
- Balthus (Bossonian Bow and Parrying Dagger) and Slasher.
After setup, each hero moves 3 gems from their Reserve zone to their Fatigue zone.
The game starts with the Overlord's turn.
The Overlord starts with 10 gems in their Reserve zone and 0 in their Fatigue zone, and places the recovery token showing a recovery value of "5" in the Book of Skelos.
Reinforcement: 3 reinforcement points.
Forced March: The Overlord chooses a unit tile of Pict Hunters, Pict Archers or Pict Warriors. All the models of that tile can move according to their movement value. The Overlord can use the Movement benefit.
Unit tiles in the setup table: Pict Hunters, Pict Archers, Sabertooth Tiger (two tiles), Pict Warriors.
Special Rules
Bossonian Guard: Only Conan the General can use Leadership to activate the Bossonian Guards. For this scenario, Conan the General and Balthus cannot spend gems to defend the Bossonian Guards.
Slasher: Only Balthus can use Leadership to activate Slasher.
Water: A character must spend 1 extra movement point to move out of a water area. A character can move from a water area to an adjacent wood area by spending 2 extra movement points.
Leap: Leaping over the water area around the altar in a single movement is not possible. The character must stop in the altar area before performing a second leap.
Chests: During setup, the Overlord places 3 chests on the board as indicated by the setup diagram. The asset deck contains 1 Javelin, 1 Explosive Orb, and 1 Life Potion.
Damned Resurrection
For 3 players. Complexity 2. King + Stretch goals.
Objective
Winning the Game:
- If the 3 altars are destroyed before the end of turn 6; the heroes win the game.
- If at least 1 altar is not destroyed at the end of turn 6; the Overlord wins the game.
Setup
The game starts with the heroes' turn.
Suggested heroes and Equipment:
- Conan the wanderer (Battle Axe and Leather Armor).
- Hadrathus (Mitra's Staff, Sword and 4 spells: Eel Skin, Set's Halo, Bel's Caress and Mitra's Healing).
After setup, each hero moves 3 gems from their Reserve zone to their Fatigue zone.
The Overlord starts with 7 gems in their Reserve zone and 3 in their Fatigue zone, and places the recovery token showing a recovery value of "5" in the Book of Skelos.
Reinforcement: 3 reinforcement points (see Special Rules).
Overlord units: Skeletons, Mummies, Natohk. Natohk has 2 spells: Set's Bite and Teleportation.
Special Rules
Altar: During setup, the Overlord places the Altar tokens as indicated by the setup diagram. A hero in an Altar token's area may perform a complex Manipulation with a difficulty of 2 to destroy that altar and remove that Altar token from the board.
Skeletons: When a Skeleton dies, the Overlord lays the model down in its area instead of removing it from the board. The model is no longer considered in play, cannot be activated, does not count regarding occupied areas and when calculating hindering.
Reinforcement: When the Overlord uses Reinforcement, they can spend up to 3 Reinforcement points only to bring back into play Skeleton models of the same tile. To do so, they stand up 1 Skeleton model laid down on the board per spent Reinforcement point. Therefore, in this scenario, Mummies cannot return as Reinforcement.
Hut Flaps: A character must spend 1 extra movement point to move across a border into or out of a hut. Moving across an opening token does not cost an extra movement point.
Climbing: A character with Climb can move across boulders as though they were a border by spending 2 extra movement points.
Wooden Huts: A character with Wall Wrecker can use it to move across the wall of one of the Wooden Huts.
Chests: During setup, the Overlord places 3 Chests on the board as indicated in the setup diagram. The asset deck contains: 2 Life Potions and 1 Explosive Orb.
The Terrible Lovers
For 3 players. Complexity 2. Barbarian + Brom guest box.
Objective
Winning the Game:
- If the heroes flee with a ship and both amulets in their possession before the end of turn 7; the heroes win the game.
- If the Overlord prevents the heroes from fleeing with both amulets before the end of turn 7, or the Overlord kills the two heroes; the Overlord wins the game.
Setup
The game starts with the heroes' turn.
Suggestions for 2 heroes:
- Conan the Thief (Conan's Sword).
- Bêlit, Queen of the Black Coast (Life Potion, Dagger and Short Sword).
After setup, each hero moves 4 gems from their Reserve zone to their Fatigue zone.
The Overlord starts with 7 gems in their Reserve zone and 3 in their Fatigue zone, and places the recovery token showing a recovery value of "5" in the Book of Skelos.
Reinforcement: 2 reinforcement points (see Special Rules).
Unit tiles in the setup table: Pirates, Pirates, Bossonian Guards, Pirates, Zaporavo.
Special Rules
Sinking a ship: Only one ship may be sunk during the scenario. There are two different ways a hero can sink a ship:
- A hero in a reinforcement token's area may perform a complex manipulation with a difficulty of 5 to sink that ship.
- A hero can throw or drop an explosive orb on a reinforcement token's area. The orb explodes normally and that ship sinks.
When a ship is sunk, the Overlord removes from the river the event tile whose number corresponds to the sunken ship. The Overlord also removes the sunken ship's reinforcement token from the board. The Overlord can no longer use reinforcement on this area. All models without Swim who are present on the sunken ship are swept away with the wreck and are immediately removed from the game. The areas of the sunken ship are now considered as being water areas for the rest of the scenario. The chest tokens and their asset cards remain on the areas where they were previously found. As of the moment when the ship was sunk, the heroes can no longer sink another ship.
Water area: A model on a water area can still fight without penalty. The models with Swim can move from one water area to the adjacent water area by spending an extra 1 movement point. A model on a water area can climb up onto an adjacent ship area by spending an extra 2 movement points. A model without Swim cannot move from one water area to another water area; however they can climb up onto an adjacent ship area by spending an extra 2 movement points.
Grapnel: During setup, the Overlord places the Grapnel token on the board as indicated by the setup diagram. A model on a water zone can climb up onto an adjacent ship area that contains the Grapnel token without spending additional movement points.
Alarm: During the Overlord's turn, they can activate only 0 or 1 tile. As soon as a ship is sunk, the alarm is raised and the Overlord can normally activate 0, 1 or 2 tiles.
Reinforcement: If all the models of an Overlord's unit tile have been killed, the Overlord can no longer bring in the models of this unit in a reinforcement event.
Fleeing: The heroes must sink one of the ships to flee with the other one. If at least one of the heroes, with both amulets in their possession, is alone on a ship (without any of the Overlord's models present on the ship) at the end of a heroes' turn, they can flee with the ship and the heroes win the game.
Jump: If a hero or one of the Overlord's units fails to leap, they fall into the water and their model is placed in the water area above which they tried to leap. The heroes or the Overlord can decide to fall directly into the water without spending additional movement points. This action does not require any particular skill.
Chests: During setup, the Overlord places 4 chests on the board as indicated by the setup diagram. The asset deck contains: 1 Explosive Orb, 1 Life Potion and 2 Amulets. A hero must perform a complex manipulation with a difficulty of 3 to open a chest in a water area.
A Lion Among Panthers
For 3 players. Complexity 2. King + Stretch goals.
Objective
Winning the Game:
- If at least one hero flees with three Sacred Treasures before the end of turn 7; the heroes win the game.
- If the Overlord prevents the heroes from fleeing with three Sacred Treasures at the end of turn 7; the Overlord wins the game.
Setup
The game starts with the heroes' turn.
Suggestion for 2 heroes:
- Amra the Lion (Leather Armor) with Conan's Lion.
- Balthus (Leather Armor) with Slasher.
After setup, the heroes move no gem from their Reserve zone to their Fatigue zone.
The Overlord starts with 5 gems in their Reserve zone and 5 in their Fatigue zone, and places the recovery token showing a recovery value of "5" in the Book of Skelos.
Reinforcement: 3 reinforcement points.
Overlord units: Pict Hunters, Pict Archers, Forest Demon (two tiles), Pict Warriors, Zogar Sag.
Zogar Sag has one spell: Set's Bite.
Special Rules
Sacred Treasures: The three Sacred Treasures, the Pictish Fetish, and the Ahriman's Heart are considered Sacred Treasures. During setup, the Overlord places one Sacred Treasure card on the same areas as the tokens 1, 2 and 3 as well as the Pictish Fetish and the Ahriman's Heart next to the board.
Equipment: During setup, the Overlord places the following cards on the area 4: 1 Axe, 1 Zingarian Bow, and 1 Life Potion.
Stone: During setup, the Overlord places a Stone token in each of the stone Huts as indicated by the setup diagram. These stones are considered Equipment cards with an encumbrance value of 2. When a hero carries a stone, they no longer suffer the penalty for Melee Attack without a weapon card.
Zogar Sag: When Zogar Sag dies, the Overlord immediately places the Pictish Fetish card in Zogar Sag's area.
Forest Demon: When the Forest Demon dies, the Overlord immediately places the Ahriman's Heart card in the Forest Demon's area.
Door: Slasher and Conan's Lion are imprisoned. As long as the door is in play, the animals cannot be activated. Conan and Balthus cannot use their Leadership skills. The Door is considered impassable. A hero in an area adjacent to the door can perform a complex Manipulation with a difficulty of 2 to remove that door from the board. The heroes may use their Leadership skills to activate Conan's Lion and Slasher.
Slasher: Only Balthus can activate Slasher. If Balthus dies, Slasher has no longer reason to fight and is immediately removed from the game.
Conan's Lion: Only Amra the Lion can activate Conan's Lion. If Amra the Lion dies, Conan's Lion has no longer reason to fight and is immediately removed from the game.
Fleeing the Village: A model can flee the village from one of the three village entrance areas (northwest, southwest and east) by spending movement points as though the model was moving across a border. The model is then removed from the board. Once a model has fled, the model cannot be returned to the board.
Flaps: To enter or leave a hut, a hero must spend 1 extra Movement point because of the Flaps. The Flaps at the entrance of each Hut block the Line of Sight.
Climb: A character with Climb can move across boulders as though they were a border by spending 2 extra movement points.
Wooden Huts: A character with Wall Wrecker can use it to move across the wall of one of the wooden huts.
The Last-Ditch Invocation
For 3 players. Complexity 3. King + Stretch goals.
Objective
Winning the Game:
- If at least one Sailor is alive at the end of turn 6; the heroes win the game.
- If all Sailors are dead before the end of turn 6; the Overlord wins the game.
Setup
Suggested heroes and Equipment:
- Zelata (Dagger, Mitra's Staff and 4 spells: Mitra's Halo, Bori's Rage, Teleportation, and Bel's Caress) with Zelata's Wolf.
- Pelias (Sacrificial Dagger, Ahriman's Heart and 4 spells: Set's Bite, Teleportation, Set's Halo, and Hand of Death).
After setup, each hero moves 3 gems from their Reserve zone to their Fatigue zone.
The game starts with the Overlord's turn. The Overlord starts with 10 gems in their Reserve zone and 0 in their Fatigue zone, and places the recovery token showing a value of "7" in the Book of Skelos.
Reinforcement: 3 reinforcement points.
Forced march: The Overlord chooses a unit tile. All the models of this unit tile may move according to their base movement value. The Overlord can use the Movement benefit.
Unit tiles in the setup table: Pirates, Bêlit's Guards, Pirates, N'gora, Bêlit.
Special Rules
Thaug: During setup, the heroes place the Tentacles models and the Thaug model as indicated by the setup diagram. The Thaug model is placed straddling the two areas to the East. These two areas are considered occupied. The heroes place Thaug's Life Point marker on the position "8" of the turn track. The heroes place Thaug's tile next to their heroes' sheets and place 4 red gems on it. The heroes place the Dagon's Attack and Return of the Brave spell cards next to Thaug's tile; these are the spells Thaug has. The heroes place the Tentacles tile next to Thaug's tile. Thaug is immediately activated if it is on the board at the start of the heroes' turn. It cannot move but can perform Melee Attacks and may use the red gems on its tile to cast spells.
If Thaug is on the board at the end of the heroes' turn, the heroes move the red gems from Thaug's spells to Thaug's tile, then:
- if there is at least one blue gem on the Ahriman's Heart, the heroes move this or these gems to Pelias' Wound zone,
- if there is no blue gem on the Ahriman's Heart, then the heroes remove the Thaug and Tentacles models from the game and flip the Ahriman's Heart card facedown.
Sailors: During setup, the heroes place the Bossonian Guards as indicated by the setup diagram. They represent the Sailors. The Sailors have an Armor Value of 1 and 1 Life point. Sailors cannot be activated nor defended but can be the target of the heroes' attacks as well as of the Overlord Units.
Ahriman's Heart: Pelias cannot drop nor give the Ahriman's Heart. If Pelias dies, the Ahriman's Heart is destroyed.
Sacrificial Dagger: Pelias cannot drop nor give the Sacrificial Dagger. If Pelias dies, the Sacrificial Dagger is destroyed.
Sacrifice: If the Ahriman's Heart card is faceup and Pelias kills a Sailor or a model of the Overlord using the Sacrificial Dagger, Pelias moves one of his blue gems to the Ahriman's Heart card. Pelias takes in priority a gem from his Fatigue zone.
Mitra's Staff: Zelata cannot drop nor give the Mitra's Staff. If Zelata dies, the Mitra's Staff is destroyed.
During setup, the hero controlling Zelata places 2 red gems on the Mitra's Staff card. The hero controlling Zelata may use the gems placed on the Mitra's Staff card only to cast spells. When the hero controlling Zelata uses these red gems, they move them from the Mitra's Staff card to the Spell card. These gems count towards the Spell card's Exertion Limit. The hero controlling Zelata may use both red gems from the Mitra's Staff and their own Energy gems to cast a spell. During the End phase of the Heroes' turn, the hero controlling Zelata moves the red gems from the Spell cards to the Mitra's Staff card. The red gems of the Mitra's Staff are never taken into account when calculating Zelata's life points.
Spellbook: During the setup, the Overlord places the Lightning Storm card next to the board. When a hero picks up the Spellbook, they also place the Lightning Storm Spell card next to their hero's sheet. That hero can now cast that spell.
Chests: During setup, the Overlord places 1 chest on the board as indicated by the setup diagram. The asset deck contains: 1 Spellbook.
For the Blood of a Barbarian
For 3 players. Complexity 3. King + Stretch goals.
Objective
Winning the Game:
- If the heroes prevent the invocation of the Swamp Demon, or if the Swamp Demon dies before the end of turn 8; the heroes win the game.
- If the Overlord invokes the Swamp Demon and the Swamp Demon is alive at the end of turn 8; the Overlord wins the game.
Setup
The game starts with the heroes' turn.
Suggested heroes and Equipment:
- Conan the General (Conan's Sword and Chain Mail) with the Kothian Archer.
- Pallantides (Sword and Shield).
After setup, each hero moves 5 gems from their Reserve zone to their Fatigue zone.
The Overlord starts with 7 gems in their Reserve zone and 3 in their Fatigue zone, and places the recovery token showing a value of "5" in the Book of Skelos.
Reinforcement: 2 reinforcement points.
Domination: See Special Rules.
Spells:
- Hadrathus has 1 spell: Lightning Storm.
- Zelata has 1 spell: Hand of Death.
- Ageera has 1 spell: Bori's Rage.
- Akivasha has 1 spell: Return of the Brave.
Unit tiles in the setup table: Hadrathus, Bossonian Guards, Zelata, Bossonian Archers, Ageera, Bossonian Guards, Akivasha, Swamp Demon (Life Point marker value 2).
Special Rules
Special Rules (part 1):
Invocation: At the end of turn 5, the Overlord removes from the board all their models located in an area of their choice where one of their model with Spell Caster is also located, including the Spell Caster's model. The number of models removed from the board corresponds to the number of life points of the Swamp Demon. The Overlord places the Swamp Demon Life Point marker on the corresponding position of the turn track. Then, the Overlord replaces the removed Spell Caster's tile in the River with the Swamp Demon's tile.
Deliverance: A hero in the same area as one of the Sorcerers under Domination (Hadrathus, Zelata and Ageera at the beginning of the scenario) may perform a complex Manipulation with a difficulty of 2 (Hadrathus, Zelata and Ageera are taken into account for Hindering) to deliver the Sorcerer from Akivasha's hypnosis. When a Sorcerer is freed from Akivasha's domination, the hero who performed the complex Manipulation takes the tile corresponding to the Sorcerer from the Overlord's River as well as the Spell card linked to that Sorcerer and places them next to their hero's sheet. From that moment, that Sorcerer is considered an Ally Sorcerer of the heroes and is controlled by the hero who just freed them. The Life Point marker of the freed Ally Sorcerer remains in the same position on the turn track.
Ally: For this scenario, when a hero activates an Ally Sorcerer, that hero may move one gem from their Reserve Zone to the Spell card linked to that Sorcerer to cast that spell, without taking into account the cost of the Spell and its exertion limit. This is the only way an Ally Sorcerer can cast a spell. Each Spell can only be cast once per Ally Sorcerer's activation and each Ally Sorcerer can only be activated once per Heroes' turn.
Special Rules (part 2):
Domination: Akivasha imposes her domination over an Ally Sorcerer of the heroes. The Overlord chooses one of the Sorcerers (Hadrathus, Zelata or Ageera) in the line of sight of Akivasha, takes that Ally Sorcerer's tile from the hero and places it in their River at the position of the Event tile before its activation (the Event tile is still moved to the right, at the end of the River). They also take the Spell card linked to that Ally Sorcerer and places it next to the Book of Skelos. The Life Point marker of the Sorcerer remains in the same position on the turn track and the Sorcerer is now considered a Unit of the Overlord.
Explosive Orb: The Overlord's models in the area effect of the Explosive Orb have their Armor Value temporarily reduced to 0 to calculate the attack power of the Orb.
Walls: A character with Wall Wrecker cannot use it to move across an outer wall of the inn or to move between areas of different elevations.
Leaping from/Climbing a Balcony: A character can move across a railing from a balcony area to a ground floor area as though it were a border. The character rolls two red dice for falling damage. If the character has Leap, the character rolls one red die instead. A character with Climb can move across a railing from a ground floor area to a balcony area by spending 2 extra movement points.
Leaping from/Climbing a Stairwell: A character can move across a banister from a stair area to a ground floor as though it were a border. The character rolls two yellow dice for falling damage. If the character has leap, the character rolls one yellow die instead. A character with Climb can move across a banister from a ground floor area to a stair area by spending 1 extra movement point.
Bar: A character with or without Leap or Climb may move onto the Bar areas or a table area by spending 1 extra movement point. These areas provide an Elevation bonus of one yellow die. A character in the bar's area or in a table's area, with or without Reach, may attack a character in an adjacent area with a Melee Attack. These areas do not block line of sight. A character may exit these areas with no movement penalty.
Chests: During setup, the Overlord places 3 chests on the board as indicated by the setup diagram. The asset deck contains: 1 Life Potion, 1 Bossonian Bow and 1 Explosive Orb.
Death from the North
For 4 players. Complexity 3. King + Stretch goals.
Objective
Winning the Game:
- If the heroes kill the Hyperborean Primitive or prevent the Overlord from killing all the pirates, Bossonian Guards and Archers before the end of turn 9; the heroes win the game.
- If the Overlord kills all the pirates, Bossonian Guards and Archers before the end of turn 9; the Overlord wins the game.
Setup
Suggestions for 3 heroes:
- Conan the General (Scale Mail) with 5 pirates with no base and 5 Bossonian Archers with a purple base.
- Pallantides (Shield) with 5 Bossonian Guards with a red base.
- N'Gora (Tribal Shield).
After setup, each hero moves 6 gems from their Reserve zone to their Fatigue zone.
The game starts with the Overlord's turn.
The Overlord starts with 6 gems in their Reserve zone and 0 in their Fatigue zone, and places the recovery token showing a recovery value of "3" in the Book of Skelos.
When the Event tile is activated, the Overlord resolves each of the following events in order:
- Gaining Ground: (see Special Rules).
- Reinforcement: 5 reinforcement points (see Special Rules).
Hyperborean Primitive has Pestilential Swarm and Withering.
Unit tiles in the setup table: Hyperborean Primitive, Bone Golem.
Special Rules
Special Rules (part 1):
- Pirates, Bossonian Guards and Archers: When a pirate or a Bossonian Guard or a Bossonian Archer is killed, the Overlord replaces its model with a skeleton model that is placed in a laid down position in the area where the pirate or the guard or the archer was killed. If the model of the guard or archer has a base, the Overlord removes the base and fixes it to the skeleton model that replaces it. The laid down skeleton models do not count for hindering and occupied areas.
- Skeletons: During setup the Overlord places the following Skeleton tiles next to the Book of Skelos: (Gray and purple Skeleton tiles with an Armor of 1, and a red Skeleton tile with an Armor of 0). The Overlord then places 15 skeleton models next to the board. When a skeleton is killed, the Overlord lays the skeleton down in its area rather than removing it from the board. The laid down skeleton models do not count for hindering and occupied areas.
- Stygian Artifact: During setup the Overlord places the Stygian Artifact card next to the board.
- Bone Golem: During setup the Overlord places the second Bone Golem tile beside the Book of Skelos. When the Bone Golem is killed the Overlord places the Stygian Artifact card in the area where the Bone Golem was killed.
- Hyperborean Primitive: The Hyperborean Primitive can only be wounded by a hero carrying the Stygian Artifact. The Hyperborean Primitive cannot be wounded in any other way other than by a hero carrying the Stygian Artifact.
- Leadership: An ally model activated by the heroes using Leadership can move but cannot attack. The heroes cannot use Leadership to defend an ally.
- Additional Gem Reserve: During setup the Overlord places 6 red gems and the second Recovery Value tile beside the Book of Skelos.
Special Rules (part 2):
- Gaining Ground: When the Overlord activates the Event tile and resolves the Gaining Ground event, they resolve each of the following events in order:
- The Overlord moves 2 gems from their Additional Gem Reserve to their Fatigue zone. If there are not enough gems in the Additional gem reserve, the Overlord does not move any gems to their Fatigue zone. The gems used to dredge the river are removed from the game and cannot be returned to the game with this event.
- The Recovery value of the Overlord is increased. If the Overlord's Recovery value is "3", they place the Recovery Value tile with a value of "5" on the Book of Skelos. If the Overlord's Recovery value is "5", they place the Recovery Value tile with a value of "7" on the Book of Skelos. If the Overlord's Recovery value is "7", the Recovery Value tile is not changed.
- A tile is chosen by the Overlord from the tiles put aside during setup and it is added to the end of the River. The Overlord cannot add a tile to the River if all the tiles set aside have already been added. The Overlord can add a unit tile to the River if there is at least one model on the board (laid down or standing) that corresponds to this tile. The tiles removed from the River when the Overlord dredges the river are removed from the game and cannot be returned to the game with this event.
- Reinforcement: The Overlord can only reinforce units whose tiles are in the River. When the Overlord uses a reinforcement point, they stand up one of the laid down models on the board. If a laid down model is in an occupied area, the Overlord cannot reinforce it.
- Pictish Drink: A hero may discard this item to move 2 gems from their Fatigue zone to their Reserve zone but must also suffer 1 wound.
- Walls: A character with Wall Wrecker cannot use it to move across an outer wall of the inn or to move between areas of different elevations.
- Leaping From/Climbing a Balcony: A character can move across a railing from a balcony area to a ground floor area as though it were a border. The character rolls two red dice for falling damage. If the character has Leap, the character rolls one red die instead. A character with Climb can move across a railing from a ground floor area to a balcony area by spending 2 extra movement points.
Conspiracy in Khauran
For 4 players. Complexity 1. Barbarian + Crossbows.
Objective
Winning the Game:
- If a hero has fled the tavern with the spellbook; the heroes win the game.
- At the end of turn 7, if the Overlord has prevented the heroes from fleeing the tavern with the spellbook; the Overlord wins the game.
Setup
The game starts with the heroes' turn.
The heroes start in the "1" area.
Suggestions for 3 heroes:
- Conan (Chain Mail, Conan's Sword).
- Bêlit (Leather Armor, Ornamental Spear).
- Hadrathus (Shield, Sword, Mitra's Halo and Lightning Storm). Hadrathus does not start with Mitra's Halo cast.
After setup, each hero moves 4 gems from their Reserve zone to their Fatigue zone.
The Overlord starts with 9 gems in their Reserve zone and 3 in their Fatigue zone, and places the recovery token showing a recovery value of "5" in the Book of Skelos.
Reinforcement: 4 reinforcement points.
Fire at will: Each unit may perform a Ranged Attack if able.
Overlord units: Crossbowmen (three cards), Bossonian Guards, Captain (two cards).
Special Rules
Chests: During setup, the Overlord randomly places 2 chest tokens numbered 1 and 2, with their chest side faceup, as indicated by the setup diagram.
Captain's Key: When the Captain dies, place the Key card in the Captain's area.
Opening Chests: A hero without the Captain's key can perform a complex Manipulation with a difficulty of 4 to open a chest. A hero with the Captain's key can perform a simple Manipulation instead. If the hero succeeds, the chest is opened: flip that chest's token. If the chest is numbered "1", it contains the spellbook and that hero immediately picks up the Spellbook card. If the chest is numbered "2", the chest is empty and the token is discarded.
Fleeing the Inn: A hero can flee the inn from one of the outer areas to the south of the board by spending movement points as though the hero were moving across a border and removing the hero's model from the board. Once a hero has fled, the hero's model cannot be returned to the board.
Walls: A character with Wall Wrecker cannot use it to move across an outer wall of the inn, or to move between areas of different elevations.
Leaping From/Climbing a Balcony: A character can move across a railing from a balcony area to a ground floor area as though it were a border. The character rolls two red dice for falling damage. If the character has Leap, the character rolls one red die instead. A character with Climb can move across a railing from a ground floor area to a balcony area by moving 2 gems from their Reserve zone to their Fatigue zone.
Leaping From/Climbing a Stairwell: A character can move across a banister from a stair area to a ground floor area as though it were a border. The character rolls two yellow dice for falling damage. If the character has Leap, the character rolls one yellow die instead. A character with Climb can come across a banister from a ground floor area to a stair area by moving 2 gems from their Reserve zone to their Fatigue zone.
Yogah's Rebirth
For 4 players. Complexity 2. Barbarian + Kushites + Yogah of Yag.
Objective
Winning the Game:
- If Shubba dies (the Orb is linked to Shubba. Yogah cannot use it while Shubba is still alive), and Yogah of Yag has fled the fort with the Orb before the end of turn 8; the heroes win.
- If Yogah dies before the end of turn 8; the Overlord wins.
In any other case, both sides lose at the end of turn 8.
Setup
The game starts with the heroes' turn.
The heroes start in the areas indicated by the setup diagram.
Suggestions for 3 heroes:
- Conan (Sword, Leather Armor).
- Hadrathus (Parrying Dagger, Bori's Rage, and Mind Control).
- Yogah of Yag (Ornamental Spear, Gift of Life, and Mitra's Healing).
After setup, each hero moves 6 gems from their Reserve zone to their Fatigue zone.
The Overlord starts with 7 gems in their Reserve zone and 5 in their Fatigue zone, and places the recovery token showing a recovery value of "7" in the Book of Skelos.
Reinforcement: 5 reinforcement points.
Forced March: The Overlord can activate a Kushite unit tile without moving gems from their Reserve zone to their Fatigue zone. The activated Kushite unit tile is placed at the end of the River, after the event tile.
Overlord units: Afari, Ghayoor, Hyenas, Shafiah, Shubba. Shubba has Teleportation, Set's Possession, Lightning Storm and Energy Drain.
Special Rules
Kushites: Afari, Shafiah, Ghayoor and Shubba are considered to be Kushite units.
Yag's Orb: Yag's Orb is represented by the Stygian Artifact equipment card. It has an encumbrance value of 8. It is made from a mysterious material of incredible density glinting with a strange blue light. A Hero with the Orb card cannot leap or fall. The Orb cannot be thrown.
Doors: A character other than a Hyena can move across a door as though it were a border by spending 1 additional movement point. After a character moves across a door, remove that door from the board.
Fleeing the Fort: A hero can flee the fort from one of the exit areas marked "1" by spending movement points as though the hero were moving across a border and removing the hero's model from the board. Once a hero has fled, the hero's model cannot be returned to the board.
Line of Sight: A character in a wall area has line of sight to each ground area within the fortress walls. An area in a tower and an area outside that tower are within each other's line of sight only if the areas are in or adjacent to the tower.
Leaping from Walls: A character can move across a parapet from a wall area to a ground area as though it were a border. The character rolls two red dice for falling damage. If the character has Leap, the character rolls one red die instead.
Rock Slide: A character can move into a rock slide area from an adjacent area. The character must spend 2 extra movement points unless the character has Climb.
Chests: During setup, the Overlord places 4 chests on the board as indicated by the setup diagram. The asset deck contains 1 Stygian Artifact, 1 Life Potion, 1 Bossonian Bow, and 1 Tribal Mace.
A Dragon on the Marches
For 4 players. Complexity 2. King + Stretch goals + Dragon.
Objective
Winning the Game:
- If the heroes kill the Dragon before the end of turn 7; the heroes win the game.
- If the Overlord prevents the Dragon from being killed before the end of turn 7; the Overlord wins the game.
Setup
The game starts with the heroes' turn.
Suggestions for 3 heroes:
- Conan Warlord (Battle Axe and Leather Armor).
- Savage Bêlit (Pirate Saber and Parrying Dagger).
- Pelias (Black Staff, Sacrificial Dagger, Teleportation, Withering, and Eel Skin).
After setup, each hero moves 5 gems from their Reserve zone to their Fatigue zone.
The Overlord starts with 8 gems in their Reserve zone and 3 in their Fatigue zone, and places the recovery token showing a recovery value of "5" in the Book of Skelos.
Reinforcement: 4 reinforcement points.
Zogar Sag has Set's Bite and Magical Dizziness.
Overlord units: Pict Hunters (two cards), Pict Archers, Dragon, Pict Warriors, Zogar Sag.
Special Rules
Dragon: The area between the 4 legs of the dragon is considered as its base with regard to occupied areas. The dragon is counted as one model when calculating hindering. During its capture the Dragon has been poisoned; during setup, the Overlord places a second Dragon tile next to the Book of Skelos with 3 grey tokens on it to represent this. The Dragon loses one red die to its Melee Attack value per token on this Dragon tile. There can be a maximum of 3 tokens on the Dragon tile. A grey token is placed on the spaces 2, 4 and 6 of the turn track. When the turn track token is placed on the grey token, one of the tokens placed on the set aside Dragon tile is removed if possible.
Javelin: The Javelins have been specially made to wound the Dragon. If a hero performs a ranged attack against the Dragon with a Javelin, the Dragon's armor value is ignored. After the attack is performed, the Javelin card is removed from the game, even if the attack has not been successful in wounding the Dragon.
Pictish Fetish: When the Pictish Fetish is burnt, pheromones are released into the air that have the ability to confuse Dragons. A hero with the Pictish Fetish in the same area as the Dragon can burn the Pictish Fetish by performing a simple Manipulation and confuse the Dragon. When the Dragon is confused, the Overlord immediately places the Dragon tile at the end of the River. The Pictish Fetish is then removed from the game.
Elixir: The Elixir has been used by the Picts to poison the Dragon in order to weaken it during its capture. A hero carrying the Elixir can apply the Elixir on one of their weapons with a simple Manipulation. If a hero applies the Elixir on a weapon, the Elixir card is placed under the weapon card and the weapon is considered as being poisoned. If a hero inflicts at least one wound on the Dragon when using a poisoned weapon a grey token is placed by the Overlord on the Dragon tile that has been set aside during setup. The Elixir card is then removed from the game; the weapon is no longer considered as being poisoned. If the Dragon has not been wounded during the attack then nothing happens and the Elixir card remains with the weapon. There cannot be more than 3 grey tokens on this Dragon tile.
Hut Flaps: A character must spend 1 extra movement point to move across a border into or out of a hut. The hut flaps at the entrance of each hut block line of sight.
Climbing: A character with Climb can move across boulders as though they were a border by spending 2 extra movement points.
Wooden Huts: A character with Wall Wrecker can use it to move across the wall of one of the wooden huts.
Chests: During setup, the Overlord places 4 chests on the board as indicated by the setup diagram. The asset deck contains 2 Javelins, 1 Pictish Fetish, and 1 Elixir.
An Ape, Several Kegs and a Girl
For 5 players. Complexity 2. King + Stretch goals.
Objective
Winning the Game:
- If Gitara flees the citadel before the end of turn 6; the heroes win the game.
- If the Overlord prevents Gitara from fleeing the citadel or if Gitara dies before the end of turn 6; the Overlord wins the game.
Setup
The game starts with the heroes' turn.
Suggested heroes and Equipment:
- Conan the General (Conan's Sword).
- Pelias (Dagger, Black Staff and 3 Spells: Set's Bite, Set's Halo and Eel Skin. Pelias starts the game with Set's Halo activated).
- Bêlit (Ornamental Spear).
- Balthus (Zingarian Bow).
After setup, each hero moves 5 gems from their Reserve zone to their Fatigue zone.
The Overlord starts with 6 gems in their Reserve zone and 5 in their Fatigue zone, and places the recovery token showing a recovery value of "7" in the Book of Skelos.
Reinforcement: 2 Reinforcement points (see Special Rules).
Overlord units: Pirates (two cards), Gray Man-Ape (two cards), Bossonian Guards, Constantius.
Special Rules
Special Rules (part 1):
Keg of Pitch: If the Gray Man-Ape is on the same area as a Keg of Pitch token, the Overlord may choose to replace his attack to throw the keg in an area in the Gray Man-Ape's line of sight. The Overlord follows the same rules for throwing an object as the heroes and rolls the Melee attack Value of the Gray Man-Ape to determine the distance of the throwing. The keg of pitch immediately explodes in the area it is thrown in.
If a model of the Overlord is in the same area as a Keg of Pitch token, the Overlord may choose to replace the model's Melee attack so that the keg explodes.
When a keg of pitch explodes, all the models in the area of the keg are the target of an area attack of two red dice. The usual defenses against the area attacks may be used. The Keg of Pitch token is then removed from play.
A hero in a keg of pitch's area may perform a simple manipulation to pick it up and transport it; the hero places the Keg of Pitch's token on their hero's sheet. A keg of pitch has an encumbrance of 6. If a hero suffers a wound while carrying a keg of pitch, they immediately put it down in the area where the hero is located, without the keg of pitch exploding.
Gitara's Cell: The door holding Gitara captive is reinforced. A hero in the area next to the door token may perform a complex Manipulation with a difficulty of 3 to remove that door from the board.
Gitara: During setup, the Overlord places Gitara's tile next to the board. As long as Gitara's door remains closed, Gitara cannot be attacked nor be wounded.
As soon as the door is removed from the board, the heroes take the Gitara tile who becomes an ally of the heroes and may be activated once per Heroes' turn. A hero with Leadership can activate Gitara by moving one gem from their Reserve zone to their Fatigue zone. Similarly, they may purchase additional Movement points for Gitara by moving gems from their Reserve zone to their Fatigue zone.
A hero in Gitara's area gains the Bodyguard skill. Only heroes with Bodyguard can spend gems to defend Gitara by using that skill.
Reinforcement: The Overlord may bring back reinforcements in any of the areas marked with the reinforcement flame, "1" or "8". If the Overlord chooses to bring back reinforcement in the areas marked "1" or "8", they remove the corresponding token and replace it with a Portcullis token. The portcullis is now considered lowered. The Overlord can no longer bring back reinforcements in that area and the heroes can no longer flee from that area.
Destroying a Portcullis: A hero in the area next to a Portcullis token and carrying a keg of pitch may perform a complex Manipulation with a difficulty of 3 to destroy the portcullis and remove that Portcullis token from the board. The explosion of the keg does not cause any damage to the models in that area and the Keg of Pitch token is discarded. The heroes can now flee from that area.
Special Rules (part 2):
Fleeing the Citadel: A hero or an ally model can flee the citadel from one of the outer areas to the west of the board by spending movement points as though the model was moving across a border. The model is then removed from the board. Once a model has fled, the model cannot be returned to the board. The Units of the Overlord cannot flee from the citadel. A hero or an ally model can flee in the same way by one of the areas marked by "1" and "8" tokens on the setup diagram if that area does not contain a Portcullis token.
Leaping From/Climbing a Balcony: A character can move across a railing from a balcony area to a ground floor area as though it were a border. The character rolls two yellow dice for falling damage. If the character has Leap, the character rolls one yellow die instead. A character with Climb can move across a railing from a ground floor area to a balcony area by spending 1 extra movement point.
Pit: A character must spend 1 extra movement point to move out of the pit area.
Chests: During setup, the Overlord places 3 chests on the board as indicated by the setup diagram. The asset deck contains: 1 Life Potion, 1 Leather Armor and 1 Mitra's Mace.
The Zamboula Strangler
For 5 players. Complexity 2. King + Stretch goals + Baal-Pteor.
Objective
Winning the Game:
- If the heroes help the Captain flee the citadel before the end of turn 8; the heroes win the game.
- If the Overlord prevents the Captain from fleeing the citadel by the end of turn 8; the Overlord wins the game.
Setup
The game starts with the heroes' turn.
Suggestions for 4 heroes:
- Conan Mercenary (Conan's Sword).
- Amboola (Pirate Saber).
- Taurus (Parrying Dagger and Throwing Knives).
- Pelias (Ring, Hand of Death, Lightning Storm, Set's Bite and Bori's Rage).
After setup, each hero moves 5 gems from their Reserve zone to their Fatigue zone.
The Overlord starts with 9 gems in their Reserve zone and 3 in their Fatigue zone, and places the recovery token showing a recovery value of "7" in the Book of Skelos.
Reinforcement: 3 reinforcement points.
Unit tiles in the setup table: Pirates (three cards), Baal Pteor (two cards), Bossonian Guards.
Special Rules
Ring: During setup 4 red gems are placed on the Ring card. These gems can be used by the hero carrying the Ring only to cast spells. When the hero carrying the Ring wants to use these red gems to cast a spell, they move them from the Ring card to the spell card. The gems used in this way must not raise the total number of gems on the spell card above its exertion limit. A hero can combine the red gems with their own gems from their Reserve zone to cast a spell. During the start phase and the end phase of each heroes' turn, the carrier of the ring moves the red gems from the spell cards to the Ring card. The red gems of the Ring card are never counted when calculating the life points of a hero.
Baal Pteor: When he dies, the key he is carrying falls to the ground, the Overlord then places the Key equipment card on the area where Baal-pteor was. A hero can then pick it up by performing a simple Manipulation.
Doors: A hero in an area adjacent to a door can perform a complex Manipulation with a difficulty of 4 to pick the lock. If the hero succeeds, the door is removed from the board. A hero carrying the key can open the doors by performing a simple Manipulation. Overlord units can pass doors freely. If an Overlord unit passes through a door, the door is removed from the board. The doors circled in red are shutters. They follow the same rules as doors regarding lock-picking. A model can never move between the two areas that a shutter separates, whether it is opened or not. Opening a shutter simply creates a line of sight between the two areas it separates.
Bossonian Guards and Captain: During setup, the heroes place 2 Bossonian Guard models without their colored base and the Captain model as well as their corresponding tiles beside the board. The Overlord places the Captain's life point token on space 4 of the turn track.
Cells: During setup, the Overlord randomly places the 3 tokens numbered 1 to 3 on the board as indicated by the setup diagram. These tokens represent the prison cells holding the Captain and the two Bossonian Guards. When a hero has line of sight to an area containing a Cell token, the hero flips that token faceup. If a token numbered 2 or 3 is revealed, the Cell token is replaced by a Bossonian Guard model without a colored base. If a token with the number 1 is revealed, the Cell token is replaced by the Captain model. The Bossonian Guard and Captain models are considered as heroes' allies. The heroes can activate them using their Leadership skill.
Fleeing the citadel: A hero or an ally can flee the citadel from an area outside the citadel to the west of the board indicated by "1" on the diagram, by spending movement points as though they were moving across a border. The model is then removed from the board. Once a hero or an ally has fled, they cannot be returned to the board. The Overlord units cannot flee the citadel.
Leaping From/Climbing a Balcony: A character can move across a railing from a balcony area to a ground floor area as though it were a border. The character rolls two yellow dice for falling damage. If the character has Leap, the character rolls one yellow die instead. A character with Climb can move across a railing from a ground floor area to a balcony area by spending 1 extra movement point.
Pit: A character must spend 1 extra movement point to move out of the pit area.
Cellar windows: The cellar windows do not block line of sight.
Chests: During setup, the Overlord places 4 chests on the board as indicated by the setup diagram. The asset deck contains: 1 Explosive Orb, 1 Axe, 1 Zingarian Breastplate, and 1 Life Potion.
Sacrificial Heroes
For 5 players. Complexity 3. King + Stretch goals.
Objective
Winning the Game:
- If the heroes destroy the outpost or sabotage the citadel before the end of turn 8; the heroes win the game.
- If the Overlord prevents the heroes from destroying the outpost and sabotaging the citadel before the end of turn 8; the Overlord wins the game.
Setup
The game starts with the heroes' turn.
Suggestions for 4 heroes:
- Zogar Sag (Black Staff, 2 Pictish Drinks, Recall, Set's Halo, Set's Bite, and Bel's Caress) and 2 Pict Warriors. Zogar Sag starts with Set's Halo cast.
- Thak (Parrying Dagger).
- Skuthus (Sacrificial Dagger, 1 Life Potion, 1 Elixir, Hand of Death, Life Transfer, Return of the Braves, and Lightning Storm).
- Zaporavo (Pirate Saber) and 2 Pirates.
After setup, each hero moves 4 gems from their Reserve zone to their Fatigue zone.
The Overlord starts with 8 gems in their Reserve zone and 4 in their Fatigue zone, and places the recovery token showing a recovery value of "7" in the Book of Skelos.
Reinforcement: 4 reinforcement points (see Special Rules).
Overlord units: Bossonian Guards (two cards), Conan, Pallantides, Shevatas, Valeria.
Special Rules
- Two Fronts: During setup, the Overlord places the two boards next to each other. The action in this scenario happens in two distant locations and at two different moments in time. The events played on the citadel board happen before the action played out on the outpost board. The resolution of certain actions on the citadel board will have an impact on the actions and units on the outpost board. The two boards are separate and are not joined. The models in an area on one board cannot move to an area on the other board.
- Bossonian Guards: When the Overlord activates the blue Bossonian Guard tile, all the Bossonian Guard models with a base (of any color) are activated on both game boards. All the Bossonian Guards with a blue and green bases are therefore activated. When the Overlord activates the gray Bossonian Guard tile, all the Bossonian Guard models without a base on both boards are activated.
- Reinforcement: The Overlord can bring reinforcements into play in any reinforcement area, on any board. For example reinforcements can be bought into play during the activation of the event tile, on the citadel board and on the outpost board.
- Return of the Braves: Skuthus can only reinforce Pirates. He cannot reinforce Pict Warriors.
- Pict Warrior: Only Zogar Sag can use Leadership to activate and defend the Pict Warriors.
- Pirate: Only Zaporavo can use Leadership to activate and defend the Pirates.
- Destroying the outpost: The outpost is considered destroyed when the huts numbered 1 to 6 on the setup diagram are destroyed.
- Destroying a hut: A hero next to, or inside, a numbered hut area can target it by performing a Melee Attack. If the hero obtains at least 6 successes during the same attack (4 successes if the maps have been stolen, see Stealing the Maps special rule) the hut is destroyed. If an orb is exploded in a numbered hut area, the hut is also the target of the area attack. An Overlord unit with Sacrifice, who is in the same area as the hero attacking the hut, can use this skill to protect the hut. When a hut is destroyed, the Overlord places a destroyed hut token on the hut area. If a chest is in same area as a destroyed hut the Overlord removes the chest token from the game. If a model is in the same area as a destroyed hut they suffer an attack of two red dice with no possible reroll (all defenses are possible).
The Curse of the Shape-shifter
For 5 players. Complexity 3. King + Stretch goals.
Objective
Winning the Game:
- If the heroes kill the sorcerer, or prevent the Overlord from warding off the curse before the end of turn 7; the heroes win the game.
- If the Overlord wards off the curse before the end of turn 7; the Overlord wins the game.
Setup
Suggestions for 4 heroes:
- Conan the wanderer (Axe).
- Savage Bêlit (Dagger and Parrying Dagger).
- Kerim Shah (Sword).
- Amboola (Dagger).
After setup, each hero moves 5 gems from their Reserve zone to their Fatigue zone.
The game starts with the Overlord's turn. The Overlord starts with 11 gems in their Reserve zone and 0 in their Fatigue zone, and places the recovery token showing a recovery value of "7" in the Book of Skelos.
Reinforcement: 5 reinforcement points.
During setup the Overlord places the tokens numbered 1 to 3 faceup on the board as indicated by the set up diagram to represent the altars.
The Sorcerer has Return of the Braves and Mitra's Halo.
Unit tiles in the setup table: Warlock (two), Mummies (three), Skeletons.
Special Rules
Special Rules (part 1):
- Animal Form: At the beginning of the scenario the tiles of the Giant Spider, the Giant Scorpion and the Camel are placed next to the Book of Skelos, unbloody side faceup, these tiles are considered as being the animal form tiles. The models of the Giant Spider, the Giant Scorpion and the Camel are placed next to the Book of Skelos, these models are considered as being the animal form models.
- Pirate: During setup the Overlord places the Pirate tile (orange, armor value 2 and movement value 2) next to the Book of Skelos. Pirates are considered neither as being heroes' allies nor Overlord units; they do not count for hindering for either side. Pirates can only be killed by a melee attack performed by the Overlord troops. They do not suffer damage from wounds inflicted by heroes.
- Curse: If at least one of the animal form tiles is placed unbloody side faceup at the beginning of each activation of the Sorcerer tile, the Overlord carries out the following steps:
- The Overlord chooses one of the animal form tiles unbloody side faceup and turns it bloody side faceup.
- The model representing the Sorcerer is then replaced by the animal form model corresponding to the animal form tile that has just been turned bloody side faceup. This model now represents the Sorcerer. The Sorcerer's turn will be played in the current animal form.
- While the Sorcerer is represented by an animal form model, all the characteristics of the animal form tile (movement, armor, attack and skills) corresponding to the animal form model that represents the Sorcerer, replace all the characteristics of the Sorcerer tile (movement, armor, attack, spells and skills). If Mitra's Halo is activated when the Sorcerer is transformed, it is automatically deactivated.
Special Rules (part 2):
If all the animal form tiles are placed bloody side faceup at the beginning of each activation of the Sorcerer tile, the Overlord carries out the following steps:
- The Overlord turns all the animal form tiles unbloody side faceup.
- The model that represents the Sorcerer is replaced by the model of the Sorcerer. The Sorcerer's turn is then played in the form of the Sorcerer.
- While the Sorcerer is represented by the model of the Sorcerer, the characteristics of the Sorcerer tile (movement, armor, attack, spells and skills) are used for all that concerns the Sorcerer.
- Warding off the curse: To ward off the curse the Overlord must sacrifice a pirate on each of the three altars. For this the pirate must be in the same area as an altar token and the Overlord must kill them using a melee attack. When a pirate is sacrificed on an altar, the altar token is removed from the board as well as the animal tile and model corresponding to the altar token (1-Camel, 2-Giant Scorpion, 3-Giant Spider). If the animal form model that must be removed from the game corresponds to the current form of the Sorcerer, it is then replaced on the board by the model of the Sorcerer.
- Escorting the Pirates: If an Overlord unit starts its activation phase in the same area as a pirate, the Overlord can decide to move the pirate model at the same time as the activated unit. The pirate makes the same move (or part of the move) as the Overlord unit. If the Overlord uses a Movement benefit for the activated unit, the pirate can follow the unit without the Overlord moving an additional gem for the pirate's move. At any moment of the unit's move, the Overlord can decide that the pirate will no longer follow the unit in question and so stop the pirate. It must not be forgotten that pirates do not count for hindering. An Overlord model can only move one pirate with them and each pirate can only be moved once per tile activation.
- Attacking the Sorcerer: When the Sorcerer is represented by an animal form model the heroes cannot target it with an attack (Melee or Ranged).
- Altar: A hero in the same area as an altar can perform a simple Manipulation to activate the altar. If a hero activates the altar corresponding to the current form of the Sorcerer (1-Camel, 2-Giant Scorpion, 3-Giant Spider) then the animal form model is replaced by that of the Sorcerer.
- Lines of Sight: A character in a wall area has line of sight to each ground area within the fortress walls. An area in a tower and an area outside that tower are within each other's line of sight only if the areas are in or adjacent to the tower.
- Leaping from Walls: A character can move across a parapet from a wall area to a ground area as though it were a border. The character rolls two red dice for falling damage. If the character has Leap, the character rolls one red die instead.
The Iron Hand
For 5 players. Complexity 3. King + Stretch goals.
Objective
Winning the Game:
- If the heroes flee with both Treasure Chests before the end of turn 7; the heroes win the game.
- If the Overlord prevents the heroes from fleeing with both Treasure Chests before the end of turn 7; the Overlord wins the game.
Setup
The game starts with the heroes' turn.
Suggested heroes:
- Conan mercenary.
- Constantius.
- Olgerd Vladislav.
- Amboola.
After setup, each hero moves 6 gems from their Reserve zone to their Fatigue zone.
The Overlord starts with 7 gems in their Reserve zone and 4 in their Fatigue zone, and places the recovery token showing a recovery value of "7" in the Book of Skelos.
Reinforcement: The Overlord chooses up to three laid down models and stands them up. If a reinforced model belongs to a tile flipped to its "bloodied" face, the Overlord flips that tile over to its non "bloodied" face.
Khemsa has 2 spells: Bori's Rage and Inversion.
Unit tiles in the setup table: Pirates (two cards), Bossonian Guards (two cards), Taurus, Khemsa.
Special Rules
Special Rules (part 1):
Fist-fight: Heroes have no equipment in this scenario. However, they ignore penalties from unarmed attacks. If a hero's life points are reduced to zero, they are considered "out of combat" and their model is laid down in their area of the board. They are not considered dead (therefore, the number of gems that their companions recover do not change) and they will have to declare themselves Cautious during the next Heroes' Stance Phase.
If a Bossonian Guard or a Pirate has their life points reduced to zero, they are not dead and their model is laid down in their area. If all the models of a tile are laid down, the Overlord flips the tile over to its "bloodied" face then places it to the right, at the end of their River.
When Khemsa or Taurus have their life points reduced to zero, they are removed from the game and their tile is flipped over to its "bloodied" face, then placed to the right, at the end of their River.
A laid down model is not taken into account for Hindering and Occupied areas.
Dredging the River: If the Overlord removes the Pirate or Bossonian Guard tiles when dredging the River, they must then remove from the board all the laid down models corresponding to the removed tile.
Recovery of the heroes: When a hero declares themselves Cautious during the Heroes' Stance phase, they may choose to either move 5 gems from their Fatigue zone to their Reserve zone or move all their gems from their Wound zone to their Fatigue zone.
Treasure Chests: During setup, the Overlord places 2 Treasure Chest tokens as indicated in the setup diagram. The Treasure Chest token is considered an object with an encumbrance of 10. A hero in a Treasure Chest token's area may perform a simple Manipulation to pick it up. A hero carrying a treasure chest cannot perform a Melee Attack.
If a hero carrying a treasure chest is the target of the Inversion spell, they drop the treasure chest in their area, then the Inversion spell is resolved.
If a hero carrying the treasure chest is "out of combat", they drop the treasure chest in their area.
Special Rules (part 2):
Alcohol Cask: A hero in an Alcohol Cask token's area may perform a simple Manipulation to take the Alcohol Cask token from the board and place it on their Hero's sheet. The hero then moves 2 gems from their Fatigue zone to their Reserve zone (in priority move the gems from the Fatigue zone, then the ones from the Action spaces if the Fatigue zone is empty).
Hangover: The Overlord may remove an Alcohol Cask token from a hero's sheet to force that hero to Reroll right after the free Rerolls and before any Reroll actions.
Walls: A character with Wall Wrecker cannot use it to move across an outer wall of the inn or to move between areas of different elevations.
Leaping from/Climbing a Balcony: A character can move across a railing from a balcony area to a ground floor area as though it were a border. The character rolls two red dice for falling damage. If the character has Leap, the character rolls one red die instead. A character with Climb can move across a railing from a ground floor area to a balcony area by spending 2 extra movement points.
Leaping from/Climbing a Stairwell: A character can move across a banister from a stair area to a ground floor as though it were a border. The character rolls two yellow dice for falling damage. If the character has Leap, the character rolls one yellow die instead. A character with Climb can move across a banister from a ground floor area to a stair area by spending 1 extra movement point.
Bar: A character with or without Leap or Climb may move onto the Bar areas or a table area by spending 1 extra movement point. These areas provide an Elevation bonus of one yellow die. A character in the bar's area or in a table's area, with or without Reach, may attack a character in an adjacent area with a Melee Attack. These areas do not block line of sight. A character may exit these areas with no movement penalty.
Bar Stools: A character in a chair token's area may pick it up for free when performing a Melee Attack. The chair token is immediately returned to the box and that character benefits from the chair's attack bonus of one yellow die (in addition to any weapon's Melee Attack bonus).
Chests: During setup, the Overlord places 3 chests on the board as indicated by the setup diagram. The asset deck contains 3 Explosive Orbs.