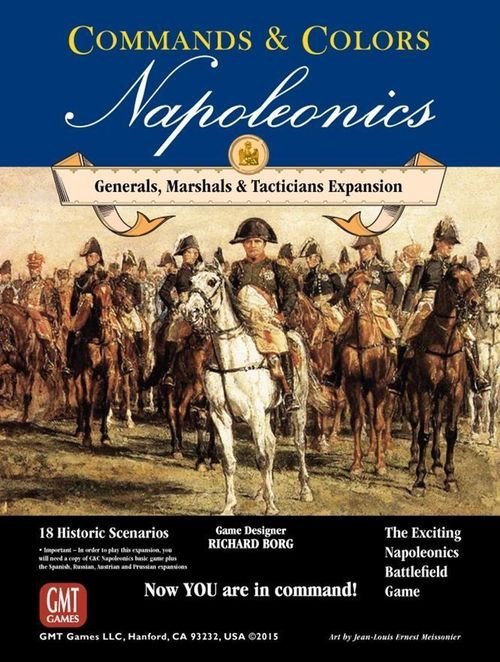
Commands & Colors: Napoleonics Expansion #5 – Generals, Marshals & Tacticians
Commands & Colors: Napoleonics Expansion #5 – Generals, Marshals & Tacticians Rulebook
Table of Contents
Table of Contents
- 1. Introduction
- 2. Contents
- 3. New Units
- 4. New Mechanics in the Game
- Tactician Cards
- Additional Notes on Tactician Cards
- 4. Terrain
- 5. Scenarios
- Scenario 1: Sahagún (Cavalry Attack), 21 December 1808
- Scenario 2: Sorauren (French Right, Early Afternoon), 28 July 1813
- Scenario 3: Sorauren (French Left), 28 July 1813
- Scenario 4: Göhrde, 18 September 1813
- Scenario 5: Wartenburg, 3 October 1813
- Scenario 6: Dohna, 9 October 1813
- Scenario 7: Liebertwolkwitz (Morning), 14 October 1813
- Scenario 8: Liebertwolkwitz (Afternoon), 14 October 1813
- Scenario 9: Lindenau, 16 October 1813
- Scenario 10: Möckern (French Right), 16 October 1813
1. Introduction
The Commands & Colors game system allows players to effectively represent epic Napoleonic battles, as well as smaller historical engagements. The scale of the game is flexible and varies from one battle to another. In some scenarios, an infantry unit may represent an entire division, while in others a unit may represent a single regiment or battalion. During play, Order cards regulate movement while creating "fog of war," and battle dice resolve combat quickly and effectively. The stylized battlefield maps emphasize important terrain features and show the historical deployment of the forces to scale with the game system. Finally, the Napoleonic tactics you will need to win are extraordinarily well suited to the advantages and limitations inherent in the different Napoleonic National Armies of the period and to the characteristics of the terrain of the battlefields on which they fought.
Generals, Marshals & Tacticians is the fifth expansion for the Commands & Colors Napoleonics game system from GMT. There are 18 historical scenarios in this expansion. Several scenarios focus on the clashes between the French army of 1813 and the Russian, Austrian and Prussian armies around Leipzig.
This expansion also introduces a completely new deck of Tactician cards. The Tactician cards, together with the updated deck of Napoleonic Order cards, are designed to give more life to the Napoleonic experience of every player, increasing the role of Leaders on the battlefield without adding complexity or pages to the rules. Overall, the Tactician cards add several new and exciting command possibilities to the scenarios included in this expansion. An exhaustive listing of the Commander tactical values for all Commands & Colors Napoleonics scenarios published to date is also included. This listing allows players to replay any previously published Napoleonic scenario using the new Tactician deck, the updated Order card deck and these Generals, Marshals & Tacticians rules.
Important: To play many of the scenarios in this expansion, you will need a copy of the Commands & Colors Napoleonics game and the expansions for the Spanish, Russian, Austrian and Prussian armies.
2. Contents
- 1 Rules and Scenario Book containing 18 battles.
- 2 Commander Reference cards with the tactical value of Commanders.
- 2 Terrain Effects Charts.
- 1 Sheet containing:
- 11 double-sided Terrain tiles.
- 8 Garrison markers (double-sided, French and Coalition).
- 18 Victory Flag tokens (3 French, 3 British, 3 Spanish, 3 Russian, 3 Austrian, 3 Prussian).
- 1 deck of 90 Generals, Marshals & Tacticians Order cards.
- 1 deck of 50 Tactician cards.
- 2 sheets of Block Stickers.
- 65 Blocks:
- 19 small blocks for Infantry units (7 brown, 2 red).
- 35 medium blocks for Cavalry units (16 green, 3 medium gray, 12 red, 4 dark blue).
- 11 rectangular blocks for Leaders and Artillery units (4 green, 1 brown, 3 red, 4 dark blue).
NOTE: There will be a few spare blocks of every size in each color.
National Unit Reference Cards
Since there are only a limited number of new units in this expansion (the Russian Light Lancer Cavalry and Light Militia Lancer Cavalry, the British Rocket Battery and the French Guard Horse Artillery), no updated Unit Reference cards have been included for these nations. Instead, there is a detailed explanation of these units in the rules (see Section 3).
Units and Leaders
Each unit is made up of a certain number of blocks. The number of blocks in a unit may vary according to the unit type and the Nation, and is detailed on the National Unit Reference card.
A General, Marshal or Field Officer of any rank (hereafter called a Leader) is represented by a rectangular block. A single Leader block alone is not considered a unit.
Visual Aids for Identifying Units and Leaders
To help players deploy and recognize units, several classes of unit icons are introduced.
- Flaming grenade icon: Grenadier Infantry. Upper left or right corner of each sticker for the following unit types: Grenadiers, Guard Grenadiers, Old Guard.
- Bugle icon: Light Infantry. Upper left or right corner of each sticker for the following unit types: Light, Light Riflemen, Guard Light, and Young Guard.
- Cavalry helmet icon: Heavy Cavalry. Upper left or right corner of each sticker for the following unit types: Heavy, Guard Heavy, Heavy Cuirassiers.
- Horse head icon: Horse Artillery. Upper left or right corner of each sticker for the following unit types: Horse Artillery.
Line Infantry, Reserve and Militia infantry units, Light Cavalry (Light, Guard Light, Light or Militia Light Lancers, and Cossacks), and Foot Artillery (Regular and Guard) are distinguished by the absence of any identifying icon.
Victory Flag Tokens
These Victory Flag tokens are used to record the players' progress in the pursuit of victory. When the Victory Flags of a scenario exceed the tokens available, players will have to improvise, and may choose to use a coin or the last block of a defeated opposing unit to record a Victory Flag.
Explanation of Victory Flags
To reduce the amount of text in a scenario's report notes, the following terms are used to describe some common conditions of Victory Flag Objective Hexes:
NOTE: All Start-of-Turn Victory Flags (temporary and permanent) are awarded at the start of a player's turn. All other Victory Flags (temporary and permanent) are awarded when they are won during a player's turn. All Temporary Victory Flags, whether won at the start of the turn or during it, are lost at the moment the condition for receiving them stops being met.
Temporary Victory Flag Objective Hex. The Victory Flag of this Objective Hex is immediately won as soon as the appropriate side occupies the hex. The Victory Flag stays captured while a unit of the appropriate side holds the hex. If the unit leaves the hex for any reason (movement, retreat or elimination) during its own turn or during the opponent's turn, the flag is immediately lost and returned to its original position on the Objective hex.
Temporary Victory Flag Objective Hex (Start of Turn). The Victory Flag of this Objective Hex is immediately won as soon as the appropriate side occupies the hex at the start of its turn. If the unit leaves the hex for any reason (movement, retreat or elimination) during its own turn or during the opponent's turn, the flag is immediately lost and returned to its original position on the Objective hex.
Temporary Group Victory Flag Objective Hex. A certain number of adjacent hexes together form a Group Victory Flag Objective. The appropriate side that occupies all of the Objective hexes immediately wins one or more Victory Flags. While all Objective hexes are occupied, the Victory Flags count; if any of the hexes stops being occupied for any reason (movement, retreat or elimination) during its own turn or during the opponent's turn, the Group Victory Flags are immediately lost.
Temporary Group Victory Flag Objective Hex (Start of Turn). A certain number of adjacent hexes together form a Group Victory Flag Objective. The appropriate side that occupies all of the Objective hexes at the start of its turn immediately wins one or more Victory Flags. While all Objective hexes are occupied, the Victory Flags count; if any of the hexes stops being occupied for any reason (movement, retreat or elimination) during its own turn or during the opponent's turn, the Group Victory Flags are immediately lost.
Temporary Majority Victory Flag Objective Hex. The Victory Flag for this group of Objective hexes is immediately won when the appropriate side has units occupying an absolute majority of the hexes in the group. An absolute majority means occupying more of these Objective hexes than your opponent. If you occupy one hex and the opponent occupies none, for example, that is an absolute majority. The Victory Flag is kept while that side holds the absolute majority. The Flag is lost when a side stops having the absolute majority.
Temporary Majority Victory Flag Objective Hex (Start of Turn). The Victory Flag for this group of Objective hexes is immediately won when the appropriate side has units occupying an absolute majority of the hexes in the group at the start of its turn. An absolute majority means occupying more of these Objective hexes than your opponent. If you occupy one hex and the opponent occupies none, for example, that is an absolute majority. The Victory Flag is kept while that side holds the absolute majority. The Flag is lost when a side stops having the absolute majority.
Permanent Victory Flag Objective Hex. The Victory Flag of this Objective hex is immediately won as soon as the appropriate side occupies the appropriate hex. Once won, the Victory Flag is not returned and does not go back into play, even if the unit leaves the hex for any reason (movement, retreat or elimination).
Permanent Victory Flag Objective Hex (Start of Turn). The Victory Flag of this Objective hex is immediately won as soon as the appropriate side occupies the appropriate hex at the start of its turn. Once won, the Victory Flag is not returned and does not go back into play, even if the unit leaves the hex for any reason (movement, retreat or elimination).
Sticker Application
The units to be assembled from the blocks and stickers are:
- French Units: Guard Heavy Cavalry, 1 unit (4 blocks); Guard Horse Artillery, 1 unit (3 blocks).
- British Units: Line Infantry, 3 units (12 blocks); Light Cavalry, 4 units (2 blocks); Rocket Battery, 1 unit (3 blocks).
- Russian Units: Light Cavalry, 1 unit (4 blocks); Light Lancers, 1 unit (4 blocks); Militia Lancers, 2 units (8 blocks); Horse Artillery, 1 unit (3 blocks); Leader (1 block).
- Portuguese Units: Line Infantry, 1 unit (4 blocks); Light Infantry, 2 units (3 blocks); Leader (1 block).
- Prussian Units: Cuirassier Heavy Cavalry, 1 unit (3 blocks).
Applying the stickers: Apply the stickers of the corresponding units to the front and back of each unit's blocks. Place the stickers of the French units on the dark blue blocks, the British unit stickers on the red blocks, the Portuguese stickers on the brown blocks, the Russian unit stickers on the green blocks, and the Prussian unit stickers on the medium gray blocks. It is suggested that you separate the blocks by color, and then sort the blocks by size. Begin with the French units. Take out the 4 dark blue medium blocks. Find the stickers for the French Guard Heavy Cavalry on sticker sheet 1. Peel off and apply one sticker to the front and another to the back of each of the 4 dark blue medium blocks. When you run out of the 4 blocks, move on to the French Guard Horse Artillery. Take out 3 rectangular blocks. Find the stickers for the French Guard Horse Artillery on sheet 1. Peel off and apply one sticker to the front and back of the 3 rectangular blocks. When you run out of the 3 blocks, move on to the British Line Infantry units, which require 12 blocks. Continue this way until you have completed all the units. It will take some time, but the effort will be worth it!
Some extra blocks and stickers are provided as spares.
3. New Units
Prussian Light Lancer Cavalry
- Map ID code: LNCR
- Blocks in the unit: 4
- Movement in hexes: 3
Battle:
- Melee: 1 die per block.
- A Lancer unit that is given orders re-rolls all of its dice showing a flag result once, for additional hits with a unit icon, saber or flag against any defending unit except Cuirassiers. Players must record the number of initial hits with unit icons, sabers and flags they rolled in the initial melee, and add to that number the number of hits from unit icons, sabers and flags they rolled on the second roll. The total number of hits and flags is then applied to the defending unit.
- A Lancer unit that defends does not re-roll flags when it responds.
- A Lancer unit re-rolls flags when a First Strike card is used with it.
Morale: Retreats 1 hex for each flag.
Notes: Can retreat and reform when attacked in melee by infantry, or attacked by infantry/artillery with Combined Arms.
Russian Light Militia Lancer Cavalry
- Map ID code: MLNCR
- Blocks in the unit: 4
- Movement in hexes: 3
Battle:
- Melee: 1 die per block.
- Does not score hits with sabers, except initial saber hits or saber hits when re-rolling flags against lone Leaders.
- A Lancer unit that is given orders re-rolls all of its dice showing a flag result once, for additional hits with a unit icon or flag against any defending unit except Cuirassiers. Players must record the number of initial hits with unit icons and flags they rolled in the initial melee, and add to that number the number of hits from unit icons and flags they rolled on the second roll. The total number of hits and flags is then applied to the defending unit.
- A Militia Lancer unit that defends does not re-roll flags when it responds.
- A Militia Lancer unit re-rolls flags when a First Strike card is used with it.
Morale: Retreats 3 hexes for each flag.
Notes: Can retreat and reform when attacked in melee by infantry, or attacked by infantry/artillery with Combined Arms.
British Rocket Battery
- Map ID code: RB
- Blocks in the unit: 3
- Movement in hexes: 1 or 2 without combat
Notes: Can retreat and reform when attacked in melee by infantry, or attacked by infantry/artillery with Combined Arms.
Battle:
- A Rocket Battery unit with orders that does not move may choose as its target an enemy unit that is 5 spaces or fewer away in any direction.
- At long range, a Rocket Battery does not need a line of sight to an enemy unit.
- At long range, terrain does not reduce the number of dice.
- At long range, a Rocket Battery always rolls 2 dice, unless these are increased by the appropriate Tactician card.
- At long range, 2 unit icons from the target unit are needed to score a hit on it.
- At long range, the target unit cannot ignore the flags rolled against it for any reason.
- At long range, if the Rocket Battery rolls 2 saber icons, it receives a hit.
- When chosen as a target at long range, the Rocket Battery receives one hit for each artillery icon rolled.
- The number of dice with which a Rocket Battery fights is not reduced when the unit has only one block.
- A Rocket Battery cannot make a Combined Arms attack.
- In melee, a Rocket Battery follows the same rules as a Horse Artillery unit.
- In melee, a Rocket Battery fights with 2 dice.
Morale: Retreats 1 hex for each flag.
HISTORICAL NOTE: In the Napoleonic era, rockets were a novelty that often inspired fear (a compulsory retreat for units showing any number of flags), but inflicted little damage (two icons from the target unit are needed to score one hit against it). Besides being unpredictable, rockets tended to explode when launched (the owning player's Rocket Battery receives a hit when both of the rocket dice show sabers).
French Guard Horse Artillery
- Map ID code: GHA
- Blocks in the unit: 3
- Movement in hexes: 1 and fight, 2 without fighting
Battle: See the artillery combat section in the base game rules.
Morale: May ignore 2 flags. If it retreats, it retreats 1 hex for each flag.
4. New Mechanics in the Game
Garrison Markers
A unit of infantry with two or more blocks that occupies a building, walled garden or walled farm hex at the start of its turn, and is ordered to leave that hex, may leave a Garrison in the hex. One infantry block is taken from the reserve of blocks that have not been deployed in this scenario and placed in the building together with a Garrison marker showing the appropriate side, French or Coalition, face up. The unit that leaves the hex does not lose a block to create the Garrison. An infantry unit may form multiple Garrisons during the course of a scenario.
A Garrison block is treated as an infantry unit in all respects, with the following exceptions:
- A Garrison block cannot move.
- A Garrison block fights with 1 die. However, Order and Tactician cards may modify its battle dice.
- A Garrison block does not receive any National modifier.
- A Garrison block is eliminated if forced to retreat.
- A Garrison block, when eliminated, does not count as a Victory Flag.
- A friendly unit may enter a hex with a Garrison. When the unit enters, the Garrison marker and the infantry block are removed from the game. The unit that has entered does not gain a block when the Garrison block is removed.
Important Note: A Garrison marker and an infantry block, by definition, will occupy a hex. Therefore, a Garrison marker and an infantry block occupying a hex will meet the condition of a victory flag objective that requires the building, walled garden or walled farm to be occupied by an army.
Great Battery
When an army has two or more Artillery units in adjacent contiguous hexes, the units may be ordered to act as a Great Battery. The Artillery units of a Great Battery may choose the same enemy unit as their target, within combat range, and will roll all of their battle dice at the same time.
- Each unit with orders in the Great Battery determines the number of battle dice it will roll in long-range combat, including any reduction for terrain.
- An Artillery unit must have the enemy unit it has chosen as its target within its range and be able to trace a clear line of sight to it.
- An Artillery unit on a hill may not fire as part of a Great Battery if it must fire over the heads of a friendly unit in a lower adjacent hex.
- A Horse Artillery unit that moves may not fire as part of a Great Battery.
Once the battle dice for each Artillery unit of the Great Battery have been determined, all the dice are gathered together and rolled at the same time. If the number of dice allowed exceeds the number of dice you have, roll the dice you have and record the number of hits and flags. Then roll the remaining allowed dice. Add the hits and flags to those of the first roll and apply all of them to the enemy target unit.
Leader Casualty Check
Addition to the Base Game Rule. With the Generals, Marshals & Tacticians rules, a Leader that is alone in a hex may now be chosen as the target of a long-range attack (choosing it in melee combat has always been allowed). When a Leader is alone in a hex, the attacking enemy unit rolls its normal battle dice in long-range combat. Two saber symbols will mean one hit and will eliminate the Leader. If the Leader is not hit, it must retreat 1, 2 or 3 hexes. Flags rolled have no effect against an unattached Leader.
Generals, Marshals & Tacticians: Order Cards
The new deck of 90 Generals, Marshals & Tacticians Order cards has not undergone many major changes. Players will find most of the cards familiar. Updates to the deck focus mainly on how Order cards work in conjunction with the new Tactician card deck.
- An Explore card tells a player to draw one Tactician card at the end of their turn.
- An Elan card tells both players to draw one Tactician card at the end of the turn.
- The Elan card also tells players to shuffle both decks, the Order cards and the Tactician cards, with their discard piles to form new decks.
- The card "Let Them Try the Cold Steel" tells a player to draw one Tactician card at the end of their turn.
- A "La Grande Manoeuvre" card tells a player to draw one Tactician card at the end of their turn.
- A Leadership card tells a player to draw one Tactician card at the end of their turn.
- A Regrouping card tells a player to draw one Tactician card at the end of their turn.
- The First Strike and Supply Under Pressure cards have been moved to the Tactician deck.
Take Command (New Cards)
The "Take Command, Any Section," "Take Command Left," "Take Command Center" and "Take Command Right" cards are six new Order cards.
When a Take Command card is played, the card gives orders to units under the command of a Leader. The Leader and units in up to 3 adjacent, linked and contiguous hexes to the Leader receive orders. When a Leader is attached to a unit, the unit also receives orders as long as the Leader remains with the unit. A Leader may leave the unit to which it is attached, but the unit will not receive orders.
- Take Command Left gives orders to a Leader on the left flank.
- Take Command Center gives orders to a Leader in the center.
- Take Command Right gives orders to a Leader on the right flank.
- Take Command Any Section gives orders to a Leader in any section.
Units receiving orders in contiguous, linked and adjacent hexes may be in different sections of the battlefield, as long as at least one of the units with orders is adjacent to at least one other unit with orders, and at least one of the units with orders is adjacent to the chosen Leader.
Future Concepts in Order Cards
The concept of a Leader of Honor found in the text of all Take Command cards is a concept reserved for a later expansion. Likewise, the Corps Order star symbols printed on some Order cards are a concept reserved for the scenarios of La Grande Bataille.
Tactician Cards
Tactician cards add an element of suspense and will challenge players to coordinate their use at the appropriate moment. Players will soon realize that Tactician cards, and how they relate to the Leaders on the battlefield, will become some of their most prized assets.
In game terms, Tactician cards represent Leader actions and Napoleonic events or unit capabilities. These cards can hinder the enemy army, improve a player's units, or can instantly change the course of the battle.
The number of Tactician cards each player receives at the start of the battle is given in the scenario notes. For official scenarios created before this expansion, players should consult the Commander Tactical Values Reference card. That card has an extensive listing of all Commands & Colors Napoleonics scenarios published to date. Each scenario has the Commander's Tactical Value for the army, which equals the number of cards with which a player's army starts the battle.
At the end of a player's turn, the player draws a Tactician card when the Order card played so indicates. There is no limit to the number of Tactician cards a player may keep.
NOTE: A player who uses a Tactician card during the opponent's turn does not immediately replenish their Tactician deck. Replenishment of Tactician cards only takes place at the end of a player's turn, when the Order card so indicates.
Players must pay attention to a number of simple but important rules when using a Tactician card.
- A Tactician card must always be played when indicated. Some cards may be played out of turn, during the opponent's turn, or as a reaction to one of their actions or played cards.
- When you play a Tactician card, play it in front of you at the appropriate moment (possibly as a reaction to one of your opponent's actions), and read it aloud.
- A player may use as many Tactician cards as desired during a turn, but only one card may be played on a lone Leader, a unit with an attached Leader, or a unit during a turn.
- If the effects of two Tactician cards played in succession conflict, the second card cancels the effect of the first.
- If there is a conflict between the basic rules of these rules and a Tactician card, the card's rules take precedence.
- Movement and battle restrictions from terrain always apply, unless the Tactician card specifies otherwise.
- During a player's turn, when an Order card containing the words "Equal to the Command" is played, the player counts only Order cards. Tactician cards are not counted.
Default Action of Tactician Cards
All Tactician cards have a default action. Instead of using the text of the Tactician card, the default action of a Tactician card allows the player to discard a Tactician card after all combat has been completed, but before drawing new Order cards, and reposition a Leader up to 3 hexes. Terrain restrictions still apply when a Leader is moved.
Additional Notes on Tactician Cards
Charge if Charged
Play this card after your opponent declares a cavalry melee against your Cavalry unit, but before any dice are rolled. Both units roll their melee dice and fight at the same time. Resolve hits simultaneously and then retreats simultaneously. If the attacking unit that received orders is not eliminated or does not retreat, it may advance if eligible.
NOTES: A Charge if Charged Tactician card may be played at any time your opponent declares a cavalry melee against one of your Cavalry units, not only when an enemy Cavalry unit receives orders through a Cavalry Charge Order card. The words "Charge if Charged" in the title of the Tactician card are for historical purposes only.
In the possible situation where one of the Cavalry units must retreat, but its route is occupied by units (friendly or enemy), an enemy Leader, impassable terrain, or the edge of the battlefield, and the unit cannot retreat, one block is eliminated for each hex the unit cannot enter.
In the possible situation where both Cavalry units must retreat, but the route of one unit is occupied, preventing it from retreating, one block is eliminated for each hex to which a unit cannot retreat before neither unit actually completes any of its retreat moves.
In the possible situation where both Cavalry units must retreat, and the routes of both are occupied, preventing retreat, one block is eliminated for each hex to which a unit cannot retreat before neither unit actually completes any of its retreat moves.
Infantry Forward Leader
An Infantry unit with orders and an attached Leader may move 1 hex further than its order allows. The unit may still fight, if eligible.
EXAMPLES:
- An Infantry unit with orders normally moves 1 hex and fights. When the Tactician card "Infantry Forward Leader" is played with the unit that has an attached Leader, the unit may move 2 hexes and fight.
- When a Tactician card is played with a Light Infantry unit that has an attached Leader, the unit may move 2 hexes and fight, or it may choose to move 3 hexes and not fight.
- An Infantry unit with orders and an attached Leader that receives the "Bayonet Charge" order may normally move 2 hexes and fight in melee. If the Tactician card "Infantry Forward Leader" is also played, the unit may move up to 3 hexes and fight.
- An Infantry unit with orders and an attached Leader that receives the "Forced March" order may normally move up to 2 hexes and fight. If the Tactician card "Infantry Forward Leader" is played with the Infantry unit that has the attached Leader, the Infantry unit may move up to 3 hexes and fight.
- A Light Infantry, Grenadier or Guard Infantry unit, with or without an attached Leader, when it receives a "Forced March" order, may normally move up to 2 hexes and fight. If the Tactician card "Infantry Forward Leader" is played with a Light Infantry, Grenadier or Guard Infantry unit with an attached Leader, the unit may move up to 3 hexes and also fight.
- An Infantry unit with orders and an attached Leader that receives orders through the Order card "La Grande Manoeuvre" may normally move 4 hexes and not fight. When the Tactician card "Infantry Forward Leader" is played with the unit with an attached Leader, the unit may move up to 5 hexes and not fight.
- An Austrian Line Infantry or Militia Infantry unit is limited to moving only 1 hex and fighting when it receives orders through a "Forced March" or "Bayonet Charge" card. However, if the Tactician card "Infantry Forward Leader" is played with one of these units with an attached Leader, the unit may move 2 hexes and fight.
Leader Unit Reform
A unit that is in a hex adjacent to a friendly Leader, or a unit with an attached Leader, and that has lost one or more blocks, may attempt to reform before its units receive orders. Roll 2 dice; a unit icon or flag reforms 1 block, which returns to the unit. Units cannot gain more blocks than they originally had.
NOTES: It is important to note that the Leader Unit Reform action takes place before any unit receives orders. A unit may therefore reform, and does not necessarily have to receive orders that turn.
Light Infantry Skirmish
A Light Infantry unit may move up to 3 hexes passing through friendly units and terrain that is not impassable. The unit may perform long-range combat. The combat restrictions due to terrain still apply. Immediately after performing long-range combat, the unit may fall back to its original hex or remain in its current hex.
NOTE: A Light Infantry unit that moves will fight with half the number of blocks, rounding up or down depending on the Nationality of the army. A Light Infantry unit cannot fight in melee. Other units may fight before and/or after the Light Infantry unit that performs the skirmish in the combat phase. However, immediately after the Light Infantry unit completes its long-range combat, the unit must either return to its original hex or remain in its current hex.
Sappers
An Infantry unit with orders that fights against an enemy unit or Leader that is not in a clear terrain hex will ignore the melee combat reductions due to terrain.
NOTE: An Infantry unit with orders ignores all combat reductions due to terrain when a "Sappers" Tactician card is played with it.
Capable Tactician
At the end of your turn, discard this card and draw one additional Tactician card of your choice from the discard pile. You may not play the selected card in this turn.
NOTE: A player may look at the Tactician discard pile before playing the "Capable Tactician" card to see which Tactician cards are available. When an Elan card is played, the decks are reshuffled before the player draws cards.
Combat in Orchards and Vineyards
Any unit may fight in the turn in which it enters an Orchard/Vineyard hex.
When fighting from an Orchard/Vineyard hex:
- An Infantry unit does not reduce the number of battle dice it rolls.
- A Cavalry or Artillery unit reduces the number of battle dice it rolls by 1.
When an enemy unit or Leader in an Orchard/Vineyard hex is chosen as a target, a unit rolls 1 battle die fewer in long-range combat and in melee.
Line of Sight: An Orchard/Vineyard hex blocks line of sight.
Church
A Church has all the characteristics and effects of a village tile. In addition, a unit in a Church hex may ignore one flag. Please see the Terrain section of the base rules for full details.
4-Sided Fortification
A 4-sided redoubt is included in this expansion. It has the same characteristics as the 3-sided fortifications, except for the number of hex sides it affects. Please see the Terrain section of the base rules for full details.
Drawing cards ends a player's turn.
4. Terrain
NOTE: The source prints the heading "4." both for the New Mechanics section above and for this Terrain section. It is transcribed as printed.
Orchard/Vineyard
Movement: There are no restrictions on movement. An Infantry unit may form square in an Orchard/Vineyard hex.
NOTE: An Infantry unit in a fortification hex cannot form square when it is attacked by cavalry across a hex side with a fortification. However, an Infantry unit in a fortification hex may form square when it is attacked by cavalry across a hex side that has no fortification.
Marsh
Movement: An Infantry, Cavalry unit or Leader that enters a Marsh hex must stop and cannot move any further that turn. A Marsh hex is considered impassable for an Artillery unit. An Infantry unit cannot form square in a Marsh hex.
Combat: A unit may fight in the turn in which it enters a Marsh hex. A unit in a Marsh hex reduces its battle dice by 1 in both long-range combat and melee. When an enemy unit or Leader in a Marsh hex is chosen as a target, a unit rolls 1 battle die fewer in melee combat, but its dice in long-range combat are not reduced.
Line of Sight: A Marsh hex does not block line of sight.
Walled Garden
A Walled Garden has all the characteristics and effects of a woods tile. In addition, a unit in a Walled Garden hex may ignore one flag. Please see the Terrain section of the base rules for full details.
Walled Farm
A Walled Farm has all the characteristics and effects of a village tile. In addition, a unit in a Walled Farm hex may ignore one flag. Please see the Terrain section of the base rules for full details.
5. Scenarios
When setting up the game, players should pay special attention to the units deployed for the scenario. Several of the battles in this expansion have more than one Coalition army fighting against the French forces.
After placing the terrain hexes on the battlefield as indicated, we recommend that players deploy the forces by nationality, deploying the Leaders and one block of the type of unit required for each unit. Use the board edges and flank boundaries (dashed lines) to quickly locate the correct hexes. Then complete each Infantry, Cavalry and Artillery unit of each nationality with the number of blocks required, as detailed on the National Unit Reference card. Note: each unit symbol on the map represents a complete unit.
Players must follow the following letter code for each National unit symbol.
- A – Austrian
- B – British
- P – Prussian
- R – Russian
EXAMPLES:
- A-GRZ means an Austrian Grenzer Light Infantry unit.
- B-LN means a British Line Infantry unit.
- R-LC means a Russian Light Cavalry unit.
- P-LT means a Prussian Light Infantry unit.
The letter P- also represents the Portuguese, but, since Portuguese units are surrounded by a dashed line on the scenario map and the probability that Prussian and Portuguese units appear in the same battle is slight, the letter identification system will work.
The brown Portuguese blocks are also used as Hanoverian units and are coded as follows:
- H-LN means Hanoverian Line Infantry.
- H-LT means Hanoverian Light Infantry.
Scenario 1: Sahagún (Cavalry Attack), 21 December 1808
Historical Background
Sir John Moore was determined to defeat Soult's isolated corps with his British army before withdrawing from the much larger army with which Napoleon was entering Spain. The first step was to penetrate Soult's cavalry screen under Debelle at Sahagún. The mission was assigned to Lord Henry Paget, who set out with two Hussar regiments in a freezing winter climate, with snow and icy roads slowing the march. At dawn, the French advance guard was defeated, but the survivors fled back to Sahagún and raised the alarm. Debelle's horsemen had kept their mounts saddled all night and, in some confusion, mounted and rode out of the town. The chance of capturing the brigade by a coup de main had gone, but Paget divided his force in an attempt to trap Debelle's horsemen between his 15th Hussars, which surrounded the town, and Slade's 10th Hussars, which were coming towards him.
Debelle tried to break contact, but Paget moved more quickly. When Debelle saw that he could not outdistance Paget, he turned his two regiments to face the outnumbered 15th Hussars. Slade's Hussar regiment was nowhere to be seen. As pompous as he was incompetent, Slade had halted his men to deliver a long harangue, and his leading troops were only just reaching Sahagún when the battle ended.
Undaunted, Paget charged at full gallop against the first French cavalry line, a provisional chasseur regiment made up mainly of Hanoverians forced to serve the French. The regiment dissolved completely at the first contact, and the fleeing riders disorganized the French 8th Dragoon Regiment behind them. Debelle's exhausted and decimated brigade escaped from Paget's victorious but disorganized regiment by crossing the river. The 15th Hussars were rewarded with the battle honor "Sahagún," and the greatly reduced provisional chasseur regiment was disbanded.
The scene is set. The battle lines are drawn and you are in command. Can you change history?
Battle Notes
British Army
- Commander: Paget
- 5 Order cards
- 2 Tactician cards
- Moves First
French Army
- Commander: Debelle
- 4 Order cards
- 2 Tactician cards
Victory: 16 Victory Flags
Special Rules
- Victory Points are gained for the number of blocks eliminated or that escape the battlefield.
- Both armies receive 1 Victory Point for each enemy block eliminated in combat.
- The French player receives 1 Victory Point for each cavalry or Leader block that leaves the battlefield from the ford or bridge hex on the river, on the left side of the map.
- The Valderaduey River is impassable except at the ford and the river itself.
Scenario 2: Sorauren (French Right, Early Afternoon), 28 July 1813
Historical Background
Marshal Soult re-entered Spain to defeat Wellington's army through selective attacks and to relieve the besieged garrisons of Pamplona and San Sebastián. The plan depended on speed. Soult, with the main force, quickly brought out Cole's division, which was ineptly positioned at the exit of the Roncesvalles Pass, with little fighting. Cole, together with Picton, withdrew much farther than Wellington wanted, but Wellington was far away and communications were poor. When Cole halted, he redeemed himself by choosing excellent defensive ground in front of the village of Sorauren.
Soult had the numerical superiority needed to win but, ironically, by channeling too many troops through narrow valleys with poor roads, he lost the speed he needed to win the campaign, and his advance was reduced to a slow crawl. On the 27th, Soult's vanguard made contact with the British at Sorauren. With only Clausel's corps at hand (Rielle's corps was still strung out in a line along miles of bad roads), Soult did not attack. The veteran of Albuera had calculated the figures needed to expel the British from the heights of Oricain and knew he did not have enough that afternoon. The next day, after a night of violent storms, Rielle's corps arrived, and Soult had the troops needed to fight and win sooner, but the British had also received reinforcements.
The French attacked first on the right. One of Clausel's divisions, under Conroux, advanced to outflank the British on the heights, but it was trapped in a triple crossfire between the troops on the heights and the reinforcements arriving from Pack's division. Conroux's shattered division was forced to retreat to Sorauren. The other divisions of Clausel assaulted the British and Portuguese on the Oricain heights with enough initial success to break through in some places. Wellington, aware of his deteriorating situation, ordered Stubbs and Lambert to counterattack. Their onslaughts sent the disorganized French columns staggering down the slope. The battle continued on the French left with attacks by Rielle.
The scene is set. The battle lines are drawn and you are in command. Can you change history?
Battle Notes
British Army
- Commander: Wellington
- 6 Order cards
- 6 Tactician cards
French Army
- Commander: Soult
- 5 Order cards
- 4 Tactician cards
- Moves First
Victory: 9 Victory Flags
Special Rules
- The 11 hill hexes that form the Oricain heights are a Temporary Majority Group Victory Flag Objective that grants 1 Temporary Flag to the British or 2 Temporary Flags to the French when that side occupies an absolute majority at the start of its turn.
- The British player gains 1 Temporary Victory Flag at the start of the turn for occupying the Bridge.
- The Ulzama River is impassable except at the ford and the river itself.
Scenario 3: Sorauren (French Left), 28 July 1813
Historical Background
Marshal Soult re-entered Spain to defeat Wellington's army through selective attacks and to relieve the besieged garrisons of Pamplona and San Sebastián. The plan depended on speed. Soult, with the main force, quickly brought out Cole's division, which was ineptly positioned at the exit of the Roncesvalles Pass, with little fighting. Cole, together with Picton, withdrew much farther than Wellington wanted, but Wellington was far away and communications were poor. When Cole halted, he redeemed himself by choosing excellent defensive ground in front of the village of Sorauren.
Soult had the numerical superiority needed to win but, ironically, by channeling too many troops through narrow valleys with poor roads, he lost the speed he needed to win the campaign, and his advance was reduced to a slow crawl. On the 27th, Soult's vanguard made contact with the British at Sorauren. With only Clausel's corps at hand (Rielle's corps was still strung out along miles of bad roads), Soult did not attack. The veteran of Albuera had calculated the figures needed to expel the British from the heights of Oricain and knew he did not have enough that afternoon. The next day, after a night of violent storms, Rielle's corps arrived, and Soult had the troops needed to fight and win sooner, but the British had also received reinforcements.
While the staggered French attacks continued, Rielle's troops attacked. Maucune's attack against Anson's brigade failed miserably, but the second French attack against the Spanish Hill succeeded. The two Spanish battalions that had admirably defeated a French probing attack the day before were, on this occasion, disorganized and allowed the French to gain temporary possession of the hill. The British brigade of Byng, attacking with the support of British artillery that was near Arleta, recaptured the hill. Although there was still daylight, Soult's infantry had met strong opposition. He could no longer wait for the artillery and cavalry trains that were trapped in the mountains. He had lost the race to defeat Wellington piece by piece, and ordered the retreat.
The scene is set. The battle lines are drawn and you are in command. Can you change history?
Battle Notes
British Army
- Commander: Wellington
- 6 Order cards
- 6 Tactician cards
French Army
- Commander: Soult
- 5 Order cards
- 4 Tactician cards
- Moves First
Victory: 9 Victory Flags
Special Rules
- The 8 hill hexes that form the Spanish Hill are a Temporary Majority Group Victory Flag Objective that grants 1 Temporary Flag to the British or 2 Temporary Flags to the French when that side occupies an absolute majority at the start of its turn.
- The British player gains 1 Temporary Victory Flag at the start of the turn for occupying Arleta.
- The stream is fordable and the steep hills are impassable.
Scenario 4: Göhrde, 18 September 1813
Historical Background
Although still officially in an armistice period, Napoleon set Oudinot and Davout in motion as early as August 1813. Davout, however, halted his march when he learned of Oudinot's defeat at Grossbeeren. Several weeks of skirmishing followed between Wallmoden's corps and the French, until an Allied force crossed the Elbe to threaten Davout's lines of communication. Davout acted quickly and ordered General Pêcheux to clear the area with an infantry brigade. Fortunately for the Allies, they intercepted a courier carrying the details of the movement. Wallmoden concentrated his multinational corps and marched to crush Pêcheux's small force. Pêcheux reached the Steinker Heights on the 18th and prepared for battle in a reckless manner. His two French regiments contained veteran troops, but were now made up mainly of young conscripts. Wallmoden's three columns, which were still marching toward the area, were ordered to attack as soon as they arrived. On the left, General von Arentschildt's Russo-German Legion moved toward Oldendorf. His men were mainly Prussians captured in Russia in 1812, now uniformed and trained by the Russians but paid by the British, and they fought wherever the latter ordered. General Lyon, in the center, advanced through the woods with his raw Hanoverian volunteers together with a few veteran units of the King's German Legion. General Dörnberg's cavalry, the British artillery and the British rockets were on the enemy's left flank. The French defensive position on the Steinker Hill proved too strong for the unsystematic Allied attacks, and these were easily repulsed. Around 4 PM, Wallmoden's full force, now in position, received the order to advance. Seeing the large mass of infantry, supported by artillery, the French began to withdraw. The British rockets spread terror through the French ranks, and the withdrawal turned into a rout.
The scene is set. The battle lines are drawn and you are in command. Can you change history?
Battle Notes
*Allied Army (Prussian, Russian, British, Hanoverian)
- Commander: Wallmoden
- 5 Order cards
- 2 Tactician cards
- Moves First
* Use the brown Portuguese blocks as Hanoverian units. Use the Portuguese National Unit Reference card for the Hanoverians with two exceptions: Line units retreat 2 hexes per flag, and Light Infantry units have 4 blocks.
French Army
- Commander: Pêcheux
- 5 Order cards
- 3 Tactician cards
Victory: 8 Victory Flags
Special Rules
- The French player has 1 Temporary Victory Flag if the Allies do not occupy any hill hex at the start of the turn.
- The Allied player gains 1 Temporary Victory Flag at the start of the turn for each village hex occupied.
- The Allied player gains 1 Temporary Victory Flag at the start of the turn for each hill hex occupied.
Scenario 5: Wartenburg, 3 October 1813
Historical Background
Marshal Ney ordered the exhausted IV Corps under Bertrand to move to Wartenburg to prevent the Allied army from crossing the Elbe River. This corps had been in the thick of the battle of Dennewitz and had suffered when the retreat turned into a rout. Only one of its three divisions was French. Bertrand reached Wartenburg on the 2nd and deployed his forces. The Prussians arrived the next day and began the attack early in the morning. Steinmetz's troops opened combat with a frontal assault on Wartenburg, but ran into intense artillery fire. Horn joined the attack on Wartenburg, but the Prussian attack still got nowhere. Mecklenburg finally drove out the small division defending the village of Bleddin. Next, Horn and Mecklenburg pushed back the Italian division that defended the gap between Wartenburg and Bleddin, but only after fierce fighting. Morand's French withdrew from Wartenburg to avoid being surrounded, ending the battle. The French and their allies fought bravely on the defensive, but failed in their mission to keep the Prussians east of the Elbe.
The scene is set. The battle lines are drawn and you are in command. Can you change history?
Battle Notes
Prussian Army
- Commander: Blücher
- 5 Order cards and 5 Iron Will tokens
- 5 Tactician cards
- Moves First
French Army
- Commander: Bertrand
- 4 Order cards
- 4 Tactician cards
Victory: 9 Victory Flags
Special Rules
- The Prussian player gains 1 Temporary Victory Flag at the start of the turn for each village hex occupied at the start of the turn.
Scenario 6: Dohna, 9 October 1813
Historical Background
The Coalition armies were closing in on Napoleon. The Russian army of Bennigsen in Bohemia moved north and entered Saxony. Facing the Russians were two French corps that were occupying Dresden (when they might have been of much more use in Napoleon's main army). The French I Corps, now under Lobau, was deployed between Dohna and the Elbe River on 9 October. At the end of August, this corps had been practically destroyed when it set out in pursuit too eagerly after the victory of Dresden, and the Coalition forces managed to surround it. Partially rebuilt, the troops were eager to redeem themselves and restore their reputation. General Bennigsen led the Russian forces from Bohemia against the French, with Bulatov directing the right and Paskievich the left. Bennigsen personally took command of the Russian center. Hardegg's cavalry was also moved to the far left, with the intention of wheeling against the French right. Bulatov's column began the battle and managed to storm the village of Klein-Sedlitz. The French counterattacked and repulsed the Russians. Bulatov then renewed his attack and, supported by artillery on the far side of the Elbe, managed to push the French back to Heidenau. On the left, Paskievich, after a hard fight, occupied Dohna with his disorganized forces. While the French were preparing to counterattack once more, Hardegg's Russian cavalry column, having passed through Sirsen, suddenly appeared on the right. To avoid being flanked, the French had to yield the ground they had fought so hard for to the Russian force, which was larger. As darkness fell, the French withdrew in good order. The French commander followed Napoleon's orders to hold Dresden, surrendering later that year, long after the fighting had moved far away to the west, on the French frontier.
The scene is set. The battle lines are drawn and you are in command. Can you change history?
Battle Notes
Russian Army [sic: the source heading reads "Prussian Army" for this scenario; Commander Bennigsen leads the Russian army of the historical background, so the heading is transcribed here as "Russian Army"]
- Commander: Bennigsen
- 5 Order cards
- 4 Tactician cards
- Moves First
French Army
- Commander: Lobau
- 5 Order cards
- 4 Tactician cards
Victory: 7 Victory Flags
Special Rules
- The 5 village hexes are a Temporary Majority Group Victory Flag Objective that grants 2 Temporary Flags to the Russian player or 1 Temporary Flag to the French player when that side occupies an absolute majority at the start of its turn. The French begin with 1 Victory Flag.
- The Elbe River is impassable.
- The "Mother Russia" Pre-Battle Roll rule does not apply in this scenario.
Scenario 7: Liebertwolkwitz (Morning), 14 October 1813
Historical Background
The Battle of Leipzig, and the events that led to the "Battle of the Nations," are well documented. Players should draw on the numerous sources, in addition to the brief historical background presented, for each of the Leipzig scenarios.
The cavalry attack at Liebertwolkwitz on 14 October marked the beginning of what was the largest battle of the Napoleonic Wars. Napoleon was advancing toward Leipzig and sent orders to Murat to delay the advance of the Army of Bohemia, but to avoid major engagements. The Russian General Wittgenstein, who led the advance guard of the Army of Bohemia, believed the Allies were only facing the French rearguard, and advanced without expecting significant fighting. However, when the great French battery on Gallows Hill opened fire on the Allied cavalry force, he realized that Murat's French were ready for battle. Murat's horsemen ignored their orders. A French cavalry charge soon followed, and the traditional pattern of cavalry battle was carried out. The French ended up destroying the Russians, but were in turn disorganized and put to flight by the newly arrived Allied cavalry, which was then routed by a new French cavalry attack. And so it went on. Additional cavalry units from both sides joined the fight, but neither side gained the advantage. Both sides withdrew to their respective starting points, disorganized but, surprisingly, with very few casualties, except for a Prussian cuirassier regiment that believed it had captured a French battery, was surrounded, and had to break out to escape. The Allied command halted to wait for the Austrian Corps of Klenau to arrive and provide the infantry needed to capture and hold Liebertwolkwitz and Gallows Hill.
The scene is set. The battle lines are drawn and you are in command. Can you change history?
Battle Notes
Russian Army
- Commander: Wittgenstein
- 5 Order cards and 2 Iron Will tokens (usable only by Prussian units)
- 3 Tactician cards
French Army
- Commander: Murat
- 5 Order cards
- 3 Tactician cards
- Moves First
Victory: 9 Victory Flags
Special Rules
- The Allies win a sudden-death victory if 7 French Cavalry and Artillery units are eliminated.
- The French win a sudden-death victory if 7 Allied Cavalry and Artillery units are eliminated. Russian Cossacks do not count as Cavalry.
- The "Mother Russia" Pre-Battle Roll rule does not apply.
Scenario 8: Liebertwolkwitz (Afternoon), 14 October 1813
Historical Background
The French had the numerical superiority to win the cavalry battle at the start of the day, but most of the French horsemen lacked good training and had poor mounts, and Murat had been out of the Napoleonic wars for several years. Klenau's Austrian corps reached the Allied right during the cavalry combat. He received orders to drive the French out of Liebertwolkwitz. Wittgenstein believed that, once the village was captured, it would give the Allies an opportunity to outflank the great battery and would be the key to victory. Klenau was one of the Allied officers who had begun to take French tactics to heart, and he organized a good combined-arms attack against Liebertwolkwitz using excellent infantry, Grenzers, artillery and a cavalry screen. After a fierce struggle, the village was captured. The Allies lost no time renewing their attack against Gallows Hill, but all those in command completely forgot to reinforce the brave Austrians at Liebertwolkwitz. Murat went into action, ordering the cavalry at hand to advance and delay the Allied attack long enough to recover the village. The French cavalry could not hold against the newly arrived cavalry formations of Klenau and was repulsed, but it gained the time needed. The French reserves fought their way to Liebertwolkwitz. Without support, the Austrians were forced to abandon it with heavy losses. By nightfall, the French again controlled Liebertwolkwitz.
The scene is set. The battle lines are drawn and you are in command. Can you change history?
Battle Notes
Austrian Army
- Commander: Klenau
- 5 Order cards
- 2 Tactician cards
- Moves First
French Army
- Commander: Murat
- 5 Order cards
- 3 Tactician cards
Victory: 8 Victory Flags
Special Rules
- The 4 hexes of Liebertwolkwitz are a Temporary Majority Group Victory Flag Objective that grants 2 Temporary Flags to the Allies or 1 Temporary Flag to the French when that side occupies an absolute majority at the start of its turn. The French begin with 1 Victory Flag.
- The Allies gain 1 Temporary Victory Flag at the start of the turn for occupying the village of Holshausen.
- The Allies gain 1 Temporary Victory Flag at the start of the turn for each Gallows Hill hex they occupy.
- The "Mother Russia" Pre-Battle Roll rule does not apply.
Scenario 9: Lindenau, 16 October 1813
Historical Background
Gyulai's Austrians were on the left bank of the Pleisse River, west of Leipzig. Although ordered to attack, the main purpose of his demonstration was to relieve pressure on the fighting on the right bank and, if possible, to draw some French reserves. For Napoleon, Lindenau was the only plausible line of retreat for his whole army, and yet the Allies did not see the obvious and decided not to reinforce Gyulai. At 6 AM, the Austrians attacked the prepared IV Corps of Bertrand. This corps had been in action since August and was badly weakened, but the soldiers fought like veterans. A brief cavalry clash pushed back the French cavalry screen, but the Austrian cavalry could not get past the French defenses. Around 10 AM, Austrian artillery was moved to a position on the heights and began bombarding the French defenses, but with little success. By then, the Austrian infantry had pushed the French back to Plagwitz and Lindenau, and for a short time even took part of those villages. A renewed French counterattack, supported by reinforcements, drove the Austrians back and pushed them practically to where the battle had begun.
The scene is set. The battle lines are drawn and you are in command. Can you change history?
Battle Notes
Austrian Army
- Commander: Gyulai
- 4 Order cards
- 3 Tactician cards
- Moves First
French Army
- Commander: Bertrand
- 5 Order cards
- 4 Tactician cards
Victory: 6 Victory Flags
Special Rules
- The Allies gain 1 Temporary Victory Flag at the start of the turn for occupying Lindenau and the bridge. (The source spells the village "Lindeanu" in this rule and in the historical background; it is transcribed here as "Lindenau" to match the scenario title.)
- At the start of each turn, before playing its Order card, the French player makes a reinforcement roll. The roll is made with 3 dice. The symbols and number rolled determine the reinforcement unit that may be placed on the bridge hex. This hex must not contain a unit for the reinforcement unit to be placed.
Reinforcement Roll with three dice:
- 2 Infantry symbols = one Line Infantry unit
- 3 Infantry symbols = one Light Infantry unit
- 2 Cavalry symbols = one Light Cavalry unit
- 3 Cavalry symbols = one Heavy Cavalry unit
- 2 Artillery symbols = one Foot Artillery unit
- 2 Artillery symbols = one Horse Artillery unit
Any other combination of symbols on the die does not provide a reinforcement unit.
NOTE: The source prints the same symbol count (2 Artillery symbols) for both the Foot Artillery and the Horse Artillery results. It is transcribed as printed.
- The stream and the Pleisse River are fordable.
Scenario 10: Möckern (French Right), 16 October 1813
Historical Background
Napoleon had chosen Leipzig as his central position from which to defeat the Allied armies, which were widely separated as they advanced to offer battle. His first objective was the Army of Bohemia, which was advancing from the south. Already on the 16th, Napoleon had ordered Marmont's Corps to join him at Wachau to provide the numerical superiority needed. Later that day, General Drouot's great battery had destroyed two Russian divisions, opening a gap for a crushing final attack, but Marmont's corps had not arrived. The reason: Blücher, Napoleon's relentless enemy, had advanced from the north more quickly than expected, and the arrival of Blücher's vanguard forced Marmont to turn to face the Prussians and Russians coming on.
The French had deployed between Möckern and Podelwitz when Blücher decided to go on the offensive. Langeron's Russians were ordered to advance toward Gross and Wiederitzsch. Dombrowski's Poles already controlled both villages when the Russian columns advanced. The Russians greatly outnumbered the Poles, but many of the latter were veterans of years of combat in Spain. The Poles, fighting fiercely from inside the village houses, halted the first advance and counterattacked effectively. A second and larger Russian advance took Gross Wiederitzsch, but the Poles, aided by the timely arrival of Delmas's division, recaptured the village and the nearby Birkenholz Wood. Expecting a breakthrough attack, Langeron had ordered his Russian cavalry to charge, but the Poles and French also sent a counter-charge that sent the Russian cavalry to the rear. Later that day, Delmas was forced out of the woods, and a final great Russian offensive forced the outnumbered Poles to abandon the villages and retreat to Eutritzsch.
The scene is set. The battle lines are drawn and you are in command. Can you change history?
Battle Notes
Russian Army
- Commander: Langeron
- 4 Order cards
- 2 Tactician cards
- Moves First
French Army
- Commander: Marmont
- 5 Order cards
- 4 Tactician cards
Victory: 10 Victory Flags
Special Rules
- The Allied player gains 1 Temporary Victory Flag at the start of the turn for occupying Gross Wiederitzsch and Klein Wiederitzsch.
- The Allied player receives 1 Victory Flag for every 2 units, excluding Cossacks, that leave the battlefield from any hex on the French baseline.
- The French player gains 1 Temporary Victory Flag when no Allied unit occupies Gross Wiederitzsch and Klein Wiederitzsch. The French player begins with 1 Flag.
- The Stream has no restrictions on combat, but it stops movement and prevents a cavalry charge. This means that a cavalry unit that receives orders through a Charge Order card does not gain the extra die described on the Charge card. This applies to a unit that moves into the stream, to a cavalry unit that begins the turn in the stream, or to a cavalry unit making a Cavalry Advance.
- The "Mother Russia" Pre-Battle Roll rule applies. Saber rolls have no effect.
Scenario 11: Möckern (French Left), 16 October 1813
Historical Background
Napoleon had chosen Leipzig as his central position from which to defeat the Allied armies, which were widely separated as they advanced to offer battle. His first objective was the Army of Bohemia, which was advancing from the south. Already on the 16th, Napoleon had ordered Marmont's Corps to join him at Wachau to provide the numerical superiority needed. Later that day, General Drouot's great battery had destroyed two Russian divisions, opening a gap for a crushing final attack, but Marmont's corps had not arrived. The reason: Blücher, Napoleon's relentless enemy, had advanced from the north more quickly than expected, and the arrival of Blücher's vanguard forced Marmont to turn to face the Prussians and Russians coming on.
The French had deployed between Möckern and Podelwitz when Blücher decided to go on the offensive. Langeron's Russians were ordered to advance toward Gross and Wiederitzsch while Yorck and the Prussians advanced toward Möckern. Both commanders understood the strategic importance of Möckern, and the village changed hands several times during the fighting that day. Several of Marmont's regiments were made up of sailors and naval gunners. In good physical condition and well disciplined, they performed miracles by holding out against superior numbers of Prussians. With all of the Prussian reserves committed, Yorck ordered his cavalry to charge against Möckern. The bold move swept the remaining French troops out of the village, but the exhausted Prussian cavalry was unable to pursue what remained of Marmont's forces retreating to Gohlis.
History would say that the absence of Marmont's troops at Wachau deprived Napoleon of his only chance of a clear victory.
The scene is set. The battle lines are drawn and you are in command. Can you change history?
Battle Notes
Prussian Army
- Commander: Blücher
- 5 Order cards
- 4 Iron Will tokens
- 5 Tactician cards
- Moves First
French Army
- Commander: Marmont
- 5 Order cards
- 4 Tactician cards
Victory: 10 Victory Flags
Special Rules
- The five hexes of Möckern (village, tower and mansion) form a Temporary Majority Group Victory Flag Objective that grants 3 Temporary Flags to the Prussians and 2 Temporary Flags to the French when that side occupies an absolute majority at the start of its turn. The French begin with 2 Victory Flags.
- The Allied player receives 1 Victory Flag for every 2 units that leave the battlefield from any hex on the French baseline.
- The Elster River is impassable except at the ford and the bridge.
- The Stream has no restrictions on combat, but it stops movement and prevents a cavalry charge. This means that a cavalry unit that receives orders through a Charge Order card does not gain the extra die described on the Charge card. This applies to a unit that moves into the stream, to a cavalry unit that begins the turn in the stream, or to a cavalry unit making a Cavalry Advance.
Scenario 12: Gohlis, 17 October 1813
Historical Background
Blücher was not informed that the Allied army would not go into action on the 17th to form reserves and regroup. Therefore, Blücher, after getting himself somewhat organized, continued his attack against the villages occupied by the French at Eutritzsch and Gohlis on the 17th. It was then that Allied numerical superiority began to decline. Yorck's Prussians, who had suffered most of the casualties on the 16th, had been pulled from the front to recompose themselves. The task of driving the French out of the villages was given to the Russian formations, which had only been briefly engaged. The French had no such luxury. The exhausted corps of Marmont, together with Delmas's division, had far fewer men at the front than the day before, but would still have to defend against Blücher. Kapzevich and St. Priest attacked Delmas's French defending Eutritzsch, while Sacken maneuvered against Gohlis. Dombrowski's diminished Polish division defended Gohlis, and Quintte's cavalry guarded the French right flank. Blücher had all of his forces moving by about 9 AM. Earlier, Vassil'shikov's cavalry charged and drove back the French cavalry, pushing it back across the Parthe; then it turned to help expel Delmas from Eutritzsch. The Poles at Gohlis defended the village vigorously, but they too were gradually driven out. Toward the end of the day, the Russians held both villages.
The scene is set. The battle lines are drawn and you are in command. Can you change history?
Battle Notes
Prussian Army
- Commander: Blücher
- 5 Order cards
- 5 Tactician cards
- Moves First
French Army
- Commander: Ney
- 5 Order cards
- 4 Tactician cards
Victory: 10 Victory Flags
Special Rules
- The Allied player gains 1 Temporary Victory Flag at the start of the turn for occupying each village hex and bridge.
- The Parthe Stream is fordable.
- The "Mother Russia" Pre-Battle Roll rule applies. Saber rolls have no effect.
Scenario 13: Brienne, 29 January 1814
Historical Background
As the Allies entered France, Napoleon planned to attack them and defeat them one at a time. Napoleon first chose as his target Blücher's Army of Silesia for several reasons. It was the nearest, and it had to be defeated before it could link up with Schwarzenberg's larger Army of Bohemia. Blücher was the most aggressive Allied commander. Putting him out of action by disabling his army could only benefit Napoleon. Napoleon's initial plan was to attack Blücher at St. Dizier, but warm weather turned the roads to mud, delaying the advance. This gave Blücher the opportunity to move to Brienne, where Napoleon had attended military academy. Despite this setback, Napoleon decided on a frontal attack there, and Blücher could not refuse battle. His baggage train was still on the muddy road to Brienne, blocking his only line of retreat. The initial French attack by Grouchy's cavalry went well but, by the time Napoleon arrived with the infantry, the French cavalry had been repulsed. For the rest of the day and well into the night, both sides committed troops to the fight. Napoleon, who directed the fighting with his inexperienced recruits, nearly was captured. Blücher was also nearly captured when he stopped to have dinner, believing the battle was over. Both armies were exhausted by midnight. Blücher decided to withdraw his army to join Schwarzenberg. In the end, both sides proclaimed victory.
The scene is set. The battle lines are drawn and you are in command. Can you change history?
Battle Notes
Russian Army (as printed in the source heading; the commander is Blücher)
- Commander: Blücher
- 5 Order cards
- 5 Tactician cards
French Army
- Commander: Napoleon
- 6 Order cards
- 6 Tactician cards
- Moves First
Victory: 9 Victory Flags
Special Rules
- The Russian player achieves a sudden-death victory when a French unit occupies the Chateau at the start of the turn. The Chateau is played as if it were a walled farm.
- The 4 village hexes form a Temporary Majority Group Victory Flag Objective that grants 2 Temporary Flags to the side that occupies an absolute majority at the start of its turn. The Russians begin with 2 Victory Flags.
- The Aube River is impassable.
- French Line Infantry units are recruits and do not receive an extra die in melee when they attack an enemy Infantry unit.
- The "Mother Russia" Pre-Battle Roll rule applies. Saber rolls have no effect.
Scenario 14: Chateau-Thierry, 12 February 1814
Historical Background
After losing the battles of Champaubert and Montmirail, the Allied forces undertook a total retreat toward Chateau-Thierry and the safety of the Marne River. Napoleon, seeking to deliver the coup de grâce to the Prussian army and end its participation in the Sixth Coalition, followed closely behind them. Marshal Ney caught up with and overran the Russian rearguard on the Allied left and quickly joined Napoleon for the attack on the Prussians, who had positioned themselves in front of the Marne at Chateau-Thierry. While the French deployed for the attack, Yorck's main objective was to hold long enough to give most of his army time to cross the river and reach safety. The French infantry attacked, pinning the Prussian front line. Napoleon enjoyed a rare superiority in cavalry and, with the Guard, trampled the Prussian cavalry opposing them. Disaster threatened the Prussians when French cavalry gained the plateau behind the Prussian lines. The defeated Prussians ran toward the bridges over the Marne and managed to escape because a few brave battalions formed square and sacrificed themselves against the French cavalry, and because well-positioned artillery slowed the French infantry. Napoleon had won the battle, but few would have escaped had MacDonald moved more quickly toward Chateau-Thierry, as he had been ordered to do.
The scene is set. The battle lines are drawn and you are in command. Can you change history?
Battle Notes
Prussian Army
- Commander: Yorck
- 5 Order cards and 3 Iron Will tokens
- 4 Tactician cards
French Army
- Commander: Napoleon
- 6 Order cards
- 6 Tactician cards
- Moves First
Victory: 8 Victory Flags
Special Rules
- The Prussian player receives 1 Victory Flag for each Prussian unit that receives orders and leaves the battlefield from any hex on the Prussian baseline.
- The French player gains 1 Temporary Victory Flag at the start of the turn when a French unit occupies a bridge.
- The Marne River is impassable except at the bridges and fords.
- French Line Infantry units are recruits and do not receive an extra die in melee when they attack an enemy Infantry unit.
Scenario 15: Vauchamps, 14 February 1814
Historical Background
The Battle of Vauchamps was the largest engagement of Napoleon's Six Days Campaign. On 13 February, reeling from his three successive defeats, Blücher sought to disengage from Napoleon and instead maneuver part of his troops to fall upon the isolated corps of Marshal Marmont and recover the initiative. Napoleon anticipated Blücher's move and maneuvered himself to support Marmont. On the morning of the 14th, Marmont continued to fall back, but counterattacked once Napoleon arrived. As French resistance stiffened, Blücher realized he was now facing the Emperor himself and decided to withdraw, but too late. Blücher's attempt to withdraw proved extremely difficult, since the Allied force was in an advanced position and had virtually no cavalry present to cover the retreat. Although the real battle of Vauchamps was brief, the Allied forces suffered heavy losses when the French infantry, under Marshal Marmont, and mainly the cavalry under Grouchy, launched a relentless pursuit. At nightfall, Blücher chose an exhausting night march to get his remaining forces to safety.
The scene is set. The battle lines are drawn and you are in command. Can you change history?
Battle Notes
Allied Army (Prussian, Russian)
- Commander: Blücher
- 5 Order cards and 3 Iron Will tokens
- 3 Tactician cards
French Army
- Commander: Napoleon
- 6 Order cards
- 6 Tactician cards
- Moves First
Victory: 8 Victory Flags
Special Rules
- The French player gains 1 Temporary Victory Flag at the start of the turn for each village hex occupied by a French unit.
- French Line Infantry units are recruits and do not receive an extra die in melee when they attack an enemy Infantry unit.
- The Le Petit Morin River is fordable.
- The "Mother Russia" Pre-Battle Roll rule does not apply.
- The French player gains 1 Victory Flag for each French Cavalry unit that leaves the battlefield from any hex on the Allied baseline.
Scenario 16: Orthez (French Right), 27 February 1814
Historical Background
After the French defeat at the Nive, Soult withdrew to a position north of the Gave de Pau River. Wellington advanced on both sides of the river while Soult deployed along a ridge running more or less parallel to it. The French position was good, but overextended. Soult had to place all of his veteran troops in the front lines. He was now obliged to fight a static defense with little more than the raw recruits he had in reserve. Wellington's army was well organized in three groups led by Beresford, Picton and Hill, with the famous Light Division in reserve. He intended for Beresford to attack the French right stubbornly while Picton carried out a diversionary attack to keep the rest of the French line occupied. Hill's divisions were to cross the Gave de Pau and fall upon the French left to complete the victory. Beresford's divisions began the battle by charging against the church and village of St. Boes. The church was captured, but the advance was halted by Taupin's troops defending the town. Reille, commander of the French right wing, then launched a vigorous counterattack that forced Beresford to fall back. Combat ceased for a time on this flank while Wellington turned Picton's feint into a main attack. Later that day, as Picton's attack pressed on, Wellington advanced the Light Division to exploit the gap in the French center. Led by the 1/52nd Foot, the Light Division advanced and opened a breach between the French divisions of the center and the right. At the same time, Beresford's men made another attack against St. Boes and captured the village. Events elsewhere were no better, and Soult admitted defeat.
The scene is set. The battle lines are drawn and you are in command. Can you change history?
Battle Notes
British Army
- Commander: Wellington
- 6 Order cards
- 6 Tactician cards
- Moves First
French Army
- Commander: Soult
- 5 Order cards
- 5 Tactician cards
Victory: 8 Victory Flags
Special Rules
- The Church grants 1 Temporary Victory Flag to the side that occupies it at the start of its turn. The French begin with 1 Victory Flag.
- The French player gains 1 Temporary Victory Flag at the start of the turn if the Allies occupy none of the hexes of the village of St. Boes. The French begin with 1 Victory Flag.
- The Allied player gains 1 Temporary Victory Flag at the start of the turn in which all 5 hill hexes are occupied.
Scenario 17: Orthez (French Left), 27 February 1814
Historical Background
After the French defeat at the Nive, Soult withdrew to a position north of the Gave de Pau River. Wellington advanced on both sides of the river while Soult deployed along a ridge running more or less parallel to it. The French position was good, but overextended. Soult had to place all of his veteran troops in the front lines. He was now obliged to fight a static defense with little more than the raw recruits he had in reserve. Wellington's army was well organized in three groups led by Beresford, Picton and Hill, with the famous Light Division in reserve. He intended for Beresford to attack the French right firmly while Picton carried out a diversionary attack to keep the rest of the French line occupied. Hill's divisions were to cross the Gave de Pau and fall upon the French left to complete the victory. The battle began with Beresford's attack, which was repulsed at St. Boes. Wellington then showed his capacity for leadership by quickly changing his plan. He turned Picton's feint into the main attack. Picton's division, helped by the Light Division, split the French center. At the same time, Clinton's division pressed the attack against Orthez, and the two divisions of Hill had crossed the stream at a ford and threatened the left and rear of Soult. On the French right, St. Boes fell after a renewed assault, and Soult admitted defeat. The escape of his army depended on reaching the Sault Navailles bridge before Hill. The French won the race by a narrow margin and blew up the bridge after crossing it.
The scene is set. The battle lines are drawn and you are in command. Can you change history?
Battle Notes
British Army
- Commander: Wellington
- 6 Order cards
- 6 Tactician cards
- Moves First
French Army
- Commander: Soult
- 5 Order cards
- 5 Tactician cards
Victory: 9 Victory Flags
Special Rules
- The Allied player gains 1 Temporary Victory Flag at the start of the turn for each hex of the village of Orthez that it occupies.
- The French player gains 1 Temporary Victory Flag at the start of the turn if the Allies occupy no hex of the village of Orthez. The French begin the game with 1 Victory Flag.
- The Allied player gains 1 Temporary Victory Flag at the start of the turn if all 9 hill hexes are occupied.
- The Allied player gains 1 Victory Flag for each Allied unit that leaves the battlefield from any hex in the left section of the French baseline.
- The Gave de Pau is impassable except at the bridges and fords.
Scenario 18: Hougoumont, 18 June 1815
Historical Background
At Waterloo, Wellington had no choice but to occupy Hougoumont, since doing so would prevent the French from reaching the heart of the British position on the ridge. In fact, Wellington came close to losing the battle by assigning a poor garrison to Hougoumont. Facing Hougoumont were General Foy and Jerome Bonaparte with three divisions of the French II Corps. The initial attack began at about 11:30 AM. The first assault met resistance, but the French infantry forced its way through the woods. As they came out the other side, they were forced to fall back because of the intense fire from the buildings and the walled garden. The second assault gained a small enclave, but the attackers were again repulsed. A third attack broke down the gate of the walled farm, and only the heroic action of the Guards commander MacDonell and a small force succeeded in closing the gate and eliminating the attackers. Despite the defenders' success, the crisis was not yet over, because Foy's division joined the attack at about 1 PM and managed to capture the orchard. The Scots Guards then counterattacked from the crest and drove the French out of the orchard. It was attacked again late in the afternoon, but the British had reinforced the position and the attack failed again. The battle of Hougoumont ended at about 7 PM.
The scene is set. The battle lines are drawn and you are in command. Can you change history?
Battle Notes
British Army*
- Commander: Wellington
- 6 Order cards
- 6 Tactician cards
* Use the brown Portuguese blocks as Nassau and Hanover units. Use the Portuguese National Unit Reference card with two exceptions: Line units retreat 2 hexes per flag. Light Infantry units have 4 blocks.
French Army
- Commander: Reille
- 5 Order cards
- 4 Tactician cards
- Moves First
Victory: 8 Victory Flags
Special Rules
- The orchard is 1 Temporary Victory Flag for the French when at least 1 orchard hex is occupied by a French unit at the start of the turn.
- The British player gains 1 Temporary Victory Flag at the start of the turn if the French occupy none of the 3 walled farm hexes or the 2 walled garden hexes of Hougoumont. The British begin with 1 Victory Flag.
- The French player gains 2 Temporary Victory Flags at the start of the turn if the British occupy none of the 3 walled farm hexes of Hougoumont.
- The French player gains 1 Temporary Victory Flag if 3 British units at full strength do not occupy the British baseline.
Designer's Note
A deck of 90 cards is a lot of cards, but if you want an open and spontaneous style of play, this is exactly what the new 90-card Order deck will provide. However, with a small modification of the deck, players can use a more compact and standard deck of 75 Order cards. Whichever deck you prefer, both have been tested and will work well with the Tactician card deck.
Modified 75-Card Order Deck
- Scout Left Flank (2 cards)
- Scout Center (2 cards)
- Scout Right Flank (2 cards)
- Probe Left Flank (4 cards)
- Probe Center (6 cards)
- Probe Right Flank (4 cards)
- Attack Left Flank (4 cards)
- Attack Center (6 cards)
- Attack Right Flank (4 cards)
- Assault Left Flank (2 cards)
- Assault Center (2 cards)
- Assault Right Flank (2 cards)
- Coordinated Advance (2 cards)
- Flank Attack (2 cards)
- Forward (2 cards)
- Recon in Force (3 cards)
- Bayonet Charge (2 cards)
- Bombard (2 cards)
- Cavalry Charge (3 cards)
- Counter-Attack (2 cards)
- Elan (1 card)
- Fire and Hold (2 cards)
- Force March (2 cards)
- Give Them Cold Steel (1 card)
- Leadership (3 cards)
- La Grande Manoeuvre (1 card)
- Rally (1 card)
- Take Command Any Section (3 cards)
NOTE: The list above totals 75 cards. The Credits block printed on the same page has been omitted.