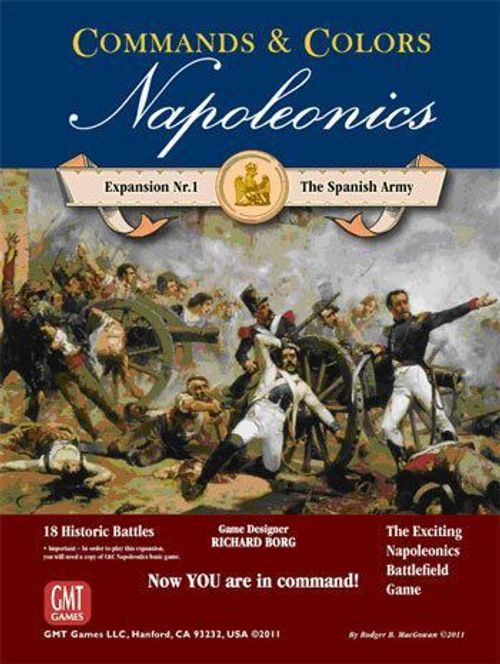
Commands & Colors: Napoleonics Expansion #1 – The Spanish Army
Commands & Colors: Napoleonics Expansion #1 – The Spanish Army Rulebook
Table of Contents
Table of Contents
- 2. Components
- 3. New Units and Leaders
- Spanish Line Infantry (Infantería Española de Línea)
- Spanish Light Infantry (Infantería Ligera Española)
- Spanish Grenadier Infantry (Infantería Española de Granaderos)
- Spanish Militia Infantry (Infantería Española de Milicia)
- Unit Counts and Label Application
- Spanish Light Cavalry (Caballería Ligera Española)
- Spanish Heavy Cavalry (Caballería Pesada Española)
- Spanish Cuirassier Heavy Cavalry (Caballería Pesada Española de Coraceros)
- Spanish Foot Artillery (Artillería Española a Pie)
- 4. New Game Mechanic: Spanish Guerrilla Action
- 5. New Terrain Tiles
- 6. Scenarios
- Bailén – 19 July 1808
- Zornoza – 31 October 1808
- Gamonal – 10 November 1808
- Espinosa de los Monteros – 10–11 November 1808
- Somosierra – 30 November 1808
- Medellín – 28 March 1809
- Alcañiz – 23 May 1809
- María – 15 June 1809
- Talavera (Spanish Flank) – 28 July 1809
- Tamames – 18 October 1809
- Ocaña (Cavalry Action) – 18 November 1809
2. Components
The expansion contains:
- 1 template containing:
- 1 Spanish Infantry in Square record sheet
- 4 Spanish Infantry in Square markers
- 9 Spanish Victory Banner markers
- 6 Spanish Guerrilla markers
- 1 template containing 15 double-sided terrain tiles
- 4 Block Label sheets
- 4 Player Aid sheets (1 Allied National Unit Reference Sheet [British/Portuguese/Spanish], 1 French National Unit Reference Sheet, and 2 Abbreviated Unit Reference Sheets)
- 1 Rules and Scenarios booklet containing 18 battle scenarios
- 195 blocks: yellow Spanish units and dark blue French units, consisting of:
- 107 small blocks, yellow and dark blue, for foot units
- 75 medium blocks, yellow and dark blue, for cavalry
- 13 rectangular blocks, yellow and dark blue, for leader and artillery units
The printed component illustration labels the three block shapes as "Small Blocks," "Medium Blocks," and "Rectangular Blocks."
National Unit Reference Sheet
Each of the major powers that fought in the Napoleonic Wars has a National Unit Reference Sheet. A National Unit Reference Sheet details:
- The unit types and the map placement codes for initial placement.
- Illustrated labels showing each unit listed.
- The number of blocks deployed in a unit.
- Note: not all nations have the same organization, so the number of blocks for a specific unit type may differ.
- The movement of the unit in hexes.
- Battle dice modifications specific to the unit, plus the Command card dice modifications.
- Morale modifications.
- National notes.
Abbreviated Unit Reference Sheet
This expansion also contains two Abbreviated Unit Reference Sheets. These sheets present all of the information on the National Unit Reference Sheets, but with minimal graphics, so that everything is accessible on a single sheet.
Units and Leaders
Visual Identification Aids. To help players with initial placement and with recognizing units, several unit-class icons have been introduced in this expansion. They will be updated in the base game upon reprinting, and they will be maintained in future expansions:
- Burning grenade icon: grenadier infantry. Shown in the upper-left or right corner of each label for these unit types: Grenadiers, Guard Grenadiers, Old Guard.
- Bugle icon: light infantry. Shown in the upper-left or right corner of each label for these unit types: Light, Light with Rifles, Guard Light, Young Guard.
- Cavalry helmet icon: heavy cavalry. Shown in the upper-left or right corner of each label for these unit types: Heavy, Guard Heavy, Cuirassier.
- Horse head icon (not used in this expansion): horse artillery. Shown in the upper-left or right corner of each label for these unit types: Horse Artillery, Guard Horse Artillery.
The unit classes of line infantry and militia, light cavalry (Light, Guard Light, and Light Lancers), and foot artillery (Foot and Guard Foot) are distinguished by the absence of an identification icon.
Unit Composition
Each unit is made up of a number of blocks. The number of blocks in a unit can vary by unit type and nation and is detailed on the National / Abbreviated Unit Reference Sheets.
A General, Marshal, or Field Officer of any rank (hereafter referred to as a leader) is represented by a rectangular block. A leader block alone is not considered a unit.
Infantry in Square Record and Markers
The infantry-in-square record and the numbered markers are used to keep track of infantry units that have formed square on the battlefield.
Victory Banner Markers
These markers track the struggle for victory between the players. The sheet shows a French Victory Banner and a Spanish Victory Banner.
Spanish Guerrilla Action Markers
When the special rules of a scenario state that the Spanish Guerrilla Action Rule is in effect, the Spanish commander may attempt to intercept the French player's Command card on a turn by spending a "Guerrilla Action" marker. See section 4.
3. New Units and Leaders
Each unit entry below gives its map ID code, the number of blocks in the unit, its movement in hexes, and its battle and morale rules, as printed.
Spanish Line Infantry (Infantería Española de Línea)
- Map ID code: S-LN
- Blocks in unit: 4
- Movement in hexes: 1
- Battle:
- Ranged fire, stationary: 1 die per block
- Ranged fire, moving: dice equal to half the number of blocks, rounded down, minus 1 die
- Melee, stationary, and melee return fire: 1 die per block
- Melee, moving: 1 die per block, minus 1 die
- Morale: retreat 2 hexes per flag
Spanish Light Infantry (Infantería Ligera Española)
- Map ID code: S-LT
- Blocks in unit: 5
- Movement in hexes: 1 or 2, and no combat
- Battle:
- Ranged fire, stationary: 1 die per block
- Ranged fire, moving: dice equal to half the number of blocks, rounded down, minus 1 die
- Melee, stationary, and melee return fire: 1 die per block
- Melee, moving: 1 die per block, minus 1 die
- Morale: retreat 2 hexes per flag
Spanish Grenadier Infantry (Infantería Española de Granaderos)
- Map ID code: S-GR
- Blocks in unit: 4
- Movement in hexes: 1
- Battle:
- Ranged fire, stationary, and ranged return fire: 1 die per block
- Ranged fire, moving: dice equal to half the number of blocks, rounded down
- Melee: 1 die per block, plus 1 die
- Morale: may ignore 1 flag; if the unit retreats, it retreats 2 hexes per flag
Spanish Militia Infantry (Infantería Española de Milicia)
- Map ID code: S-MI
- Blocks in unit: 4
- Movement in hexes: 1
- Battle:
- Ranged fire, stationary: 1 die per block
- Ranged fire, moving: dice equal to half the number of blocks, rounded down, minus 1 die
- Melee, stationary, and melee return fire: 1 die per block; no sabre hits, except against lone leaders
- Melee, moving: 1 die per block, minus 1 die; no sabre hits, except against lone leaders
- Morale: retreat 3 hexes per flag
Unit Counts and Label Application
The printed sheet gives the following counts for the armies in this expansion.
French units
| Unit | Units | Blocks |
|---|---|---|
| Line Infantry | 4 | 16 |
| Grenadier Infantry | 2 | 8 |
| Light Cavalry | 2 | 8 |
| Light Cavalry Lancers | 1 | 4 |
| Heavy Cavalry | 4 | 16 |
| Guard Light Cavalry | 2 | 8 |
Spanish units
| Unit | Units | Blocks |
|---|---|---|
| Line Infantry | 12 | 48 |
| Light Infantry | 3 | 15 |
| Light Cavalry | 7 | 21 |
| Grenadier Infantry | 2 | 8 |
| Heavy Cavalry | 5 | 15 |
| Militia Infantry | 3 | 12 |
| Cuirassier Heavy Cavalry | 1 | 3 |
| Leaders | – | 4 |
| Foot Artillery |
Label application. Apply the unit labels corresponding to the fronts and backs of the blocks for each unit. Spanish unit labels go on the yellow blocks, and French unit labels go on the dark blue blocks. It is suggested that you separate the blocks by color and then sort them by size. Start with the Spanish units. Take the 48 small yellow blocks. Find the Spanish Line Infantry labels on sheet 1 and 2 of 4. Peel off one label and apply it to the front and back of each of the 48 small yellow blocks. When the 48 blocks are finished, move on to Spanish Light Infantry. Take 15 small yellow blocks. Find the Spanish Light Infantry labels on sheet 2 of 4. Peel off the labels and apply them to the front and back of the 15 small yellow blocks. When the 15 blocks are finished, move on to the Spanish Grenadier Infantry, which needs 8 blocks. Continue this way until all Spanish units are finished. Then move on to the French units, using the dark blue blocks. This will take some time, but the effort will be worth it!
Layout note: the printed text reads "hoja 2 d3" followed by a separate "4." line at the start of the label-application paragraph. This is a layout fragment of "hoja 2 de 4" ("sheet 2 of 4"), and it is rendered here as "sheet 2 of 4".
Spanish Light Cavalry (Caballería Ligera Española)
- Map ID code: S-LC
- Blocks in unit: 3
- Movement in hexes: 3
- Battle (melee only): 1 die per block
- Morale: retreat 2 hexes per flag
- Notes: may retreat and reform when melee is attacked by infantry, or attacked by infantry/artillery combined arms.
Spanish Heavy Cavalry (Caballería Pesada Española)
- Map ID code: S-HC
- Blocks in unit: 3
- Movement in hexes: 2
- Battle (melee only): 1 die per block, plus 1 die
- Morale: retreat 2 hexes per flag
- Notes: may retreat and reform when melee is attacked by infantry, or attacked by infantry/artillery combined arms.
Spanish Cuirassier Heavy Cavalry (Caballería Pesada Española de Coraceros)
- Map ID code: S-CU
- Blocks in unit: 3
- Movement in hexes: 2
- Battle (melee only): 1 die per block, plus 1 die
- Morale: may ignore 1 flag; if the unit retreats, it retreats 2 hexes per flag
- Notes: may retreat and reform when melee is attacked by infantry, or attacked by infantry/artillery combined arms. They ignore 1 hit when attacked in ranged combat by infantry. Lancers do not re-roll flag results.
Spanish Foot Artillery (Artillería Española a Pie)
- Map ID code: S-FA
- Blocks in unit: 3
- Movement in hexes: 1, and no combat
- Battle: as French, British, or Portuguese artillery. See the standard rules booklet.
- Morale: retreat 2 hexes per flag
Spanish Leader (Líder Español)
- Map ID code: Star
- Movement in hexes: 3 if alone; if attached to a unit, it moves when the unit moves.
- Battle: if alone, it cannot fight. If attached to a unit, it changes the number of dice that unit rolls when a Leadership card is played: the unit rolls one additional die.
- Morale:
- If alone: nothing. It must retreat after surviving a melee attack, and it will attempt to escape through enemy units if its retreat route is occupied by enemy units.
- The unit to which the leader is attached may ignore 1 flag. If that unit retreats, the leader must retreat with it.
French Light Cavalry Lancers (Caballería Ligera Francesa de Lanceros)
- Map ID code: LNCR
- Blocks in unit: 4
- Movement in hexes: 3
- Battle (melee only): 1 die per block.
- Lancer rule: Lancer units with orders re-roll all dice showing flag results once, for additional unit hits, sabres, or flags against any defending unit except Cuirassiers. Note the number of initial flags obtained in the first melee and add this number to the number of flags obtained on the re-roll. The total number of flags obtained, plus all unit hits and sabres obtained, are then applied to the defending unit. Defending Lancers do not re-roll flags unless a "First Strike" Command card is played.
- Morale: retreat 1 hex per flag
- Notes: may retreat and reform when attacked in melee by infantry, or attacked by infantry/artillery combined arms.
French Guard Light Cavalry (Caballería Ligera Francesa de la Guardia)
- Map ID code: GLC
- Blocks in unit: 4
- Movement in hexes: 3
- Battle (melee only): 1 die per block.
- Morale: may ignore 2 flags; if the unit retreats, it retreats 1 hex per flag
- Notes: may retreat and reform when attacked in melee by infantry, or attacked by infantry/artillery combined arms.
4. New Game Mechanic: Spanish Guerrilla Action
When the special rules of a scenario state that the Spanish Guerrilla Action Rule is in effect, the Spanish commander may attempt to cancel the French player's Command card during any French turn by spending a "Guerrilla Action" marker, if one is available. "Guerrilla Action" markers cannot be spent to cancel a French "First Strike" Command card played on the Allied player's turn.
When the Spanish Guerrilla Action Rule is in effect, place the "Guerrilla Action" markers next to the Command card deck before the battle begins.
The number of "Guerrilla Action" markers the Spanish player starts with is detailed in the special rules of the scenario. During a game, the Spanish player may acquire one additional "Guerrilla Action" marker each time he plays a "Scout" card. Instead of drawing two cards, he draws only one card and gains a "Guerrilla Action" marker. Acquired "Guerrilla Action" markers are kept near the Command card hand of the player.
The Spanish player may choose to spend a "Guerrilla Action" marker to stop the sending of all French orders on any French turn, after the French player has played a Command card but before the French player's order phase.
The French player may attempt to stop the Guerrilla Action by rolling 1 die. A sabre result prevents the Guerrilla Action from occurring, and the marker is returned to the bag of unacquired "Guerrilla Action" markers. The Spanish player may not play a second "Guerrilla Action" marker that turn. The French player's Command card is executed normally.
If the attempt to stop the Guerrilla Action is unsuccessful, the French Command card is discarded and no orders are sent. The French player draws a new Command card, which ends his turn.
5. New Terrain Tiles
Walled Farm (Granja Amurallada). A Walled Farm has all of the characteristics and effects of a villa tile. Please see the base rules booklet for full details.
4-Sided and 2-Sided Redoubts (Reductos de 4-Lados y 2-Lados). This expansion includes 4-sided and 2-sided redoubts. All of them have the same characteristics as 3-sided redoubts, except for the number of sides they affect. Please see the base rules booklet for full details.
6. Scenarios
The booklet contains 18 battle scenarios. Each scenario gives a historical background, followed by its battle notes (the commanders and number of Command cards for each army, which army moves first, the number of Victory Banners needed to win) and its special rules. The historical background is reproduced as printed.
Labels as printed: in several Anglo-Spanish scenarios (La Barrosa, Albuera, Talavera, and Vitoria) the battle notes label the first army "Spanish Army" even where the commander is British, Portuguese, or Allied. This is the printed label and is kept as printed. The commander named in each entry identifies the army.
Bailén – 19 July 1808
Large areas of Spain had risen against the French invasion. The French corps of Dupont advanced to occupy Córdoba and Seville. Most of Dupont's troops were newly formed recruits. Dupont soon found himself facing the 30,000-strong force of General Francisco de Castaños in front of him, along with the harassing guerrilla forces that cut his line of communication until a French reinforcing division reopened it. Fearing that these communications would be cut again, Dupont retreated, but did so very slowly, slowed by a great baggage train. Half of Castaños's army, under Reding, carried out a decisive flanking march that placed it on the high ground at Bailén, directly across Dupont's line of retreat. Dupont kept ignoring its presence until it was too late.
On 19 July Dupont's advance guard (the brigade of Chabert) made contact with Reding's defensive line. Without reconnaissance, Chabert sent his 3,000 infantry and cuirassiers forward against three times their number. The attack was repulsed. Most of Dupont's corps was marching behind the baggage train, which made it difficult to reinforce. Units that arrived were thrown into a second, gradual French attack, and again it was repulsed. Dupont reached the battlefield and took command. Led by the Marines of the Guard, a third French attack, with fewer forces, also failed. To make matters worse, most of Dupont's Swiss infantry, originally in Spanish service, deserted to their former masters. With no additional reserves, and with the rest of Castaños's Spanish army moving behind the French, Dupont surrendered.
The scenario is set up. The battle lines are drawn, and you are in command. Can you change history?
Battle Notes
- Spanish Army: Commander Castaños; 5 Command cards
- French Army: Commander Dupont; 5 Command cards; moves first
- Victory: 7 Victory Banners
Special Rules
- The Spanish Guerrilla Action Rule is in effect. The Spanish player does not start with Guerrilla markers.
- French Swiss: the French Swiss units use line infantry blocks, and their leader is a British leader. Spanish Swiss: the Spanish Swiss units use brown Portuguese line infantry blocks, and their leader is a Portuguese leader. Spanish and French Swiss line infantry units have 5 blocks each. All Swiss infantry units that move and engage in ranged combat fight with half the number of blocks, rounded down. They fight in melee with one die per block and retreat 1 hex per flag. When two French Swiss infantry units have been eliminated, the remaining 2 French Swiss units are immediately removed from the battlefield. Their removal does not count as Victory Banners for the Spanish player.
- The entire Rumblar river is fordable.
Zornoza – 31 October 1808
The first French invasion of Spain had ended in failure, but the Spanish, without a high command that functioned, failed to coordinate an advance with the nearest Spanish armies to take advantage of the temporary weakness of the French position behind the Ebro river. The French Marshals Bessières, Victor, and Ney, knowing that Napoleon was on his way, chose not to act. Marshal Lefebvre, hungry for glory, observed that Blake's Spanish "Army of the Left" was vulnerable to attack.
On 31 October, Lefebvre launched a fierce three-line attack on Blake's army as it formed in front of Zornoza along a chain of low hills. At first the entire Spanish line withdrew to the heights of San Martín, but shortly afterward the Spanish centre disintegrated. Blake reacted quickly, ordering his two wings to withdraw and cover his centre. Blake's army then retreated in good order.
Lefebvre's premature attack at Zornoza, together with Blake's rapid withdrawal, compromised the northern part of Napoleon's plan for a great double envelopment of the Spanish armies.
The scenario is set up. The battle lines are drawn, and you are in command. Can you change history?
Battle Notes
- Spanish Army: Commander Blake; 4 Command cards
- French Army: Commander Lefebvre; 5 Command cards; moves first
- Victory: 6 Victory Banners
Special Rules
- Spanish units with orders may exit through the Spanish edge of the battlefield. After three Spanish units with orders have exited, the Spanish player gains one Victory Banner for each additional Spanish unit with orders that exits through the Spanish edge of the battlefield. Spanish leaders that receive orders and exit through the Spanish edge of the battlefield do not count as a Victory Banner for the Spanish player, but their exit can prevent the French player from gaining banners for their elimination if they remain on the battlefield.
- The Spanish Guerrilla Action Rule is in effect. The Spanish player does not start with Guerrilla markers.
- The entire river is fordable.
Gamonal – 10 November 1808
The Spanish commander at Burgos, the Conde de Belveder, was an inexperienced and imprudent officer. He left the strong defences of Burgos for a weak defensive position on an open plain in front of the village of Gamonal. Soult arrived at Gamonal on the 10th with his advance guard. Seeing the enemy's weak position, he immediately threw his cavalry against the Spanish right, while his infantry used the cover of the woods to advance against the Spanish centre and left. Milhaud's French cavalry drove off the Spanish cavalry and then proceeded to roll up the Spanish line. Belveder's attempts to reorganize his forces were in vain, and the Spanish army broke and fled. Gamonal was the opening action, and the first French victory, of Napoleon's second invasion, and it led to Madrid in November 1808.
The scenario is set up. The battle lines are drawn, and you are in command. Can you change history?
Battle Notes
- Spanish Army: Commander Conde de Belveder; 5 Command cards
- French Army: Commander Soult; 6 Command cards; moves first
- Victory: 6 Victory Banners
Special Rules
- The Spanish Guerrilla Action Rule is in effect. The Spanish player starts with one Guerrilla marker.
- The Pico river is fordable.
Espinosa de los Monteros – 10–11 November 1808
After escaping from Zornoza, Blake's army was still in trouble. Marshal Victor was pressing through the mountains and was in a position to isolate one of Blake's divisions, commanded by Pedro Caro, Conde de San Romana, but Blake halted his retreat and turned to join Romana at Espinosa. The 23,000 Spaniards occupied a strong position. Romana's division, composed entirely of regular Spanish regiments, held the Spanish right flank. After defeating the Prussians in 1806, Napoleon had requested and received this division to protect the Baltic coast. On learning of Napoleon's invasion of Spain, the whole division boarded Royal Navy ships and returned to Spain to fight. On the first day of battle they repulsed the advance division of Victor's corps. When Victor arrived later with the rest of his corps, he launched a second attack against Romana's division, but again the French were repulsed with heavy losses on both sides, including Romana himself, who died while leading his troops.
Victor was no Napoleon, but he realized that the attacks of that day had forced Blake to weaken his centre and left to prop up the weakened Romana division on the right. The next day Victor ordered Lapisse's division to attack the Spanish left at the Las Peñucas elevation. It was a fortunate decision. General Acevedo's division held this ground, but most of his troops were newly recruited, inexperienced, and untrained. After a short fight, the Spanish left flank broke and fled. With Lapisse in firm control of the heights that dominated Espinosa, Victor ordered a general advance, and the Spanish army collapsed. After the battle, more than 8,000 Spaniards dispersed to return home rather than re-form with Blake's battered army at Reinosa.
The scenario is set up. The battle lines are drawn, and you are in command. Can you change history?
Battle Notes
- Spanish Army: Commander Blake; 5 Command cards
- French Army: Commander Victor; 5 Command cards; moves first
- Victory: 7 Victory Banners
Special Rules
- The Spanish Guerrilla Action Rule is in effect. The Spanish player starts with one Guerrilla marker.
- The Trueba river is impassable.
- The Shallow Stream is fordable.
Somosierra – 30 November 1808
After success in the north, Napoleon marched on the Spanish capital at Madrid, but first he had to cross the Somosierra Pass in the Sierra de Guadarrama mountain range. The pass was defended by the Spanish troops of Don Benito San Juan, who had been sent to the front from Madrid. The terrain and the troops formed a formidable barrier to the French advance.
At about 8 AM on the 30th, Napoleon ordered the infantry of Ruffin's division to advance, but their advance, though steady, under a rain of cannon and musket fire, was too slow for Napoleon's taste. He first ordered his personal escort of 80 cavalrymen to charge the guns, but many of them were killed or wounded, and the survivors withdrew. Napoleon now ordered the Polish light guard cavalry to take the guns. The cavalry charge was made against the first enemy gun position, and after a fight the men of the guard captured the battery. Musket and cannon fire from the Spanish second battery could not stop the Poles, and soon the second battery was also silenced. The surviving Poles then moved against the third battery, joined by the rest of the French cavalry, and together they took the last battery.
It is unclear whether Napoleon wanted the Poles to take only the first battery or all of the batteries, but the audacious charge can hardly be matched in the annals of military history. Immediately after the charge, Napoleon promoted the Polish light guard cavalry from the Young Guard to the Old Guard.
The scenario is set up. The battle lines are drawn, and you are in command. Can you change history?
Battle Notes
- Spanish Army: Commander Don Benito San Juan; 4 Command cards
- French Army: Commander Napoleon; 6 Command cards; moves first
- Victory: 7 Victory Banners
Special Rules
- The French player scores a sudden-death victory if all three Spanish artillery units are eliminated.
- The Spanish Guerrilla Action Rule is in effect. The Spanish player starts with one Guerrilla marker.
Medellín – 28 March 1809
General Cuesta's army faced Victor's advance after being driven from its defensive positions on the Tagus river. On 27 March, Cuesta's army was reinforced by the Duke of Albuquerque, and Cuesta decided it was time to fight. Cuesta's plan was to attack both French flanks, hoping to catch the French army with its back to the Guadiana river. Victor was outnumbered, but he had veteran troops who knew how to win, so he willingly deployed for battle. Victor's plan was to keep his flanks falling back, drawing them ever closer to the centre until a powerful counterattack could disorganize the Spanish line.
Cuesta formed his infantry in a long, thin, continuous line, since his greatest fear was that the French cavalry could destroy his infantry if there were gaps in the line. At first Cuesta's plan seemed to work. Lasalle's position on the French left was a risk, but his men held their weak positions. Spanish infantry formations were also pressing against the French batteries on the Latour-Maubourg hill position. Latour-Maubourg launched his cavalry in a counterattack, but the cavalry was forced into a disorganized retreat. When the Spanish infantry threatened to capture the French guns, Latour-Maubourg ordered his reorganized cavalry to attack again, this time against the Spanish cavalry covering the end of the infantry line. Events then moved quickly. The French cavalry charge succeeded, and the Spanish cavalry fled the battlefield, exposing the thin Spanish line to a devastating flank attack. Cuesta's left flank dissolved in panic. Lasalle and Villatte, seeing the opportunity, ordered a counterattack that caught the right flank of the Spanish army between the infantry in front and the cavalry on its flanks and rear. The result was a massacre. Whole battalions were destroyed when they tried to hold their ground and fight, and the French cavalry gave no quarter in pursuing the fugitives. More than 7,500 Spaniards became casualties. In the end, Cuesta's battered army withdrew to Monasterio.
The scenario is set up. The battle lines are drawn, and you are in command. Can you change history?
Battle Notes
- Spanish Army: Commander Gregorio de la Cuesta; 6 Command cards; moves first
- French Army: Commander Victor; 5 Command cards
- Victory: 6 Victory Banners
Special Rules
- The Spanish player's hand size is reduced by one Command card for each Victory Banner lost. The cards lost are chosen at random by the French player when each banner is lost. Once the Spanish player's hand reaches three cards, it is not reduced any further.
- The Spanish player may form square with a maximum of two units during the battle.
- The Spanish Guerrilla Action Rule is in effect. The Spanish player starts with one Guerrilla marker.
- The Guadiana and Hortiga rivers are impassable except at the bridge.
Alcañiz – 23 May 1809
After the capture of Zaragoza, most of the French forces in the region had withdrawn to France, because problems with Austria were beginning. General Suchet, the newly arrived French commander, led a force that was 20,000 strong on paper. Disease, lack of supply, garrisons, and anti-guerrilla operations left him with fewer than 10,000 men available to occupy the battlefield against Blake's rebuilt army of equal strength. Blake's forces held the advantage, so they were deployed on the hills west of Alcañiz with all of the Spanish artillery grouped in the centre. Although this was a strong position, Blake was fighting with the Guadalupe river at his back, and defeat would mean the almost certain destruction of his army.
Suchet's reconnaissance was poor. In the afternoon the battle began with an attack on the Spanish left, the strongest part of their line. As could be foreseen, the French infantry was repulsed by effective musketry from Aréizaga's infantry division. The Spanish cavalry sent to finish off the retreating infantry was dispersed by a French light cavalry counterattack. In the centre, several columns of French infantry, including the Polish infantry of the Vistula Legion, advanced under heavy Spanish artillery fire. They never reached the guns, being repulsed by close-range canister fire. Realizing that the battle was lost, Suchet ordered his commanders to return to Híjar. Blake could not mount an effective pursuit because his cavalry was still recovering from its flight from the battle.
Battle Notes
- Spanish Army: Commander Blake; 5 Command cards
- French Army: Commander Suchet; 5 Command cards; moves first
- Victory: 6 Victory Banners
Special Rules
- The Spanish Guerrilla Action Rule is in effect. The Spanish player starts with one Guerrilla marker.
- The Guadalupe river is impassable except at the bridge.
María – 15 June 1809
After the defeat at Alcañiz, Suchet returned to Zaragoza to reorganize his battered troops, while Blake lingered for several days at Alcañiz waiting for reinforcements. Once these reinforcements arrived, Blake crossed the mountains to the west with 25,000 men and then turned north at the Huerva river to threaten Suchet's lines of communication, forcing Suchet to abandon Zaragoza. Inexplicably, Blake divided his army, sending his best division to the far bank of the Huerva. Suchet now had an opportunity to defeat Blake in detail. On the morning of the 15th, Blake's two remaining divisions formed a battle line on a series of hills, awaiting the inevitable French attack. It did not come. The French formed on a hill parallel to the north, waiting for 3,000 promised reinforcements. Although Suchet wanted a defensive battle, his inactivity led Blake to launch an attack on the French right, but the Spanish attack was repulsed. Suchet counterattacked through the ravine, trying to take advantage of the Spanish disorganization. The attack was stopped by artillery and infantry fire, since the Spanish held firm. Around 3 PM there was a pause in the battle because of a hailstorm. During the hail, French reinforcements arrived, and Suchet ordered an attack against the Spanish right. The French infantry attacked first, and although they did not force the Spanish to retreat, they opened gaps in their lines. Now the French cavalry slipped through those gaps, making the Spanish cavalry flee and effectively destroying the Spanish infantry on the right. The French cavalry then turned toward the Spanish centre, forcing the rest of the Spanish army to leave the battlefield quickly. The French did not pursue at close range, but once again a defeated Spanish army dissolved. Only 12,000 men reached the reorganization point at Belchite.
The scenario is set up. The battle lines are drawn, and you are in command. Can you change history?
Battle Notes
- Spanish Army: Commander Blake; 5 Command cards; moves first
- French Army: Commander Suchet; 5 Command cards
- Victory: 6 Victory Banners
Special Rules
- The Spanish Guerrilla Action Rule is in effect. The Spanish player starts with one Guerrilla marker.
- The Abbey of Santa Fe is treated as a villa.
Talavera (Spanish Flank) – 28 July 1809
The reinforced French army of Victor again faced a larger British/Spanish army in magnificently defensive positions. The French solution was to attack! Ruffin's division was shattered in two unsupported assaults against the British positions on the heights of the Cerro de Medellín. Now it is mid-morning on 28 July, and the French commanders meet. They decide to launch concentric attacks. Victor moves Ruffin's survivors to the right and supports them with one of Villatte's brigades. Sebastiani's fresh divisions fill the gap. The plan is for Sebastiani's division to attack first [see Talavera (French attack against the British)]. Leval's division is to attack second, after Sebastiani's frontal attack against the Allied lines, but Leval's troops lose sight of the French lines and attack first. The French columns lose cohesion as they advance through the trees and emerge disorganized into open ground directly in front of the Spanish batteries at Pajar de Vergara. The French regiments still make some progress, but the central regiment ends up breaking under artillery fire. Seeing this, the Allies counterattack, and Leval's worn regiments retreat to avoid being isolated. On the far French left, Milhaud, the cavalry commander, recognizes the strength of the Spanish position at Talavera and its surroundings, and is content to harass the Spanish in that part of the battlefield.
The British hold their positions for twenty-four hours, and then withdraw hastily when they learn that Soult and a second French army are marching to cut their lines of communication with Portugal. The French claim a victory, although they were soundly beaten in all of their attacks.
The scenario is set up. The battle lines are drawn, and you are in command. Can you change history?
Battle Notes
- Spanish Army: Commander Cuesta (Wellesley); 5 Command cards
- French Army: Commander José/Victor; 5 Command cards; moves first
- Victory: 6 Victory Banners
Special Rules
- The Spanish Guerrilla Action Rule is in effect. The Spanish player starts with one Guerrilla marker.
- The Portina stream stops movement, but it imposes no battle restriction.
Tamames – 18 October 1809
General Del Parque advanced toward Salamanca with the Spanish "Army of the Left" as part of the Spanish Junta's autumn 1809 campaign to recover Madrid. Blocking this route was the weak French 6th Corps. Marshal Ney, its commander, was on leave. General Marchand, temporarily in command of the corps, advanced hastily to intercept Del Parque. Marchand knew he was outnumbered, but pride, ambition, and contempt for Spanish combat capabilities led him to attack. The Spanish occupied a formidable defensive position behind the village of Tamames. Marchand correctly identified the Spanish left as the weak section, but he did not gather enough troops to win decisively. Maucune's attack penetrated the Spanish front line but did not have enough strength to dislodge the Spanish reserve division behind it. Marcognet's attack on the right quickly miscarried, since it was advancing uphill against a larger force. Del Parque, seeing the confusion in Marcognet's advance, ordered his infantry forward. Marcognet's troops broke and retreated to their original starting line. Maucune now realized he was facing the entire Spanish army, so he wisely abandoned his attack and conducted an orderly retreat. The Spanish won another morale-boosting victory, but unfortunately the rest of the autumn campaign became a disaster when the Army of La Mancha was completely destroyed at Ocaña.
The scenario is set up. The battle lines are drawn, and you are in command. Can you change history?
Battle Notes (Tamames)
- Spanish Army: Commander Del Parque; 6 Command cards
- French Army: Commander Marchand; 6 Command cards; moves first
- Victory: 8 Victory Banners
Special Rules
- The Spanish Guerrilla Action Rule is in effect. The Spanish player starts with one Guerrilla marker.
- The Arroyo is fordable.
Ocaña (Cavalry Action) – 18 November 1809
When the French and Spanish armies converged at Ocaña on the morning of the 18th, the French vanguard cavalry under Milhaud encountered three of General Freire's Spanish cavalry divisions. The French deployed with the light cavalry of Paris in front of Milhaud's dragoons and the horse artillery. Paris's light division executed a vigorous charge that isolated the Spanish light cavalry in pieces. Paris, in turn, was attacked and forced to turn back when Freire advanced his heavy cavalry reserves. Milhaud then led his dragoons forward in a furious counter-charge that sent the Spanish cavalry fleeing from the battlefield. This ended one of the largest cavalry actions of the Peninsular War. With the French cuirassiers fully committed against the Austrians, the French dragoons established themselves as the main heavy cavalry in the Peninsula.
The scenario is set up. The battle lines are drawn, and you are in command. Can you change history?
Battle Notes
- Spanish Army: Commander Freire; 5 Command cards
- French Army: Commander Milhaud; 6 Command cards; moves first
- Victory: 7 Victory Banners
Special Rules
- The Spanish Guerrilla Action Rule is in effect. The Spanish player starts with one Guerrilla marker.
Ocaña – 19 November 1809
The Spanish autumn 1809 campaign was developing successfully. The secondary Army of the Left had defeated the French at Tamames. Now the 55,000 men of the Army of La Mancha, commanded by Juan de Aréizaga, were a scant 55 kilometres from Madrid. The French were reacting quickly to isolate the Spanish. Aréizaga realized the threat and began to fall back, but not quickly enough. The French army, under the tactical command of Marshal Soult, cornered the Spanish army near the village of Ocaña, where it deployed on terrain unfavourable for defence. The Spanish centre and right were formed on an open plain, excellent ground for French cavalry. On the 19th, Soult ordered Sebastiani to attack the Spanish right flank infantry with his German and Polish divisions. When the infantry was fully engaged, Milhaud's French cavalry attacked Freire's cavalry, badly mauled in the cavalry battle of the previous day, and quickly sent the Spanish horsemen fleeing. Meanwhile the Spanish were reinforced on the right and began to press Sebastiani's troops. The Spanish advantage was only temporary. Soon the victorious French cavalry, including the fearsome "Polish devils" (the lancers of the Polish Vistula Legion), fell on the rear of the Spanish right flank infantry. Within minutes three Spanish divisions ceased to exist.
Marshal Soult advanced his infantry against the now exposed divisions of the Spanish centre, pinning them in place. Soon the French cavalry also fell on these troops, scattering them to the wind. Dessolles's division then attacked Ocaña, and all the other Spanish formations fled except Zayas's division. It attempted to cover the Spanish retreat and held its formation for several kilometres, but it too collapsed later in the day under a French cavalry pursuit that could not be stopped. More than 5,000 Spaniards became casualties, another 14,000 were captured, and practically all of the army's artillery was lost.
The scenario is set up. The battle lines are drawn, and you are in command. Can you change history?
Battle Notes
- Spanish Army: Commander Aréizaga; 4 Command cards
- French Army: Commander Soult; 5 Command cards; moves first
- Victory: 6 Victory Banners
Special Rules
- The Spanish Guerrilla Action Rule is in effect. The Spanish player begins the battle without Guerrilla markers.
Alba de Tormes – 28 November 1809
After the victory at Tamames, Del Parque's Army of the Left advanced from its mountain sanctuary, fighting the French forces. In mid-November, Del Parque's 32,000 Spaniards were about to attack Kellermann's force of 16,000 men when news of the Spanish disaster at Ocaña reached him. Del Parque withdrew quickly back toward the mountains. The French were caught off guard by the sudden retreat. Confident that he had made a clean escape, Del Parque established his camp at Alba de Tormes. However, Kellermann's cavalry had kept pace with Del Parque, and on the 28th it made contact with the Spanish army. Only two of the five Spanish divisions had crossed the Tormes river safely to the far bank.
Kellermann knew that the Spanish would escape if he waited for his infantry to arrive, so he ordered his 3,000 men to attack the 16,000 Spaniards in front of them. He reasoned that if his men could attack before the Spanish could form square, he would inflict heavy losses on the Spanish infantry. With Lorcet's light cavalry in the lead, the French horsemen overran the Spanish cavalry and then the unprepared Spanish infantry formations. Losada's division and most of Belveder's division disintegrated under the avalanche, and the survivors ran for the bridge and the safety of the far bank. La Carrera's division on the left (off the map) had time to form square, and the following French cavalry attacks there were repulsed. La Carrera's men were still in grave danger, since the Spanish could not move while in square and would be destroyed if French infantry arrived in time. Fortunately it was a short November day, and the sun was setting when the French infantry units appeared on the horizon. In the growing darkness La Carrera ordered his units to run for the bridge, and most of the Spaniards crossed.
The Spanish lost about 3,000 men in the battle, and another 3,000 deserted during the retreat. French losses were negligible. Kellermann's bold move was worth it. Worse for the Spanish, Del Parque's army suffered a harsh winter in the mountains. About 16,000 men remained when the spring campaigning season began.
The scenario is set up. The battle lines are drawn, and you are in command. Can you change history?
Battle Notes
- Spanish Army: Commander Duque Del Parque; 4 Command cards
- French Army: Commander Kellermann; 5 Command cards; moves first
- Victory: 6 Victory Banners
Special Rules
- The bridge hex is a Victory Banner objective for the French player. If a French unit occupies the objective hex at the start of the French player's turn, the French player gains a Victory Banner. As long as the unit remains on the objective hex, the French player keeps the Victory Banner. If it moves or retreats from the hex or is eliminated, the banner no longer counts and is removed. If the French retake the hex, they receive the Victory Banner again.
- The Spanish Guerrilla Action Rule is in effect. The Spanish player begins the battle without Guerrilla markers.
- The Tormes river is not fordable.
La Barrosa – 5 March 1811
At the beginning of 1811, the French were engaged in an endless siege of the Allies in the port of Cádiz. The French under Marshal Victor were not strong enough to reduce the port without a French naval blockade. After Soult took 8,000 of Victor's men for his invasion of Extremadura, the Allies saw an opportunity to lift the French siege by using their naval power to land 14,000 British, Spanish, and Portuguese troops on the south coast of Cádiz. If Victor remained in his siege lines, he would be trapped between Cádiz and the relief force. If he chose to fight the relief force, he would give the Cádiz garrison the opportunity to sortie and destroy the siege lines.
Victor soon learned of the Allied advance. He hoped to ambush the Allied column as it advanced, but the Allies advanced en masse, and Graham's British division occupied the chain of hills at La Barrosa. General La Peña, the Spanish commander, gave a second opportunity: he ordered the Spanish and British to the north, now that communication with Cádiz had been established. A rearguard of several Spanish battalions stayed at La Barrosa.
Victor seized the opportunity and ordered Ruffin's division to attack the hills, with Leval's division advancing on its right. At the first sight of the French, the Spanish battalions ran. Graham received news that the French were attacking and chose to disobey orders. While La Peña dug in, Graham sent Dilkes's Guards brigade to recover the hills and Wheatley's brigade to attack Leval. Dilkes's brigade came into contact with Ruffin's French infantry and grenadier battalions, still advancing in column. The two forces became engaged in a bloody exchange of fire, with the firepower of the British line gaining the upper hand. The valiant Ruffin died, and his division withdrew from the hills. Meanwhile Wheatley's brigade advanced against Leval's division. Another exchange of fire between a British line and French columns resulted in a French defeat.
The Allies gave away the victory. Graham urged a new round of attacks to break up the French siege line, exactly what Victor feared would happen. Instead, General La Peña ordered a withdrawal to Cádiz. Marshal Victor could not believe his good luck and immediately re-established his siege lines. Apart from confirming the value of the soldiers on both sides, the battle had been a colossal loss of life.
The scenario is set up. The battle lines are drawn, and you are in command. Can you change history?
Battle Notes
- Spanish Army: Commander Graham; 6 Command cards
- French Army: Commander Victor; 5 Command cards; moves first
- Victory: 7 Victory Banners
Special Rules
- The 11 hexes of the La Barrosa hill chain serve as a Victory Banner group objective for the side that holds an absolute majority of those hexes at the start of its turn. An absolute majority means occupying more hill hexes than the opponent. If one side occupies 1 hex and its opponent occupies no hill hex, that side has the absolute majority. The Victory Banner is lost when a side no longer has the absolute majority. The Victory Banner can be won or lost more than once by each side. At the start of the battle, the Spanish player occupies 3 hexes of the hill group and begins the battle with 1 Victory Banner.
- The Spanish Guerrilla Action Rule is not in effect.
- The river is not fordable.
Albuera – 16 May 1811
The fortress of Badajoz dominated the southern invasion route from Portugal into Spain. The British had taken an interest in the fortress, but there were few engineers and no siege train as such. The French were not idle. Marshal Soult set out for Badajoz with a relief force. Beresford, the temporary army commander, marched with a force larger than Soult's to the small town of Albuera to meet the French. Beresford placed his army on the hills behind Albuera, expecting a frontal assault that would split his army. However, Soult formed most of his army behind high ground opposite the Spanish on the French right flank.
On the morning of 16 May, General Godinot's brigade attacked Albuera as a diversion, while Soult's main force moved unobserved across the Albuera river and carried out a flank attack against Blake's Spanish contingent. The first Spanish unit attacked was Zayas's division, a veteran unit under a good commander. Although attacked by superior French forces, the Spanish held on until the British division of Stewart arrived. Stewart launched Colborne's British brigade against the French flank and tested the French advance, but none of Colborne's regiments was in square. French cavalry charged and virtually destroyed three of the four regiments. The rest of Stewart's division formed a line behind the beleaguered Spanish. The French made a fatal pause to allow a fresh division to arrive. The survivors of Zayas's division withdrew without pressure. Now a solid line of British musketeers awaited the French columns that had succeeded against Zayas. When the fresh French and British formations met, both carried out a terrible mutual execution at short range, and the fire of the British line prevailed, causing the battered columns to retreat. The French reserves (Werle's division) advanced against Stewart's remnants, but help was arriving. Sensing disaster, General Cole advanced his British division without orders. His action won the battle, since the British line fire triumphed over the French columns, but again at a high cost in British casualties. Soult could see Harvey's fresh Portuguese division advancing, and with no fresh troops left, he ordered a French retreat.
Although it was considered a British victory, when Wellington heard that he had lost almost 6,000 irreplaceable British soldiers, he was reported to have said: "Another battle like this will ruin us."
The scenario is set up. The battle lines are drawn, and you are in command. Can you change history?
Battle Notes
- Spanish Army: Commander Beresford; 5 Command cards
- French Army: Commander Soult; 5 Command cards; moves first
- Victory: 8 Victory Banners
Special Rules
- The hexes of the village of Albuera are Victory Banner objective hexes for the French player. If a French unit occupies any village hex at the start of the French player's turn, the French player gains 1 Victory Banner. As long as the French unit remains on the objective hex, the French player keeps the Victory Banner. If it moves, retreats, or is eliminated, the banner is lost. The French player may gain or lose this Victory Banner more than once.
- The Spanish Guerrilla Action Rule is in effect. The British player begins the battle without Guerrilla markers. (Printed as in the source. The Guerrilla markers belong to the Spanish player in this rule set; the source names the British player here.)
- The entire Albuera river is fordable. In addition, in all ford hexes, the movement of a unit or leader does not stop.
- Stewart's Folly. If the French player plays a "Cavalry Charge" Command card, and the card is not negated by a Spanish Guerrilla marker, then during the French player's turn the British player cannot form square, nor can he play a "First Strike" Command card if he holds that card in his hand.
Vitoria – 21 June 1813
1813 was the year in which the balance of power in Spain shifted in favour of the Allies. Wellington's army received major reinforcements from England. Napoleon drew large numbers of veteran troops from Spain to rebuild his army after the disastrous campaign of 1812. Wellington's Allied army advanced through the mountains to the north and east of Spain, outflanking the French armies of José Bonaparte and forcing him toward the French frontier. José, slowed by an enormous baggage train, had halted at Vitoria to wait for General Clausel and reinforcements. José imprudently deployed to the west of Vitoria. The defensive ground was good, but it had only a single route of retreat through the mountain pass, and that enormous baggage train was in the way. The army's morale was wary.
Wellington determined to attack in four vulnerable areas of José's line and destroy the French army before the arrival of Clausel took away its numerical superiority. The first attack was made by General Hill's corps and a Spanish division against the French left flank. Kempt's Light Division was to cross the Zadorra and extend the British line. Two divisions, including Picton's, were to engage the French right flank, and two more divisions under Graham were to attack across the Zadorra north of Vitoria to block the route of retreat.
Hill's attack slowly pressed the French rearguard, and Kempt's division crossed the intact, unguarded bridges over the Zadorra to support the attack. Picton's divisions joined the fight late, but luck was with the British. Hill's attack drew in practically all of the French reserves. When Picton's divisions became engaged, they made great progress, and the whole French army was pushed into an even smaller area. More than seventy guns on each side took part in the greatest artillery duel seen in Spain, as the Allied infantry kept up the pressure. By 4 PM the French were beaten, and José's order to retreat became a total flight when the troops heard the sound of battle near their escape route through the mountain pass.
The whole French army was saved from destruction by two things. First, the terrain and the fanatical French resistance prevented Graham from blocking the route of retreat. Second, the Allied army dissolved into a horde of looters when it reached the riches of the baggage train, effectively ending the pursuit. When it was all over, José's army had suffered 8,000 casualties and had lost all of its artillery and reserves, in addition to the baggage train.
The scenario is set up. The battle lines are drawn, and you are in command. Can you change history?
Battle Notes
- Spanish Army (printed label for Wellington's Allied army): Commander Wellington; 5 Command cards; moves first (see Special Rules)
- French Army: Commander José Bonaparte; 4 Command cards; moves first (see Special Rules)
- Victory: 9 Victory Banners
Special Rules
- Moves first. At the beginning of the battle, each player simultaneously chooses and reveals one Command card from his own hand. The card each player chooses is the card he must use on his first turn. The side that moves first is the side whose card gives orders to the lowest printed number of units. "Counter-Attack," "Elan," "First Strike," "Leadership," and "Rally Tactic" cannot be played. The rest of the Tactic cards are taken to give orders to the maximum number of units allowed. If tied, the British player moves first.
- The Spanish Guerrilla Action Rule is not in effect.
- The Zadorra river is not fordable.
San Marcial – 31 August 1813
After the flight at Vitoria, Napoleon replaced his inept brother José with the capable Marshal Soult. The French retreat to the east allowed Wellington to lay siege to the important coastal fortress of San Sebastián. Soult made plans to bring relief to the French garrison there after resting and reorganizing his formations. On 31 August, under cover of dawn mist, the French crossed the Bidasoa river and advanced against Freire's Spanish army, which had formed in line on the heights. Reille's corps climbed the hills at San Marcial, but the Spanish were ready and threw back their leading divisions to the foot of the hill. Soult reorganized the broken units and, with fresh troops from Villatte, launched a second attack on the heights. Times had changed. The French no longer attacked with their former vigour, and the Spanish, feeling that their country was almost free of the hated invaders, fought with unaccustomed valour. The Spanish bayonet line held firm against the second assault, and the French lines wavered. Unable to prevent his men from retreating back to the river, Soult ordered a withdrawal.
The scenario is set up. The battle lines are drawn, and you are in command. Can you change history?
Battle Notes
- Spanish Army: Commander Freire; 5 Command cards
- French Army: Commander Soult; 5 Command cards; moves first
- Victory: 8 Victory Banners
Special Rules
- The six connected hexes of hill on the left section, the seven connected hexes of hill in the centre, and the six connected hexes of hill in the right section each form a Victory Banner group objective for the side that holds an absolute majority of those hexes at the start of its turn. An absolute majority means occupying more hill hexes than the opponent. If one side occupies 1 hex and its opponent occupies no hill hex, that side has the absolute majority. The Victory Banner is lost when a side no longer has the absolute majority. The Victory Banner can be won or lost more than once by each side. At the start of the battle, the Spanish player occupies several hexes of the three hill groups, and the French player occupies none. The Spanish player begins the battle with 3 Victory Banners.
- The Spanish Guerrilla Action Rule is in effect. The Spanish player starts with 1 Guerrilla marker.
- The Bidasoa river is fordable.
Cruce de Ordal – 13 September 1813
At the end of June, Suchet had reported the French defeat at Vitoria and began the retreat north of his Army of Aragón. Lord Bentick, a rather inept British commander, followed him timidly, since Suchet's army had been undefeated through several battles. Bentick ordered the British advance guard under Adam, together with the Spanish under Torres, to occupy the heights above the Ordal crossing. The position was extremely strong, and Suchet was still believed to be retreating. Adam placed his best unit, the Inniskillings, in the abandoned trenches near the crossing itself. Worryingly, no detachments were sent out.
Suchet had determined that the best defence was a good attack and had turned back south to attack. Shortly after midnight, on the morning of 13 September, Suchet's troops crossed the Lledoner bridge in the gorge near the undetected Allied position. The first contact occurred when a Spanish cavalry patrol discovered the advancing French column. Soon the whole mountain pass was engaged in a fierce night battle. The Allies made a series of bayonet charges against the French advance, which had to pay a heavy toll from cannon fire, but Suchet skilfully kept troops moving forward and extended his lines. The Allies were gradually forced back. After three hours of fighting the last entrenchments fell, and with Adam wounded, the Inniskillings and the surviving Spaniards withdrew, but most were captured by Suchet's pursuing cavalry.
The scenario is set up. The battle lines are drawn, and you are in command. Can you change history?
Battle Notes
- Spanish Army: Commanders Adam/Torres; 5 Command cards
- French Army: Commander Suchet; 6 Command cards; moves first
- Victory: 6 Victory Banners
Special Rules
- The Spanish Guerrilla Action Rule is in effect. The Spanish player starts with 1 Guerrilla marker.
- The river is not fordable.