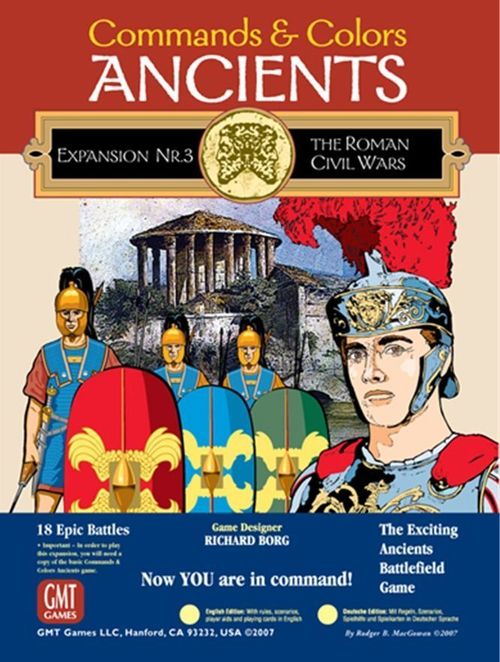
Commands & Colors: Ancients Expansion Pack #3 – The Roman Civil Wars
Commands & Colors: Ancients Expansion Pack #3 – The Roman Civil Wars Rulebook
Table of Contents
Table of Contents
1. Introduction
The Commands & Colors: Ancients game system lets players faithfully recreate epic clashes from ancient history. The battles, illustrated in the scenarios section, focus on the historical deployment of the forces and on terrain that was influential at the scale of the game. The scale of the game is flexible and varies from battle to battle. In some scenarios one infantry unit may represent a legion of soldiers, in others only a few warriors.
The Command card system is the engine of movement. It creates uncertainty and gives players many opportunities and challenges, while the battle dice resolve combat quickly and efficiently.
The tactics needed to win fit closely with the strengths and weaknesses of the various unit types, their weapons, the terrain, and the effects that actually occurred.
In this third expansion, we turn our attention to 19 battles from 82 BC to 45 BC, including the campaigns of Quintus Sertorius in Spain, the battles of the second Roman civil war, and other battles of Caesar against the Barbarian tribes of the Gauls and the Germans.
In addition to the standard battles, you will find 4 Epic battles that use two maps, allowing battles of greater size to be reproduced.
You must own the base game Commands & Colors: Ancients to play this expansion, plus Expansion #2 for the standard battles. One battle uses the blocks of Expansion #1, but these can be replaced by others if you do not own it. For the Epic battles you need the base game and all the expansions.
2. Contents
- 1 mounted map
- 2 sheets of decals to apply to the blocks
- 2 tables
- 1 booklet of rules and scenarios containing 23 battles
- 120 blocks: Roman Red Army and Roman Grey Army, comprising:
- 100 small blocks (60 red and 40 grey) for infantry
- 18 medium blocks (9 red and 9 grey) for cavalry units
- 2 large red blocks for elephants
Units, commanders and blocks
A unit is made up of a number of blocks:
Infantry units
- All Light, Archer, Slinger, Auxiliary, Warrior, Medium and Heavy infantry units consist of 4 small blocks.
- All light or heavy war machine units consist of 2 small blocks.
Cavalry units
- All Light, Mounted Archer, Medium, Heavy cavalry and Camel units consist of 3 medium blocks.
- All Elephant units consist of 2 large blocks.
- All Light or Heavy Chariot units consist of 2 rectangular blocks.
- All Barbarian Light Chariot units consist of 3 rectangular blocks.
A commander is not a unit. It is represented by a rectangular block.
Unit symbols and colors
To help identify the unit type, coloured symbols have been placed on each label.
- Green circle: Light Infantry, Slingers, Archers, Light Cavalry, Mounted Archers, Light War Machine.
- Green circle with white border: Auxiliaries, Light Chariots, Barbarian Light Chariots.
- Blue symbol: Medium Infantry, Medium Cavalry, Camels.
- Blue symbol with white border: Warriors.
- Red symbol: Heavy Infantry, Heavy Cavalry, Heavy Chariots, Elephants, Heavy War Machines.
This expansion provides additional red and grey blocks for the two Roman armies. Apply the appropriate labels to the front and back of the blocks, for each unit.
3. Setting Up the Game
- Choose a battle.
- Place the map in the centre of a table. Note that the map has battlefields on both sides. To play the battles of this expansion, use the battlefield divided into three parts, with the words "Commands and Colors Ancients" in the centre. The other side will be used later together with a second mounted map for other battles.
- Place the terrain hexes as indicated on the scenario map.
- Separate the blocks by colour, grey and red, and where necessary green for barbarians or brown for the East. Place the blocks of the various units on the map, in accordance with what the scenario indicates. Each unit symbol represents a whole unit.
- Choose the side you will play.
- Shuffle the Command card deck and deal the number of cards indicated in the scenario notes to the players. Keep the cards face down. Place the remaining cards beside the map to form the deck.
- Place the battle dice beside the map, accessible to both players.
- Read the special rules for the battle.
- The starting player, indicated in the scenario notes, begins play.
4. Object of the Game
The object of the game is to be the first player to capture a certain number of flags (usually from 5 to 8), according to the victory conditions indicated in the scenario.
A flag is obtained for each enemy commander or unit completely eliminated from the game. When the last block of a unit, or of a commander, is eliminated, take a flag. In some scenarios flags can also be obtained by capturing certain hexes or other territorial objectives.
5. The Turn (Sequence of Play)
The scenario notes indicate which player begins the game. The players then alternate turns until one of them obtains the number of flags needed to win.
During your turn, follow the sequence of play:
- Command card play
- Orders to units and commanders
- Movement
- Battle
- Draw a new Command card
6. New Special Rules
The Marian Legions rule
When the Marian Legions rule is in effect, Roman Medium and Heavy infantry units are armed with the pilum and sword. These units now have fire capability and must follow the rules for ranged combat. The range is two hexes, and one die is rolled when the unit remains stationary or moves only one hex. As with the normal ranged combat rules, a Marian legion may not conduct both ranged and close combat in the same turn.
Before the reforms of Marius, the maniple was the tactical unit of the legion. It now becomes the cohort, ten per Marian legion. Marius abolished the old distinction between velites, hastati, principes and triarii. All Marian legions were equipped and organised in a standardised way. Each man was armed with the pilum – a javelin with an iron point – a sword and a cuirass. Marius also recruited soldiers from the proletariat, creating a professional army in place of the citizen militia. Finally, Marius abolished the distinctions between Roman soldiers and allies, incorporating them all into his new legions. Each legion became a permanent organisation, with its numerical designation and an eagle as its standard.
The Julian Legions rule
When the Julian Legions rule is in effect, all Roman Medium and Heavy infantry units are armed with the pilum and sword and follow the ranged combat rules, as for the Marian Legions rule. The range is two hexes, and one die is rolled when the unit remains stationary or moves only one hex.
In addition, all Roman Medium and Heavy infantry may either move one hex and conduct close combat as normal, or move 2 hexes and not fight.
Note: the Julian Legions rule may be applied retroactively to all the scenarios of Expansion #2, from the Sabis River (57 BC) to Cefn Carnedd (AD 51), except for the two Teutoburg scenarios, where the terrain greatly hindered Roman mobility.
Julius Caesar
When the commander Caesar is assigned to any Roman unit, that unit fights with one extra die in close combat (including when terrain reduces the number of dice normally rolled). When he is assigned to an infantry unit (except war machines), the unit may move two hexes and conduct close combat against an enemy unit.
7. Terrain in Detail
Marsh
Movement: a unit must end its movement when it enters a marsh hex and may not move further that turn. The unit must also roll a die in battle to see whether it loses a block. It loses a block when the die shows the unit's symbol.
Units that retreat or evade do not stop when they enter a marsh hex. A unit that must retreat (or evade) onto or through a marsh hex must check for the possible loss of a block for each marsh hex onto or through which it retreats or evades. The loss of a block for the marsh is checked before the removal of blocks for failure to retreat on the map-edge hexes.
Unassigned commanders that enter, retreat, evade or flee into or through marsh hexes are also subject to dice rolls for the loss of blocks. A unit leaving a marsh hex may move only into an adjacent hex, regardless of its normal movement allowance.
A war machine may not enter or retreat into a marsh hex.
Battle: a unit may conduct battle in the turn in which it moves into a marsh hex. When it fights against a unit on a marsh hex, a maximum of two dice are rolled in close combat. A unit that chooses to advance into a marsh hex after a successful close combat must check for the possible loss of a block. A unit in a marsh hex that fights from outside it rolls a maximum of two dice in close combat, and one die in ranged combat. A unit may still make a momentum advance out of a marsh hex onto the attacked hex in close combat.
A Command card that gives extra dice in battle changes the maximum number of dice rolled.
Line of sight: a marsh hex does not block line of sight.
Bastion
Movement: no restriction.
Battle: a bastion gives protection along the two or three front hexsides.
Close combat: when a defending unit is attacked through a bastion hexside, it ignores one sword symbol and one flag that it would otherwise suffer. Note that the defending unit does not enjoy the benefits of the bastion when the enemy unit does not attack through a bastion hexside.
Ranged combat: a unit attacked through a bastion hexside may ignore one flag that it would otherwise suffer.
Note: mounted units do not enjoy this benefit.
Line of sight: a bastion hexside does not block line of sight.
Scalable city walls (use bastions to represent them)
Movement:
- Foot units (except war machines) and commanders: to enter a scalable city walls hex, such a unit or commander must begin its movement from an adjacent hex. When it enters the hex it must stop and may not move further that turn. If it moves out of such a hex it may move only into an adjacent hex and may not move further that turn. Foot units that Retreat or Evade are not obliged to stop when they enter such a hex.
- Mounted units and war machines: scalable city walls are considered impassable terrain. The two types of unit may conduct close combat against adjacent units on this terrain if they begin the turn adjacent to it. The two types of unit may not retreat into such a hex, and mounted units may not Evade or make a momentum advance into such a hex.
Battle:
Close combat
- When fighting against a unit in a scalable city walls hex, or when a unit occupying such a hex fights out of it, a maximum of 2 dice are rolled in close combat.
- A unit defending in a scalable city walls hex ignores one sword symbol that it suffers and may also ignore one flag.
- A unit defending in a scalable city walls hex that cannot Evade, or chooses not to, fights first (treat it as having a First Strike card) when it is attacked in close combat, unless the attacking enemy unit is also in an adjacent scalable city walls hex.
Ranged combat: a unit defending on a scalable city walls hex may ignore one flag that it suffers. The normal line-of-sight rules apply, and adjacent units prevent ranged combat. A Command card or commander that adds dice in battle changes the maximum number of dice rolled.
Line of sight: a scalable city walls hex blocks line of sight behind the hex, and vice versa.
Fortified city walls (use bastion hexes to represent them)
Movement: fortified city walls are normally considered impassable terrain for all units, unless the siege rules apply, as indicated in the special rules of the battle. When the siege rules apply, attacking infantry units have ladders and this type of terrain is treated as scalable city walls, see above.
Battle: no combat is possible unless the siege rules apply.
Line of sight: a fortified city walls hex blocks line of sight behind the hex, and vice versa.
Broken ground
Movement: no movement restriction for infantry. Exception: war machines may not enter it. A mounted unit must stop when it enters it, and may not move further that turn.
Battle: an infantry unit may conduct battle in the turn in which it enters a broken ground hex. A mounted unit may not conduct battle in the turn in which it enters such a hex.
When fighting against an enemy unit on broken ground, or when a unit on broken ground fights out of it, it rolls a maximum of two dice in close combat.
A Command card that gives extra dice in battle changes the maximum number of dice rolled.
Line of sight: a broken ground hex does not block line of sight.
Forest
Movement: a unit must stop when it enters a forest hex, and may not move further that turn.
Battle: a unit may not conduct battle in the turn in which it enters a forest hex. Exception: Light Infantry, Slingers, Auxiliaries and Warriors. These units may enter a forest and fight.
When fighting against an enemy unit in a forest hex, or when a unit fights from such terrain, it rolls a maximum of two dice in close combat. A unit that attacks an enemy in a forest with ranged combat may roll only one die. An advance with momentum into a forest hex after close combat is allowed (except for war machines). The close combat bonus is possible only for any Light, Warrior, Medium or Heavy infantry unit with an assigned commander.
A Command card that gives extra dice in battle changes the maximum number of dice rolled.
Line of sight: a broken ground hex blocks line of sight.
Translator's note: the forest line-of-sight entry is printed as "a broken ground hex blocks line of sight", as in the source. The broken ground entry above says that hex does not block line of sight, so this may be a source error. It is transcribed as printed.
Hill
Movement: no restriction.
Battle: all units roll a maximum of two dice in battle when fighting against an enemy unit that is higher up in close combat. Infantry roll a maximum of 3 dice when fighting against enemy units that are lower down, and when fighting from one hill hex to another hill hex. Mounted units roll a maximum of two dice in battle when fighting against an enemy unit that is lower down, and when fighting from one hill hex to another.
A Command card that gives extra dice in battle changes the maximum number of dice rolled.
Line of sight: a hill hex blocks line of sight for units behind a hill hex. A unit on a lower level has line of sight to the first hill hex, and vice versa. It has no line of sight through a hill hex to a second hill hex, and vice versa (that is, a unit on the lower level cannot see, or be seen, if at least one of the other hill hexes lies between the two units).
Line of sight is not blocked between units on the same hill that observe through hill hexes at the same level.
Coast
Movement: a coast hex is impassable. Units may not move, retreat, evade or flee onto a coast hex.
Battle: not applicable.
Line of sight: a coast hex does not block line of sight.
River
Most river hexes are treated as impassable terrain unless the special instructions of the scenario indicate otherwise. Impassable river hexes do not block line of sight.
Fordable river (when specified in the scenario special rules)
Movement: a unit must stop when it enters a fordable river hex.
Battle: a unit may conduct battle in the turn in which it enters a fordable river hex. When fighting against a unit on a fordable river hex, a maximum of two dice are rolled in close combat. A unit on a fordable river hex that fights from that hex rolls a maximum of 2 dice in close combat and one die in ranged combat. A unit may still make an advance with momentum after a successful close combat.
A Command card that gives extra dice in battle changes the maximum number of dice rolled.
Line of sight: a fordable river hex does not block line of sight.
Fortified camp
Line of sight: a marsh hex does not block line of sight.
Translator's note: the line-of-sight entry at the head of the fortified camp section is printed as "a marsh hex does not block line of sight", as in the source. It appears to be a copy error, since the fortified camp's own line-of-sight entry is given at the end of this section. It is transcribed as printed.
Battle
- Close combat: a unit defending on a fortified camp hex ignores one sword symbol and any flag it suffers.
- Ranged combat: a unit defending on a fortified camp hex ignores one flag symbol that it suffers.
Note: mounted units do not enjoy this benefit.
A fortified camp gives this protection against attacks from all sides.
A unit in a fortified camp hex rolls one die fewer in battle than it normally would.
Line of sight: a fortified camp hexside blocks line of sight.
Scenarios
The Hill Gate (near Rome) – 82 BC
[Page 8 of the English text]
Council of War
Samnite Army
- Commander: Pontius
- 5 Command cards
- Moves first
Roman Army
- Commander: Sulla
- 6 Command cards
Victory: 5 flags
Special rules
The walls of Rome (bastion hexes) are impassable.
The Marian Legion rule applies to both armies.
When a Roman unit occupies an enemy camp hex at the start of the Roman turn, it gains a victory flag that cannot be lost. Remove the camp marker and take the flag before playing a Command card.
Baetis River – 80 BC
[Page 9 of the English text]
Council of War
Sertorian Army
- Commander: Quintus Sertorius
- 5 Command cards
- Moves first
Roman Army
- Commander: Lucius Fufidus
- 4 Command cards
Victory: 6 flags
Special rules
The Marian Legion rule applies to both armies.
The Baetis River is fordable.
Lauron – 76 BC
[Page 10 of the English text]
Council of War
Sertorian Army
- Commander: Quintus Sertorius
- 6 Command cards
- Moves first
Roman Army
- Commander: Pompey
- 5 Command cards
Victory: 7 flags
Special rules
The Marian Legion rule applies to both armies.
The four-hex city representing Lauron is impassable.
The ambush force (Herennius) is part of the Sertorian Army. It starts on the left of the line. It may receive orders from the first turn, without delay. Herennius's units must retreat towards the Sertorian map edge.
Valentia – 75 BC
[Page 11 of the English text]
Council of War
Sertorian Army
- Commanders: Gaius Herennius and Marcus Perpenna
- 4 Command cards
Roman Army
- Commander: Pompey
- 5 Command cards
- Moves first
Victory: 6 flags
Special rules
The Marian Legion rule applies to both armies.
The four-hex city representing Valentia is impassable.
The Sertorian player may give orders to the units of only one command when playing a Command card: that of Herennius (right/centre) or that of Perpenna (left). Units cannot change command, so to tell apart the units of the two commands it is recommended to keep the blocks facing one way for one command and the other way for the other command.
Sucro – 75 BC
[Page 12 of the English text]
Council of War
Sertorian Army
- Commander: Quintus Sertorius
- 6 Command cards
Roman Army
- Commander: Pompey
- 5 Command cards
- Moves first
Victory: 6 flags
Special rules
The Marian Legion rule applies to both armies.
Bibracte – 58 BC
[Page 13 of the English text]
Council of War
Helvetii
- Commanders: various tribal chiefs
- 4 Command cards
- Moves first
Roman Army
- Commander: Julius Caesar
- 6 Command cards
Victory: 7 flags
Special rules
The Julian Legions rule is in effect.
The Caesar rule is in effect.
The two Roman Auxiliary units in the hexes of the Roman camp are new recruits, ordered to remain in the rear. These units may not move or advance outside their starting hexes. They may, however, fire, conduct close combat or respond to attacks.
When a friendly unit occupies an enemy camp hex at the start of the Roman turn, it gains a victory flag that cannot be lost. Remove the camp marker and take the flag before playing a Command card.
Plain of Alsace – 58 BC
[Page 14 of the English text]
Council of War
Germanic Tribes
- Commander: Ariovistus
- 4 Command cards
Roman Army
- Commander: Julius Caesar
- 6 Command cards
- Moves first
Victory: 7 flags
Special rules
The Julian Legions rule is in effect.
The Caesar rule is in effect.
Gergovia – 52 BC
[Page 15 of the English text]
Council of War
Gallic Army
- Commander: Vercingetorix
- 5 Command cards
Roman Army
- Commander: Julius Caesar
- 5 Command cards
- Moves first
Victory: 8 flags
Special rules
The Julian Legions rule is in effect.
The Caesar rule is in effect.
The four Gallic reinforcement units and the reinforcement commander may be ordered into battle by playing a Commander card. In this case, place the units on any of the 5 hexes indicated on the right of the Gallic side, with Vercingetorix assigned to one of the units. These units may not move further in the turn in which they enter the battle.
Then, before the next Roman player turn, the Roman player must place his reinforcement unit [Roman Reinforcement] on any map-edge hex on his left side. The unit becomes part of the Roman army on the map and may receive orders to move and fight.
There are three Gallic camp hexes. When a Roman unit occupies an enemy camp hex at the start of its own turn, remove the camp hex, but do not award a victory flag for this first hex. The flag is obtained for the second or third camp hex captured, and cannot be lost.
If a Roman unit occupies a city-walls hex, it gains a flag; but if it leaves or the unit is eliminated, the flag is lost.
When a Gallic unit occupies an enemy camp hex at the start of its own turn, remove the camp hex and assign a victory flag that cannot be lost. If a Gallic unit occupies a bastion hex of the Roman camp, it gains a flag; but if it leaves or the unit is eliminated, the flag is lost.
The Gallic camp hexes and the hexes of the walls of Gergovia (represented by bastions) are considered to be on hills. The city of Gergovia has scalable walls, and the corresponding rule is in effect.
Hill hexes adjacent to forest hexes are too steep to climb and are considered impassable terrain for units in the adjacent forest hexes. Units on hill hexes adjacent to forest hexes may, however, move or retreat downhill from the hill to a forest hex. A unit on a hill hex may not conduct close combat against an enemy unit in a forest, and vice versa.
Translator's note: the source prints the Gallic commander's name as "Vercingerotige". It is rendered here as Vercingetorix, the name used elsewhere in the same scenario.
Ilerda – 49 BC
[Page 16 of the English text]
Council of War
Pompeian Army
- Commander: Afranius
- 5 Command cards
- Moves first
Caesarian Army
- Commander: Caesar
- 6 Command cards
Victory: 7 flags
Special rules
The Julian Legions rule applies to both armies.
The Caesar rule is in effect.
The walls of Ilerda (bastion hexes) are scalable.
The river is impassable.
When a unit occupies an enemy camp hex at the start of its own turn, remove the camp hex. When both camp hexes have been removed, assign a victory flag.
When several Caesarian units occupy the hill in the centre of the line, gain a victory flag.
Utica, Part 1 – The Cavalry Action – 49 BC
[Page 17 of the English text]
Council of War
Numidian Army
- Commander: Saburra
- No Command cards: roll two dice to give orders to units
Caesarian Army
- Commander: Curio's cavalry lieutenant
- 6 Command cards
- Moves first
Victory: 4 flags
Special rules
This scenario is designed for solo play, with one person commanding both sides. Only the Roman side has a hand of cards.
The Numidian rolls two dice at the start of his turn instead of playing a Command card. The dice roll determines the type of unit that receives orders. The Roman player has the freedom to decide which units of that type receive orders or are chosen to move and fight.
- Green circle: a green unit
- Blue triangle: a blue unit
- Red square: a red unit
- Helmet: the commander and, if it has an assigned unit, that unit
- Flag: one unit retreats a full movement. The Roman player may choose any unit, even one whose retreat path is blocked, one that occupies a map-edge hex, or one that would retreat into such a hex with movement points remaining.
- Swords: one block is removed from any unit of choice
The river is impassable.
Utica, Part 2 – The Valley – 49 BC
[Page 18 of the English text]
Council of War
Pompeian Army
- Commander: Varus
- 5 Command cards
- Moves first
Roman Army
- Commander: Curio
- 5 Command cards
Translator's note: the source labels this force "Roman Army", while the battle details table lists it as Caesarian. It is printed as in the source.
Victory: 5 flags
Special rules
The Julian Legions rule is in effect for both armies.
A Pompeian cavalry unit that moves down into the valley and leaves by one of the two hexes indicated on the opposite side (on the left, "Cavalry Exit Hexes") gains a victory flag for its courage.
A Caesarian unit that occupies the enemy camp gains a victory flag, which is lost if it leaves or is eliminated.
Bagradas River – 49 BC
[Page 19 of the English text]
Council of War
Numidian Army
- Commander: Saburra
- 5 Command cards
- Moves first
Caesarian Army
- Commander: Curio
- 5 Command cards
Victory: 5 flags
Special rules
The Julian Legions rule is in effect for both sides.
Brindisi Raid – 48 BC
[Page 20 of the English text]
Council of War
Pompeian Army
- Commander: Libo
- 5 Command cards
- Moves first
Caesarian Army
- Commander: Antony
- 2 Command cards at the start, rising to 5 (see special rules)
Victory: 6 flags
Special rules
The Caesarian player starts with 2 Command cards. On turn 1 he plays one and draws two; he now has three. On turn 2 he plays one card and draws two. Continue in the same way until he reaches a hand of 5 cards.
The Julian Legions rule is in effect for both sides.
The city of Brindisi is protected by bastions. Even though it lies on the Pompeian side of the battlefield, the units occupying the bastions at the start of the battle are Caesarian units, which must retreat towards the Caesarian map edge.
Place a block in every coast hex behind the bastions of Brindisi to represent the transport ships. When a Pompeian unit occupies a coast hex at the start of its own turn, the player gains a victory flag that cannot be lost. Remove the block representing a ship from the hex before playing a Command card.
Place a block in every coast hex outside the bastions of Brindisi to represent the landing (and escape) hexes of the Pompeian sailors. When a Caesarian unit occupies a coast hex outside Brindisi at the start of its turn, it gains a victory flag that cannot be lost. Remove the block representing a ship from the hex before playing a Command card.
Treat all coast hexes as fordable river hexes for movement and combat.
Dyrrhachium – 48 BC
[Page 21 of the English text]
Council of War
Pompeian Army
- Commander: Pompey
- 5 Command cards
- Moves first
Caesarian Army
- Commander: Caesar
- 5 Command cards
Victory: 6 flags
Special rules
The Julian Legions rule is in effect for both armies.
The Caesar rule is in effect.
A Pompeian unit that leaves the map by the Roman left side counts as a victory flag. The unit is removed and may not re-enter play.
Pharsalus – 48 BC
[Page 22 of the English text]
Council of War
Pompeian Army
- Commander: Pompey
- 4 Command cards
- Moves first
Caesarian Army
- Commander: Caesar
- 6 Command cards
Victory: 7 flags
Special rules
The Julian Legions rule is in effect for both armies.
The Caesar rule is in effect.
All hill hexes are impassable.
Zela – 47 BC
[Page 23 of the English text]
Council of War
Pontic Army (use light brown blocks)
- Commander: Pharnaces
- 4 Command cards
- Moves first
Roman Army
- Commander: Caesar
- 6 Command cards
Victory: 7 flags
Special rules
The Julian Legions rule is in effect for both armies.
The Caesar rule is in effect.
When a unit occupies an enemy camp hex at the start of its own turn, remove the camp hex and assign a victory flag that cannot be lost. Remove the camp marker and take the flag before playing a Command card.
Ruspina – 46 BC
[Page 24 of the English text]
Council of War
Numidian Army
- Commander: Titus Labienus
- 5 Command cards
- Moves first
Caesarian Army
- Commander: Caesar
- 6 Command cards
Victory: 5 flags
Special rules
The Julian Legions rule is in effect for both armies.
The Caesar rule is in effect.
A Roman unit or commander that leaves the Numidian side of the battlefield counts as a victory flag. The unit and/or commander is removed from the game.
Thapsus – 46 BC
[Page 25 of the English text]
Council of War
Pompeian Army
- Commander: Scipio
- 5 Command cards
- Moves first
Caesarian Army
- Commander: Caesar
- 6 Command cards
Victory: 7 flags
Special rules
The Julian Legions rule is in effect for both armies.
The Caesar rule is in effect.
Munda – 45 BC
[Page 26 of the English text]
Council of War
Pompeian Army
- Commander: Gnaeus Pompey
- 4 Command cards
Caesarian Army
- Commander: Caesar
- 6 Command cards
- Moves first
Victory: 8 flags
Special rules
The Julian Legions rule is in effect for both armies.
The Caesar rule is in effect.
Close Combat Example
The Roman player has used an "Inspired Command" card to order the five Roman units shown in the illustration. All movement must be completed before proceeding to close combat. Note that the routes indicated require the Light Cavalry to move first (otherwise it could not have moved through hexes B and C).
For this example, the defending units that are able to Evade do not do so. The Carthaginian chooses to keep all units in place in the hope of winning the combats.
- A. The Auxiliary unit moved 2 hexes, so it cannot conduct close combat. Alternatively, it could have been moved only one hex and conducted ranged combat with one die.
- B. Since it moved two hexes, the Warrior unit must fight either against the heavy cavalry or against the heavy infantry. The Roman player chooses the heavy cavalry. The Warrior unit is at full strength, so it rolls 4 dice. It hits with the red square, sword and commander symbols (a commander being assigned). Any flag symbol obtained may cause retreats. It obtains two hits and no flags. The opponent must remove two blocks, and since the unit has survived and has not retreated, it responds with 4 dice. It obtains hits with the blue triangle and sword symbols. Note that causing a retreat is one of the main advantages of attacking first in Close Combat: the defender has no chance to respond and so cannot cause losses or cause the attacker to retreat.
- C. The elephant can fight against the heavy infantry with 5 dice, or against the archer with 2 dice. The Roman player chooses the heavy infantry and rolls 5 dice. It obtains hits with the red square and sword symbols only (remember that commanders give no benefit to elephants in close combat). It can cause retreats with the flags. The result is a square, two swords and one flag. The elephant rerolls the two dice that gave swords as results, but obtains no further hits or flags. The heavy infantry loses 3 of its 4 blocks. The Carthaginian chooses to ignore the retreat result because the heavy infantry is supported (there are two adjacent friendly units). The heavy infantry holds and responds with 5 dice (even though only one block survived). The Carthaginian scores hits only with the red square (the sword symbol has no effect on the elephant) and can cause retreats with flags.
- D. The light cavalry fights against the archers and scores hits only with the green circle; flags can cause retreats. The archer may choose to ignore one flag, being supported, and if it does not retreat it responds with two dice, also scoring with the green circle and possibly causing retreats with flags.
- E. The heavy chariot unit fights against the Carthaginian heavy chariots with 4 dice. It hits with the red square and swords and causes a retreat with any flag (chariots are not supported and have no commander). The defending chariot may ignore one sword and, if able to respond, rolls 4 dice.
Battle Details
| Battle | Date | Armies | Winning army |
|---|---|---|---|
| Hill Gate (Porta delle Colline) | 82 BC | Roman / Samnite | Roman |
| Baetis River (Fiume Baetis) | 80 BC | Roman / Sertorian | Sertorian |
| Lauron | 76 BC | Roman / Sertorian | Sertorian |
| Valentia | 75 BC | Roman / Sertorian | Roman |
| Sucro | 75 BC | Roman / Sertorian | Sertorian |
| Bibracte | 58 BC | Roman / Helvetii | Roman |
Translator's note: the source table lists the Ruspina battle as Caesarian against Pompeian forces, but the Ruspina scenario above names a Numidian army (Labienus) against the Caesarian army. Both are printed as in the source.
Epic Battles
This expansion allows experienced players to recreate larger ancient battles. The rules are not complex and do not alter the way the base game works. Epic Battles allow up to eight players to take part.
The battlefield
To create an "epic" battlefield, use the maps of Rome and the Barbarians and of this expansion. Together these maps form a single battlefield 26 hexes wide and 9 deep, with a left section, a centre and a right section.
Number of players
The game works best with eight players: three Generals and one Supreme Commander per side. Each General controls a single section of the army, while the Supreme Commander holds and chooses which Command cards to play for his army each turn.
With six players, play three per side; the General of the centre section also acts as Supreme Commander.
With four players, one player acts as General of the right and left sections, and the other as General of the centre and Supreme Commander.
Setting up
- Choose an Epic scenario and decide which side to take.
- Each side chooses a Supreme Commander, while the Generals position themselves next to the section they control.
- Place the terrain and the unit blocks as indicated in the scenario.
- Shuffle the Command cards and give the appropriate number to the Supreme Commanders.
- Read the special rules and the victory conditions.
- The side that has the initiative takes the first turn.
Normally a single Command card deck is used, but for greater completeness it is suggested to use two.
Turn sequence
- Play Command cards and give orders to units and commanders. a) Play up to 3 Command cards for Generals. Remember that a unit that receives orders from a General's Command card may not receive another order from the play of another General's card. b) When at least one Command card has been played, Generals who have not received a Command card may attempt to give orders to a unit in their section using Initiative. c) If no Command card is played, play an Army Command card. The Supreme Commander, when playing such a card, has no section limits and may assign the card's orders to Generals in any section. d) The Supreme Commander must play at least one Command card (Normal or Army) per turn. He may not pass without acting.
- Movement.
- Combat.
- Draw new Command cards. The Supreme Commander draws two new Command cards, unless doing so would exceed his initial number of cards, in which case he draws only one.
Translator's note: the printed summary of step 4 reads the other way round ("draws two, except if this would exceed the initial number, otherwise draws only one"). It has been read to match the detailed rule under "4. Drawing new Command cards" below, which says he draws two unless that would give him more than his starting number.
1. Playing Command cards and giving orders to units and commanders
The Command deck is divided into two categories of card: Normal and Army. All Command cards are shuffled together, regardless of type.
Normal Command cards
The Supreme Commander may play up to 3 Normal Command cards per turn. Playing some of these cards may limit the playing of others of the same type. Coordinated Attack, Outflanked, Line Command, Leadership, Double Time (Forced March) and the Inspired General play are cards that may involve units in more than one section of the battlefield and therefore limit the number of Normal Command cards that may be played in a turn.
The Supreme Commander is never obliged to play the maximum number of Normal Command cards per turn. He may play one, two or three, or one Army card and no Normal cards.
A Normal Command card played is given to the General who must use it. Normally only one Normal Command card may be given to each General per turn (exception: the Inspired General play).
Normal Command cards that indicate a specific section must be given to the General of that section.
After handing over these cards, the Supreme Commander may discuss in detail the battle situation, the tactics to follow and his strategy with one (and only one) of his Generals, without being heard by the other Generals. The Supreme Commander may not show or declare which cards he holds. Once the discussion is complete, the General carries out the orders of the Command card, although he is not obliged to follow the directions and wishes of the Supreme Commander.
The other Generals may not speak with the Supreme Commander during the current turn. They simply receive the Command card and carry out its orders as they see fit.
Generals may discuss tactics among themselves whenever they wish, while the Supreme Commander must limit his talks to the moment he speaks with one of the Generals.
List of Normal Command cards
| Title | Effect |
|---|---|
| Order two units left | Give orders to two units and/or commanders in the left section. |
| Order two units center | Give orders to two units and/or commanders in the centre section. |
| Order two units right | Give orders to two units and/or commanders in the right section. |
| Order three units left | Give orders to three units and/or commanders in the left section. |
| Order three units center | Give orders to three units and/or commanders in the centre section. |
| Order three units right | Give orders to three units and/or commanders in the right section. |
| Order four units left | Give orders to four units and/or commanders in the left section. |
| Order four units center | Give orders to four units and/or commanders in the centre section. |
| Order four units right | Give orders to four units and/or commanders in the right section. |
| Clash of shields @ |
@ In the base game this card applies to all sections of the battlefield. Here it applies only to one section, that of the General to whom it is given.
Special Normal Command cards
| Title | Effect |
|---|---|
| Coordinated attack | If played by the Supreme Commander, counts as 3 Normal Command cards played in the turn, as it gives orders to units in 3 sections of the battlefield. Playing this card allows each of the three Generals to give an order to one unit. The Supreme Commander may not play other Normal Command cards, and the Generals may not try to give orders with Initiative. Note that playing this card lets the Supreme Commander draw two cards at the end of the turn, rebuilding his hand. |
| Outflanked | If played by the Supreme Commander, counts as 2 Normal Command cards played in the turn, as it gives orders to units in 2 sections (left and right). Playing this card allows each of the Generals of the right and left to give orders to two units. The Supreme Commander also has the option of giving a card to his General of the centre. |
Commander cards (Special)
Commander cards are Special. If such a card is played by the Supreme Commander, it may also count as one Normal Command card played when it gives orders to units in one section only.
It counts as two Normal Command cards played when the Supreme Commander gives the card to two Generals in adjacent sections to give orders to units positioned in two sections of the battlefield. A Command card that involves two sections must involve the centre and one of the two wings. In addition to the Command card that gives orders to two sections, the Supreme Commander may give another Normal Command card to the General who was not involved in the play of the previous card.
When the Supreme Commander plays a Commander card and two other Normal Command cards in his turn, the Commander card may involve units in one section only.
| Title | Effect |
|---|---|
| Leadership any section | Give orders to the units under the command of a commander (in the commander's hex and in 3 connected adjacent hexes), or give orders to one unit of your choice. |
| Inspired left leadership | Give orders to the units under the command of a commander in the left section (in the commander's hex and in 4 connected adjacent hexes), or give orders to one unit of your choice. |
| Inspired center leadership | Give orders to the units under the command of a commander in the centre section (in the commander's hex and in 4 connected adjacent hexes), or give orders to one unit of your choice. |
| Inspired right leadership | Give orders to the units under the command of a commander in the right section (in the commander's hex and in 4 connected adjacent hexes), or give orders to one unit of your choice. |
Other special cards
| Title | Effect |
|---|---|
| Double time (Forced March) | Give orders to up to 4 foot units in a block (connected adjacent hexes). These move up to 2 hexes and may attack in close combat. Warriors may move up to 3 hexes and conduct close combat if they moved 2 or 3 hexes. Units that receive orders may not fire. If you have no foot units, give orders to one unit of your choice. Note: light foot units gain no benefit from movement from this card (except Auxiliaries). |
| Line command | Give orders to a block of foot units in connected adjacent hexes. The units may move one hex. After movement, the units receiving orders may fire or conduct close combat if possible. These units may advance with momentum after a successful close combat and may also fight again if possible. If you have no foot units, give orders to one unit of your choice. |
- The Double Time (Forced March) card, when played by the Supreme Commander, may count as one Normal Command card when it gives orders to units in one section only. It counts as two Normal cards when the Supreme Commander gives the card to two Generals in adjacent sections to give orders to units in a group positioned in their two sections of the battlefield. When two sections are involved, the General of the centre and the General of the right or left must be involved. In addition to such a card, the Supreme Commander has the option of giving another Normal Command card to the General who has not received orders from the Double Time card. When the Supreme Commander plays a Double Time card and two other Normal Command cards in his turn, the Double Time card may involve units in one section only.
- The Line Command card, when played by the Supreme Commander, may count as one Normal Command card when it gives orders to units in one section only. It counts as two Normal cards when the Supreme Commander gives the card to two Generals in adjacent sections to give orders to units in a group positioned in their two sections of the battlefield. When two sections are involved, the General of the centre and the General of the right or left must be involved. In addition to such a card, the Supreme Commander has the option of giving another Normal Command card to the General who has not received orders from the Line Command card. It counts as three Normal Command cards when the Supreme Commander gives it to three Generals to give orders in all three sections. In this case, the Supreme Commander may not give other Normal Command cards. No section may have units receiving orders from more than one Line Command card. The Supreme Commander may play two Line Command cards in his turn as long as both give orders to units in one section only each, or one gives orders to one section and the other to the other two. The Supreme Commander may play three Line Command cards in his turn as long as each gives orders to units in one section only.
The Generals may discuss how to coordinate their forces in using Commander, Double Time and Line Command cards across more than one section, but cooperation is not compulsory.
Playing the Inspired General
Normally the Supreme Commander can give only a single Normal Command card to a General. However, when the Supreme Commander holds two section Command cards that are exactly the same, both may be given to one General, and this is considered the Inspired General play.
The following section cards may be used for the Inspired General play:
- Order two units right, centre or left (orders up to 4 units in the section of the General who plays them)
- Order three units right, centre or left (orders up to 6 units in the section of the General who plays them)
- Order four units right, centre or left (orders up to 8 units in the section of the General who plays them)
Translator's note: the source prints these three cards as "right or centre i sinistra", read here as "right, centre or left".
The Inspired General play counts as 2 Normal Command cards given, so only one of these cards remains available to the Supreme Commander in the same turn. If two Normal Command cards have already been given, the Inspired General play cannot be made.
General's Initiative
If the Supreme Commander has played at least one Normal Command card in the turn, any General who has not given an order to any of his units by such a card may decide to act on Initiative and try to give orders to one unit in his section. The General rolls a die with the following effects:
- Green circle: a light unit of the General's choice receives orders.
- Blue triangle: a medium unit of the General's choice receives orders.
- Red square: a heavy unit of the General's choice receives orders.
- Helmet: a unit of the General's choice receives orders. Alternatively, an assigned or unassigned commander receives orders.
- Flag: a unit of the General's choice must retreat. It may not fight. If it cannot retreat its full movement, the normal block losses apply for the unused movement points.
- Swords: a unit of the General's choice in his section loses a block. It may not fight.
If the symbol obtained does not correspond to any unit under the command of the General rolling the die, no unit receives orders. The die roll has no effect.
Army Command cards
The Supreme Commander may play only one Army Command card per turn, and it may not be played if one or more Normal Command cards have already been played, and vice versa. When an Army Command card is played, it is not given to a General. Instead it is played by the Army commander, who assigns orders to the Generals.
The command of the army is determined at the moment the Army Command card is played, by counting the number of Command cards that the Supreme Commander has in hand, including the card played. The number is equal to the number of units that can receive orders from the card played.
Example: the initial command for an army is 8. In the first 4 turns, the Supreme Commander plays 3 Normal Command cards per turn, replacing 2 per turn. At the start of turn 5, the army command is 4. In turn 5 the Supreme Commander decides not to play any Normal card, but instead plays Order Light Troops, an Army card, and may give orders to only 4 light units.
After assigning orders to each General, the Supreme Commander may speak in detail with all his Generals about the battle situation, the tactics and the strategy, but may not show or say which Command cards he holds. Once the discussion is complete, each General carries out the orders received, but is not obliged to follow what the Supreme Commander wants or indicates.
List of Army Command cards
| Title | Effect |
|---|---|
| Order light troops | Give orders to a number of light foot and mounted units equal to your command. Light foot units may move through a friendly unit. If you have no light units, give orders to one unit of your choice. Note that this card allows light foot troops, including auxiliaries, to move through a friendly unit when they move 2 hexes. |
| Order medium troops | Give orders to a number of medium foot and mounted units equal to your command. If you have no medium units, give orders to one unit of your choice. |
| Order heavy troops | Give orders to a number of heavy foot and mounted units equal to your command. If you have no heavy units, give orders to one unit of your choice. |
| Order mounted | Give orders to a number of mounted units and/or commanders equal to your command. If you have no mounted units, give orders to one unit of your choice. |
| I am Spartacus | Roll dice equal to your command. For each unit symbol obtained, a corresponding unit receives orders; a commander symbol gives orders to any commander. Units receive orders in any section. Units that receive orders fight with one extra die for this turn. Important: shuffle the deck together with the discards, including this card, to form a new deck. Cards in players' hands are not shuffled. |
| Move-Fire-Move | Give orders to light foot and mounted units equal to your command. They may move, fire and then move again. Units that move first must complete their movement before firing. After firing, units may move again. No combat is possible after the second movement (whether executed or not). Light foot units, auxiliaries included, may move through a friendly unit if they move 2 hexes. If you have no light units, give orders to one unit of your choice. Note: the three orders on this card are all optional. |
Special Army Command cards
| Title | Effect |
|---|---|
| First Strike | May be used to cancel a Normal Command card given to a General, or an Army card played by the opponent. |
| Counter attack | A reaction card played by the Supreme Commander during the opponent's battle phase. The defending unit, when this card is played, fights first with two extra dice. |
2. Movement
As in the standard game, all movement of units must be completed before battles begin. Generals must make sure they have completed all movement in all sections before beginning to fight. The Supreme Commander may not intervene: if a General forgets to move a unit in his section, the Supreme Commander may not step in.
A unit may receive only one order per turn. A unit in one section may cross a section commanded by another General, and may fight if movement or terrain limitations do not prevent it. However, it may not immediately receive other orders in this new section in the same turn.
3. Combat
As in the standard game, each unit resolves combat individually, in the sequence decided by each General. The Generals must announce and resolve the combat of one unit entirely before beginning the next. It is suggested that the Generals resolve combats simultaneously, if possible, to speed up the game. When units in two sections must fight against the same enemy unit, the Generals must coordinate to decide the order in which the combat is resolved.
The Supreme Commander normally does not resolve any battle (he resolves them only if he commands one or more sections of the battlefield).
4. Drawing new Command cards
Once all the actions (movement and battle) of the played Command cards have been completed, the cards are collected and discarded. The Supreme Commander then draws two new Command cards, regardless of the number of cards played in the turn, unless doing so would give him more cards than his initial number.
Playing three cards will therefore reduce the command level by one in the following turn, since only two cards are drawn. Playing only one Command card will instead increase the command level by one in the following turn.
Victory
The aim of Epic battles is the same as for normal battles: to be the first player to capture a certain number of victory flags.
Epic scenarios
[Translator's note: the initial deployment of the Epic battles is given in two separate tables, printed front and back, one with Ilipa and Zama and the other with Raphia and Cannae. Those tables are not part of this text.]
Ilipa – 206 BC
Carthaginian Army
Use the Carthaginian (brown) and barbarian (green) blocks. All icons shown are Carthaginian.
- Commander: Hasdrubal
- 7 Command cards
Roman Army
- Commander: Scipio
- 9 Command cards
- Moves first
Victory: 13 flags
Special rules: none.
Optional rule: it is recommended that all Roman Medium and Heavy infantry may move one hex and fight, or two hexes without fighting. These units have no fire capability.
Zama – 202 BC
Carthaginian Army
Use the Carthaginian (brown), barbarian (green) and Eastern (light brown) blocks. All icons shown are Carthaginian.
- Commander: Hannibal
- 8 Command cards
Roman Army
- Commander: Scipio
- 8 Command cards
- Moves first
Victory: 14 flags
Special rules: none.
Optional rule: it is recommended that all Roman Medium and Heavy infantry may move one hex and fight, or two hexes without fighting. These units have no fire capability.
Raphia – 216 BC
Ptolemaic Army
Use the Greek (blue) and Roman (red) blocks. All icons shown are Greek.
- Commander: Ptolemy
- 7 Command cards
Seleucid Army
Use the Eastern (light brown) and Carthaginian (brown) blocks. All icons shown are Eastern.
- Commander: Antiochus
- 7 Command cards
- Moves first
Victory: 13 flags
Special rules: none.
Cannae – 216 BC
Carthaginian Army
Use the Carthaginian (brown), barbarian (green) and Eastern (light brown) blocks. All icons shown are Carthaginian.
- Commander: Hannibal
- 9 Command cards
Roman Army
- Commander: Varro
- 6 Command cards
- Moves first
Victory: 12 flags
Special rules
- The river Aufidus is impassable.
- Hill hexes are impassable.