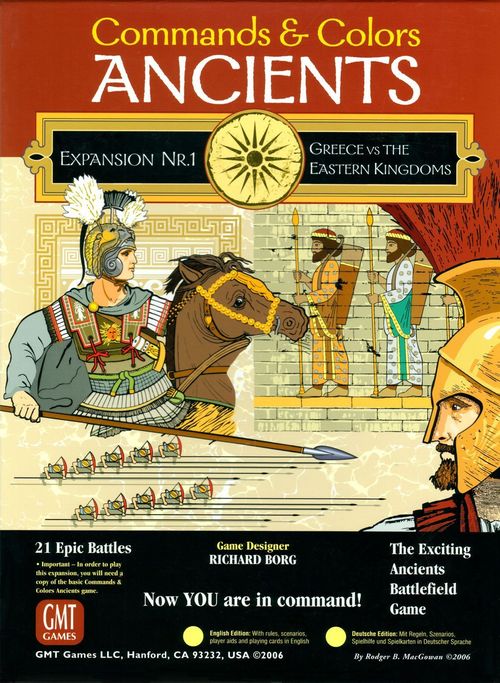
Commands & Colors: Ancients Expansion Pack #1 – Greece & Eastern Kingdoms
Commands & Colors: Ancients Expansion Pack #1 – Greece & Eastern Kingdoms Rulebook
Table of Contents
Table of Contents
Introduction
The Commands & Colors: Ancients game system lets players simulate epic battles of antiquity. The battles, presented in the scenarios chapter, focus on the historical deployment of forces and the important terrain features relevant to the scale of the game system. The scale of the game varies from battle to battle. In some scenarios one infantry unit represents a legion of fighters, while in others a unit represents only a few courageous warriors.
The Command Card system directs movement, creates "fog of war" and offers players many interesting challenges and opportunities, while the Battle Dice resolve combat quickly and efficiently. The battle tactics you will need to implement to win follow very well the advantages and limitations inherent in the various types of ancient units, their weapons, the terrain and history.
In this first expansion we concentrate on battles that pit the Greeks against their rivals and enemies from the East: the Persians, the Scythians and the Indians. Other battles are presented so that you can pit the Greeks of Pyrrhus against the Roman army of the base game. You may also use the Greeks of this expansion instead of the base game Romans to fight the Carthaginians in the battles of Akragas and the Crimissos River. Other expansion modules will follow soon. You will need the base game to play this expansion.
Welcome, and have fun!
Materiel
- 7 Battle Dice
- 5 sheets of labels for the blocks and dice
- 2 reference sheets
- 1 scenario booklet containing 21 battles
364 blocks: light blue for the Greek units, light brown for the Oriental Kingdoms units, and black for the Victory Banners and Special Unit markers, comprising:
- 232 small blocks in light blue and light brown for the foot units
- 22 small black blocks for the Victory Banners and Special Unit markers
- 78 medium blocks in light blue and light brown for the cavalry units
- 14 large blocks in light blue and light brown for the elephant units
Victory Banner and Special Unit markers: Greek Victory Banner, Oriental Kingdoms Victory Banner, Special Unit marker.
Battle Dice: each Battle Die has six blank faces that require stickers. On each face stick one of the following: a Light (green circle), a Medium (blue triangle), a Heavy (red square), a Leader (helmet), a Flag (banner) and two crossed swords. A set of spare die stickers is included.
Units, leaders and blocks: a unit is made up of a number of blocks:
- Foot units: all Light Infantry, Archers, Slingers, Auxiliaries, Warriors, Medium Infantry and Heavy Infantry units consist of four small blocks. All Light or Heavy War Machine units consist of two small blocks.
- Mounted units: all Light Cavalry, Mounted Archers, Medium Cavalry, Heavy Cavalry and Dromedary units consist of three medium blocks. All Elephant units consist of two large blocks. All Light or Heavy Chariot units consist of two rectangular blocks.
- A Leader is not a unit. It is represented by a rectangular block.
Example of a foot unit (4 blocks) and a cavalry unit (3 blocks).
Example markers, as printed: Greek Victory Banner, Oriental Kingdoms Victory Banner, Special Unit.
Greek units
- Light Infantry (16 blocks)
- Archers (16 blocks)
- Slingers (4 blocks)
- Auxiliaries (16 blocks)
- Warriors (8 blocks)
- Medium Infantry (24 blocks)
- Heavy Infantry (24 blocks)
- War Machine (4 blocks)
- Alexander the Great (1 block)
- Light Cavalry (6 blocks)
- Mounted Archers (6 blocks)
- Medium Cavalry (12 blocks)
- Dromedaries (3 blocks)
- Heavy Cavalry (3 blocks)
- Heavy Chariots (4 blocks)
- Elephants (6 blocks)
- Leader (3 blocks)
Oriental Kingdoms units
- Light Infantry (16 blocks)
- Archers (16 blocks)
- Slingers (8 blocks)
- Auxiliaries (24 blocks)
- Warriors (4 blocks)
- Medium Infantry (24 blocks)
- Heavy Infantry (16 blocks)
- Light Cavalry (12 blocks)
- Mounted Archers (12 blocks)
- Medium Cavalry (12 blocks)
- Heavy Cavalry (6 blocks)
- Heavy Chariots (4 blocks)
- Elephants (6 blocks)
- Leader (3 blocks)
Assembly note (from the printed sheet): stick the appropriate unit stickers on the front and back of the blocks for each unit. Stick the Greek labels on the light blue blocks and the Oriental Kingdoms labels on the light brown blocks. It is suggested that you separate the blocks by colour, light blue for the Greeks and light brown for the Oriental Kingdoms, then sort them by size. Start with the Greek units. Take 16 small light blue blocks. Find the Greek Light Infantry stickers on sheet 1 of 5. Peel and place the stickers on the front and back of the 16 small light blue blocks, then continue with the Greek archers. Take 16 small light blue blocks. Find the Greek archer stickers on sheet 1 of 5. Peel and place them on the front and back of the 16 small light blue blocks. When done, move on to the 4 light blue Greek Slinger blocks. Continue in this way until all the Greek units are complete, then move on to the Oriental units with the light brown blocks. It is worth it! A few extra blocks and stickers are supplied as spares.
Note: some units presented in these rules are not used in this game's scenarios but will be used in future expansion modules.
Unit symbols and colours
To help you identify the type of a unit, coloured symbols have been placed on each label:
- Green circle: Light Infantry, Slingers, Archers, Light Cavalry, Mounted Archers, War Machine (light).
- Green circle with a white border: Auxiliary Infantry, Light Chariots.
- Blue symbol: Medium Infantry, Medium Cavalry, Dromedaries.
- Blue symbol with a white border: Warrior Infantry.
- Red symbol: Heavy Infantry, Heavy Cavalry, Heavy Chariots, Elephants, War Machine (heavy).
Set Up
- Choose a battle from the scenarios chapter of the booklet.
- Place the game board in the centre of the table.
- Place the terrain hexes as shown on the battle map.
- Separate the blocks of Victory Banners between the Oriental Kingdoms forces (light brown blocks) and the Greek forces (light blue blocks). Place the unit blocks on the board, following the various unit positions shown on the battle map.
Translator's note: the French text of this step reads "Séparez les blocs de Bannières de Victoire"; the sentence that follows places the unit blocks, so the step appears to refer to the unit blocks. It is transcribed as printed here.
Note: each unit symbol represents an entire unit.
- Assign a side to each player and sit in front of the board accordingly. Each scenario states which army is at the top or the bottom of the board.
- Shuffle the Command Card deck thoroughly and deal the Command Cards to each side according to the instructions of the War Council of the chosen scenario. Hide your Command Cards from your opponent. Place the rest of the deck face down beside the battlefield, within reach of both players.
- Place the seven Battle Dice within reach of both players.
- Re-read the special rules and victory conditions that apply to the battle.
- The player designated by the War Council notes of the scenario begins the game.
Goal of the Game
The goal of the game is to be the first to capture a predetermined number of Victory Banners (usually between 5 and 8) according to the victory conditions of the chosen battle scenario.
A Victory Banner is won for each enemy leader or unit completely eliminated from the battlefield. When the last block of a unit or the block of a leader is eliminated, take a Victory Banner block. In some scenarios, additional Victory Banners may be obtained by capturing certain terrain hexes or other objectives on the battlefield.
Turn Sequence (Sequence of Play)
The notes of the War Council indicate which player plays first. The players then alternate turns until one of them reaches the number of Victory Banners stated in the victory conditions of the scenario.
On your turn, follow this sequence:
- Play a Command Card
- Give orders to your units and leaders
- Move
- Fight
- Draw a new Command Card
New Unit Types in this Expansion
The Greek and Oriental Kingdoms armies include Mounted Archer units, and the Greek army has a Dromedary unit. These new unit types are included on the Reference Sheet (as are the light War Machine and light Chariot units, unit types that are not used in this expansion).
Mounted Archers
- Class: Light (green circle)
- Movement: Mounted Archer units may move 1, 2, 3 or 4 hexes and fight.
- Range: 3 hexes.
- Ranged Dice: if the Mounted Archer unit did not move before firing, it throws 2 dice in Ranged Combat; if it moved, it may only throw one die.
- Close Combat: Mounted Archer units may remain in place or move 1, 2, 3 or 4 hexes, then attack an adjacent enemy unit in Close Combat by throwing 2 Battle Dice. These units do not inflict a Hit on a sword symbol in Close Combat. Mounted Archer units may ignore a flag if they are supported.
- Evade: Mounted Archers can always evade.
- Momentum Advance: a Mounted Archer unit, after a first successful Close Combat, may make a Momentum Advance into the vacant hex and then move one additional hex. This additional hex move is optional and is not required in order to conduct a Bonus Close Combat. A Mounted Archer unit may no longer move from that additional hex after a Bonus Close Combat.
- Retreat: a Mounted Archer unit retreats 4 hexes. Each flag inflicted by Elephants and Dromedaries forces a Mounted Archer unit to retreat one additional hex.
Dromedaries
- Class: Medium (blue triangle)
- Movement: Dromedary units may move 1, 2 or 3 hexes and fight.
- Range: N/A.
- Ranged Dice: N/A.
- Close Combat: Dromedary units may remain in place or move 1, 2 or 3 hexes, then attack an adjacent enemy unit with 3 Battle Dice. When defending in Close Combat, Dromedary units throw only 2 Battle Dice. Dromedary units may ignore a flag if they are supported. Dromedary units may also ignore a Hit symbol when the enemy unit attacking them, or defending against them, is composed of cavalry or chariots.
- Evade: Dromedary units may evade all foot units or heavy mounted units.
- Momentum Advance: a Dromedary unit, after a first successful Close Combat, may make a Momentum Advance into the vacant hex and then conduct a Bonus Close Combat.
- Retreat: a Dromedary unit retreats 3 hexes.
New Game Mechanic: Special Units
This expansion introduces the concept of Special Units: elite ancient units such as Alexander's Companion Cavalry or the Persian Immortals. When Special Units are present in a battle, they are identified on the battlefield, and the scenario instructions specify that a Special Unit block is placed in each hex of the Special Unit. The special rules describe the enhanced capabilities of each Special Unit.
- The Special Unit block moves with the unit. It does not count as a block that can be removed to satisfy losses.
- The block is not transferable to another unit.
- If the Special Unit is eliminated, this block is removed from the board together with the last block of the unit.
The Carthaginian Sacred Band
This unit appears in the battle of the Crimissos River scenario of the base game Commands and Colors: Ancients. It was an elite unit, and if you want to replay this battle with a more historical Sacred Band, use the special abilities described below.
On the battlefield, the Sacred Band is the Heavy Infantry unit located directly below the hex containing the leader Hasdrubal. Place a Special Unit block in the Sacred Band's hex to distinguish it from the other Carthaginian units.
Sacred Band special abilities:
- The Sacred Band inflicts one Hit for each leader symbol obtained in Close Combat. A leader does not need to be attached to or adjacent to the unit for this ability to apply.
- The Sacred Band may ignore a flag.
- The Sacred Band keeps its special abilities until the last block of the unit is removed from the battlefield.
Additional Examples and Clarifications
These examples are taken from Commands and Colors: Ancients, Second Edition, which adds further examples to answer players' questions about the first edition rules.
Warriors
A unit of Warrior Infantry may remain in place, move one hex, or move two hexes and attack an adjacent enemy unit in Close Combat with 3 Battle Dice. Note that the normal movement of a Warrior unit is only one hex, but when the unit charges into a Close Combat attack against an enemy unit, it moves two hexes and is then obliged to fight.
A Warrior unit at full strength fights with 1 additional Battle Die and may ignore 1 flag symbol against it. It loses these bonuses in subsequent combats once its first block is lost, but this only takes effect when the unit is either attacked again by an enemy unit or is ordered to fight on its turn. See the Warriors example below.
Warriors example: two enemy units that are not supported (a Medium Cavalry unit and a Heavy Infantry unit) receive an order. They are adjacent to an intact, unsupported Warrior unit. The player chooses to conduct a Close Combat against the Warriors, first with the Medium Cavalry. The cavalry unit throws three dice and gets a blue triangle Hit and a flag. The Warrior unit loses one block but chooses to ignore the flag in order to Fight in Defense. The Warrior unit still throws four dice. Even though a block was lost, the Warrior unit remains eligible to throw four dice during the ongoing combat (initial losses have no effect on Warriors in the heat of action). The Warriors throw a sword symbol and a flag, inflicting a one-block loss on the Medium Cavalry and forcing it to make a long retreat. The first Close Combat is over. Because they are no longer at full strength, the Warriors can no longer ignore the first flag and must fight with three dice in subsequent combats. The player then engages the Warriors in Close Combat with the Heavy Infantry. The Heavy Infantry throws five dice and gets a sword Hit, a blue triangle Hit and a flag. The Warriors lose two additional blocks, and the surviving block must retreat because the flag can no longer be ignored. The victorious Heavy Infantry unit chooses to make a Momentum Advance into the hex freed after this victorious Close Combat.
Close Combat example
The Roman player played the Command Card "Inspired Leadership" to give orders to the five Roman units illustrated in the diagram. All movements are made before any Close Combat is conducted. Note that the movement routes shown force the Light Cavalry to move first (otherwise it could no longer pass through hexes B and C). For the purposes of this example, the defending units that could Evade do not do so. The Carthaginian player chooses to leave all of his units in place in the hope of fighting in Defense.
- A: The Auxiliary unit moved two hexes, so it cannot conduct a Close Combat. An alternative would have been to move the Auxiliaries only one hex and conduct a Ranged Combat with one die.
- B: Because it moved two hexes, the Warrior unit must attack either the enemy Heavy Cavalry unit or the enemy Heavy Infantry unit. The Roman player chooses the Heavy Cavalry unit. His Warrior unit is at full strength, so he throws 4 Battle Dice. He will hit on red square symbols, swords and the leader symbol (because the leader is attached). Any flag obtained causes a retreat. He obtains 2 Hits and no flag! His opponent must remove two blocks, and because the unit survived and did not retreat, it may Fight in Defense with 4 dice. It will inflict Hits on blue triangles and swords, and may force a retreat with flags. Note that forcing a unit to retreat is one of the main advantages of attacking first in Close Combat: the defender can no longer Fight in Defense to inflict losses or a Retreat on the attacker.
- C: The Elephants may attack Heavy Infantry with 5 dice, or Archer Light Infantry with 2 dice. Seeing a chance to destroy the heavy infantry, the Roman player chooses to fight this unit and throws 5 dice. He will inflict Hits only on red squares and swords (remember that leaders give no advantage to Elephants in Close Combat, so helmets do not count). He can inflict a retreat with flags. The result is 1 red square Hit, 2 sword Hits and one flag. The Elephants re-throw the 2 sword dice but obtain no Hit or flag. The Heavy Infantry loses 3 of its 4 blocks to satisfy the red square and sword Hits. The Carthaginian player decides to ignore the flag because the Heavy Infantry is supported (there are two adjacent friendly units). The Heavy Infantry remains in position (just barely) and Fights in Defense with five dice (even though it now has only one block left). The Carthaginian will hit on red squares (the sword Hits have no effect against elephants), and will force a retreat on flags.
- D: The Light Cavalry unit is going to fight the Archer Light Infantry and will only inflict Hits on green circles (swords do not inflict Hits), and may cause a retreat on flags. The defending Archer unit may choose to ignore 1 flag because it is supported, and if it does not retreat, it will Fight in Defense with two dice, inflicting Hits only on green circles, or forcing a retreat on flags.
- E: The Heavy Chariot unit attacks the Carthaginian Heavy Chariot unit with 4 dice. It will hit on red squares and swords, and cause a retreat on any flag (the chariots are not supported and have no leader to increase their morale). Chariots defending may ignore one sword Hit, and if they can Fight in Defense they will throw 3 dice.
Elephants
- Each sword symbol obtained by an Elephant unit in Close Combat inflicts a Hit. In addition, each Battle Die that produces a sword Hit is re-rolled, possibly obtaining another symbol Hit, a sword Hit or a flag.
Game note: in other words, keep rolling that die until you no longer obtain a sword symbol! Be sure to note the total number of flags and Hits obtained when you make your extra rolls. All Hits and Retreats inflicted are only applied once the extra dice rolls have been completed.
Example: an Elephant unit attacks an intact, unsupported Light Infantry unit that decides not to Evade. The Elephants throw two dice, since they are attacking Light Infantry in Close Combat. The Elephant unit obtains a green circle Hit and a sword Hit. The die showing the sword Hit is re-rolled and produces another sword Hit. It is re-rolled a third time and produces a flag. The die can no longer be re-rolled, and the damage to the Light Infantry unit is calculated: one green circle Hit, two sword Hits and a flag. The badly beaten Light Infantry unit loses three of its four blocks and must retreat its full movement potential, that is two hexes. The Elephant unit may then make a Momentum Advance into the freed hex.
- An Elephant unit ignores all sword Hits against it in Close Combat.
- An Elephant unit receives no Close Combat or morale benefit from an attached leader, nor any Close Combat benefit from an adjacent leader.
- An Elephant unit may remain in place or move one or two hexes and attack an adjacent enemy unit in Close Combat. In a Close Combat, an Elephant unit throws the same number of Battle Dice as the unit it attacks would throw against an Elephant unit.
- When an Elephant unit Fights in Defense after being attacked in Close Combat, it throws the same number of dice as the attacking unit threw.
Exceptions:
- Elephants against Elephants: throw 3 dice.
- Elephants against a leader: throw 1 die.
- Elephants against a Warrior unit: throw 3 dice.
- Elephants against a Heavy Chariot unit: throw 3 dice.
- Elephants against a Dromedary unit: throw 3 dice.
Elephants versus Cavalry and Chariots
Horses were easily frightened by elephants in combat, hence the following rules. When a Cavalry or Chariot unit is in Close Combat with an Elephant unit, the Cavalry or Chariot unit may ignore a red square Hit and a flag symbol. If a Cavalry or Chariot unit must retreat while fighting Elephants, it must retreat one additional hex for each flag symbol thrown by the Elephant unit.
Elephant Retreat (Loss of Control)
When Elephants retreat, they run amok before withdrawing. All units and lone leaders in adjacent hexes (friendly or enemy) must check whether they are trampled. Throw two dice for each adjacent hex containing a unit or a lone leader.
During a Loss of Control, your opponent throws the dice for Hits on your units, and you throw the dice for Hits on theirs. A Hit is inflicted when the symbol obtained matches the type of the unit concerned. Any other symbol is ignored.
After the Loss of Control, the Elephants make their Retreat movement. If the Retreat path of an Elephant unit is blocked by friendly units, enemy units or an enemy lone leader, the Elephant unit does not retreat and does not lose any block. Instead, the units or leaders blocking the Retreat must each lose one block for each Retreat hex that could not be entered.
See below a revised example of an Elephant Loss of Control.
- A: In combat A, the Elephants attacked the Heavy Cavalry and inflicted a flag. Heavy Cavalry units normally retreat 2 hexes, but when attacked by Elephants they retreat 3 hexes. The illustration shows some Retreat path options. Because it cannot retreat through one of its required hexes, it loses a block. The Roman Elephant unit chooses to make a Momentum Advance into the freed hex, and decides not to conduct a Bonus Close Combat.
- B: In combat B, the Roman Warrior unit inflicted two flags on the Carthaginian Elephants, which must resolve a Loss of Control and then retreat two hexes. Note that the two friendly units located behind the Elephants do not provide support (Reinforced Morale) because Elephant units cannot benefit from it; they can only provide it. First, the Elephants run amok against all adjacent hexes, five units in this case. The Roman player throws two dice for each unit in hexes X and Y, while his opponent throws for the three other hexes of his units. If the Roman Warrior unit is hit, the leader attached to it takes a Leader Loss Test. After the dice have been thrown for all five hexes, the Elephant unit retreats. Since its Retreat path is blocked, it stays in place, and the two friendly units obstructing the way each suffer two Hits (one for each hex the Elephants cannot pass through). The Carthaginian Elephants may now Fight in Defense against the Warrior unit.
Leader Escape
If enemy units block one or two hexes of a leader's Evade path, the leader may attempt to escape through these hexes.
Leader Escape procedure:
- Move the leader into one of the enemy hexes. Allow the enemy unit in that hex to attack the leader. The attacking unit uses its normal number of Close Combat dice. The leader does not benefit from terrain.
- To inflict a Hit on a leader trying to escape, you must obtain a leader symbol.
- If the leader is not hit, its escape succeeds, and it may continue its Evade movement by entering the next hex. If that hex is also occupied by an enemy unit, the leader must again follow the Leader Escape procedure described above. Note: a hex containing an enemy unit can never be designated as the final hex of a leader's Evade path.
- If the leader ends its Evade movement in a hex containing a unit, it attaches to that unit.
Leader Escape and Evade examples:
- An enemy Light Infantry unit and an enemy Medium Cavalry unit occupy the two hexes behind a lone leader that must Evade. The hexes behind these two enemy units are free. The leader chooses to evade through the hex containing the Light Infantry, because the opponent will only throw two dice instead of the three dice the Medium Cavalry would throw. The opponent throws two dice, obtaining a sword Hit and a red square. Since no helmet was thrown, the leader escapes and finishes its Evade movement after moving one or two hexes.
- The hex behind a lone leader is vacant. The next hex is occupied by a Medium Cavalry unit. A friendly unit without a leader occupies the hex behind the Medium Cavalry. The leader could Evade one hex into the vacant hex, but chooses to Evade three hexes, ending in the friendly unit's hex. On entering the second hex containing the Medium Cavalry unit, the Evade movement is stopped, and the opponent throws three dice, obtaining two flags and a green circle. Since no helmet symbol was thrown, the leader escapes and continues its Evade movement into the third and last hex, which contains the friendly unit.
- The only Evade path has an enemy Light Infantry unit in the first hex and an enemy Medium Cavalry unit in the second hex. The leader enters the first hex and stops, while the opponent throws two dice for the Light Infantry, obtaining a flag and a sword. The escape succeeds, but the leader must now make another escape attempt when it enters the second hex. The opponent throws three dice for the Medium Cavalry and obtains a blue triangle Hit and helmets. Only one helmet is needed, and the leader is removed one hex short of the end of its Evade. The opponent gains a Victory Banner for the eliminated leader.
Ramparts and Fortified Camps
Ramparts and Fortified Camps were clarified in the reprint. Their descriptions are reproduced here.
Rampart (applies to both front hexsides)
- Movement: no movement restriction.
- Close Combat: when attacked by an enemy unit through a rampart hexside, the defending unit ignores a sword symbol and may also ignore a flag against it. Note that the defending unit does not benefit from the protection of the rampart when the enemy unit does not attack through a hexside containing the rampart drawing (generally, from a hex located directly on the side or directly behind the two hexsides protected by the rampart).
- Ranged Combat: a unit attacked across a rampart front hexside may ignore a flag against it.
- Note: mounted units receive no protection from ramparts.
- Line of Sight: a rampart does not block Line of Sight.
Fortified Camp
- Movement: no movement restriction.
- Close Combat: a unit defending in a fortified camp hex ignores a sword symbol and may ignore a flag against it.
- Ranged Combat: a unit defending in a fortified camp hex may ignore a flag against it.
- Note: mounted units receive no protection from fortified camp hexes.
- A fortified camp hex offers protection from all sides.
- A unit located in a fortified camp hex reduces its number of Battle Dice by 1.
- Line of Sight: a fortified camp blocks Line of Sight.
Rally (revised card text)
Some minor changes have been made to the Rally card. The text is reproduced here.
Rally: roll a number of dice equal to your Command. For each unit type or leader symbol obtained, a unit located in a leader's hex or in an adjacent hex is rallied (replace a lost block in the hex of the diminished unit). Rallied units have received an order and may move and fight. Elephant and Chariot units cannot be rallied. If you do not have a leader, give an order to 1 unit of your choice (1 card).
Note: units cannot gain more blocks than they started with. Leader symbols may be used to rally any eligible unit type.
Rally example: a leader is attached to a two-block Medium Infantry unit. It is adjacent to a friendly Light unit and an Elephant unit, each of which has lost one block. The Rally dice are rolled and result in two helmets and two red squares. Each helmet result may be used to replace a lost block of any eligible unit type. The player chooses to replace both lost blocks in the Medium Infantry unit and none in the Light unit. The Medium Infantry unit is rallied and may receive an order to move and fight, but the Light unit is not rallied and so cannot receive an order. The Elephant unit cannot be rallied. Fortunately, the player has another leader adjacent to two Heavy units that have each lost two blocks. The player assigns a red square result to each adjacent Heavy Infantry unit, replacing a lost block in each. Both Heavy Infantry units are rallied and may receive orders to move and fight. The player also had the option of applying both red square results to a single Heavy Infantry unit, but since they wanted to reinforce both units, they gave one block back to each.
The Armies of the Battles
The War Council notes specify, for each battle, the armies to use. Players are free to substitute other armies if enough units are available, or to combine armies.
Example 1 – Battle of Magnesia. The Seleucid army was a mixture of Greek, Macedonian and Middle Eastern units. The Seleucid player may want to use the Heavy Infantry and Heavy Cavalry units of the Greek and Carthaginian armies, and the Light units of the Oriental Kingdoms army.
Example 2 – Battle of the Granicus River. The Persian player may want to use Greek Medium Infantry units to simulate the Greek mercenaries who faced Alexander's army. In this case, lay the blocks down to differentiate them from Alexander's Medium units, or use upside-down Special Unit markers to distinguish them.
Feel free also to incorporate the Greek and Oriental units into base game battles. Have fun!
Scenarios
Each scenario gives its historical background, the War Council (the armies, leaders and Command Cards for each side, and which side moves first), the number of Victory Banners needed to win, and any special rules.
Marathon – 490 BC
Historical Background: King Darius I of Persia sent an expedition against Athens in reprisal for the burning of Sardis in 498 BC during the abortive Ionian Revolt. The Persian fleet, under the joint command of Datis and Artaphernes, landed near the bay of Marathon, which offered perfect terrain for their troops. The Athenians marched out to meet the enemy with 1,000 allied soldiers from Plataea reinforcing the Athenian force of 9,000 men. The Persians outnumbered the Greeks, but to offset this weakness, Callimachus extended the Greek line so that it was as wide as the enemy's, weakening the centre while keeping both wings at full strength. The Persian army, with its best soldiers in the centre, was taken by surprise when the Athenians attacked. Historians suggest that part of the Persian cavalry was in the process of re-embarking on the ships at that moment. During the battle, the Persian centre exploited the weakness of the Greek centre and broke through, but this success was more than offset by the defeat of its two wings. The victorious Athenians then converged on the centre, and the Persian force fled back to its ships. Fearing that the defeated Persians might still sail on to Athens, Philippides ran 26 miles to Athens to announce the news of their victory, thus running the first marathon. Greece was saved, at least for the time being.
The stage is set. The battle lines are drawn, and you are in command. It is up to you to write the rest of the story.
War Council
- Greek army: Leader: Callimachus. 6 Command Cards. Moves first.
- Persian army (use the Oriental Kingdoms blocks): Leader: Datis. 5 Command Cards.
Victory: 6 Banners.
Special Rules:
- The watercourse is passable.
- Sea and hill hexes are impassable.
Himera – 480 BC
Historical Background: Phoenicia and Greece were colonising the western Mediterranean. Carthage united the Punic cities into an empire, while Syracuse began to become the largest Greek city, led by its first tyrant, Gelon. With Theron of Akragas, Gelon took control of Himera and deposed the former ruler, Terillus, in 483. King Hamilcar of Carthage, an ally and friend of Terillus, led an army to Sicily in 480 BC to restore him to power. Hamilcar established two camps to the west and south-west of Himera. While the armies clung on outside the city, Gelon's men captured a message indicating the date of arrival of a Greek cavalry corps intended to reinforce Hamilcar's army. A cunning plan was put in place to substitute Gelon's cavalry for these reinforcements. At dawn on the planned day, Gelon's cavalry entered the unsuspecting Punic camp on the seashore. They attacked suddenly, sowing panic and killing Hamilcar. Meanwhile, the rest of Gelon's army launched a surprise attack against the two camps. Most of the forces in the seashore camp were massacred, but a successful counter-attack on the camp situated on the hill prevented the total destruction of the Carthaginian army. A peace treaty was signed between Syracuse and Carthage, which lasted seven decades. Since Hamilcar's expedition coincided with the invasion of Xerxes, it is accepted that it was part of a coordinated assault against the Greek world.
The stage is set. The battle lines are drawn, and you are in command. It is up to you to write the rest of the story.
War Council
- Carthaginian army (use the Carthaginian blocks): Leader: Hamilcar Gisgo. 5 Command Cards.
- Syracusan army (use the Greek blocks): Leader: Gelon. 5 Command Cards. Moves first.
Victory: 6 Banners.
Special Rules: None.
Plataea – 479 BC
Historical Background: The Persian Emperor Xerxes I led a massive invasion of Greece to avenge the defeat of his father's forces at Marathon. After annihilating the 300 Spartans at Thermopylae, Xerxes captured and burned Athens. Macedonia, Thessaly and Boeotia surrendered to Xerxes. However, following the loss of the Persian fleet at Salamis (480), Xerxes withdrew to Asia and left Mardonius with most of the Persian land forces to continue the subjugation of Greece. Despite dissension, an allied Greek army was formed under the Spartan Pausanias, and marched to meet the Persians. The Greeks took care always to remain on terrain that hindered the Persian cavalry. The cavalry attacked nonetheless, but its commander Masistias was killed. Ceasing direct combat, the Persian cavalry began to raid, poisoning the Greek water supplies and destroying an important Greek baggage train. Short of water and food, Pausanias ordered a night withdrawal, but only the allies in the centre moved. The Spartan right and the Athenian left remained in place until the first light of day. Faced with this confusion, Mardonius ordered a general advance, and attacked the Athenian units of the Greek left wing. It was a violent attack that prevented the Athenians from going to help the Spartans, who were under heavy pressure on the right. Waiting for their moment until conditions were favourable, the Spartans were finally ordered to charge, routing everyone in their path and killing Mardonius. The sight of the Persians retreating unnerved the forces of Artabazus, who also fled. The victory at Plataea meant that the Persian threat against Greece was coming to an end.
The stage is set. The battle lines are drawn, and you are in command. It is up to you to write the rest of the story.
War Council
- Greek army: Leader: Pausanias. 6 Command Cards. Moves first.
- Persian army (use the Oriental Kingdoms blocks): Leader: Mardonius. 5 Command Cards.
Victory: 5 Banners.
Special Rules: None.
Leuctra – 371 BC
Historical Background: Sparta's victory over Athens in the Peloponnesian War (431–404) built the reputation of its hoplites as the greatest infantry force in the world. However, the Spartan arrogance that followed its victory led to hostilities with its former ally, Thebes. In 371, King Cleombrotos of Sparta marched on Thebes. When he reached Leuctra, he found himself facing the Theban army, which barred his way. The Spartans deployed in a long line with their allies on the left. Greek commanders traditionally placed their best troops on the right, and this wing usually led the attack. The brilliant Theban commander Epaminondas devised an unprecedented plan by grouping his best men on his left in a phalanx fifty men deep. He sought to counter the Spartan charge with a super charge. The two sides launched their horsemen, and the Spartan cavalry was quickly defeated. Seeing his cavalry fail, Cleombrotos ordered his infantry to advance. Simultaneously, Epaminondas' left advanced against the Spartan right, while the rest of his army was to hold its positions in an oblique order. The Spartans were trying to change formation in the face of the situation when the Sacred Band charged and struck them while they were in the middle of manoeuvring. Cleombrotos was killed, and the enormous weight of the Theban phalanx broke the Spartan line. Never before had Sparta suffered such a defeat, and Leuctra shattered the myth of Spartan military invincibility.
The stage is set. The battle lines are drawn, and you are in command. It is up to you to write the rest of the story.
War Council
- Theban army (use the Greek blocks): Leader: Epaminondas. 6 Command Cards. Moves first.
- Spartan army (use the Oriental Kingdoms blocks): Leader: Cleombrotos. 5 Command Cards.
Victory: 4 Banners.
Special Rules:
- The Theban Sacred Band is a Special Unit. Place a Special Unit block in the same hex as the Sacred Band unit to distinguish it from other units.
- The Sacred Band inflicts one Hit for each leader symbol obtained in Close Combat (even if no leader is attached or adjacent), and may ignore a flag.
Mantinea – 362 BC
Historical Background: The Theban shock victory at Leuctra (371) had ended Spartan hegemony over Greece. Epaminondas then organised the Arcadian League of the Peloponnesian cities, in order to counterbalance Sparta and ensure Theban supremacy. A dissension within the Arcadian League led Mantinea to ally itself with Sparta. Sparta's hereditary enemy, Athens, even joined the alliance against Thebes. Epaminondas launched an invasion in 362 to re-establish Theban dominance. On a plain near Mantinea, he faced the enemy force of 20,000 infantry and 2,000 cavalry, with the Mantineans on the right, the Spartans in the centre, and the Athenians on the left. Epaminondas' force of 30,000 infantry and 3,000 cavalry was deployed with enormous depth on his left, using the same tactic that had succeeded at Leuctra. The Thebans approached the Mantinean wing, then grounded their arms as if they did not want to fight that day. Once the Mantineans had let down their guard, Epaminondas suddenly ordered the attack. The assault broke the Mantinean right flank, leading to the defeat of the entire Spartan army. Unfortunately for Thebes, Epaminondas was killed at the height of the battle. Sparta was once again humiliated, but without its brilliant leader, Thebes was unable to maintain its hegemony over Greece. The ultimate result was the weakening of Greece, which opened the way for the Macedonian conquest.
The stage is set. The battle lines are drawn, and you are in command. It is up to you to write the rest of the story.
War Council
- Theban army (use the Greek blocks): Leader: Epaminondas. 5 Command Cards. Moves first.
- Spartan army (use the Oriental Kingdoms blocks): Leader: Agesilaus. 5 Command Cards.
Victory: 6 Banners.
Special Rules: None.
The Crocus Plain – 352 BC
Historical Background: In 359 BC, Philip became king of Macedonia. As a young man, he had been a captive in Thebes, where he observed the innovations of Epaminondas. Applying these lessons, Philip created a manoeuvrable combined force made up of a phalanx, cavalry and light troops. He re-armed his phalanxes with 17-foot pikes instead of the usual 9-foot pikes. Philip aggressively extended Macedonian control, which brought him into conflict with the Athenians. In 352, Philip turned south-west into Thessaly. The Greco-Phocian army under Onomarchus arrived on the Crocus Plain with 20,000 infantry and 500 cavalry to stop him. Onomarchus deployed with his back to the Persian Gulf. Philip attacked with the same number of infantry and 3,000 cavalry. The army of Onomarchus fought with astonishing tenacity, holding the Macedonian phalanx at bay until it was taken in flank by Philip's cavalry. The Phocian lines began to fall back, then broke and fled towards the sea, where many tried to swim out to join the Athenian fleet that had just arrived. Onomarchus died fighting, and Macedonia now dominated all of Thessaly. Philip had demonstrated the superiority of a combined force against a traditional Greek army composed of hoplites. The irresistible Macedonian expansion into Greece was to continue.
The stage is set. The battle lines are drawn, and you are in command. It is up to you to write the rest of the story.
War Council
- Macedonian army (use the Greek blocks): Leader: Philip II. 5 Command Cards. Moves first.
- Phocian army (use the Oriental Kingdoms blocks): Leader: Onomarchus. 5 Command Cards.
Victory: 6 Banners.
Special Rules:
- The Persian Gulf is impassable.
Granicus – 334 BC
Historical Background: Alexander succeeded his father in 336 BC, and after securing control of Macedonia and the other Greek states, he marched east against the Persian Empire. He crossed the Hellespont and entered Asia with about 32,000 infantry and 5,100 cavalry. Darius III, Emperor of Persia, did not react in time to prevent the crossing, and ordered his satraps (governors) and generals to gather their forces near the Granicus River. The Persian cavalry was deployed along the bank, and the infantry somewhat behind. Alexander placed his heavy infantry in the centre and the light infantry and cavalry on the wings. Parmenion commanded the left defence, and Alexander the powerful right. The initial Macedonian attack across the river was repulsed. Alexander then led the cavalry of the Companions in a ferocious assault against the Persian leaders, who had regrouped. Mithridates, the nephew of Darius, wounded the Macedonian king with a javelin, but Alexander killed him with a sword blow. Rhoesaces then managed to fire a shot that tore off Alexander's helmet. When Alexander killed Rhoesaces, Spithridates came from behind and raised his scimitar to slay the Macedonian king. However, Alexander's bodyguard, Cleitus, struck the Persian noble with such force that he damaged his weapon. The death of these three leaders was too much for the Persian cavalry, which broke and fled. The Persian infantry did likewise. Only the Greek mercenaries remained. When they asked for mercy, it was refused and they were massacred almost to the last man. Asia Minor was then ripe for Macedonian conquest.
The stage is set. The battle lines are drawn, and you are in command. It is up to you to write the rest of the story.
War Council
- Macedonian army (use the Greek blocks): Leader: Alexander. 6 Command Cards. Moves first.
- Persian army (use the Oriental Kingdoms blocks): Leaders: Mithridates, Rhoesaces, Spithridates. 4 Command Cards.
Victory: 6 Banners.
Special Rules:
- The Granicus River is passable.
- When Alexander is attached to a unit, that unit fights in Close Combat with 1 additional die.
- The Greek Companion cavalry is a Special Unit. Place a Special Unit block in the same hex as the Companion cavalry unit to distinguish it from other units. The Companion cavalry ignores 1 sword symbol in Close Combat and may ignore 1 flag.
- Poor Persian command: the three Persian Satraps (Mithridates, Rhoesaces and Spithridates) convert leader symbols into Hits only for the units to which they are attached, not for adjacent units. (Translator's note: the French text reads "par pour les unités adjacentes", which is a typo; the intended meaning, "not for adjacent units", is given here.) A "Leadership" Command Card gives an order only to the unit to which a leader is attached, and does not concern adjacent units. A Satrap leader does, however, improve the morale of the unit to which it is attached, which may ignore 1 flag.
Issus – 333 BC
Historical Background: After the battle of the Granicus River, Darius gathered a new army near Babylon while Alexander spread through Asia Minor. Darius advanced into Syria to wait for the Macedonian invader. However, owing to the delay caused by Alexander's ill health, Darius manoeuvred his forces around the rear of the Macedonian army and seized its supply base. Alexander turned back to meet Darius on the Pinarus River. Darius' army deployed defensively behind the river, with light units on the hills on the left, the Greek mercenaries in the centre, and the majority of his cavalry on the right under Narbazanes. Alexander took command of the cavalry of the Companions on the right, deployed his phalanx in the centre, and sent the Thessalian cavalry under Parmenion to the left flank to face the numerous Persian horsemen. Alexander's advance was slow at first, but when he realised that the Persian units on the hills were no threat, he ordered the charge against the Greek mercenaries. The Macedonian phalanx was having a hard time against Darius' Greek mercenaries, but Alexander appeared with his Companions and took the mercenaries in flank. The Persian centre collapsed quickly and Darius fled. The hard-fought cavalry battle between forces of equal strength near the beach turned into a Persian rout when the horsemen saw Darius fleeing. Persia had lost two armies, and Alexander now had access to the heart of the empire.
The stage is set. The battle lines are drawn, and you are in command. It is up to you to write the rest of the story.
War Council
- Macedonian army (use the Greek blocks): Leader: Alexander. 6 Command Cards. Moves first.
- Persian army (use the Oriental Kingdoms blocks): Leader: Darius III. 4 Command Cards.
Victory: 8 Banners.
Special Rules:
- The Pinarus River is passable without reduction of Battle Dice.
- When Alexander is attached to a unit, that unit fights in Close Combat with 1 additional die.
- The Greek Companion cavalry is a Special Unit. Place a Special Unit block in the same hex as the Companion cavalry unit to distinguish it from other units. The Companion cavalry ignores 1 sword symbol in Close Combat and may ignore 1 flag.
- The Persian Immortals are a Special Unit. Place a Special Unit block in the same hex as the Immortals unit to distinguish it from other units. The Immortals are armed with bows and follow the rules of Ranged Combat.
Gaugamela – 333 BC
Historical Background: Instead of pursuing Darius after the victory at Issus (333), Alexander turned south to neutralise the Persian fleet. In two years of campaigning, he captured Tyre and Gaza, then conquered Egypt. In 331, Alexander entered Mesopotamia in order to attack Babylon. Darius had raised another army, strong in cavalry but lacking good infantry. The two armies met on the plain of Gaugamela. Darius posted his cavalry on the left and right, and occupied the centre with his Greek mercenaries, the Guard cavalry, elephants and chariots. Alexander positioned the Thessalian cavalry on the left, personally taking charge of the phalanx in the centre and the Companions on the right. The Persian line extended well beyond both flanks of the Macedonian formation. Against this, Alexander advanced obliquely while refusing his left. Darius sent his mounted troops forward. The Macedonian right had to hold against its attackers long enough for Alexander to charge with his Companions and for the heavy infantry to reach Darius. Once again, Darius turned and left the battlefield, but the battle was not yet over. The Macedonian left was still being hard pressed by the Persian cavalry. Alexander turned and charged the Persians with the Companions, forcing them back. Soon the entire Persian army was retreating. Gaugamela is one of the decisive battles of history, and marked the beginning of Alexander's great empire. This battle is also considered the classic example of the penetration tactic.
The stage is set. The battle lines are drawn, and you are in command. It is up to you to write the rest of the story.
War Council
- Macedonian army (use the Greek blocks): Leader: Alexander. 6 Command Cards. Moves first.
- Persian army (use the Oriental Kingdoms blocks): Leader: Darius III. 4 Command Cards.
Victory: 7 Banners.
Special Rules:
- When Alexander is attached to a unit, that unit fights in Close Combat with 1 additional die.
- The Greek Companion cavalry is a Special Unit. Place a Special Unit block in the same hex as the Companion cavalry unit to distinguish it from other units. The Companion cavalry ignores 1 sword symbol in Close Combat and may ignore 1 flag.
The Jaxartes River – 328 BC
Historical Background: In 329 BC, Alexander had completed the subjugation of the eastern Persian satraps, and his army was building a new city, Alexandria Eschate, on the banks of the Jaxartes, to guard his north-eastern frontier. A Scythian force led by their chief, Satraces, arrived on the opposite bank. The Scythian force was mainly made up of mounted archers who were about to launch a major raid. Alexander decided to attack and defeat the barbarians to deter them from further raids. Alexander had catapults positioned to counter the mounted archers during the supposedly difficult crossing of the river. When the catapults began to fire, a number of Scythian horsemen were immediately crushed. The mounted archers withdrew cautiously from the river. Alexander's troops crossed rapidly en masse. Once on the other side, he sent a few units of cavalry and infantry as bait. When the Scythians, as he hoped, had surrounded the Macedonian detachment, Alexander sent the rest of his cavalry and light infantry to block their retreat so that they could not avoid his heavy infantry units. After a brief close-quarters clash, Satraces was killed and the Scythians broke and fled. Although the bulk of the Scythian army escaped, it knew that the Macedonians could counter its tactics. Alexander had succeeded in defeating the swift mounted archers of the steppes where Cyrus the Great and Darius I had failed.
The stage is set. The battle lines are drawn, and you are in command. It is up to you to write the rest of the story.
War Council
- Macedonian army (use the Greek blocks): Leader: Alexander. 6 Command Cards. Moves first.
- Scythian army (use the Oriental Kingdoms blocks): Leader: Satraces. 5 Command Cards.
Victory: 7 Banners.
Special Rules:
- The Jaxartes River is passable.
- When Alexander is attached to a unit, that unit fights in Close Combat with 1 additional die.
- The Greek Companion cavalry is a Special Unit. Place a Special Unit block in the same hex as the Companion cavalry unit to distinguish it from other units. The Companion cavalry ignores 1 sword symbol in Close Combat and may ignore 1 flag.
Hydaspes – 326 BC
Historical Background: Having gained control of the whole known civilised world, Alexander ventured into India in 326 BC. On reaching the Hydaspes River, he had to face the resistance of Porus. The imposing body of Porus' 200 elephants thwarted all of Alexander's attempts to cross the river. Learning that a large force was approaching to reinforce Porus, Alexander divided his army and secretly crossed the river upstream with most of the Macedonian troops. Craterus remained behind with a large detachment to deceive the Indians. On receiving the startling news of Alexander's crossing of the Hydaspes, Porus hastily re-oriented his army to face him. Porus sent his chariots forward, but they were quickly put out of action. Alexander then launched his cavalry against the right wing of Porus and reached the flank of the Indian army, while his heavy infantry advanced to attack the elephants and archers. The elephants charged the phalanx and inflicted enormous damage among the elite Macedonian infantry. Only the timely intervention of the light troops prevented heavier losses. Porus, wounded six times, was captured, and the rest of his army was routed. Porus so impressed Alexander with his courage that he was allowed to keep his kingdom as a Macedonian vassal. The power of the elephants was not forgotten by the Macedonian generals who fought at the Hydaspes, and they had great difficulty acquiring them during the Wars of the Successors.
The stage is set. The battle lines are drawn, and you are in command. It is up to you to write the rest of the story.
War Council
- Macedonian army (use the Greek blocks): Leader: Alexander. 6 Command Cards. Moves first.
- Indian army (use the Oriental Kingdoms blocks): Leader: Porus. 5 Command Cards.
Victory: 7 Banners.
Special Rules:
- The Hydaspes River is passable.
- When Alexander is attached to a unit, that unit fights in Close Combat with 1 additional die.
- The two Greek Companion cavalry units form a Special Unit. Place a Special Unit block in the same hex as the Companion cavalry unit to distinguish it from other units. The Companion cavalry ignores 1 sword symbol in Close Combat and may ignore 1 flag.
Hellespont – 323 BC
Historical Background: The death of Alexander in 323 BC plunged his empire into political and military turmoil, his generals and governors declaring their kingdoms independent as "Successors" (Diadochi). Perdiccas inherited the bulk of the Macedonian army and the title of "Regent of the Asian Empire". A coalition of other Successors formed against him. An army under Craterus was sent to Asia to confront Perdiccas and his allies. Perdiccas sent Eumenes and Neoptolemus with an army to the Hellespont to prevent Craterus from entering Asia. Neoptolemus, jealous of Eumenes, deserted with a hundred cavalrymen and joined Craterus' forces. After the crossing, when Craterus and Eumenes faced each other, each had about 20,000 infantry, but Craterus' phalanx of Macedonian veterans was superior. Eumenes relied on his more numerous cavalry. Both armies placed their phalanx in the centre and their cavalry on the wings. Craterus, commanding the right wing, charged at the start. He was killed, and his cavalry scattered. On the other wing, Neoptolemus confronted Eumenes, and Neoptolemus was killed in single combat. Craterus' infantry, now surrounded and without a leader, capitulated. Eumenes invited the defeated Macedonians to join him. They accepted, but left during the night to join Antipater, regent of Greece and Macedonia. The battle of the Hellespont eliminated two rivals, but the Wars of the Successors were to last another 40 years.
The stage is set. The battle lines are drawn, and you are in command. It is up to you to write the rest of the story.
War Council
- Army of the Successor Craterus (use the Carthaginian blocks): Leader: Craterus. 5 Command Cards. Moves first.
- Army of the Successor Eumenes (use the Greek blocks): Leader: Eumenes. 6 Command Cards.
Victory: 6 Banners.
Special Rules:
- If one of your leaders is eliminated, your Command is reduced by one Command Card. If the leader is lost during your turn, do not draw a new Command Card at the end of your turn. If the leader is lost during your opponent's turn, your opponent draws one of your Command Cards at random, which is discarded.
- If you eliminate all enemy leaders, you win.
Translator's note: the French text reads "ne tirez pas e nouvelle Carte de Commandement"; the obvious intended word "une" is read here as "a".
Paraitacene – 317 BC
Historical Background: In 318 BC, the Successors had formed two opposing alliances: the "Royalists", who declared they were fighting to maintain the empire for the sons of Alexander, and a rival coalition seeking to claim their own independent kingdoms. The opposing armies of the Successors in Asia, one commanded by Antigonus, the other by Eumenes, clashed at Paraitacene in 317 BC. Antigonus was then the most powerful of the Diadochi, controlling most of Anatolia and the Eastern Satrapies. Eumenes had the support of Alexander's heirs as well as substantial war funds, although the fact that he was Greek and not Macedonian was a major handicap. Antigonus fielded 28,000 infantry and 11,000 cavalry. Eumenes' force of 35,000 infantry and 6,000 cavalry included veterans of the Silver Shields who had distinguished themselves in combat during all of Alexander's campaigns. The battle began with the attack of Antigonus' light cavalry against Eumenes' right. This attack was broken by Eumenes' heavy cavalry. Meanwhile in the centre, the Silver Shields pushed back Antigonus' phalanx. Antigonus' army was on the wrong slope when he attempted a manoeuvre that rebalanced the situation. He charged through a gap and succeeded in routing Eumenes' left flank. Both sides were then exhausted and returned to their camps. Antigonus claimed victory, but in reality the battle was a draw, and its conclusion took place at Gabiene a year later.
The stage is set. The battle lines are drawn, and you are in command. It is up to you to write the rest of the story.
War Council
- Army of the Successor Antigonus (use the Oriental Kingdoms blocks): Leader: Antigonus. 5 Command Cards.
- Army of the Successor Eumenes (use the Greek blocks): Leader: Eumenes. 5 Command Cards. Moves first.
Victory: 7 Banners.
Special Rules:
- Hill hexes are impassable.
- The Silver Shields are a Special Unit. Place a Special Unit block in the same hex as the Silver Shields unit to distinguish them from other units. The Silver Shields inflict one Hit for each leader symbol obtained in Close Combat, and may ignore a flag.
Gabiene – 316 BC
Historical Background: After Paraitacene in 317, Eumenes desperately tried to maintain the unity of Alexander's Empire for his heirs. The following year, Antigonus left his winter quarters quickly and crossed the desert in forced marches to take Eumenes by surprise. Eumenes was informed of the manoeuvre, and the two armies faced each other on a salt plain near Gabiene. Antigonus' force included 22,000 infantry, 9,000 cavalry and 65 elephants. Eumenes' army had dwindled to 17,000 infantry, 6,000 cavalry and 114 elephants. The two sides deployed in the classic manner of Alexander's armies. The battle began with skirmishers and elephants engaging in a confused melee. Antigonus' cavalry charged Eumenes' left cavalry wing, routing it. In the centre, Eumenes' Silver Shields again dominated in an infantry attack that pushed back Antigonus' phalanx. Meanwhile, Antigonus' cavalry attacked on both flanks while capturing Eumenes' baggage train (camp). There was another melee, but Antigonus prevailed. He offered the Silver Shields to exchange their commander for the captured baggage, and Eumenes was handed over and put to death. Antigonus was then the undisputed master of the Eastern Satrapies, and he soon set about claiming all of Alexander's Empire for himself.
The stage is set. The battle lines are drawn, and you are in command. It is up to you to write the rest of the story.
War Council
- Army of the Successor Antigonus (use the Oriental Kingdoms blocks): Leader: Antigonus. 6 Command Cards. Moves first.
- Army of the Successor Eumenes (use the Greek blocks): Leader: Eumenes. 5 Command Cards.
Victory: 7 Banners.
Special Rules:
- The Silver Shields are a Special Unit. Place a Special Unit block in the same hex as the Silver Shields unit to distinguish them from other units. The Silver Shields inflict one Hit for each leader symbol obtained in Close Combat, and may ignore a flag.
- A unit of Antigonus' army that captures (enters) the hex of Eumenes' camp scores a Victory Banner for Antigonus. The unit must stop in the hex, not simply pass through it. The camp can only be captured once, and once the Victory Banner is obtained it cannot be lost.
Ipsus – 301 BC
Historical Background: In 309 BC, all the heirs of Alexander had been executed. The Successors ceased to claim to be fighting for the restoration of the empire, and proclaimed themselves kings. At the head of the most powerful army of all the competitors, Antigonus set out to reunify the empire under his domination in 302 BC. The four other Diadochi kings had formed an alliance to stop him. The allies met Antigonus' army near Ipsus. The armies had a similar number of infantry, but the allies had more cavalry and an enormous numerical superiority in elephants. When the battle began, Antigonus' cavalry charged one of Seleucus' cavalry wings, routing it. Unfortunately, Antigonus' cavalry pursued too far and could not return to the battle because it was blocked by the Seleucid elephants. "Celma" left Antigonus' phalanx unsupported when the allied phalanx charged. Overwhelmed, Antigonus was killed and his phalanx broken. The rest of the cavalry and some infantry units fled, along with a young general who would make his presence felt later: Pyrrhus. With three kings and three future kings present, it was truly "the Battle of the Kings". At 81 years of age, Antigonus had never lost a battle before this one. His defeat and death ended the first phase of the Wars of the Successors and gave rise to some hope of reunifying the empire.
Translator's note: the French text reads "Celma" for the commander who left the phalanx unsupported; this name is transcribed as printed.
The stage is set. The battle lines are drawn, and you are in command. It is up to you to write the rest of the story.
War Council
- Army of the Successor Antigonus (use the Greek blocks): Leader: Antigonus. 5 Command Cards. Moves first.
- Army of the Successor Seleucus (use the Oriental Kingdoms blocks): Leaders: Seleucus and Lysimachus. 6 Command Cards.
Victory: 8 Banners.
Special Rules:
- Seleucus brought 400 elephants back from India for the battle. You will need to deploy a Roman or Carthaginian elephant unit from the base game as the fourth elephant unit of the Seleucid army.
Heraclea – 280 BC
Historical Background: In his youth, Pyrrhus of Epirus served as a lieutenant under the Diadochi, including Demetrius and Ptolemy. In 297 BC, he regained his ancestral kingdom and sought to seize the throne of Macedonia. In 284, he was expelled from Macedonia and sought new adventures. When Rome threatened expansion south of Italy, Pyrrhus accepted an invitation from Tarentum to fight their battle in 281 BC. His campaign began badly when his invasion army of 25,000 infantry, 3,000 cavalry and 20 elephants was scattered while crossing the sea, and he found a "wait-and-see" attitude among his former Greek allies in Italy. Pyrrhus needed a quick victory to make them change their attitude. Laevinus moved south to counter the Epirote invader with a Roman army made up of two legions and allies, about 25,000 men. The two armies met near the Siris River. Pyrrhus could not prevent the Romans from crossing it. The Romans held the advantage in the early stages of the battle, when Pyrrhus played his master card by unleashing the elephants. No Roman soldier had seen them before, and this was too much for the infantry and cavalry. The Roman rout was triggered. There is some doubt as to whether the elephants were the key to Pyrrhus' victory, since it was a hard and bloody battle: 7,000 Romans and 4,000 Greeks were left on the battlefield. The victory swelled Pyrrhus' ranks with new allies, but Rome was far from defeated.
The stage is set. The battle lines are drawn, and you are in command. It is up to you to write the rest of the story.
War Council
- Epirote army (use the Greek blocks): Leader: Pyrrhus. 5 Command Cards. Moves first.
- Roman army (use the Roman blocks): Leader: Consul Valerius Laevinus. 5 Command Cards.
Victory: 7 Banners.
Special Rules:
- The Siris River is passable only at the bends. Treat the other river hexes as impassable.
- First-sight terror: any Roman infantry unit in Close Combat with an elephant unit cannot ignore the flags obtained by that elephant unit, even if the unit has an attached leader or is supported by two adjacent friendly units.
Asculum – 279 BC
Historical Background: Pyrrhus of Epirus almost doubled the size of his army after his victory at Heraclea, with the Greeks, the Samnites and the Lucanians rallying to his banner. After integrating the new recruits, Pyrrhus set out for Rome. His advance was halted at Asculum by the two Roman consuls, Decius and Sulpicius, and their army of four legions and allies. The two sides had about 40,000 men, but Pyrrhus had the advantage of cavalry and, of course, his elephants. After a day of skirmishing in rough terrain, the two armies lined up at dawn on a height. What followed was a direct confrontation between the legion and the phalanx. During the clash, Pyrrhus failed to envelop the Roman flanks. After a violent fight in the centre, the Romans were once again pushed back by the elephants. Pyrrhus, at the front of the fighting, was wounded, preventing him from exploiting his victory. More than 6,000 Romans were slaughtered, but Pyrrhus had lost 3,500 of his men, most of them irreplaceable veterans and many of his officers. It is said that Pyrrhus exclaimed after the battle, "Another victory like this and I shall be lost!", giving rise to the term "Pyrrhic victory". The road to Rome was still guarded by other armies, and the Romans refused to negotiate a peace treaty. Discouraged, Pyrrhus accepted an offer from Syracuse to lead the Sicilian Greeks in their war against Carthage in 278 BC.
The stage is set. The battle lines are drawn, and you are in command. It is up to you to write the rest of the story.
War Council
- Epirote army (use the Greek blocks): Leader: Pyrrhus. 6 Command Cards.
- Roman army (use the Roman blocks): Leaders: Consuls Decius and Sulpicius. 4 Command Cards. Moves first.
Victory: 6 Banners.
Special Rules:
- Each player must place two leaders on the battlefield once each has consulted their Command Cards. The Roman player places his two leaders first, then it is the Epirote player's turn.
Beneventum – 275 BC
Historical Background: After the battle of Asculum, Pyrrhus left Italy for a three-year campaign in Sicily. Although he defeated the Carthaginians in every battle, he was unable to drive them off the island. Pyrrhus decided to return to Italy. Years of attrition and a naval defeat during his return voyage had greatly weakened his army. However, on his return, his reputation drew thousands of new recruits who joined him. With 20,000 infantry, 3,000 cavalry and 20 elephants, Pyrrhus marched once more on Rome. The Consul Manius Curius Dentatus gathered his army of about 20,000 infantry and 2,000 cavalry and set up near Beneventum to await the Epirote army. Pyrrhus decided on a surprise night attack, but some of his detachments got lost. Morning came before he could organise his scattered forces near the Roman camp. Dentatus sent out his forces and pushed back Pyrrhus' vanguard. As the Roman attack continued, it was in turn pushed back by the skilful use of Pyrrhus' elephants. However, a second Roman assault sent the elephants fleeing into the Macedonian phalanx. Dentatus struck while the phalanx was disorganised and broke it, winning the battle. Pyrrhus withdrew from the battlefield with the remains of his army and returned to Epirus, and never came back to Italy. Beneventum was the last crucial battle in the attempt of the Roman Republic to gain total control of the Italian peninsula, and the first great victory of the legion against the phalanx.
The stage is set. The battle lines are drawn, and you are in command. It is up to you to write the rest of the story.
War Council
- Epirote army (use the Greek blocks): Leader: Pyrrhus. 5 Command Cards. Moves first.
- Roman army (use the Roman blocks): Leader: Consul Manius Curius Dentatus. 5 Command Cards.
Victory: 7 Banners.
Special Rules: None.
Raphia – 217 BC
Historical Background: The Wars of the Successors led to the establishment of three Hellenistic kingdoms: the Antigonids (Macedonia), the Ptolemies (Egypt) and the Seleucids (from Asia Minor to India). The Seleucid empire was beginning to fragment, losing Judea and most of its eastern provinces and parts of Asia Minor. Antiochus III became its ruler at the age of eighteen in 223 BC, and immediately began to restore his empire. In 217, he retook Judea and marched on Egypt with 62,000 infantry, 6,000 cavalry and 103 elephants. Ptolemy IV, at the head of a much smaller army, enrolled native Egyptians in his Greek phalanx to bring his strength up to 70,000 infantry, 6,000 cavalry and 73 elephants. The two armies faced each other at Raphia on the Egyptian frontier. They deployed with their phalanx in the centre and the cavalry on the wings. Antiochus began the battle by charging the enemy's right cavalry wing and breaking Ptolemy's left. The young Antiochus impetuously pursued the cavalry fleeing before him. Meanwhile, the Egyptian right rushed into action and defeated its counterpart. With all the wings gone in opposite directions, Ptolemy ordered his centre to attack. Surprisingly, the Egyptian phalanx got the better of the Seleucid veterans, and Antiochus' entire army broke ranks and fled. Antiochus withdrew, and Ptolemy recovered Judea. Despite this defeat, Antiochus continued his efforts to reconquer his lost provinces and restore the great Seleucid empire. Ptolemy, for his part, had to quickly face a major rebellion led by the Egyptian soldiers he had trained for the phalanx.
The stage is set. The battle lines are drawn, and you are in command. It is up to you to write the rest of the story.
War Council
- Ptolemaic army (use the Oriental Kingdoms blocks): Leader: Ptolemy. 5 Command Cards.
- Seleucid army (use the Greek blocks): Leader: Antiochus. 5 Command Cards. Moves first.
Victory: 8 Banners.
Special Rules: None.
Cynoscephalae – 197 BC
Historical Background: Rome's victory in the Second Punic War (218–201 BC) made Rome the dominant power of the western Mediterranean. Since Philip V of Macedonia had been an ally of Hannibal during that war, Rome had a score to settle. Rome used the complaints of Rhodes and Pergamum against Macedonian aggression as a pretext for invasion. The Senate sent Flamininus with two legions and some Greek allies to confront Philip in 197 BC. This was the first confrontation between the Roman legion and the pure Macedonian phalanx (Pyrrhus' phalanx was made up of Epirotes, and Hannibal's of many nationalities). The two armies were practically the same size, with about 23,000 infantry and 2,000 cavalry each. The battle would be won by the best tactical system, not by weight of numbers. However, the hilly terrain of Greece at Cynoscephalae favoured the legion. The two armies marched on either side of a ridge line and met by chance in the mist of the early morning. A skirmish began between the light troops, and Philip decided to engage his whole army. Philip took command of the right wing and managed to attack the Roman left. Flamininus took the initiative and launched an attack whose spearhead was the elephants on the flank of the phalanx, breaking it before it was fully deployed. The right wing of each army was then victorious. An unknown Roman tribune, "seeing what had to be done", detached a few maniples from the Roman right to strike the flank of the victorious Macedonian right-wing phalanx. Philip's phalanx was cut to pieces, a model example of flexibility against rigidity. Philip's hopes of uniting the Greeks under Macedonian hegemony ended with the defeat.
The stage is set. The battle lines are drawn, and you are in command. It is up to you to write the rest of the story.
War Council
- Macedonian army (use the Greek blocks): Leader: Philip V. 5 Command Cards.
- Roman army (use the Roman blocks): Leader: Consul Lucius Quinctius Flamininus. 5 Command Cards. Moves first.
Victory: 6 Banners.
Special Rules:
- Option – Roman tactical flexibility: an unsupported Greek Heavy Infantry unit may Fight in Defense against a Roman Medium or Heavy Infantry unit only with 3 Battle Dice (reflecting the ability of the more manoeuvrable legions to reach the flanks of the phalanx and strike decisively).
Magnesia – 190 BC
Historical Background: Following his defeat at Raphia, Antiochus III continually campaigned to restore his empire. He reconquered Asia Minor, Armenia, Parthia and Bactria. He then avenged Raphia with a decisive victory against Ptolemy's Egyptians at Panion in 199 BC. For these victories he received the title "the Great". Meanwhile, the Macedonian defeat at Cynoscephalae in 197 BC left the power vacant in Greece. Antiochus, seeing an opportunity, invaded Greece, but Rome quickly drove him back. A Roman consular army under Lucius Cornelius Scipio pursued Antiochus into Asia Minor. Antiochus accepted the Roman challenge near Magnesia. He lined up a large army including his Greco-Macedonian phalanx, Galatian warriors, cataphracts, chariots and elephants. The Romans possessed two legions supported by Greek and Pergamene allies with their king Eumenes II. Although the Seleucid army was larger, the Roman legionaries, veterans of the war against Hannibal, were much more effective soldiers. The action began on the Roman right when Eumenes launched a combined force of skirmishers and cavalry against the Seleucid chariots. The legions then advanced against the Seleucid phalanx. Seeing his army being beaten on the wing, Antiochus charged forward with his heavy cavalry in an attempt to reverse the tide. He crossed the Roman right, but was forced to fall back because of the Roman elephants before he could take the legions in flank. Then the Seleucid elephants in the centre panicked, Antiochus' phalanx collapsed, and his entire army was routed. Antiochus managed to escape and later made peace with Rome, ceding Asia Minor and paying a large indemnity. However, the defeat led to the revolt of his eastern provinces, and Antiochus' life work was left unfinished. Rome became the dominant Mediterranean power.
The stage is set. The battle lines are drawn, and you are in command. It is up to you to write the rest of the story.
War Council
- Seleucid army (use the Persian blocks): Leader: Antiochus III, Emperor of the Seleucids. 4 Command Cards.
- Roman army (use the Roman blocks): Leader: Consul Lucius Cornelius Scipio. 5 Command Cards. Moves first.
Victory: 7 Banners.
Special Rules:
- The Phrygios River is impassable.
- Option – Roman tactical flexibility: an unsupported Greek Heavy Infantry unit may Fight in Defense against a Roman Medium or Heavy Infantry unit only with 3 Battle Dice (reflecting the ability of the more manoeuvrable legions to reach the flanks of the phalanx and strike decisively).